


Doug's BMW 328is
DIY Fuel Pump / Suction Unit Replacement
Introduction
The fuel tank of the 3-series is located under the rear seat. It straddles the hump in the floor that provides clearance for the driveshaft. To utilize the fuel on both sides of the tank BMW put a pump / sender unit on the passenger's side and a suction / sender unit on the driver's side.
While the fuel pump is not considered a "hot item" in the 3-series, it's probably a good idea to replace it every 100K miles as preventative maintenance. I replaced my pump at around 126K miles for that reason. While I was at it, I also replaced the suction / sender unit along with the associated seals for good measure.
This procedure must be done with less than approximately 7/8 fuel remaining because the tank is sloped slightly. Otherwise, gas will pour out of the opening when you remove the pump / sender units. The best thing to do is what my technician recommended -- run the car down until the gas warning light is on. That represents around 2 gallons remaining (vapor, essentially).
Tools and Equipment Required
- Small flat-blade screwdriver
- Large flat-blade screwdriver
- #1 phillips screwdriver
- Hammer
- Long-nose pliers
- Diagonal cutters
- Dental pick
- 1/4" drill bit or round bar
- (1) BMW Fuel Sender for left side of vehicle (Late model part number 16146758736)
- (1) BMW Fuel Pump for right side of vehicle (Late model part number 16146758255)
- (2) BMW Fuel tank seals (see realoem.com or your parts supplier)
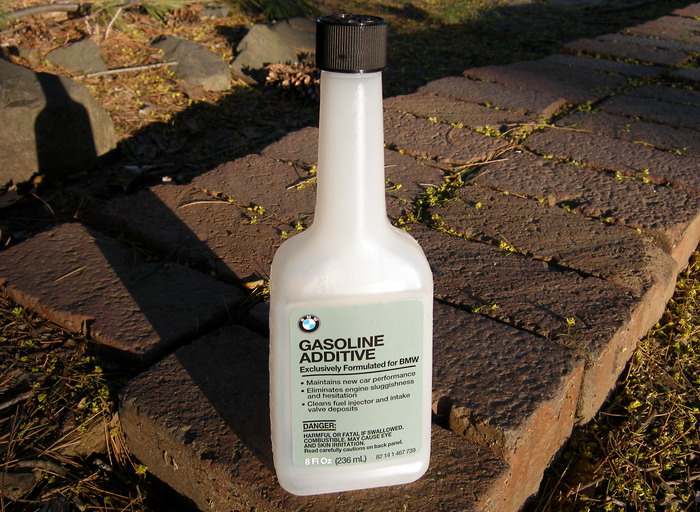
- [Optional] One bottle of BMW or Techron gasoline treatment
- (2) Small hose clamps appropriate for 1/2 OD rubber hose (make sure they are not the kind that dig into the hose as they are tightened). Get them from your BMW parts department if necessary.
- Common house ventilation fan. One on a long, adjustable stand is best.
- Common household vacuum with crevice attachment (needed to vacuum in tight spaces)
- (1) Roll of blue heavy-duty shop towels (household paper towels fall apart too easily when wet)
Procedure
Step 1: Sanity Check
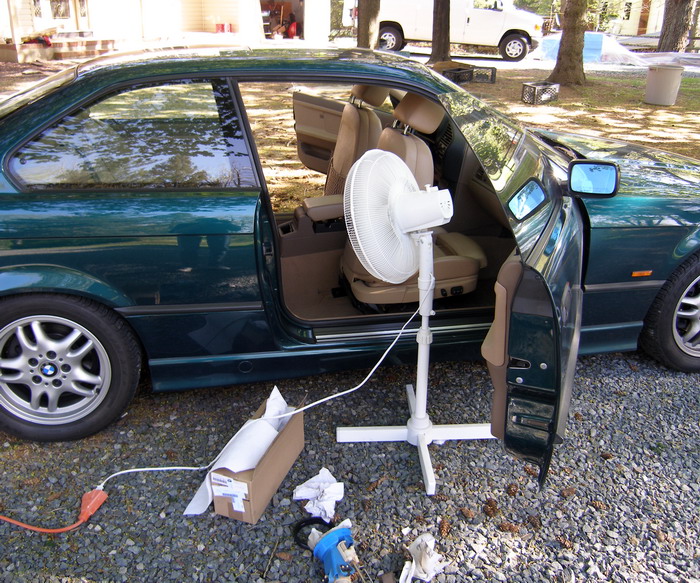
First of all, this procedure involves gasoline. Do this job outside, preferably on a nice, sunny, breezy day. Open both car doors and leave them open. Keep all ignition sources at least 20 feet from the car. Disconnect the car's battery before starting work. Don't huff the gasoline vapors. In other words, safety (and common sense) first.
Step 2: Prepare the Work Environment

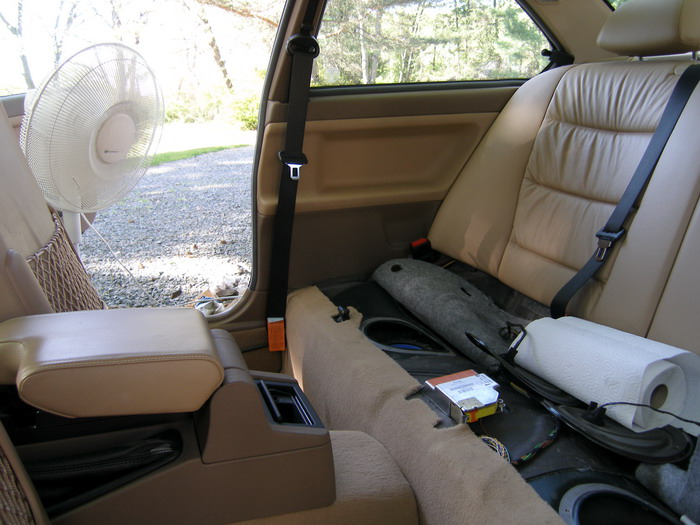
Move the front seats all the way forward so you have some room. Remove the rear seat bottom cushion, which is fastened with two metal clips positioned within 2" of the front of the cushion and about 1' from either side of the vehicle. Wedge your fingers under the front edge of the cushion in those locations and pull up and forward.
You'll note that the vertical section of the carpet as well as some black noise-attenuating mat is wrapped around the metal seat latches. Remove the carpet by lifting it up and over the latch toward the front of the vehicle. Lift the mat up and over the latches, and fold it back toward the rear of the vehicle. This will reveal two metal covers in the seat base.
Step 3: Remove Covers and Clean Up
The metal covers are fastened to the metal seat base with four philips-head screws. Remove these screws and the metal covers to reveal the pump and sender units. Since the tank is technically on the exterior of the vehicle, it's likely that a lot of dirt has collected around and on top of the pump and sending units. This MUST be vacuumed out thoroughly before the units are removed or this dirt WILL go into the tank as the units are cocked to one side and generally moved around during their extraction from the tank.
Step 4: Remove Locking Ring(s)
Each unit is held into the tank with a large locking ring. The rings on my vehicle were reasonably tight, so the first thing I did -- before removing hoses or anything else -- was make sure I could actually remove BOTH rings. BMW makes a special tool for this, but done properly, the job can be accomplished with a large flat blade screwdriver, a small hammer and some patience.
The trick to doing this, incidentally, is to position the screwdriver on one of the ridges and proceed to rapidly and lightly tap the screwdriver with the hammer. The intent is to "vibrate" the ring open rather than force it open in a few swift hits. While the plastic is reasonably strong, you don't want to break it. If you do, I hope you have another vehicle or your parts department delivers, since you're going nowhere until the tank is resealed. If you are especially paranoid, you might buy one additional ring while you're at it, but I don't think it is strictly necessary if you're careful.
Once the rings are loose enough to be rotated by hand, it's reasonable to proceed with the remainder of the task. If you can't remove a ring, get the BMW tool and try again.
Step 5: Remove Electrical Connections
Before we go any further and expose the interior to fuel vapors, make sure the key is out of the ignition and then disconnect the electrical connections from the pump and suction units. The pump unit has two connectors (one to power the pump and the other for the sender) while the suction / sender unit has one (for its transducer).
Note: you can disconnect the battery if you want, but I did not find that necessary. I later found out that techs don't disconnect the battery either to perform this task, so I figured skipping that step is as safe as can be expected (we are playing with gas, after all).
Step 6: Remove the Hoses (Carefully!)
This is one area in which most of the DIY guides glossed over, but it's also the most critical part in the process. I also noticed one physical difference between my vehicle and one of the guides. Older vehicles (E30?) apparently have two hoses going to the pump and one to the suction unit. My car had one hose going to each. Note that the pump may appear to come with two hose nipples, but if you look closely one of them is non-functional. The same plastic mold is obviously used for both applications. Make sure you specify the last 7 digits of the VIN when you buy the part and make sure you have the right one for your particular vehicle.
Remove the hose of the suction / sender unit first. Look closely at the hose clamp. If it is the crimp type from the factory use diagonal cutters to cut across the crimp and remove the clamp. Naturally, do not try to cut it off in the same direction as it was clamped -- that will only serve to put further stress on the hose and associated nipple. Once the clamp is removed, carefully remove the hose.
While the plastic used to construct the senders is obviously fuel resistant, after 8 years and 126000 miles it was very brittle. Unfortunately, I managed to break the nipple off of the suction unit while trying to remove the hose (thus committing me to the replacement process). I strongly recommend using some kind of dental pick or micro screwdriver to break the bond between the nipple and the inner surface of the hose, as yanking on it is practically guaranteed to break it. Of course, you can afford to break the unit if you have the correct replacement part, but you don't want tiny plastic parts dropping into the tank either, so patience is key here.
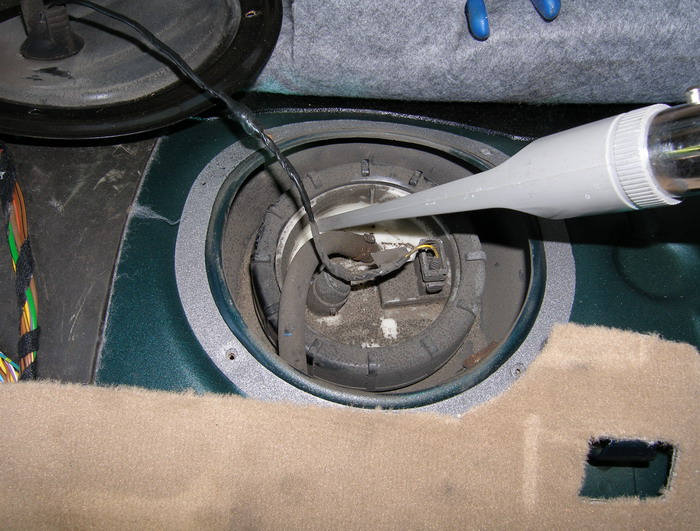
With the hose on the suction unit removed, it's now appropriate to remove the hose to the pump. Keep in mind that fuel in this hose is under pressure and will spray like a geyser if you don't clamp the hose down before you remove it. I found that my fingers were just strong enough to keep the leak to a dribble, but the process still put raw fuel on top of the pump unit. I didn't have a bolt or something similar to plug up the line so I improvised and used the smooth shank of a drill bit to plug the line before I mopped up the raw fuel with some towels.
Step 7: Remove and Replace the Suction unit
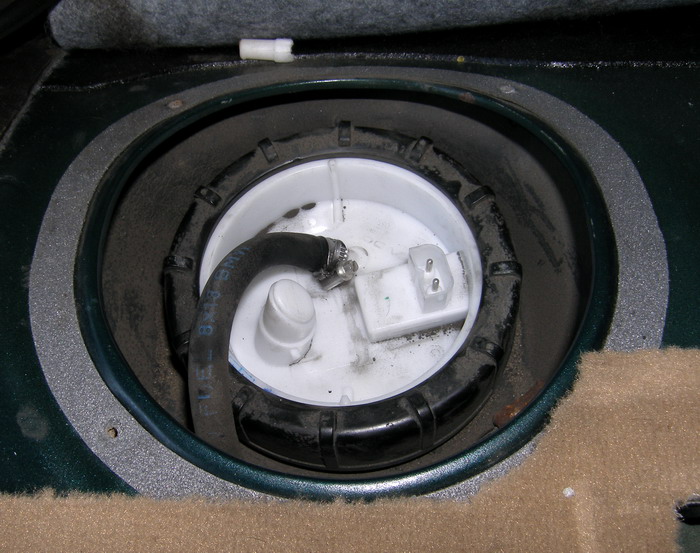
With the electrical connectors and hoses disconnected, it's now possible to fully remove the locking ring, set it aside, and pull the suction unit out of the tank. You'll be able to pull the unit up only about 6 inches before the suction hose connected to the unit prevents further movement. Rotate the unit so you have a clear view of where the black hose connects to the base of the unit and use a small screwdriver to push in the tab that unlocks the hose from the unit. Then firmly pull the suction hose from the unit but HOLD ON TO THE HOSE. Do not let it drop down into the tank.
While holding the suction hose, carefully pull out the old suction unit and set it aside. Remove the old tank seal, and install the new seal before installing the new suction unit. The tank seal is press fit around the inner diameter of the tank opening. Contrary to its apparent design, it does not press fit over the lip of the tank. Look closely at the old seal as you remove it and you'll understand what I'm talking about.
When you connect the suction hose to the new suction unit base, you should feel a slight resistance as the plastic and o-rings seat and then a click when it's pushed home. That means the hose is locked to the suction unit and you can breathe a bit easier.
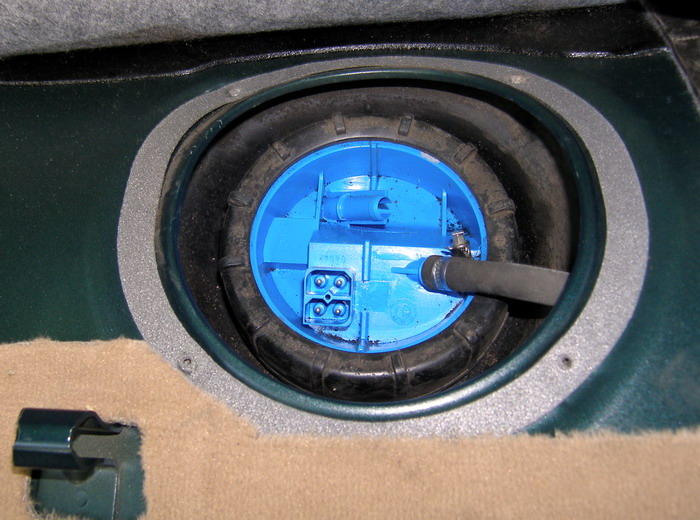
Now it's time to install the new suction unit. Note that the pump and sender units must be oriented properly, and BMW engineers were kind enough to put small raised notches on both the sender unit as well as tank. Look just behind the tank opening and you'll see what I mean. To install the unit, simply line up the marks and carefully push the unit into the tank opening. You may feel a slight resistance to this -- that's normal due to the seal. You may or may not notice that the suction unit has a long plunger-like stem that hits the bottom of the tank. That is intentional in that it automatically calibrates the float level.
Naturally, the next step is to reinstall the ring using the reverse procedure. Put it on by hand and pay careful attention to cross-threading. I found that the stem pushed the sender up a bit, which made it appear I was threading the ring on correctly when I wasn't. To work around this, simply push down on the suction unit to make sure it's seated, then rethread the ring. Simple, really.
Incidentally, now would be a good time to figure out what size drill bit will fit the inner diameter of the fuel hose. This will come in handy when you change the pump. The reason for doing it here is that this hose isn't pressurized with fuel, so you can figure out the size without spraying fuel all over the place. I found a 1/4" drill bit fit snugly into the hose. Once you've figured that out, you can continue with the suction unit installation.
With the ring fully seated, put the hose clamp around the hose and fit the hose to the suction unit nipple. The nipple is lined with a brass sleeve, so you don't have to worry too much about crushing the nipple, but don't go overboard here. The clamp should be very snug, but not so tight that the clamp is compressing the hose.
This finishes the suction unit replacement. Don't bother to reinstall the cover just yet -- the entire system needs to be checked for leaks and you can't do that with the pump deactivated.
Step 8: Replace the Pump / Sender Unit
Replacement of the pump follows a procedure very similar to the suction unit, except you need to look out for a few things.
First of all, unlike the hose that connects to the suction unit, the hose that connects to the pump is pressurized with gasoline. A check valve maintains the pressure even if the pump is off. This is obviously done to facilitate quick starts, but it does create a minor annoyance when changing either the fuel pump or the fuel filter. Some DIY articles suggested pulling the fuel pump breaker and starting the car to draw out the fuel, but all that will do in my opinion is suck air into the line. This will cause the engine to run roughly before it dies and throw a DME code or two that you'll need to have cleared before you go to inspection (yes, they check this crap now).
This is where that drill bit or round bar comes in. When it comes time to remove the line, pinch it about 2" back from the nipple with your fingers to minimize the fuel loss and then insert the bit or round bar into the hose to prevent it from gushing fuel everywhere. Note that SOME minor fuel spillage is inevitable -- no matter how strongly you pinch or clamp the hose. The goal here is to prevent a geyser and plugging the hose does that while you use both hands to replace the tank seal and carefully maneuver the pump unit into the tank.
The other thing to look out for is alignment of the pump in the tank. Remember the raised notches? Use them on the pump to make sure it's aligned correctly. The top of the pump is constructed such that it may APPEAR to be crooked if you use the notches to align it, but that's an optical illusion. Bottom line: use the notches to align the pump and you'll be fine.
When ready, install the new tank seal, insert the pump unit into the tank and reinstall the retaining ring slowly and methodically until you feel resistance. When that's done, pinch the hose again, pull the plug out, reinstall the hose, and tighten the clamp.
Then STOP. Don't do anything else except proceed to Step 9. Seriously.
Step 9: Evaporate any spilled gasoline!
I spilled a very small amount of gas on the top of the new pump unit reinstalling the hose, but it was enough to fill some of the recesses of the unit, including the electrical connector bodies. For this reason I brought my fan over, positioned it to blow directly on the pump unit, and then I just walked away for 20 minutes to let the increased airflow thoroughly evaporate the gas and dry out the entire area. If you don't do this and try to reconnect the electrics, well...if I have to tell you what will happen you shouldn't be working on cars by yourself.
Step 10: Reconnect the electrical connectors and Idle Test
Once any spilled fuel is completely evaporated, again make sure the ignition is off and reinstall the electrical connectors.
Next, hop in the driver's seat and turn the key to the PRESTART position (don't start yet) until most of the warning indicators in the cluster go out. Look back around the fuel pump and suction unit to make sure there are no leaks. If everything looks good then then turn the key off and repeat the procedure once more. When the cluster lights go out the second time around, turn the key to start and hold it there until the engine fires.
I heard that the engine might run rough for a minute or so, but mine ran like a champ. It probably has a lot to do with the fact that I didn't spill that much gas or let a lot of air into the line. Your mileage may vary. At this point you can let the car idle for a minute or two, but no more than that should be strictly necessary. When done, turn the key off and reinstall the tank covers, noise mat, carpet, and lastly, the seat bottom.
Step 11: Take a Test Drive and top off the tank
Once everything is buttoned up, take the car out for a spirited test drive around the block. With low fuel level, save the high-lateral-G turns until later, however, you should accelerate quickly to prove the system can deliver nominal fuel pressure.
I recommend you stay close to home on this drive and, if you're especially pessimistic like me, have a cell phone and the number of your local towing company in your pocket. Don't laugh...when you're playing with fuel systems ANYTHING can happen.
Since your fuel level is low at this point, this is a good opportunity to throw in a bottle of BMW gasoline treatment so it mixes well with the fresh gas.