


BMW E36 Power Steering Pump DIY
The BMW power steering pump is one of the most reliable
accessories on the engine, but
they do have a finite life. Fortunately, replacement is
straightforward for the DIYer.
Introduction
This DIY outlines the labor required to replace the power steering pump on an E36 BMW equipped with an M52 6 cylinder engine. The procedure and principles involved may be applied to several other BMW models including the E46.
The easiest way to replace the pump is from the bottom of the vehicle. However, I replaced my pump from the top because I replaced it at the same time as the alternator and thus found it easier to approach the pump from above. Thus, while this DIY will describe the procedure to remove the pump from the bottom, many of the pictures will be from the top.
Troubleshooting
The power steering pump typically works until it doesn't. My pump never failed, strictly speaking, but it did start to make a high pitched squealing noise at around 2000 RPM for a few minutes just after start on winter mornings. I tolerated that for two winter seasons before deciding to replace the pump as part of a preventative maintenance program. Replacing the pump eliminated the squealing noise.
It's important to note that the pump should NOT be replaced if the vehicle appears to have power steering under normal conditions but seems to lose power assist when turning the wheel quickly. That is a classic symptom of a main accessory belt contaminated with power steering fluid. If this occurs, the easiest way to remedy the problem is to shoot a stream of brake cleaner downward at the exposed portion of the belt just forward of the airbox for 15-30 seconds, or as required. This is not particularly environmentally friendly but it does eliminate the need to replace the belt. If the belt is more than 3 years old, has more than 60K miles on it, or underside of the belt shows any cracks, it should be replaced in any case.
Prerequisites
Tools
- Long breaker bar and application specific (16mm hex, T47 torx) socket for tensioning the main accessory belt
- Ratchet and application specific (13mm deep hex, T40 torx with 2" extension) torx) socket to remove power steering mounting bolts.
- Ratchet and 13mm socket for the bolts that mount the pulley to the pump
- Flat blade screwdriver to R&R the hose clamp holding the inlet hose to the pump
- 22 mm socket and ratchet to R&R the banjo bolt holding the output hose to the pump
Parts
- Remanufactured power steering pump (BMW part number 32411093577)
- [Optional] New pulley (BMW part number 32421740858 or equivalent - see below)
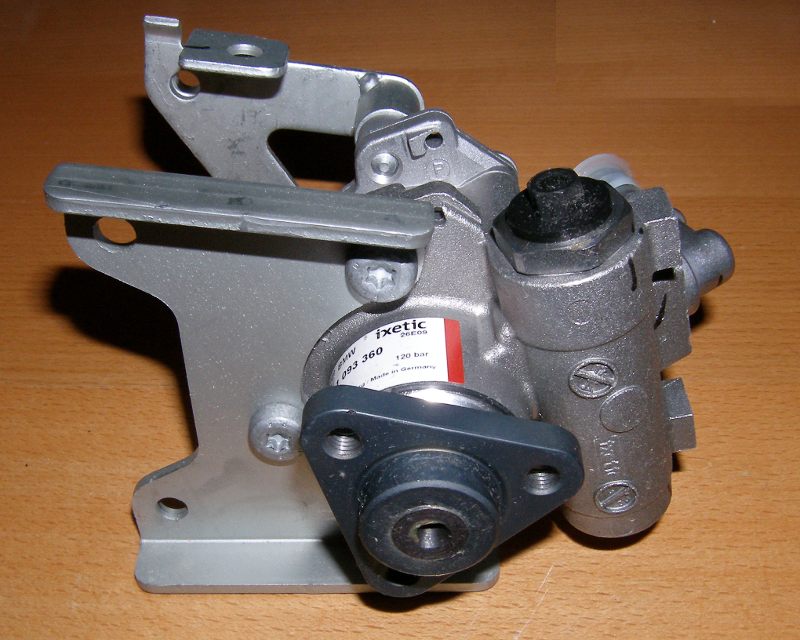
Power steering pumps provided by BMW are remanufactured in Germany. The unit I received was branded "ixetic". The pump I received did not come with a pulley but that's just as well because BMW foolishly migrated to a plastic pulley in the E36 and there are better alternatives.
As failure of this pulley can throw the main accessory belt and thus disable the water pump, alternator and power steering pump simultaneously, I recommend the pulley be replaced with an aluminum version manufactured by URO Parts (URO Part number 32421740858) and distributed by BMP Design (BMP part number 179540). This option is particularly attractive because it's actually a bit less expensive than the OE plastic piece, if you can believe that. If there is any downside it's that the part seems to be backordered more often than not, so you may need to order this well in advance of the work.
I do not advocate the use of underdrive pulleys (so-called "power pulleys") on street cars. They are designed for high revving track cars, will require a non-standard size accessory belt and are expensive to boot. I looked long and hard for a stock-sized aluminum pulley and found only the URO / BMPDesign option. If the URO part cannot be acquired, it may be possible to give the the factory pulley to a local machine shop and have them mill a copy out of billet aluminum, but that won't be the least expensive option I can assure you.
Part Highlights
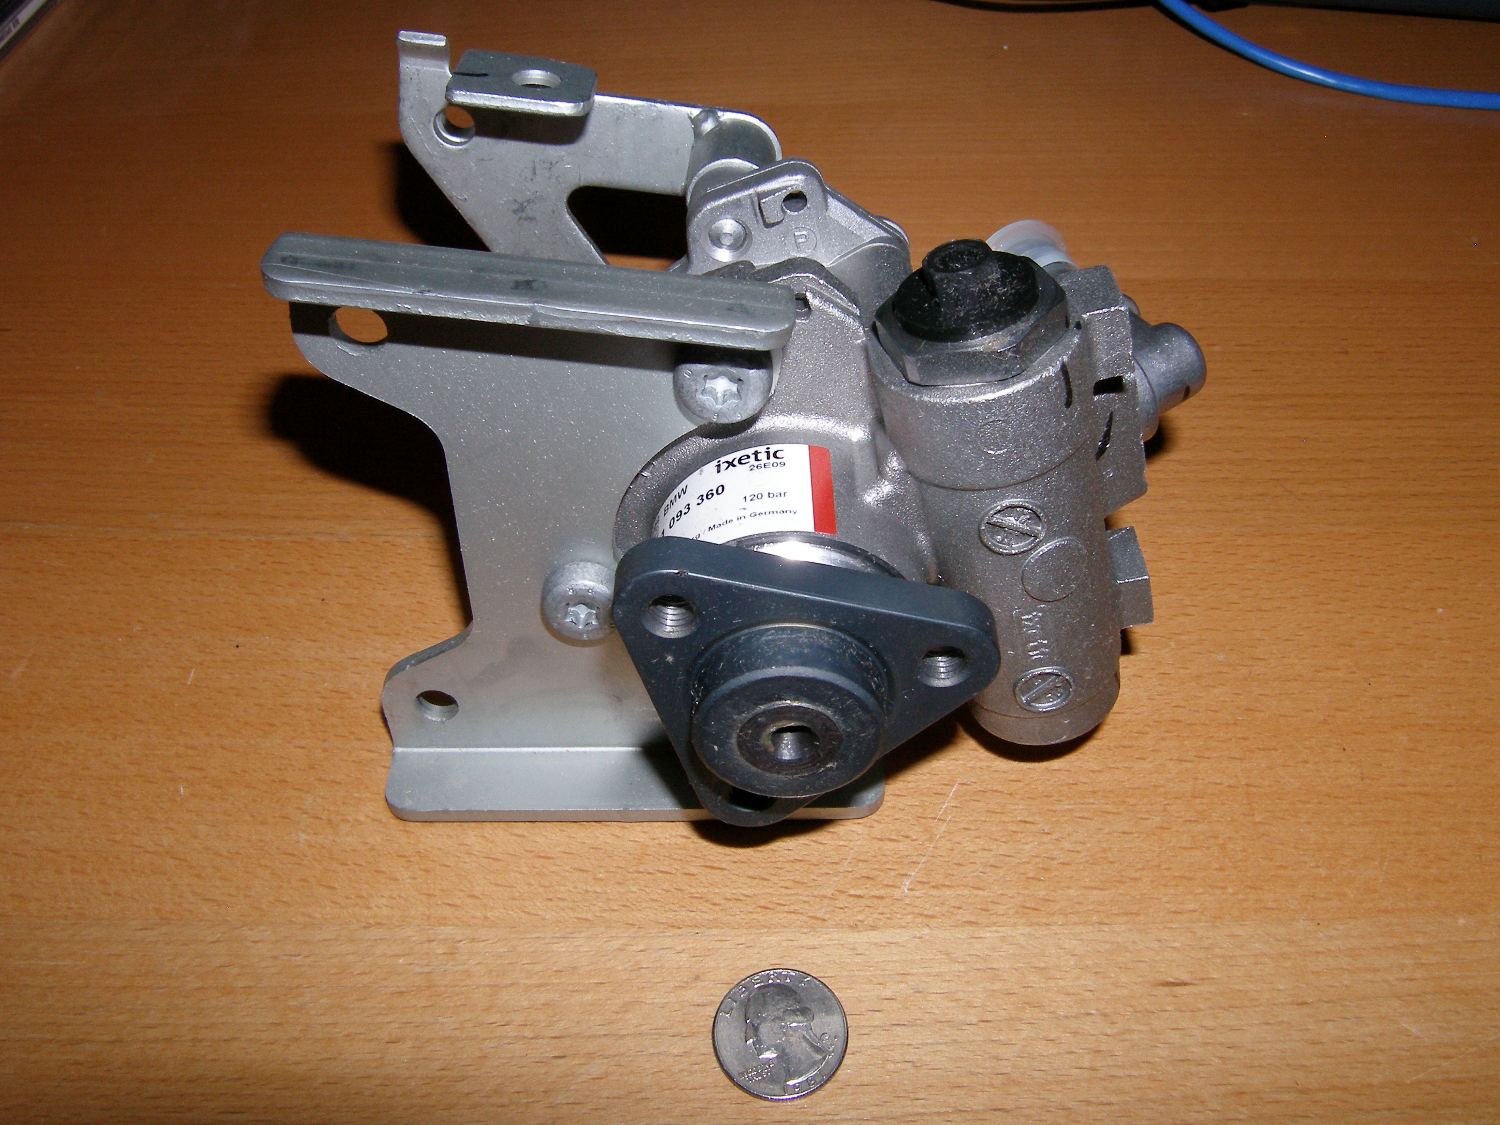 Front of the new power steering pump. Note the pressure on the tag: 120 Bar. |
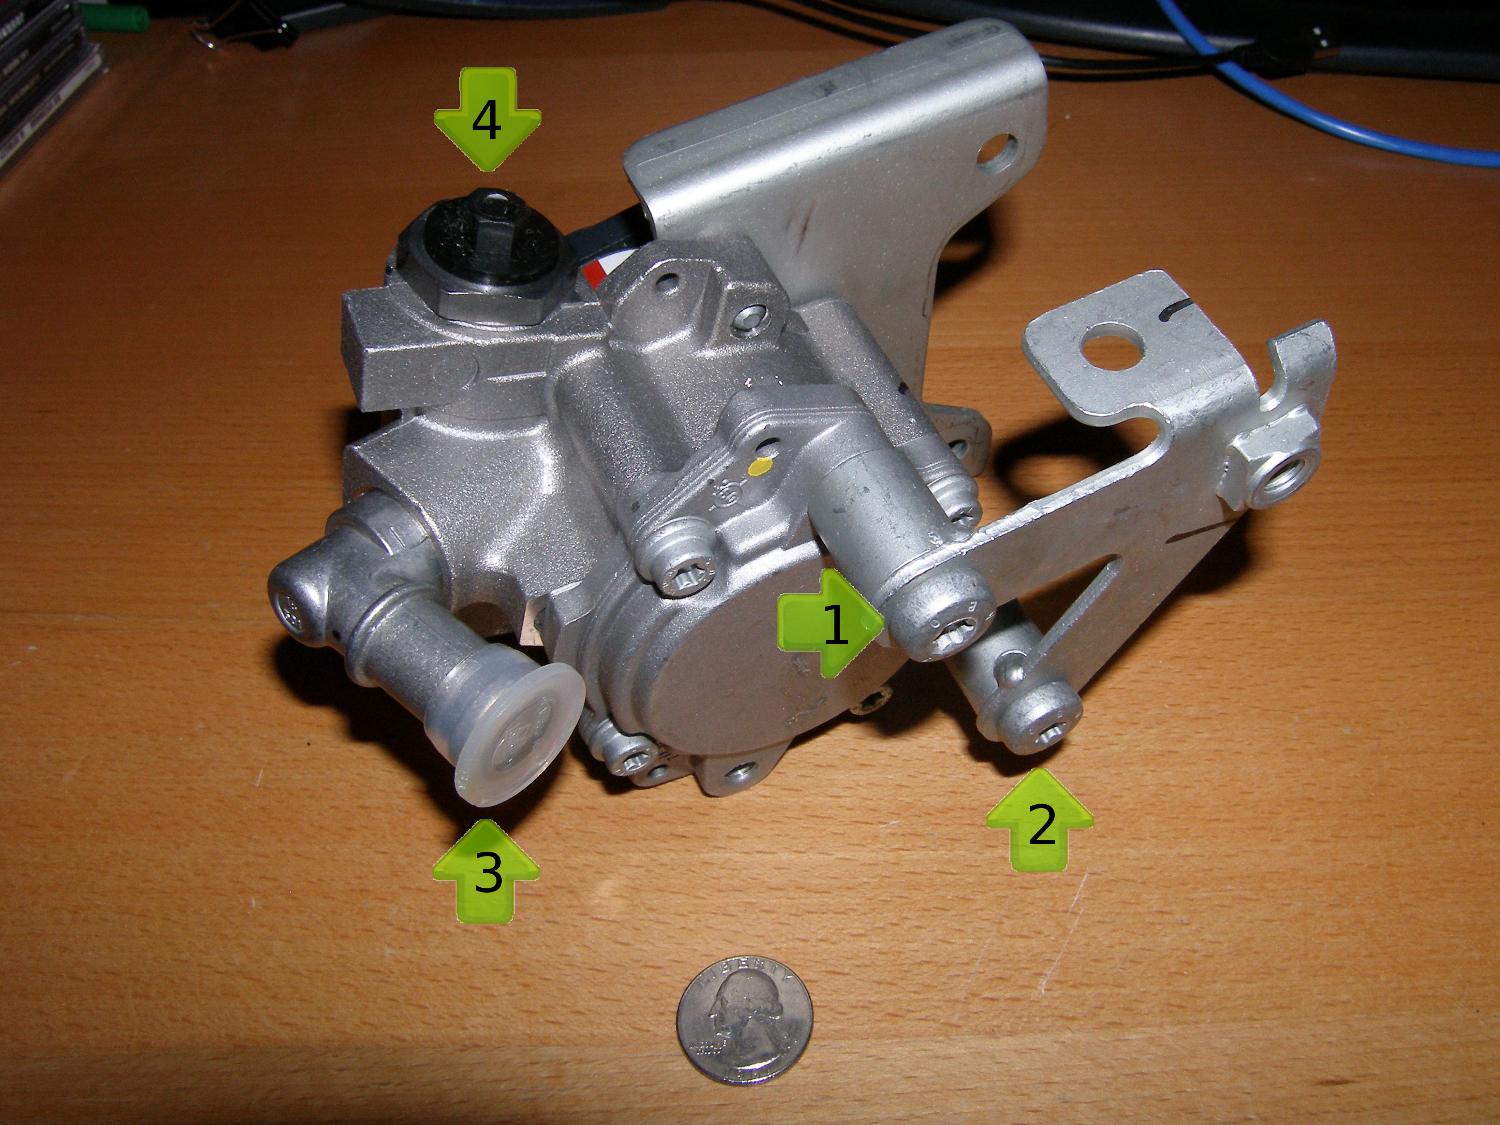 The rear of the pump shows the rear bolts (1 & 2), inlet pipe (3) and output that accepts the banjo fitting (4). |
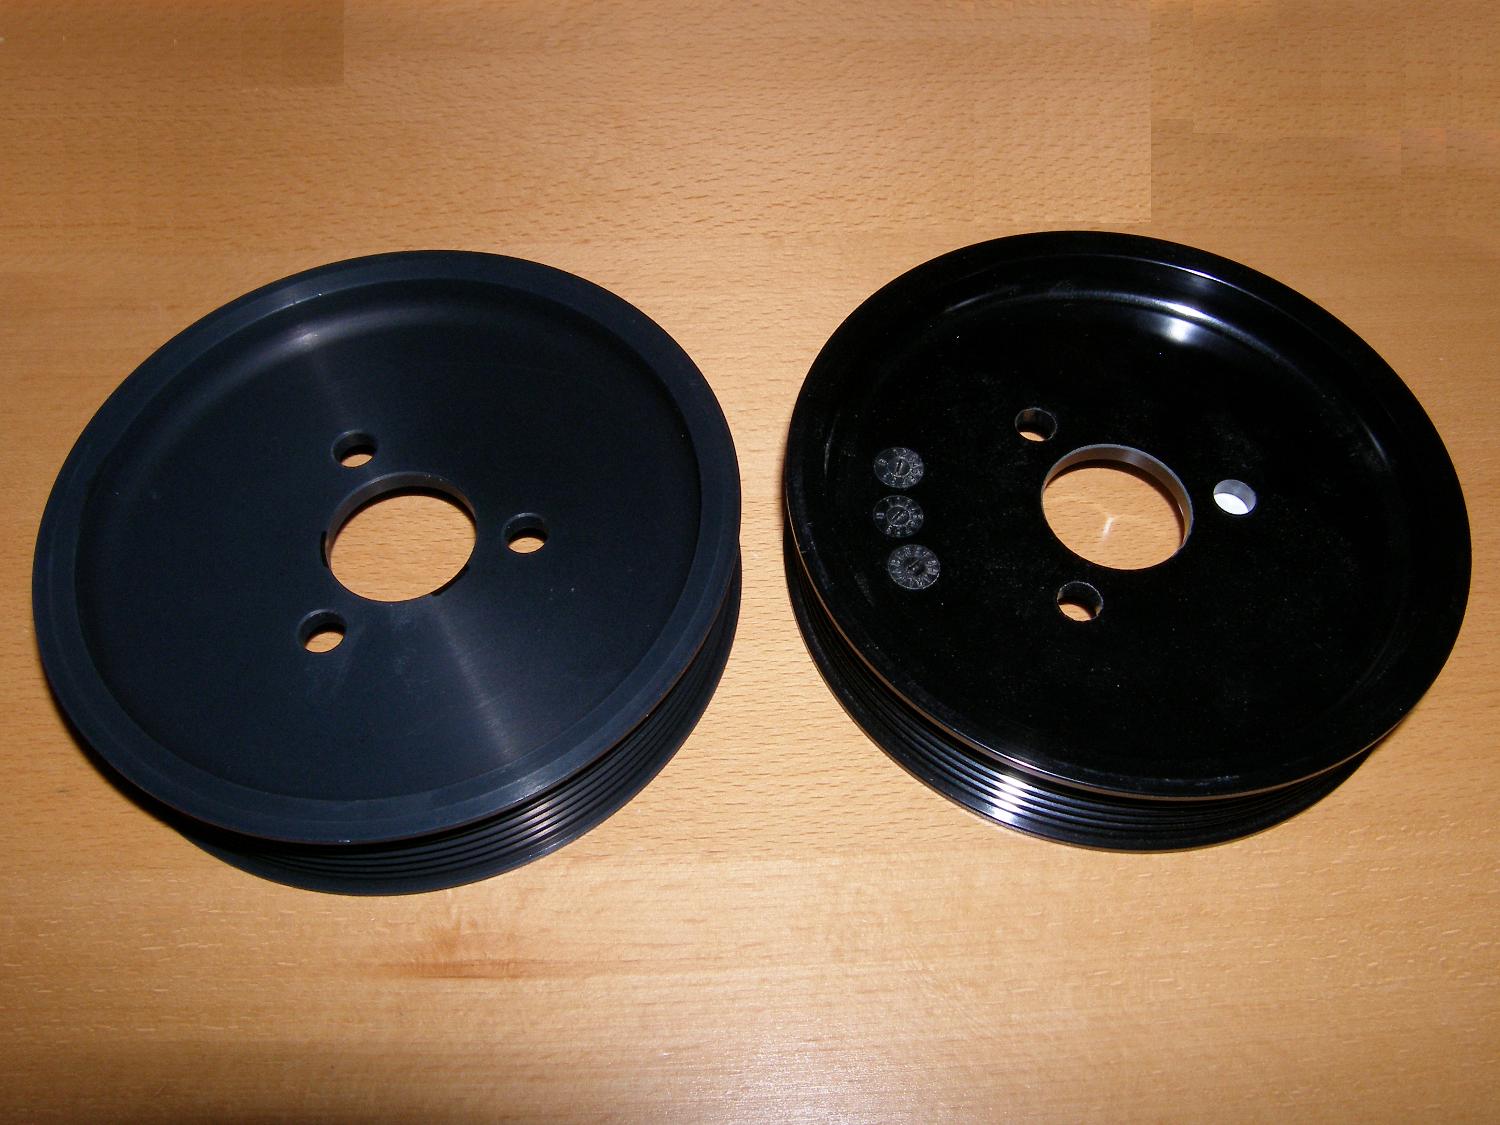 A side by side comparison of the aftermarket aluminum (left) and OE plastic pulley. |
Removal / Disassembly Procedure
- Jack up the front end of the vehicle and place it securely on jack stands. Under no circumstances work under a car supported only be a jack. It may very well wind up being the last mistake you ever make.
- Crack loose, but do not remove, the three bolts holding the power steering pulley to the pump. This is done now because it's a lot easier to use the belt tension to hold the pulley securely while you loosen the bolts. They should be lightly torqued, so this may not be strictly necessary, but it certainly doesn't hurt.
- Remove the A/C belt. Remove tension from the belt by using a breaker bar equipped with a 13mm shallow socket to grab and rotate the upper tensioner mounting bolt clockwise. The design of the tensioner will require a lot of force to be applied initially, but it will begin to move almost instantly. If it doesn't move at all, the socket is on the wrong bolt.
- Remove the main accessory belt. Take note of the proper belt routing. You'll need it to install the belt later. Remove tension from the belt by attaching a breaker bar equipped with an appropriate socket to the main belt tensioner and rotate it clockwise. This process varies slightly based the specific revision of mechanical belt tensioner in use. Old versions require removal of the protective cap on the tensioner pulley and then use of an appropriate hex (16mm) or torx (T47) socket. Newer versions of the tensioner have a 16mm hex bolt head cast into their body for this purpose so it is not necessary to remove the protective cap in this case.
- Remove as much ATF as possible from the ATF reservoir. A irrigation syringe is ideal for this task. This will help reduce the amount of oil that will drain from the hose when it's removed from the pump.
- Loosen the bolt connecting the banjo fitting of the output line to the pump. Position a drain basin below the pump and then loosen the banjo bolt connecting the output line to the pump. This will cause a good amount of oil to drain. Once the flow slows to a few drips, remove the hose from the pump, wrap it in a lint-free towel or cloth and then use tape or a ty-wrap to secure it so no dirt enters the hose.
- Loosen the hose clamp securing the inlet line on the pump and remove the hose. Make sure the basin is still under the pump and remove the hose. If you've removed the fluid from the reservoir only a small amount of fluid should drain, but it's nothing you'd want on the floor.
- Remove the four pump mounting bolts with a 13 mm deep socket. The pump is fixed in position with two bolts on the front of the unit and two on the rear. The front bolts will be relatively easy to reach and identify but the rear bolts (and the inner rear bolt in particular) may be a slightly greater challenge to find so a small mirror may help here. Note also that depending on the age of the pump the rear bolts may incorporate a T40 Torx head rather than a 13mm hex head. My original bolts were 13mm hex, while the bolts that came with the new pump were T40 Torx. I reused my old 13mm hex bolts simply to keep things consistent.
- Remove the pump. With everything disconnected, the pump should slide right out. Be sure to keep the pump inlet/outlet upright to the extent possible until you reach the drain basin with it as some additional ATF may drain from the unit. Save the unit since in all likelihood you'll need to return it for core credit.
- Remove the pulley from the pump, as it will not returned with the core.
Installation / Reassembly Procedure
- Install the new pump. Mount the unit and install all four mounting bolts. Torque each bolt to 21NM (15 ft*lbs).
- Optionally, install the new metal pulley. Tighten the bolts hand tight for now.
- Connect the hoses to the pump. Torque the hose clamp by feel. Don't over torque it. Torque the banjo fitting by feel (since you likely won't be able to get a torque wrench in there), and only so far as you begin to feel the sealing rings compress.
- Clean all pulleys and hose fittings with aerosol brake cleaner to make sure they are free of contamination of ATF, grease, engine oil, coolant, or anything else. If you're wondering why I recommend cleaning the hoses it's so that you can quickly tell if either is leaking during the functional check later on.
- Install the accessory belt. This will provide tension necessary to prevent the pulley from rotating.
- Torque the pulley mounting bolts to 22 Nm (16 ft*lbs). This is a relatively light torque, but that comes right from the BMW TIS.
- Refill the power steering reservoir with fresh fluid and rotate the wheel back and forth from lock to lock a few times until additional resistance is felt as fluid permeates the system. Reinstall the cap then remove it to check the fluid level. The correct level is between the two marks on the dipstick built into the reservoir cap. Add fluid as necessary until the level is between the marks, but do not exceed the upper mark.
- Bleed the system. The system is self bleeding but you'll need to run the engine to turn the pump to circulate the fluid enough to free trapped air, which will then vent to the atmosphere via the vent hole in the reservoir cap. While the engine is idling (and the front end is still jacked up and thus the wheels are free) turn the steering wheel lock to lock a few times. Turn off the engine and check the fluid level in the reservoir. Add fluid again only if needed.
- Lower the vehicle and take it for a test drive with a can of brake cleaner handy. Find an appropriate location along your test route with no conflicting traffic in the way and attempt to turn the wheel quickly either left or right. If you notice any loss of power steering, the belt may be contaminated with fluid. If this is the case, stop the vehicle, open the hood, and use the procedure mentioned above to clean the pulleys and belt. Close the hood and try the test again. Repeat as required. One time should be sufficient, depending on the level of contamination. In a worst case scenario, a new belt may be required.
- Re-check the fluid level when back at the garage. If the level is lower than before, some air has been bled out of the system and this is quite common after the first test drive. Check the level again the following day after some driving to ensure that the level is no longer dropping.
Procedure Highlights
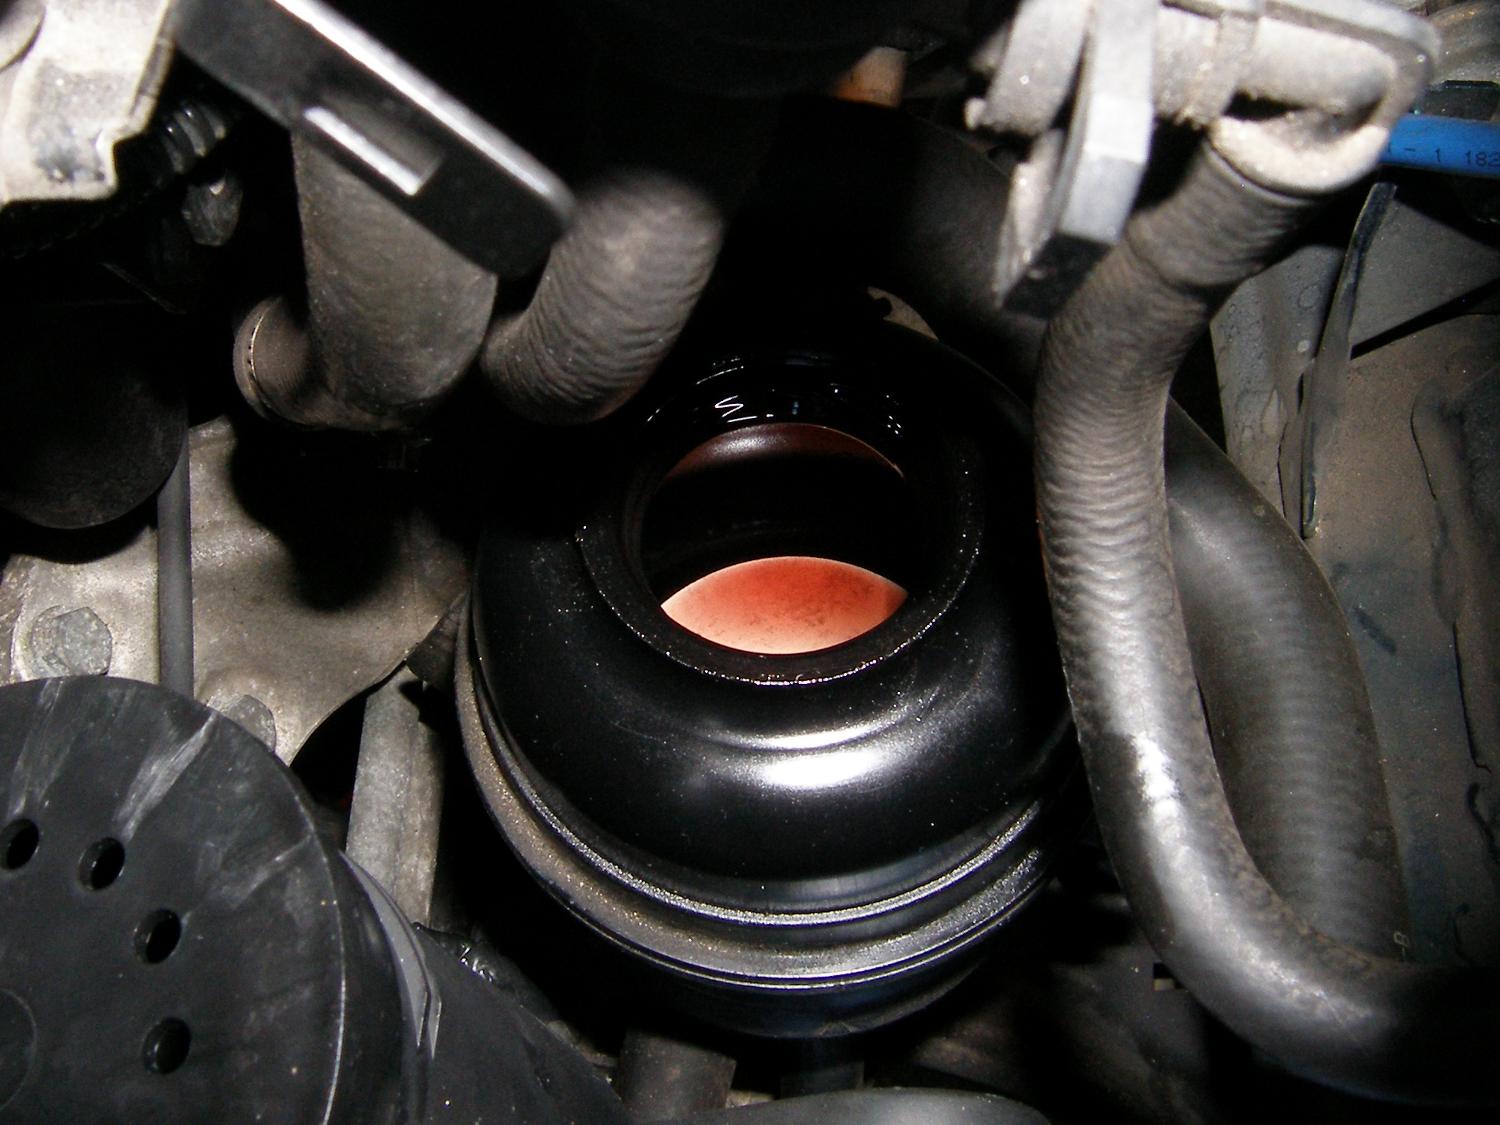 What an empty power steering reservoir looks like. You should never see that white component during normal operation. |
 Once the reservoir is drained, both inlet and output hoses can be removed from the pump. |
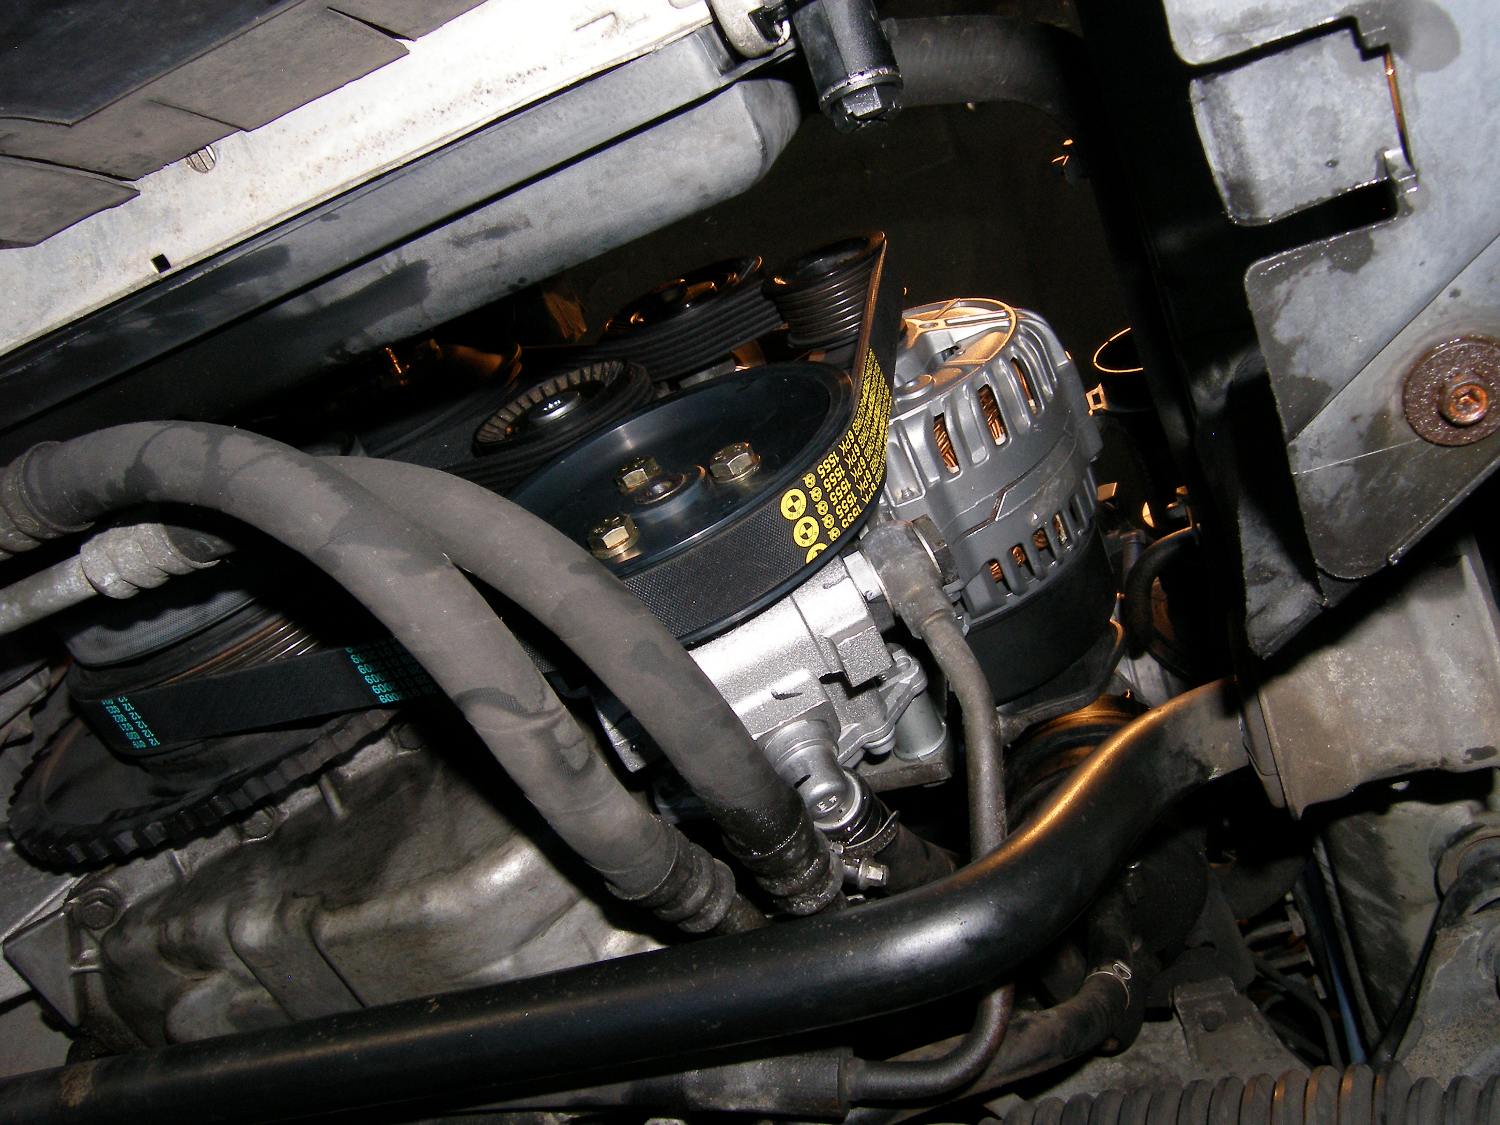
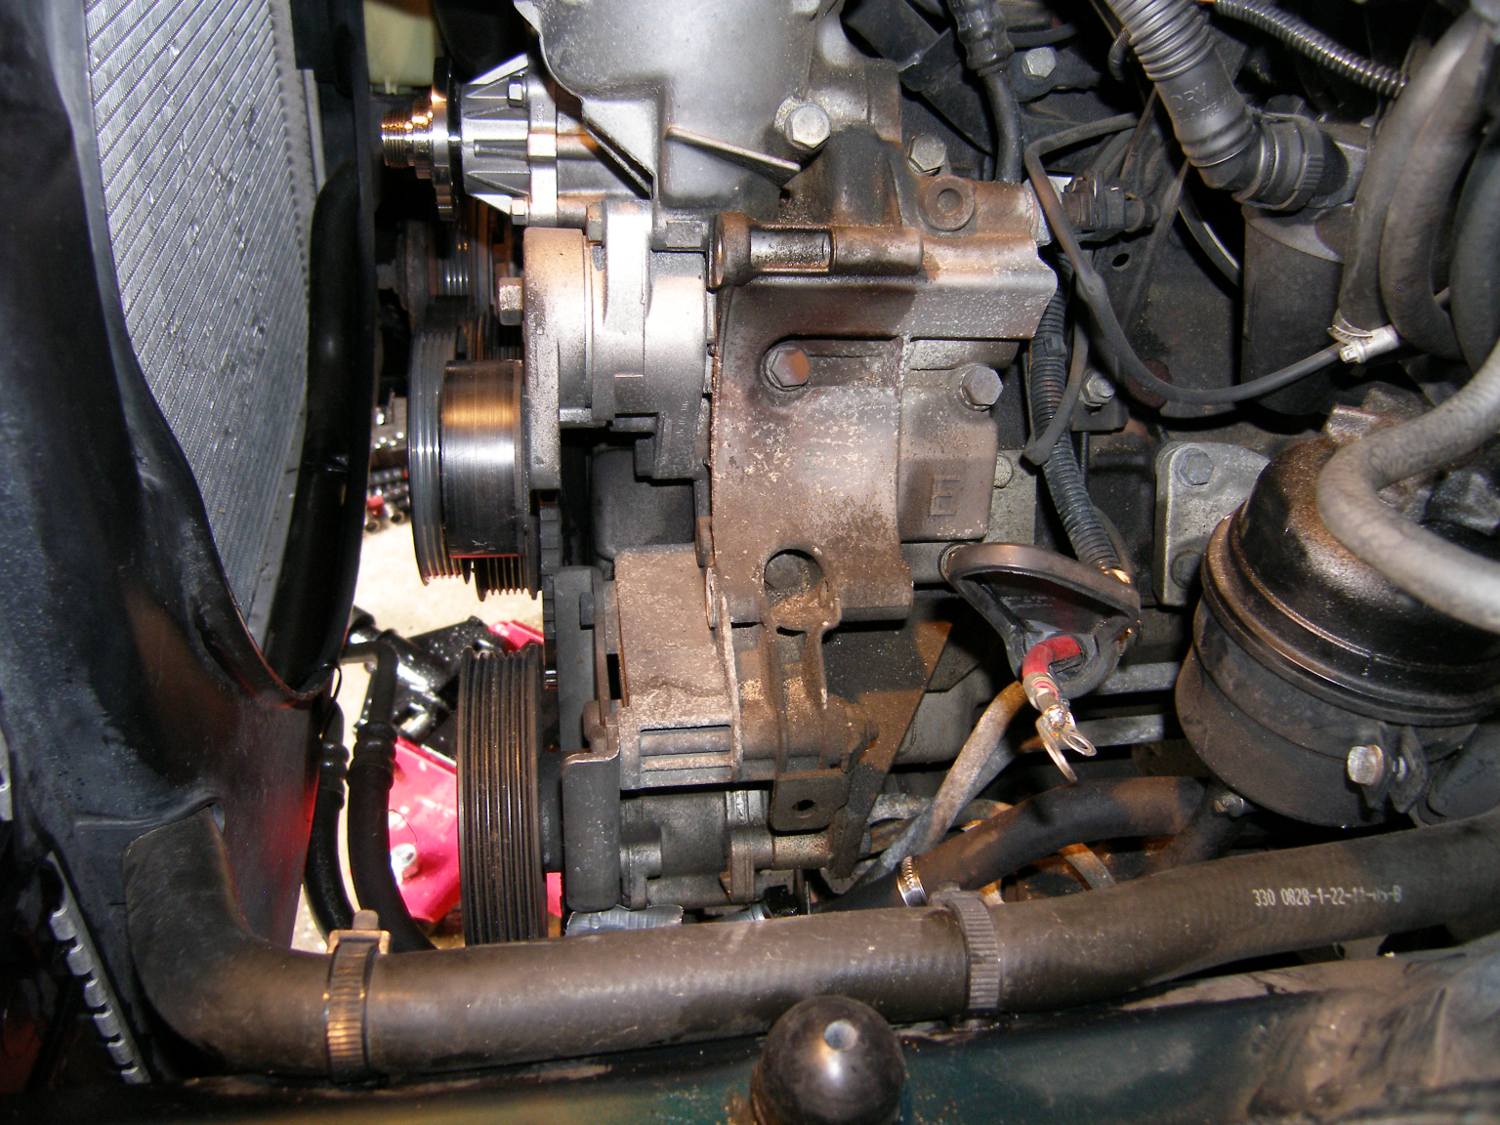 Just a perspective shot of the work area. Note that the alternator has been removed here, but this is not required to replace the pump. |
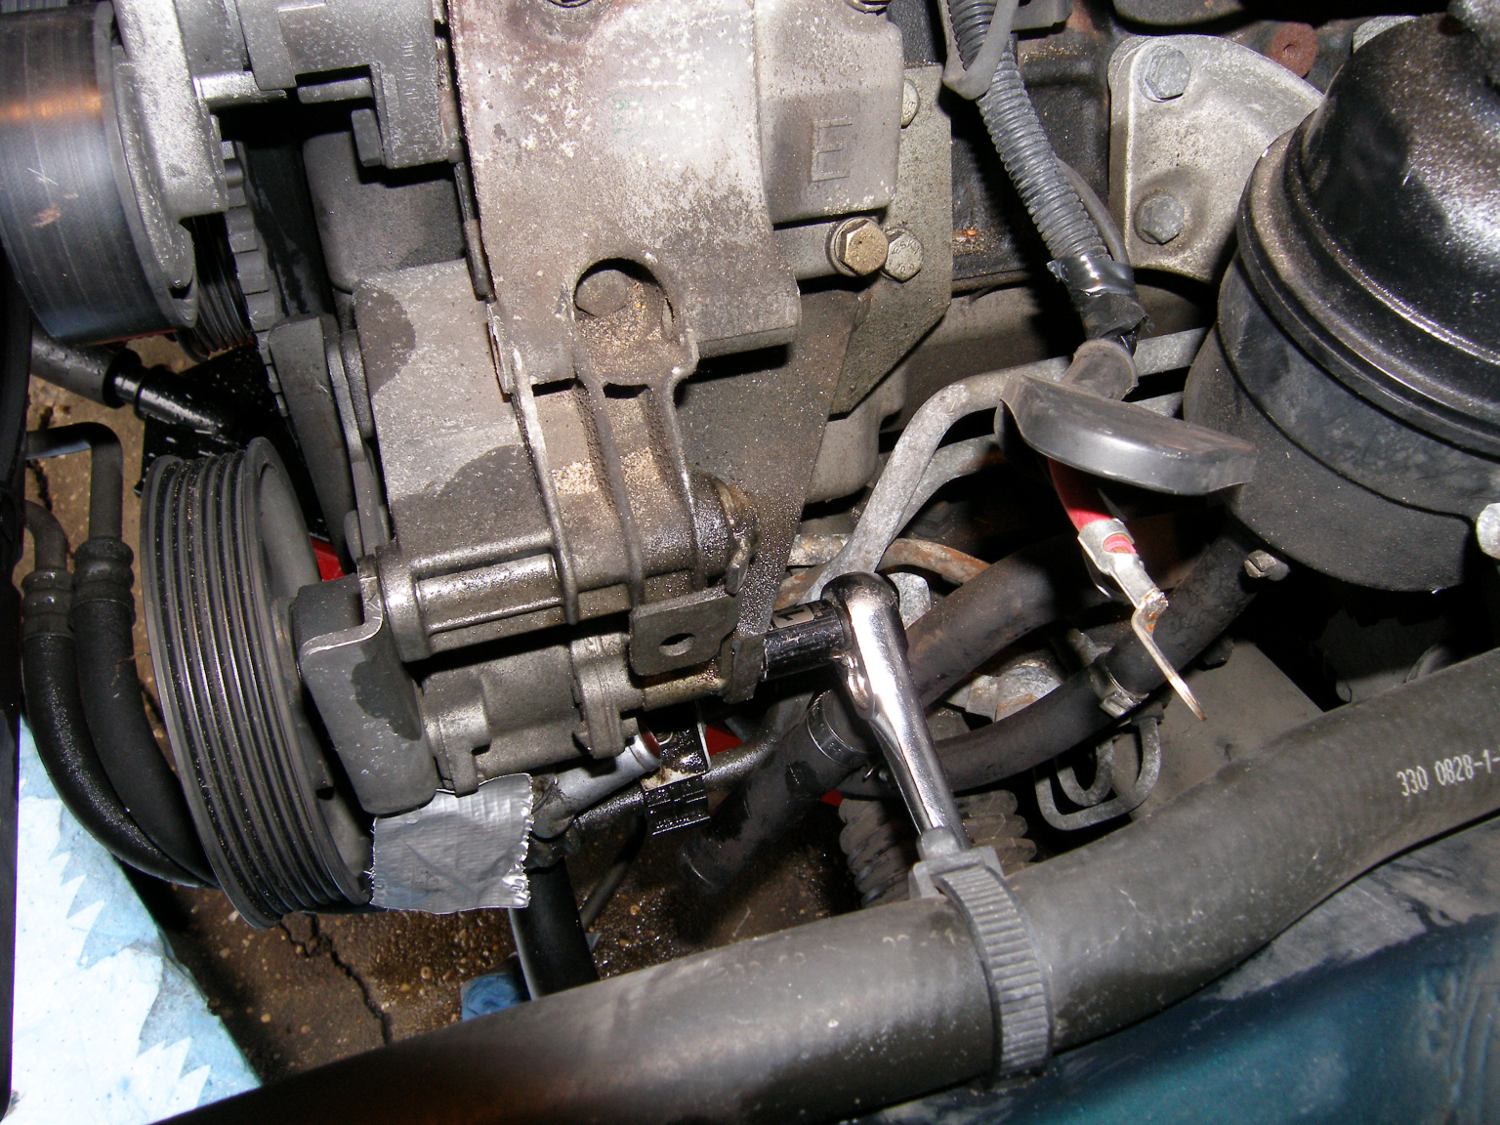
 Removing the front bolts is easy enough, but you'll need a deep socket for the task or a shallow socket with an extension. |
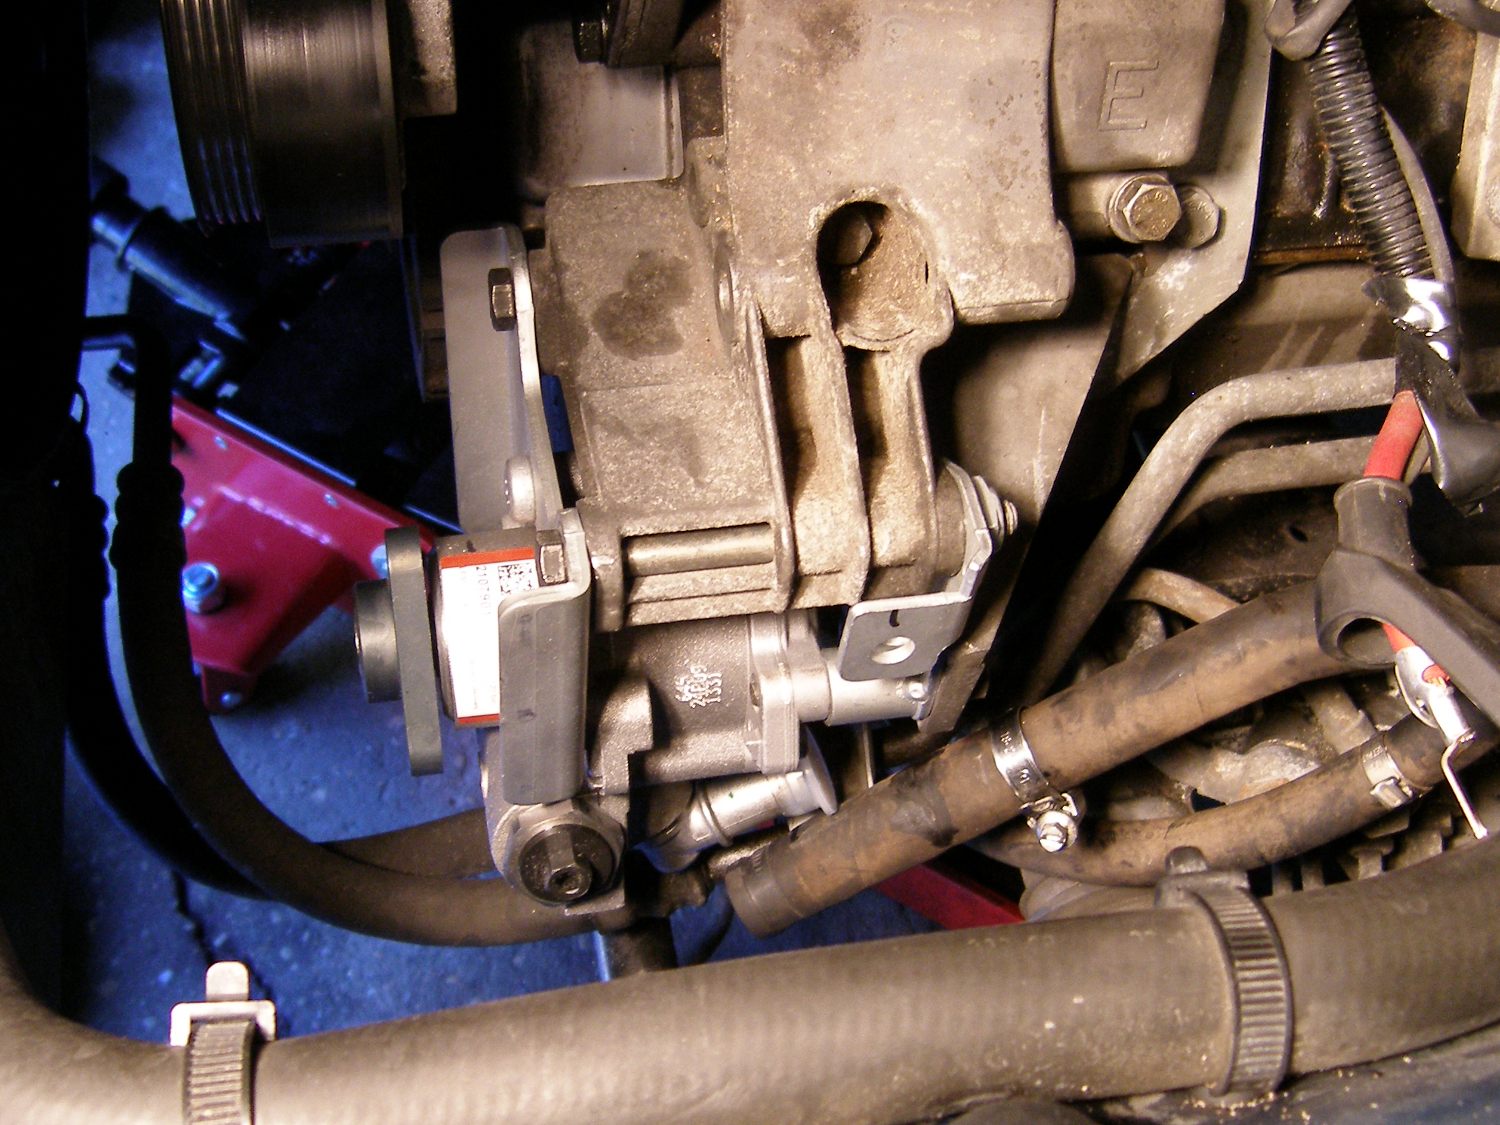
 The rear mounting bolts are a bit trickier to find, especially with the alternator in place, but a mirror helps here. |
 Here you can see the difference between the old (hex) and new (torx) rear mounting bolts. I reused my hex bolts. |
 It's best to install the pump without the pulley so it is not dinged up during installation. Dings can develop into stress fractures! |
 I decided to upgrade to an anodized aluminum pulley, but it's hard to tell the difference. From a distance, it's a near perfect match to the original. |
 Anytime you need to detension the belt for maintenance, it's always a good idea to consider new belts. |
Conclusion
Replacement of the power steering pump is a simple task well within the reach of a DIYer. This is a great time to replace the pulley with an aluminum power and conduct an optimum power steering system flush.
While I tend to buy a lot of parts online now I bought the pump at my local dealer in order to simplify the core credit process.