


BMW E36 Thermostat & Housing
Replacement DIY
If your car's coolant temperature needle seems a bit flaccid
lately it might because the thermostat isn't
gettin' any. Fortunately, the DIYer can fix it with a few common tools,
a couple hours, and this procedure.
Introduction
Thermostats on BMWs typically fail in the open position, which is a reasonably benign failure mode. The classic symptoms of this failure mode are:
- Temperature needle will refuse to climb to the normal 12 o'clock position after more than 10 minutes of driving, or may reach the 12 o'clock position but drop back down toward the blue arc (cold) after some driving at highway speeds
- Insufficient heat, no matter the temperature selected via the climate control system
If the thermostat fails in this mode it is safe to drive the car as necessary until it can be repaired, though if it is very cold, gas mileage may decrease somewhat because the engine is operating below its optimal temperature and you may find yourself shivering a bit due to the lack of heat.
Failure of the thermostat in the closed position will cause the engine to overheat in short order. This failure mode must be treated in the same manner as any other cooling system component failure. The car should be pulled over to the side of the road and the engine shut off immediately to prevent major engine damage.
The temperature needle on the E36 and later BMWs is buffered by the DME and is not a direct indication of the coolant temperature. If you wait to shut off the engine until the needle reaches the red arc and the temperature warning light illuminates, it is possible that the vehicle has already sustained engine damage. This is one of the reasons why many enthusiasts and independent BMW technicians recommend regular replacement of the cooling system components. There is simply too much at stake in the event of a failure.
For preventative maintenance purposes, thermostats should be replaced every 60K-80K miles. If a plastic OE thermostat housing is installed, it should be replaced at the same time. If a metal thermostat housing is installed, the profile gasket should be replaced and the flange cleaned before it is reinstalled.
Prerequisites
Tools
- 32mm open end wrench
- 10mm deep socket and accompanying ratchet (I used a 1/4" drive unit because it was less bulky)
- 13mm deep socket and accompanying ratchet
- Torque wrench capable of 10Nm (89 inch pounds or about 7 ft*lbs) - should match the 10mm socket (likely 1/4" drive)
- Torque wrench capable of 22Nm (16 ft*lbs) - should match the 13mm socket (likely 3/8" drive)
- Appropriate safety equipment (Gloves and eye protection at a minimum)
Parts
- (1) 92 Degree Thermostat (BMW part strongly recommended)
- (1) Plastic or Aluminum Thermostat housing
- (1) Profile Gasket
- (1) Gallon BMW OE Coolant (No substitutes, buy the blue stuff)
- A dab or two of Oxygen Sensor Safe RTV Sealant (needed for aluminum housing only)
Removal / Disassembly Procedure
- Put the front of the car up on ramps. This will facilitate access to the drain bolt on the radiator and the process of bleeding the cooling system.
- Drain the cooling system. Use my Coolant Flush DIY to accomplish this.
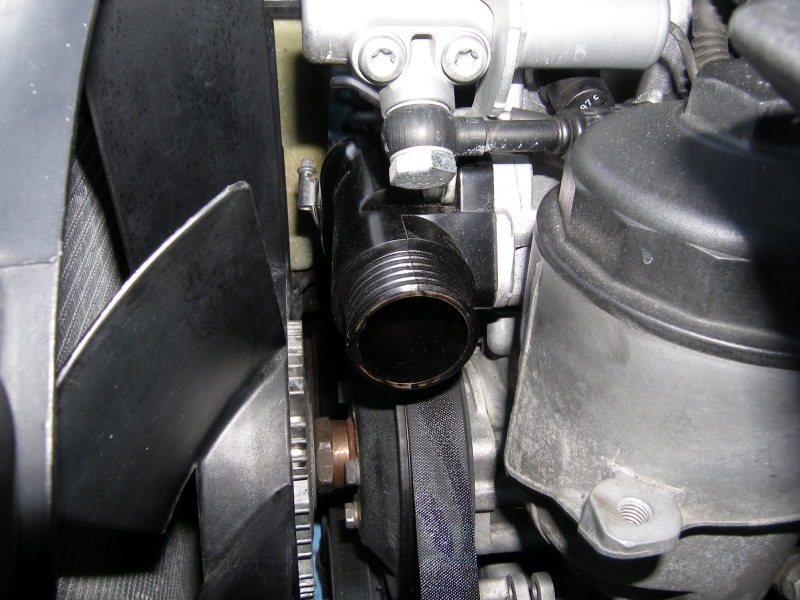
- Remove the radiator hoses from each side of the thermostat housing. Plug the lower radiator hose with a rag to prevent any debris from entering it. You need not remove that hose from the lower radiator neck.
- Remove the engine driven fan using a 32mm wrench. Simply put the wrench on the flats of the fan hub nut with the wrench positioned at the 12 o'clock position and hit the box end with a hammer to your right (the left side of the car) to loosen it, as the fan is reversed threaded. This is the way my 30 year BMW technician removes the fan so you do not need the special fan holding tool unless for some reason the main accessory belt is not presently installed, in which case the water pump / fan will turn without resistance from the belt.
- Optionally remove the fan shroud to provide a bit more working room. First, remove the overflow hose from the radiator. This will allow you to remove the expansion tank which is fastened to the shroud. Pop the two plastic rivets loose at the top corners of the radiator and be sure the bottom catches release before you pull the shroud up and out of the engine bay along with the engine driven fan. Be careful not to damage the radiator as you remove the fan.
- Remove the three (3) 10mm bolts holding the thermostat housing to the engine block. The upper bolt is easily accessible but the bottom two bolts can be difficult to locate. I used a telescoping mirror in one hand and ratchet in the other to get the job done quickly and easily.
- Remove the single 13mm bolt that serves as both a fastener for the housing as well as the engine lift bracket and loosen the other 13 mm bolt that holds the top of the lift bracket. While you don't technically need to remove the entire bracket, you may find it easier to R&R the housing if you remove it. I merely loosened the upper nut sufficiently to get the housing out from behind the lower portion of the bracket simply so I wouldn't do a bonehead move and forget to reinstall it (don't laugh -- distractions are everywhere).
- Carefully remove pull the housing from the block and set it aside. The thermostat should remain behind in the block. Before you remove the thermostat, take a close look at it. You should see an arrow embossed in the outer face of the thermostat and it should be pointing straight up. If it isn't, the last guy to work on your car didn't know what he was doing. Do not use a screwdriver, pick, or other tool to pry the housing from the block as that may gouge the mating surface of the block and cause leaks.
- Remove the thermostat. Make sure there is no debris left behind in the block opening. If you intend to step away from this job for any length of time, stuff a clean, lint-free rag in the opening to prevent anything from getting in there.
Installation / Reassembly Procedure
- Clean the mating surfaces on the block of any old coolant residue, RTV, or gasket material, taking care not to get any debris into the exposed coolant passages. Some brake cleaner sprayed on a lint-free rag should do the trick. If you need something more aggressive, use a PLASTIC scraper or putty knife to help out. Use of a metal tool may gouge the mating surface and cause leaks when the gaskets fail to mate perfectly with the block.
- Install the o-ring on the new thermostat. It is designed to seal the thermostat to the housing -- not the block -- so it goes on the outside face of the thermostat. Pretty obvious, particularly if you took a good look at the old thermostat, but I figured I'd mention it.
- Install the thermostat in the block with the arrow facing outward and pointing straight up (toward the sky -- not aligned with the canted block). This is very important. If you somehow managed to skip ahead and install the housing and you don't know if you installed the thermostat like this, you would be well advised to take your lumps and pull it apart to check and correct your mistake.
- Prepare the housing for installation. Install the profile gasket. If installing the metal thermostat housing, make sure its mounting flange is perfectly clean and then put a VERY thin (barely there) film of oxygen sensor-safe RTV sealant on the face of the flange. The plastic housing comes with a gasket bonded to it and does not require any RTV but the housing must be replaced with each installation to prevent leaks.
- Mate the housing to the block and install all housing bolts. Make sure that you start ALL of the bolts by hand (meaning, with the bolt in the socket and the socket detached from the ratchet) as I found it is very easy to cross thread them. If you meet any significant resistance, back out the bolt and start over. A telescoping mirror will come in very handy here. Once all the bolts are started, use the ratchet to tighten each bolt a little at a time. When they start to snug up, switch to the torque wrench and tighten each one a little at a time until they all achieve the final torque at the same time. Do NOT just torque one bolt and then go to the next, or you may bend or crack the housing. The final torque for the 10mm bolts is 10Nm (89 inch*pounds or 7 ft*lbs) while the torque for the 13mm bolt is 22Nm (16 ft*lbs).
- Reinstall the fan (and shroud, if applicable). Remember to tighten by hitting the end of the wrench toward the right side of the car (to your left). Don't be shy. Give it a half dozen good whacks -- the sharper and harder the better -- since that will tend to tighten the fan much in the same way as an impact wrench and help prevent the water pump pulley from slipping under the belt. Of course, if you have the fan-holding tool, now is the time to use it.
- Reinstall the radiator hoses and snug all connections down. Do not over tighten the clamps or you may damage the hose, housing, or radiator necks particularly if they have been in service for some time.
- Refill the cooling system with a 50/50 mix of BMW coolant. Again refer to my Coolant Flush DIY for the proper technique.
- Conduct a test drive. Pay particular attention to the coolant gauge. While it is buffered and thus provides little more information than an idiot light, if it does start moving above the 12 o'clock position, be in a position to shut down to add coolant. Hint: bleed the system properly before the test drive and take the remainder of the premixed coolant along with a screwdriver to open the bleed screw just in case.
Procedure Highlights
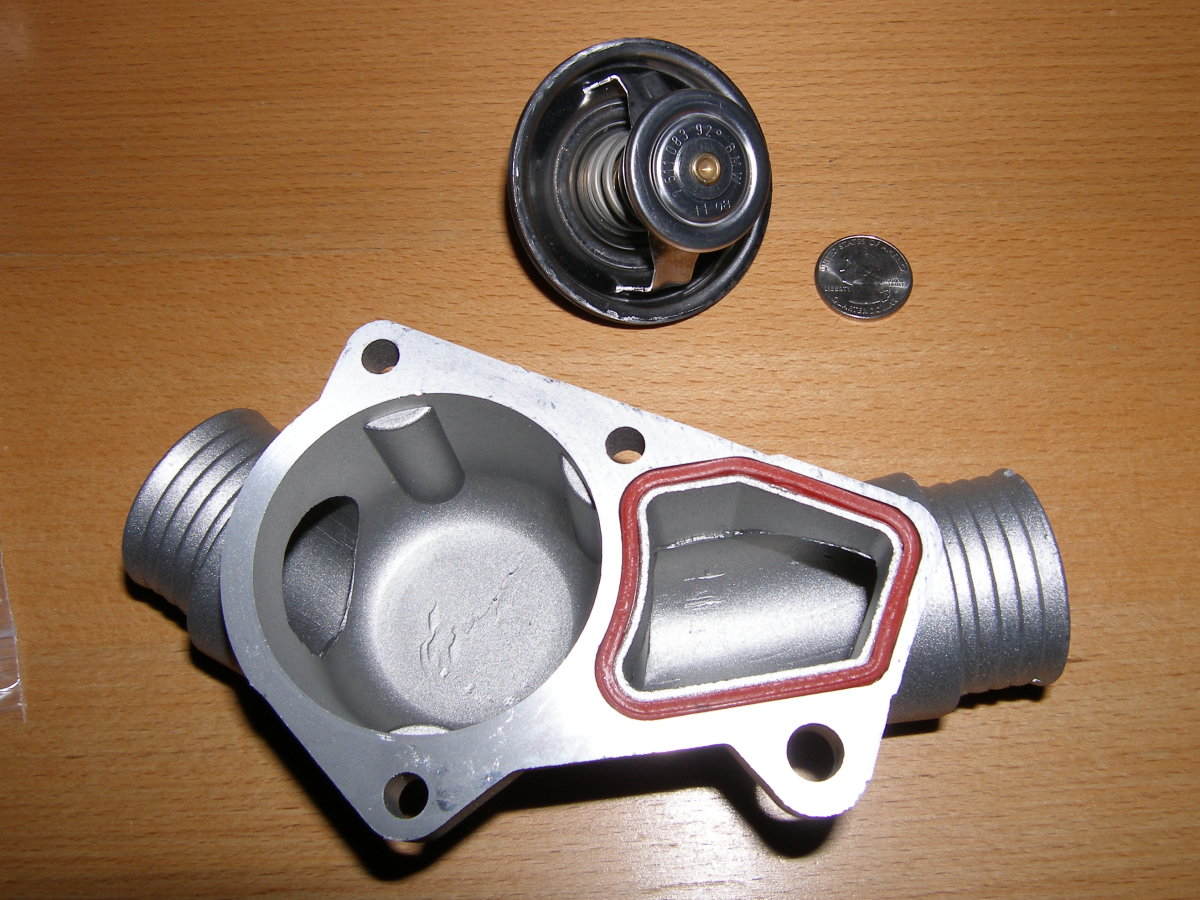 Here's a closeup of the Zionsville metal thermostat housing. It came with the profile gasket shown. The thermostat is a 92 degree OE unit made in Germany. |
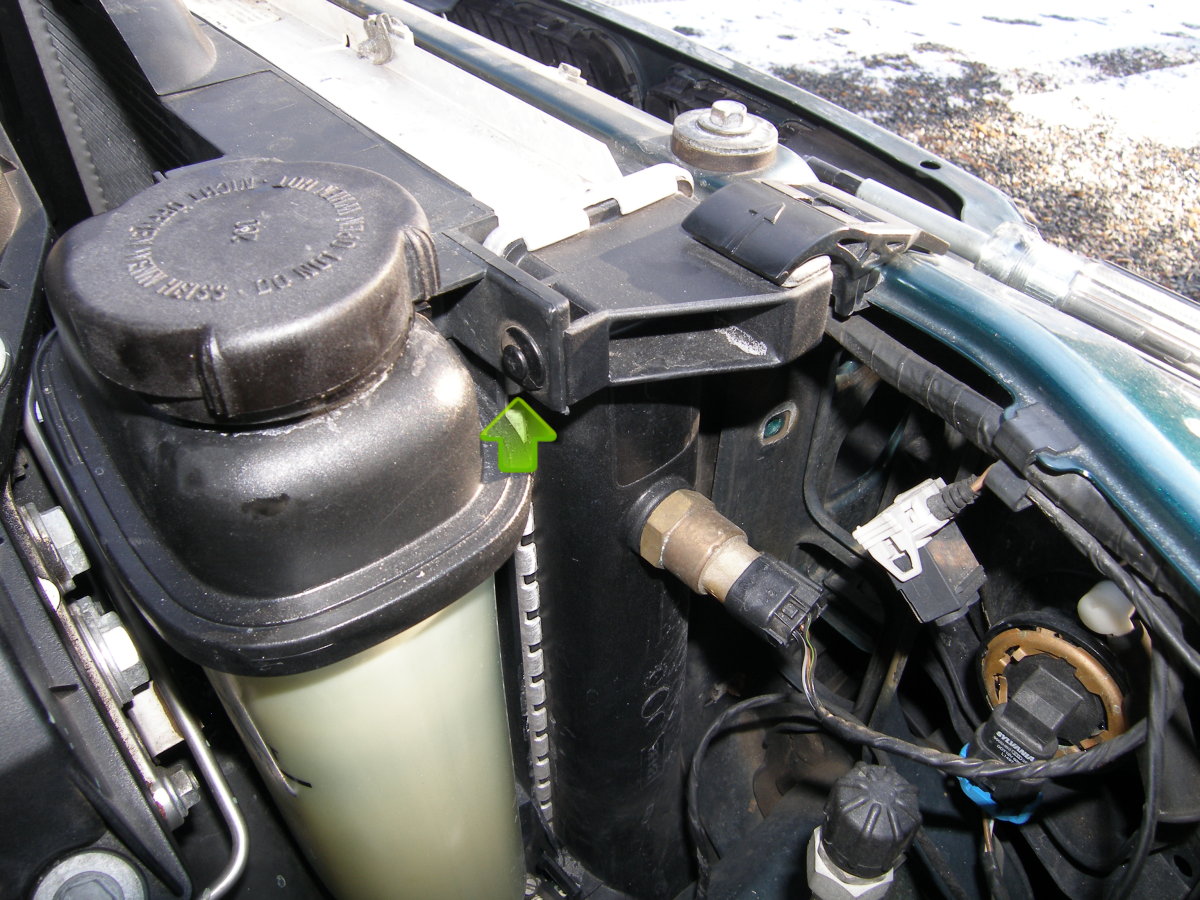
 First step in removing the alternator cooling duct is to release it from the radiator cover as shown here. |
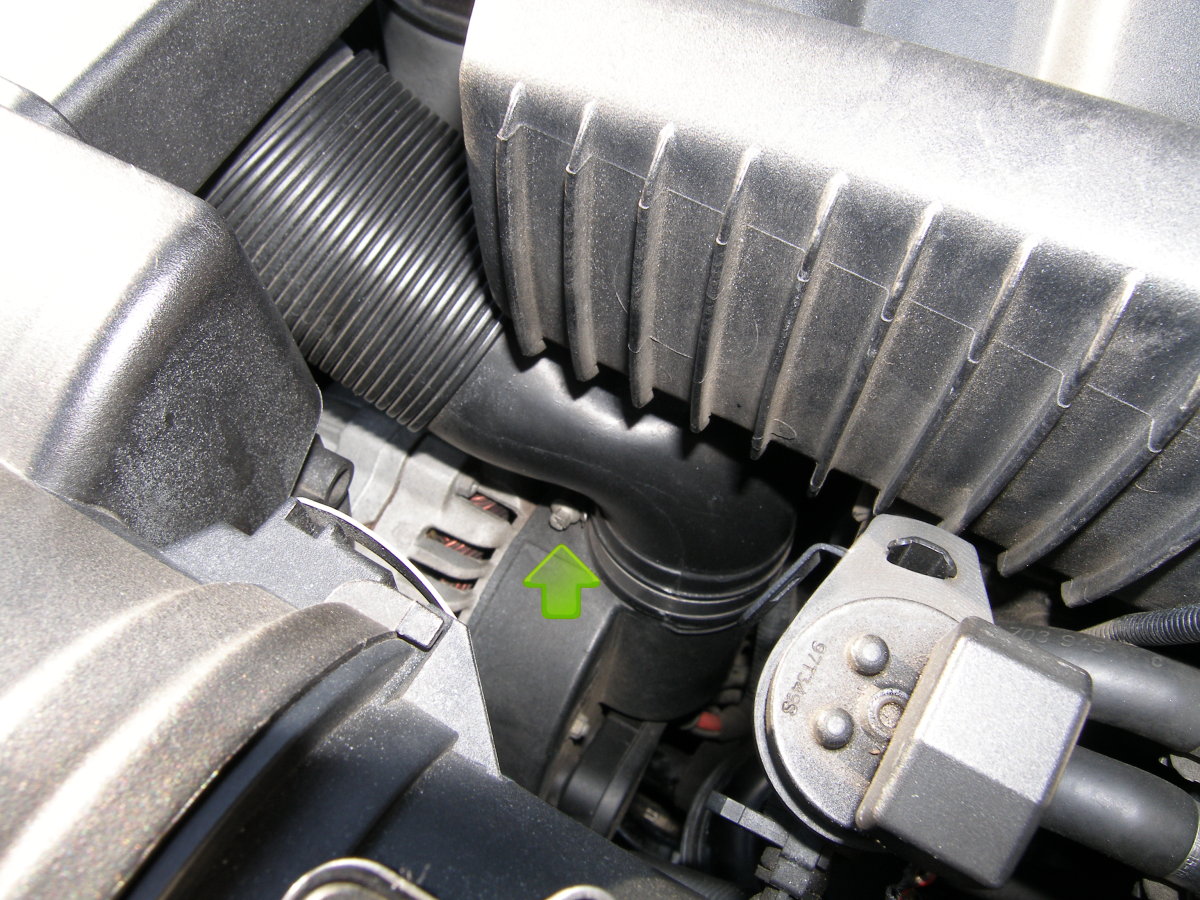 To remove the alternator cooling duct, loosen the band clamp holding it to the alternator. I always make sure to position the band as follows so it's easy to get a screwdriver in there to reinstall it. |
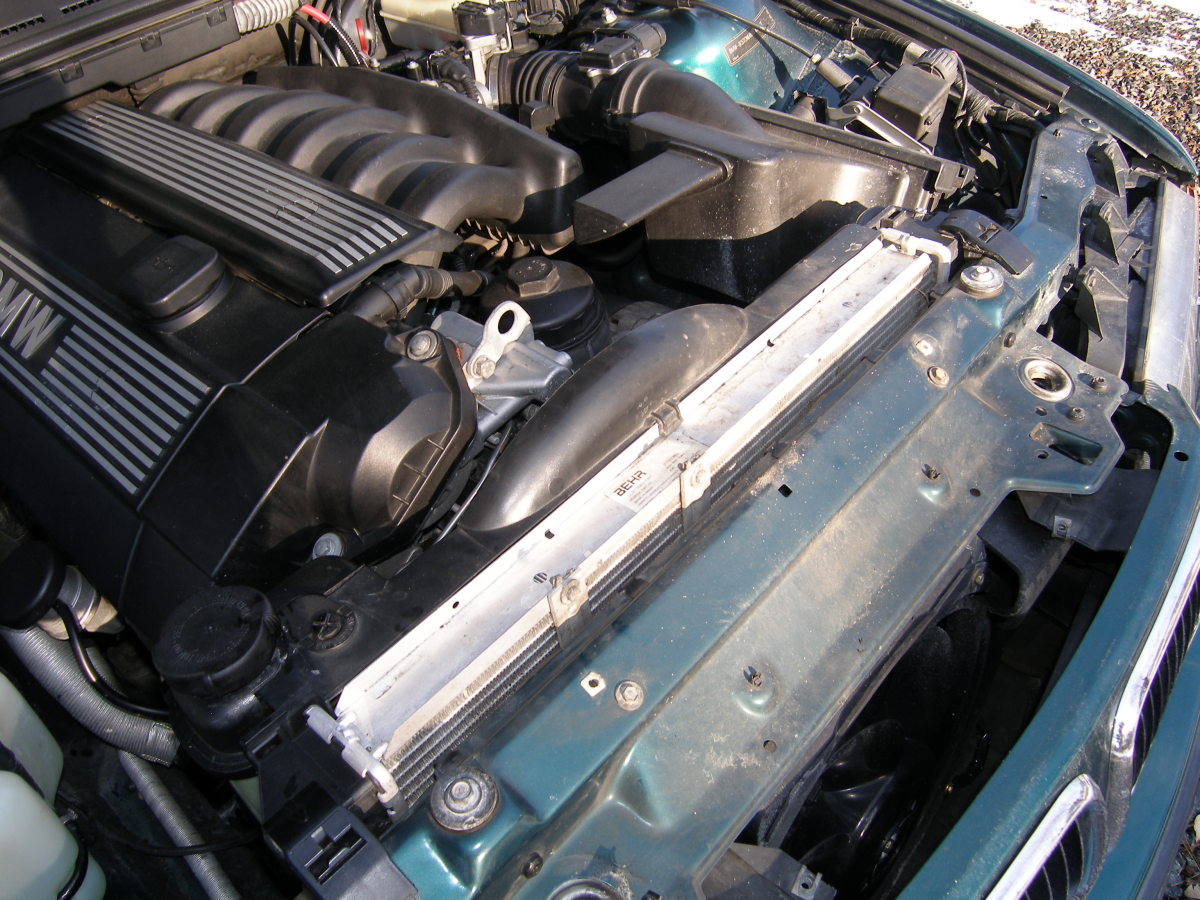 After the alternator cooling duct is removed, four screws release the radiator cover. Lift the cover up from the rear (nearest the radiator) and then pull toward the engine to release the front of it. |
 The arrow points at the plastic rivet on the left side of the fan shroud. This is one of two rivets that must be removed. As you can see, it's probably best to remove the hose going to the expansion tank first. |
 This is a closeup of the plastic rivet located on the right side of the fan shroud. When both rivets and the engine driven fan are released, pull the shroud and fan carefully upwards. You may need to reach down and free the catches at the base of the shroud. |
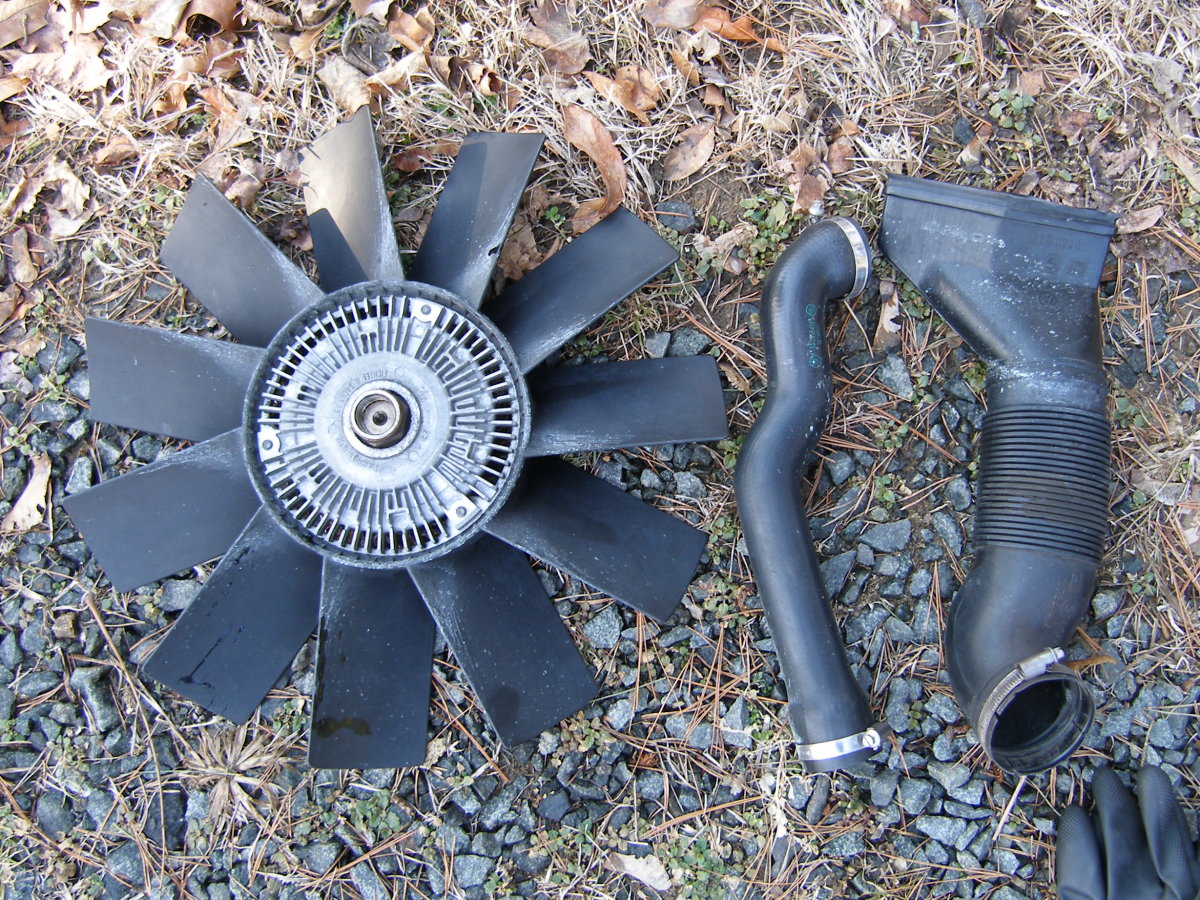 Just a quick picture of the parts I removed for the thermostat replacement. If you feel it's time to replace the fan clutch or fan itself (or both), now would be an ideal time to do that. |
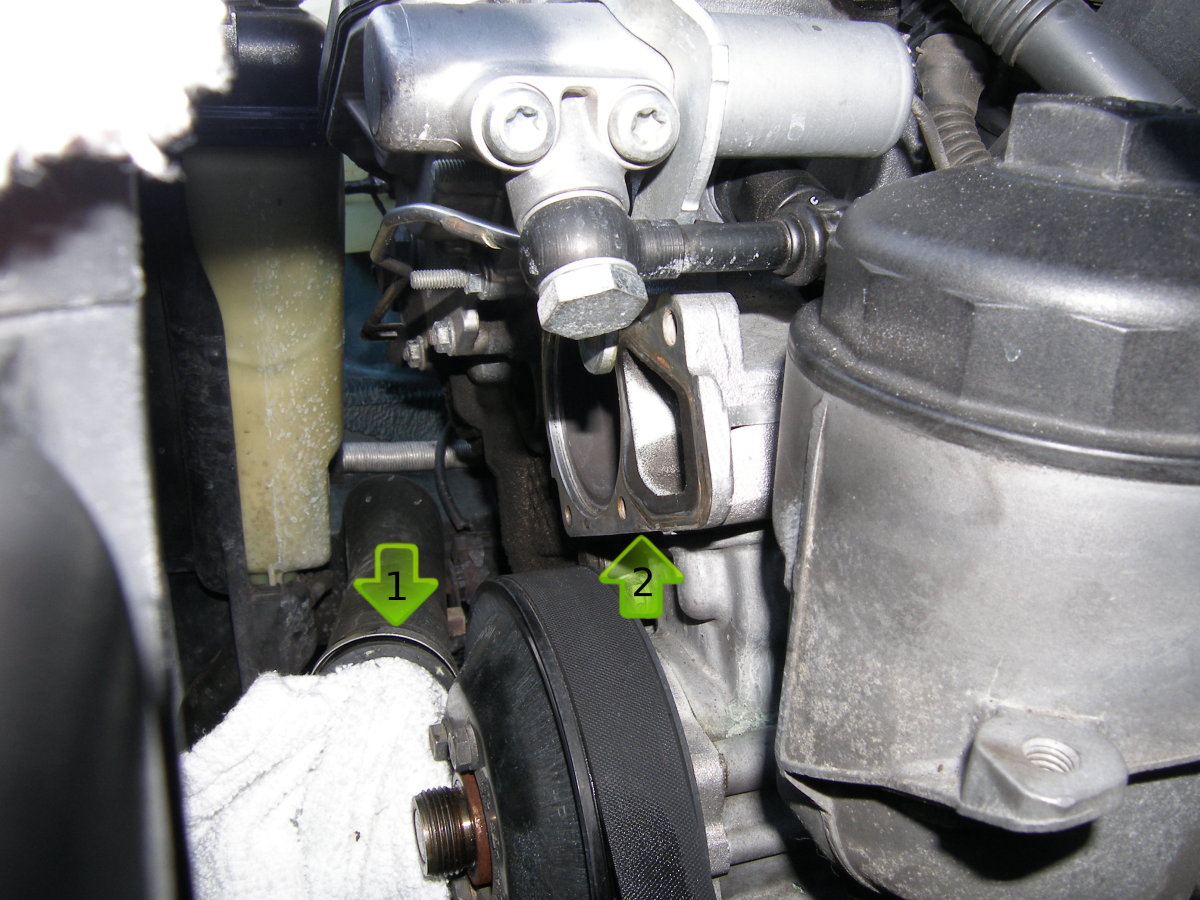 Remember to plug up the lower coolant hose to prevent any debris from falling in it (Arrow 1). Also remember to clean up the face of the block before installing the new thermostat housing (Arrow 2). |
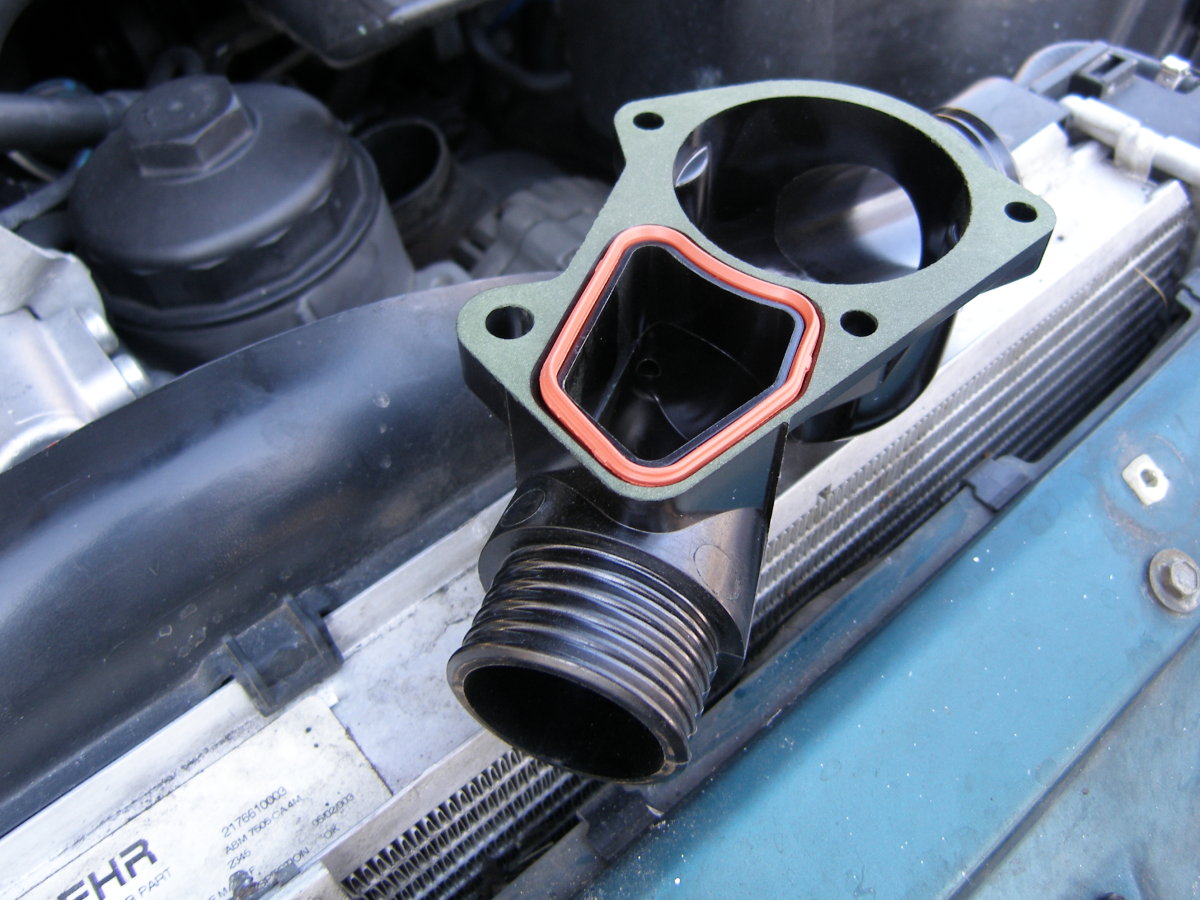 A closeup of the BMW OE plastic thermostat housing with OE profile gasket and flat gasket material bonded to its flange. No flat gasket needed for this application. |
Conclusion
Next to brakes, replacement of the thermostat is the most common maintenance item performed on these cars. Fortunately, it is a relatively simple process and well within the reach of the DIYer.
I think the metal thermostat housings are far superior to the plastic units. The only downside to the metal unit is the need to acquire an appropriate flat gasket or use RTV to help seal the housing to the block. Due to the design of the plastic housing, BMW no longer supplies the flat flange gasket that would likely be perfect for this application. Some vendors provide an aftermarket flat gasket but my vendor (Zionsville) did not. Be sure to ask your vendor what gasket(s) they provide so you are ready to do the job when the time comes.