


BMW E36
Engine Coolant Flush DIY

Engine coolant does more than just keep your engine cool.
Remember to flush your coolant every year to preserve your engine for the long
haul.
Introduction
Long before BMW instituted "free scheduled maintenance" they advocated flushing the engine coolant annually. BMW now recommends flushing every three or four years. Sadly, there is more than enough evidence to suggest that this decision was based more on BMW's profit and loss statement than any real change in the science involved. Thus, if you intend to keep your BMW long term, annual coolant flushes are advised.
Normally, a coolant flush is a straightforward process: remove a couple drain plugs to let the old coolant drain out, put the plugs back in, and refill the coolant. In fact, that is the case on pre-96 vehicles. Unfortunately, a fluke created by the use of parts from the M3 make the job on the non-M 96-99 E36 vehicles a bit more difficult: the drain plug is blocked by one of the pre-catalyst oxygen sensors. I found it was not possible to remove the coolant drain bolt on the block without removing the oxygen sensor first.
For this reason I advocate draining the coolant only through the radiator drain plug for 96-99 vehicles. Further, given the fact that dousing an oxygen sensor with coolant is a sure way to destroy it, I strongly recommend removal of the oxygen sensor in any application where there is a risk spilling coolant on the sensor. If you have to remove the oxygen sensor as part of a coolant flush you may find my Oxygen Sensor DIY helpful.
Electrolysis
No coolant change article would be complete without at least a brief discussion on electrolysis, its causes and effects. Engine coolant serves many purposes. When combined in a typical 50/50 mix with distilled water, it lowers the freezing point and raises the boiling point of the fluid. But what most people don't know is that it also has properties that help prevent the destructive effects of electrolysis.
Electrolysis is a chemical process that induces the transfer of metals by way of electrical current flow. Traditionally, electrolysis has been the result of poor grounding in a car's electrical system. As electrical current always attempts to find the shortest and most efficient path to ground (Lightning, anyone?), a poor ground would result in the electricity flowing through other means to get to ground, including the engine and coolant itself. More recently, however, most electrolysis occurs as a consequence of the higher operating temperatures of modern vehicles that are the result of the never-ending quest to improve fuel economy, particularly at highway speeds.
In any case, the best way to avoid electrolysis is to regularly replace the old coolant to restore the chemical protection afforded by new coolant. Thus, changing one's engine coolant is just as important as changing the driveline oils.
A test for electrolysis requires a voltmeter with a range of 0 to roughly 12 volts and a resolution of 0.1 volts or less. A modern, inexpensive digital voltmeter is ideal for this. To conduct the test:
- Ground the negative lead of the voltmeter to the nearest ground. I chose one of the valve cover bolts.
- Submerse the tip of the positive lead into the coolant located in the expansion tank (WARNING: removal of the cap when the coolant is hot must be done carefully and while wearing appropriate hand and eye protection -- see the remainder of this DIY for more).
- Measure the DC voltage. For a cast iron block like the M52 or the E46 M3's S54, the maximum safe reading is 0.3 volts (three tenths of a volt). For the aluminum alloy block of the M54 in the E46 and later vehicles, the maximum reading is 0.15 volts, or 15 hundredths of a volt.
If the voltage readings exceed the maximum, you should first replace the coolant, drive it around for a few days and test again. If the readings are still high, you should consider a troubleshooting procedure to determine the location of the bad ground. Such a procedure is outside the scope of this article.
Prerequisites
A coolant flush requires:
- 1 Gallon of BMW engine coolant / antifreeze. No substitutes.
- 1 Gallon of distilled water - DO NOT USE TAP WATER.
- A 1 Gallon jug or old (but clean) coolant bottle, graduated in 1 quart or liter increments
- 13 mm box end wrench - if you don't have that, a 1/2" may work, though it will be a tight fit
- Torque wrench capable of 2-3 Nm (18-27 inch-lbs). Note the units are in inch-pounds. This is a VERY light torque.
- Drain pan capable of holding at least 2 gallons of liquid. You can reuse your oil drain pan if so desired.
- I also recommend you replace the radiator block drain plug because it comes with a sealing / compression washer.
- A DC voltmeter capable of 0-12 Volts with 0.1 volt resolution
If you intend to remove the block drain plug, you'll need:
- A sealing washer (see your BMW parts supplier)
- 19mm box end wrench or appropriate ratchets with short extensions
- Tools required to remove the oxygen sensor (see my Oxygen Sensor DIY)
Procedure
Flushing the existing coolant
- Go out for a drive of at least 15 minutes to bring the car fully up to temperature. This will open the thermostat which will help purge as much of the old coolant as possible. While less critical if you are able to remove the block drain plug, it definitely helps speed the flush in any case. This is the technique my technician uses.
- If you're planning to remove the block drain plug, jack up the front end and put it on jack stands. If you intend to use the abridged flush procedure and remove only the radiator drain plug, you don't need to jack the front end at all. I drove the front wheels up on some 2x10s I had handy because that was the easiest and fastest way to gain some additional clearance for the drain pan.
- While wearing appropriate gloves and eye protection, take a heavy cloth towel (not a paper towel) and very slowly open the expansion tank cap until you hear a hissing sound, and then STOP loosening until the hissing stops. The goal is to release any air pressure in the system before releasing all the threads of the cap. When the hissing stops in a few seconds, remove the cap.
- Optionally, conduct the test for electrolysis as outlined above.
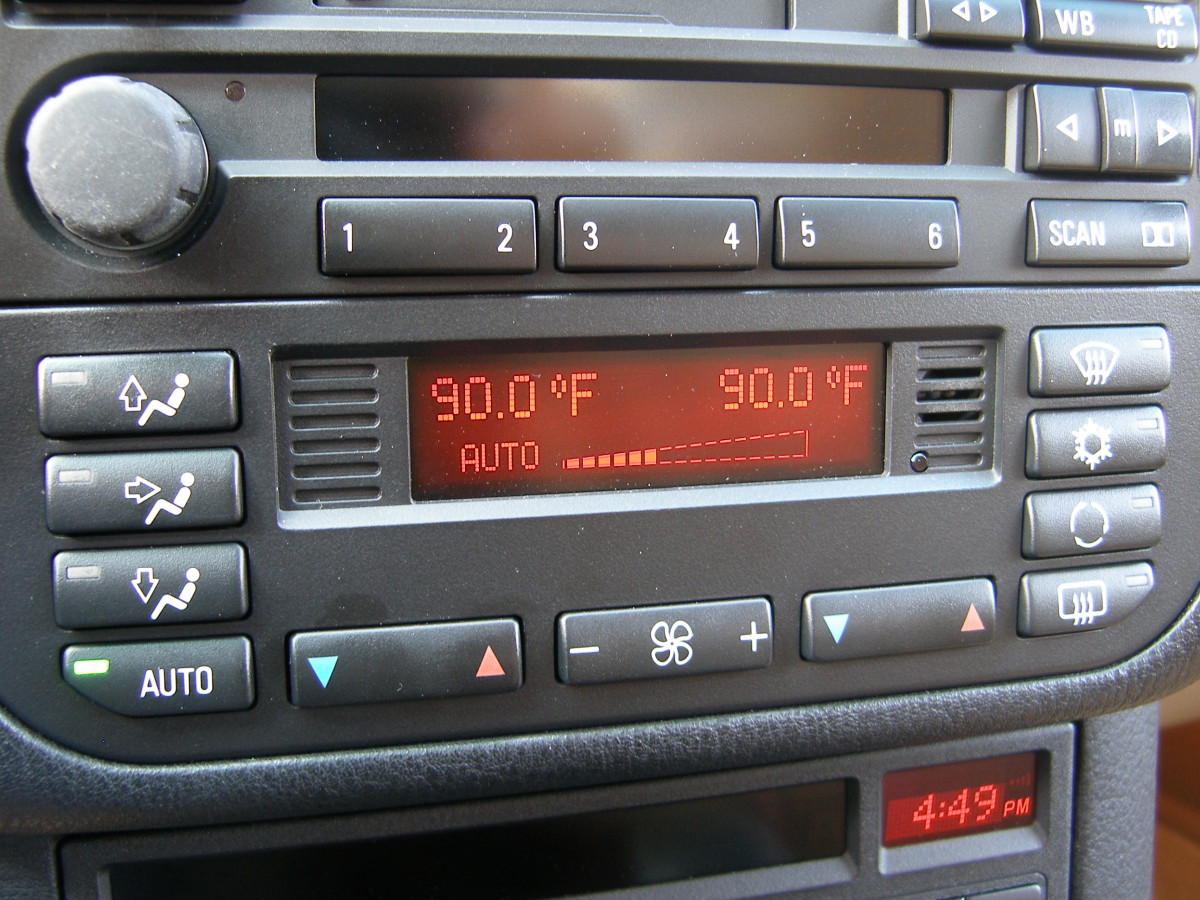
- Turn the ignition on to position 2 (the "run" position reached just before triggering the starter) and adjust the climate control temperatures to maximum. This will open the water control valves and allow the coolant to drain from the heater core and associated plumbing.
- Using a philips or straight blade screwdriver, remove the bleeder screw located about 2 inches to the right of the expansion tank opening. As you remove the screw, take note that there may be a rubber o-ring on it. Don't lose that or the system won't fully pressurize (which means you'll be at risk of an overheat).
- With the drain pan in position, loosen the radiator drain plug. You can expect a good spray of coolant from this drain, but if you depressurized the system beforehand, it shouldn't be anything dangerous. You are still wearing eye protection, right?
- Optional: use a light application of compressed air (less than 10 PSI) or a pressure tester affixed to the expansion tank to help force a bit more coolant out of the system. I estimate I managed to get another tenth or two of a gallon of coolant out using this technique.
- If you choose to remove the block drain, use a 19mm open or box end wrench
to remove it. A few notes on this step:
- On 1996-1999 vehicles you'll need to remove the oxygen sensor first. I strongly recommend you apply some tape (electrical or duct) around the open bung and then tightly wrap some plastic around it so coolant does not flood the exhaust pipe, as I can't see that being good for the catalyst. Remember that if you have warmed the car to normal operating temperature the exhaust and the sensor may still be quite hot. Be careful!
- The stream of coolant that comes out is virtually impossible to capture in any basin because it will hit the header and splash all over the place. For this reason I suggest you try to put yourself in a position to get out from under the car quickly or you'll be bathed in coolant.
- If coolant trickles out of the drain once the plug is removed some corrosion may be blocking the hole. In this happens stick a small screwdriver in the block drain hole to free the blockage and be ready for the torrent of coolant. You're still wearing your eye protection, right? Oh, and yea...keep your mouth closed too unless you like the taste of coolant (hint: even if you do coolant is poisonous so you are well advised to spit it out and rinse well).
Refilling the system
- If you removed the block drain, install a new compression washer on the bolt, reinstall the bolt in the block, and torque to 25 Nm or 18 ft-lbs. If you can't get a torque wrench in there (likely), just guestimate it. This is the same very light torque required for the oil drain bolt, so if you've done that you should have a good sense of how much torque is involved. Read: not much.
- Reinstall the radiator drain plug. This plug is installed with the lightest torque specification on the car I've found -- a mere 2-3 Nm or 18-27 INCH-POUNDS. My smallest torque wrench only goes down to 4 Nm so I used that with no ill effects.
- Using the empty container graduated with marks indicating quarts or liters, mix up a 50/50 batch of coolant.
- Pour the coolant into the expansion tank while you watch the level in the tank carefully. Fill the tank until the level reaches the top the threaded collar and the level stops rising. As you attempt to maintain the level at the top of the collar, squeeze and release the upper radiator hose several times. You may notice the level rise and fall in the tank and some bubbles exit the bleeder screw when you do this. This is normal.
- Reinstall the bleeder screw and the expansion cap hand tight.
- Start the engine and then walk around to the front of the car and squeeze the upper radiator hose. You should feel some resistance because the hose should be full of coolant at this point. This confirms that it's safe to go for a short test drive around the block. If the hose feels empty, you have some additional filling and bleeding to do.
- Before you go out on the test drive, make sure the heater controls are at maximum, make sure the main vent air control is set to warm, and the fan speed is set to medium-high.. In short order you should start to feel heat coming from the vents, even if it's 80+ degrees outside. If you don't feel any heat, there is likely air trapped in the system and some additional bleeding is in order.
- On the test drive, keep it short and sweet. Upon your return, shut off the engine and once again use the towel and remove the expansion tank cap to examine the coolant level. It may have dropped some and that's normal. Before you close up the expansion tank permanently, the level should be at or near the top of the internal stiffener / divider. Remember to keep a close eye on the coolant level over the next few days since a bit of driving could free a bit of trapped air.
- Grab a beer, because you're done. Well, okay, you'll be done after you wash down the garage floor or driveway of all the spilled coolant, remove the sticky grime that gets on your tools and hands, and have (properly) disposed of the old coolant. Remember to take the old antifreeze to your local HazMat facility. Don't pour it on the ground or down the drain.
Highlights
 Turning the climate controls to the maximum temperature opens the water control valves and allows the heater core to drain. |
 Here we're doing the electrolysis test and coming up with a good result...virtually no electrical current is passing. |
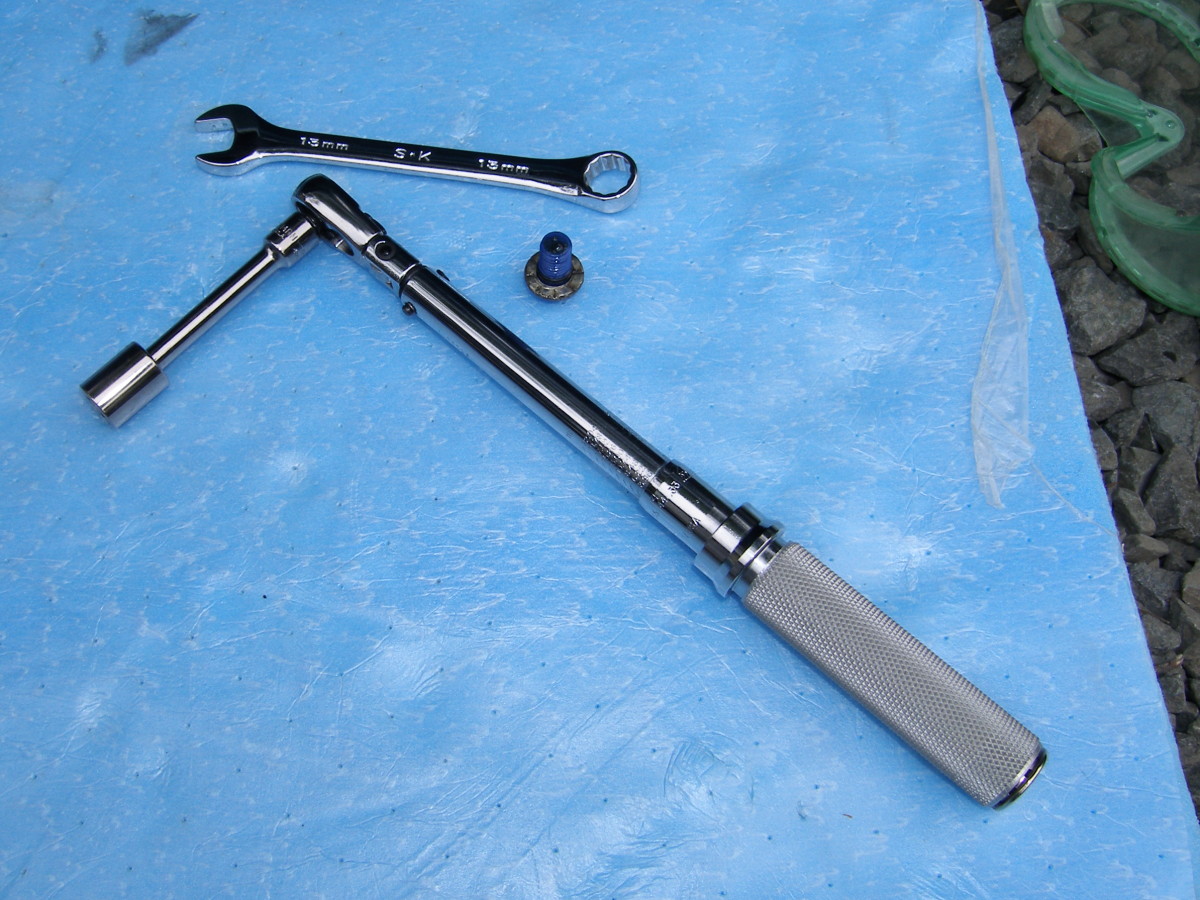 My small torque wrench is pictured and it's set to its minimum torque value (4 NM) to get the job done. Also shown is the original plug and 13mm box wrench I used to remove it. |
 The blue radiator drain plug came with the radiator that was replaced a couple years ago. The black one was ordered from my dealer. Note the o-ring on each. Don't lose that! |
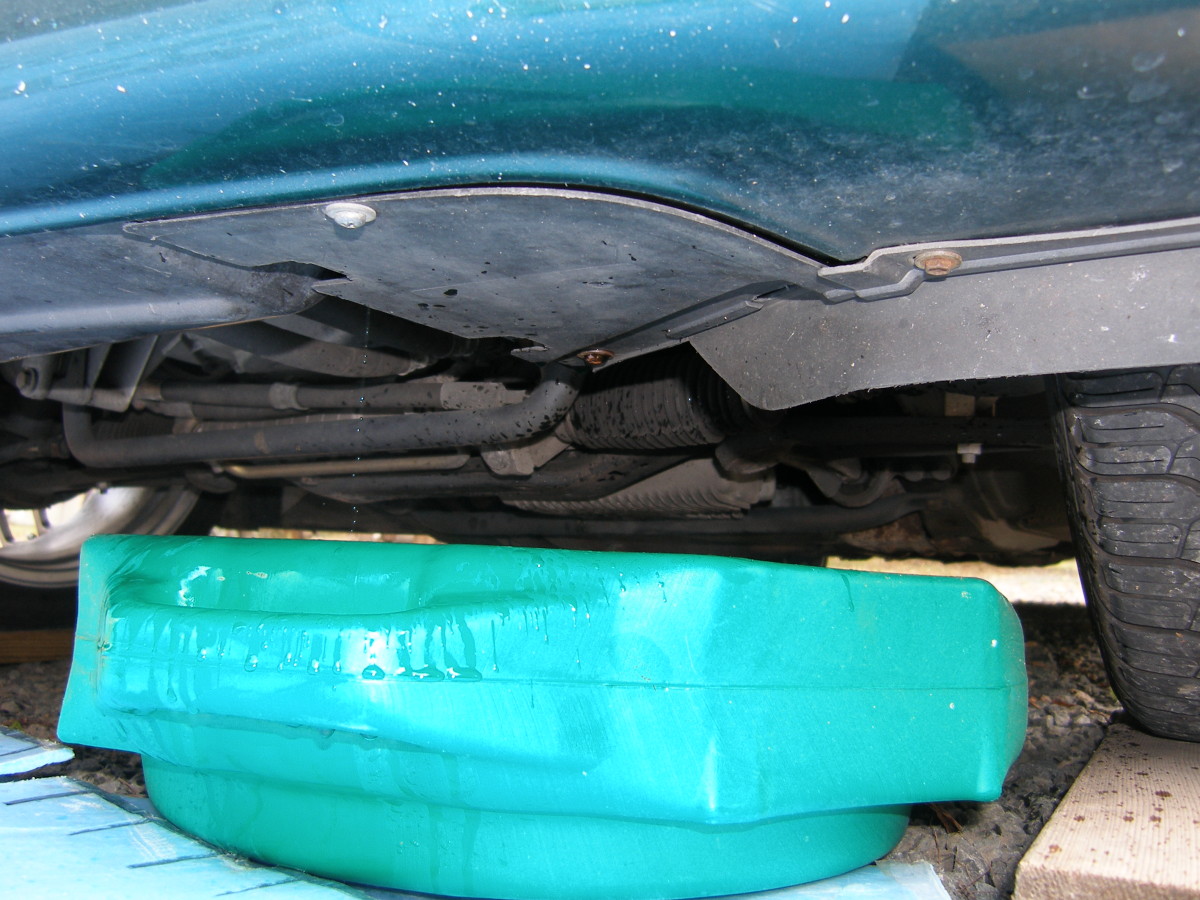 Down to business, with the front wheels up a couple inches for clearance. With the system depressurized and the radiator drain plug removed, the coolant drains quickly. |
 Producing an accurate 50/50 mix of distilled water and coolant is easy. Pour out some of the full strength coolant to a graduated bottle and then add an equal volume of distilled water. Here I'm using an old coolant bottle I had on hand. Save your empties! |
Conclusion
By using what I could term the "abridged" version of the coolant flush I managed to remove about 1.2 gallons of coolant. While this is decidedly less than the capacity of the system (reportedly 2.8 gallons), this was certainly easier than removing the oxygen sensor and I can do this as many times as necessary without putting the oxygen sensor at risk.
The best part about this task is that it took me less than an hour, and I wasn't exactly inclined to rush given this was my first time dealing with a BMW cooling system. I'm not sure what the book labor number is based upon, but my guess is they don't factor in the need to replace the oxygen sensor. And that's a good thing for the techs that work piece-meal, since they'd lose their shirts on this job if they did bother to do it.
Because BMW cooling systems are particularly difficult to bleed, check the coolant level via the expansion tank the following day with the engine cold. Add more coolant as needed, but only fill to the line on the expansion tank that says "Kalt" (Cold). Give it another check in a few days. If the level has not dropped significantly, you're in good shape.