


Friday, April 6, 2012
New Cam Sensor Installed, or What DIY Techs Do With Time Off
After many weeks without a day off I decided to take a vacation day today. Of course, "vacation" is relative, and I always have so many projects on the burner (as well as waiting in the wings) that time off always translates into time spent doing work of another type. And today was no different, since I knew I had to replace the cam sensor in the E36 in order to return it to service. While conducting some last minute research on the task I realized that I would indeed have to remove the vanos oil line and that meant having a couple new sealing rings at the ready, so the first task of the day was a trip to the dealer to pick up those parts. I called ahead to check on stock and I was fortunate twice -- first, because they had them in stock, and second, because they put a half dozen in a bag and handed them to me free of charge. Cool, eh?
Of course, no trip to the dealer with an ailing car would be complete without a trip down the line of new cars. During my stroll I discovered a beautiful Interlagos Blue 2012 M3. As I walked around the car I contemplated the sad fact that it contains the very last normally-aspirated engine in the M line. While I have never been a fan of the E9x series of BMWs, this particular car looked amazing....right up until I got to the window sticker: $75K including dual clutch gearbox, etc. I'd buy it only as a stripper (with a 6MT) but still they're $65K in that form and that's idiotic. And it's only going to worse from here -- the new F30 3 series is $41K stripped with a 4-banger. My technician has driven it and gave the engine the thumbs up, but turbocharged or not, regardless of the specs, I'm not spending $40K+ on a 4 cylinder car. Congratulations BMW...you're doing a fine job pushing me toward that Cayman S. Keep up the good work.
 If you need to replace a cam sensor, do yourself a favor and buy the OE part. The aftermarket versions are notorious for causing problems. |
 Someone at BMW was thinking for a change: the vanos solenoid wire terminates close to the unit so you don't need to dig under the intake manifold to disconnect it. |
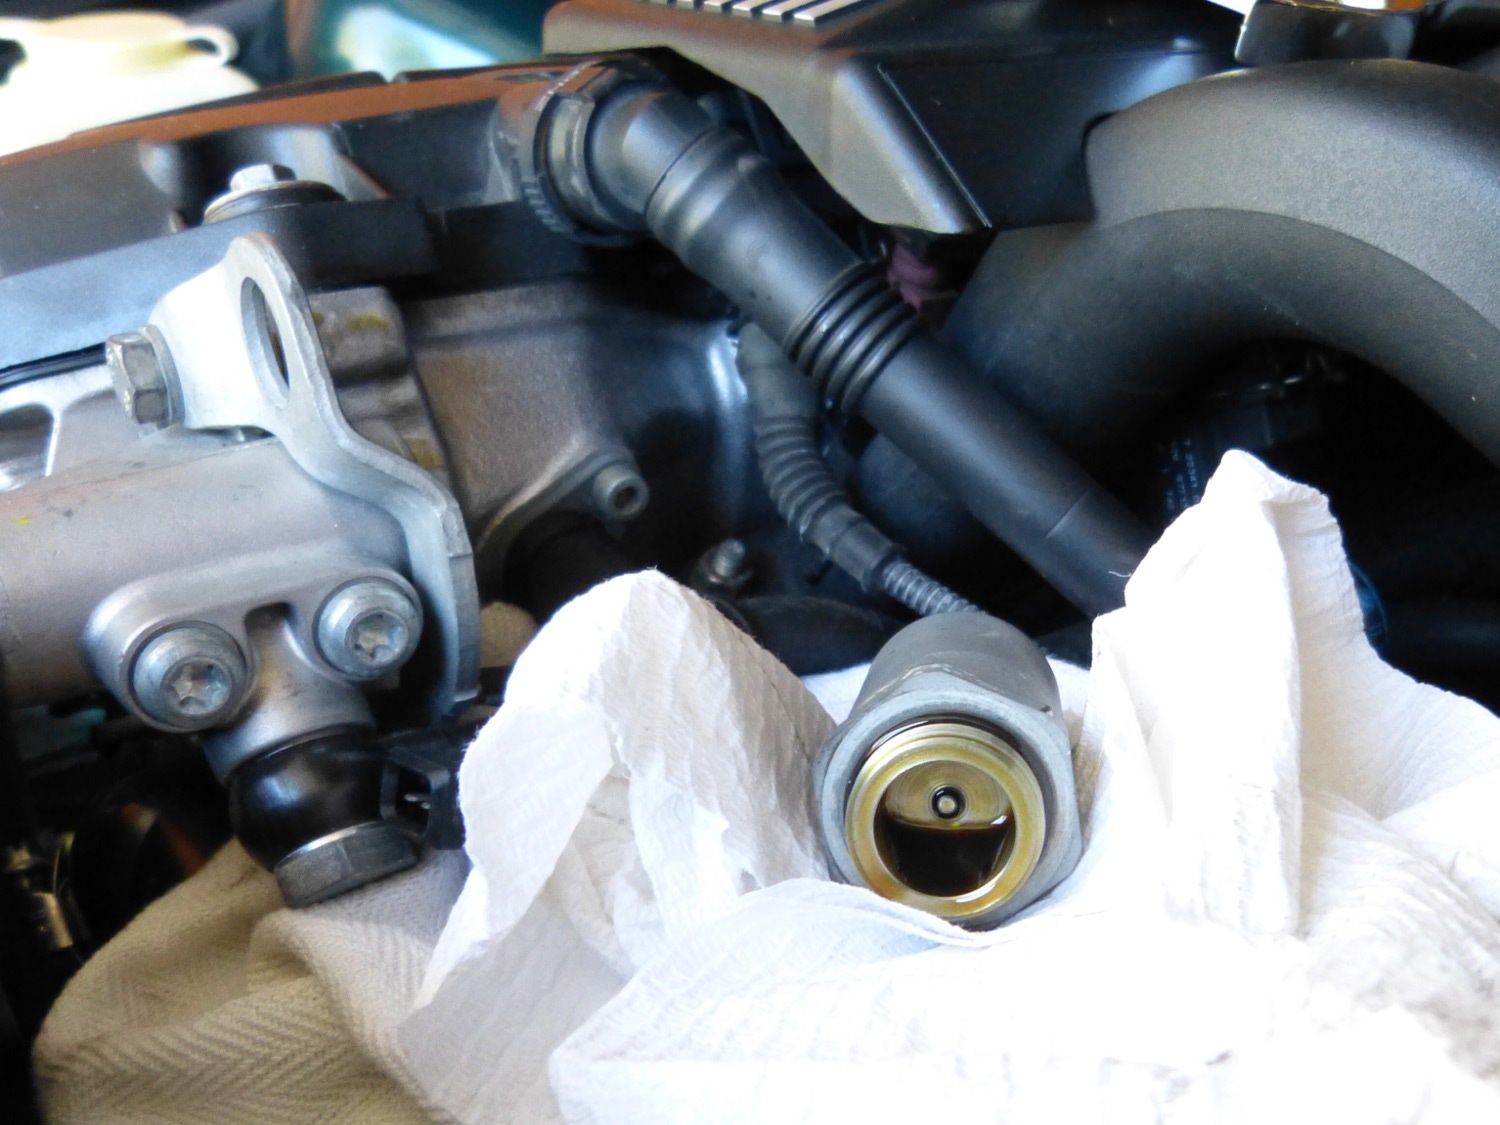 Here's the business end of the vanos solenoid. Only a bit of oil was left behind, and I used that to lube the o-ring on the new cam sensor before I inserted it. Nothing wasted! |
Back at the garage I took my time and replaced the cam sensor in a bit over an hour. As expected I had to pull the airbox, alternator duct, oil filter, vanos oil hose, and the vanos solenoid to provide clearance to remove the sensor. Incidentally, details on how to remove the airbox, alternator duct, and oil filter may be found in my Alternator and Oil Service DIYs. Once those parts were removed I placed a clean towel over the alternator, oil filter housing and belts just to be sure that if oil did leak at any point in the process it would not make a mess on the engine or worse, contaminate the belts. A 19mm box end wrench allowed me quickly remove the hollow bolt retaining the vanos oil hose, and perhaps because I put the car to bed several days ago only a few drops of oil came out of the hose as I removed it from the fitting.
With the hose removed I was able to get my huge 32 mm wrench on the flats of the vanos solenoid case and crack it loose. As it turned out the sensor wire leading from the solenoid is only about four inches long and terminates with a connector that mates with the wiring that runs under the intake manifold. I disconnected the sensor wire at this junction and then held the connector in one hand and rotated it at the same speed I loosened the solenoid housing to prevent the wire from twisting.. Why be so careful? The insulation on the wire was slightly heat damaged and a new vanos solenoid is $200. I expect to replace it when I overhaul the engine, but wanted to avoid that expense now. The most oil I saw during the entire process came when I removed the solenoid, but that too was a miniscule amount and was easily contained when I tipped the wire-end down as it came free of the head.
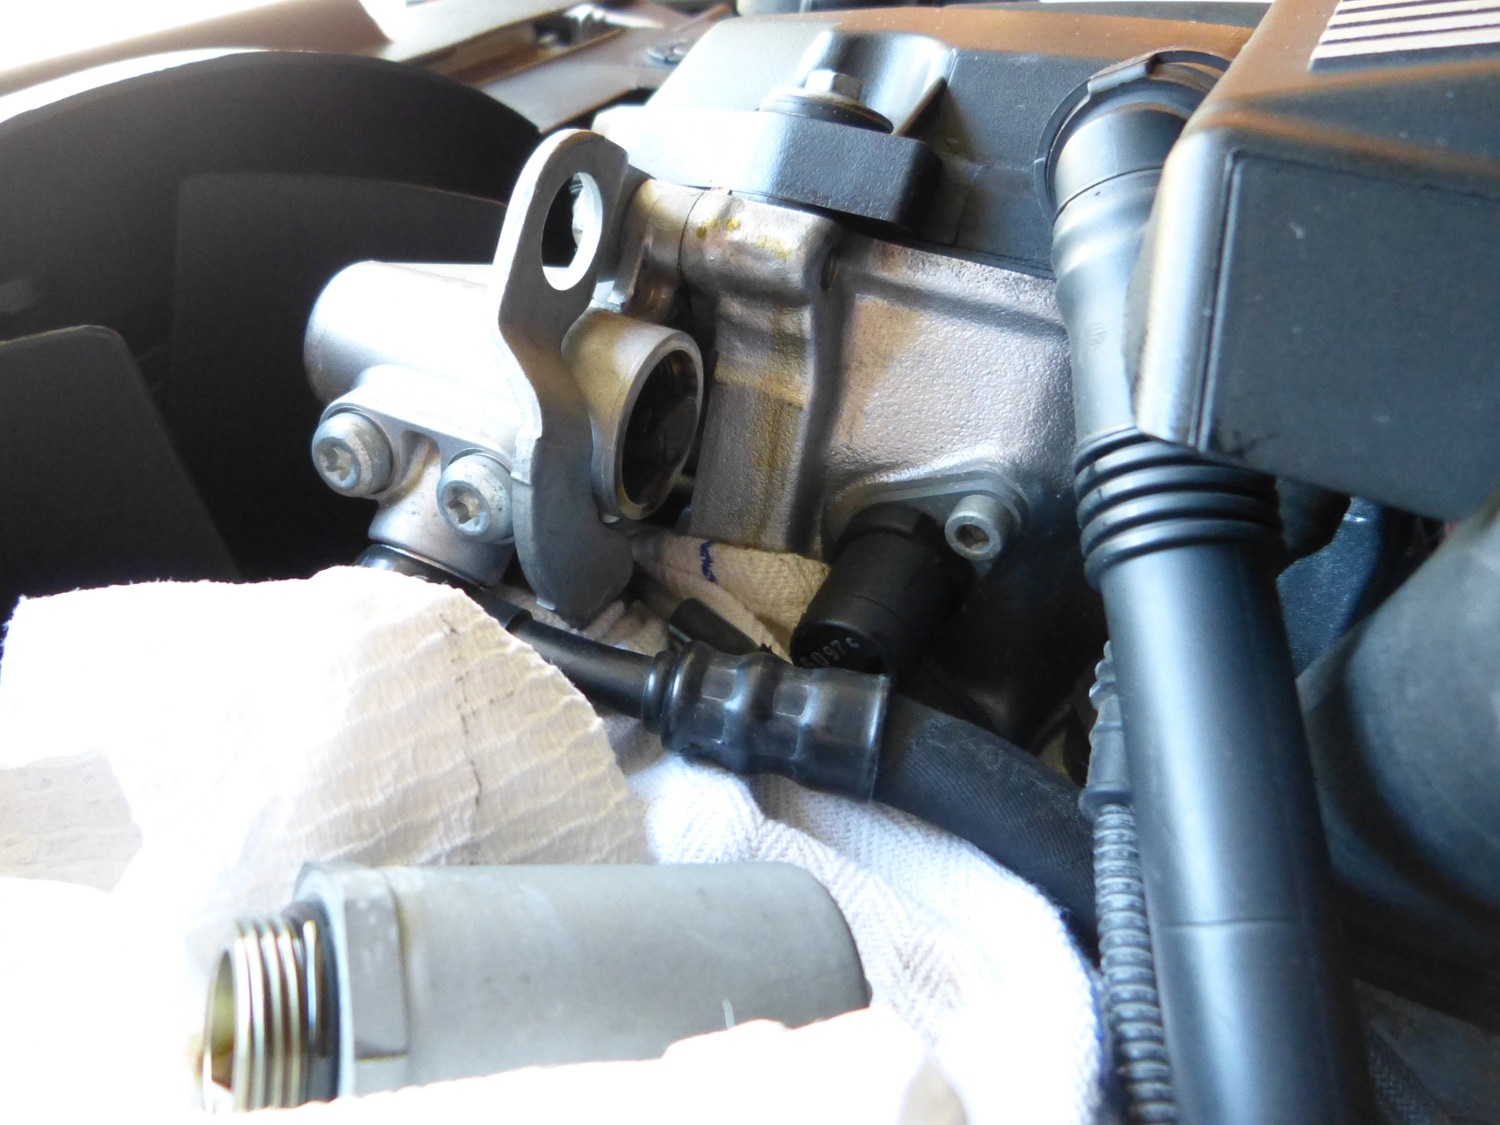 The vanos solenoid removed from the vanos unit. Notice how the vanos oil hose fitting blocks removal of the cam sensor. |
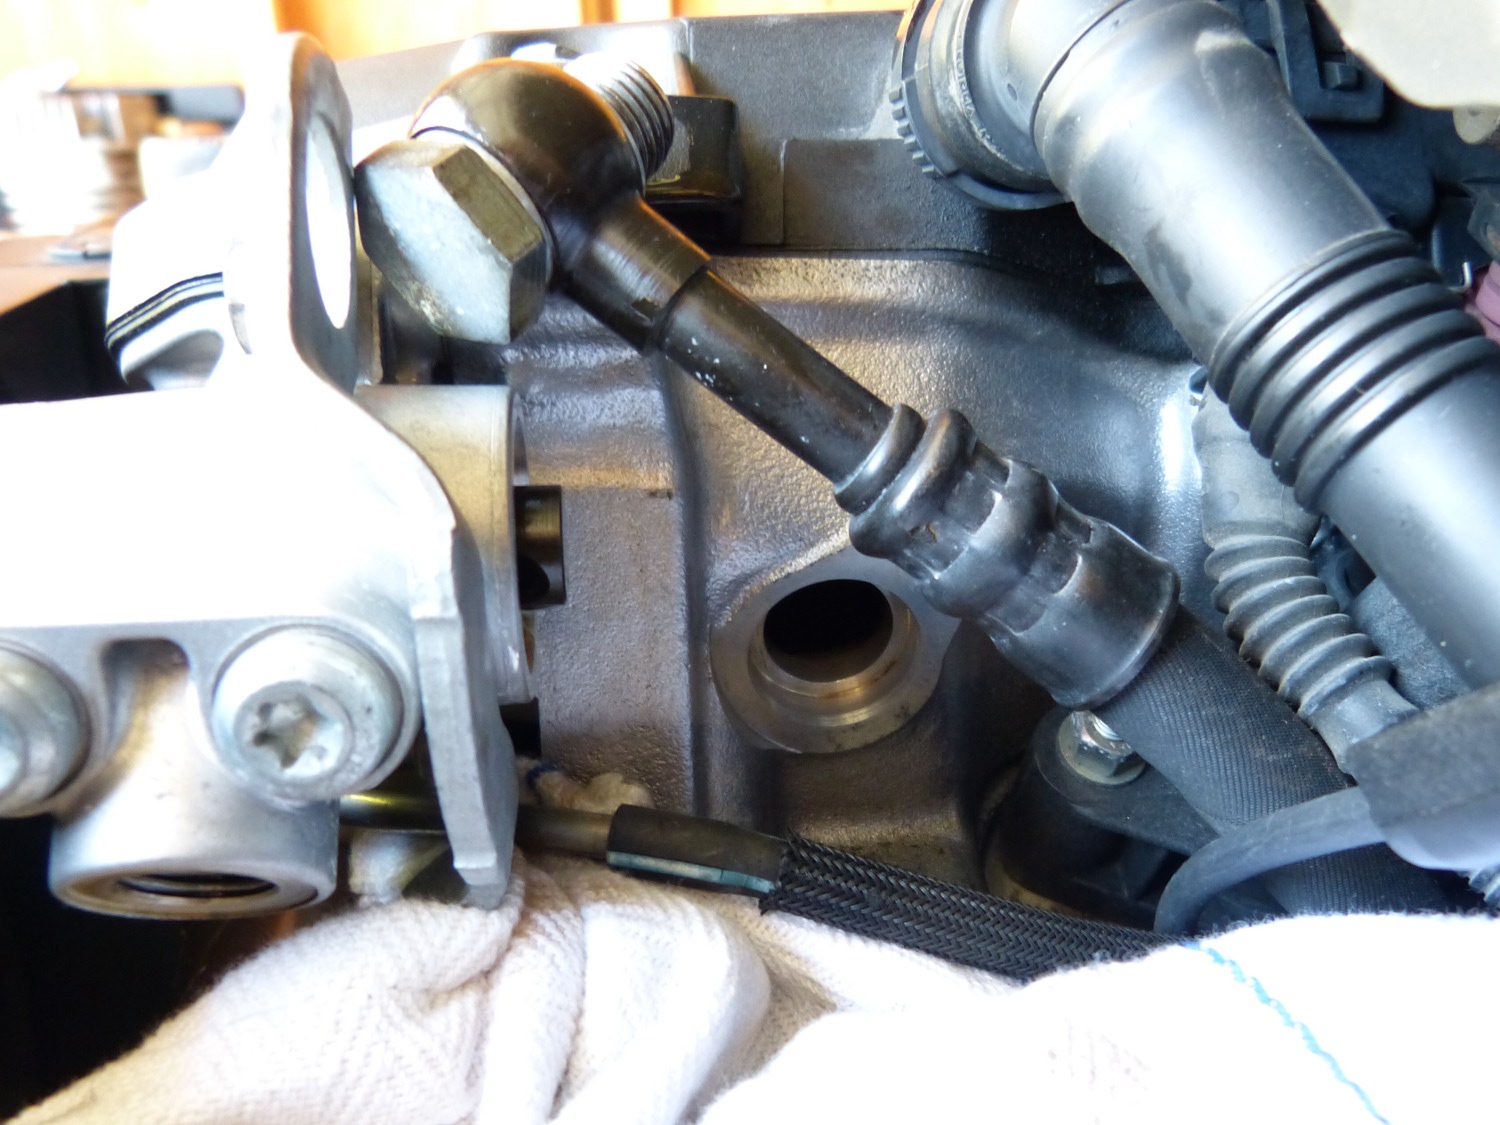
 With all the interfering components removed, it's possible to use a common 5mm allen socket and a small ratchet to carefully remove the single bolt that retains the cam sensor in the head. |
 With the cam sensor removed you can see the recess into which the sensor o-ring fits. This picture was taken after I cleaned out a bunch of hardened oil residue to ensure the new o-ring would seat and seal properly. |
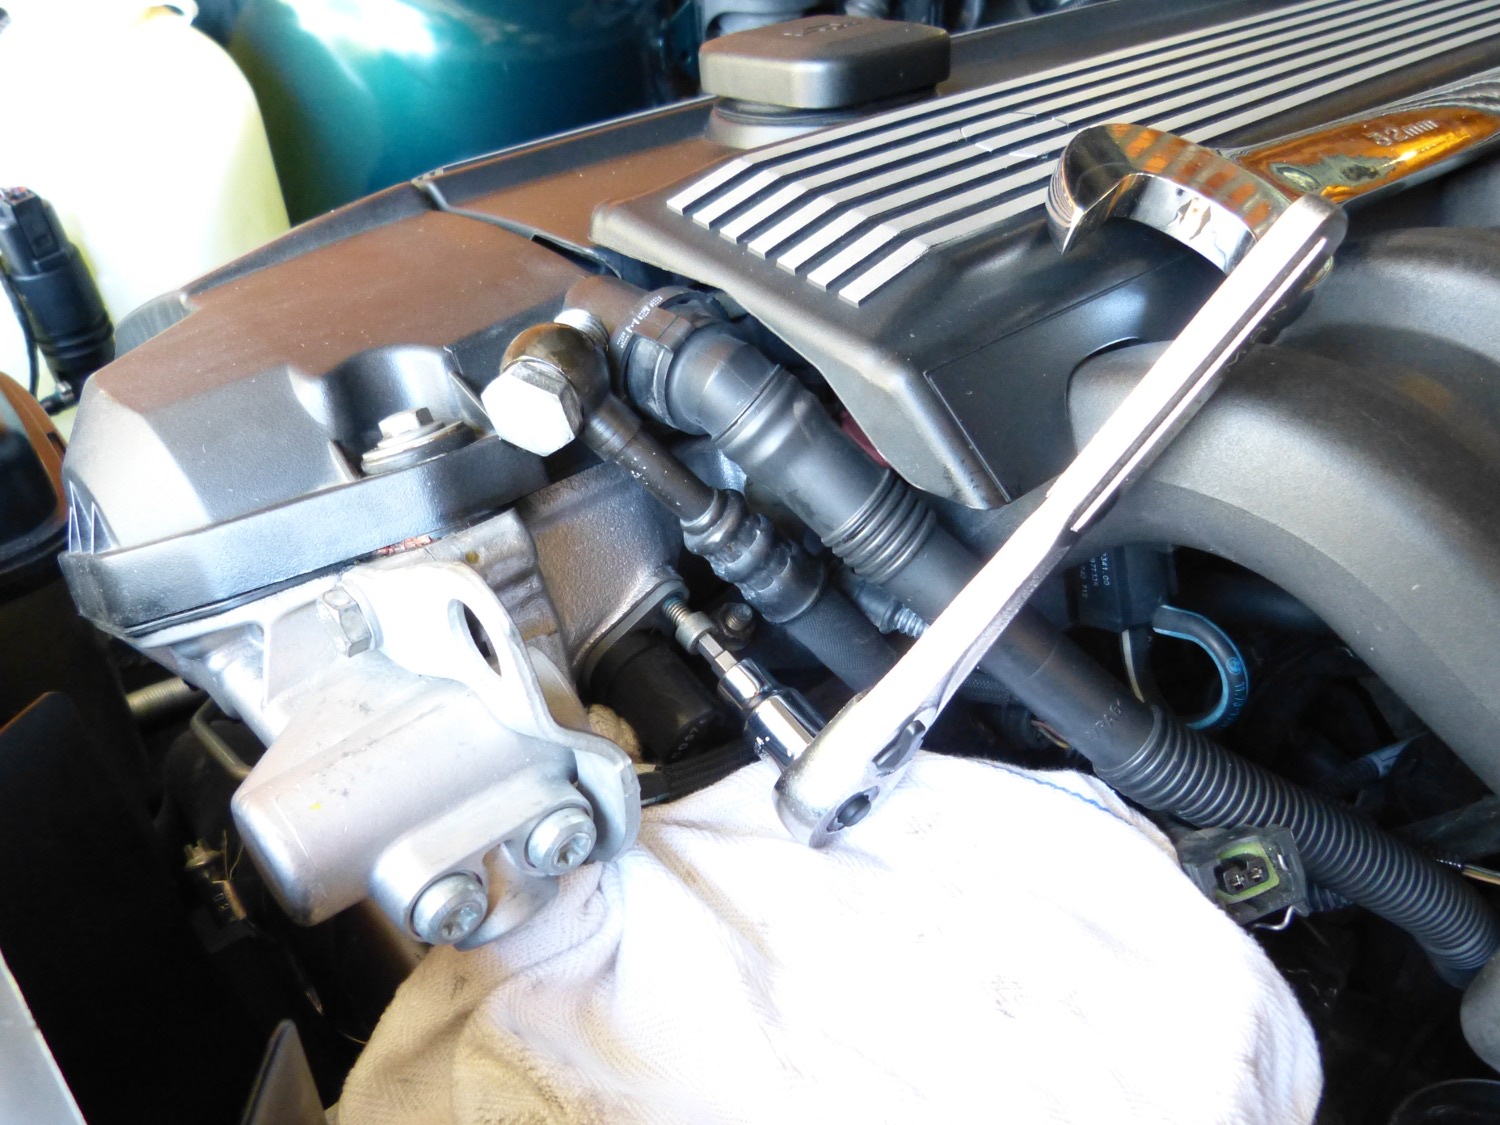
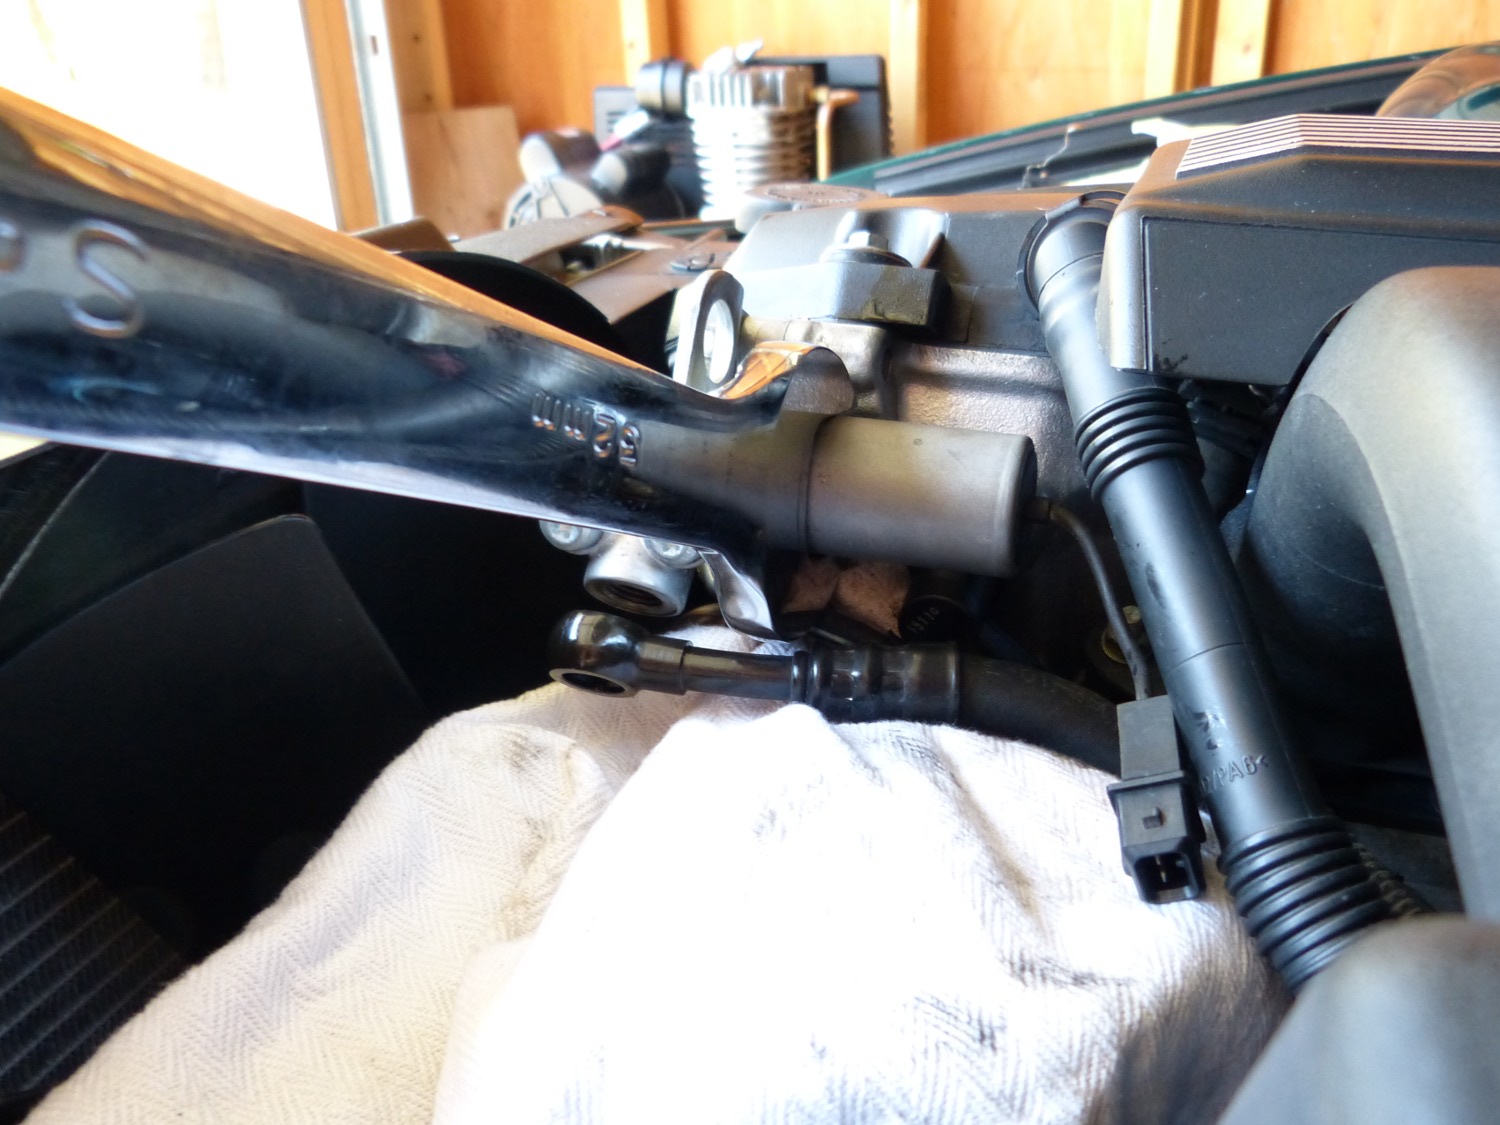 I like multi-function tools! I never thought I'd find another use for that humongous 32mm wrench I use to remove the engine driven fan, but here it is. Note how the oil line must be removed to swing the wrench. |
 At the dealer, we first attempted to connect the 20 pin adapter to connect the new SSS diagnostic system to this old-school BMW. Hint: it didn't work. |
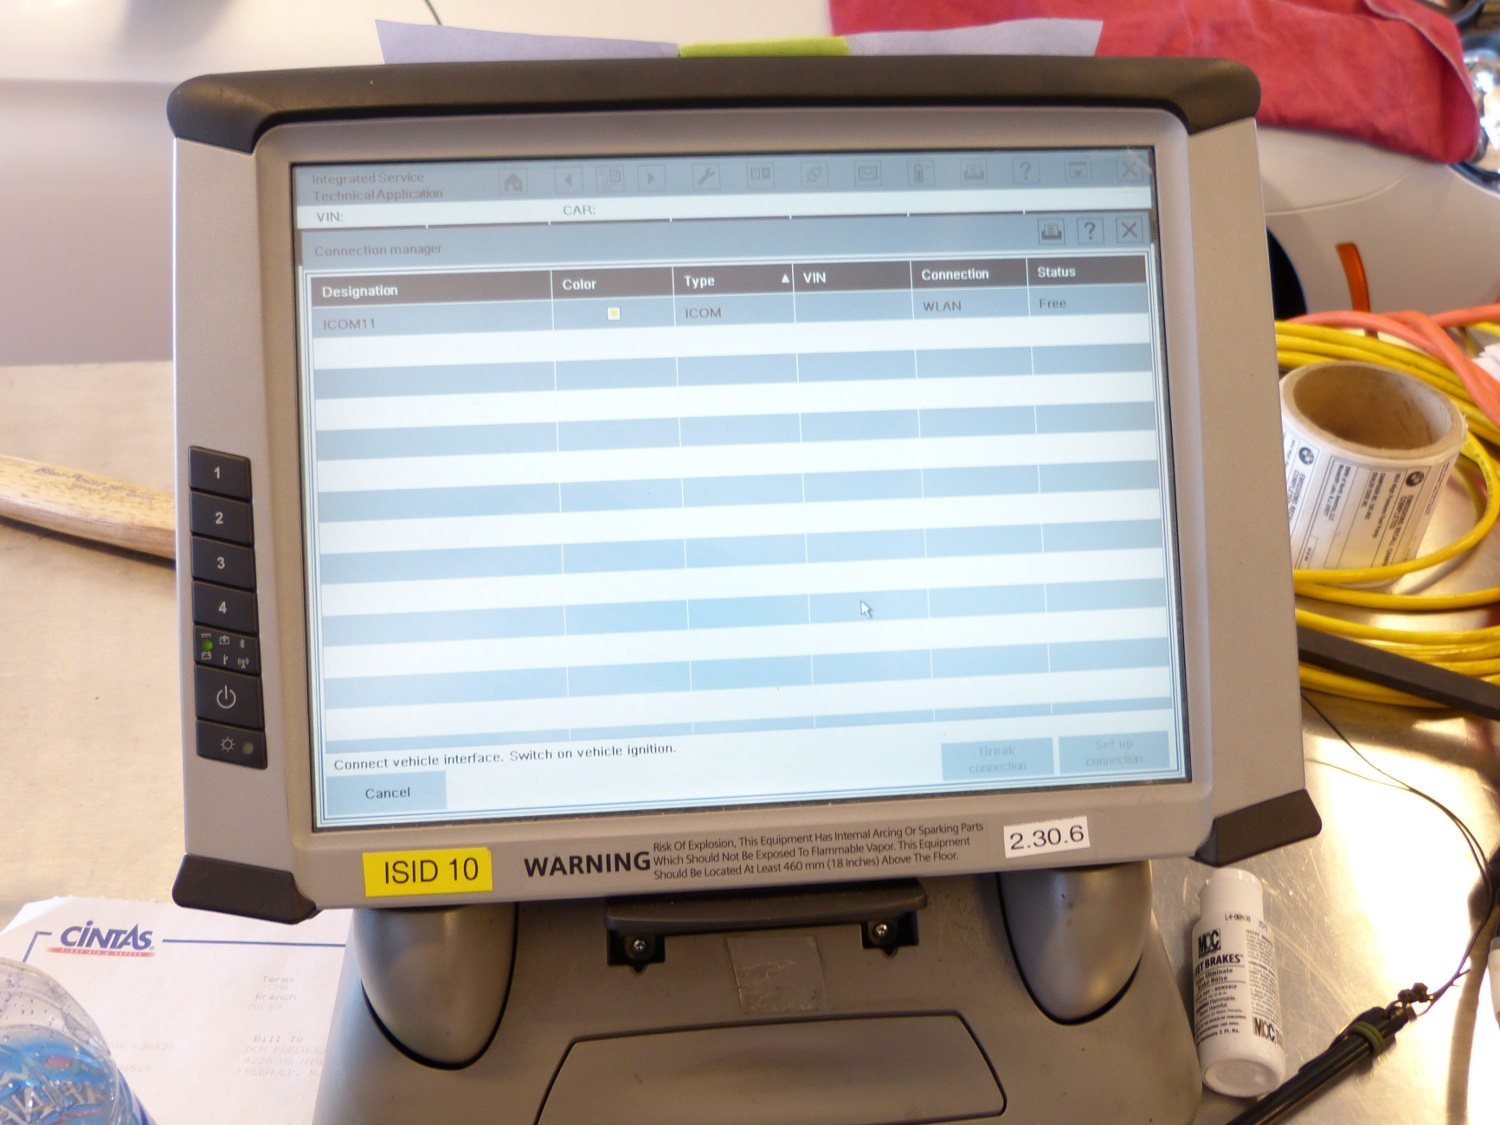 Oh, I see the problem now. The SSS was designed by a bunch of clueless Winders developers. Hey BMW: next time hire a Linux / Unix systems integrator and your tools may actually work. |
I wound up using a standard 3/8" drive 5mm allen socket to remove the sensor retaining bolt. It didn't want to come out initially so I took extra care to "rock" the bolt, meaning I loosened 1/8 turn then tightened it back up, then loosened 1/4 turn and then tightened, etc. After about two cycles I squirted a couple drops of PB blaster over the gap that now appeared between the head of the bolt and the face of the head and waited a minute before continuing. That dramatically reduced the friction on the bolt and it came out quickly and easily after that. This technique is helpful on rusted or corroded fasteners and, I can now report, on fasteners laced with thread locker. Sure enough, as the bolt came out I saw the tell-tale signs of blue loctite.
After pulling the old sensor out I spent some time cleaning the threads of the sensor retaining bolt as well as the recess in the head where the sensor o-ring sits before sending the new sender home, which literally popped into place. I put a drop of fresh blue loctite on the bolt before I drove that in and torqued by feel to about 5 foot pounds. It doesn't take much. I then reinstalled the solenoid, oil line, oil filter, alternator duct, and lastly, the airbox. I turned the key to find the CEL still present which was completely expected since CELs occur because of hard faults that must be cleared with diagnostic equipment. So after a quick leak check I decided to drive over to the dealer to find my technician and have him clear the codes once again.
This time I found my technician hiding in plain sight at the back of the front shop working on a 650. When I noticed the turbocharged engine tightly packed in the engine bay I commented "well, at least you can get to all the expensive hot-section bits that fail all the time", referring of course to how BMW now puts the turbos and wastegates in the valley of the engine. Obviously speaking from experience he wearily rebutted "yea, that's true, but good luck getting at the injectors...since they're now where the exhaust headers used to be". So much for progress.
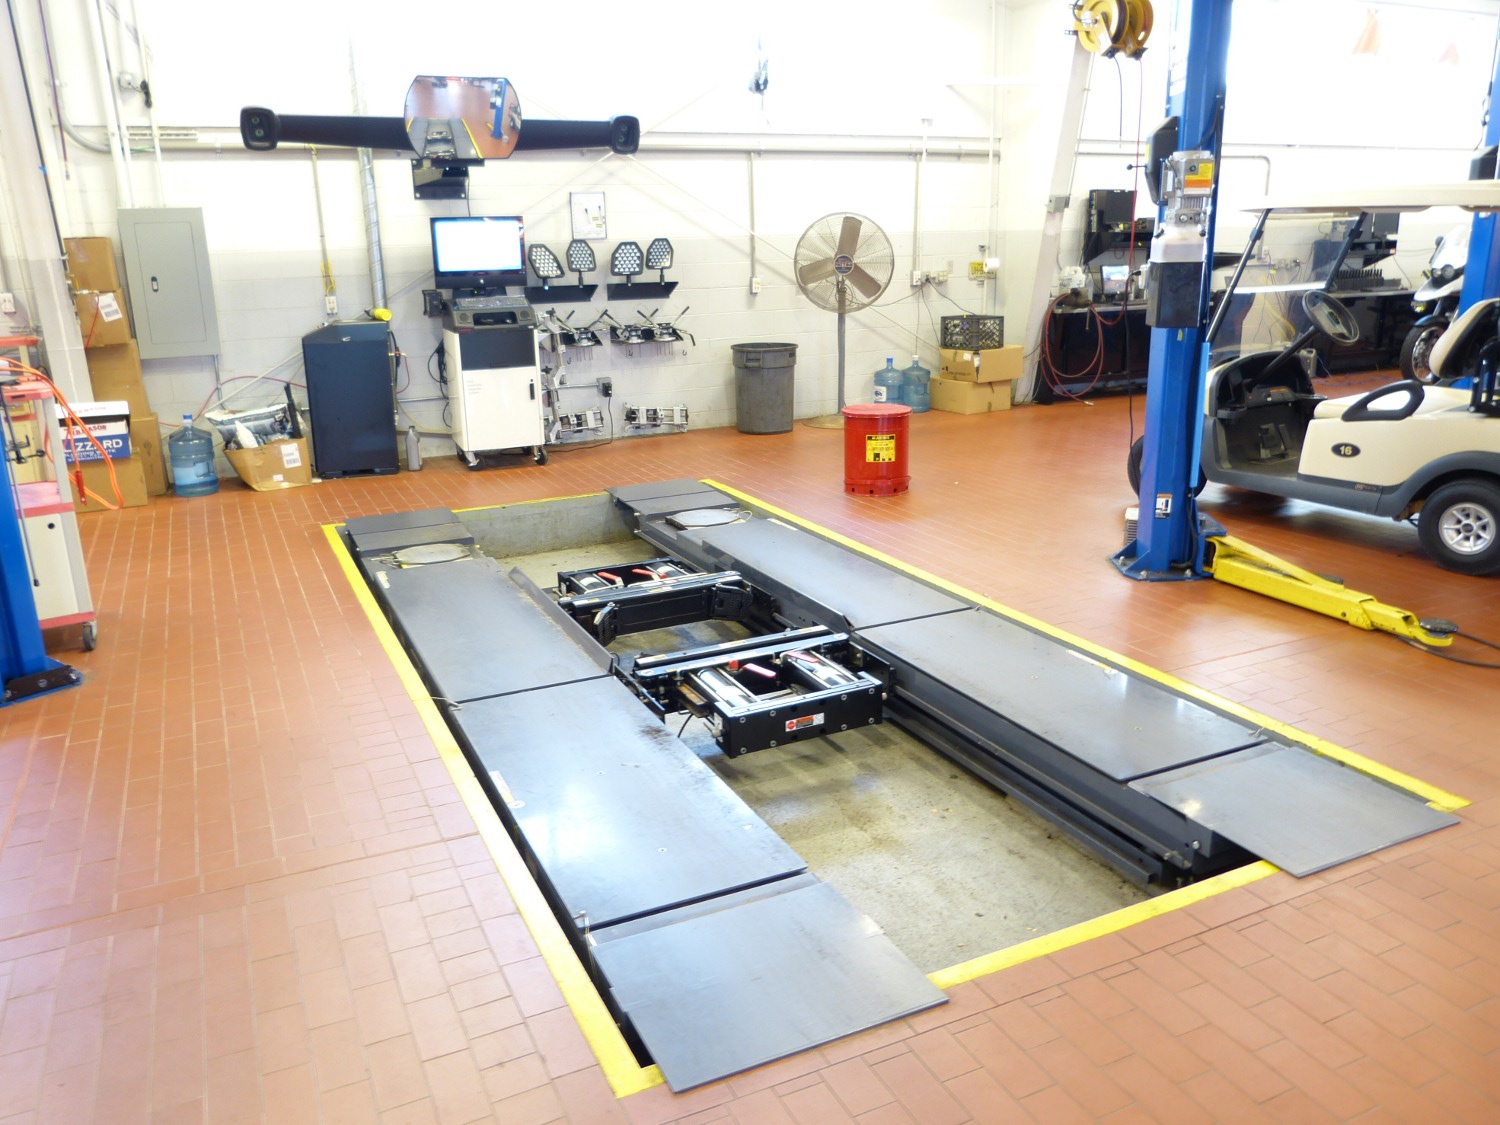 One last picture from the dealer: the state of the art Hunter Alignment System specially tailored for BMW. I want one in my shop. Badly. Anyone have a spare $80K handy? |
 Family shot: One E46, One E36, and one Dog -- my brother's shepherd/lab mix Shea. The lab part dominates as he expects me to throw his ball to him ad infinitum. |
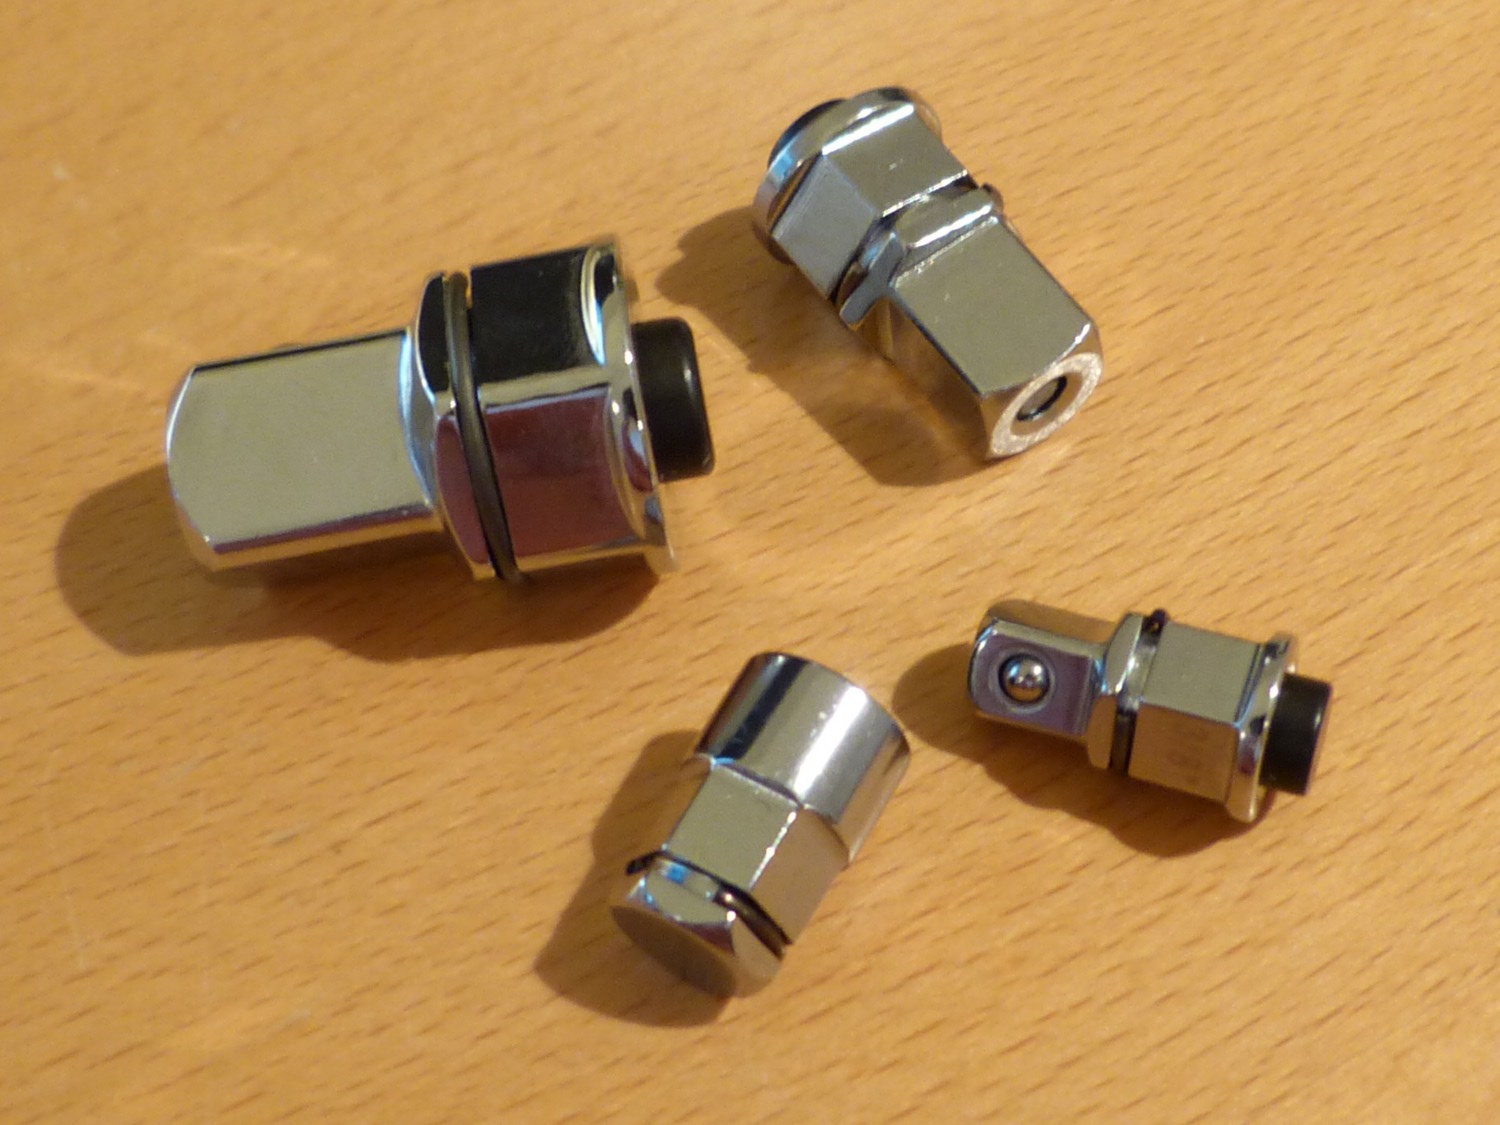 A friendly gift from a reader: box end wrench adapters that should come in handy the next time I have to replace that *F#&@! power window motor. |
A few minutes after I told him what I needed he offered to connect the new SSS but we didn't have much luck with that. It just refused to talk to the car. So we disconnected the equipment and drove back to the rear shop where he had ready access to the same GT1 and wireless head we used earlier in the week. Naturally, the GT1 cleared the codes no muss, no fuss. Before I knew it I had said my goodbyes and was headed home with the CEL extinguished and engine running smoothly. Mission accomplished.
I didn't think to ask what book labor is on a cam sensor replacement, but I have a hard time believing the customer is charged less than 1.5 hours for this task so I'll call this $192 labor saved. Combined with the parts savings that brings the DIY dividend for this project to $262. Once again, not a bad return for a couple hours out of my day.
Reader Donation: Box Wrench Socket and Bit Adapter Set
You may recall I used an "alternative" technique to swap out my failed driver's side window motor last year. A reader recently sent me mail to comment that the tool I was looking for at the time is called a box-end wrench adapter and he offered to send me a set to thank me for the writeup. The toolset arrived in the mail this week and has been added to my ever-growing tool collection. I expect them to come in handy the next time I have to replace the window motor because I'll probably use the "alternative" technique to replace the motor even if it is still operational simply to eliminate the need to remove the regulator.
My hope is that I won't need these tools for a couple years (which seems to be about how long those stupid motors last) but I know from long experience that I *will* need them eventually. Well, unless I go do something stupid and buy a new car to replace the E36.
Naaaaa. Never happen.
Mileage: 220220, Labor Saved: $192