


Fixing an Induction Leak

Ridge line immediately to the west as we ride the Altoona, PA
ILS approach course. No time to have engine problems!
One Sunday afternoon I decided to fly to Altoona, PA, to visit the Altoona Flight Service Station and see their new OASIS weather briefing system. As I said my goodbyes to the friendly Cleveland Center controller and reduced power during intercept of the localizer inbound on the ILS approach, I noticed a slight vibration in the engine. With the landing check complete and the throttle reduced to land, I felt the engine get rougher. After touchdown, I knew something wasn't quite right. I had a slight misfire and a noticeable vibration that was causing the panel to shake slightly.
 When I stopped at the FBO and did
my usual walkaround, I paid particular attention to the engine
compartment. Nothing seemed out of the ordinary, so after I added
a quart of oil, paid for my top off, hopped in and fired it
up.
When I stopped at the FBO and did
my usual walkaround, I paid particular attention to the engine
compartment. Nothing seemed out of the ordinary, so after I added
a quart of oil, paid for my top off, hopped in and fired it
up.
Running at my usual 1000 RPM and the mixture aggressively leaned to prevent plug fouling, the engine was noticeably rough as I taxied into the runup area and brought the throttle up for the usual pre-takeoff checks. To my surprise, once at runup RPM of 1800, the engine smoothed out. It still wasn't running perfectly smooth, but to the uninitiated, it would definitely pass as normal.
To get a good sense of what might affect the problem, I played with mixture, magnetos, and even cycled the propeller more than once. No effect...until I reduced throttle to idle again. Like clockwork, the intermittent misfire and vibration reappeared. After a few more jogs of the throttle, I determined that the engine developed full power and was smooth above 1500RPM, so I decided it was safe to fly home. Once there, I figured I'd restrict the aircraft to maintenance flights only, and call my mechanic to ask his opinion.
Back home, my mechanic said the symptoms could represent
something as relatively simple as a faulty ignition component, or
possibly something more severe such as valve trouble. Since
faulty plugs were a 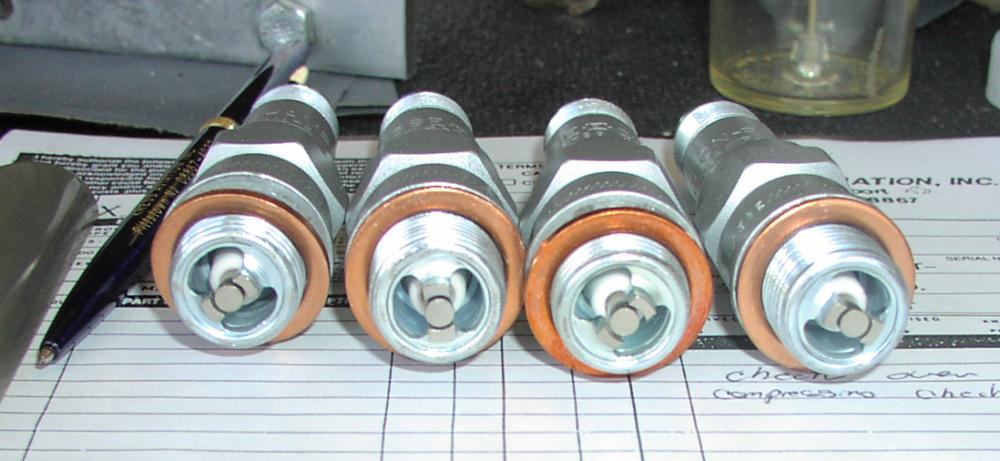 possibility and we had planned
to replace at least a few at the upcoming annual, I told Marty to
order a new set of massive electrode plugs and arranged with him
a date to replace them and give the engine a good once-over.
possibility and we had planned
to replace at least a few at the upcoming annual, I told Marty to
order a new set of massive electrode plugs and arranged with him
a date to replace them and give the engine a good once-over.
One sunny morning I flew the airplane out to Marty and had the cowling off the airplane in short order. Marty's experienced eye gave no hint as to the problem, so we decided to pull the bottom plugs one by one and do a compression check. The check revealed solid mid 70's, so we knew we didn't have a bad ring or valve.
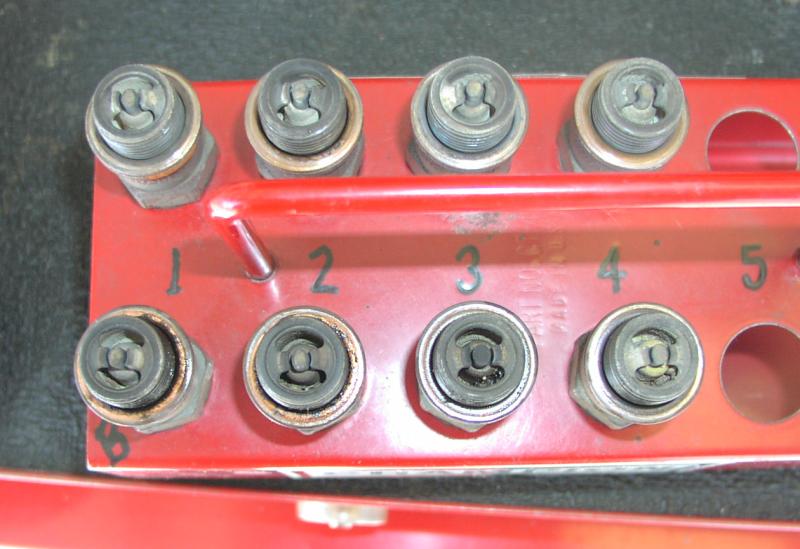
We pulled the remainder of the plugs, placed them in their proper location in the plug tray (above). Although we had just cleaned and inspected these plugs a few months and 50 hours ago, this problem came about fairly suddenly, so I expected to see something significant, but this is what we found -- all in all, reasonable wear on a set of REM38E's after approximately 400 hours time in service. The lower plugs are below the cylinder numbers and the tops above them.
 As is typical in these engines,
the plugs that live at the top of the cylinder were cleaner than
those stuck in the basement. The bottom plugs were also in pretty
good condition, aside from a few lead deposits on the plugs from
cylinders #3 and #4.
As is typical in these engines,
the plugs that live at the top of the cylinder were cleaner than
those stuck in the basement. The bottom plugs were also in pretty
good condition, aside from a few lead deposits on the plugs from
cylinders #3 and #4.
All the plugs were serviceable, but since damage to a plug isn't always visible from the exterior, a few of the electrodes were near football shaped (a clear sign they were nearing end of life), and we had planned to replace them soon anyway, I decided to just go ahead with the installation of 8 new plugs, which are pictured. Check out how much more ROUND those new electrodes are and how tight the gaps are as compared to the old plugs. I think that says it all. Given the amount of flying I do in actual IMC, I was glad to see those old plugs go.
Unfortunately, when we did the runup after replacing the plugs, the rough idle remained. The one positive thing I noticed is how much more quickly the engine fired. While it would take 4-5 blades to fire on the old plugs, we didn't see two blades go by before the engine burst to life and settled into a bumpy 1000 RPM idle. A runup revealed similar behavior as before, but slightly smoother operation at runup and higher RPM. This was no doubt due to the better spark distribution pattern afforded by the new plugs. The downside, of course, is that we were still fighting the rough idle gremlin.
 Marty and I discussed things a bit and
then decided to flush the carb bowl. Since we found no
contaminants, we then decided to enrich the idle mixture screw by
1.5 turns. The next runup noted a significant improvement. One
cylinder still stumbled every once and a while, but this was
enough to convince us that one or more cylinders were running
lean due to an induction leak.
Marty and I discussed things a bit and
then decided to flush the carb bowl. Since we found no
contaminants, we then decided to enrich the idle mixture screw by
1.5 turns. The next runup noted a significant improvement. One
cylinder still stumbled every once and a while, but this was
enough to convince us that one or more cylinders were running
lean due to an induction leak.
To fix the problem we concluded that we needed to pull the intake tubes to inspect them for cracks and replace the gaskets and rubber couplers. Unfortunately, Marty didn't have the necessary parts in stock, so I had to leave with the carb tweaked rich and come back the following week. And, that's exactly what I did.
Upon my return another late summer sunny morning, we again made quick work of removing the cowling. Since we had cleaned the inside of the cowling last time, when we took a closer look at it this time we noted little blue speckled stains directly across from the intake couplers...a telltale sign of gas spitting out of the couplers, presumably when the differential between manifold pressure and ambient air pressure is highest (in other words, at low manifold pressure and near idle RPM). It didn't exactly comfort me to think about gas spitting out over the exhaust manifold, but I was actually glad to see the stains, since it clearly established the couplers as the source of the leak.
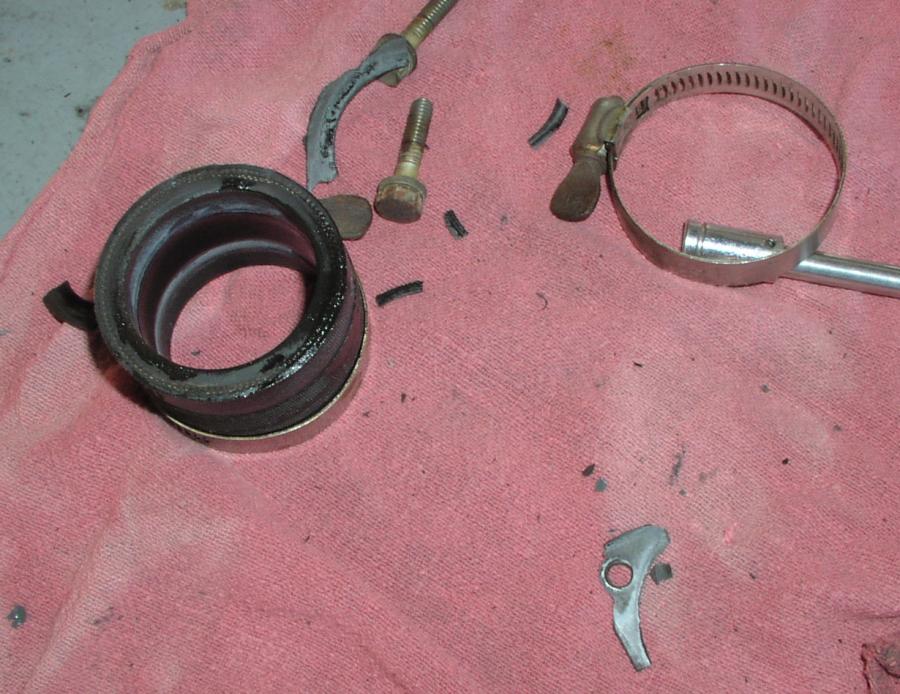
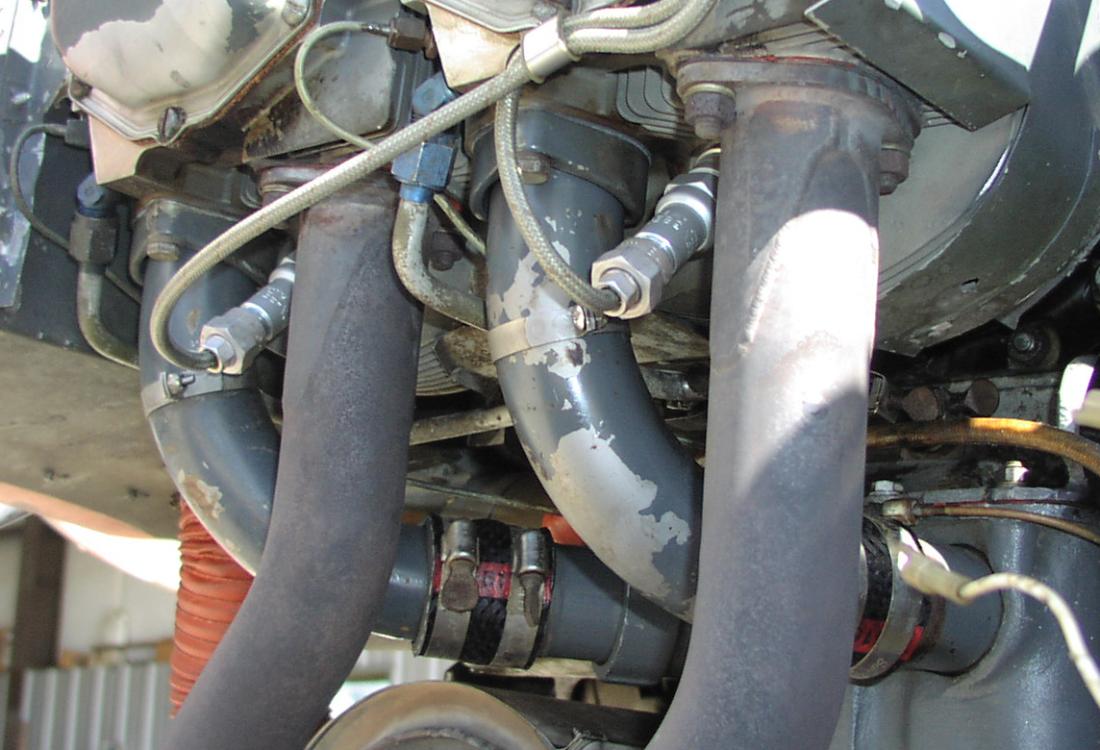 We removed the first intake
pipe from one of the "problem" cylinders by removing the two
bolts from the intake pipe flange mount (seen loosely fitted
around the pipe) and the two band clamps holding the upper intake
pipe to the lower. Not surprisingly, the intake flange gasket
that mates with the cylinder came off in pieces (see above). The
couplers didn't really look that bad. Inside and out, there
weren't any really obvious cracks.
We removed the first intake
pipe from one of the "problem" cylinders by removing the two
bolts from the intake pipe flange mount (seen loosely fitted
around the pipe) and the two band clamps holding the upper intake
pipe to the lower. Not surprisingly, the intake flange gasket
that mates with the cylinder came off in pieces (see above). The
couplers didn't really look that bad. Inside and out, there
weren't any really obvious cracks.
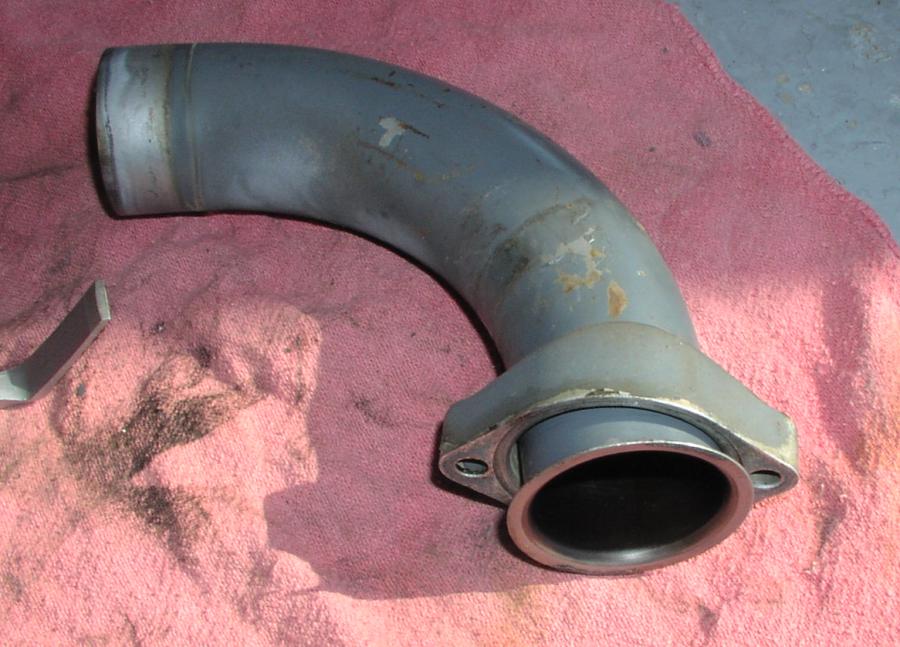
Marty then took the pipe over to the grinder with soft wire wheel attachment to clean up the edges. The purpose of this process was twofold: to remove any remnants of the gasket that may have stuck to the pipe flange, and to clean the flange to check for cracks. Marty said he's seen these crack right in the bend of the flange, but ours looked good, so we felt we were still on track to fixing the problem by replacing the "consumable" items.
While reinstalling the first pipe, Marty pointed out that it's important to ensure the pipe flange sits precisely in the center of the recess in the mount, or else the seal would leak, so he gently shifted the loose-fitting pipe back and forth to make sure it was properly set, before snugging down the bolts. About 2 hours later, we managed replace the components on the other three cylinders, and, not surprisingly, when I fired up the engine for the first time after the fix, I was greeted with a perfectly smooth idle. Indeed, the engine ran consistently smoother throughout its normal operating range than in recent memory. I left there a happy camper.
Total tab for this? Well, as with everything in aviation, far more than you might think. The upside is that we got a head start on the annual and the engine is running perfectly at this point.