


Saturday, August 30, 2003
Ok, I goofed. I accidentally caught the driver's door moulding on an
obstruction in the garage. Due to the design of the moulding, it shifted on
its mounting clips and wound up compressed
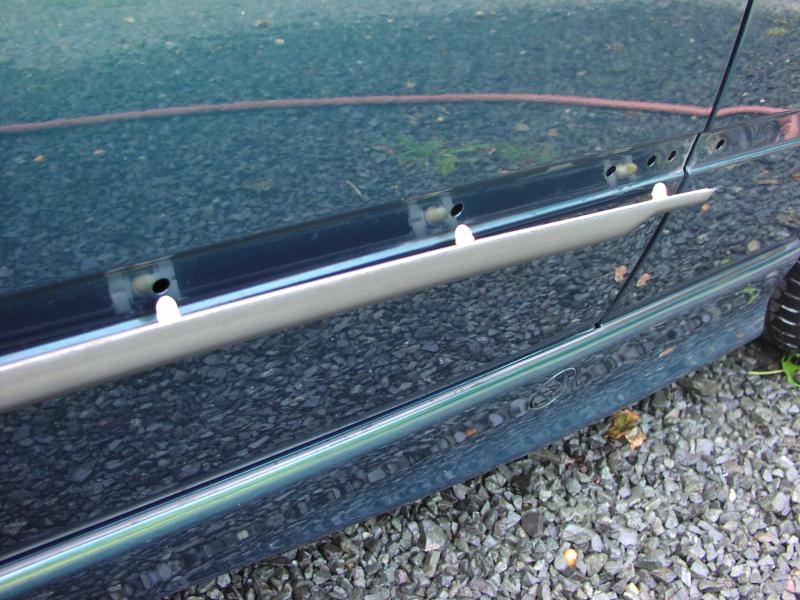 between the door and the quarter panel. That effectively trashed the end of
the moulding. Since the side moulding in particular was faded from UV damage,
I figured I'd do something I'd been planning to do for some time -- replace
all the moulding around the car.
between the door and the quarter panel. That effectively trashed the end of
the moulding. Since the side moulding in particular was faded from UV damage,
I figured I'd do something I'd been planning to do for some time -- replace
all the moulding around the car.
I made my way to the dealer the next morning and spoke to the parts guy about
this and he quoted me almost $450 for all of the moulding pieces around the
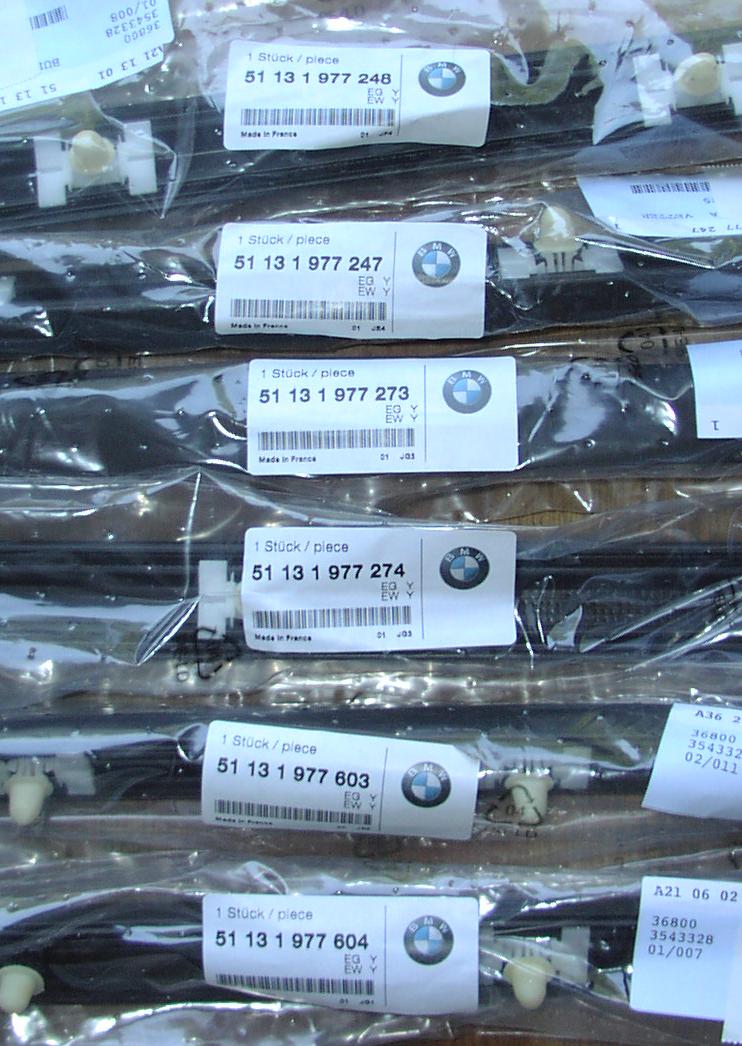 car.
After I picked myself up off the floor, I chuckled and said, "well, hey,
let's just order the left and right side mouldings today". $226 and a
week later, I went back to pick them up.
car.
After I picked myself up off the floor, I chuckled and said, "well, hey,
let's just order the left and right side mouldings today". $226 and a
week later, I went back to pick them up.
Today I installed them. Pretty easy, actually. The moulding is attached to the car via plastic butterfly-type plastic mounting hardware. Each clip is covered with a soft rubber tip. According to my mechanic, the tip is required to prevent scratching the paint on the edge of the hole in the door that receives the clip. If you scratch the paint, you're asking for rust and corrosion to set in. After working with the clips, I figure the rubber tip is also required to create the proper interference fit and prevent vibration from wearing down the plastic mounting hardware. Incidentally, when you receive the moulding, the rubber tip is about half-way on the clip. That needs to be stretched over the mounting clip before you install it.
After carefully (but "firmly") pulling the old moulding off, I decided to wash and wax the entire car and pay particular attention to cleaning out the cruft that had formed on the paint under the moulding. After that was done, I started with the front left quarter panel trim and went around the car, firmly pushing the new moudling mounting clip into their respective holes. Mission accomplished.
At some point, I'll likely replace the front and rear trim, but right now, the car looks great again, so it's no biggie.