


Sunday, April 29, 2007
Door Pull Trim Replacement
Door Pull Trim Highlights
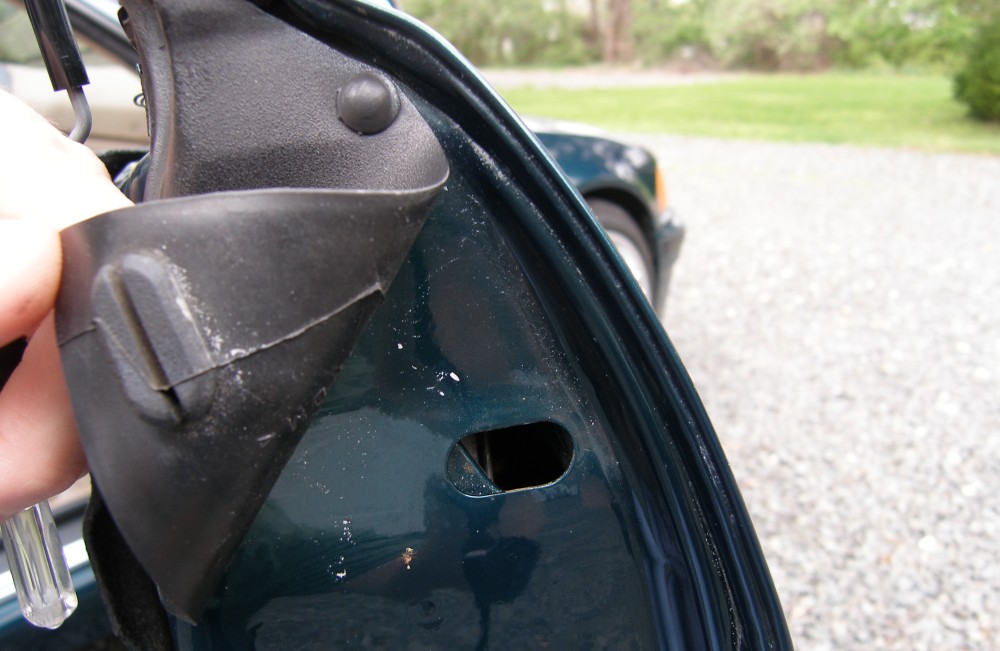
No access to slider here
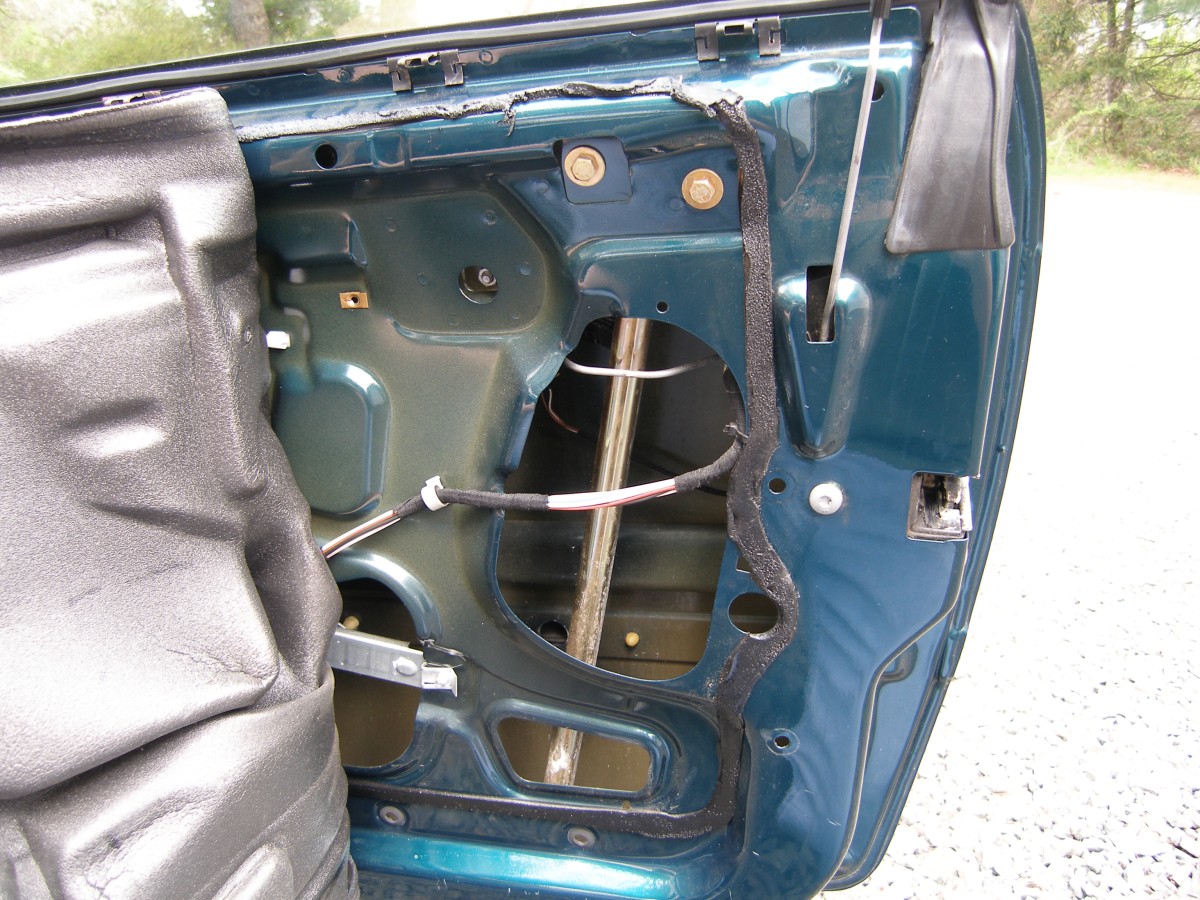
Vapor barrier removed
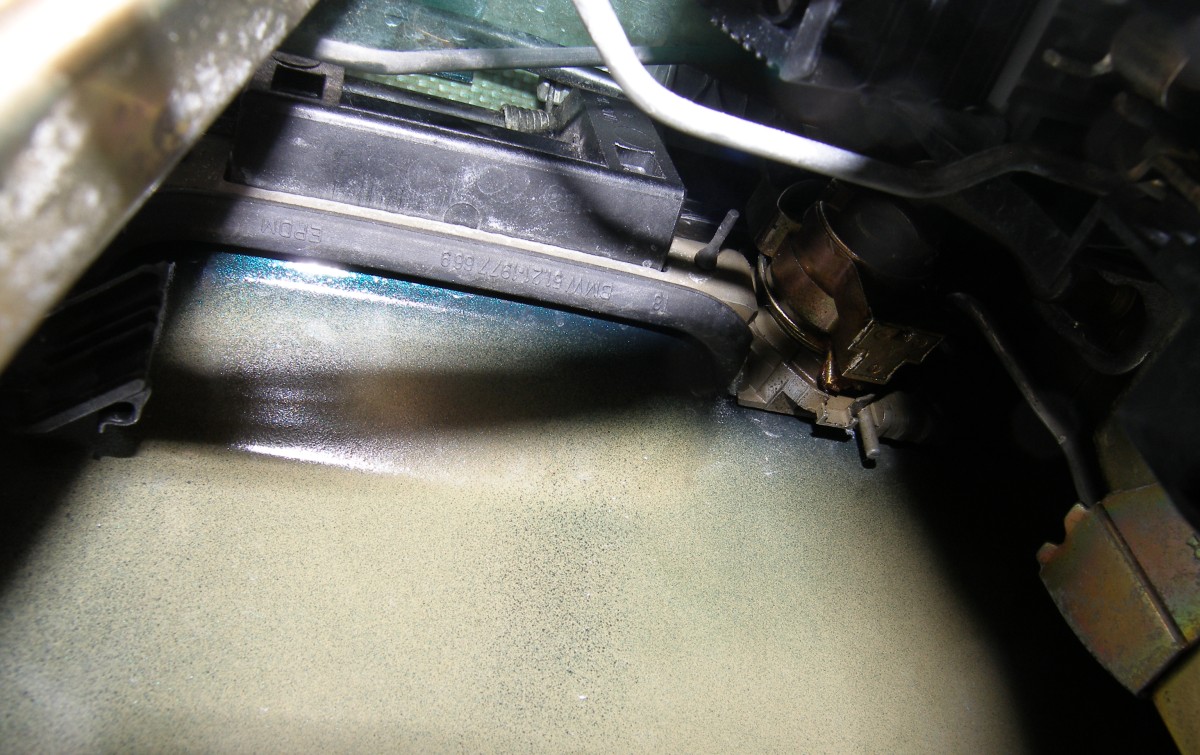
Door pull assembly inside door
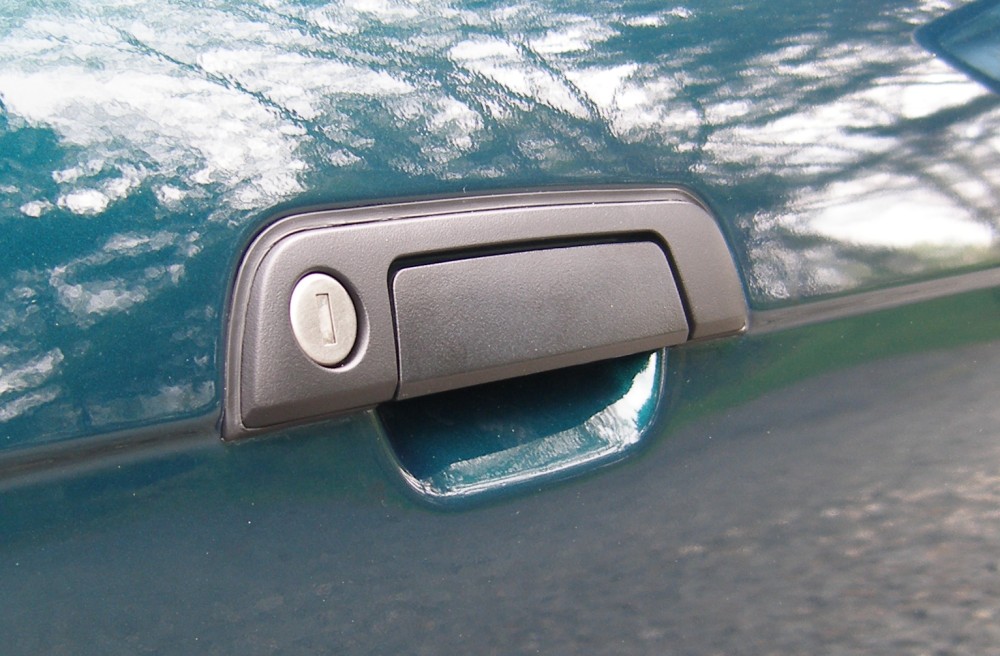
Door pull trim installed
When the car was in the body shop earlier this year I asked the shop to remove the driver's side door pull trim prior to painting the door so it wouldn't look like ass when it was done. Since it takes the same amount of effort to replace it, I asked the shop to buy a new trim and install it.
Several months back I ordered the door pull trim for the passenger side because the original rubber gasket was cracked and warped in several locations and generally looked like crap. The skies were relatively sunny and the temperatures tolerable yesterday so I figured I'd replace the trim.
I'll start by confirming that the E36 coupes indeed have a piece of metal built into the door structure that blocks access to the slider from the top edge of the door (under the rubber trim), so if you want to replace the door pull trim you definitely have to pull the door panel and peel back the vapor barrier to approach it from the inside. The bummer is, even if you do it this way, it's still a pain in the ass because the slider is located on the top of the door pull assembly and is not easily accessible. The rear vertical window slide rail, the door pull itself (the piece you grab and pull up to open the door) and lock assembly all conspire to make this harder than it should be.
The slider is a flat plate of metal about 1/2" tall that runs the length of the door pull assembly. It has a couple of notches cut into it that grab the pins moulded into the back of the trim piece. Various online references indicated that the slider had a hook at the rear (just above the lock assembly), but I couldn't find that. Granted, I was doing this all by feel since it's impossible to see what you're doing in there, but I just couldn't find it. However, I did manage to find a slot about 1/2" long by 1/8" wide at the opposite (front) edge of the slider into which I was able to insert a long (8" shank) flat blade screwdriver in order to gain the leverage required to move the slider. Keep in mind that you must keep a steady pressure on the new trim to keep it flush with the door as you move the slider rearward to lock the new trim in place, or the slider will bind.
Before you mate the trim piece with the door make sure you examine its rubber gasket and ensure that the lip of the gasket reaches around the sides of the plastic as intended. If the lip of the gasket remains behind the trim it will be possible to install the trim but it will not seat properly. If this occurs, the trim will sit high on the door and the door pull will appear recessed relative to the trim. I now see that the body shop didn't take care of this properly and the driver's side trim piece is incorrectly installed. This means that I'll need to pull the driver's door panel off again, but I have plans to replace the lock cylinder in a few months so I'll just fix it then. And if you're thinking "oh, I can just stick a micro screwdriver or maybe a feeler gauge in there and pull the gasket out from under", don't bother. If you do that you'll stretch the gasket, it will not reform to its original shape, and you'll need to buy another trim piece.
By the way, you would be well advised to wear old clothes when you do this and have some GooGone, WD-40, terpentine, or kerosene handy as you will need a solvent to clean up if you get any of the gooey vapor barrier sealant on anything. It's very tenacious stuff. I got a ton of it on my arm that did not come off with ANY of the various soaps (including citris-based cleaners) I tried.
I'm pleased with the end result, in spite of the fact that I had to repair the door panel for the third time (yea, that stupid upper plastic strip broke free of the door panel substrate again...errr). It was well worth doing myself as the dealer would have charged 0.8 in labor (about $90) for the job. As usual, that's better in my pocket than theirs.
Mileage: 143000, Parts $11, Labor Saved: $90.