


Sunday, April 20, 2008
Valve Train Noise
As the odometer has crept over 159000 miles I've noticed slightly more valve train noise in the morning after start. It sounds like classic tappet noise and only a couple tappets appear to be making noise. It is nothing obvious or distracting -- just more noticeable until the car warms up...then it purrs like a kitten. Nothing I can really do about this as I understand it is normal for an engine of this age.
OBC Lamp Replacement
 This week the bulb that backlights the clock LCD in the OBC failed. Rather
than bug my technician for something so trivial I decided to pull out
the OBC and fix it myself. In fact, it took me more time to adjust the
camera to take the pictures for this log than it did to actually
replace the bulb.
This week the bulb that backlights the clock LCD in the OBC failed. Rather
than bug my technician for something so trivial I decided to pull out
the OBC and fix it myself. In fact, it took me more time to adjust the
camera to take the pictures for this log than it did to actually
replace the bulb.
Last time I had a bulb failure in the OBC my technician took care of it while I was in the shop getting some other work done. Normally, technicians just replace all the bulbs because their labor is expensive relative to the parts and it's better from a customer relations perspective to replace all the bulbs rather than fix one bulb and force the customer return several times to replace the other bulbs as they fail, but since my labor is "free" and the bulbs cost almost $3 a piece, I felt there was no point in throwing $12 at a $3 problem.
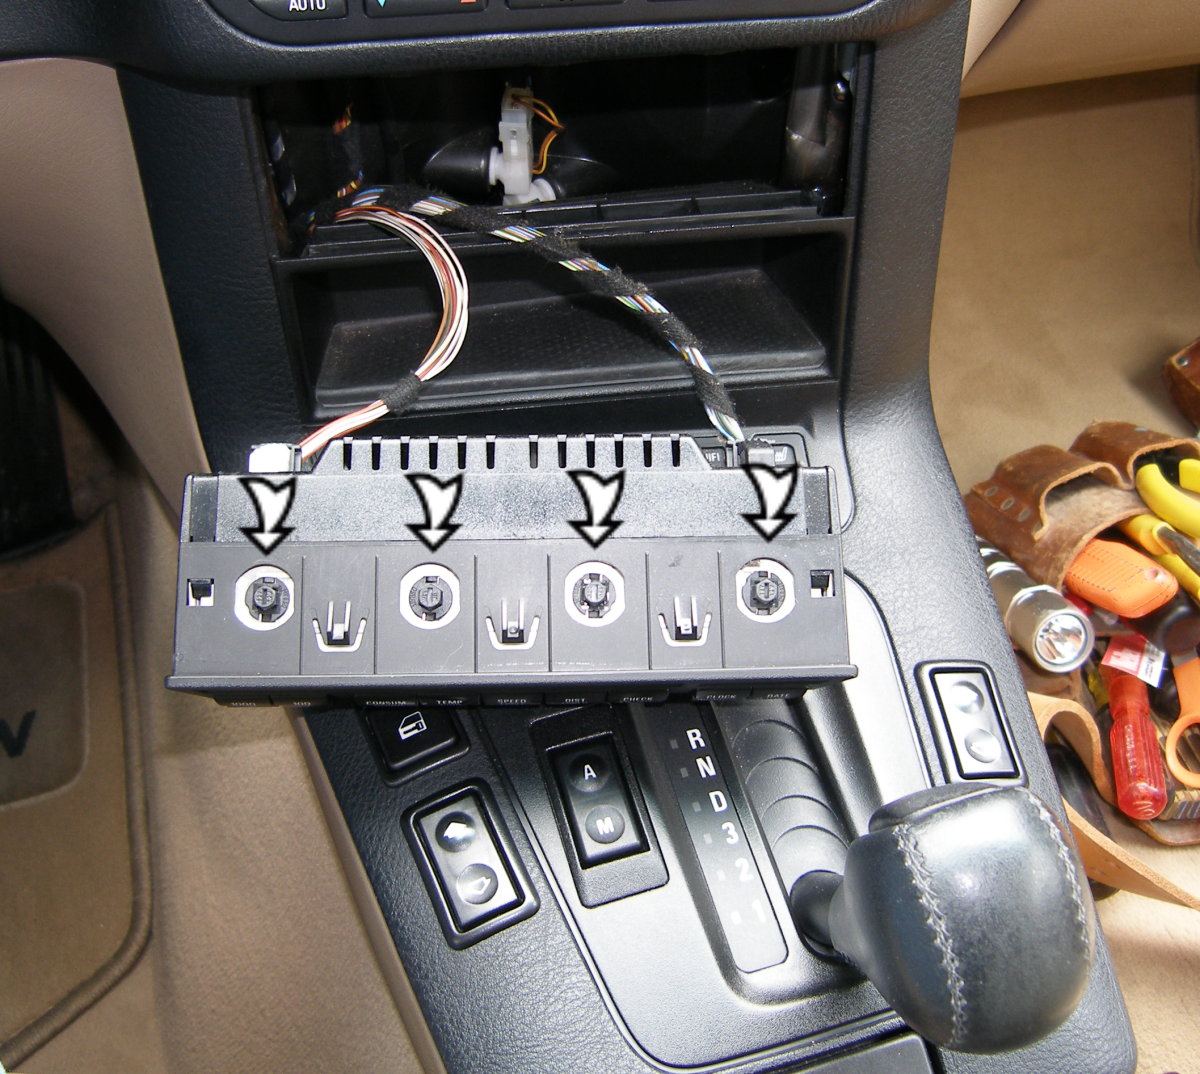
Access to the latching mechanism is provided by a hole in the top of the tray beneath the OBC. To release the OBC I stuck my index finger in the hole and then pushed directly upward. At the same time, I managed to get my middle finger slightly behind the OBC while I used a screwdriver to carefully pull the top of the glasses tray down an 1/8" or so to help unlock the unit. With about 10 seconds of fiddling the OBC popped loose.
The bulbs are the same 1/4 turn type used on the back of the speedo / tach gauge cluster and required only a small screwdriver to remove and reinstall. The four OBC bulb sockets are highlighted in the photo with arrows. Mission accomplished.
Exterior Trim Restoration Experiment
Although I've been forced to replace the exterior side mouldings on this car more than once, the trim on the front and rear bumpers is original...and it shows. The plastic is faded and generally looks like crap even if I hit it with some 303 Aerospace Protectant. Replacement mouldings for the front and rear bumpers aren't terribly expensive, but I have other things on which to spend $200, so I decided to try an experiment before I ordered new trim.
 I read about various black trim restoration
kits and settled on the Leatherique Rubber Black restorer ($25). Rather than
sacrifice a piece of trim currently installed on the car and commit myself
to a long job I decided to use some of the old rubber side mouldings I'd
saved. The directions on the bottle indicated that I should use a poly brush
to avoid brush marks. That struck me as odd because most dyes would not be
affected by this, but as I opened the bottle it became clear that this
is more of a paint than a dye. Don't get me wrong...it may have dye in
it, and as as far as paints go it's fairly thin, but it's not the watery
consistency of Rit or similar dyes. Since I did
not have a poly brush handy and really didn't want to make a special trip
to the home center to get one just to sacrifice for this experiment I
used the only thing I had -- a spare paint roller with a 1/4" nap.
I read about various black trim restoration
kits and settled on the Leatherique Rubber Black restorer ($25). Rather than
sacrifice a piece of trim currently installed on the car and commit myself
to a long job I decided to use some of the old rubber side mouldings I'd
saved. The directions on the bottle indicated that I should use a poly brush
to avoid brush marks. That struck me as odd because most dyes would not be
affected by this, but as I opened the bottle it became clear that this
is more of a paint than a dye. Don't get me wrong...it may have dye in
it, and as as far as paints go it's fairly thin, but it's not the watery
consistency of Rit or similar dyes. Since I did
not have a poly brush handy and really didn't want to make a special trip
to the home center to get one just to sacrifice for this experiment I
used the only thing I had -- a spare paint roller with a 1/4" nap.
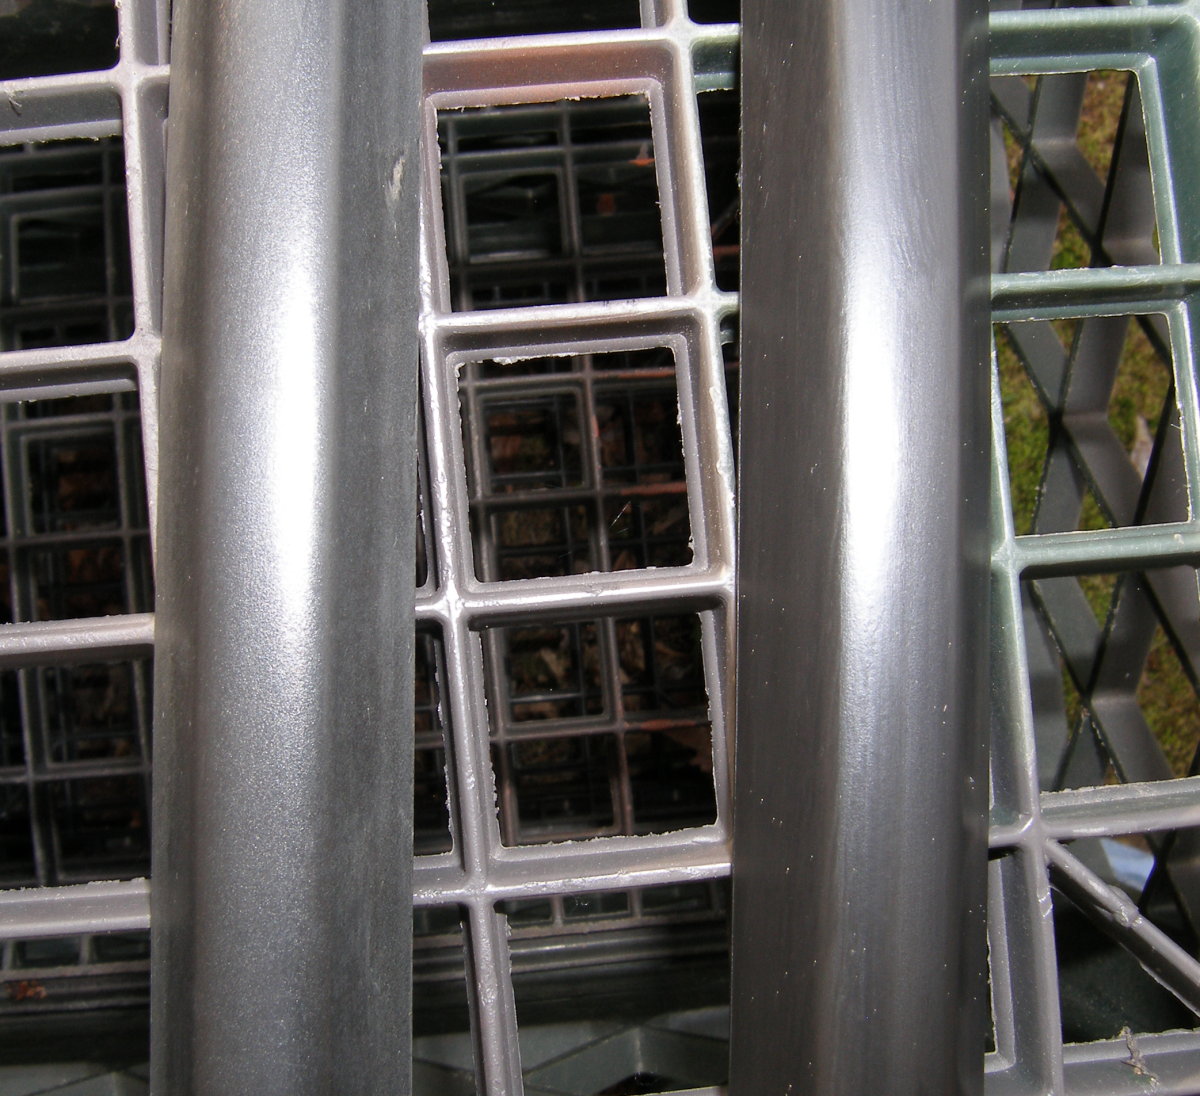
I shook the product for 10-15 seconds before I opened the container and poured a bit of it on the end of the roller. I then smoothly and carefully applied the product over the length of the trim, and let it dry about 30 seconds before wiping off the excess and taking care to avoid the combination of pressure and direction of travel that would tend to produce any "brush marks". The result is shown in the picture. If it's not obvious, the old, faded trim is on the left and the newly "restored" trim is on the right. Judge for yourself.
I'm not convinced this trim restorer product is the best solution available, but the improvement is notable in spite of the fact that some brush marks are visible in the finish. The overall tonal quality of the trim is more uniform and given a shot of Aerospace Protectant I'm sure it would look like new. Of course, the trim on which I experimented has a smooth finish while the front and rear trim I endeavor to restore has a grainy texture that may not take to this process as well...that is unless I were to apply it with an airbrush or similar. The product directions (such as they are) do suggest spraying it to avoid brush marks. Fortunately, I have a need for an airbrush to touch up some rivets on the airplane following some airframe repair work so I may buy one and use it for a second experiment on the remaining trim piece. Something tells me I'll wind up ordering new trim in any case, but at least I can order it with a clear conscience knowing that I made a best effort to repair it.
Mileage: 159000, Parts: $30