


Monday, July 26, 2010
Accessory Overhaul Complete
I got up at a reasonable hour today so I managed to start work at around 11 AM and finish up around 5PM. I took almost an hour for lunch and had to run an errand in that time so that means I spent around four hours doing the following:
- Installed power steering pump and aluminum pulley
- Installed aluminum water pump pulley
- Transferred alternator pulley to new alternator and installed assembly
- Connected power steering pump hoses and filled system with fresh ATF
- Installed new A/C and accessory belts and reinstalled the tensioner/idler protective caps
- Assembled and installed new engine driven fan and viscous clutch
- Installed upper radiator hose and filled system with coolant
- Installed airbox and cruise control unit
- Reconnected battery
- Started engine
- Verified the power steering fluid at the correct level
- Bled cooling system
- Verified charging system operating correctly
- Conducted a test drive
When I flushed the power steering system yesterday I took extra time to rotate the wheels back and forth until I could no longer feel resistance or hear fluid squishing in the system. This purged the maximum amount of fluid possible using the optimal flush method. When I filled it today I moved the wheels back and forth (actually by grabbing the spokes in the rim and pivoting the tire rather than the steering wheel) until I felt consistent resistance in the wheels. All told the system took almost a quart of fluid. After the test run the fluid was not translucent, but I wasn't expecting it to be as only the official flush method has any hope of flushing all the old fluid and particulates from the system. I plan to do that at some point in the future but as I said yesterday I couldn't justify the time at this point.
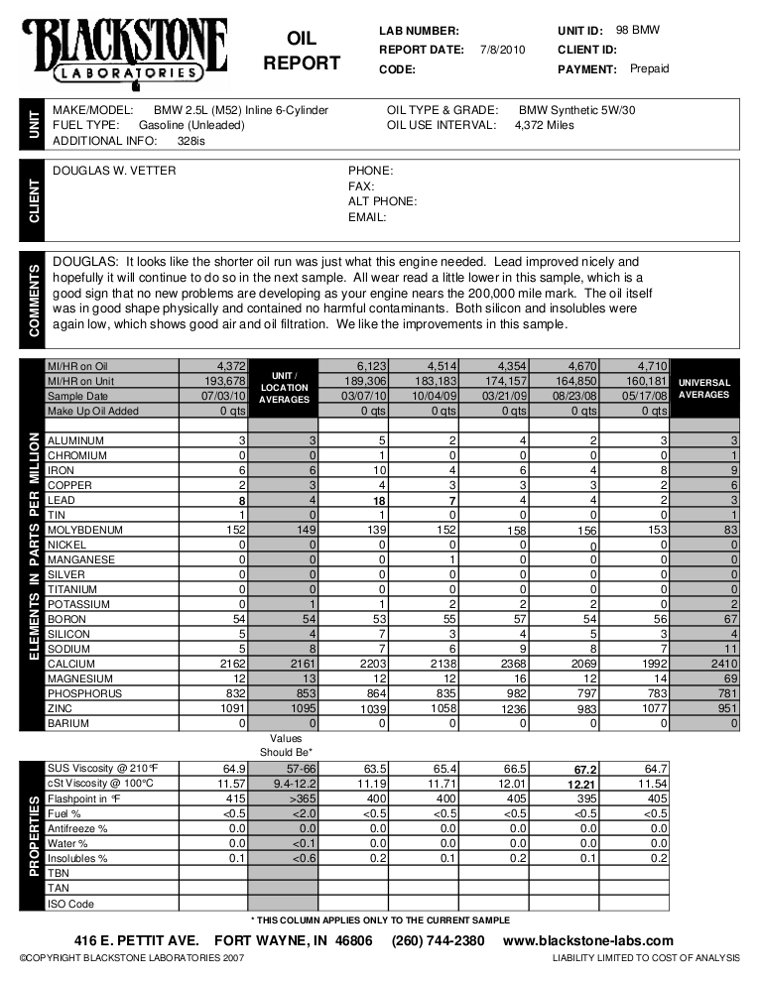
 The alternator nut requires a 24 mm thinwall socket. I used a 22 mm socket as a drift and tapped the pulley on until it fully seated. |
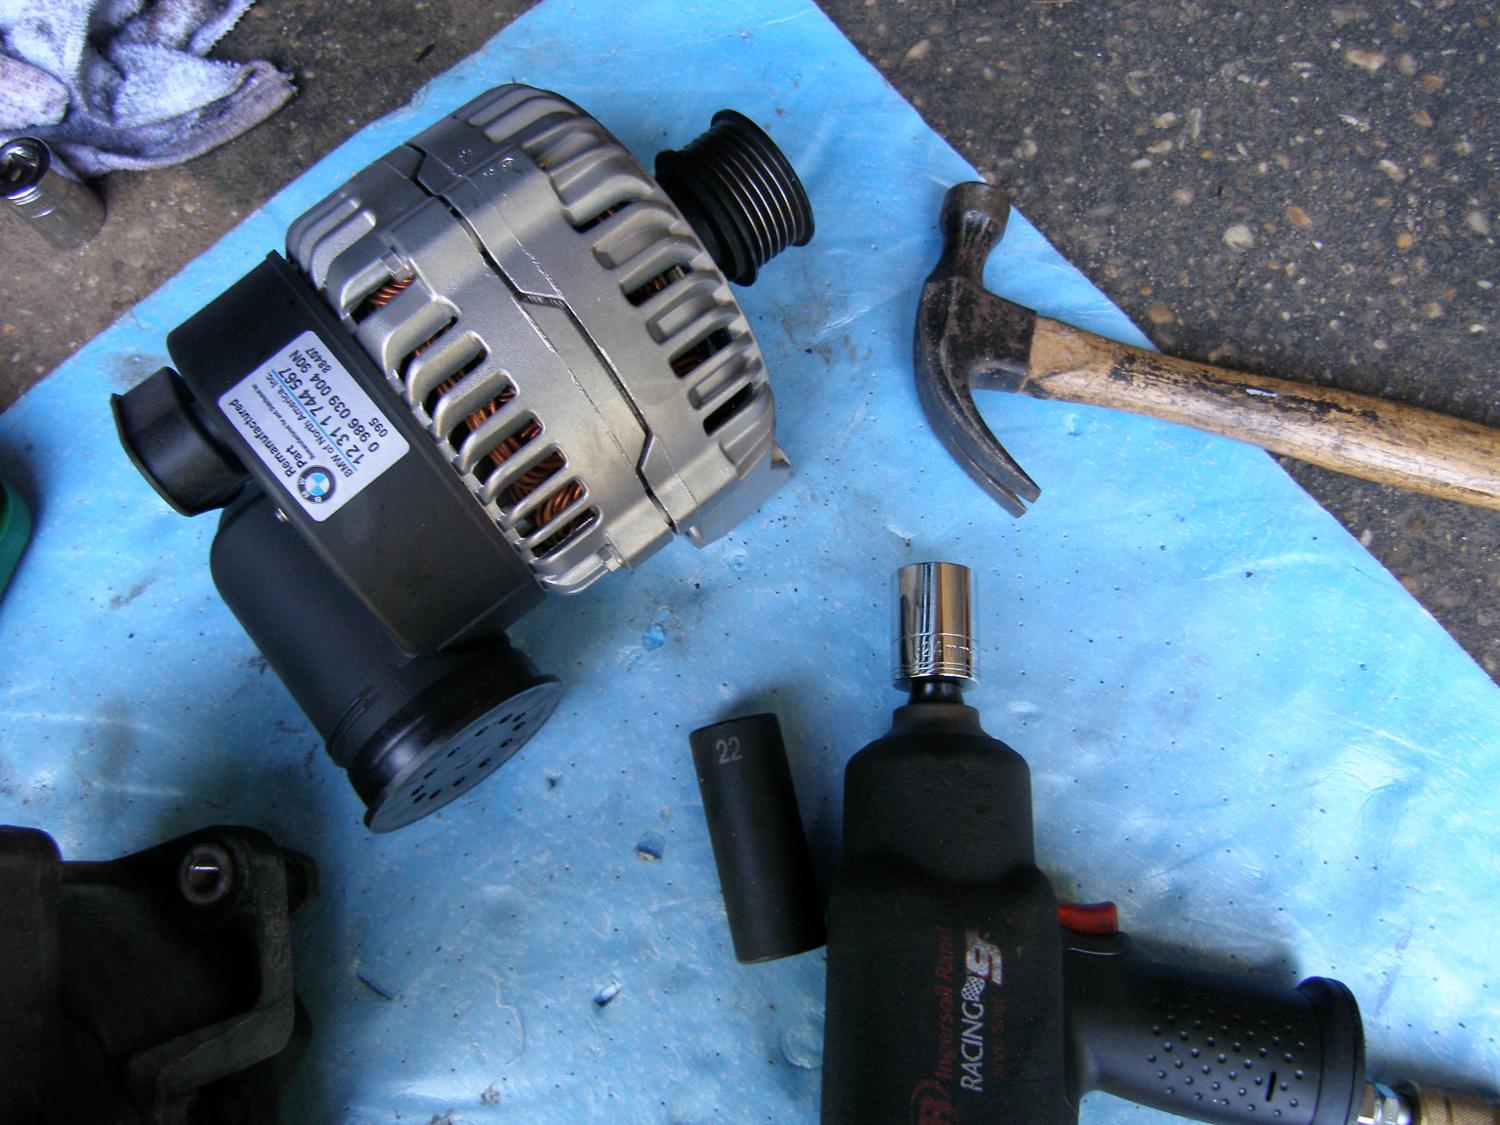
 Just a perspective of the new accessories taken just before I installed the airbox. |
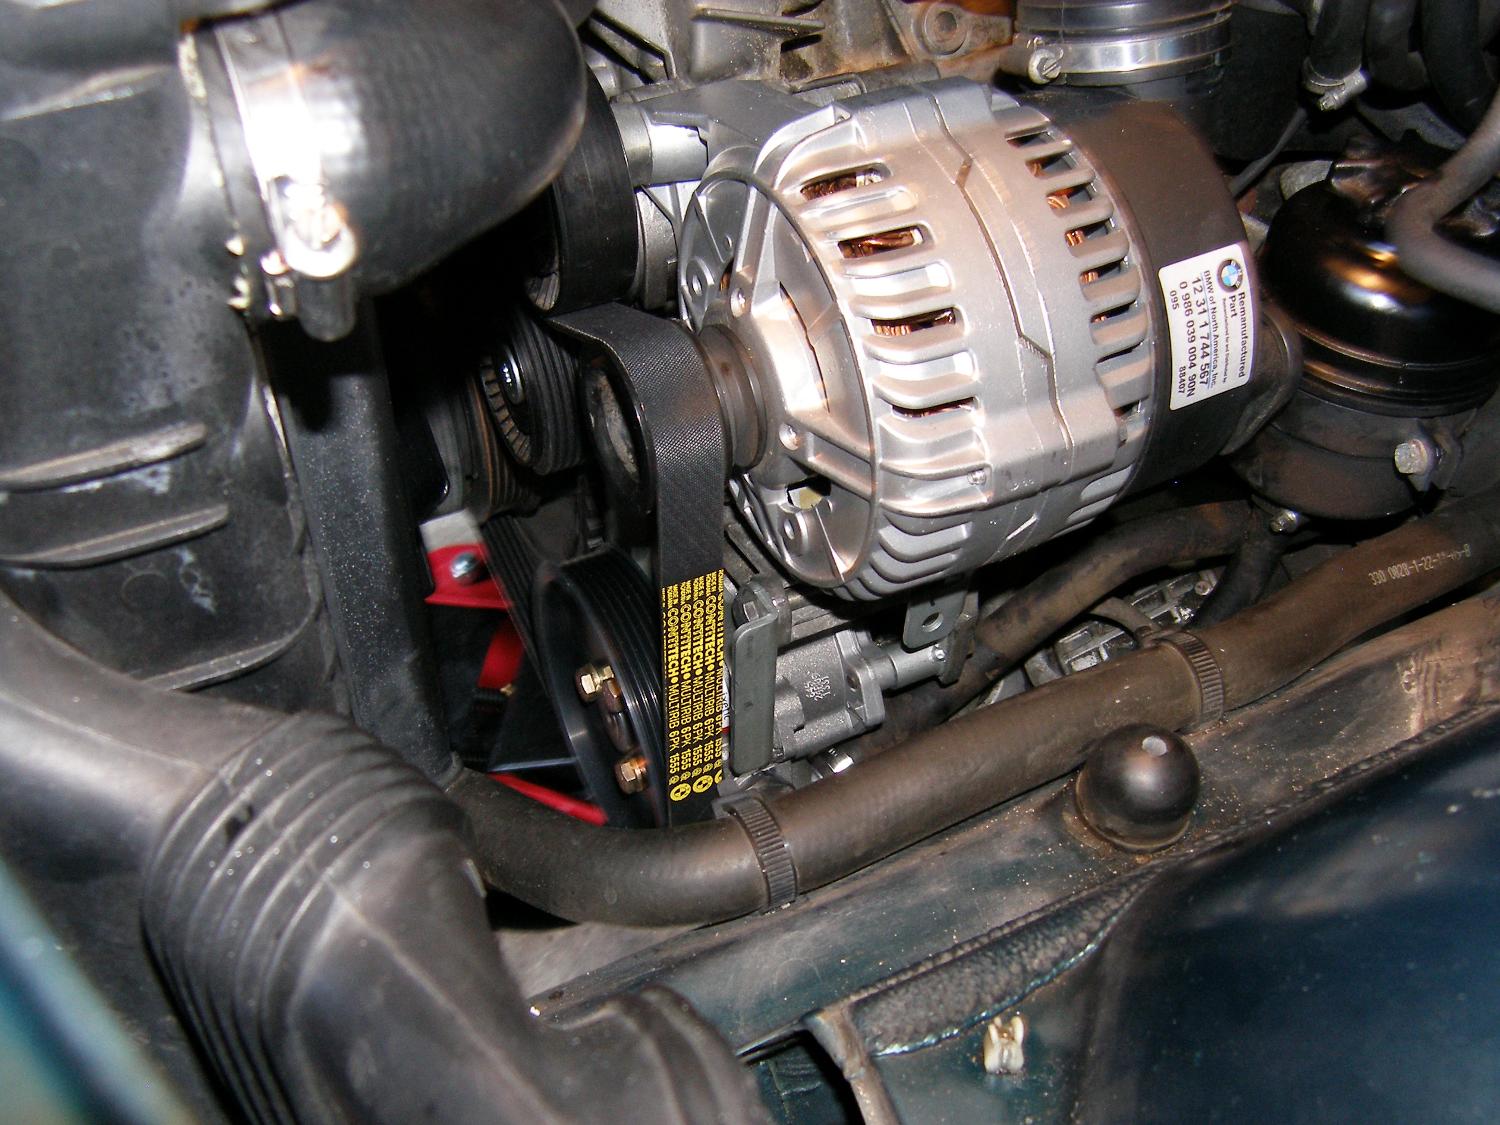
 Another perspective of $1325 worth of new parts, this time from below. |
My technician originally told me that remanufactured alternators come with a pulley attached. The remanufactured unit I received from the dealer most certainly did not come with a pulley so I had to transfer the pulley to the new alternator. I made quick work of loosening the pulley nut with my air wrench and a 24 mm thinwall socket and I was able to pull the pulley off the shaft of the old alternator by hand without significant effort. Oddly, the very same pulley would not fit with mere hand pressure onto the shaft of the new alternator so I had to use a 22 mm impact socket as a drift and hammer the pulley onto the shaft. Mind you this was not a crude attempt to fit a square peg in a round hole...the pulley clearly fit the shaft...it was simply a press fit. After I installed the pulley I glanced skyward and said a small prayer that the new alternator was not defective because I didn't have the foggiest idea how I would remove the pulley from the shaft and transfer it back to the old alternator. If I ever do this job again I'll buy a spare pulley just in case.
I would have preassembled the engine driven fan and new clutch ahead of time to save a few minutes but I was not sure of the orientation. It is entirely possible to mate the fan to the clutch in several ways. For clearance reasons I had to be sure, so I just waited until I could examine the old unit more closely and use it as a template. Since I've removed and reinstalled the fan several times in the past I made quick work of installing it this time and took a minute to bask in the glow of a nice new clutch and fan assembly.
Incidentally, after a test drive I opened the hood and noticed that the engine driven fan was spinning and blowing air at a rate I hadn't seen in, well, a long time. This tells me that the original clutch was near or at end of life. After all, the viscous coupling is supposed to become rigid when the temperature increases and therefore turn the fan at the speed of the water pump, and I was clearly not used to seeing it blow this much air. So the lesson learned is these things do go bad and not necessarily in an obvious way. The corollary is that the engine driven fan serves a purpose on these cars and should not be removed, at least on vehicles that came equipped with them from the factory (not all did).
I always keep a gallon of 50/50 mixed coolant around just to top off the system when necessary. When I used the entire gallon I had on hand and realized the system wanted more I had to run out for some coolant and distilled water. That ate up a solid hour of the day but it was necessary because all told the system took nearly two gallons. This means I can count this as a coolant flush in my maintenance schedule. Fortunately I had no issues with the cooling system bleeding process, but this was likely because I left the front end jacked up for the first few minutes of engine operation.
A few weeks ago I was hanging out at Don's shop and saw first hand how the bleeding process can go awry. I stood silently to the side as he and one of his techs lit up a freshly overhauled S52 on a track-prepped M3. The tech began to add coolant and Don started the engine. To help circulate the coolant and free any air from the system he revved the engine between 4000 and 5000 RPM and watched the temperature needle (aftermarket VDO unit) like a hawk. When the needle started to rise above a safe point he took this as a sign that an air bubble had formed in the system and the pump was not circulating coolant as required. To remedy the problem they quickly put the front end of the vehicle on the lift and raised it to aid the bleeding process. As expected this cleared the air bubble and the temperature dropped to the regulated value. Lesson learned: the more coolant you remove from the system, the more you risk encountering problems during the bleed, and the more you have to be on your guard with respect to monitoring coolant temperature.
When everything was ready to go I verified all fluid levels and then applied a VOM to the battery terminals to make sure the system was charging. The charging voltage of 14.0 volts, while slightly higher than usual, was within the normal range. A short test drive around the block confirmed that the infamous power steering whirring noise that had plagued the car for years is gone. Once back at the garage I jacked up the front end again to conduct an inspection. I found no leaks or other problems so I put it back on the ground, pulled it out the garage, washed it for good measure and called the project complete.
Total project time was eight hours. I have no idea what the dealer would charge but something tells me that book labor, with each task taken separately as it usually is, would easily be in the vicinity of 6-8 hours. Multiplying the lower figure by $128 (my dealer's labor rate) equates to $768 so I think I can safely call that the labor saved doing this job myself. The parts came to a total of $1325. I saved $290 sourcing parts myself, so that brings the DIY dividend on this project to $1058. Not bad for a couple days work, doncha think?
Mileage: 194662, Labor Saved: $768