


Saturday, February 19, 2011
Seatbelt Buckle Stop Installed
 I almost feel like an idiot for reporting
the installation of something so trivial, but I managed to properly install
the seatbelt buckle stop.
I almost feel like an idiot for reporting
the installation of something so trivial, but I managed to properly install
the seatbelt buckle stop.
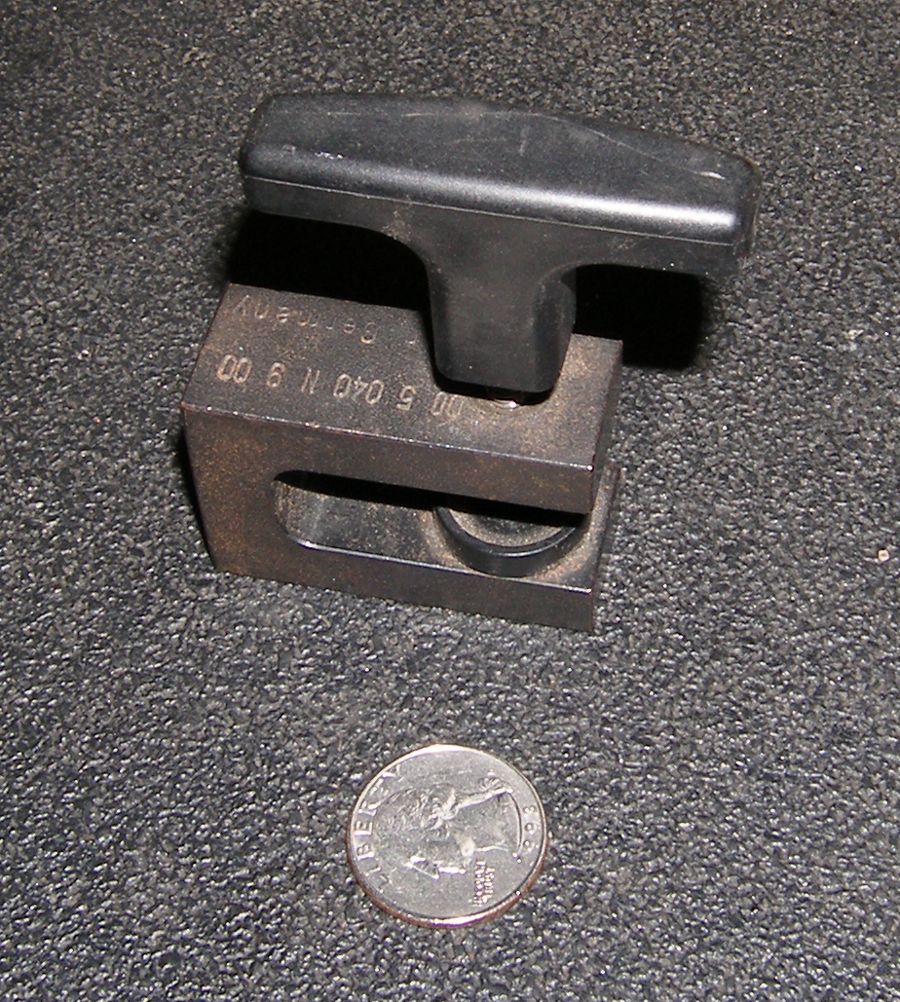
I received a bit of email about this subject following my last report, which kind of surprised me. Most people seemed to advocate the "press it in with a pair of pliers" approach and at least one person agreed with my original plan to involve a soldering iron. But I really wasn't happy with either approach when I knew full well, just by instinct, that BMW had to have a special tool for this job. And as it turns out, courtesy of my dealer technician, they do. It's special tool part number 00 5 040 N 9 00. The tool is a small U-shaped press milled from a roughly two inch square block of steel and includes a threaded rod with a T handle on one end and a cupped end on the other.
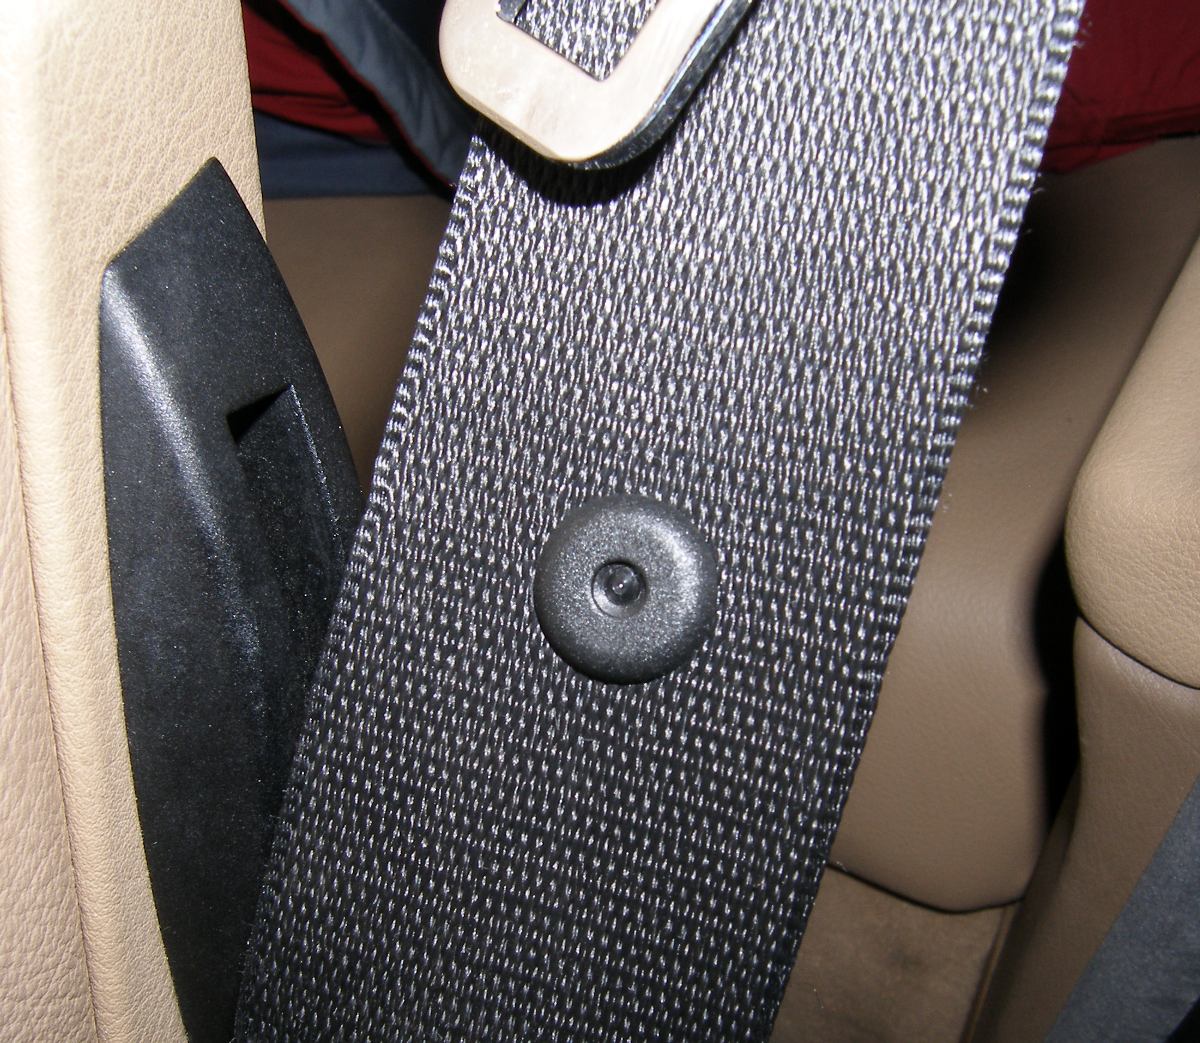
To install the parts, the thumbtack part is pressed through the seatbelt webbing, the washer is mated over the pointy end on the opposite side of the belt, and the entire assembly is inserted into the press. Then, the rod is threaded into one end of the press and the T-handle is turned clockwise to drive the end of the threaded rod down onto the pointy end of the thumbtack, ultimately compressing it into a nice hemispherical shape (see the picture). Just before I walked out the bay door to my car to install the part my technician gave me some good advice: "Don't crank it down too hard or the rod will push a hole through the washer and destroy the parts." I got it right the first time and I certainly couldn't argue with the result -- it looked virtually identical to the original factory piece.
 Before leaving for the office I asked my tech how much the tool cost but he
couldn't remember offhand. Plus, he rebutted "there's no point in buying
it...this is likely the last time you'll need it". And he's probably right.
Still, I'd never seen the tool advertised anywhere, its function is not easily
duplicated by any other tool or combination of tools, and I know enough people
with BMWs now that it might benefit someone at some point. So perhaps I'll
splurge. It wouldn't be the first time.
Before leaving for the office I asked my tech how much the tool cost but he
couldn't remember offhand. Plus, he rebutted "there's no point in buying
it...this is likely the last time you'll need it". And he's probably right.
Still, I'd never seen the tool advertised anywhere, its function is not easily
duplicated by any other tool or combination of tools, and I know enough people
with BMWs now that it might benefit someone at some point. So perhaps I'll
splurge. It wouldn't be the first time.
Oil Service
My trusty maintenance schedule spreadsheet indicated that my last oil service occurred at 197986 miles, or 6174 miles ago. Since my last oil service occurred at mid-cycle, the green service indicator bars had long since extinguished and the yellow, red, and "Oil Service" indicators were now illuminated in their place. So in spite of a 45 degree temperature and bone-chilling wind with gusts to 40 mph I took an opportunity today to conduct a long overdue oil service.
Since I addressed my concern of lead wear with the last oil service I had no plans to take a sample this time, so this oil service turned out to be faster and less expensive than usual. My homemade clip lead tool allowed me to hold pin 7 of the 20 pin diagnostic connector to ground for three seconds as required to reset the service indicator and a turn of the key resulted in oil pressure in about five seconds. Another task completed in textbook fashion.
Mileage: 204160, Parts: $40, Parts Saved: $5, Labor Saved: $80