


Saturday, June 25, 2011
Door Handle Assembled
When the new driver's door handle assembly came in I found it in the expected condition and, best of all, my key turned the lock so I knew they had coded it correctly. Still, something didn't look right, however. I managed to kick a few extra synapses out of their deep slumber and then realized that the handle assembly does not come with the two microswitches required to complete the overhaul.
The first microswitch meshes with a cam on the rotating lock assembly and performs two functions. First, and most obviously, it triggers the central locking system to lock all doors when you turn the key all the way to the right. Second, if you hold the key in that position for more than a few seconds, it activates "convenience close" and closes all the windows and the sunroof. The other microswitch contacts a portion of the door handle so that when you lift it the interior lights turn on and (assuming the temperature is at or below freezing), the lock heater is activated. And yes, if you didn't know that, try it next winter when your lock freezes. Mine did several times last winter and it was great using this feature. Less than five seconds after pulling the handle the lock turned. I love it. Anyway, back on topic...
I pulled two part numbers off the side of the microswitches. The handle microswitch turned out to be 61311387028 and the central locking system part was 61131387631. While the parts guys easily found the *028 part, they could not initially find the *631 part in the system. Some searching ultimately revealed the part had been superceded by 51218208423. If you know the significance of the first few digits of BMW part numbers, that last one should have jogged your noodle. If you look up the *423 part in the book, the depiction of the part is nothing more than the microswitch itself (no pigtail or other info) and the description is "Left microswitch door catch". When the microswitches came in, the *028 part looked exactly like the one in my car but the *423 part looked like it belonged elsewhere on the car, and indeed it does.
If you look closely at the door post that is installed in the body there is a small button of sorts that is triggered as the door swings by it on its way to mate with the car. This is designed to cause the window to lower a very small amount so that the overpressure that would normally result from closing the door does not cause the window to bend slightly outward and contact the body trim. It's a complicated solution to a common problem with frameless doors, but it works.
In any case, the *423 part came with the microswitch embedded in an assembly needed for the door catch application so it threw me for a loop until I realized that this was BMW's answer to improving the efficiency of their inventory. The microswitch and pigtail itself can be used in either application -- it's just that it must be removed from the assembly needed for the door catch application. So that's what I did.
One other thing to look out for, assuming you're crazy enough to pull this thing apart is that the small plastic bushing (Arrow 3 on picture) is not available separately from what I can tell and is most certainly not included with the operating rod that connects to it. My bushing was not inserted in the location shown and as a result the operating rod was nearly worn half way through. The bushing shown came installed as pictured in the new handle assembly and I ordered a new operating rod to replace the worn part.
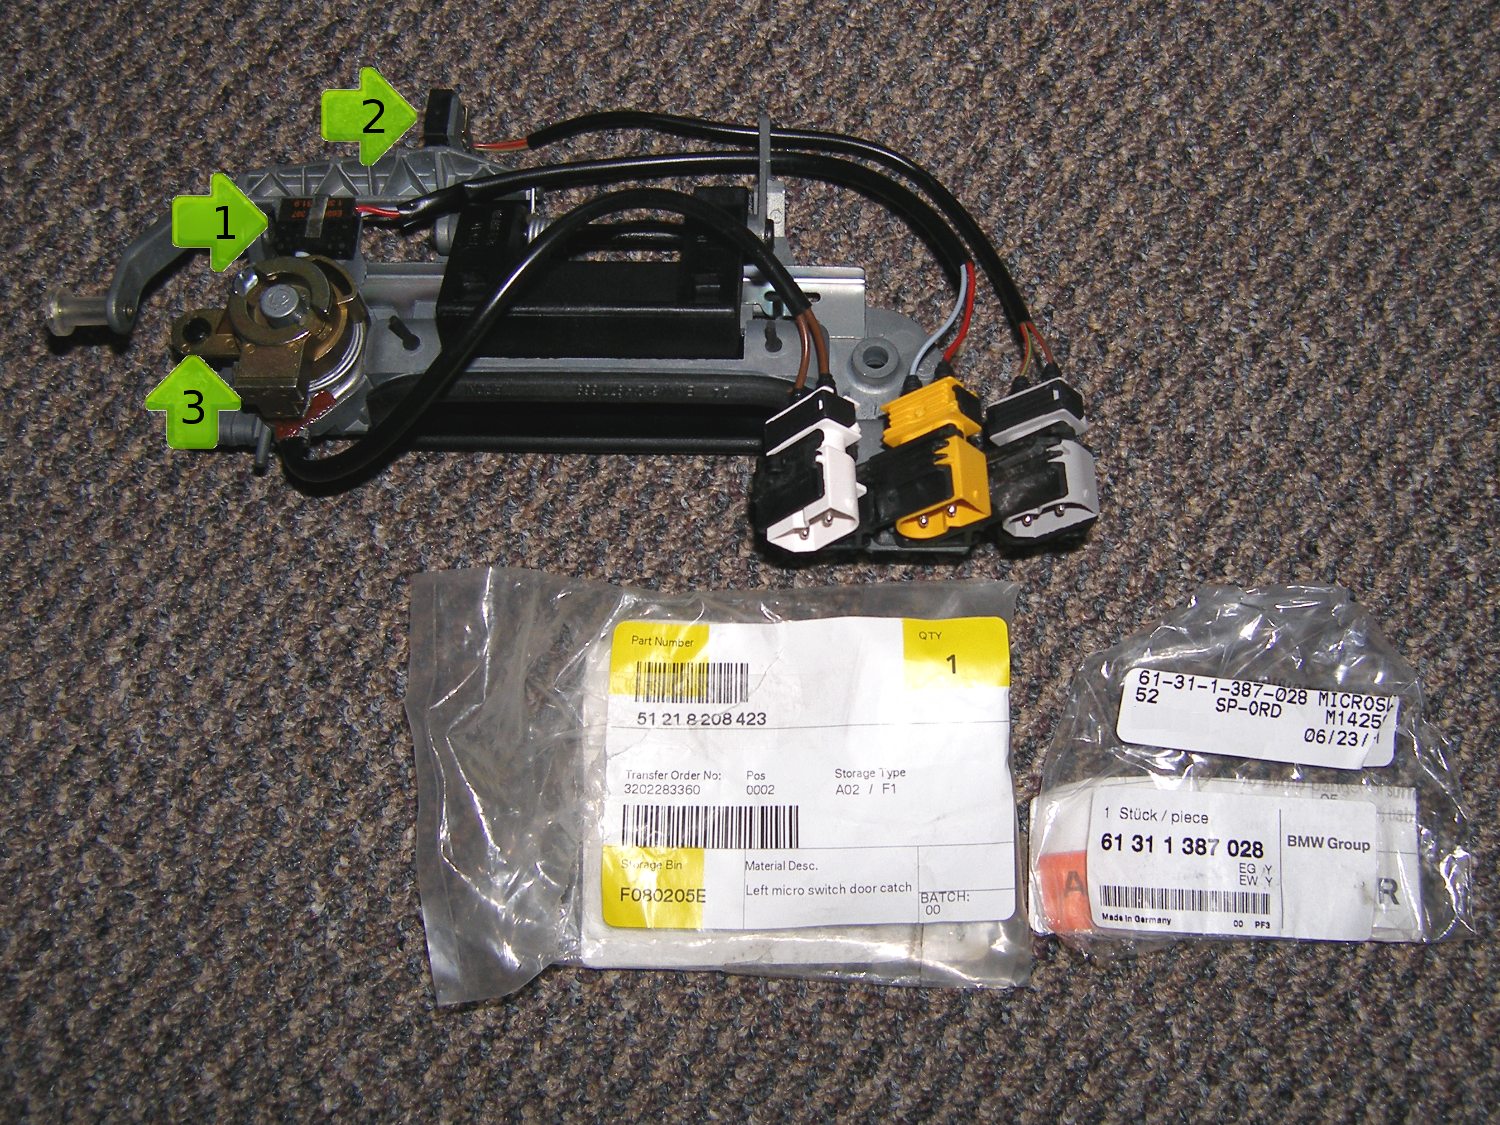 Closeup of rear of driver's door handle assembly. Arrow 1 is part *423, Arrow 2 is *028, and Arrow 3 is an essential grommet supplied with the handle. |
 My local dealer gets new Rotary inground lifts. I have nothing against above-ground lifts but these lifts seem more stable by design. |
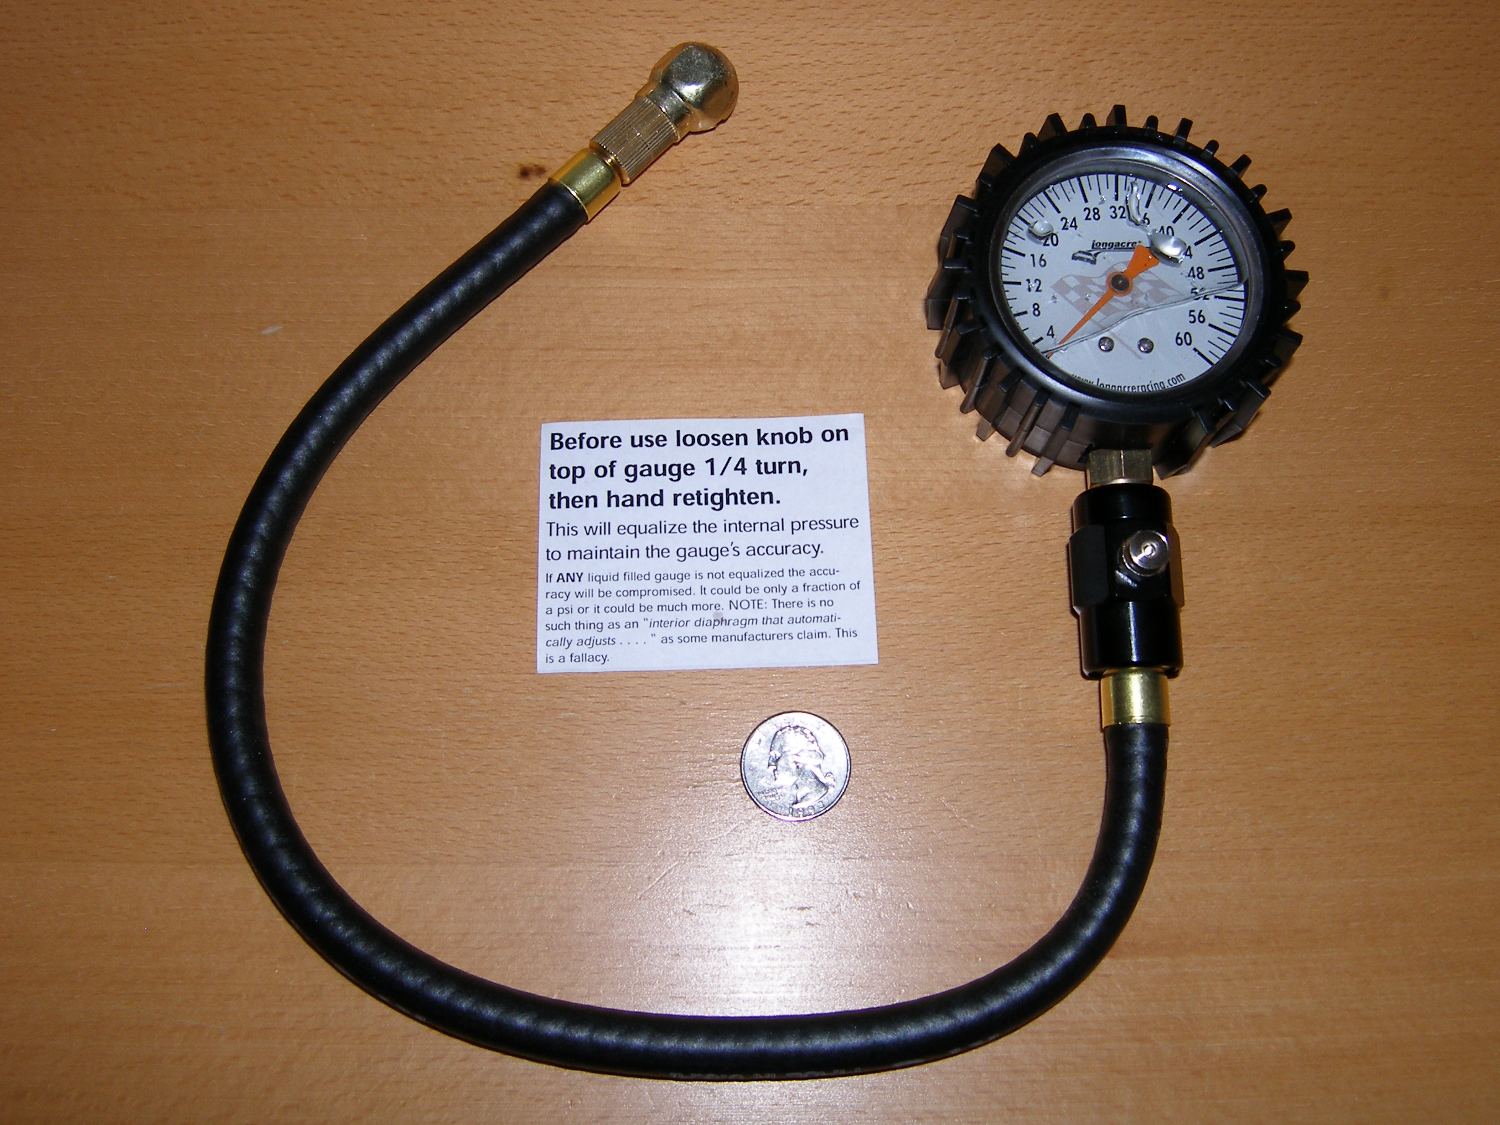 Longacre 50403 tire pressure gauge with warning / instructions for use. Note: the gauge is not broken. It is only partially filled with liquid by design. |
If you're wondering why there are two separate part numbers for what on the face appear to be nearly identical parts, you asked the same question I did. As confirmed with a volt ohm meter the *423 part is normally open and the *028 part is normally closed. Simple, eh?
Construction Here and There
As I've been visiting my dealer on a regular basis in the last month I've been watching the construction at their shop with interest. They pulled the old concrete floor out, replaced all the soil contaminated with hydraulic oil from the old-school lifts, and just recently started setting the tubs that enclose the new Rotary in-ground lifts. As you can see from the picture, the installation is pretty much as one would expect: they dig a deep hole (about seven feet from what I can tell), suspend the lift to the height of the finished floor and then backfill the hole with concrete to encase the lift. The plastic "tub" shown is completely sealed and indeed Rotary cites that as a selling point. If the lift starts leaking hydraulic oil, it will be retained in the tub and thus protect the environment. Of course, I'm pretty much a fixture around the dealership so the running joke is that one of the bays has my name on it. Access to the lift in my brother's toybox notwithstanding, I could only wish that were the case.
And speaking of the toybox, after a bit of a slow start, construction is proceeding nicely now. The foundation is up, multiple utility trenches have been dug 300' back to the house and the provisions for utilities including a natural gas generator have been laid and approved. The "bathtub" consisting of 2" thick foam insulation and a vapor barrier has been installed and the position of the lift has been determined. A couple 18" deep and wide holes have been dug directly below the post locations so this, in combination with a six inch slab, will effectively put two feet of reinforced concrete below each lift post. Complete overkill, of course, but it seems a wise thing to do considering we'll be lifting 10000 lb trucks on occasion. Pex for the heated floor is next and after that is approved the slab will be poured. From there, basic framing should take about a month. After that, it's anybody's guess as to how long it will take to wire the building and generally prepare it for use, but the hope is that it will be ready in some form by the end of August.
Longacre Racing Analog Tire Gauge
I have long equipped my cars with inexpensive ($15) electronic tire gauges to quickly verify tire pressure on the road, but wanted a high precision gauge to use in both my automotive and aviation pursuits. Some searching revealed favorable reviews of the Longacre Racing Model 50403 gauge so I decided to take a chance. I received the unit today and am pleasantly surprised at the build quality and features of this unit:
- 0-60 PSI range on a large (2.5"), easy-to-read, glow-in-the-dark face
- Liquid filled (helps maintain accuracy and prevent damage due to vibration or shock)
- Comes with a rubber gauge guard (helps absorb impact if dropped)
- After pressure is sample, the gauge holds the reading until the release button is pressed
- Hose is approximately 18" long and flexible, made of US materials
- Ball chuck rotates to make it easier to mate with the schrader valve
- Replacement parts including new glass are available in case you break it
I asked Longacre where the gauge is made. They responded "the gauge itself comes from off shore and all other components are from the states. We manufacture the bleed assembly in our Monroe, Washington facility. All repair work is done in Washington as well."
While at $46 I wouldn't call it inexpensive, it's a quality, accurate piece that should be with me for a long time. If you're wondering, I bought mine from Amazon.
Mileage: 208880, Parts: $60, Tools: $46