


Saturday, November 19, 2016
Evaporative Emissions System Expansion Tank Replacement
On Wednesday I checked weather and realized that the highs in the low 60s were bound to give way to highs in the 40s this weekend so I decided to get to work on the evap tank replacement project. To get started I jacked up the rear end, removed the right rear wheel, and finally the wheel well cover to expose the tank and associated plumbing.
The tank is held to the car with two plastic nuts and a protrusion / nipple molded into the rear of the tank that mates with a hole on a bracket welded to the vehicle body. Mostly because plastic doesn't rust the nuts were removed with ease. When it came time to pull the tank out, however, I found that the stud on the tank that mates with a flange on the filler neck would not clear the flange, so I had to loosen the filler neck. It is secured to the body with a single M6 nut and integrated fender washer. This nut was quite rusted, as was the mating stud, which is pressed into a flange that is welded to the body. I cracked the nut loose as far as I dared, gave it a good dose of PB blaster and left it to do its magic.
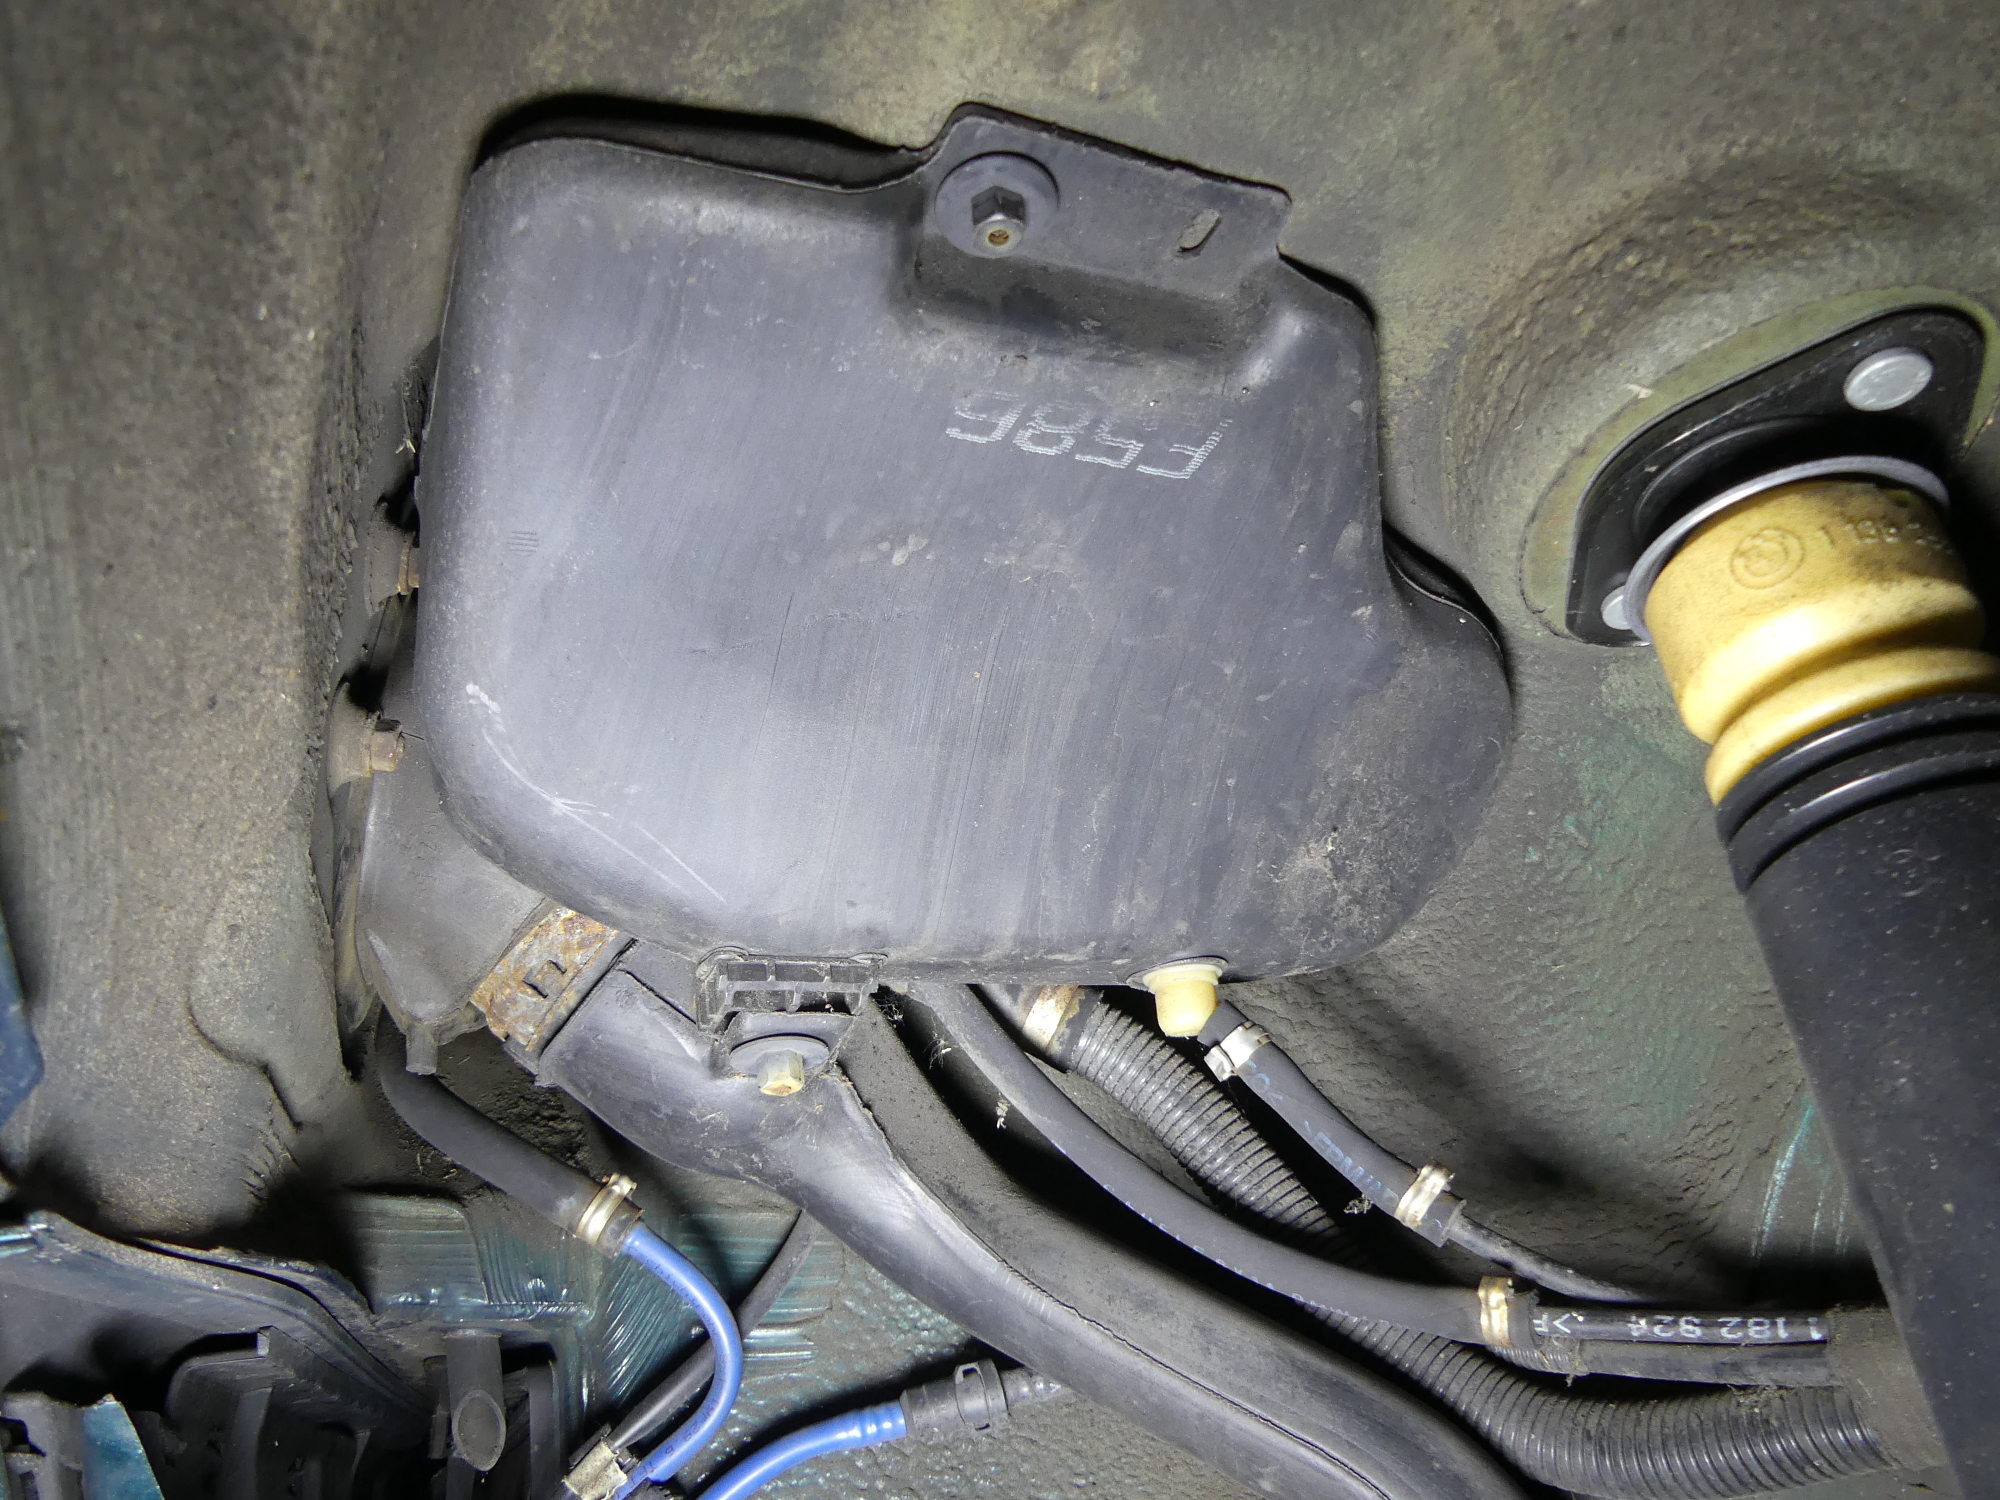 The wheel well cover (chip guard) has been removed to expose the existing tank. |
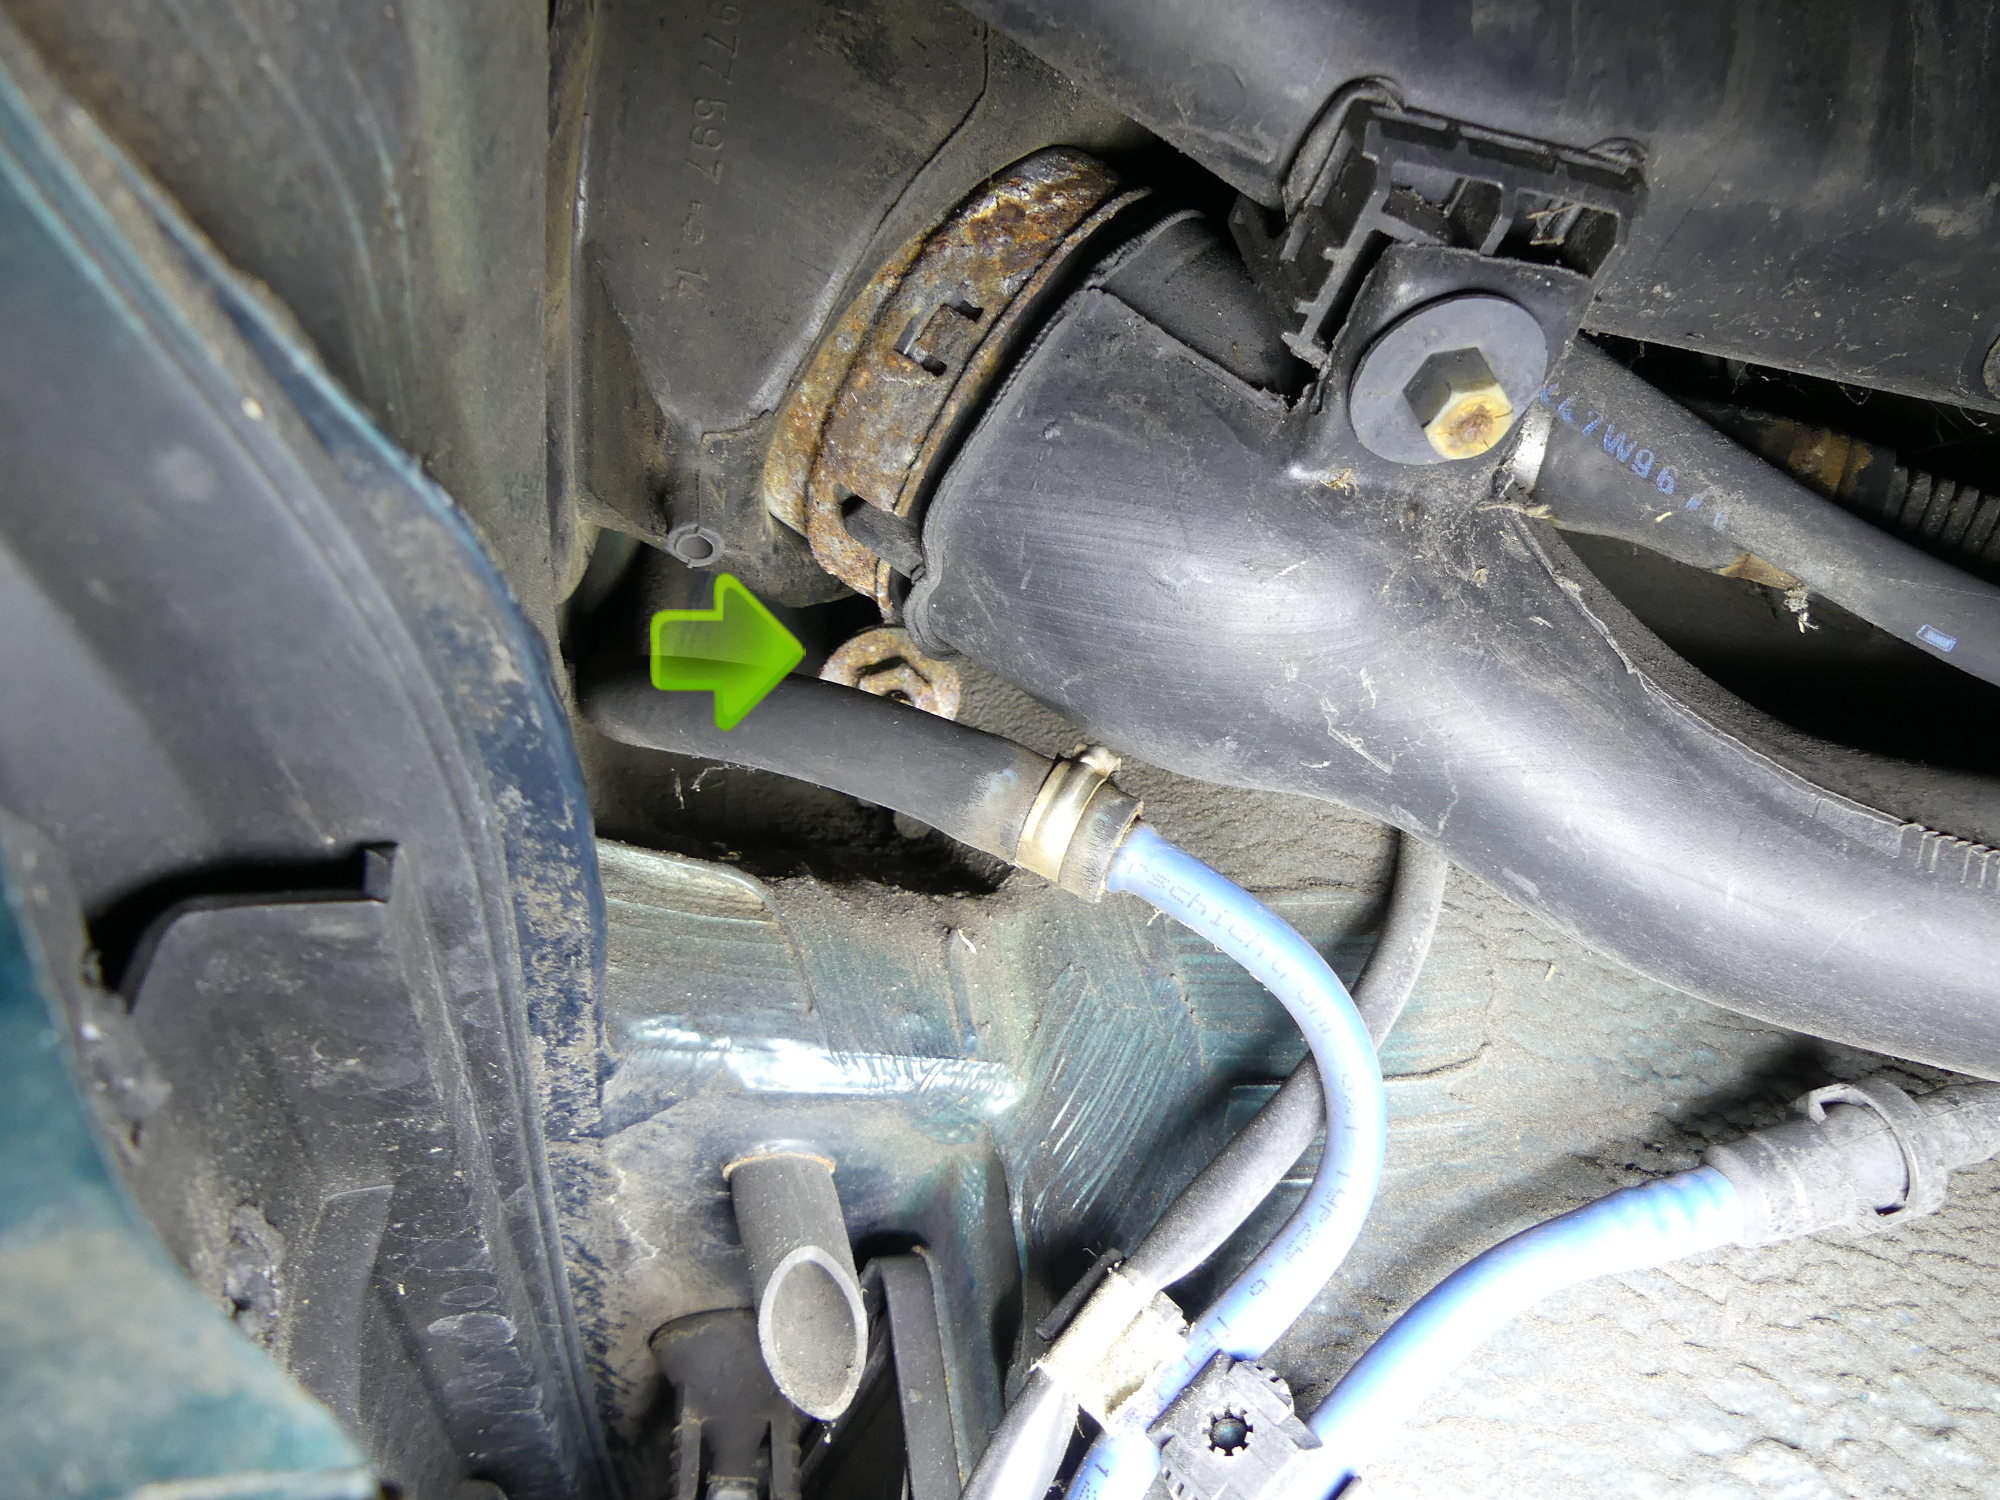 The arrow points at the nut that secures the filler neck. This must be loosened if not removed entirely to remove the tank. |
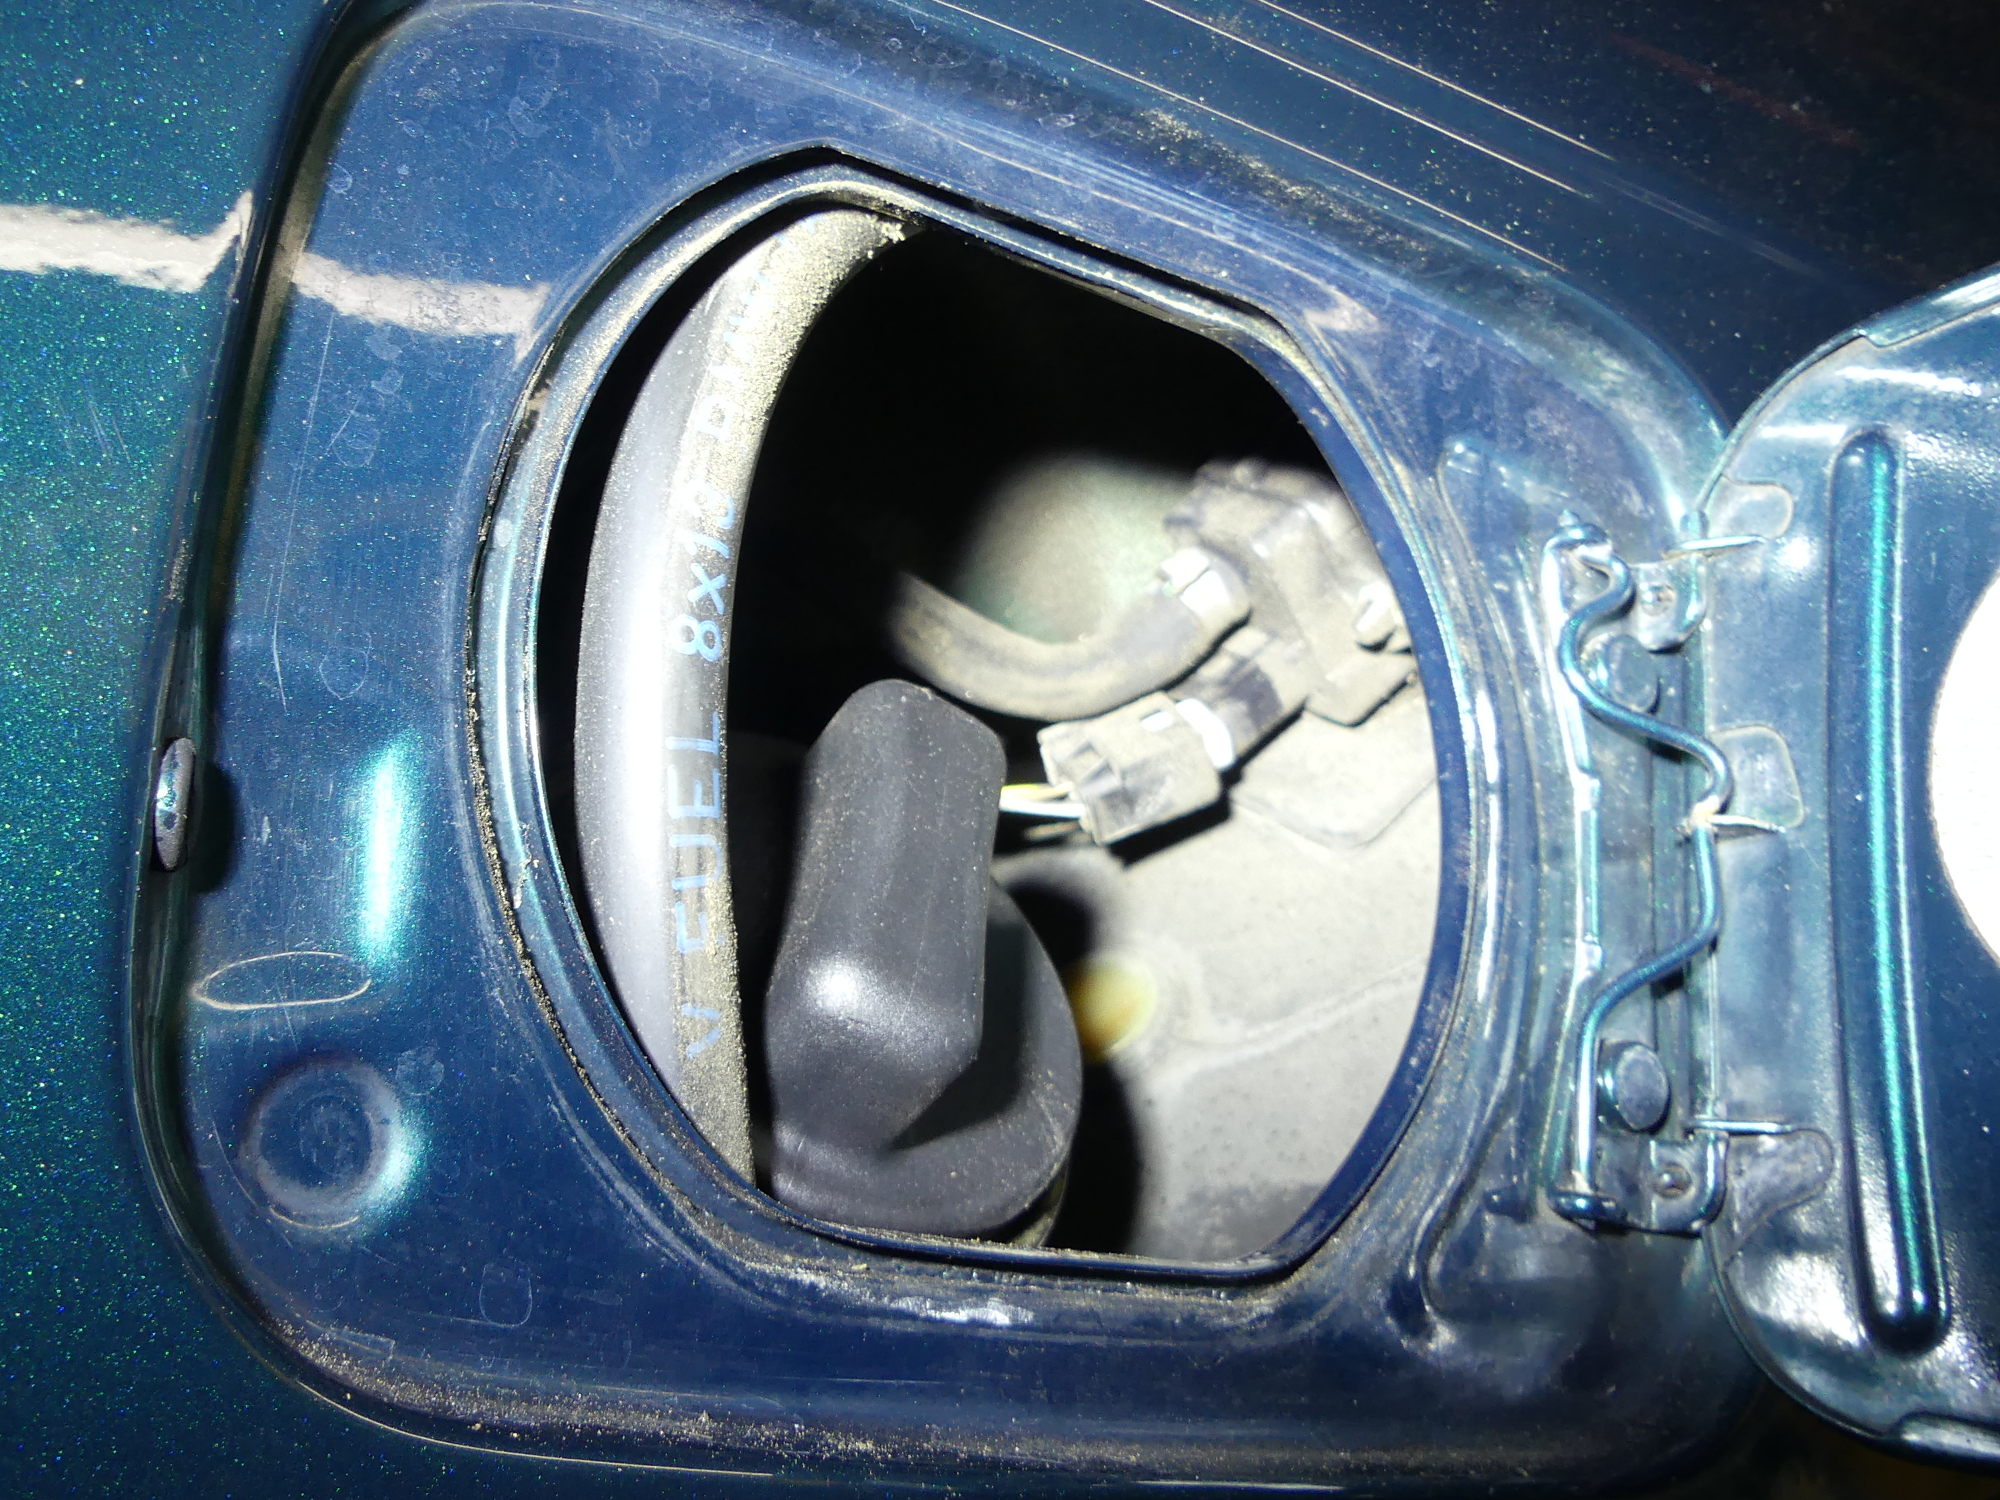 After removing the rubber seal around the filler door/neck I detatched the electrical connector leading to the pressure sensor. |
Coming back a while later I still found the nut quite stubborn, to the point that with every quarter turn I saw the entire flange bending under the strain. I cringed every time I twisted the ratchet and tried not to think of the collossal mess I'd create if the stud (or worse, the entire flange) broke off. The nut did come off successfully, however, and I set it aside to be reused, as I (foolishly) did not buy another nut. When I inquired about it during a subsequent parts order I learned that it would have to come from Germany, which meant a two week wait. Word to the wise: if you do this job, consider that nut essential to your parts order, and be sure to order well in advance.
When I tried to pull the tank down I noticed that it came away from the body a few inches, but then stopped. I then realized I needed to open the fuel filler door and remove the rubber seal that surrounds the filler neck. That exposed the pressure sensor electrical connector and hose. After I unlatched the electrical connector I found the tank came down a bit more but then stopped again. It was clear at this point that the molded hose that connects the sensor to the filler neck was holding things up.
At this point I was not bold enough to just start cutting hoses to free the tank so this meant I had to unlatch the sensor from its mounting flange on the tank. Looking at the new tank I saw that the barbs molded into the tank mounting flange were flat on one side. I concluded that to release the sensor I would have to simultaneously push the tip of the barbs toward the tank and then attempt to pull the sensor from the mounting flange. This is easier said than done in close quarters but a thin flat blade screwdriver wedged gingerly between the flat base of the sensor and the mounting flange, along with a few select explicatives, got the job done.
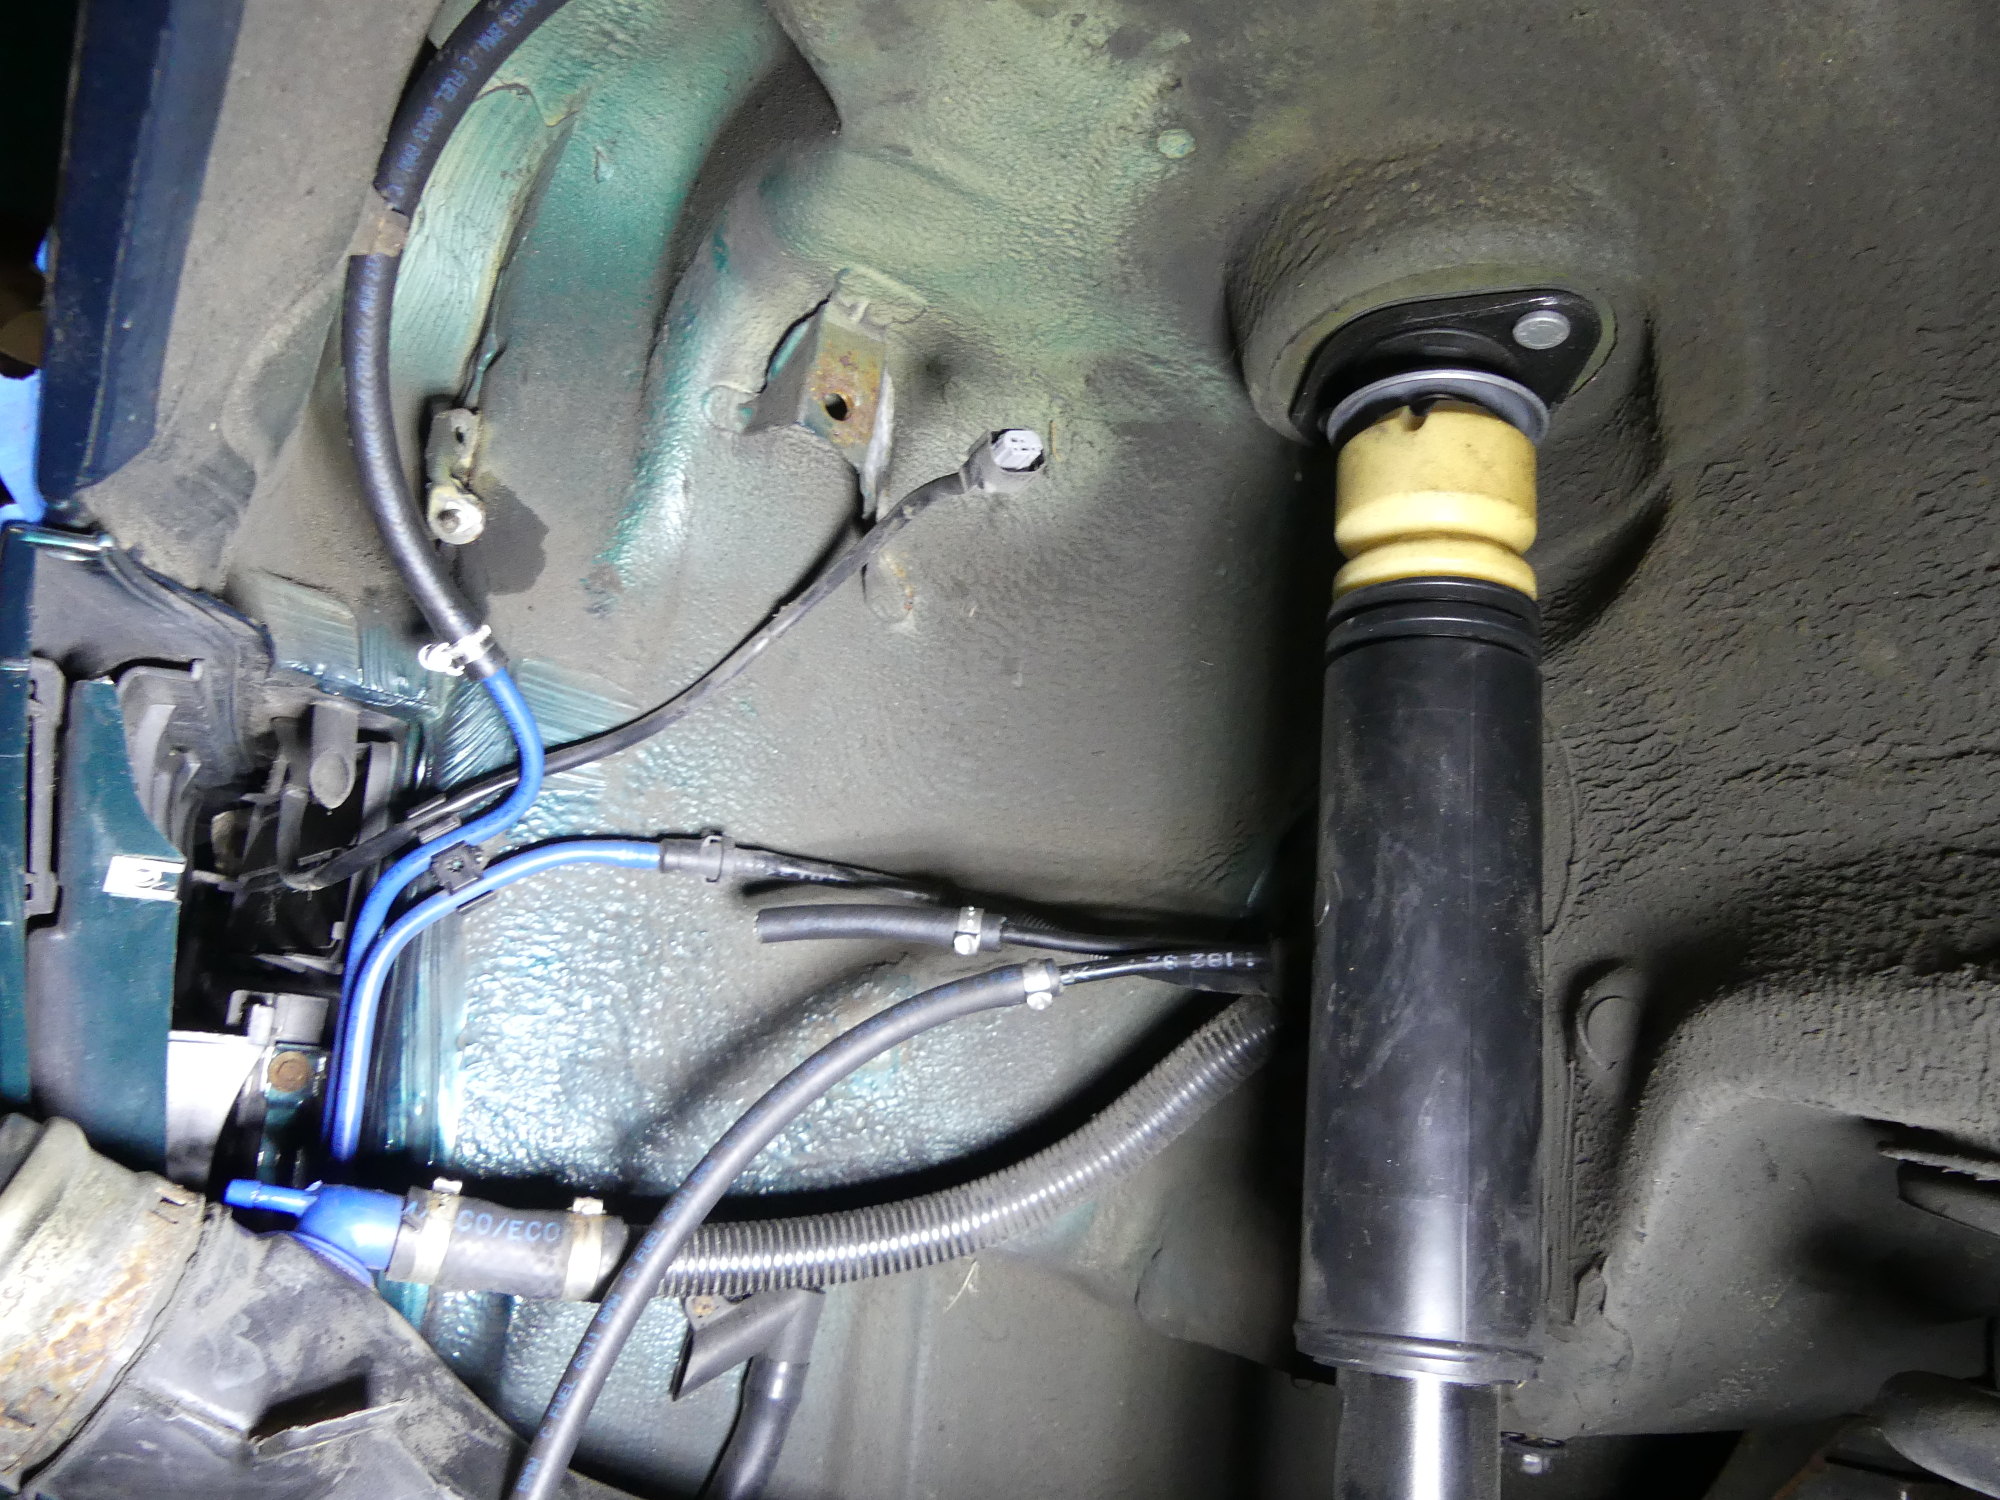
 With the tank lowered somewhat the hoses on the top become accessible. Knowing what I know now I would just cut all three hoses and remove the remaining hose with ease. |
 Here I've installed new 8x13mm and 6x11mm fuel hose with a combination of BMW's excellent worm drive clamps and one-time-use compression clamps. |
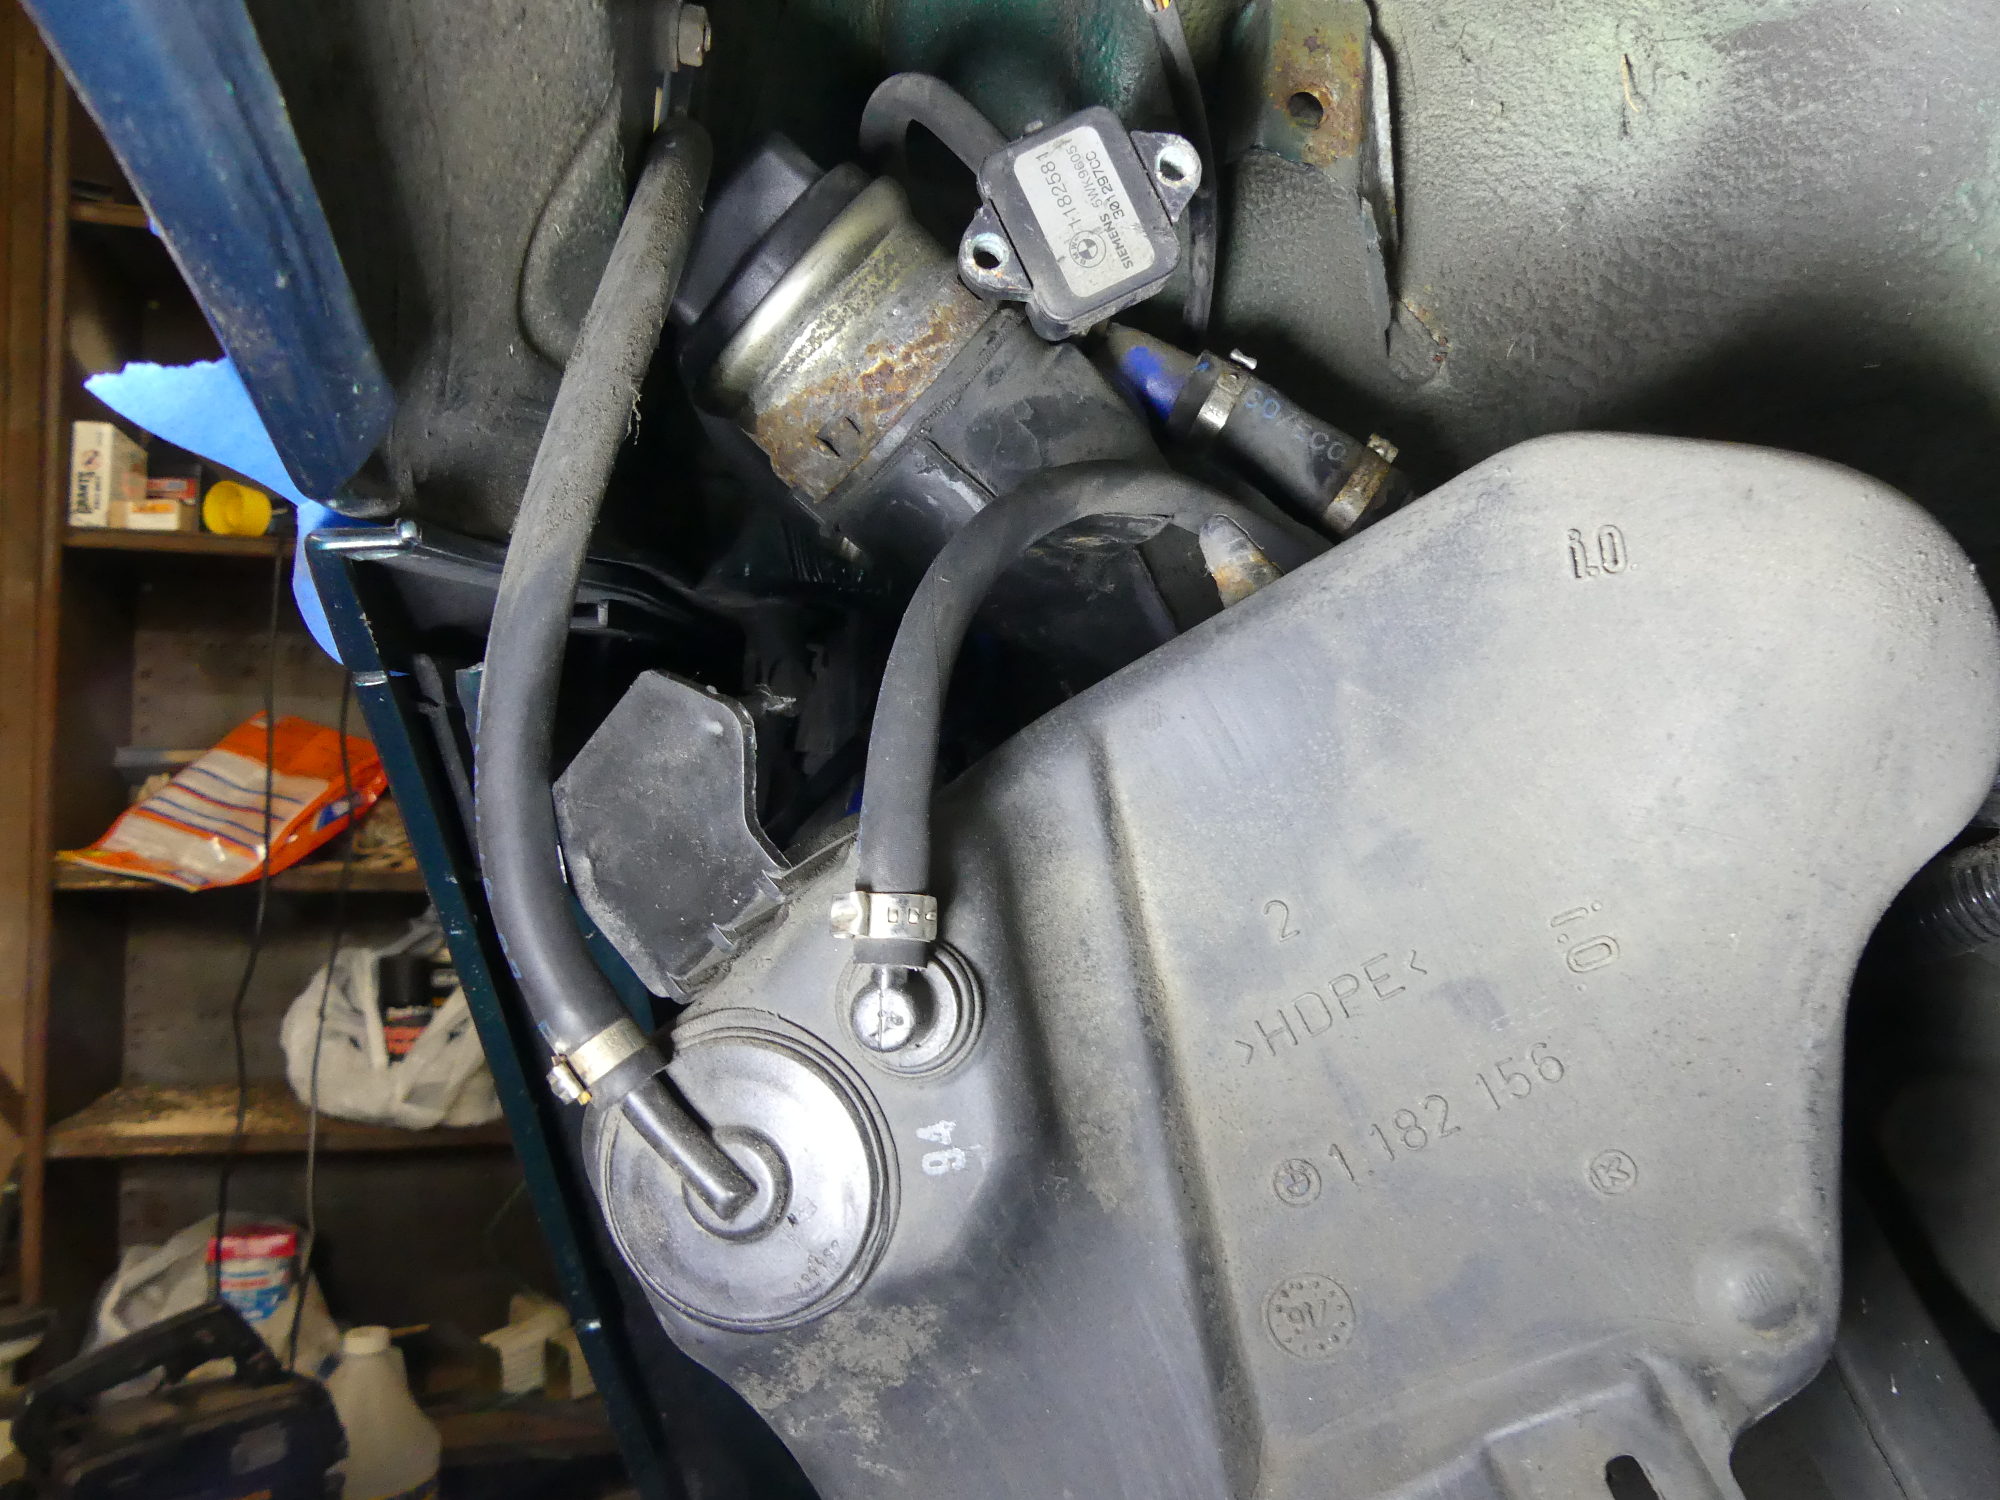
 I replaced the molded hose for the pressure sensor (BMW part number 16-14-1-183-148) but reinstalled the existing sensor. The one-time-use clamps are carefully compressed with a nipper tool. |
With the sensor disconnected I was able to pull the tank down a bit further to expose the hoses on the top of the tank. To remove the one-time-use clamps I used a pair of diagonal cutters to cut the raised portion of the clamps. Then I used a razor knife in addition to the diagonal cutters to remove enough hose material as required to release the hose from the nipples. This wasn't particularly easy -- the hoses were quite stuck to the nipples as I thought they might be, but I managed to get the job done. In retrospect, given that I had new hose to replace the old, if I did this job again I would just cut the old hoses a couple inches away from the tank and be done with it. Rest assured, the hoses won't just pull off any of the nipples so if the tank must be replaced, so must the hoses.
I then measured the old pieces of fuel hose and cut new hose to match. Knowing that BMW most likely scrimped and cut each hose to the absolute minimum length required I decided to add about 1cm to each. That turned out to be a good idea on all but the shortest hose needed for the bottom nipple. I was later forced to trim this back to the original length because the plastic hard line that leads from this hose to the fuel tank is apparently secured at the bulkhead somehow, so it will not slide in or out to compensate for any difference in length of the hose and eliminate the kink in the line that would otherwise result.
When it came time to install the new hose I realized almost immediately that the new hose rubber sticks just as aggressively to the mating hard lines and nipples as the old hose did, making installation difficult. To the point that pressing the rubber on even 1cm or so resulted in lots of disconcerting squeaking noises. I took this as a warning to stop and I was glad I did, as pulling the hose off even that initial 1cm proved to be quite a pain in the ass. Thinking for a moment I grabbed some silicone paste lube and applied an almost imperceptible amount (a thin film, really) to my finger and then transferred it to the mating surfaces. The hoses then slipped on relatively easily and in one case where I had to reposition a hose it came off almost as easily (the barbs were fighting me during removal). Incidentally, I'm not sure silicone paste lube is the right tool for this job but it is what I had available and it worked.
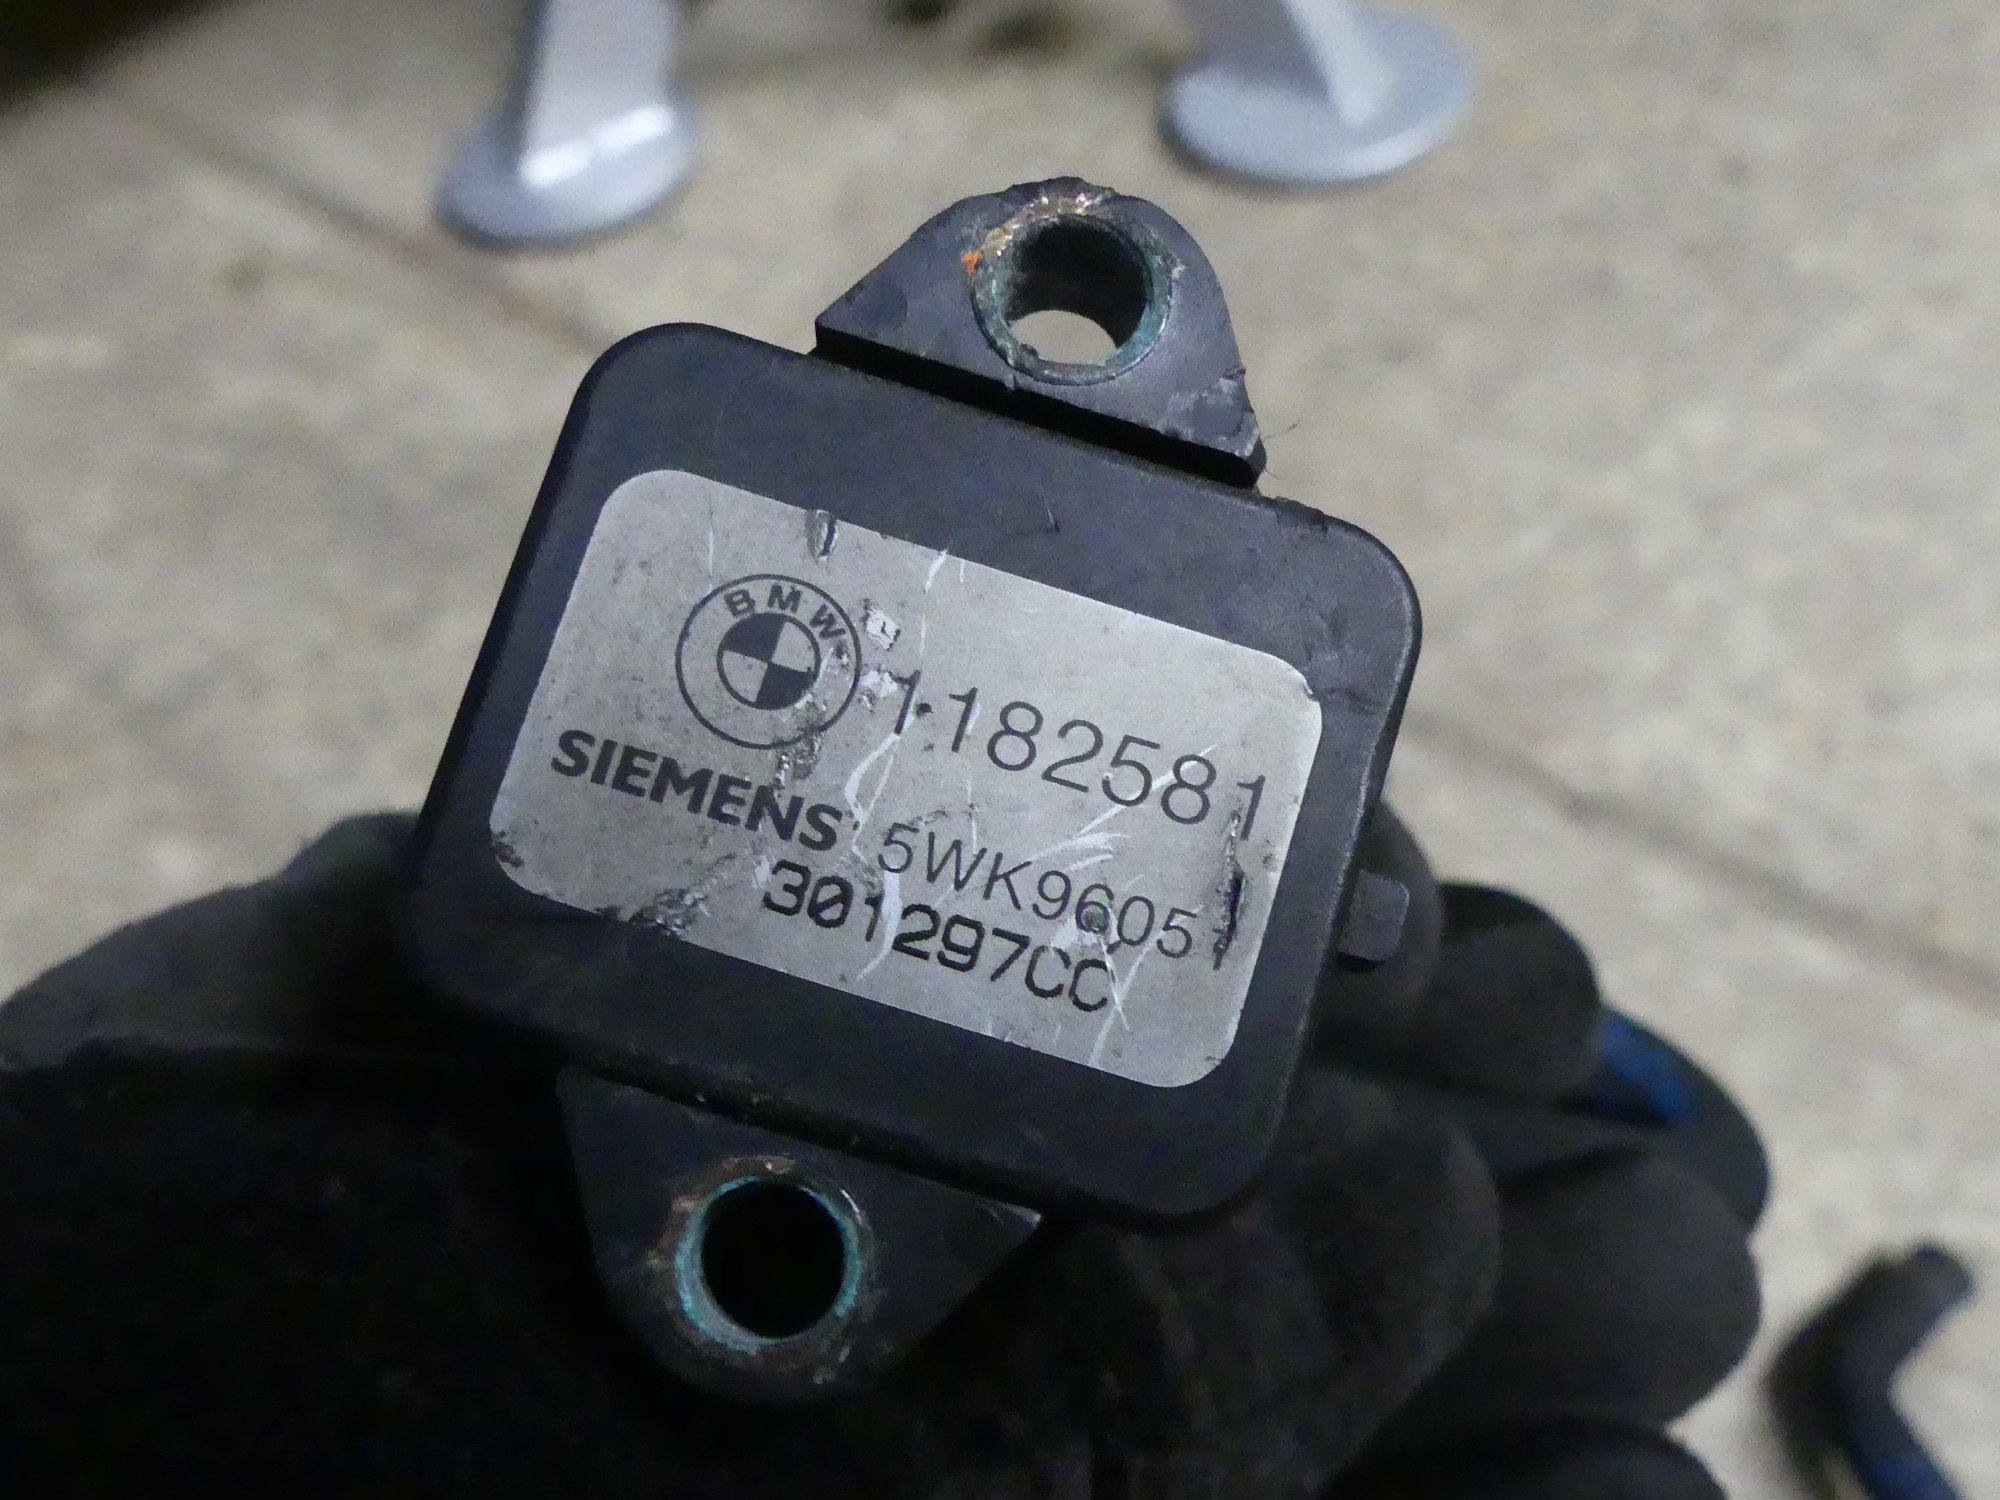 A simple closeup of the pressure sensor part number, just in case this needs to be replaced at some point. |
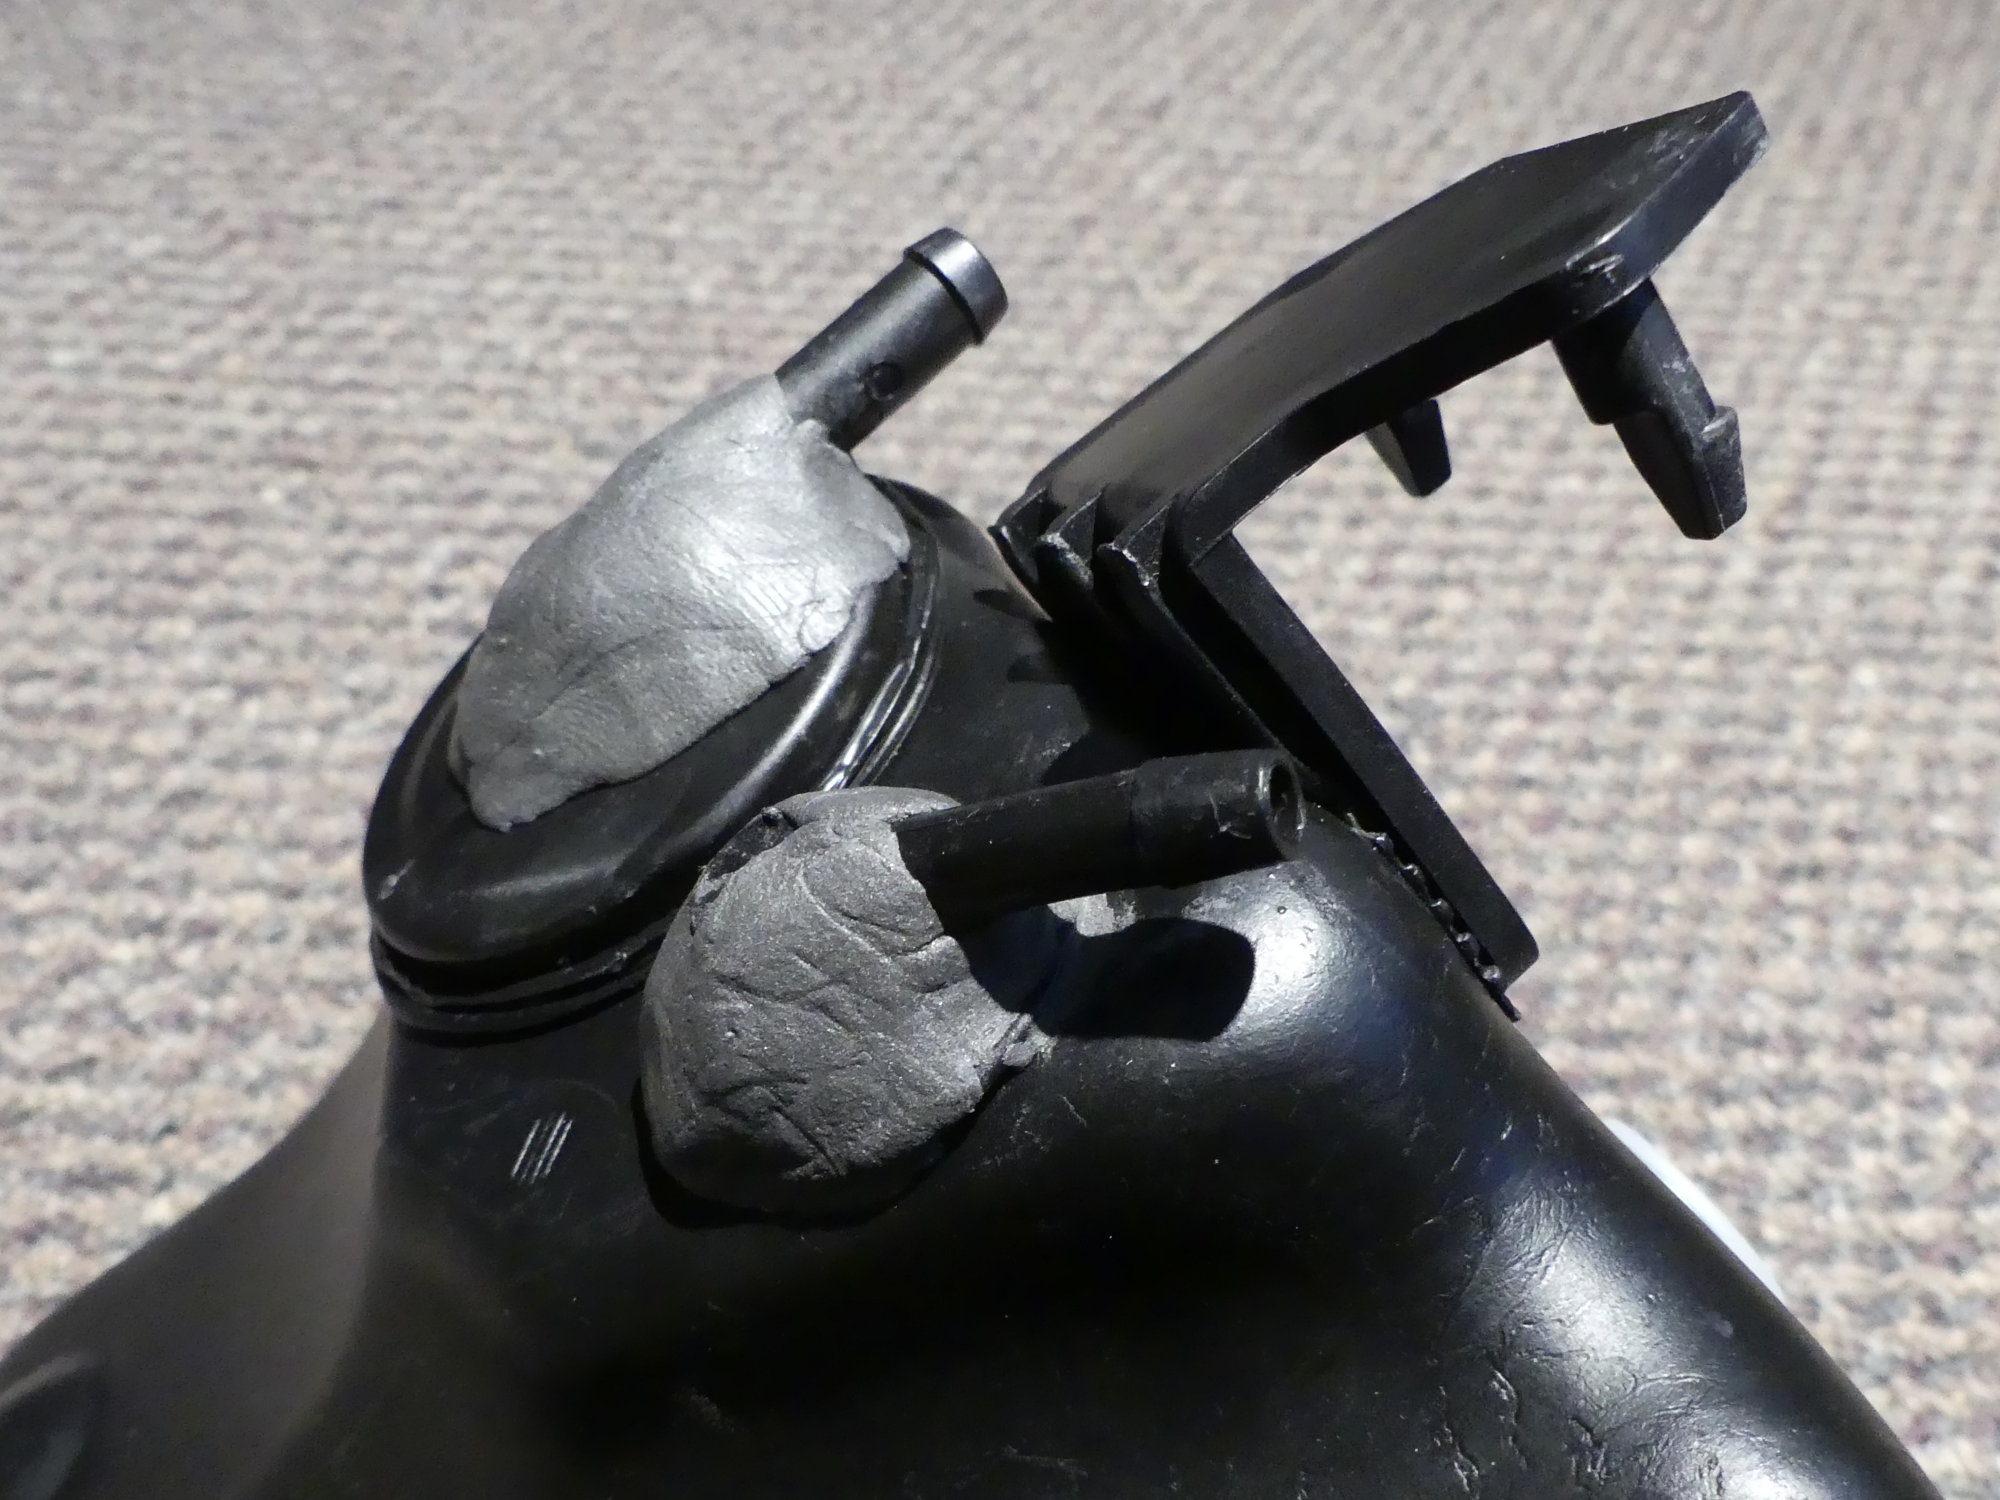 I used JB Weld's "SteelStik" to reinforce the nipples on the new tank. I doubt I'll own the car long enough to see these nipples break. |
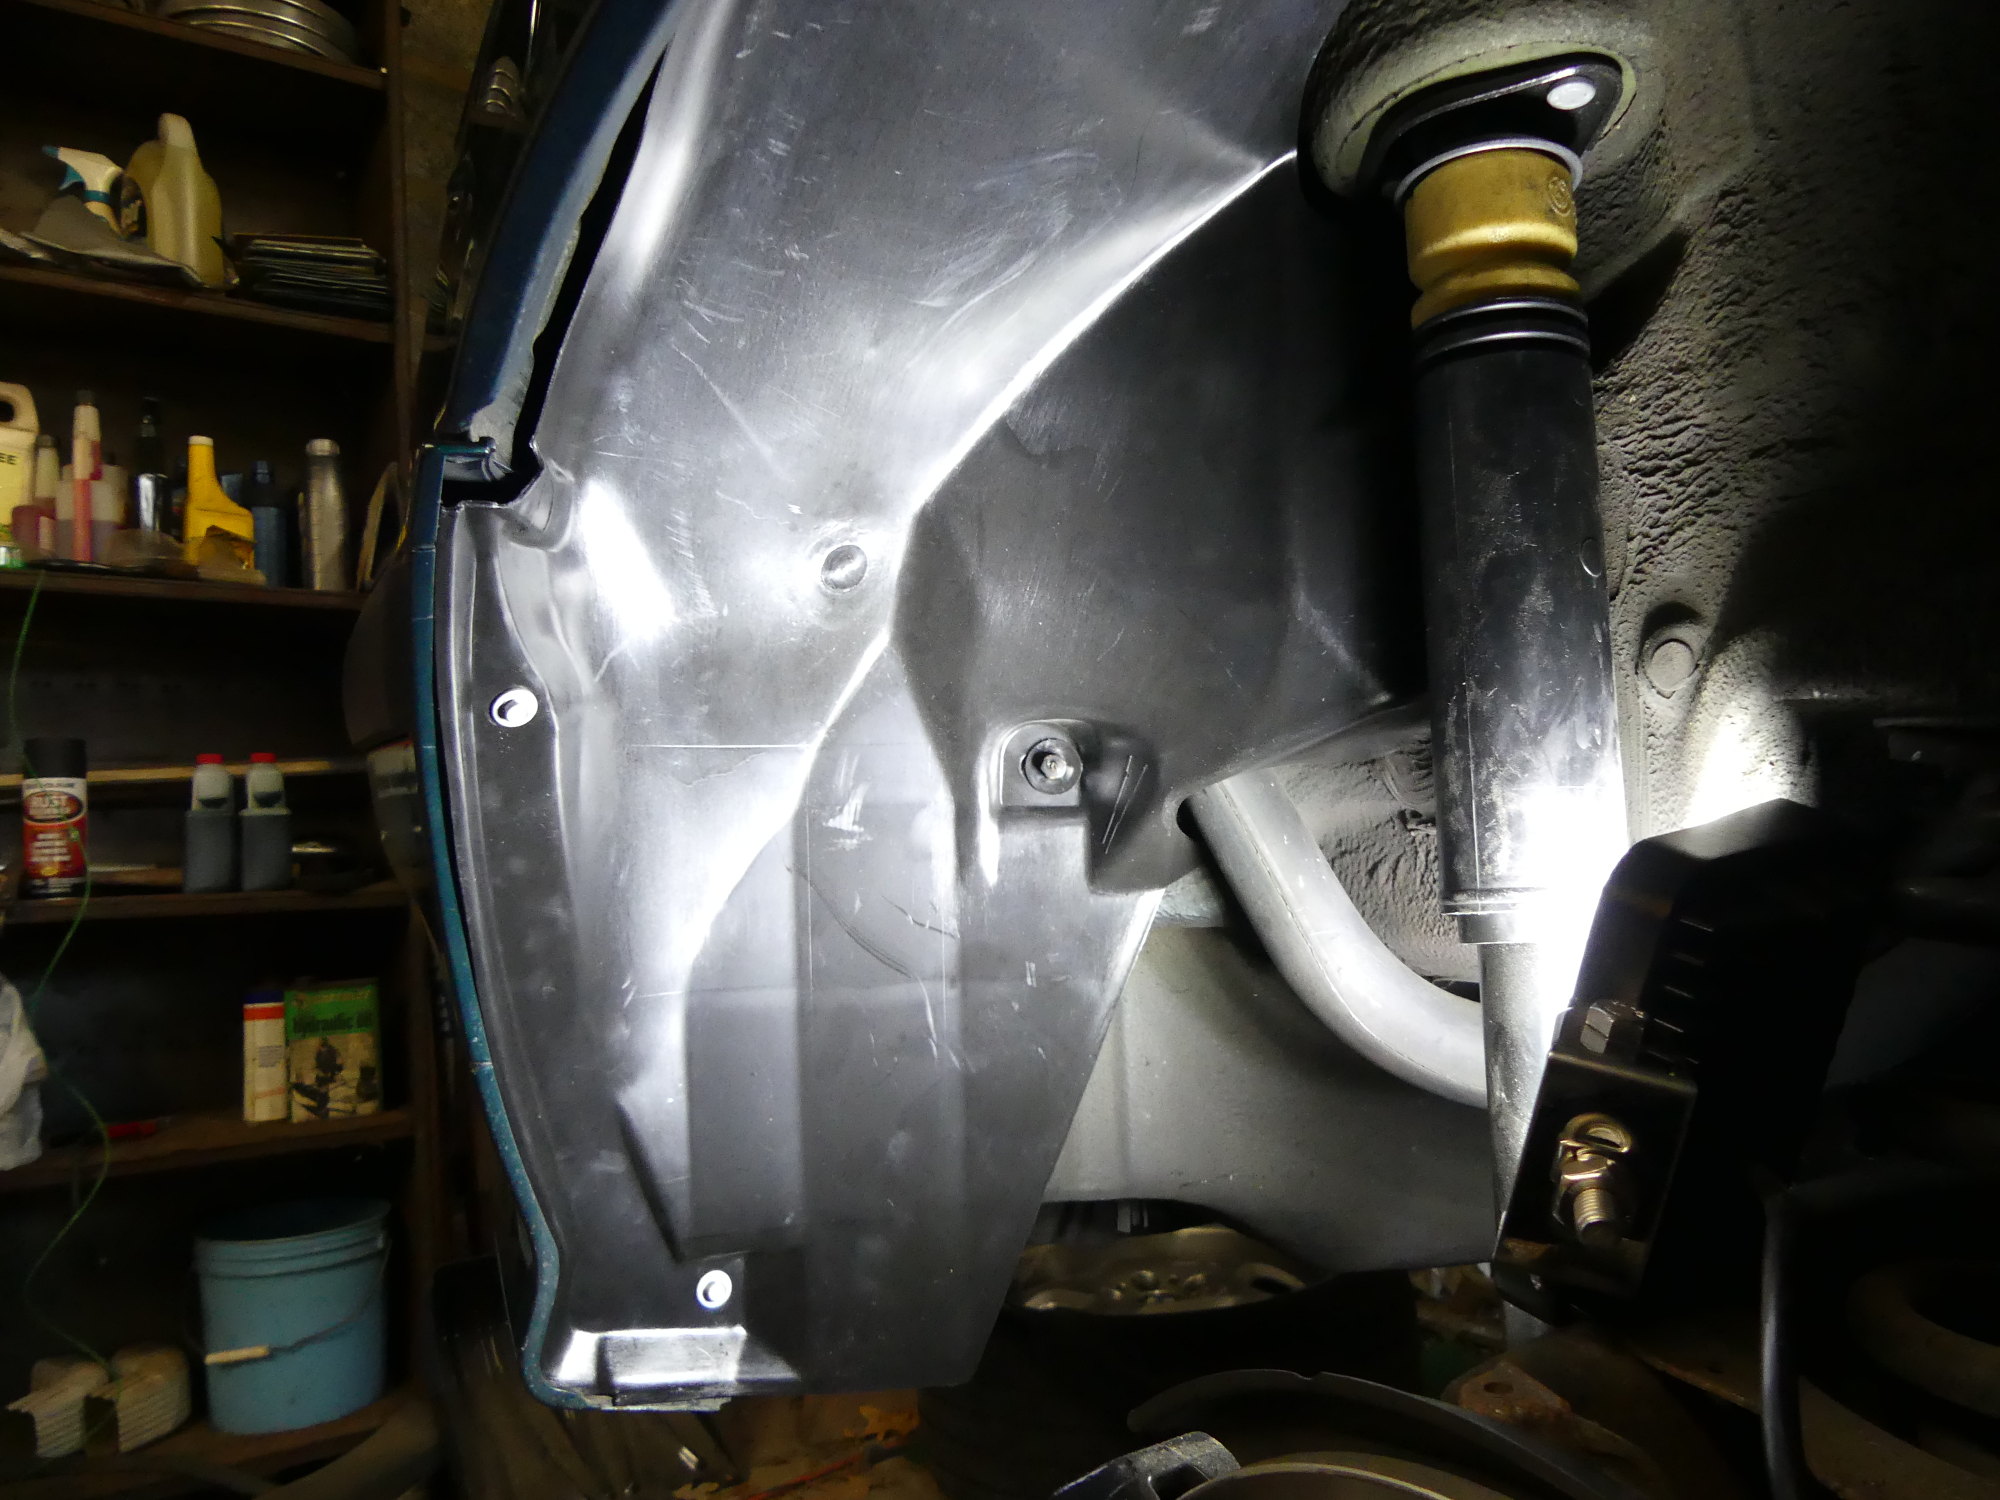 As a new wheel well cover was available for a reasonable price so I decided to install one to finish off the task. |
It was around this point that I realized I was short a few clamps so I had to stop work and call the dealer to place a parts order. While I waited for those clamps to arrive I decided to pick up a tube of JB Weld brand "Steel Stik" to use as a prophylactic reinforcement of the nipples on the top of the new expansion tank. This material is essentially JB Weld in a clay-like resin format. Once the two materials were thoroughly mixed I applied it to both upper nipples and set the tank aside to fully cure, which happened within an hour or so.
Today the clamps came in and I wrapped up installation of the tank. I had to pay particular attention to the 6x11mm hose that is routed to the top of the tank to ensure it would not rub up against any other clamps or some sharp edges on the body, but aside from that the task went pretty much as expected.
I picked up a new purge valve and expected to install it today but realized I could not do that without replacing the hose that attaches it to the intake manifold. I decided to order the new hose and reserve installation of the new valve until I pull the engine for overhaul in the spring, since I'll have the intake manifold off at that point and everything will be easier to install.
If you're wondering, the CEL is still off, but the fuel level is currently less than 3/4 and I've only driven the car once since I completed installation of the expansion tank. Only time will tell if this has fixed the problem.
Video of the highlights of this project can be viewed here.
Mileage 264650