


Saturday, July 1, 2017
Yet more drivetrain overhaul supplies, tools and prep...
High Temperature Engine Paint Options
Concerned with the very high cost of Eastwood's 2K Aerospray high temperature paints I decided to do a bit of additional research on high temperature paint options before I ordered anything. Here are my high level opinions and some facts about each of the paints I found, in order of preference:
-
Good to 650F. Catalyst based. Available only in flat or high gloss finish. $28 per can. Cans are small and, by admission of Eastwood's tech support, do not provide the specified coverage.
-
Good to 550F. Solvent based. Available in flat and satin finishes. About $10 a can. Docs suggest "good" chemical resistance from salt spray, chemicals, gasoline and degreasers. Requires heat curing (200F+) and is reportedly easy to chip / scratch until cured. This is my preferred "low cost" solution.
-
Good to 1200F. Solvent based. Available in flat and satin finishes. They also have a high temperature zinc-based primer. The zinc should bond with the cast iron and serve as cathodic protection (i.e. a rust preventative). No mention of chemical resistance or if it needs to be cured at high temperature (400F+, as is the case with at least one other 1200F paint I researched). No mentions of actual results by customers. Not a popular paint so I'd be taking a lot of risk here. About $11 per can.
-
Popular, but good only to 500F "intermittently". Solvent based. Available in flat, semi gloss and satin finishes. About $10 a can. No mention of chemical resistance, which I can only assume means it has little or none. Hey Duplicolor -- how about providing some data about your products on your worthless website?
-
Rustoleum High Temperature Paint
Good to 1200F. Solvent based. Only available in flat finish, so I can't use this.
At the end of the day I decided to order the Eastwood product. Based on some input from their tech support staff, who admitted that the cans do not provide the coverage indicated on the website, I calculated that I should be able to provide both sides of the block with a couple coats from a single can so that's what I ordered.
Harbor Freight Engine Stand
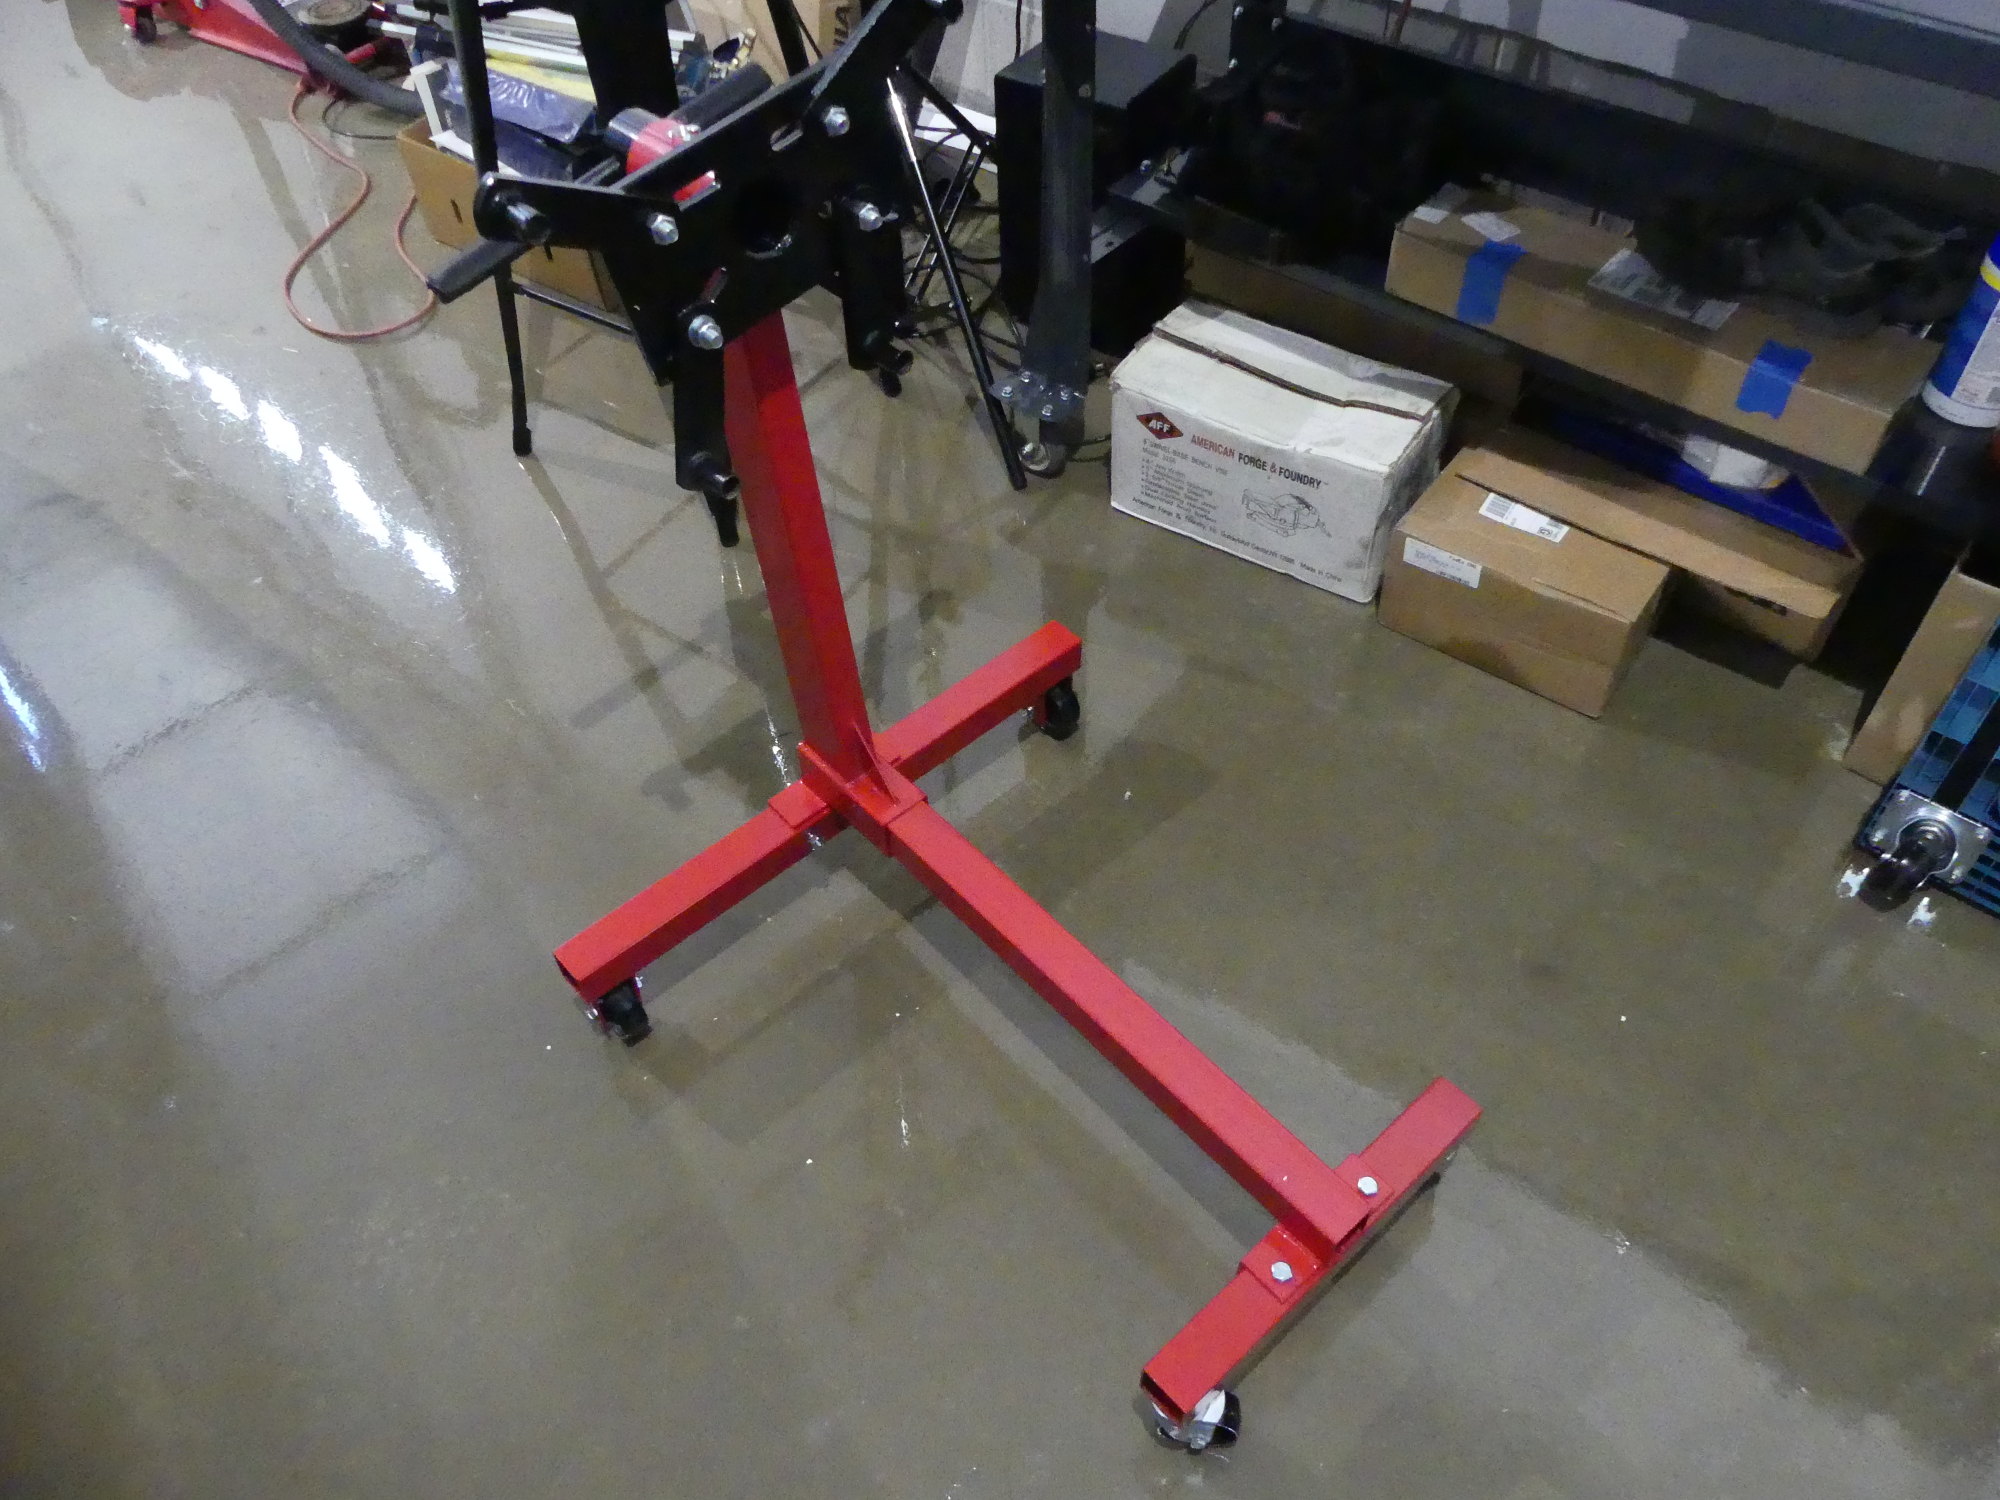
I finally picked up the Harbor Freight 1/2 ton engine stand. While the base of the unit is reasonably well built (or so it appears to be) the welds on the engine mount plate and rotating cylinder as well as the arms are shockingly poor, especially as compared to the Sunex model I inspected at Eppys.
I read accounts of where people complained about the locking pin. Now I understand why. There are two design issues. First, the holes drilled to accept the pin (in both the engine stand frame and the black cylinder welded to the engine mount) are too big, so the engine mount portion rotates by a good number of degrees in either direction with the pin installed. Second, the pin is just too short. It really should be 3-4 inches long so it goes completely through the assembly.
Harbor Freight continues to sell two different versions of this stand. The 69520 version I purchased has the "old" style of fixed casters mounted in a U-shaped bracket. If you insist on buying from HF I recommend this model over the new model with the welded axles as that design is so obviously flawed it's not funny. But if you're willing to spend a bit more money, however, I say buy the Sunex 1250lb unit. The only downside to the Sunex unit, as I have said before, is that the forward crossbeam (the one with the casters) is wider than the HF and may conflict with the legs of some engine cranes.
Engine Crane and Load Leveler
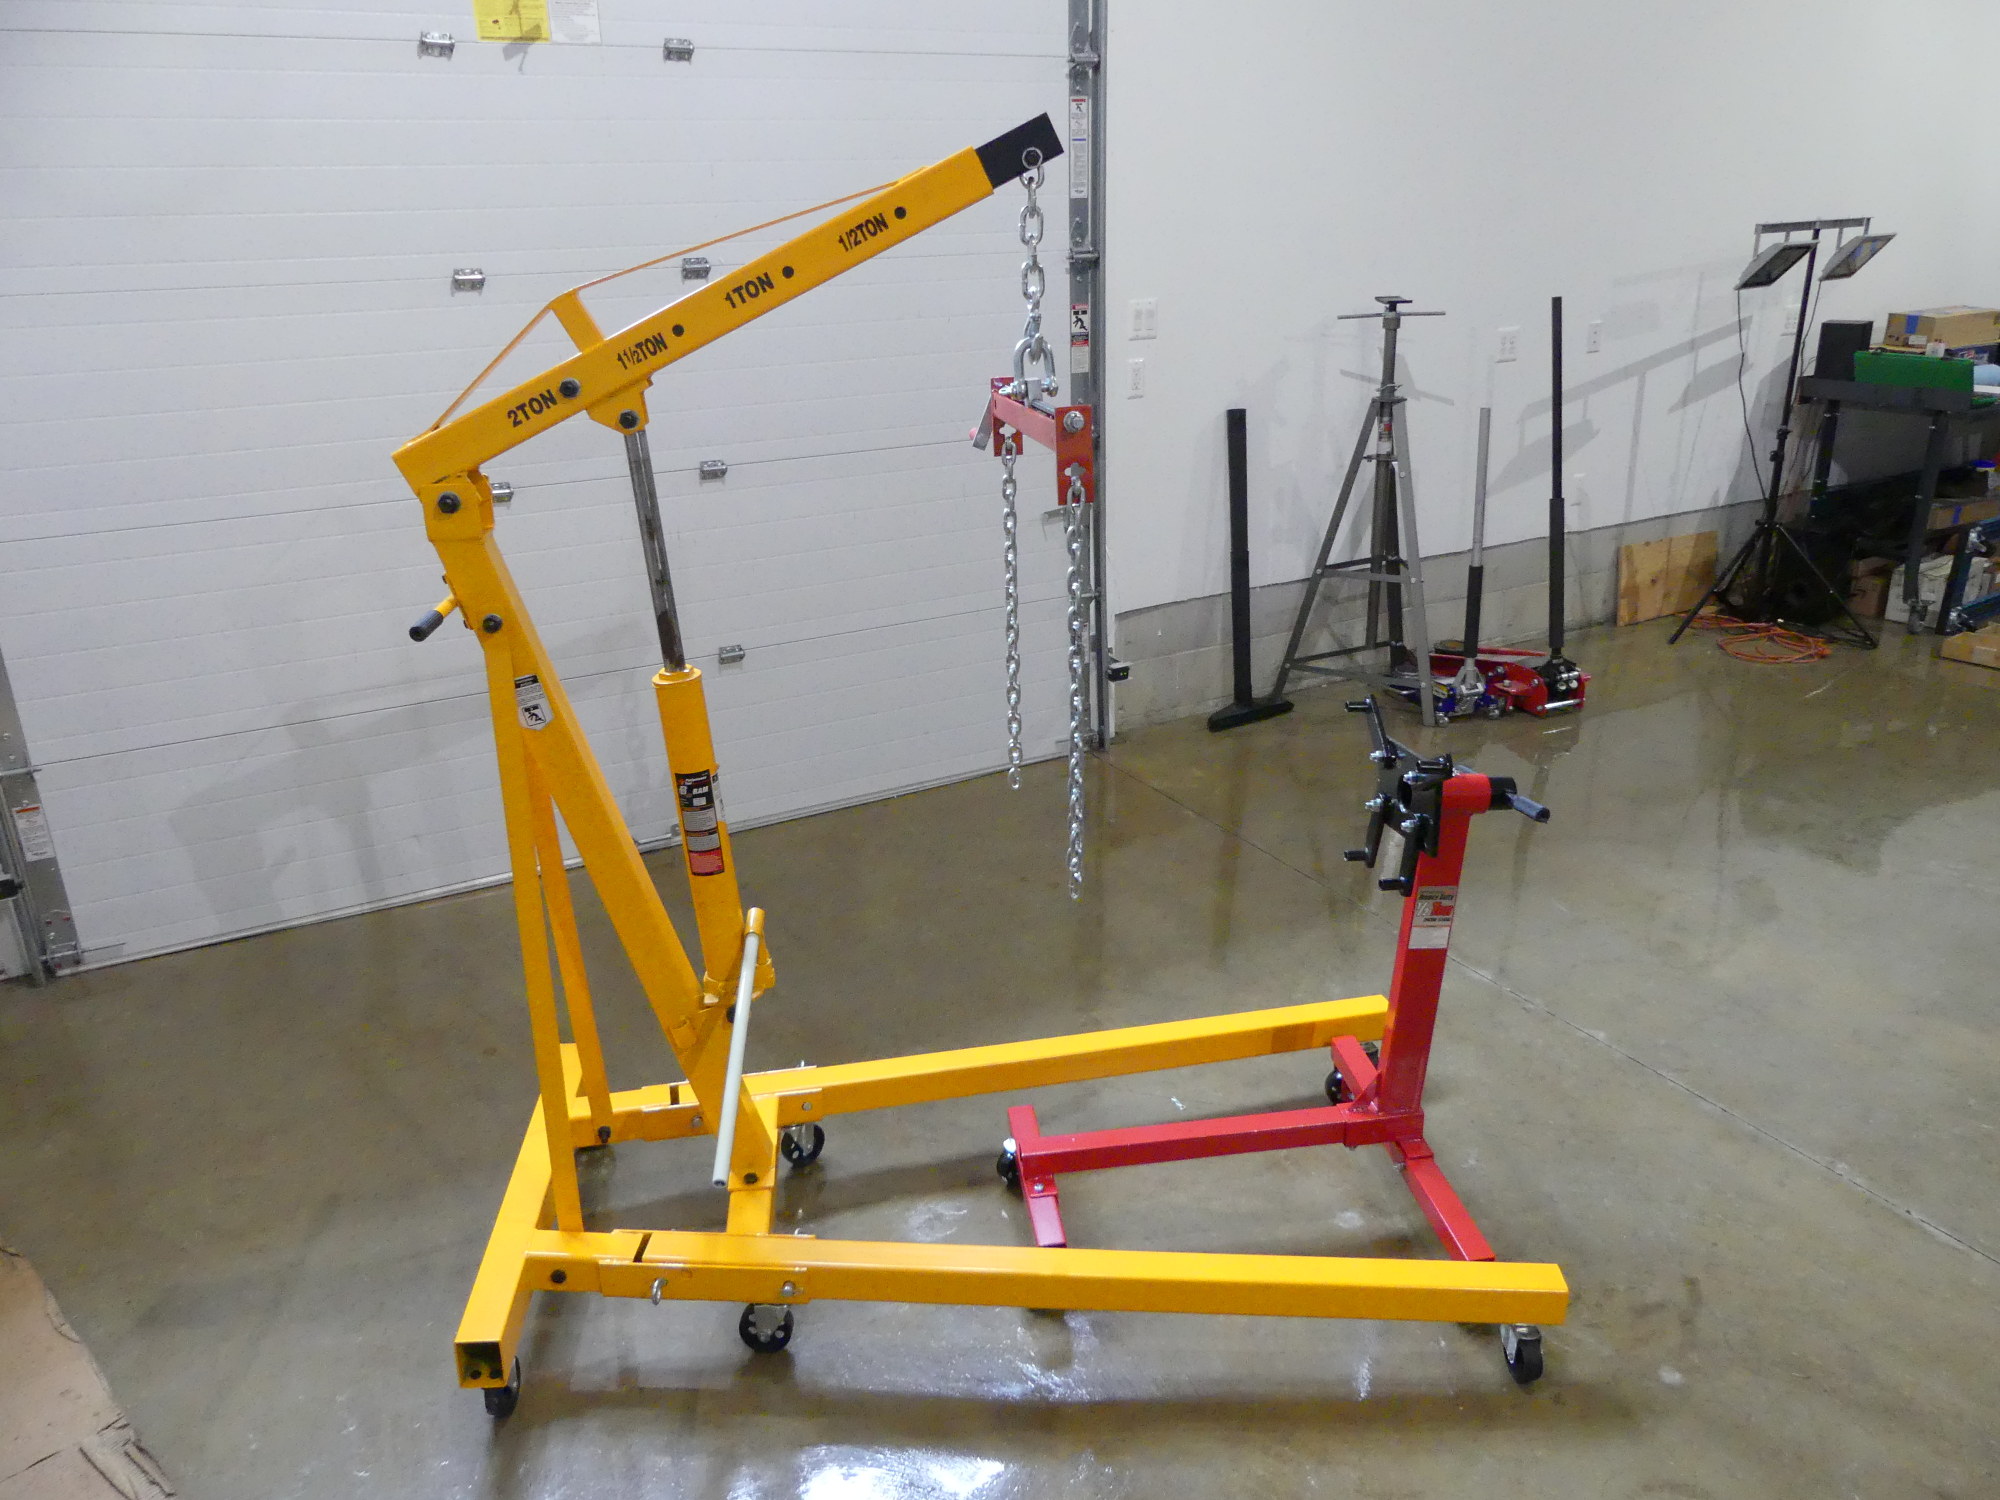
I finally bought the engine crane at Eppys today. Although you wouldn't know it from Eppy's site, it's a Wilmar / Performance Tool W41029. During my research I read about more than a few failures of the hydraulic ram on the HF units but figured I wouldn't have that issue if I bought this model from Eppys. I was wrong. As we loaded the (fully assembled) floor model into the back of my brother's pickup we noticed the base of the cylinder was leaking.
The Eppy's guys were helpful, pulled the ram of the unit and agreed to swap it. A check of stock unfortunately indicated the replacement ram was located in their Brooklyn warehouse so they said I'd have to come back after the holidays to pick it up. While some might be miffed at this, I didn't think much of it because I knew I could take the crane home today and come back in my car to pick up the replacement ram. As I drove back to the garage I wondered how Harbor Freight would have dealt with this scenario. Would they have allowed me to swap the ram or forced me to disassemble and return the product for a complete swap? If you're considering buying an engine crane from Harbor Freight you might want to ask before you find out the hard way.
While at Eppys I also picked up the AFF 582 load leveler that I'll use to pick up the engine at my technician's bay and mount it to the engine stand. As I've come to expect of AFF gear in general, the AFF582 is well made. The welds are substantial and smooth, and the entire unit is nicely finished. There are cheaper load levelers available at HF and elsewhere, of course, but they are not nearly as well made.
The unit comes with a set of heavy chains and some L-shaped brackets that can be optionally installed on the chains. I expect to buy a few heavy gauge (perhaps 3/8") bolts, nuts and washers to mate the chains on either side of the forward and rear attachment points on the block. Then, after I've removed the head and I need need to pick up the block to get it back into the truck for delivery to my machinist I'll mate the brackets to the block with a couple old head bolts and then mate the chain to the brackets.
Update 7/5/2017: Eppys followed through. I picked up the ram and installed it today. As I pumped up the ram I noticed two problems. First, the rod that extends out of the cylinder is very poorly machined / finished. Second, as I actuated the pump at the base of the ram I noticed a bit of fluid leaking out of the reciprocating plunger. That obviously has poor manufacturing tolerances, damaged seals, or both. While the basic design and manufacturing of the crane itself is adequate, the ram is garbage and I have little confidence in it lasting very long. I believe I read somewhere that better quality replacement rams are available so if it does fail I suppose it could be replaced if not rebuilt.
Lifter Retention Magnets

After some research I found the magnets I needed at K&J Magnetics, which was conveniently just outside of Philadelphia and thus well within one day's shipping time.
I had originally planned to buy relatively long bar magnets (2"), as I assumed those would be long enough reach from one lifter, across walls of the cam tray, and over to the adjacent lifter but I scrapped that idea when I realized that the neo magnets were so strong I could easily get away with a smaller magnet positioned over each lifter. So I bought twelve BX024, which is 1"x1/8"x1/4".
This magnet is interesting in that it is magnetized across its width -- meaning it will stand on its side rather than its broad face. This characteristic appealed to me because I figured it would allow the magnet to serve as its own handle. And a handle IS required with these magnets because they are quite strong for their size. I placed a couple of the units flat on a table about 3-4 inches away and they quickly attracted each other and snapped together. The repulsive force is such that I can't get identical poles closer than about 1/2" from each other. In summary I would say that the ~7 lb pull force listed on the site is accurate.
I wrapped all the magnets in several layers of blue painter's tape, which will serve three purposes:
-
The resulting gap between the magnet and lifter will reduce the magnet's attractive force. This will make them safer to install (no pinched fingers) and easier to remove.
-
Tape will prevent magnet to metal contact and thus prevent any damage to the lifter's finely ground face or the machined edges of the lifter bores.
-
Although the magnets are nickel plated and thus not as likely as uncoated magnets to leave magnetic particles behind, the magnets are quite brittle and can snap. In the unlikely event this happens and particles are released in the process the tape will prevent them from adhering to the engine parts. This is a critical safety precaution, as any particles left behind would stick around (literally) and destroy the lifter and cam lobe in short order.
Achilles Motorsport Oil Pump Upgrade Arrives
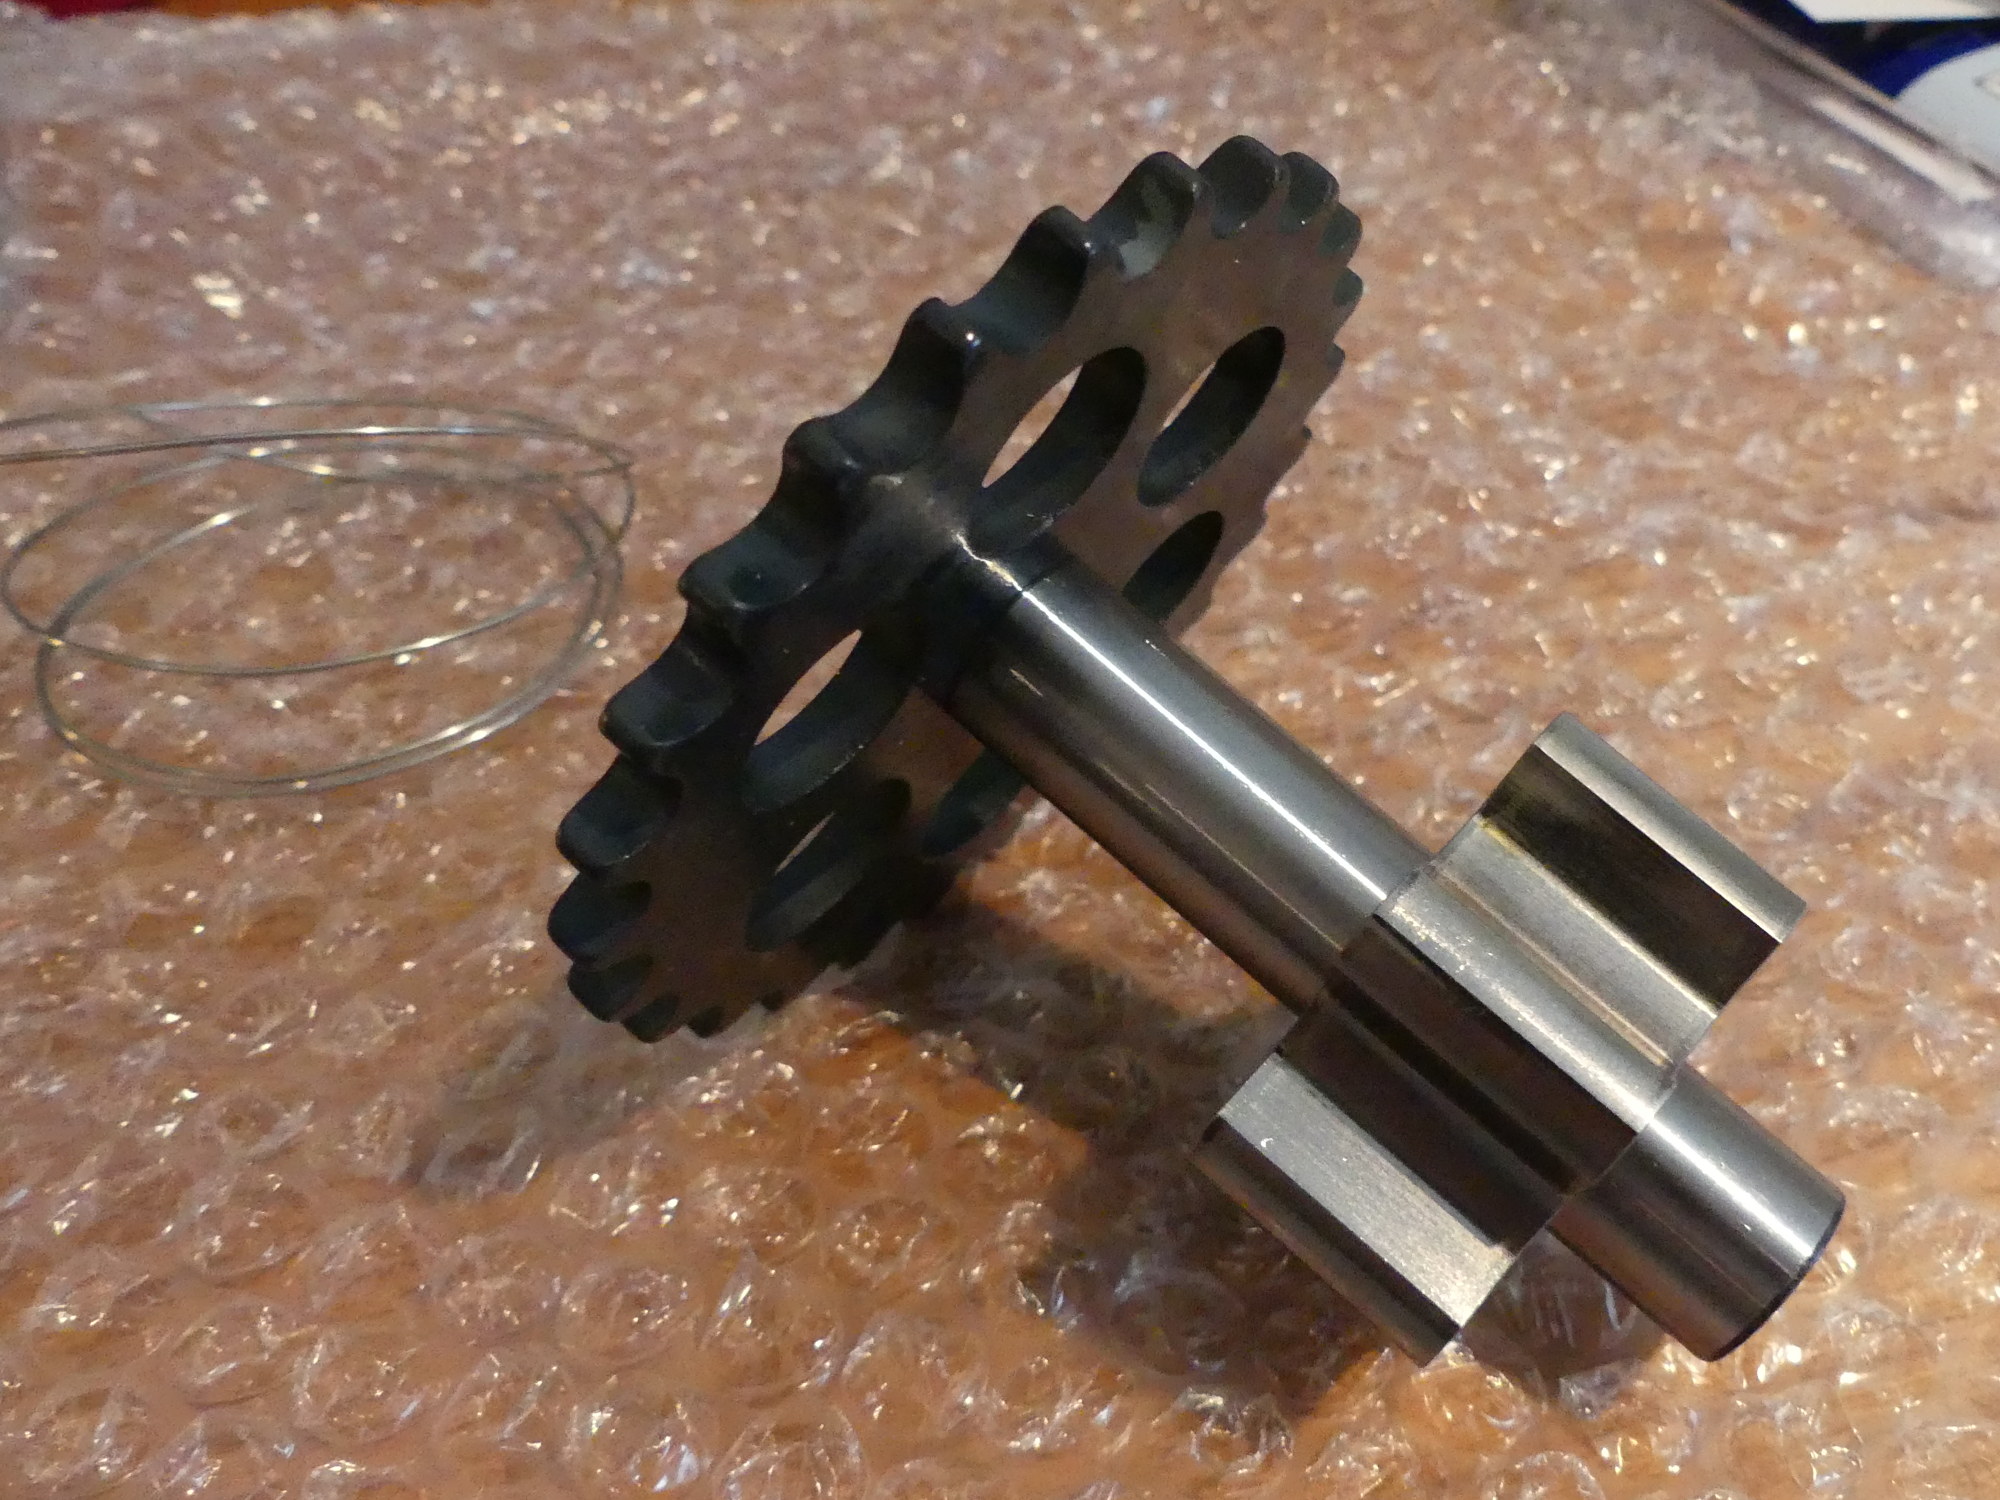
After a slight shipping delay (the fault of the USPS, not Achilles), the oil pump upgrade arrived today. I purchased the unit with the shaft already pressed into a brand new BMW pump rotor. The location of the rotor on the shaft is critical and according to Achilles they use a jig for this process to ensure accuracy and consistency. Unfortunately they do not sell the jig so the only option in my opinion is to buy the pre-pressed assembly.
Out of the box I immediately noticed that the small square indentations on the side of the rotor were facing away from the sprocket (toward the inside of the pump). As these are used for orientation and the mating dot is usually on the face of the pump I was initially concerned that Achilles made a mistake and pressed the rotor on the wrong way. A quick call to them confirmed that the rotor is symmetrical and the dots don't matter. In fact, the rep told me the dots have been found in either orientation on brand new BMW pumps they purchase to retrofit so apparently BMW's supplier doesn't care either.
So all I have to do is disassemble my new BMW pump (which is on order as I write this) and install the new Achilles rotor and shaft assembly before mounting the upgraded pump to the engine.
Wire Lock Tool
One of the tasks all engine builders universally loathe is installation of the wrist pin locks. These locks come in two flavors -- thin metal spirals ("Spiral Locks") and simple wire ("Wire Locks"), both bent into a form designed to mate with a small groove machined into the pin bore. Installation of either type requires a special technique that most DIYers seem to master right around the time they finish their first set of pistons, but only after considerable pain. And by pain I mean physical pain. It hurts to install these things!
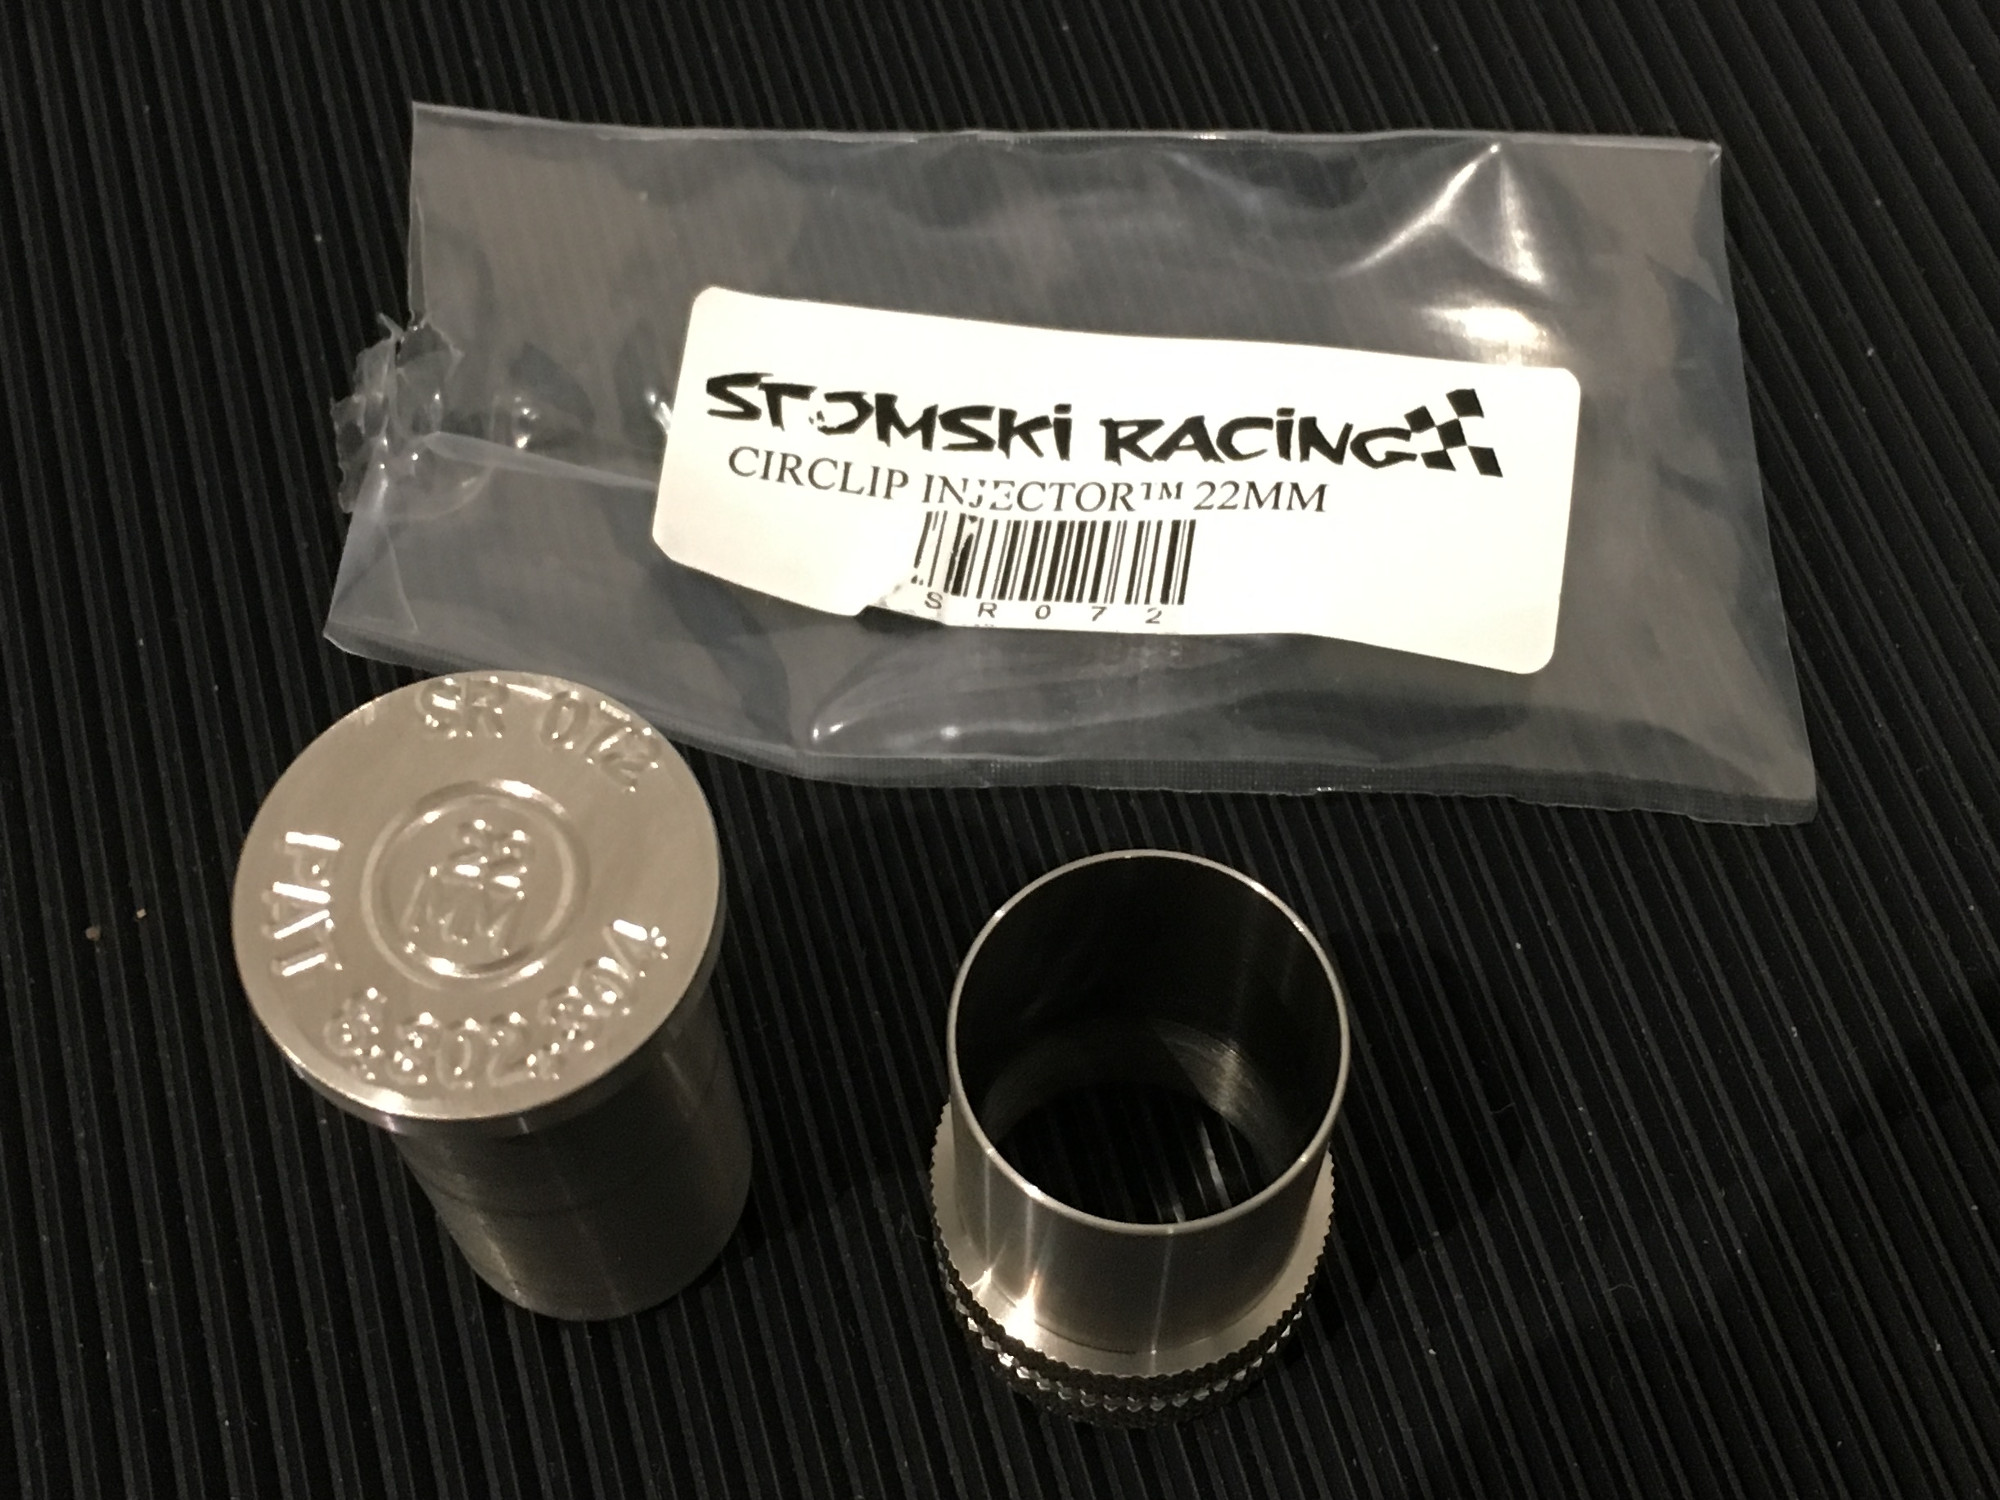
While some JE pistons are designed to use spiral locks my M52 OE replacement pistons use standard wire locks. Courtesy of this video I learned that JE's wire locks are made of a thicker gauge wire and that makes them more difficult to install than other manufacturer's locks. For this reason I decided to buy a tool designed to make installation a lot faster and less painful. My search revealed two readily available tools:
The Circlip Injector initially struck me as a great design but I did find it a bit odd that it requires the use of a second tool that the manufacturer fails to provide. They expect people to modify an old screwdriver. Not a tall task, for sure, but annoying when I'm paying nearly a Benjamin for the solution. I have a plastic rivet removal tool that may suffice. We'll see.
The LockInTool is available in two material types -- metal and plastic. The plastic version is designed for a limited number of uses but is significantly less expensive than the metal version. So much so, in fact, that I would have purchased it if it were available in 22mm. It's not, so I didn't. I should point out that the metal version of the LockInTool is designed as a system incorporating a handle and interchangeable heads that support a variety of pin bore sizes, as well as spiral locks.
With respect to wire locks both tools obviously serve the same function but accomplish the task in different ways. What strikes me as a bit less than desirable is that the LockInTool relies on the pin bore to compress and install the lock. Based on what I was able to see from the ridiculousy poor quality video on the manufacturer's site, this process places palpable stress on the edge of the pin bore. I could see this rounding the edge of the pin bore slightly, as well as scraping off a bit of the skirt coating, and cramming both contaminants into the lock groove. It's probably a non-issue, but all things being equal I'd just as soon avoid that.
The Circlip Injector, on the other hand, uses the tool body to keep the lock compressed until it can be inserted with absolutely no stress placed on the edge of the pin bore. Use of the Injector is not without concern, however, as it naturally compresses the wire lock a bit more than strictly necessary (or certainly more than the LockInTool does in any case). I think it's safe to say the tool does not permanently distort the locks but I raised the concern as I closely watched the demonstration video and saw what appeared to be one side of the lock protruding from the groove a bit more than the other side. This might be the simple result of not checking / seating the lock in the groove (an essential step after injecting the lock) but it could also occur if the tool permanently bent the lock.
I think the LockInTool is the only choice for spiral locks and is probably the lower cost option for professional rebuilders who need to deal with multiple pin bore sizes. But for wire locks I prefer the Injector's principle of operation and $10 lower price so I decided to buy the Injector. The manufacturer's website is driven by Shopify so I was expecting a quality shopping experience including shipping notifications. I was not disappointed. The product shipped the same day and arrived the following day. I'm now looking forward to the piston assembly process, rather than dreading it as so many do.
Incidentally, like many of the one-time-use tools I've purchased for this project I will be selling the Circlip Injector when I'm done with it. This will work for any engine (BMW or not) with 22mm pin bores. If you're planning a build in the near future and want to pick this up for a reasonable price watch the blog or the RSS feed for the sale announcement.
Revised Plan for Break-In
As I recently decided to replace all the lifters I concluded that I will need to amend my break-in procedure. The most critical change relates to the first start. With the fuel pump fuse out, I'll pull the plugs and use the starter 30+ seconds to drive oil up into the head. Then I'll install the plugs and coils, insert the fuel pump fuse and turn the key. Once the engine starts I'll rev it up to 2000 RPM and hold it there for 3-5 minutes to help break in the lifters. This RPM should reduce loading and stress on the lifters and thus reduce the chance for damage.
Then I'll take the car out for a few ring-seating runs, each separated by a cool-down process. The purpose of the runs will be to generate a significant load on the engine during both acceleration and deceleration. This will generate heat in the cylinders and pressure on both sides of the rings as required to seat them. While many people (and manufacturers, for that matter) obsess about babying an engine during break in, that is precisely what NOT to do if you want the rings to seat properly and quickly.
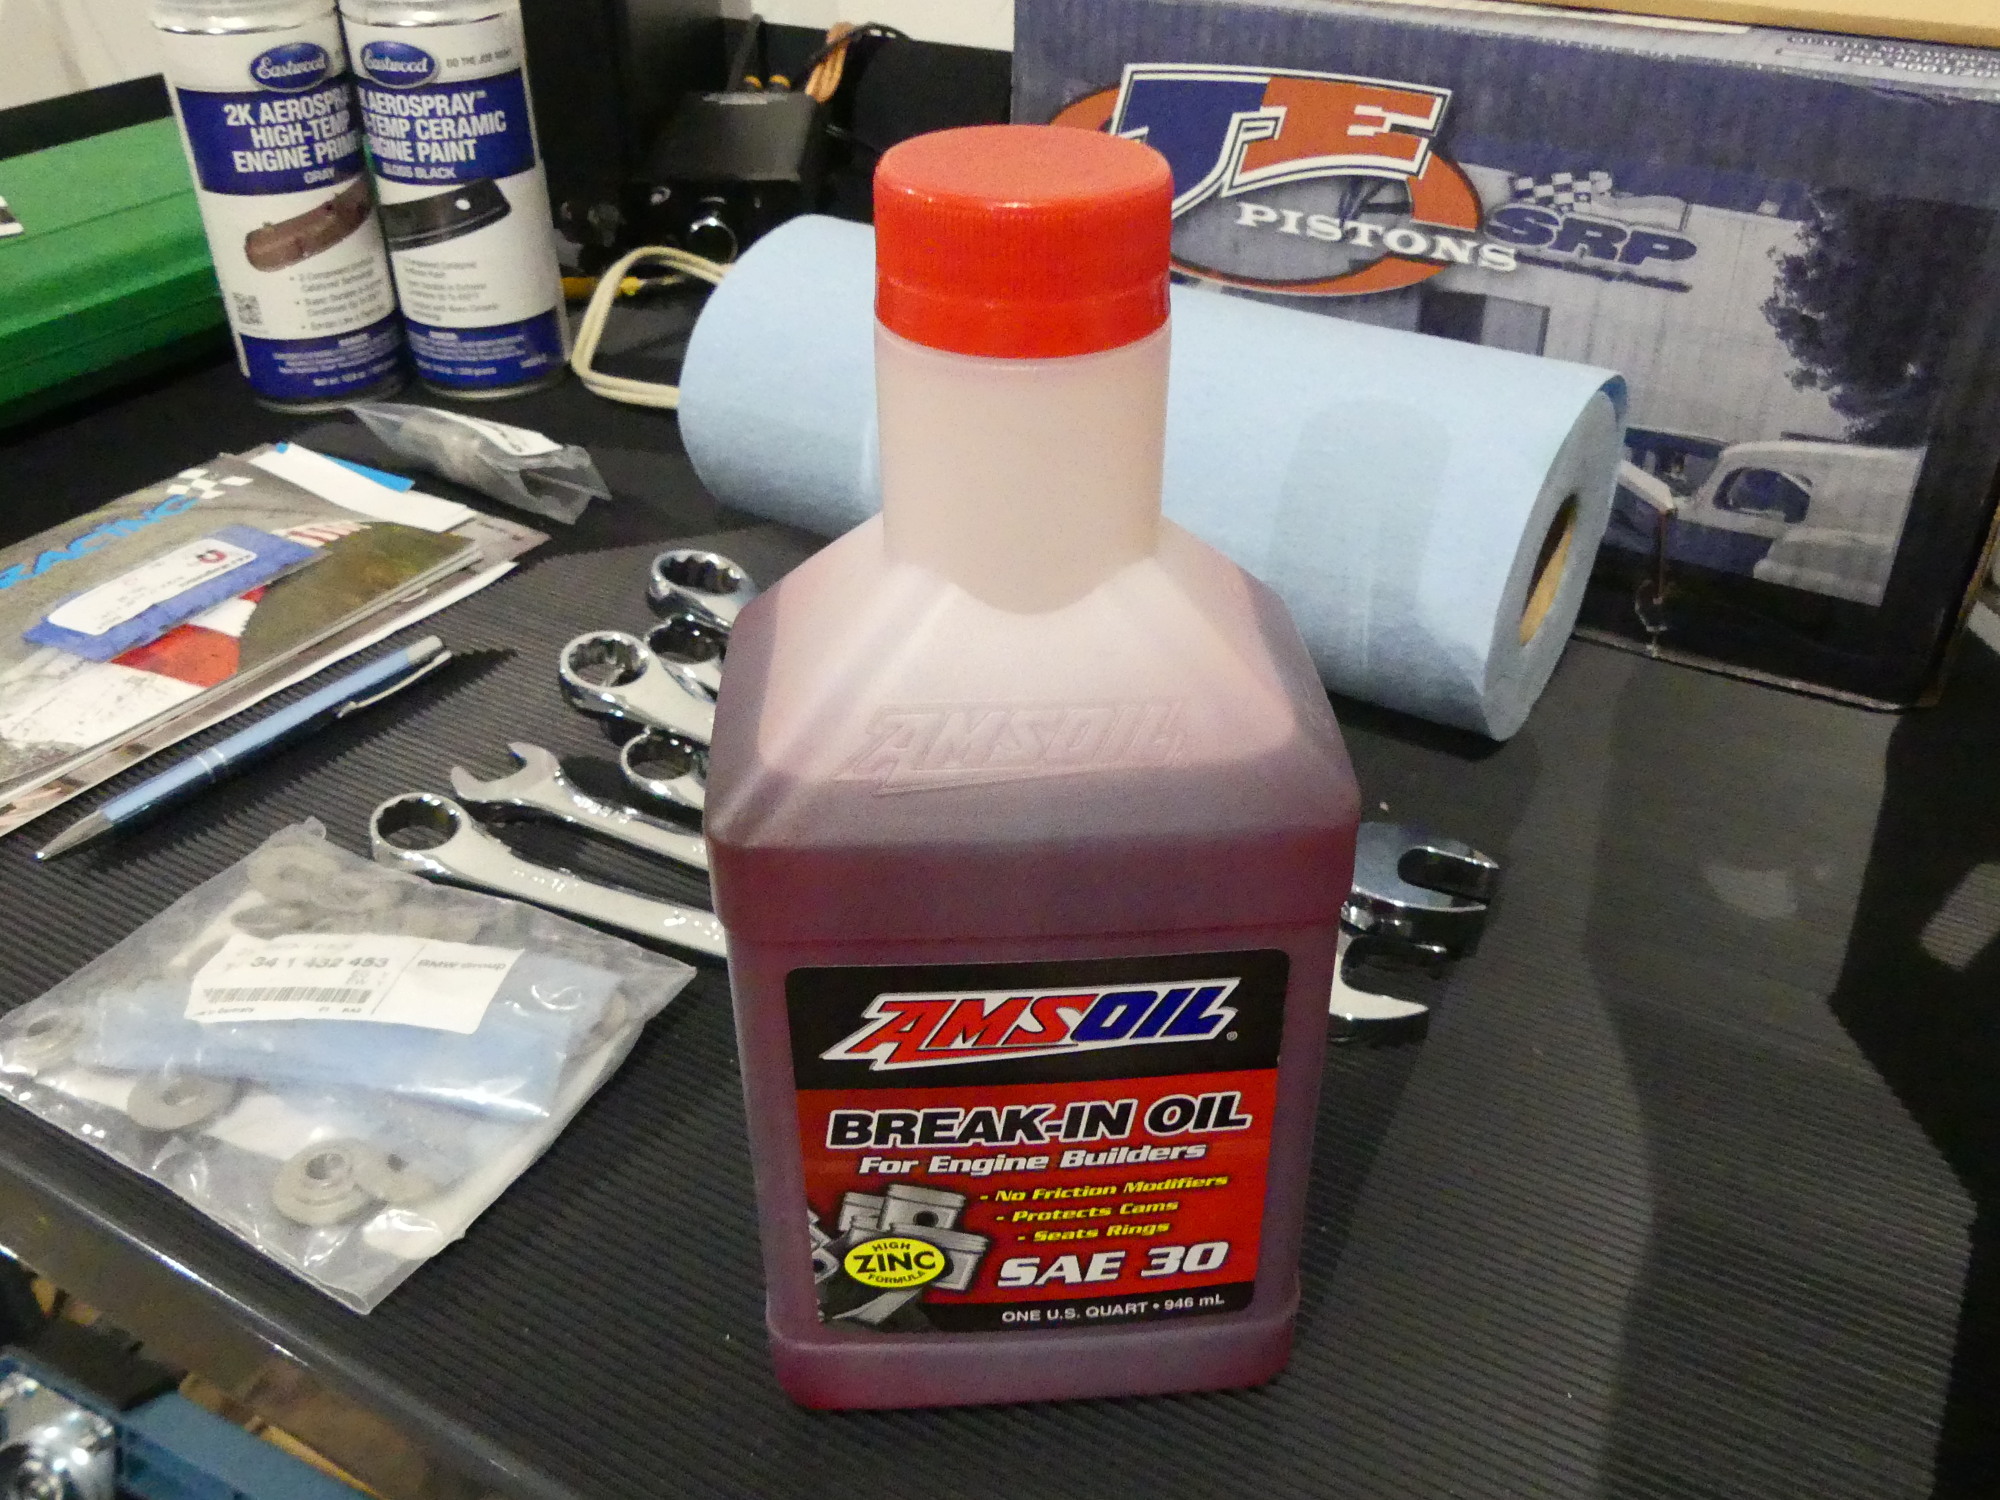
I stated earlier that I wasn't planning to use a break-in oil but with new lifters installed I figured it would be a good idea to have all the protection I can get so I've purchased seven quarts of Amsoil SAE30 break-in oil. This oil lacks friction modifiers and is high in zinc and phosphorus anti-wear additives. I'm planning to run that until the rings are fully seated, then switch to a conventional (non-synthetic) oil until 1000 miles, mostly for reasons of cost (since it will be drained relatively quickly). After that I'll transition to BMW 5W-30 synthetic and continue my routine changes at 4500 miles or 6 months, whichever comes first.
Drivetrain Pull Scheduled
The car is now scheduled to go to my tech Monday July 17th. This is a few weeks later than originally planned but I had to schedule around the 4th of July holiday and a conference my tech is attending the following week. I'm not complaining, however, as this will give me a bit of extra breathing room needed to get the remaining parts, tools and supplies in house so when the time comes I'll be able to hit the ground running.
My tech gave me a quote of 22 hours for the R&R that is loosely based on warranty times. I consider this a gift because I couldn't do the job in the same time and also because I know that, as usual, the value I will receive from my tech will far exceed the actual cost of his time.