


Thursday, October 26, 2017
Assembly Wrap Up
While on the way home from an appointment today I stopped by my technician's bay to see how he was making out. I found the engine and all accessories, transmission, driveshaft, tunnel heatshield and headers installed. The electrical harness and fuel lines were connected. The engine has been filled with oil and both the torque converter and transmission have received their initial top-off. More fluid will, of course, have to be pumped into the transmission but this can only be done while the engine is running and the transmission is circulating fluid at normal operating temperature. All that remains to be installed, from what I could see, includes the radiator and coolant hoses, mechanical fan, exhaust mid-section and muffler, and a few cover panels.
 Fuel tank cleaned and reinstalled with new straps, new tunnel heat shield installed with new hardware, noalox anti-corrosion paste and supported by new brackets. |
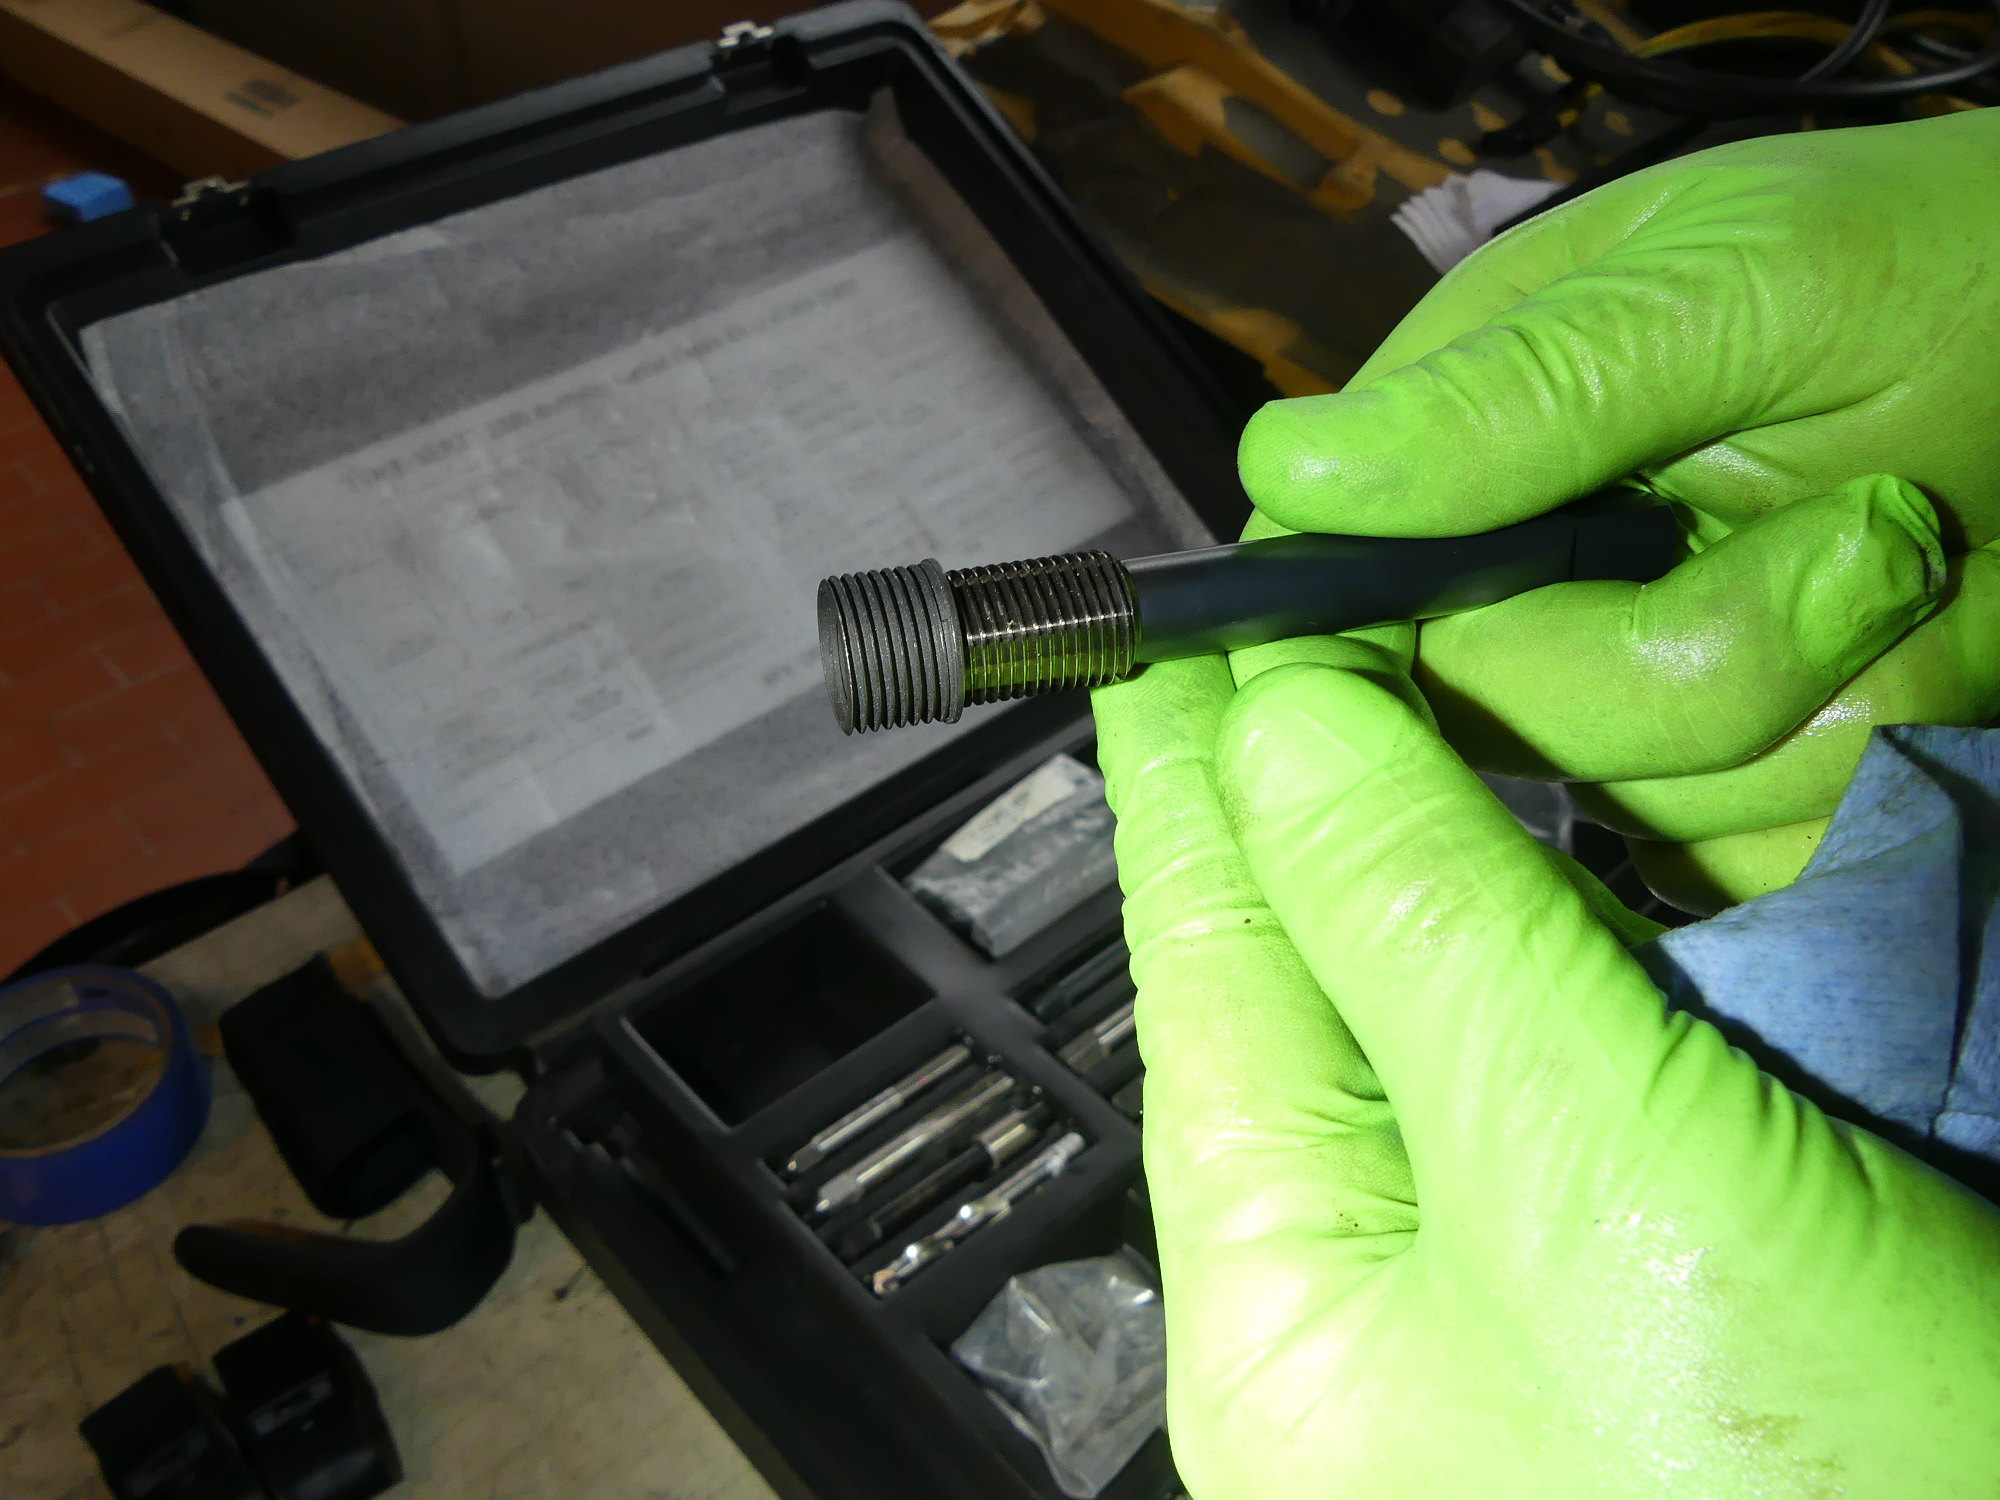 My technician demonstrating how a timesert is installed. This is a much larger timesert than the one he installed to correct the tunnel brace bolt but the principle is the same. |
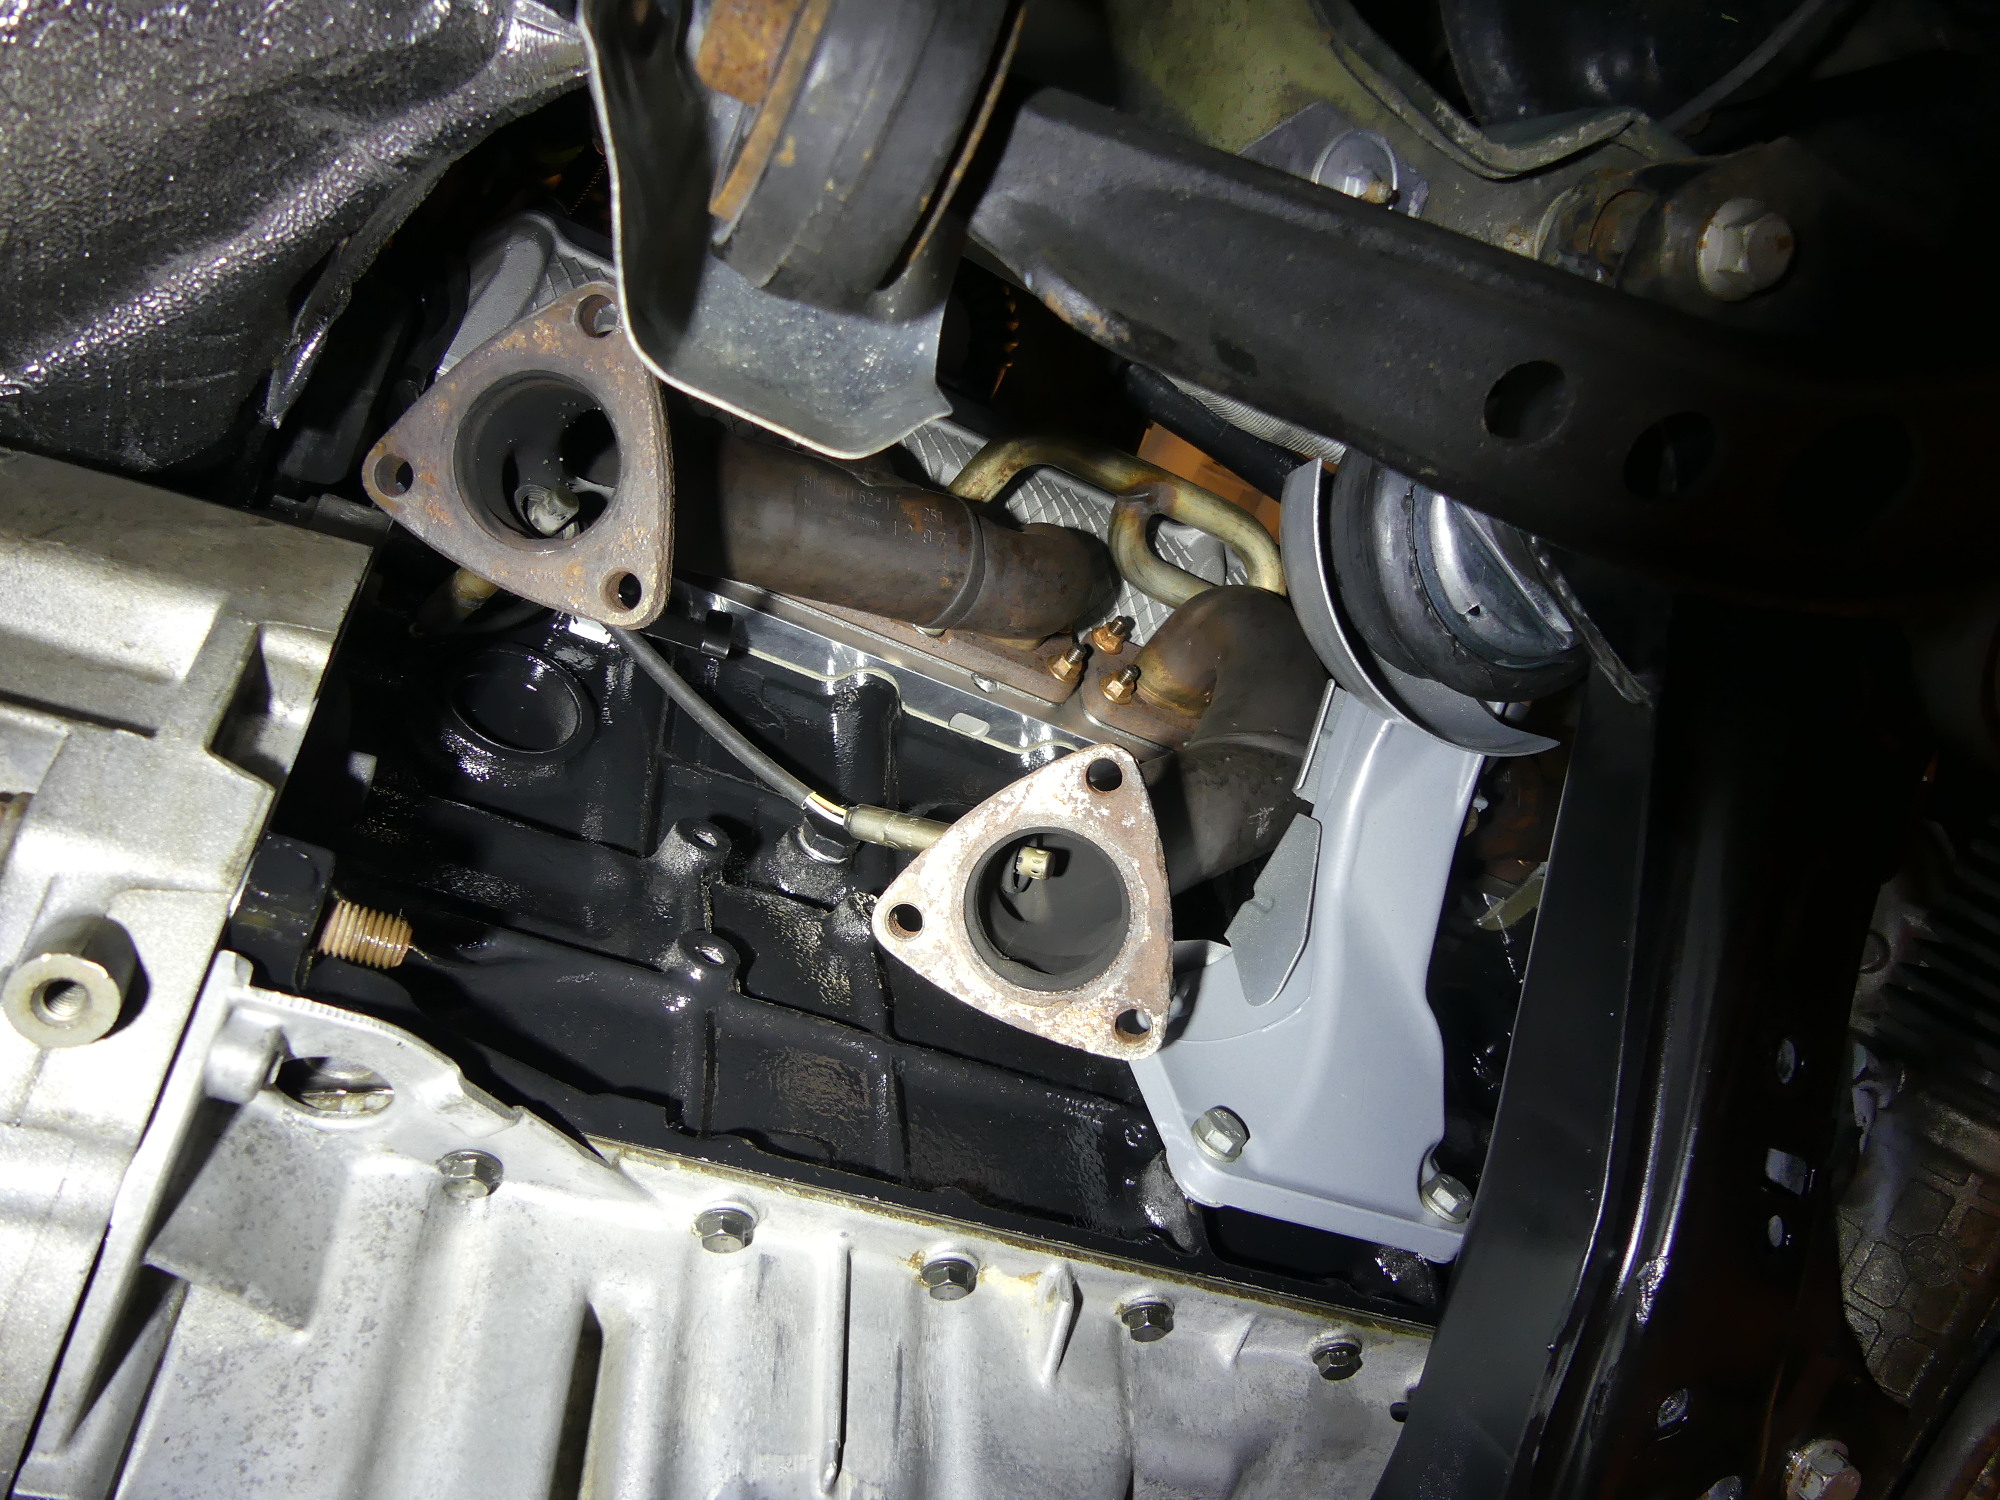 A rare sight on my car -- open headers, with the dual oxygen sensors visible. All header studs will be replaced with new parts. These are reportedly made of inconel and aren't cheap. |
After taking some pictures and video my technician pointed out a few details. First, while I had purchased the large tunnel heat shield I had forgotten to provide the hex screws to mount it. He found them in the dealer's local inventory and proceeded to install them with a bit of Noalox paste I provided. A small amount was placed on the rear face of the screw head and the mating surface of the heat shield. Noalox, for those that don't know, is an anti-corrosion paste electricians often use to eliminate dissimilar metal corrosion when joining copper and aluminum building wire, but it works well enough for other purposes. I don't know how well it will work in this application but time will tell.
You may recall me mentioning earlier that my technician snapped a M8 bolt while trying to remove the rear tunnel support bracket. Adding insult to injury I attempted to drill this out but wound up destroying half the threads in the process. My technician managed to fix the problem this week with a timesert pulled from a really nice case of timesert installation tools left over from when the dealer still had a GM franchise. It was labeled "Northstar Engine Timesert Repair Kit". I've known about timeserts for a long time, but for some reason I thought they were more or less equivalent to heli-coils. As it turns out the two devices are nothing alike. Timeserts are a solid collar that has threads on in the inside (for the bolt you want to install) as well as on the outside, as required to thread into the substrate. According to my technician, installing timeserts is more challenging than a heli-coil but in certain applications (like mine) they are the only solution.
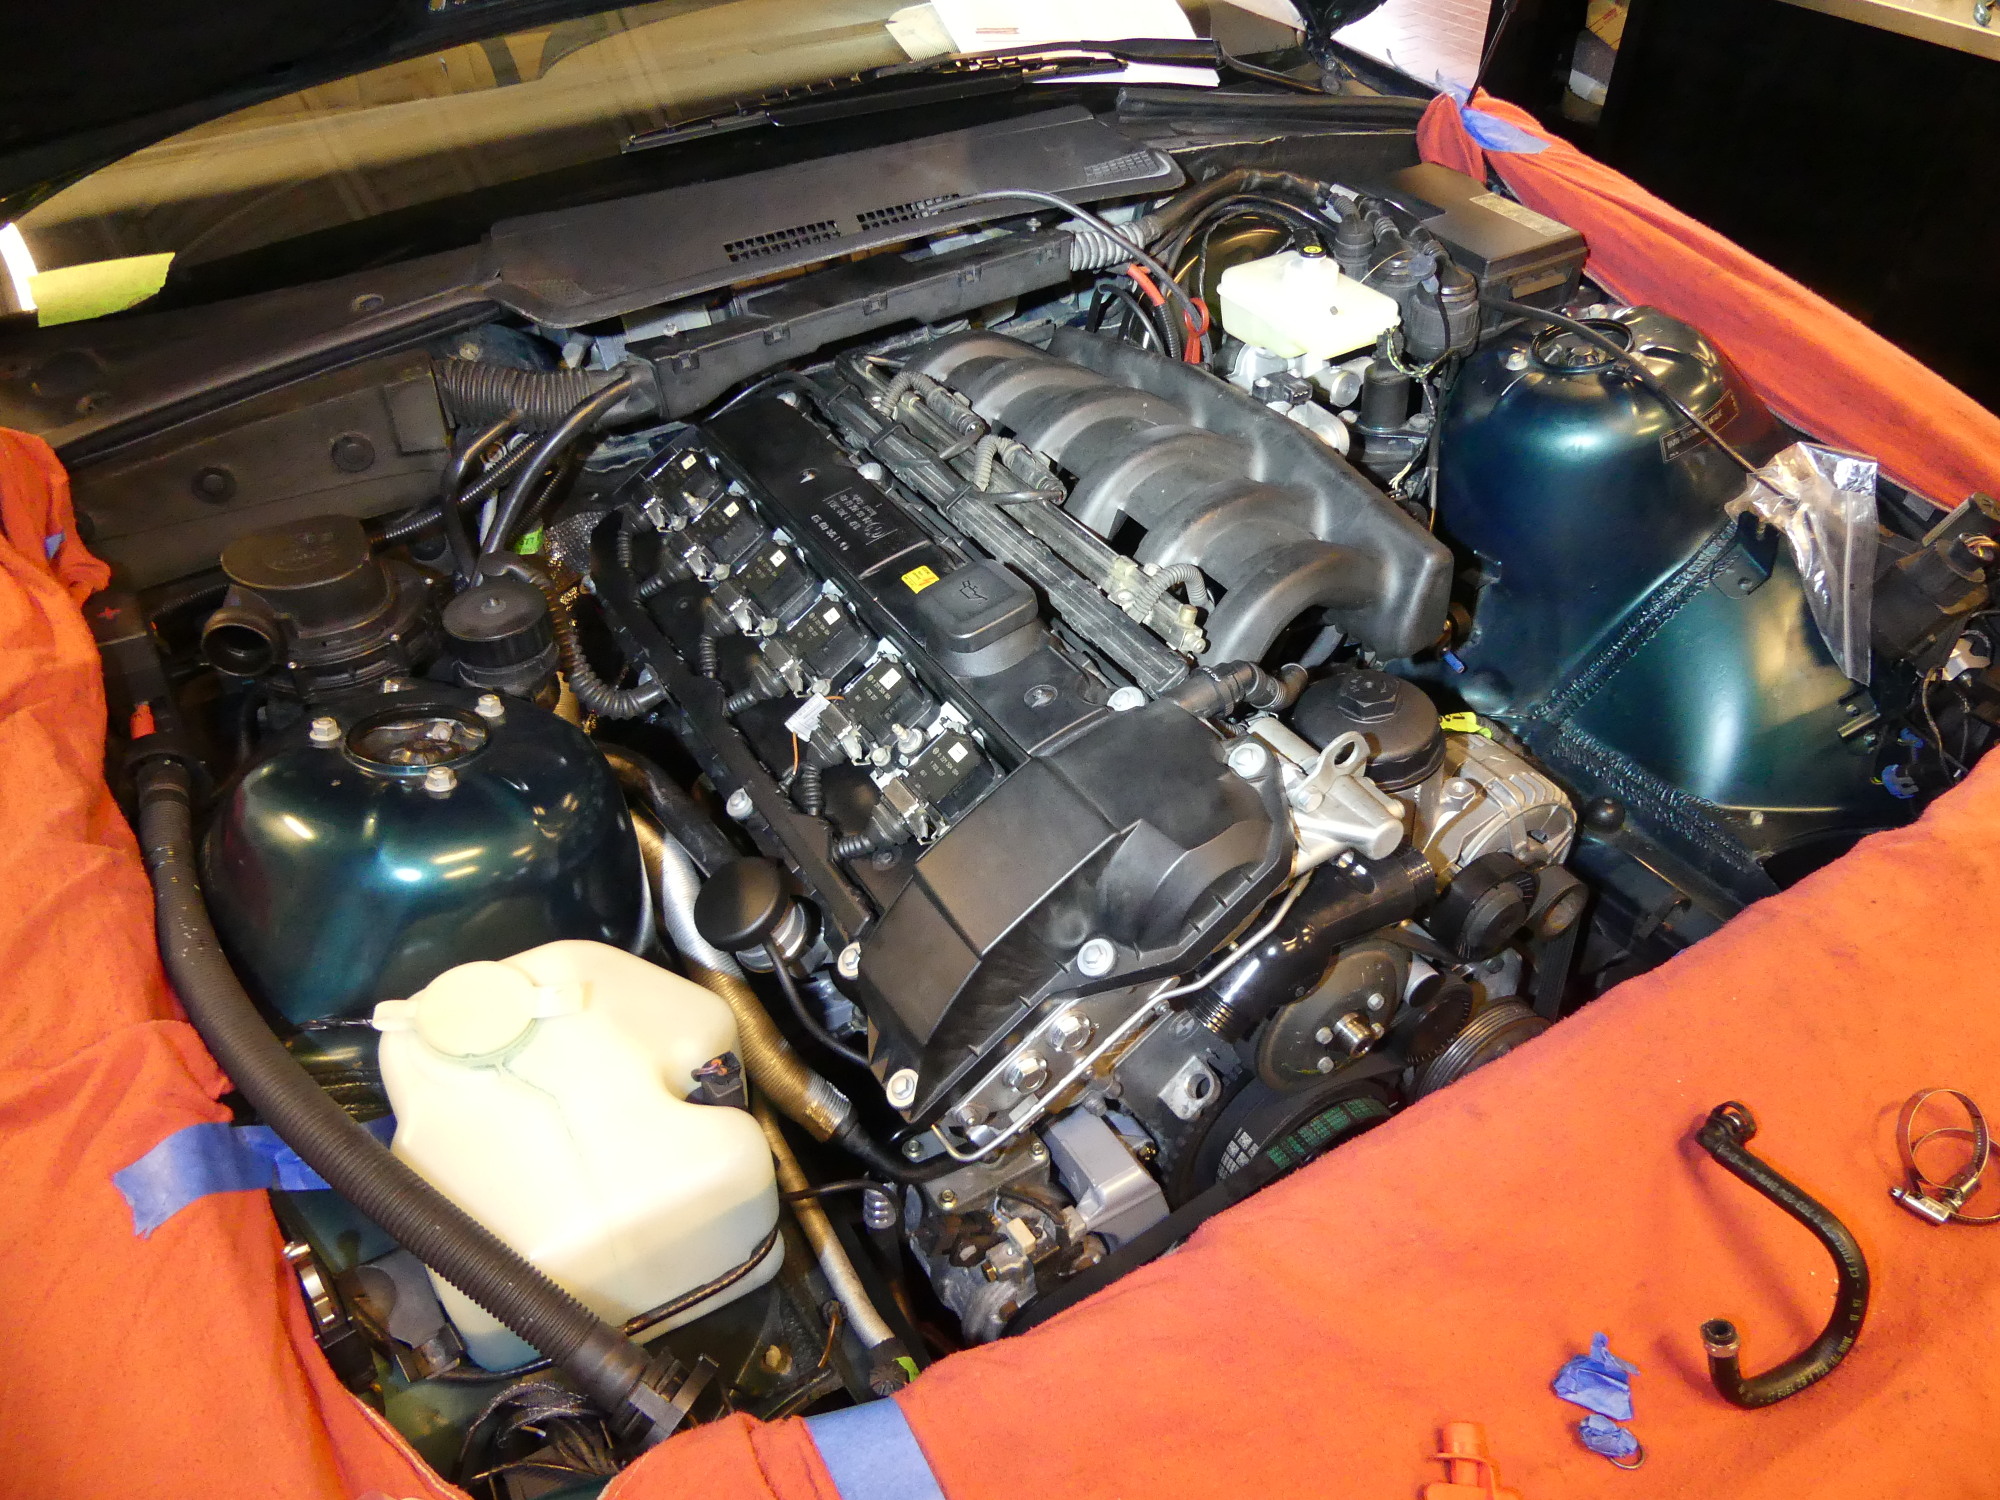 My newly rebuilt engine, back where it belongs, and almost ready to fire. I'll be on edge until the engine has several hundred miles on it and oil consumption has stabilized. Hopefully we'll start it tomorrow! |
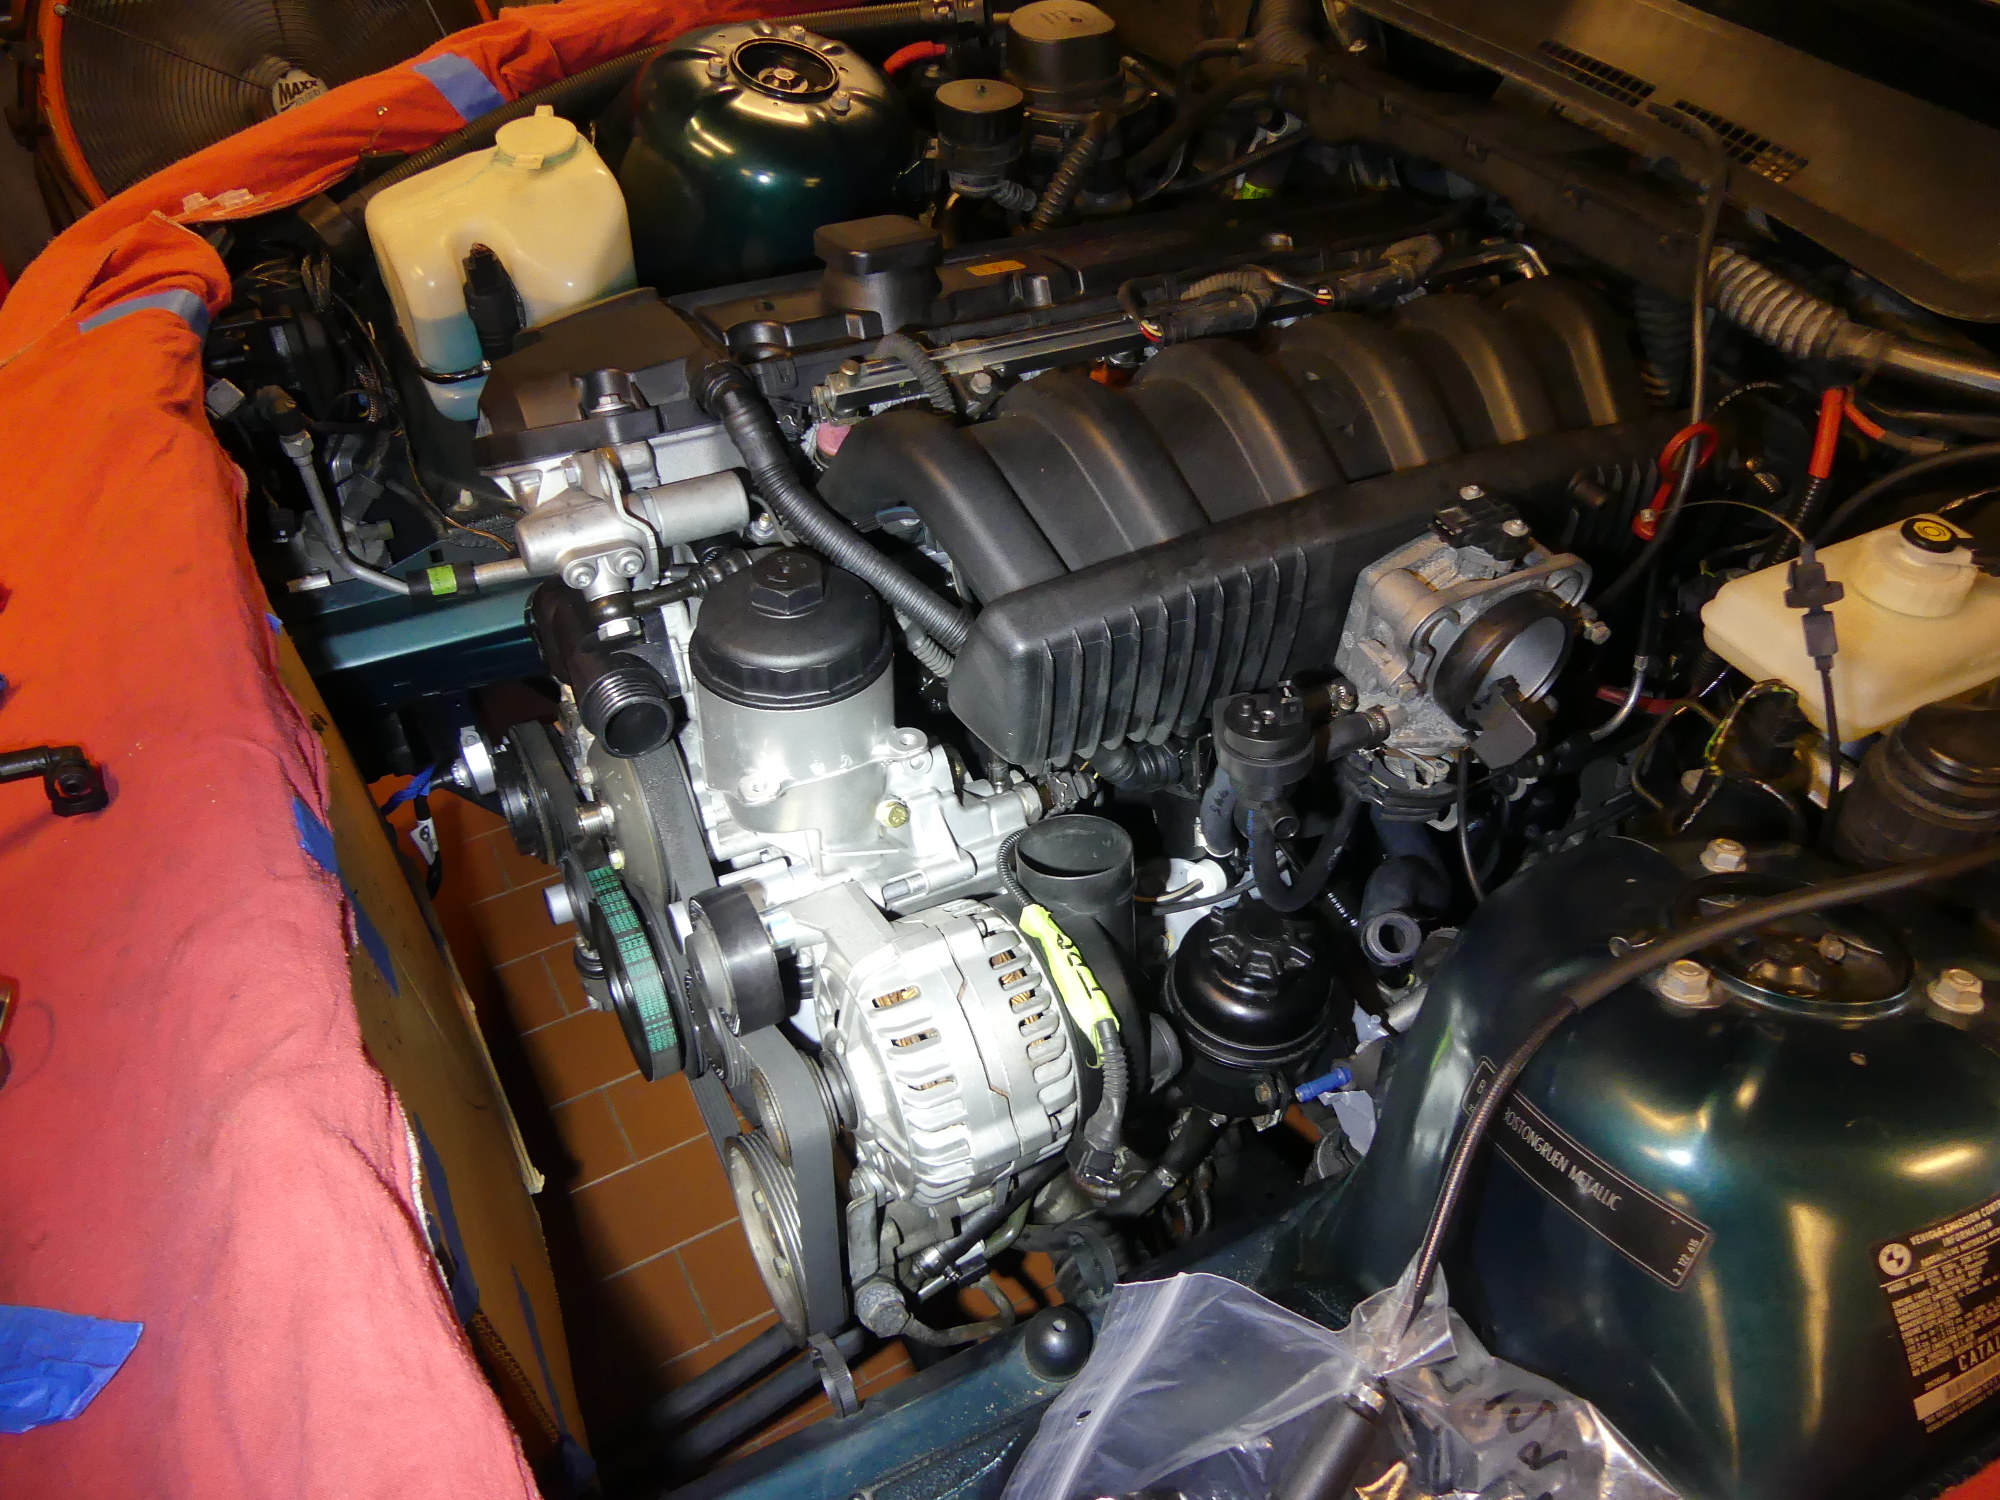 I took extra time toward the end of the engine build to clean up the accessories and the alternator looks a lot better than it did as a result. The new oil filter housing doesn't hurt the look either. |
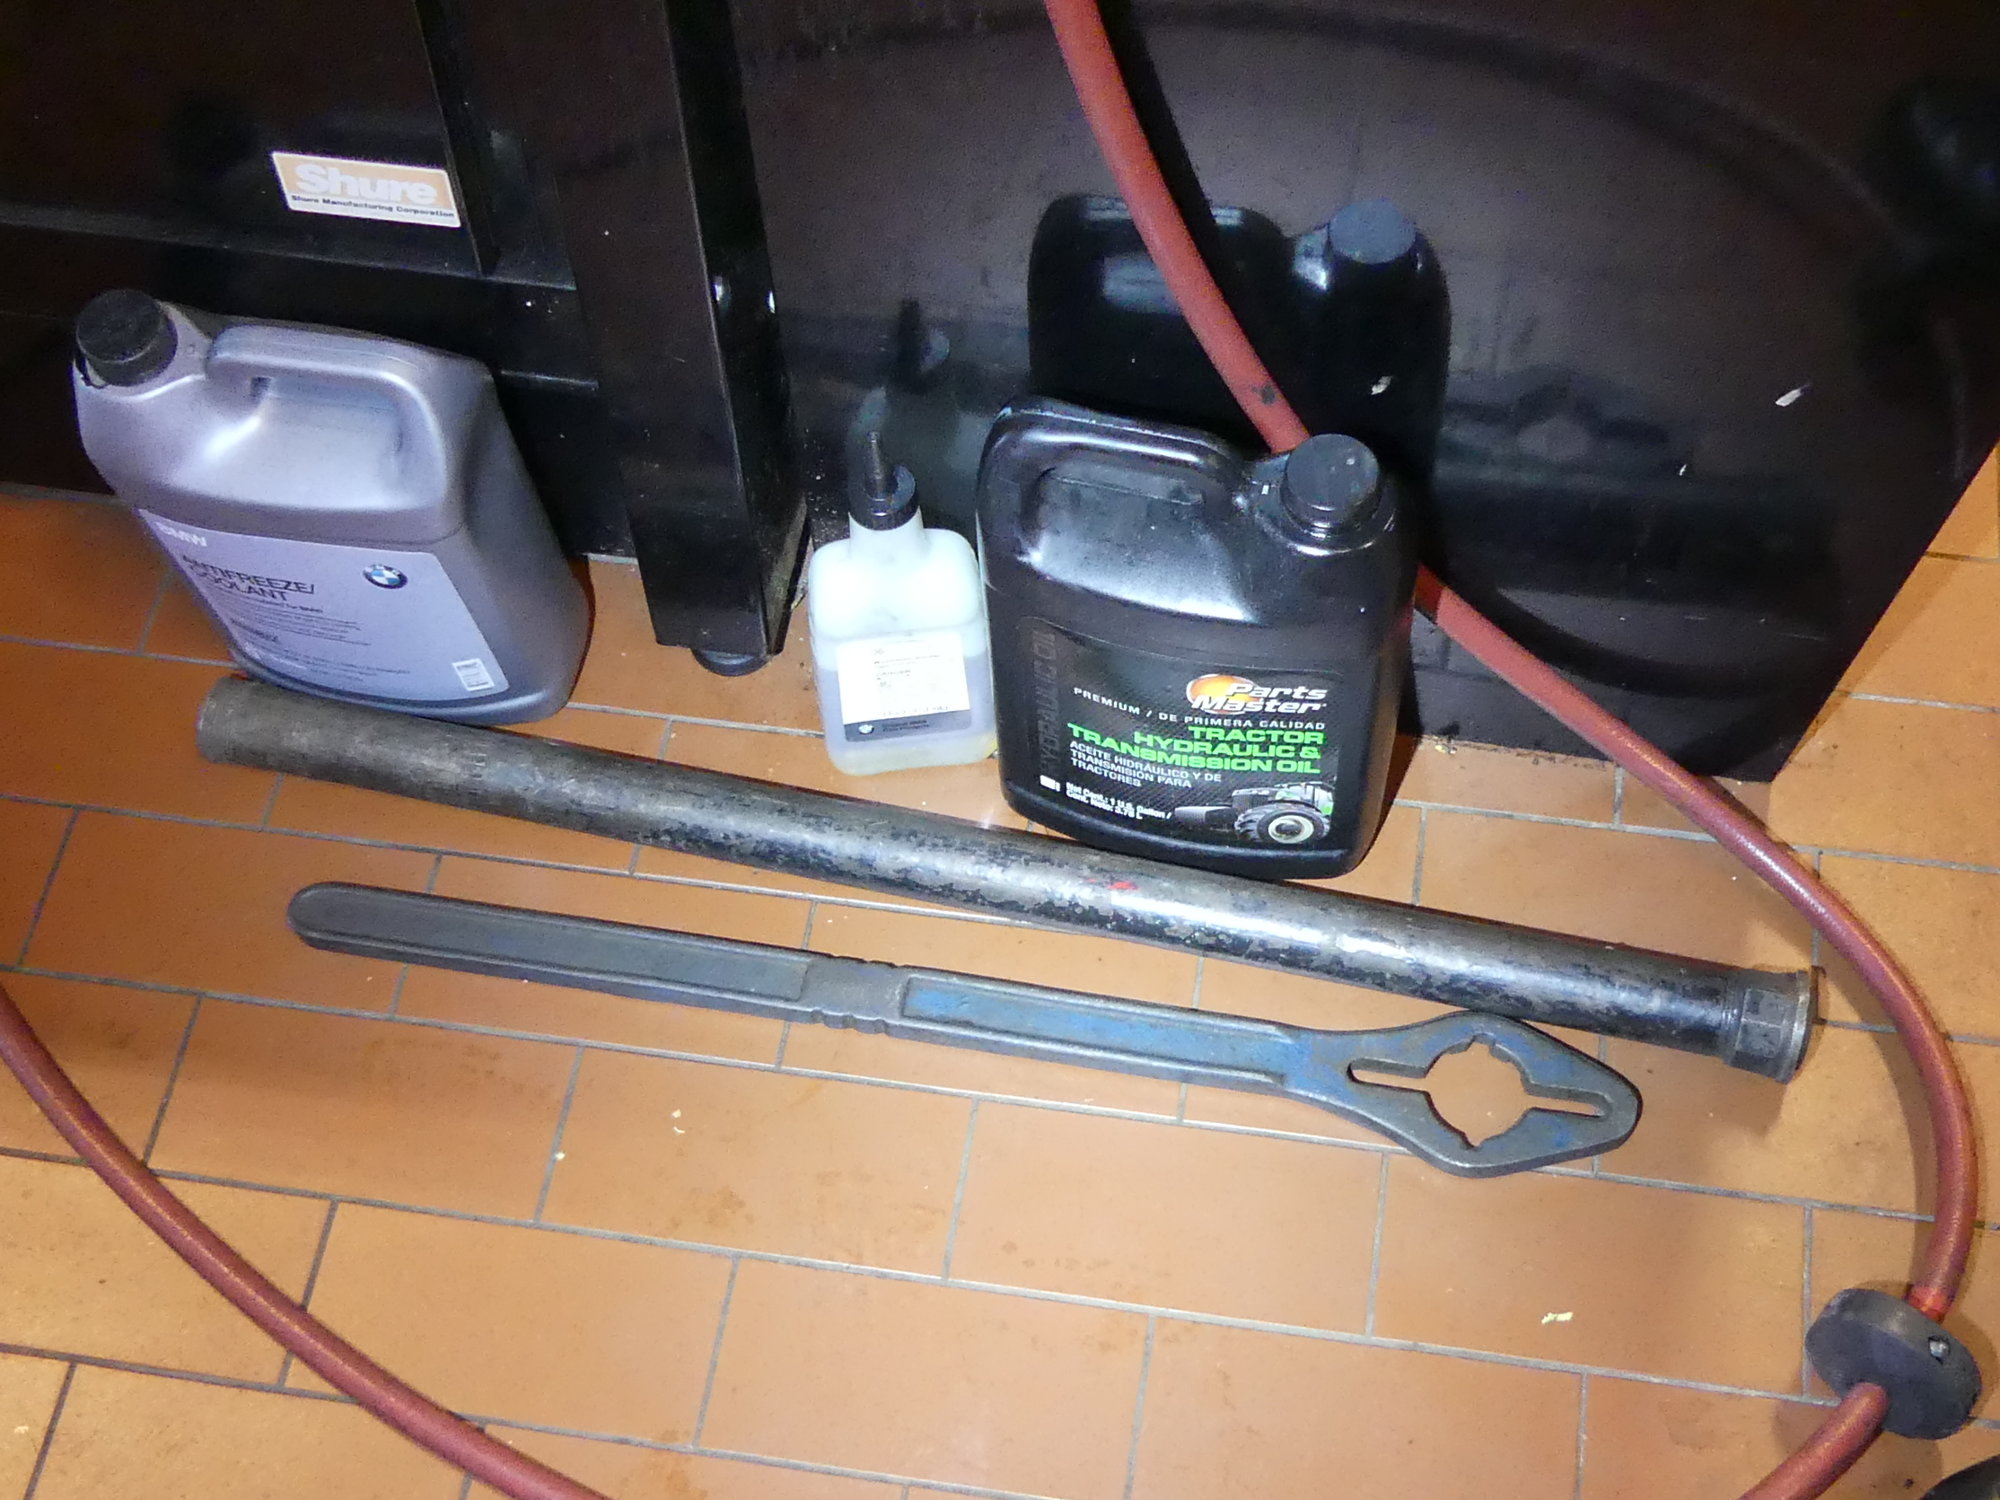 These are the tools my technician used to counterhold the crank so the crank bolt could be torqued to 410Nm (302 ft*lbs). Yes, the bolt reaches its yield point in this process and must be replaced. |
While looking at the crank bolt my technician pointed out that he was able to torque the bolt to the recommended spec of 410Nm (302 ft*lbs) by using two special tools. The first is a long handle welded to a flange that is designed to be bolted to the crank. The second is little more than a high strength pipe that is placed over the handle of the first tool to increase leverage. With those tools in place my technician used the largest SnapOn digital torque wrench he had and while this torque was slightly out of its maximum range and it did not beep, it did measure the torque applied. Oddly enough, he said that the newer cars have a torque spec of 100 ft*lbs + 270 degrees, and most of the time they can't achieve that in their shop. This is yet more evidence BMW is producing products that can't be effectively maintained in the field. Paul Rosche is rolling over in his grave, that much is sure.
Next Up: Engine Start!
Wrapping up our conversation my technician let me know that we should be ready to fire it up tomorrow. Naturally I told him I want to do the honors. While I can honestly say I've done everything in my power to build the engine properly, I will be on edge until I hear the engine fire up, run smoothly,and survive the break-in process with little or no oil consumption.