


BMW E36 HK Audio System
Speaker Upgrade DIY
Page 2 of 2
Spurred by a need to replace a failed midrange driver, I decided to
replace all of the speakers in my E36.
Rear Speaker Replacement
- Remove the speaker grills from the rear deck cover. The trick to this is wedging your fingers under the center of each side of the grill and carefully pulling upward. The grill will bend upward in the center and consequently pull in the front and rear tabs that fasten the grill to the deck cover.
- Disconnect the wiring from the top of the enclosure. The woofer and tweeter connect with the amplifier via a connector on the top of the enclosure. Remove this connector by just tugging upward. Be sure to grab the connector body, however, and not the wires, or you may rip the wires out of the connector. If you intend to reuse the BMW enclosure, you'll need those connectors undamaged.
- Remove the three screws holding the speaker enclosure to the rear deck. Removal of the grills will expose three screws used secure the speaker enclosure to the rear deck. Some of these screws are too close to the rear window to use even a stubby screwdriver, so I used a philips socket and a ratchet to make quick work of them. Once the screws are removed, the enclosure will be held to the rear deck with a metal clip and a small protrusion in the enclosure that acts as a hinge. To remove the enclosures, go around to the trunk, tug the inner side of the enclosure downward to release the clip, and then pull the assembly toward the center of the car to release it.
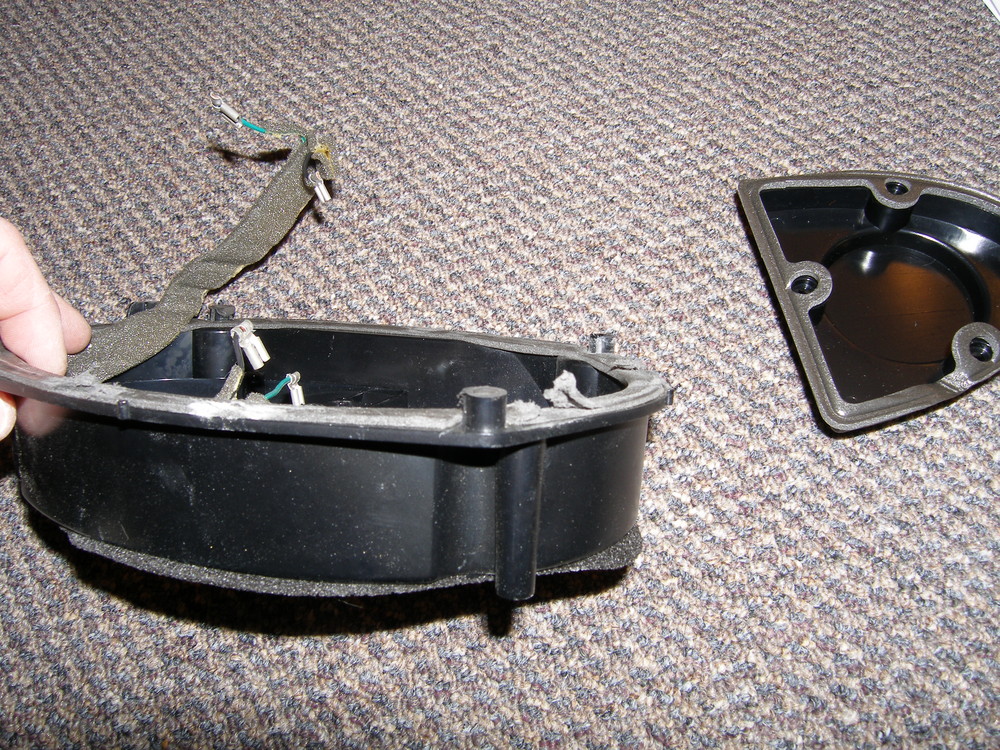
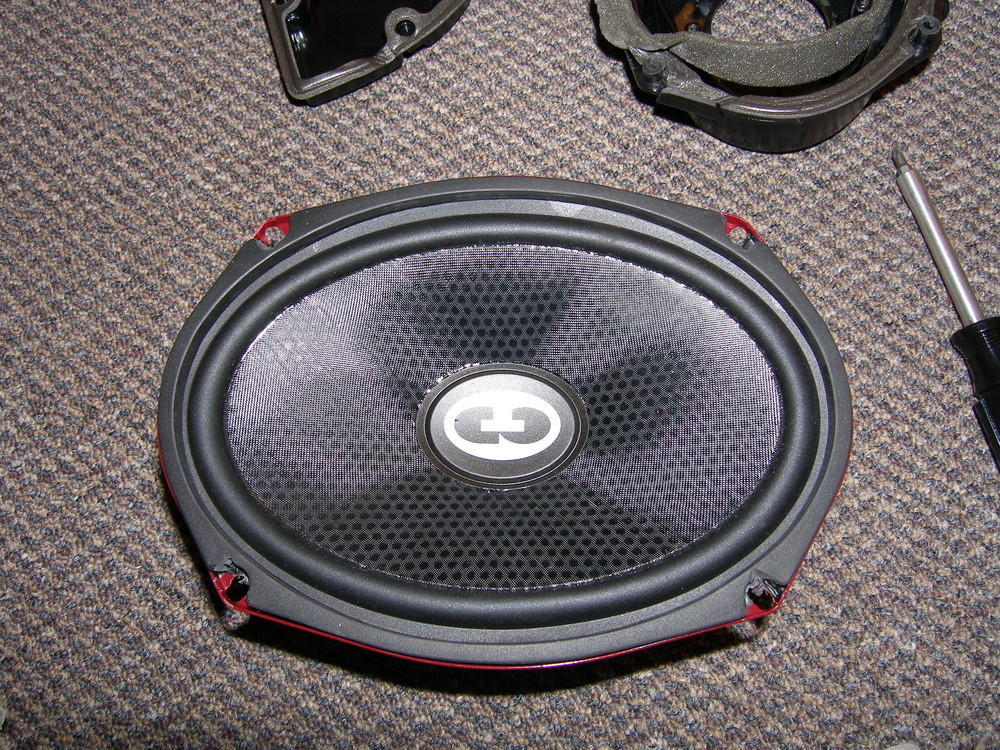
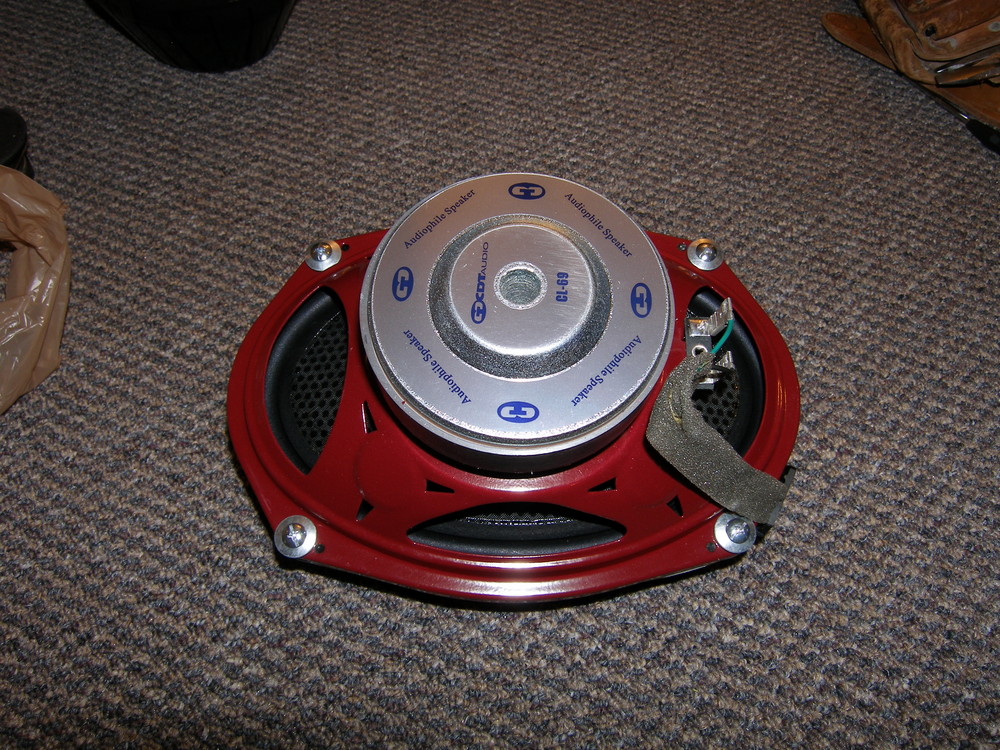
- Remove the enclosure and drivers. The 6x9 enclosure is of a clamshell design and is easily dismantled by removing the four machine screws that hold the upper and lower halves together with the woofer sandwiched between them. The upper half incorporates a tweeter mount that is sealed from the rear to prevent the tweeter from being affected by the pressure waves from the woofer during normal operation. I purchased the BSW adapters to replace the BMW enclosure, but I quickly realized that the BSW adapters lacked any provision for mounting a component tweeter. This motivated me to salvage the BMW enclosures. In fact, the only the lower half of the BMW enclosure was discarded because it would not fit over the CDT woofer and it's large magnet.
- Modify the enclosure to accommodate the new woofers. After a brief period of trial and error, I realized that the CDT tweeters would fit the BMW enclosure tweeter pod perfectly and I only needed to made a few modifications to the enclosure to accommodate the CDT woofers. The most obvious modification included grinding down the four plastic standoffs on the upper half of the enclosure. This served to close the gap between the enclosure and the woofer. I used a palm sander for the first one as an experiment, but found a grinder with a stone abrasive wheel made quick work of the remainder. I found that leaving approximately 7 mm of the standoff produced the best bit. To perfect the fit and eliminate the chance for vibration, I installed some thin adhesive-backed foam and trimmed it to fit.
- Install the speakers in the modified enclosure. I installed the tweeter first and used the surface mount installation hardware to produce what looks almost like a factory installation. A bit of hot melt glue solidified the installation. I then bell spliced the tweeter wiring in with the existing enclosure wiring in order to retain use of the special press-fit enclosure wiring connector and reinstalled the protective cover on the tweeter pod. Next I mated the CDT woofer with the upper half of the BMW enclosure using some 8/32 x 1 1/4" machine screws, nylon locking nuts, and some washers. I used some special concave neoprene washers on the driver side of the connection only because I had them handy from an earlier project and I figured they would further help reduce vibration. All of the materials were purchased at the local home center.
- Reinstall the enclosures in the car. With both enclosures finished, I reinstalled them in the car, reconnected the wiring and turned on the stereo to test them. The first thing I noticed was the increased bass because a portion of the shelf was rattling on bass peaks. I quickly determined that it was caused by the rear deck cover hitting the metal shelf so I stacked up a few three inch long pieces of the same adhesive backed foam I used earlier and wedged it between the shelf and the cover. No more rattling, and no heavy (and expensive) Dynamat needed!
Rear Speaker Replacement Highlights
 The CDT 6x9 infinite baffle subwoofer is a perfect match to the BMW provided you use the right adapter. This is designed for use in unsealed enclosures (so called infinite baffles) such as the trunk of our BMW. In fact, any subwoofer you mount to the rear deck must be designed to operate in an infinite baffle of you'll easily exceed its excursion limits. |
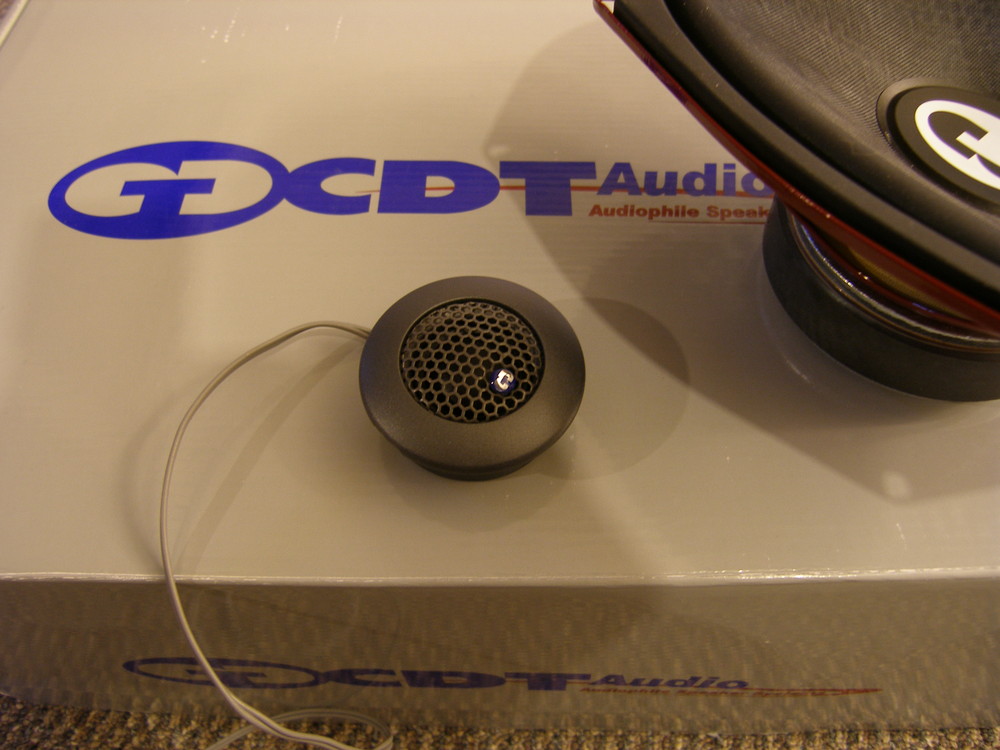 Although I'm a fan of Polk tweeters, I bought the CDT tweeter set to mate with the CDT woofer so in case I installed an aftermarket amp I could buy the CDT crossover designed specifically for these drivers. |
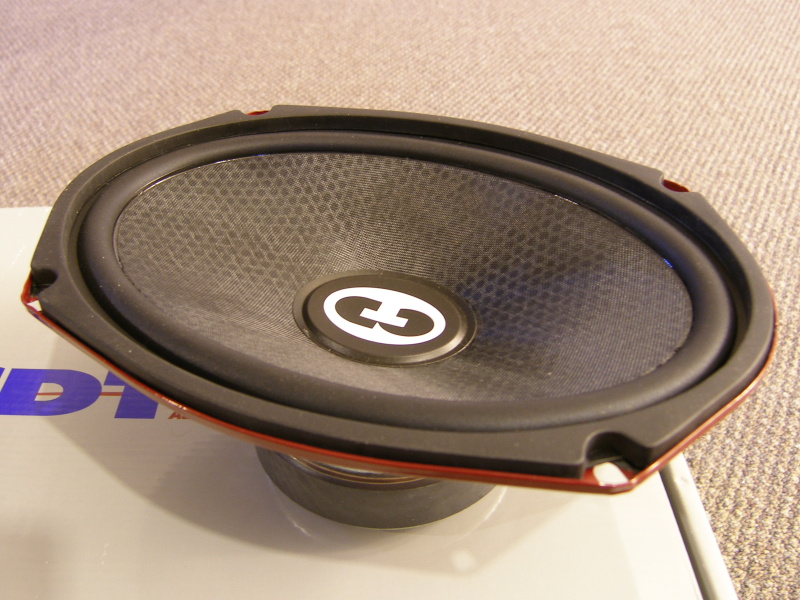
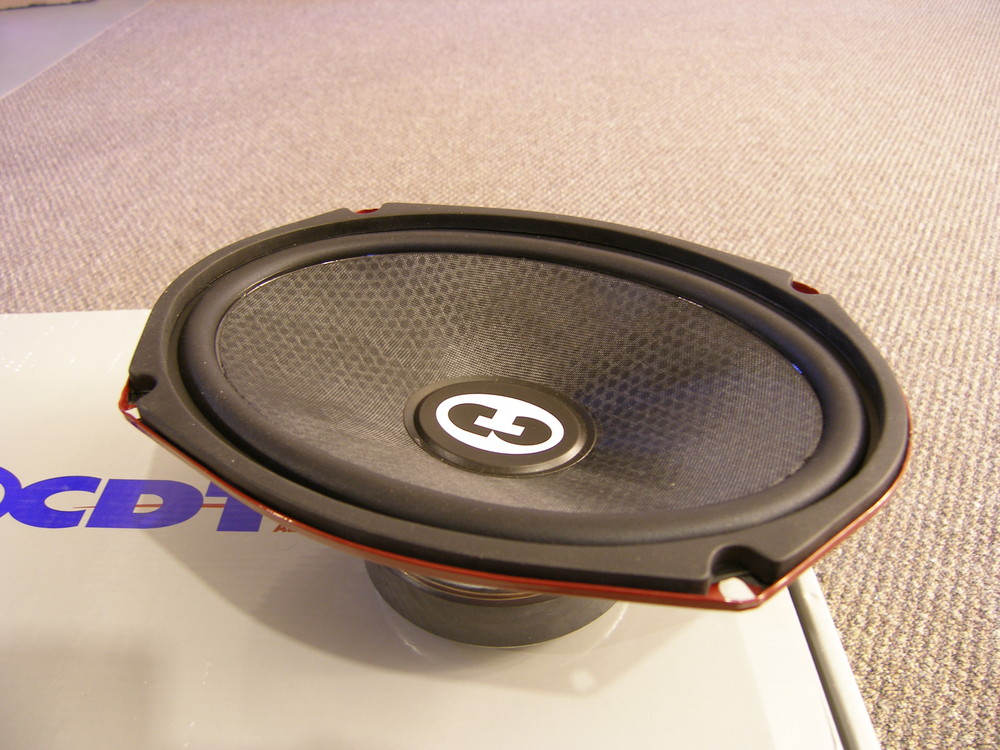
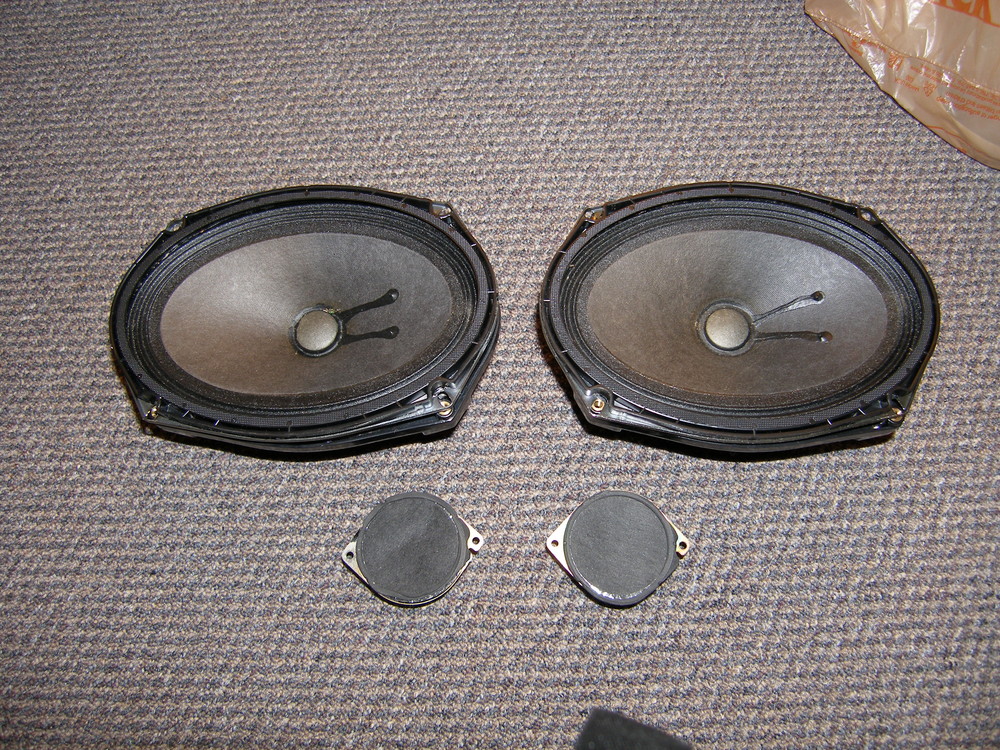
 The BSW 6x9 adapters (on top) are a good solution if you don't mind giving up the tweeters, as they provide no mounting provisions for them. Also shown is the BMW enclosure (bottom left) and the new CDT 6x9 driver. |
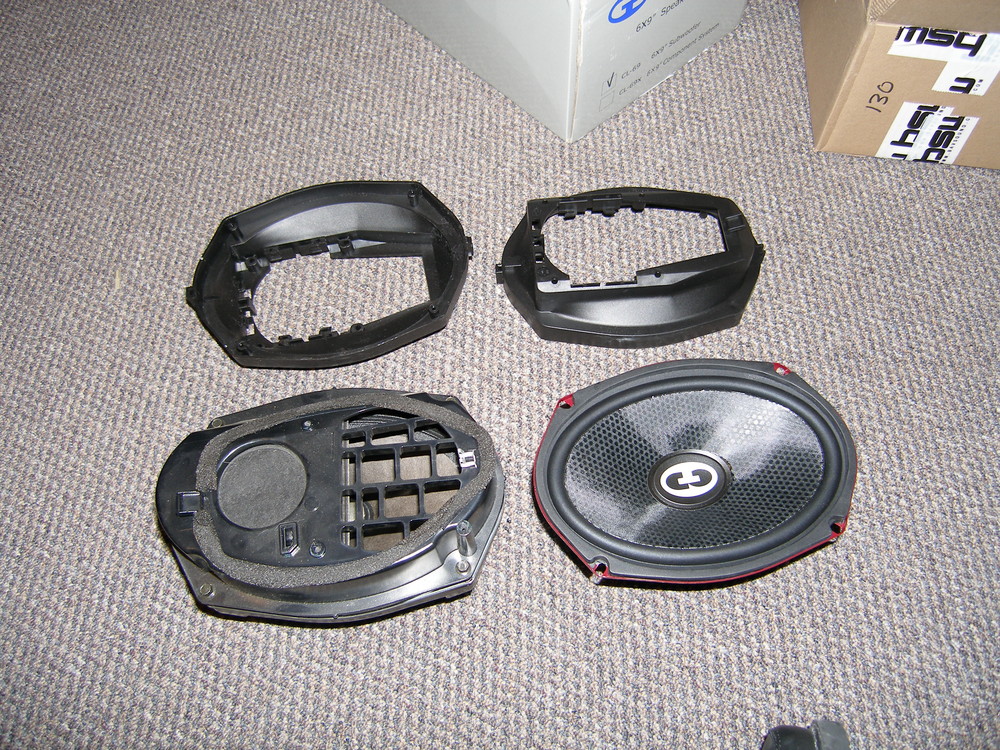
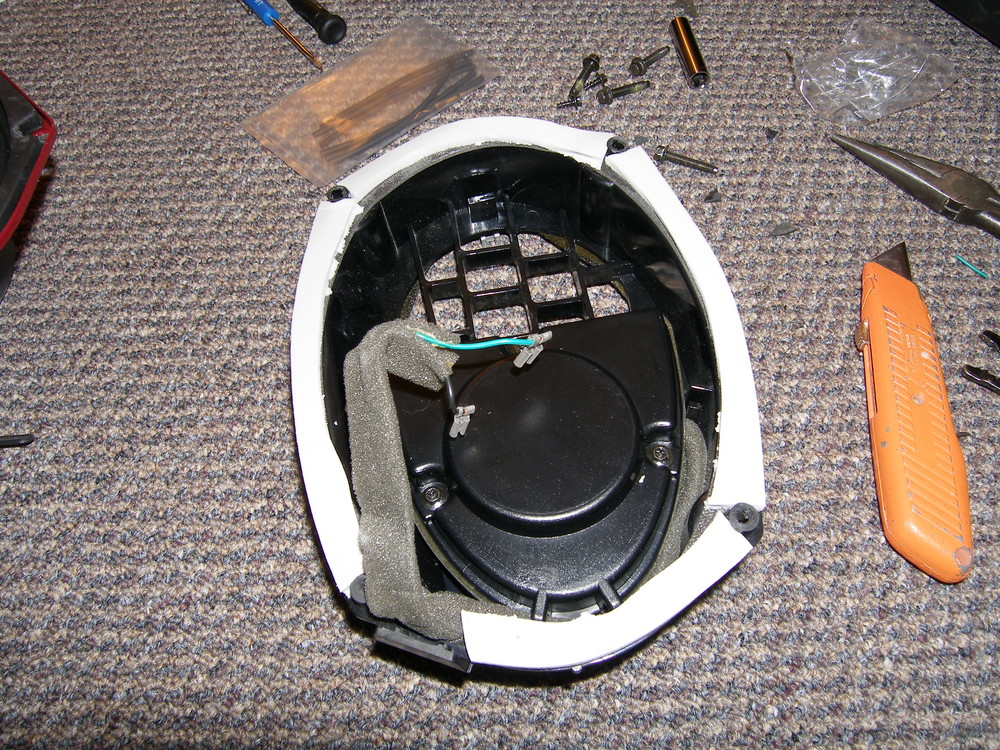
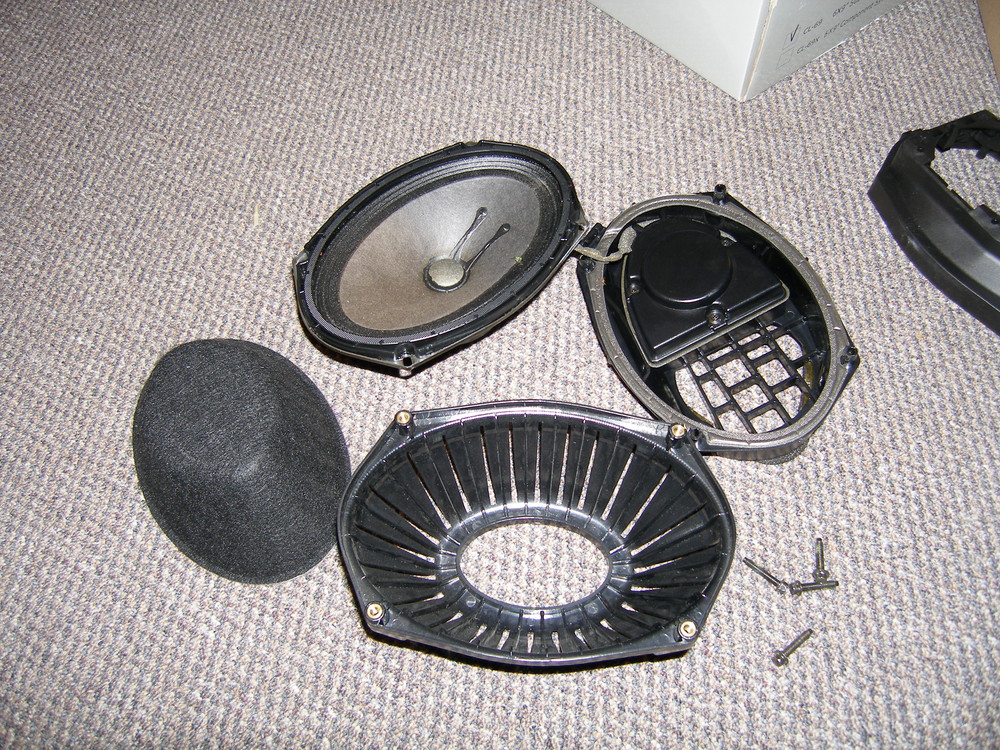 The BMW enclosure is used to mount a 6x9 woofer and component tweeter to the rear deck. It is shown here dismantled. Clockwise from the top: The original HK woofer, the top half of the enclosure that contains the sealed tweeter mounting pod, the bottom half of the enclosure, and the protective felt insert. The insert and bottom half of the enclosure are discarded in this upgrade. |
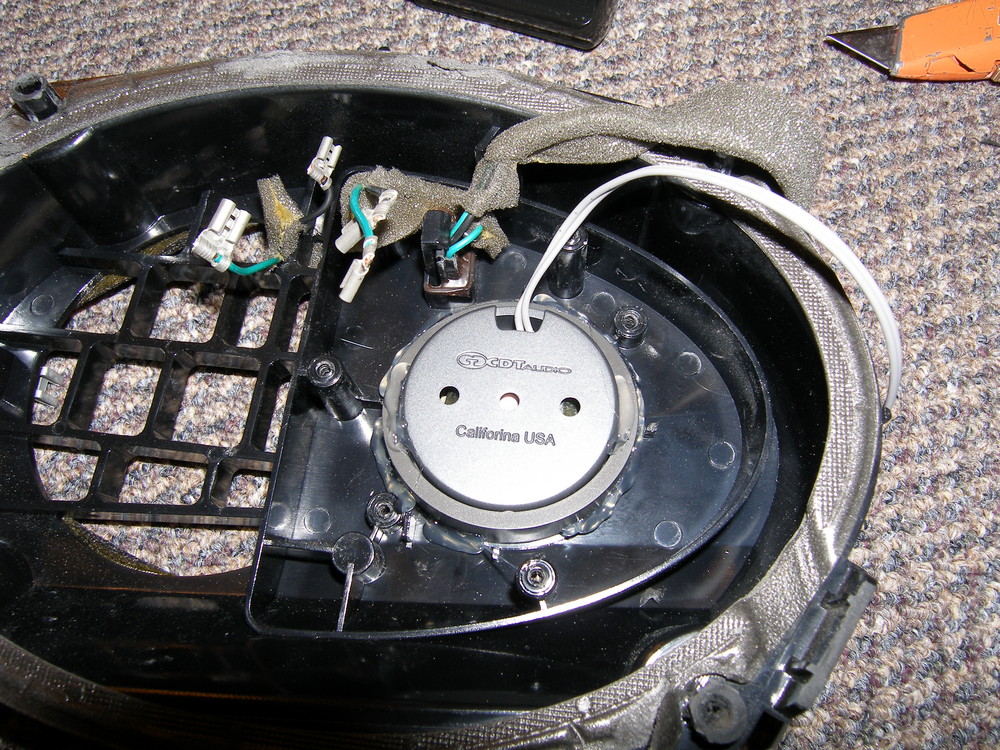
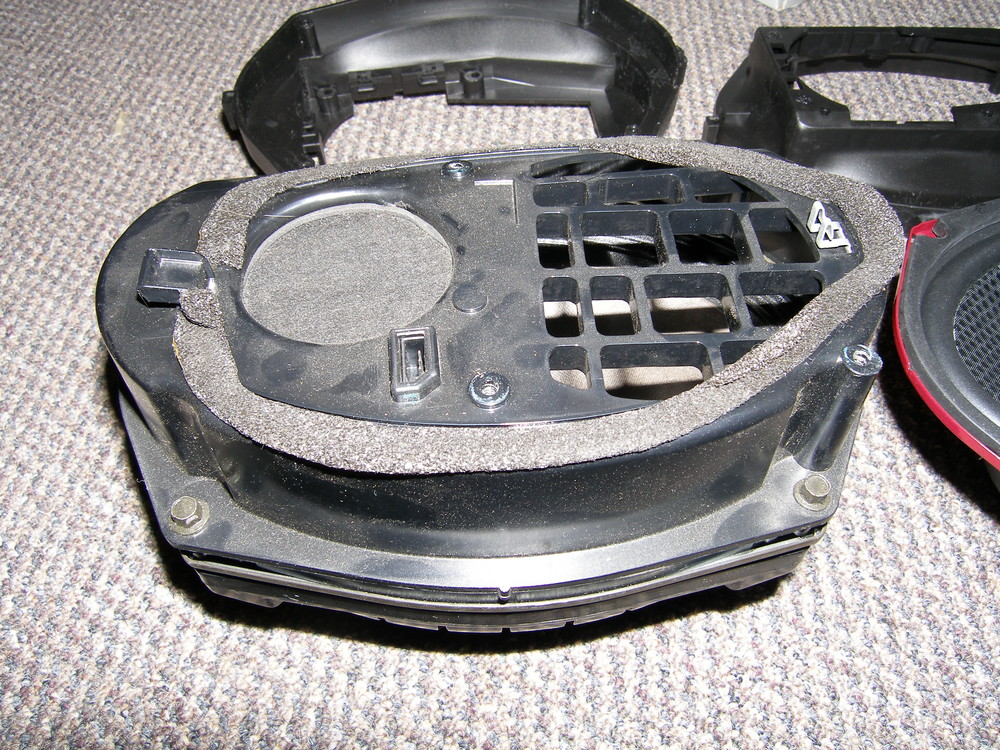 Here's a closeup of the original assembly. It effectively sandwiches the 6x9 driver between the upper and lower halves and connects using four machine screws. The L-shaped bracket and metal spring clip on top of the enclosure combine to temporarily hold the unit in place on the rear deck so you can insert the screws that permanently mount it. The female connector used to connect the signal wires is just to the left of the mounting screw. |
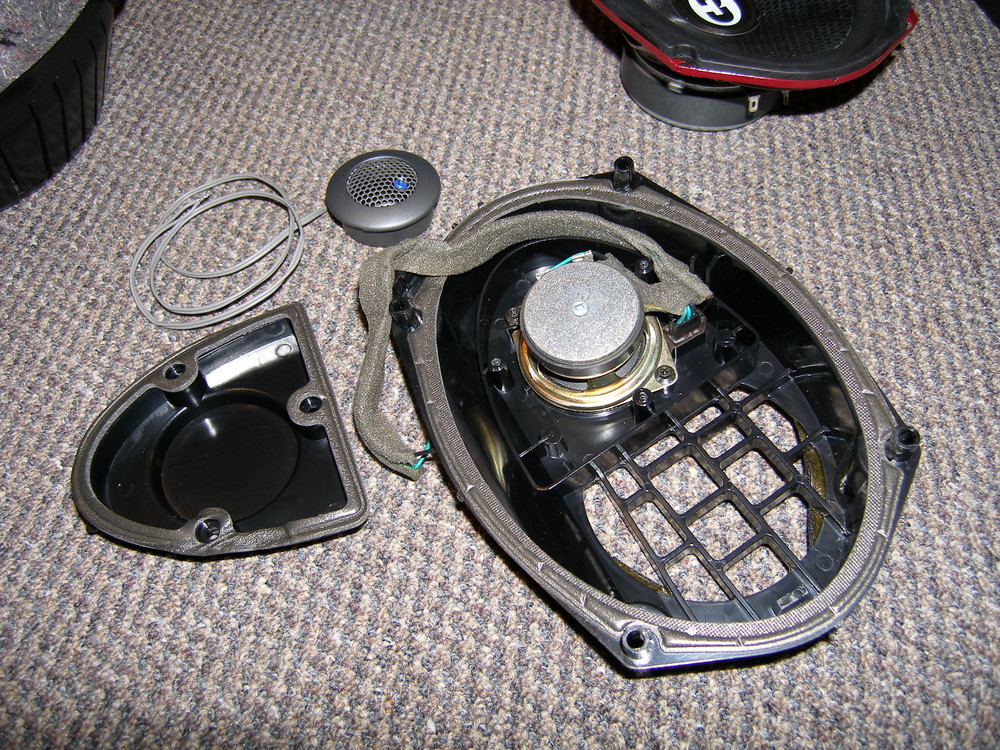 A few philips screws provide access to the original tweeter. HK sealed the tweeter so it wouldn't be affected by the woofer pressure waves. The really odd thing about this enclosure is how they routed the wires from the signal connector (to right of the tweeter) to the woofer by just putting the wires in some foam and routing them through the junction between the woofer and enclosure (pretty much as depicted). |
 I had to shorten the standoffs so the CDT driver would mate properly with the top half of the enclosure. This is a decidedly permanent modification, so there is no going back after this. I started out with 150 grit sandpaper on a palm sander before giving up and using the grinder in the garage. |
 I also had to made some minor modifications to the CDT driver, including elongating the mounting holes and removing just a bit of the mating gasket so the standoffs would mate with the metal frame. |
 I used the CDT tweeter surface mounting option to install the tweeter in the enclosure. The ring around the back of the tweeter is a press fit and not particularly secure, so I used just enough hot glue to keep the unit secure, yet a small enough amount to facilitate later removal. |
 Every good connection starts with a bell splice, solder, and heat shrink. I found this heat shrink at my local home center's electrical aisle but any electrical supply house would have it too. |
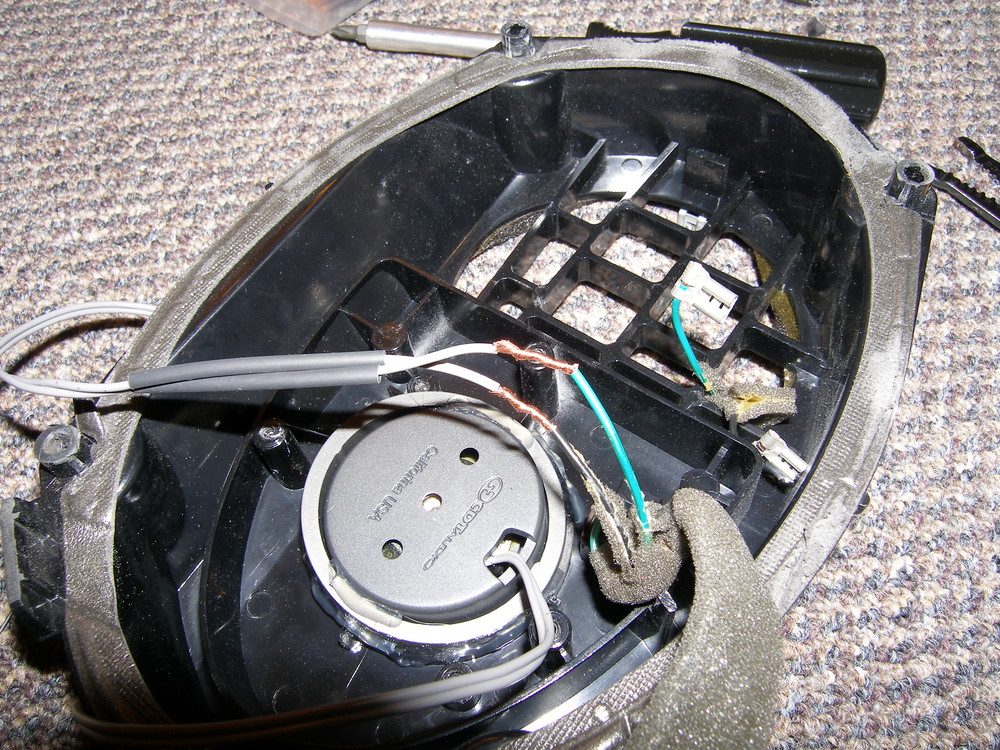 Here is a closeup of what a bell splice looks like. The wires are stripped about 1 inch back, cross with each other at the 1/2 inch point and wrapped in a spiral motion back on themselves. The result is a low-profile splice that is surprisingly strong, even without solder. |
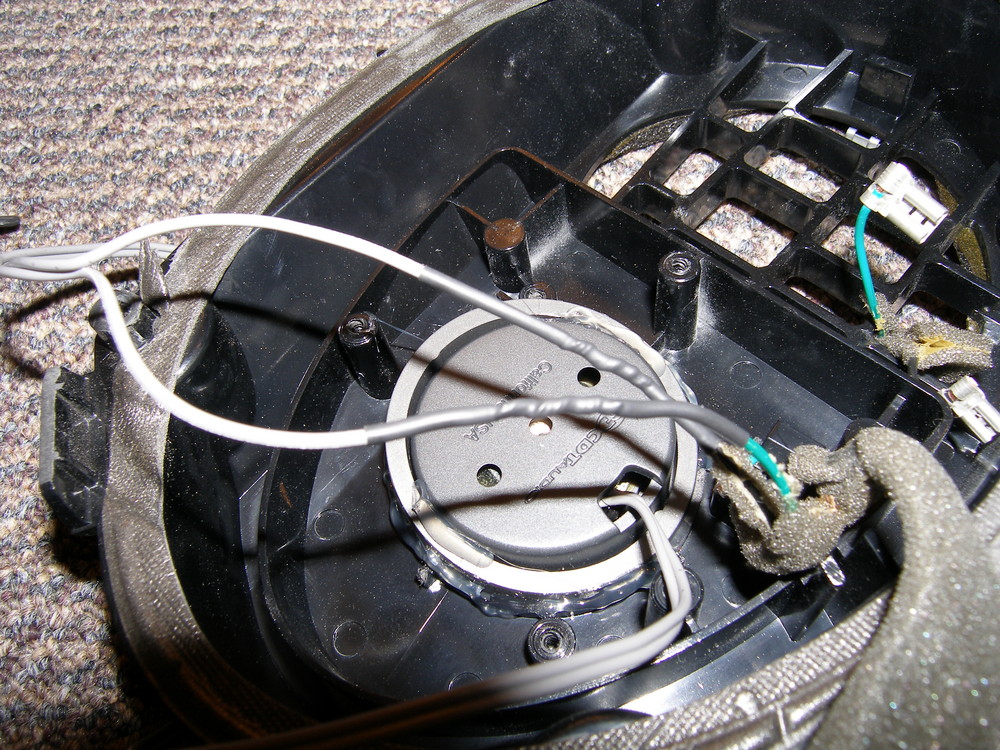 With the wiring soldered and the heat shrink applied, the tweeter is ready to be closed up. With a connection this secure, there is no chance that the connection will loosen up or short out. |
 To help seal the enclosure and reduce vibration I installed some thin adhesive-backed foam on the mating surface of the top half. I then used a very sharp construction knife to remove any unnecessary material. |
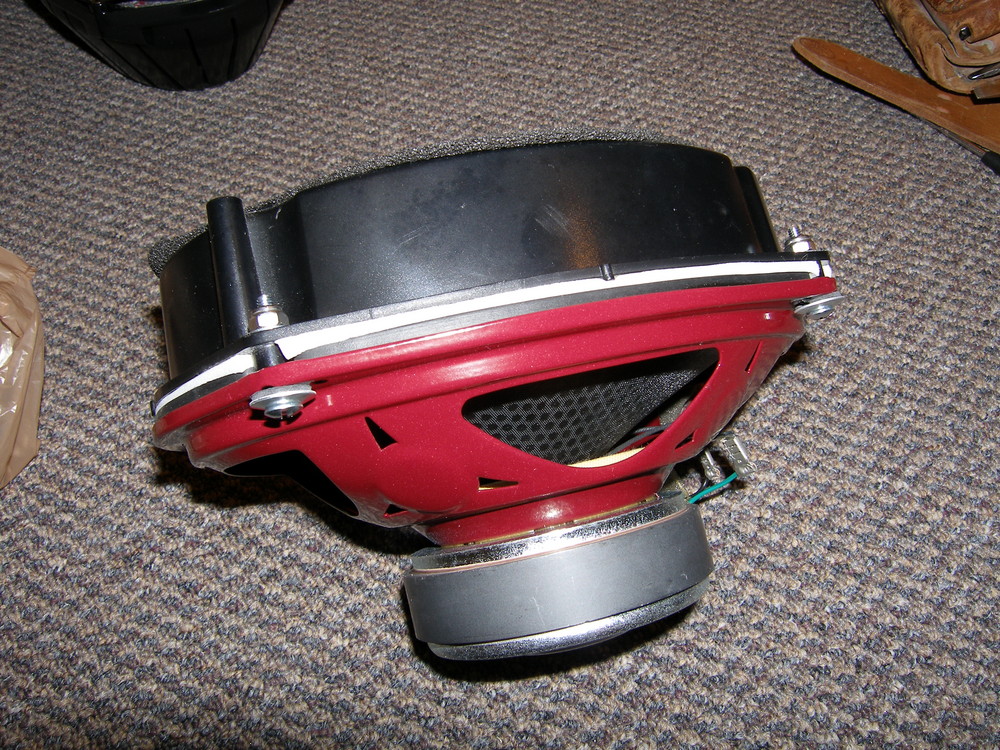
 The HK system will obviously never compete with a good aftermarket system but from the looks of these drivers I'm surprised the system performs as well as it does. These drivers promptly found their way into the circular file. |
 I bought some 8/32 screws and nylon locking nuts along with some washers to mate the CDT 6x9 with the enclosure. The concave neoprene washers were a leftover from another project and are most certainly not necessary. |
 Side shot of the new enclosure. Note how the foam nicely seals the driver with the enclosure. |
 This shows how nicely the CDT tweeter fits the enclosure. |
 While the temptation exists to torque down the mounting hardware, the nylon lock nuts make this unnecessary. To retain the best seal, it is best to evenly tighten the hardware. |
 Note how the neoprene washers nicely support the driver. |
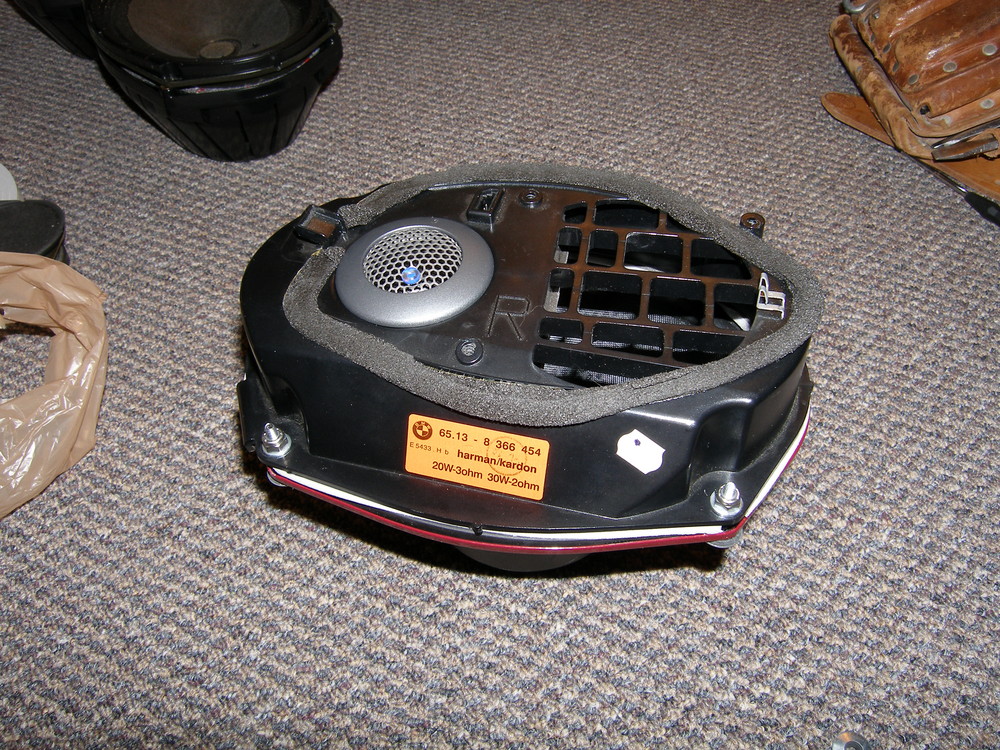
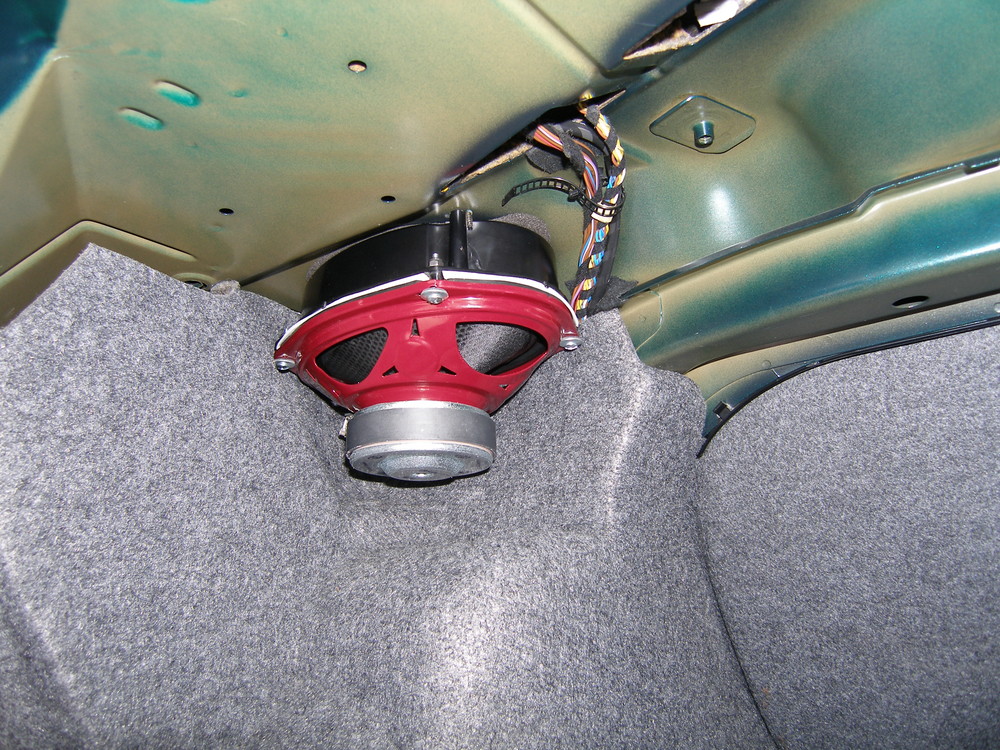 Left side enclosure reinstalled. Looks almost stock! |
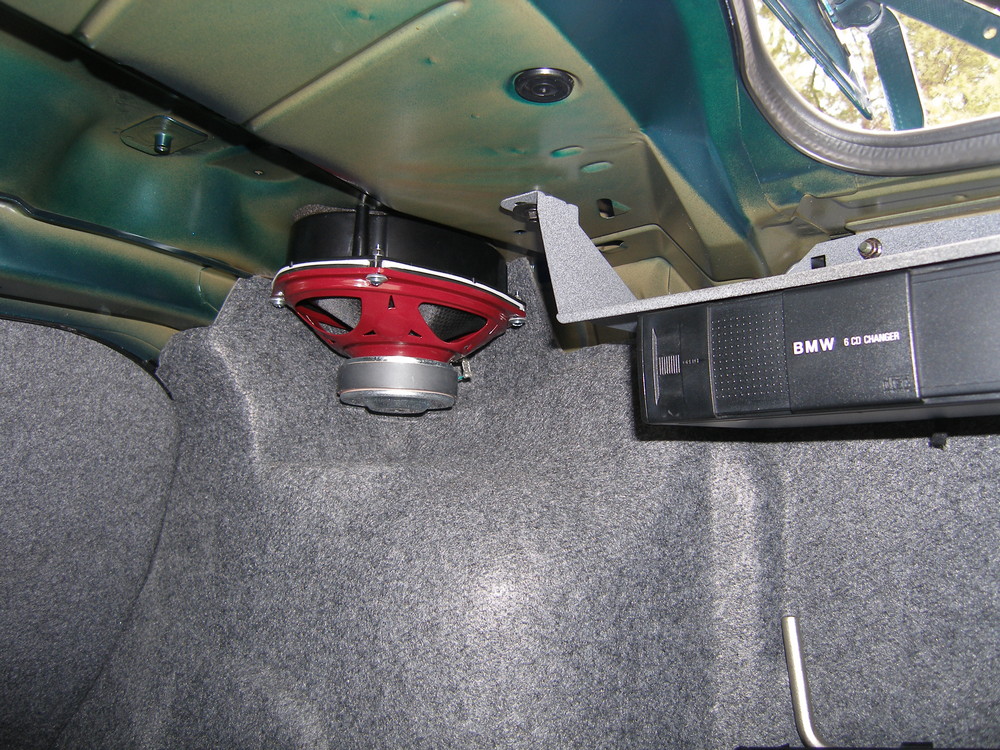 Right side enclosure ready for action. Hmmm...that CD changer sure would look better as an Ipod! Maybe next time... |
Conclusion
Replacement of the speakers in the E36 is a relatively simple process. The most difficult aspect of the procedure is dealing with the door panels, and only because BMWs interior subcontractor doesn't know how to build door panels.
As far as sound quality is concerned, the resulting system is subjectively 50% better than before. The bottom is is certainly better defined, but the overly-aggressive subsonic filter in the HK amp really prevents the drivers from achieving their full potential. The most improvement comes in the high end, which seems to indicate that the OE HK tweeters were the weak link in that region. The high end is certainly smoother, at least in the front. On the other hand, I find the CDT tweeters to be almost offensively bright and "metallic" sounding at times (which surprised me given that they are a soft-dome design) but that is very likely because I am driving them with the crossover in the HK amplifier. Hardly an ideal configuration.
The weak link in the BMW HK audio system is clearly the amplifier, so if you can afford to invest the time and money I recommend replacement of the HK amp with an aftermarket unit so you can provide a full range signal to the crossovers that come with the component sets. Not only will the frequency response be what the driver manufacturers intended, a more powerful amplifier will be able to cleanly drive the speakers to levels you simply will not achieve using the HK amp.
The E36 is known to be an electrically "noisy" car so if you do decide to replace the amp be sure to get one that supports balanced differential inputs. The ideal amplifier for this application is the Arc Audio SE series in combination with the Audiophile Line Driver (ALD), which converts the single ended preamp outputs of a typical aftermarket headunit into balanced differential for the long trip back to the trunk. The result will be a lower noise floor.