


BMW E36/E46
Rear Shock and Spring Replacement DIY
After 100K miles of abuse, a rear suspension refresh involving
new shocks
and springs is essential to maintaining original vehicle
performance.
Introduction
Some people will tell you that the way to test for bad shocks is to push down on the vehicle body to see if it returns to rest quickly or "bounces". While that might be a valid test if the shocks are blown out entirely, shocks wear gradually over time and can pass the "push" test but still be in a state that degrades handling. The best test for bad shocks in a BMW therefore involves your butt and your ears.
If your butt tells you that the rear of the vehicle is skittish over bumps it might be time for shocks. If you don't know for sure whether the shocks are bad, verify how long they have been in service. In most cases, once shocks -- and more often, shock mounts -- reach 100K miles in service they need to be replaced, and in fact that is what BMW recommends.
If you hear clunking noises when going over bumps and the clunking is limited to one side of the vehicle or the other, it's likely that one of the shock mounts or springs has failed. BMW OE shock mounts have been revised a few times and the latest versions are good pieces, though they won't last forever, particularly if the vehicle is driven over extremely bumpy roads regularly and/or is equipped with larger aftermarket wheels and low profile tires. The reason for this is simple -- the more rigid the connection between the road and the suspension, the more vibration can contribute to the fatigue of the shock mount.
BMW also recommends spring replacement every 100K miles but most people do not replace them until one of the springs fails. The usual failure mode involves the smallest bottom coil breaking due to corrosion. This occurs due to the design of the upper control arm and the crummy quality of the eco-friendly paint BMW's supplier applies to the springs during manufacturing. The problem is most prevalent in the northern climates in the US due to the use of road salt during the winter months. Two symptoms of a failed spring are a lower ride height and a clunking noise when traversing bumpy roads or speed bumps.
Parts Selection
In my experience it really doesn't make sense to attempt to salvage any components from the old shock assemblies. The shock and shock mounts are expected to be garbage at this point (otherwise why are you doing this?), and the remaining metal components are likely to be rusted or otherwise unusable. The possible exceptions include the upper cup washer, plastic guard and bump stop. However, since those parts can be purchased new for only a few dollars per side, I recommend buying all new parts and creating two entirely new shock assemblies. These assemblies can be pre-manufactured and then quickly swapped with the original assemblies, thus reducing the time the car is out of service.
I strongly recommend the use of the factory shock mounts. They get a bad rap, but the latest versions of the parts are fine pieces and will do well on the street to reduce noise and impact on the shock towers. I also strongly advise against the use of more "rigid" mounts, particularly those made of urethane, or worse yet, solid mounts, because these materials may transmit more forces to the shock tower and cause metal fatigue, ultimately leading to failure of the shock tower and a very costly repair. If your car is intended for the track, do what you wish, but if it is intended for the street, be realistic about your parts selection. "Stronger" is not always better.
In the area of prevention, I recommend installation of the BMW OE shock tower reinforcement plates. They reinforce the top of the shock tower and spread the load of the mount over a wider area. They are not exactly cheap but they are far less expensive than the repair for the damage that might otherwise result. Note that these parts are often referred to as the "Z3 shock tower reinforcement plates" and can be found in the BMW ETK or realoem.com by searching for the E36/7 Z3 vehicle parts list. You will not find them on the E36 or E46 parts lists because BMW technically does not recommend their installation, presumably because they do not feel they are needed. And for 98% of the cars on the road, they're probably right, but do you want to be in the 2%?
BMW supplies springs in matched sets. It is not possible to buy only one spring, so if one fails or you want to refresh the suspension, you'll need to buy a set of springs. Unfortunately, the ETK does not provide part numbers for the springs. You will need to get those from the dealer. Further, the spring seats should be replaced along with the springs. The lower spring seats come in different thicknesses based on the suspension package. The sport package's lower spring seat is about 3 mm thick. The upper spring seat is the same for all suspension packages.
Prerequisites
To replace the shocks, you should have ready access to the following:
- Jacking equipment (2+ ton jack and jack stands) and a stable jacking surface
- Oval socket (special tool to hold shock rod) - Lisle 20400
- 16 mm box end wrench
- 13 mm box end wrench
- 18 mm shallow or deep socket with appropriate ratchet
- 10 mm and 13 mm deep sockets with appropriate ratchet
- Torque wrench capable of 10 ft*lbs [optional]
- Torque wrench capable of 22 and 74 ft*lbs
- BMW OE shock tower reinforcement plates [optional, but highly recommended]
- All new parts associated with the shock assemblies
- New springs and seats appropriate to the installed suspension [optional]
- About 2.5 hours of your day.
Disassembly
- Remove the trunk floor liner that covers the spare.
- Remove the large flat plastic cover on the left and frame rail cover on the right (adjacent to the battery). The left panel is fastened to the body with two 10 mm plastic nuts that mate to studs in the body. The rail cover is fastened using a nut at the rear and a philips head fastener at the front. Be careful removing the philips head fastener -- the heads tend to strip VERY easily which complicates their removal.
- Remove the tail light covers. Find the handle in the recessed center of the cover and twist it 90 degrees counterclockwise to unlock the cover. Then wrestle a bit and pull them toward the front of the vehicle to remove them.
- Remove the side bolsters on the rear seats. Fold down the seats, grab each bolster at the top and then pull toward the front of the vehicle. There is a hole at the bottom inboard edge of each bolster that fits around the pivot point of each seat. Be careful removing that so you don't tear the leather.
- Remove the speakers from the rear deck if required. If your vehicle is equipped with the OE speakers you will likely need to remove them to gain the clearance required to pull the trunk liners out. See my Speaker Upgrade DIY for information on how to do that. My vehicle's aftermarket speakers do not use the large protective "basket" provided with the OE speakers so I had sufficient clearance to remove the liners without removing the speakers. This saved me at least 20 minutes. Hint: if you haven't already, replace the speakers with aftermarket units!
- Remove the trunk liners on both sides of the vehicle. To remove each liner, remove the single philips head fastener holding each liner to the bulkhead that separates the interior from the trunk and then carefully pry and slide the liner out of the car.
- Remove the shock tower insulation to gain access to the fasteners that hold the shock mount to the body. The left side may be removed as a single piece easily enough. The right side requires a more work, so it is preferable to use a sharp knife to carefully create a semicircular flap near the top of the shock tower for access. This is one of the tricks the pros use to reduce the time necessary to do the job and since there is no lasting side effect other than cosmetic (which can't be seen once the liner is reinstalled), I recommend the technique.
- Jack up the rear of the vehicle and place the car on jack stands. Place the jack under the differential carrier (subframe). Do not jack under the differential itself and under NO circumstances work under a car supported only by a jack.
- Place a jack under the trailing arm (left or right, doesn't matter...just pick one) where the lower control arm attaches and pump up the trailing arm a couple inches. This will prevent the spring from violently extending the trailing arm downward after the shock is disconnected.
- Remove the two 13mm nuts holding the shock mount to the body. They are lightly torqued so they should come off easily.
- Remove the 18 mm bolt that holds the shocks to the trailing arm. Be sure to take note how the thrust washer in the shock bushing faces the head of the bolt. You'll need to orient the new shock this way. Hold the body of the shock with one hand and slowly lower the jack until the studs in the shock mount clear the shock tower and then remove the shock assembly. Repeat for the other side.
- Swap the springs. If springs are to be replaced, now is the time to do that because with the shock disconnected from the trailing arm it will be possible to push the trailing arm down far enough to pull the spring out.
- Disassemble the shock assemblies to acquire whatever parts you think you need. Place the 16mm box end wrench over the top nut and then use the oval socket and appropriate box end wrench to hold the rod steady while you remove the top nut. Once the mount has been removed, you may salvage whatever parts you need.
Assembly
- Install the new springs. Make sure the smaller spring seat is on the bottom.
- Build the new shock assemblies using new and/or salvaged parts. Under no circumstances reuse the shock mount. Even if it "looks good", it isn't unless it has less than 30K miles on it. Tighten the top nut to 10 ft*lbs. If you don't want to screw around with a torque wrench, crow's foot socket, etc. just tighten it until it snugs up and apply a bit more force to it before stopping. As a last step place a new paper sealing gasket onto the mount so it will mate with the underside of the body when the assembly is reinstalled.
- Install the new shock assemblies in the vehicle. Lift the shock assembly up until it the shock mount studs fit into the body. Jack up the trailing arm again as necessary, but only enough to place the hole in the trailing arm at the same level as the hole in the bottom of the shock. Position the thrust washer in the shock bushing toward the center of the vehicle and then thread the bolt through the shock into the trailing arm. Some minor adjustment to the height of the trailing arm may be necessary to ensure the bolt does not cross thread. Take it easy. Screw the bolt in nearly all the way, but do NOT apply the final torque to this fastener at this time.
- Install the reinforcement plates and tighten the shock mount nuts. With the trailing arm still jacked up, install the shock tower reinforcement plates and then install the nuts on the shock mount studs. Tighten the nuts and apply the final torque of 22 ft*lbs.
- Lower the car down onto a set of ramps. Jack the rear of the vehicle up (via the subframe). Remove the jack stands and place a set of ramps under the wheels. Lower the car down onto the ramps and allow the wheels to support the vehicle's weight. Then apply the final torque to the bolt that fastens the shock to the trailing arm. This torque is 57 ft*lbs for the smaller variants (318 and Z3) and 74 ft*lbs on the 325/328/M3. To wrap up, jack the car up again, remove the ramps, and then lower the vehicle to the ground.
- Reinstall the interior liners and other components.
Highlights
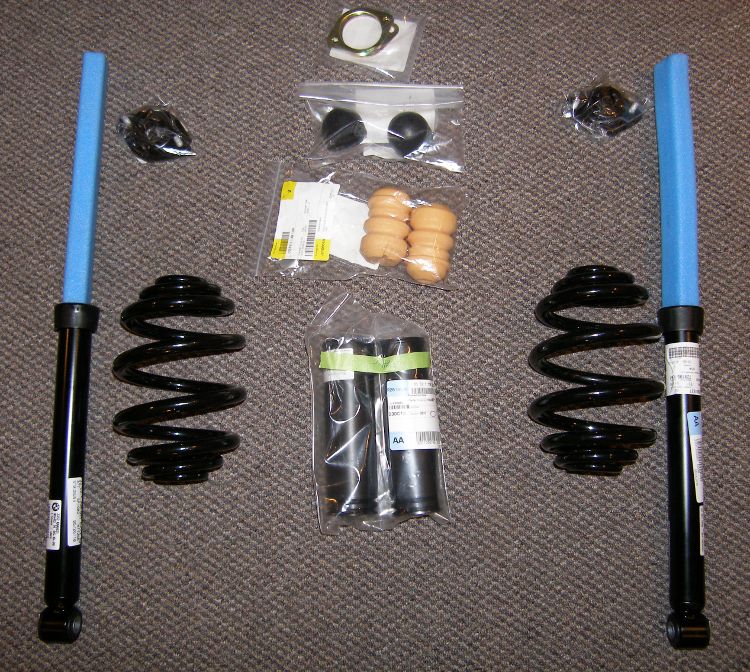
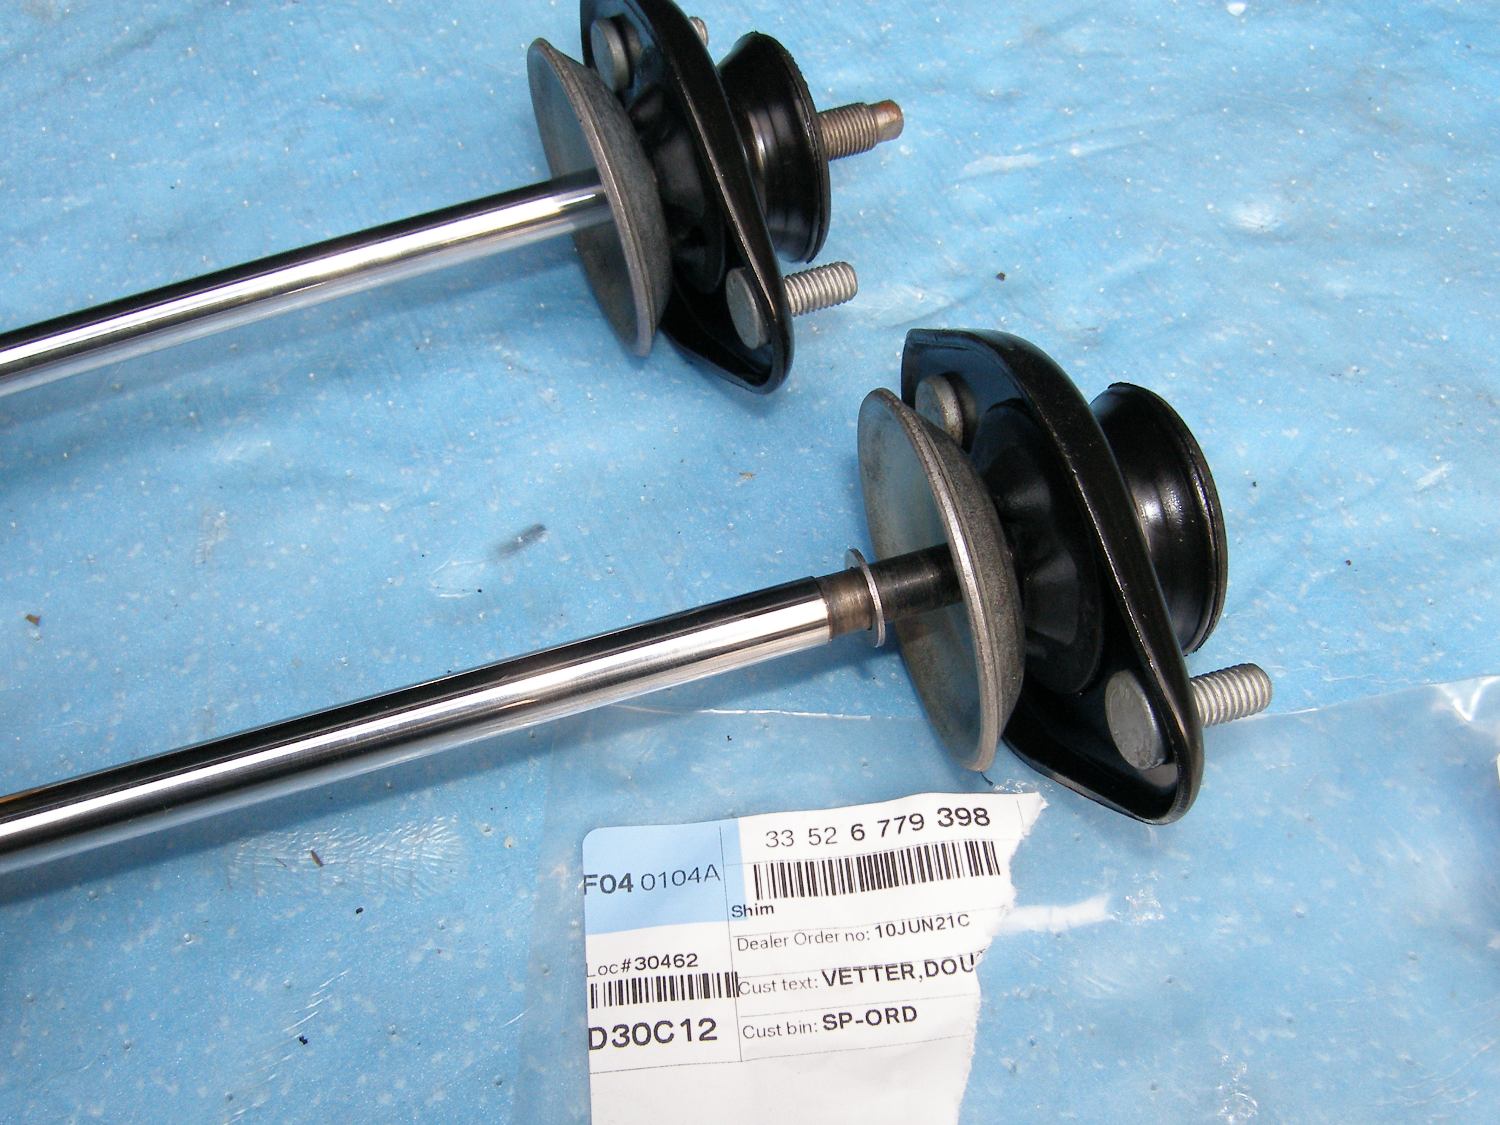
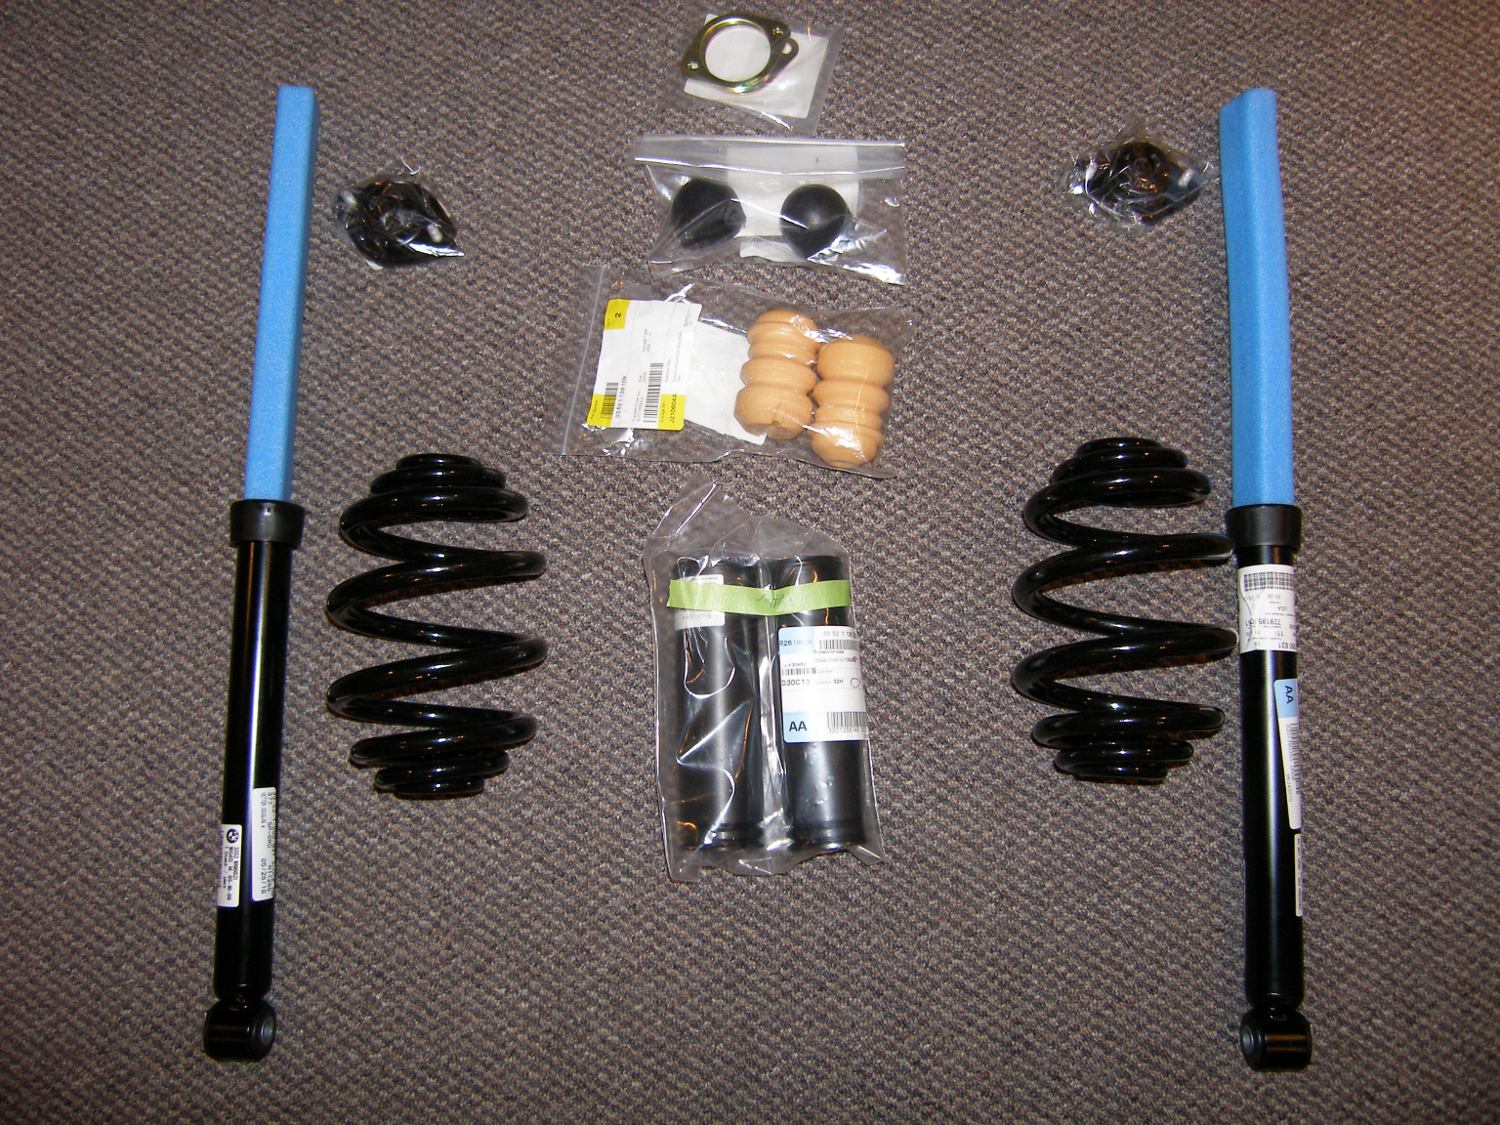 This is a layout of the parts you'll need for a rear shock and spring refresh. The two dust caps are optional. |
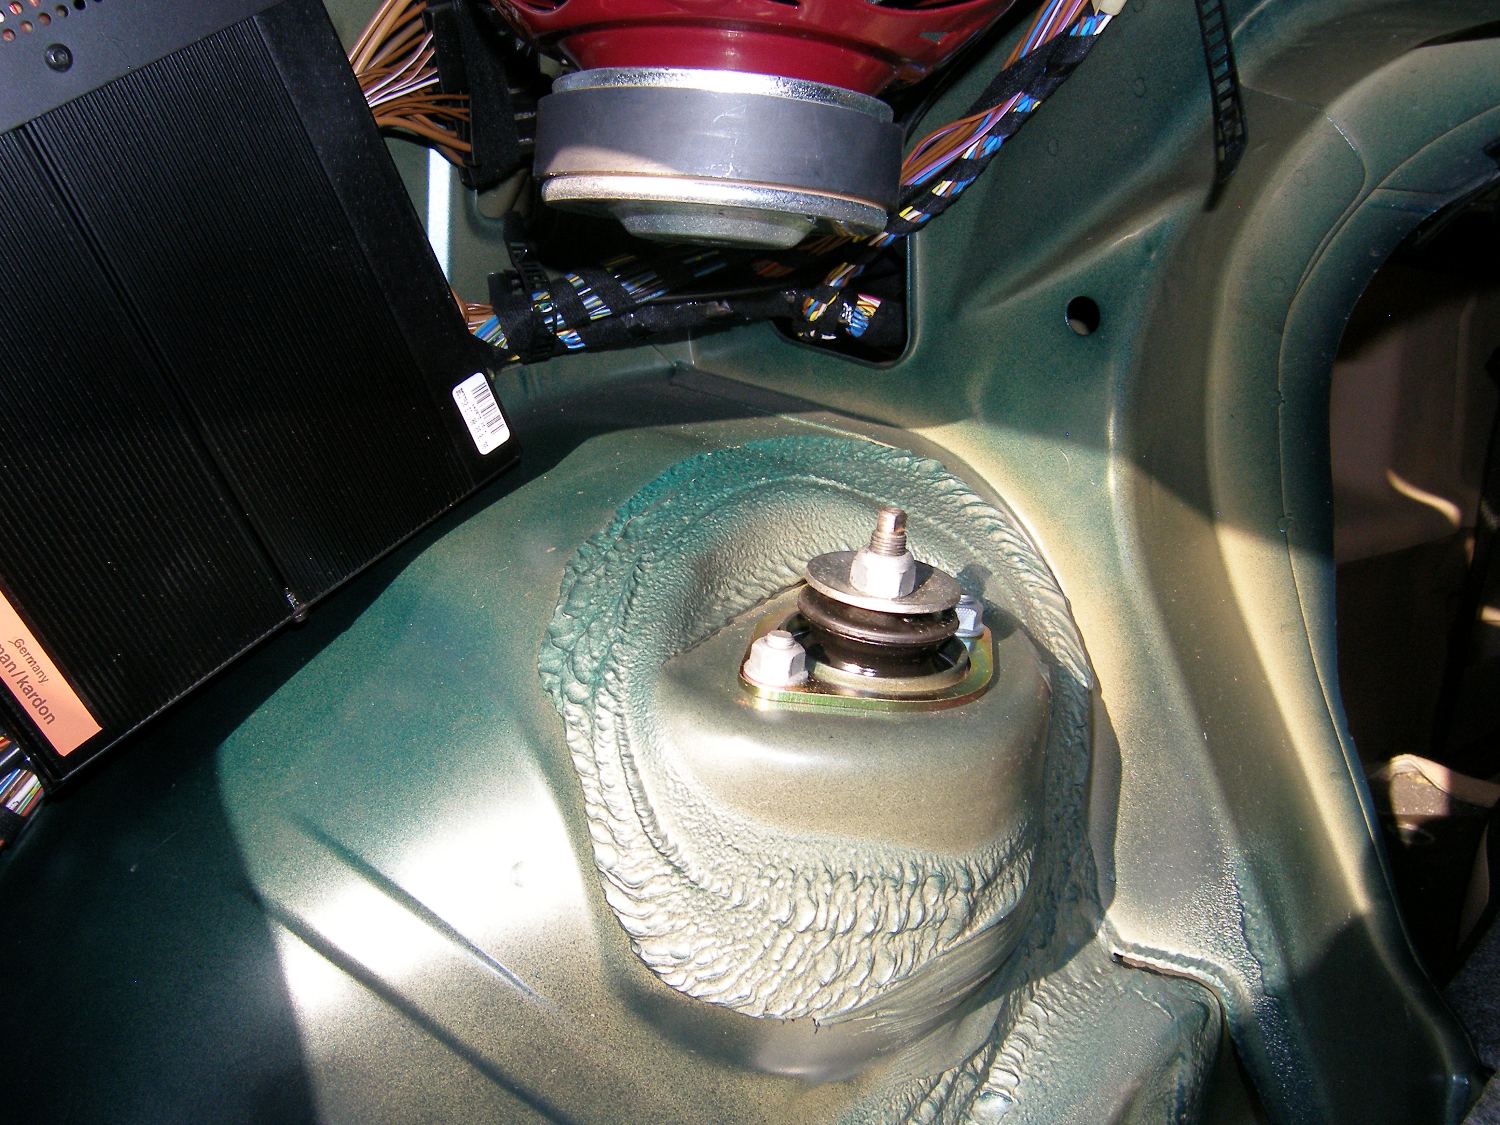 After the insulation is removed on the left side, this is what you'll see, aside from the reinforcement plates, since those are added an option. |
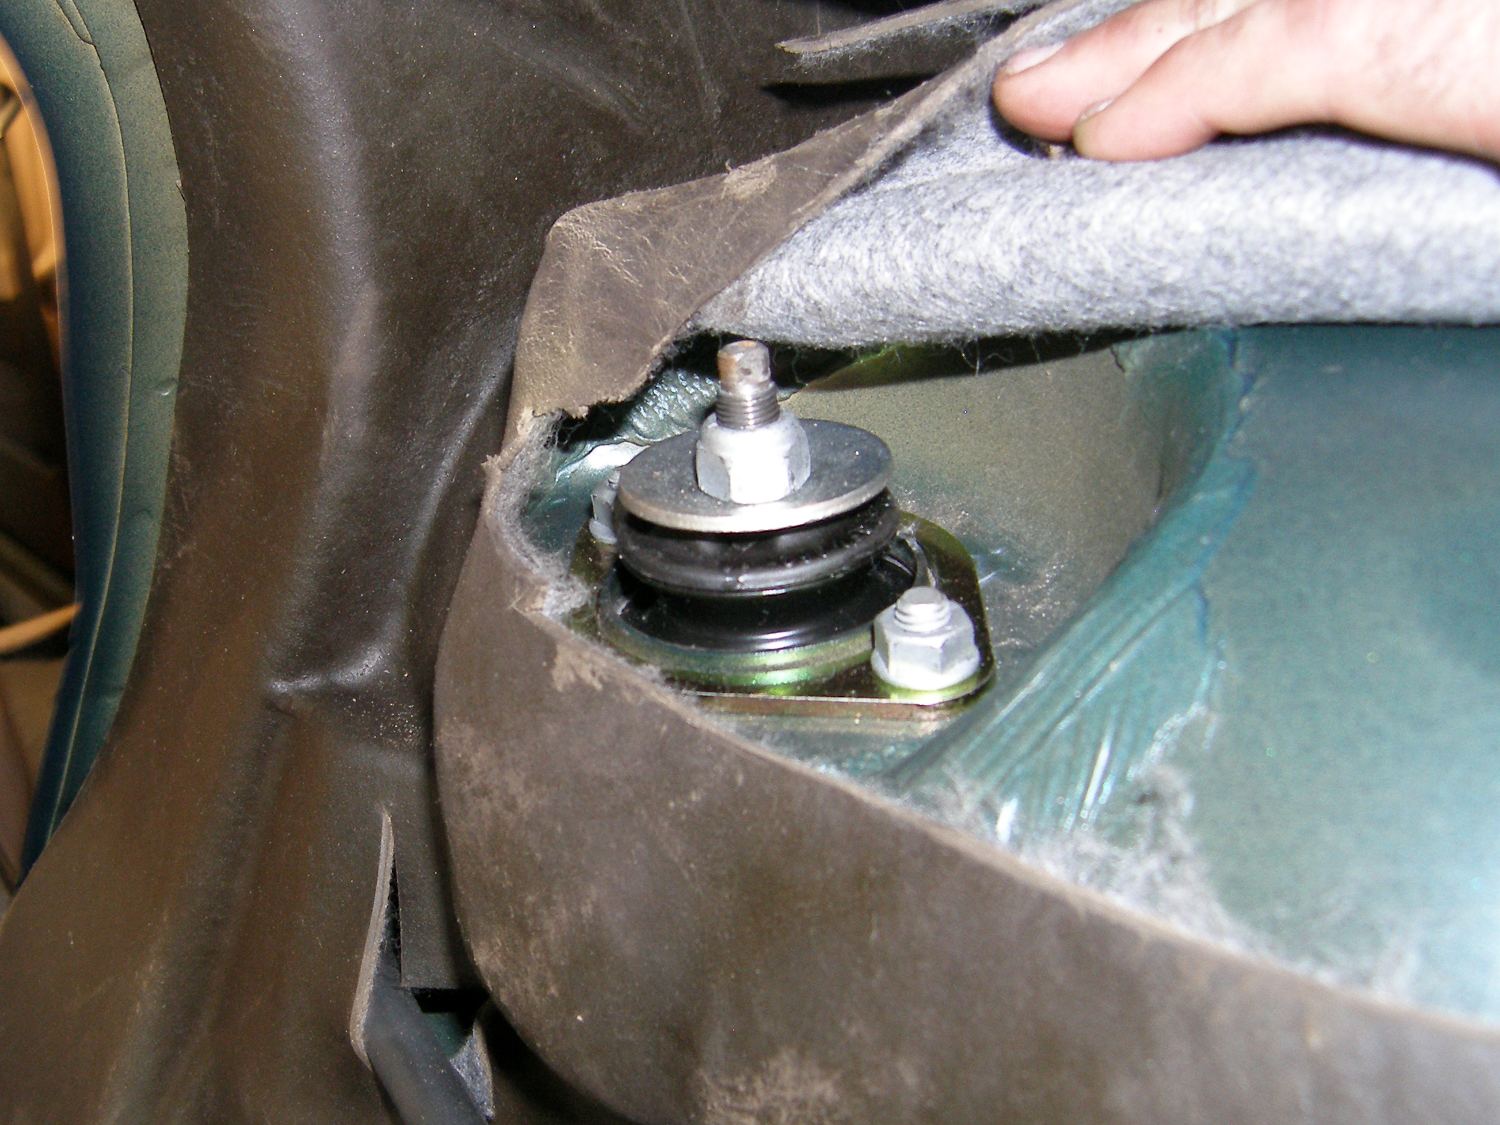 I had the shocks replaced once prior by my dealer tech and he cut this access hole into the insulation. Makes a lot of sense and saves time. |
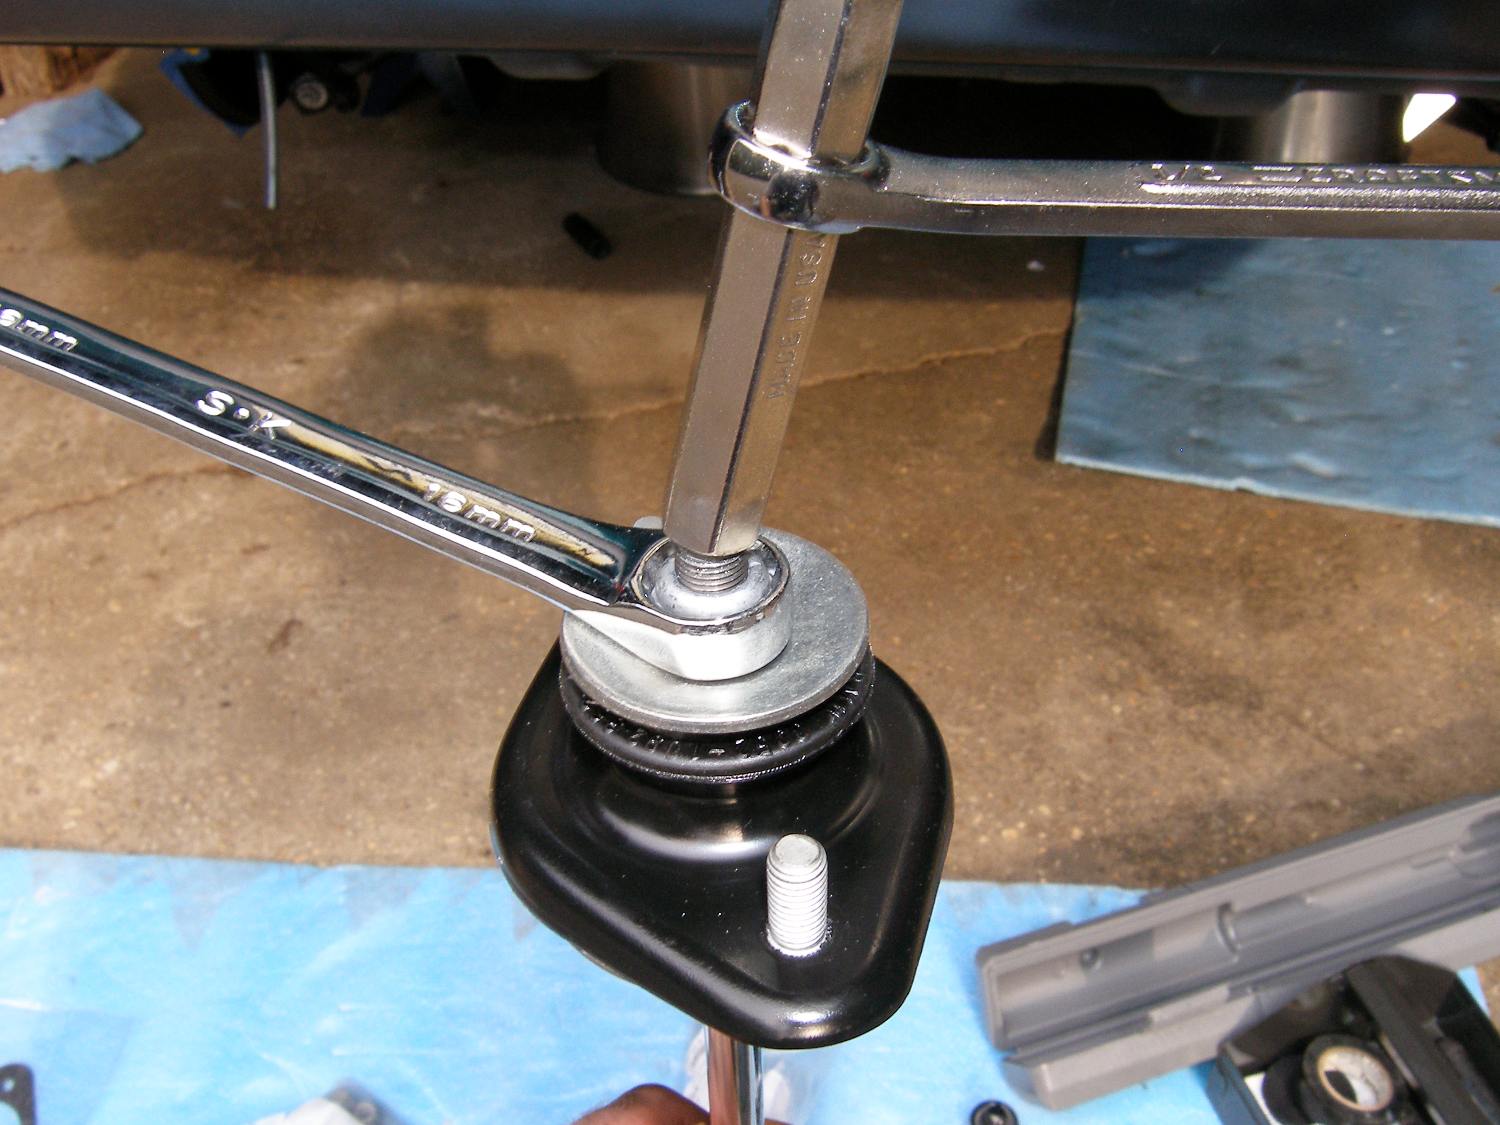 One special tool is essential to this job -- an oval socket. Don't even think of using a pair of vice grips on the flats. |
 When assembling the shock, don't forget the small washer that fits between the ridge in the shock rod and the lower cup washer. |
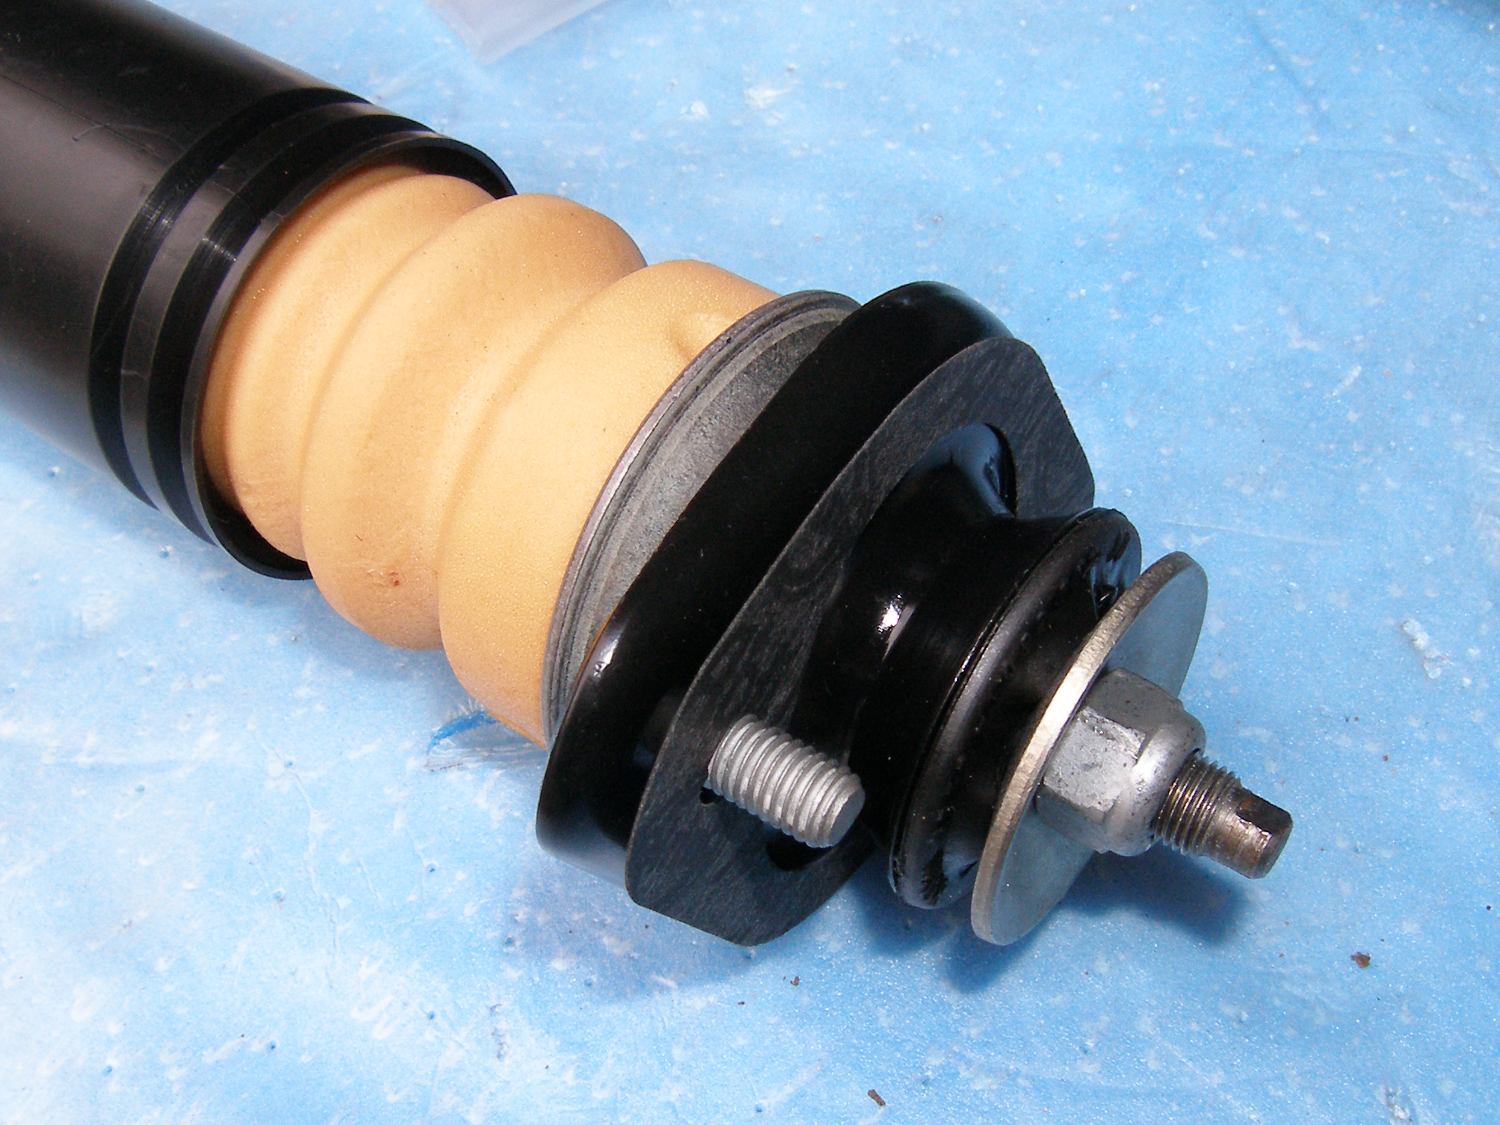 Another small but essential detail is the gasket installed between the shock mount and the body. It prevents water from creeping into the interior. |
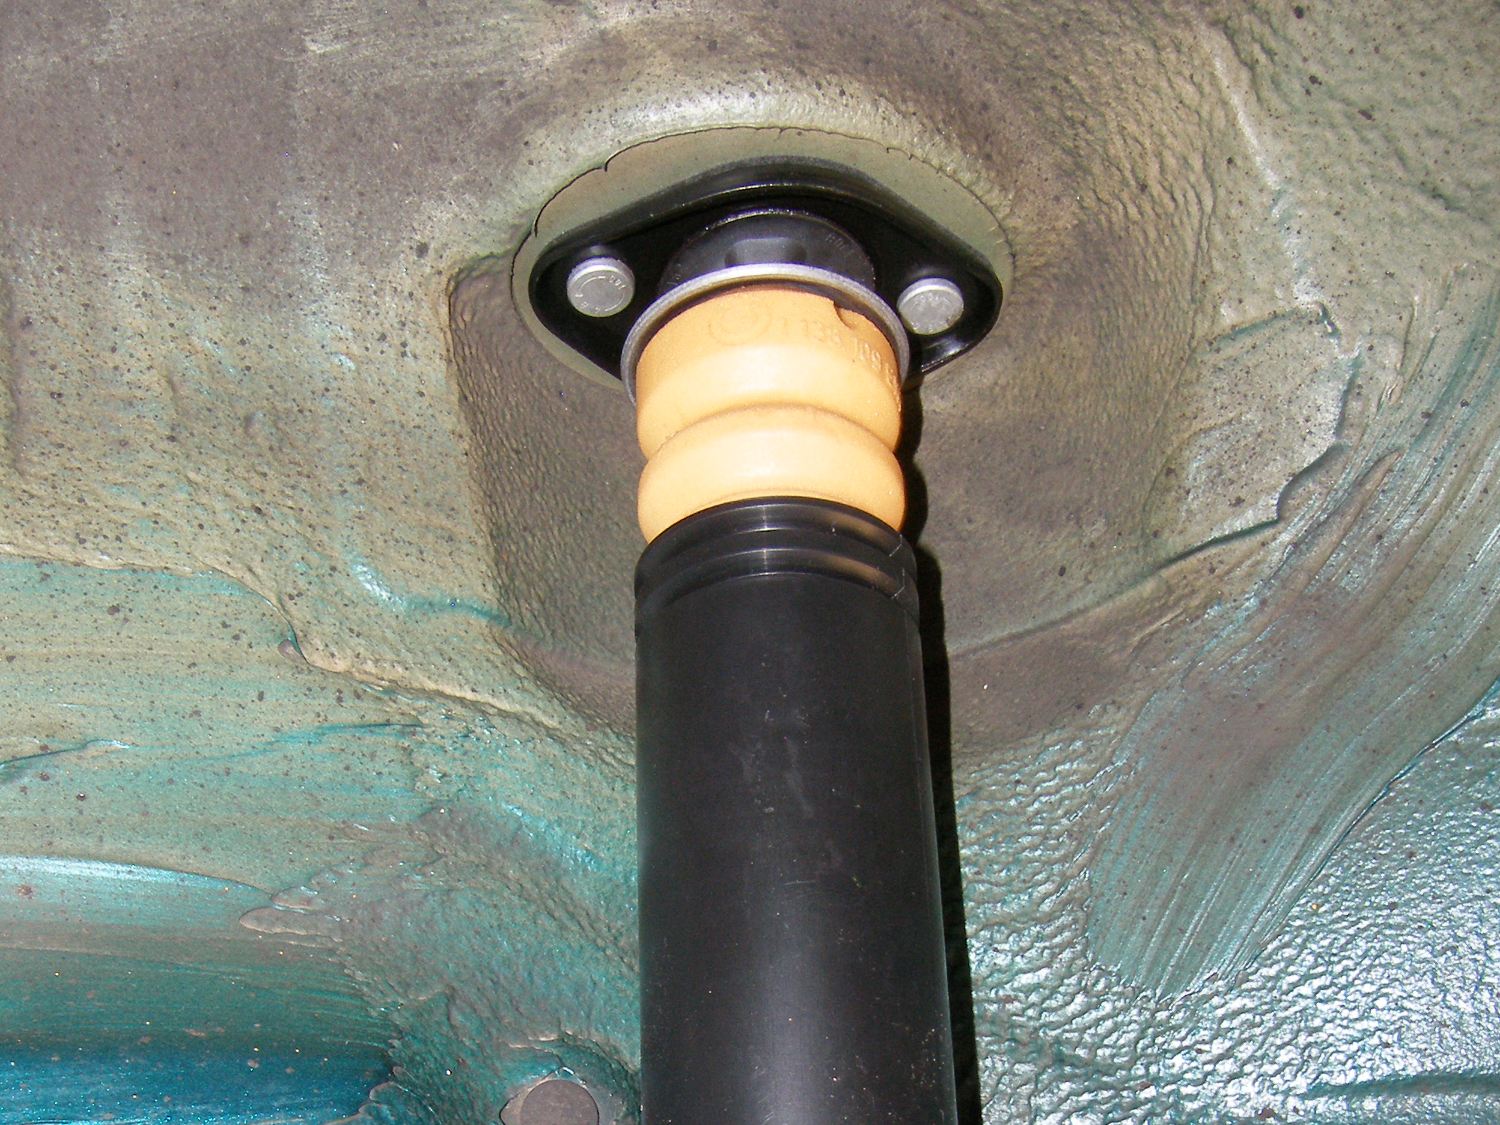 With the shock held up, this is how the shock should mate with the underside of the body. |
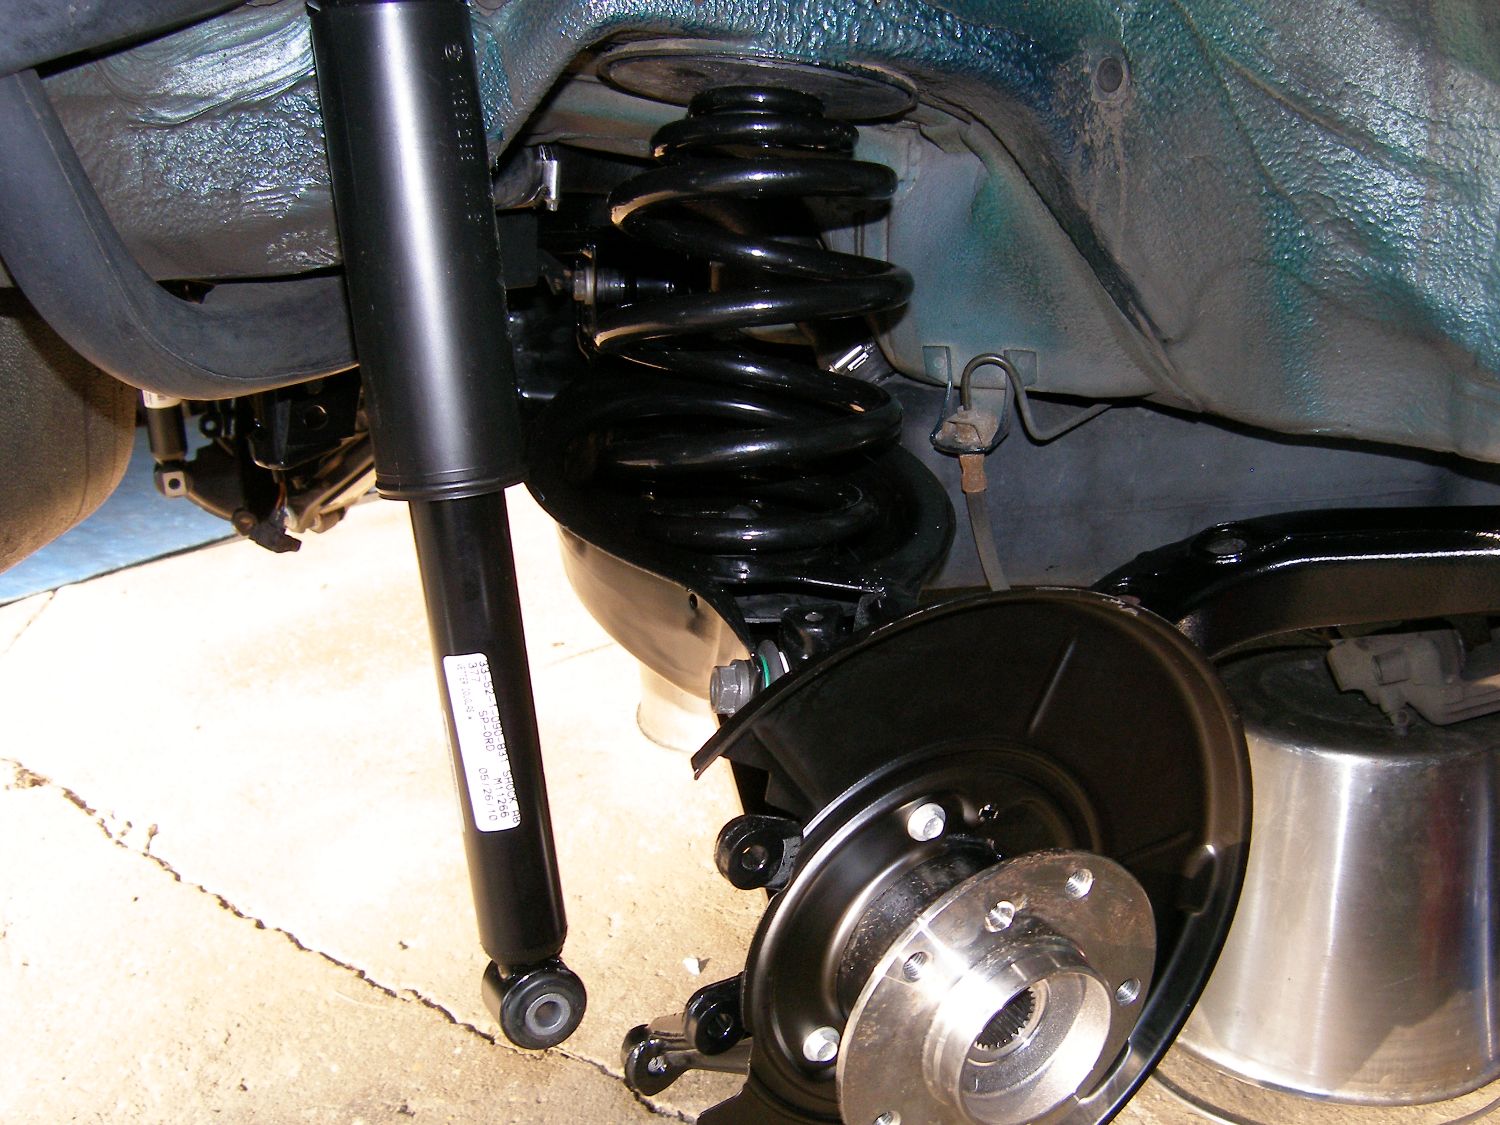 Before the shock is fastened to the trailing arm, new springs should be installed with the smaller of the two rubber seats in the trailing arm. |
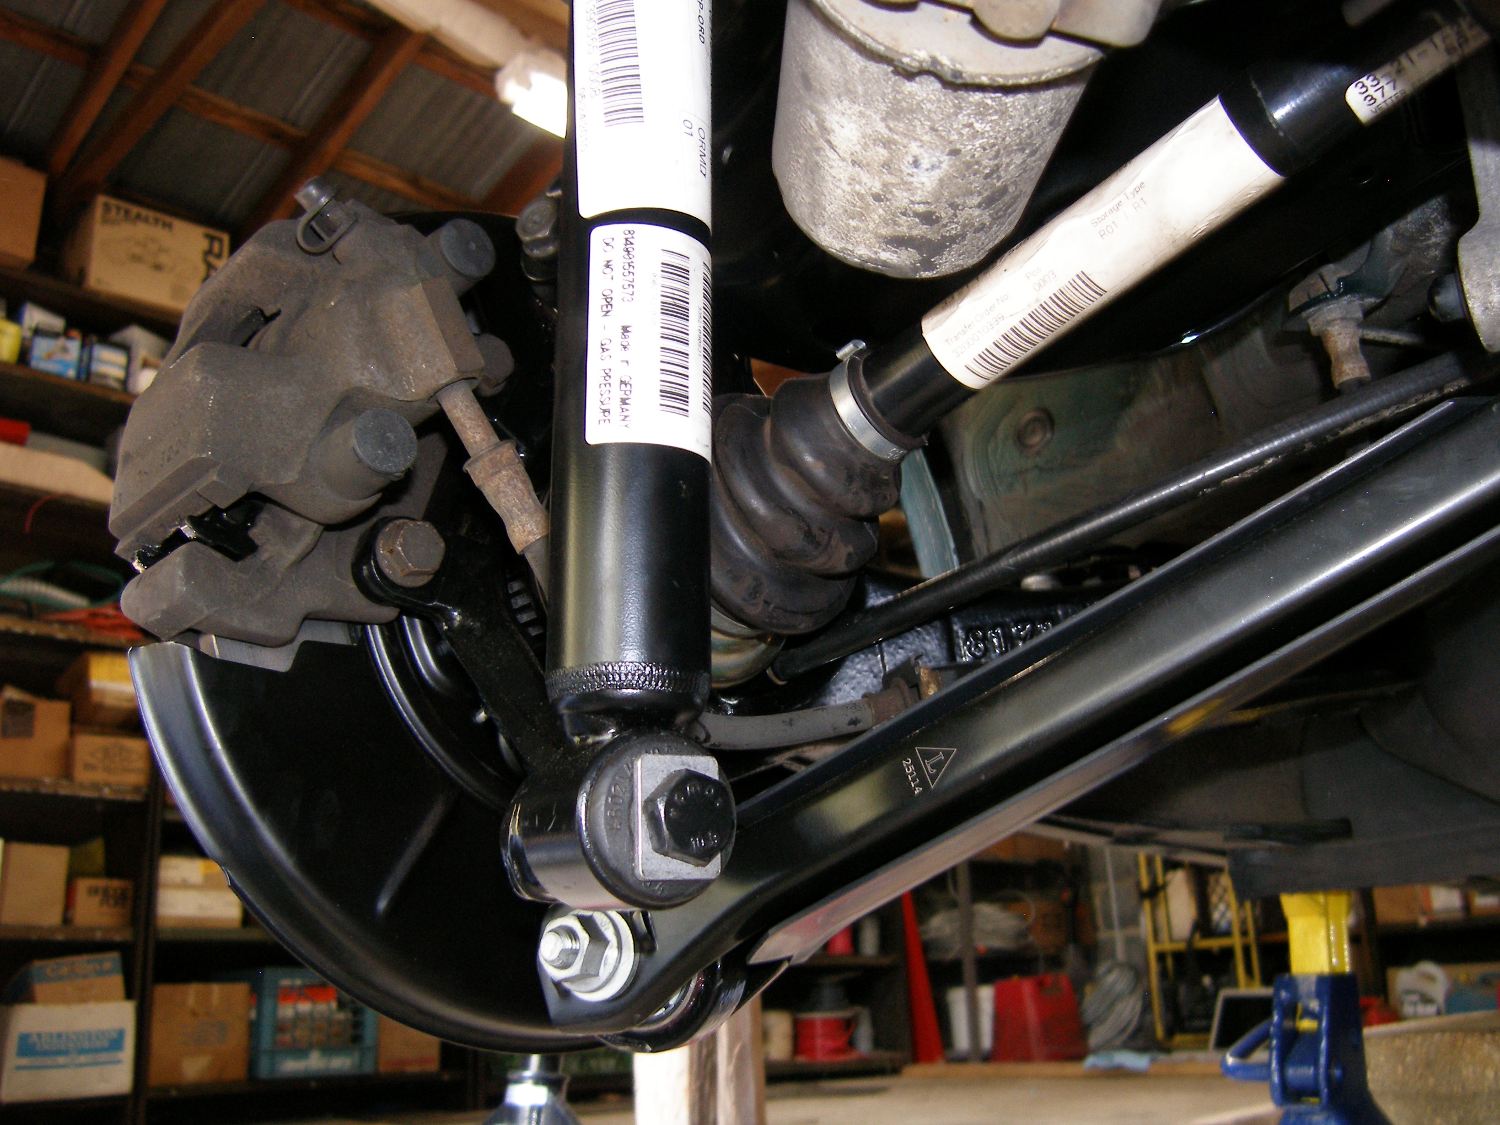 Rotate the shock with the rectangular flat washer (part of the shock bushing) facing inward before installing the bolt and torquing to either 57 or 74 ft*lbs (depending on vehicle). |
Conclusion
Replacement of shocks and springs is one of the simpler suspension maintenance tasks on the vehicle. It can easily be done in three hours even for the uninitiated.
The special oval socket is essential for this job. The flats extend down the rod only about 1/4" and that isn't much space to grab using a vice grip without damaging the rod or the nearby threads. This is particularly important if you ever hope to remove the top nut and salvage parts from the shock assemblies during a subsequent replacement.
I don't think spring replacement is necessary at 100K miles, but I strongly advocate it at 200K intervals because by that time the lower coils of my springs were notably corroded. I can't say when they would have failed, but at least with new springs I no longer have to worry about that failure mode for the foreseeable future.