


BMW 328is
Windshield Replacement 2003
The Culprit, Take 2
I couldn't quite believe it, but not more than a month after I'd put a nice, fresh inspection sticker on my two-year-old BMW OEM replacement window, another damn truck kicked up yet another stone into my window. This put a dime-sized gouge into a windshield that, in spite of being moderatedly pitted from the usual morning commute, er, sandblasting, was far too young to die.
While the defect left in the windshield was far smaller than the one that prompted me to replace the original, this defect was right in my line of sight, and far more annoying. Being the "detail-oriented" guy I am, I could not tolerate this, so I went about the process to have the window replaced...again.
The Process
Rather than provide me with a long list of glass replacement companies, this time around my insurance agent simply told me to call the only company they recommended - Quality Auto Glass (QAG), 1-800-794-1239, located in central NJ. The name sounded familiar, but I wasn't sure if they replaced my original windshield because I spoke with a couple of shops at that time. To reuse an old trick, I called my dealer's parts department to confirm the name of the company they use, and sure enough, it was QAG.
This time I didn't get involved in pricing the window since I knew I wouldn't pay for anything other than my $100 deductable, and given that the insurance company recommended the company, they had probably prearranged a good deal. Upon receiving the invoice, I saw no costs other than "$100 Deductable", so your guess is as good as mine as to how much window replacement costs have increased in the last two years.
To get the ball rollling I put in a call to QAG. I again requested BMW OEM glass and a trim kit, and they confirmed my insurance information, brought me into a conference call with the Lynx company (interface to my insurance company) and concluded the call with a dispatch number.
The only snafu came when the glass arrived at my dealership. The parts manager told QAG that the glass had arrived and had been verified intact. When QAG arrived at the dealership about 30 minutes prior to my first appointment (which had, incidentally, forced me to leave work early), they found that the box had not been opened, and ultimately found the glass broken. QAG called me to tell me the bad news, and I went back to work.
We rescheduled a week later and this time QAG found the glass in one piece.
The Installation
I won't repeat the overall installation process here, since the steps were identical to the last time around, however, I did manage to get a few better shots of various installation details I thought you might like to see.
Incidentally, when I first started taking pictures, the head installer asked why I was doing so. He seemed a bit paranoid, until I told him "well, see, I run this BMW website...". He then confessed that he thought it might have had something to do with a TV story that ran recently about "problem windshield installers". He went on to say that the business is now subject to a lot of liability claims because the window must be able to meet crashworthiness standards and attorneys can now sue not only the glass company, but the installer as well, for improper installation.
While talking about liability and how much damage ambulance-chasing attorneys
have caused this country, I couldn't help but segway into a discussion on aviation
- an industry more than familiar with liability litigation. When I mentioned
my other life as a pilot and flight instructor, the
installer perked up and started asking lots of questions about learning to
fly that I was more than happy to answer. By the time we established that he
lives within a few miles of the airport at which I originally learned
to fly, I figured any question as to my intentions was answered. Good thing
too...I didn't want paranoid and/or disgruntled people working on my car!
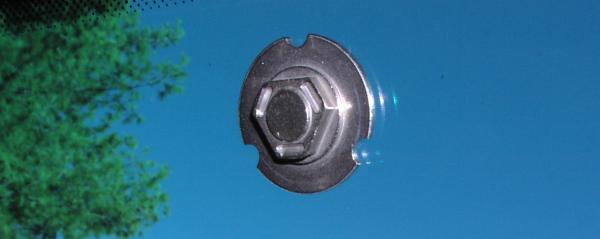
Here's a picture of the mount which comes mounted on the BMW OEM glass. This is one of the best reasons to go with the BMW glass, IMHO. No need to worry about the quality of the glass installer's bonding agent that would ordinarily be required. It is true that the stuff the pros use is better than the stuff you can buy off the shelf for $5, but this is installed perfectly. No guessing where the center of the windshield is...
Not pictured here is a rubber ring that fits around the outer circumference of the mount evidentally to prevent damage to the glass when the rear view mirror is installed. The ring is reused.
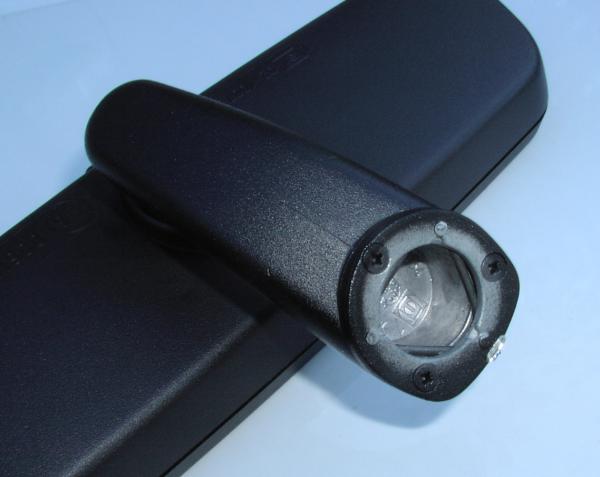
And here's a closeup of the rear of the mirror. The rods in the mounting hole are spring loaded and this allows the mirror to snap into place. No screws required.
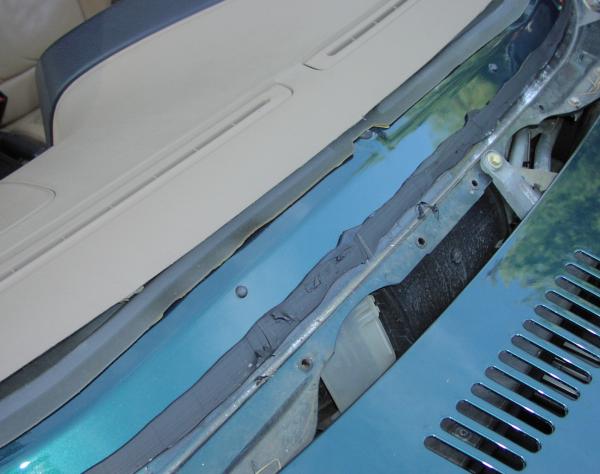
I was particularly interested to see how well the aftermarket adhesive had held up, and whether it had formed that "square" I saw when the original windshield was removed. The reality is that the factory applies the bead with a machine, while the aftermarket installers freehand it, so while the aftermarket job doesn't look as nice, it apparently seals just as well -- too well, in fact, if you ask the installers. They had to work considerably harder to remove the window this time around.
In the following picture, if you look just above the old adhesive line, you'll see a couple black rubber dots. These are spacers that prevent the window from fully (and unevenly) compressing the adhesive. When you see the installers pushing on the window, what they're trying to do is get the window to mate with these, compressing the adhesive uniformly around the window frame. I neglected to see this the first time around and grew needlessly concerned over the prospect of the adhesive squeezing out from under the window.
The next step involved cleaning and prepping both the window frame and the new window. The excess old adhesive was again removed from the window frame, the area vacuumed, and then the window cleaned and coated with a substance that looked a lot like black shoe polish. When it dried, it left a hazy appearance...
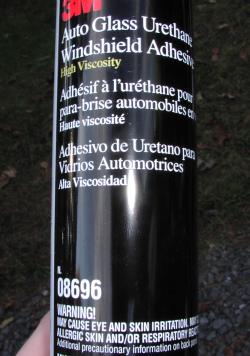
The installers then said, "hey, if you're taking pictures of everything, why not the adhesive?". So, here are the choices. The BMW sealant came with the window.
 |
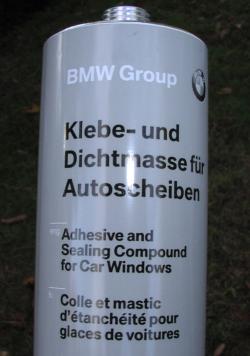 |
The installers had more experience with the 3M product and felt more comfortable with it, so that's what they used. I'm a fan of 3M products in all industries, so I couldn't disagree with the installers' choice. The BMW stuff is made in Switzerland, if that's worth anything to you.
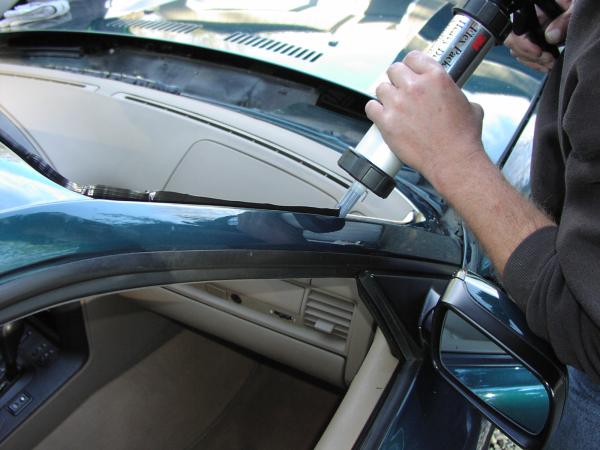
When it came time to apply the new adhesive, the head installer used a sharp razor blade to cut a "V" into the applicator nozzle. Not surprisingly, it resulted in a V-shaped bead of adhesive that (under optimal temperature conditions) will make complete contact with the window and create a strong seal.
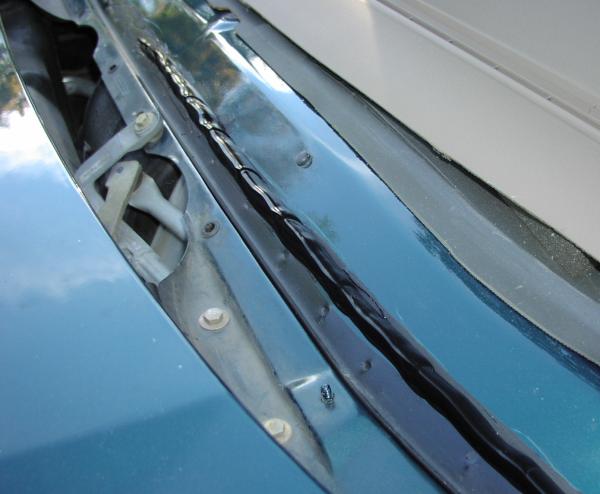
Here's another perspective on the bead as it was applied on the bottom of the window frame.
And here's the finished product!
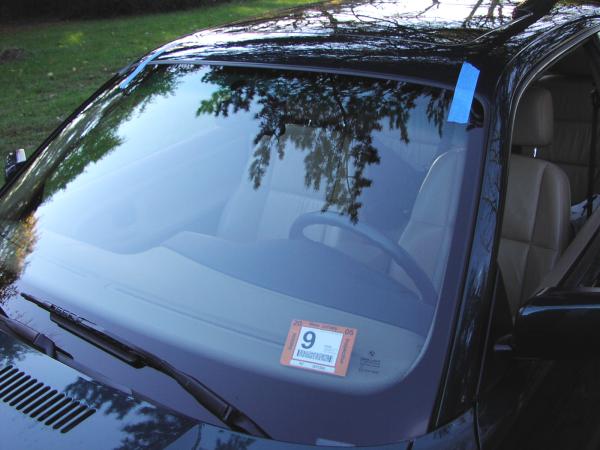
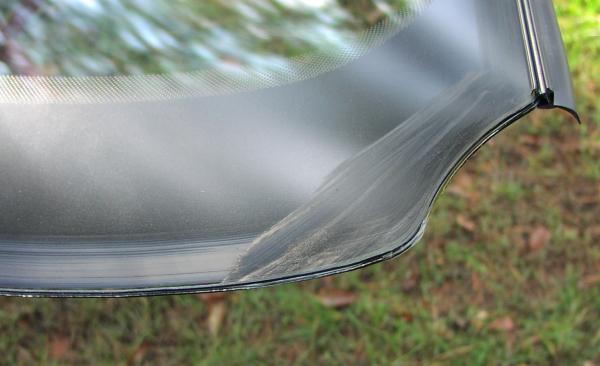
You'll note that the inspection sticker has been moved from the old window to the new, without damaging it. Two years ago, the installer removed it with a razor blade, which pretty much obscured most of the writing on the colored border (the white center portion does not have any adhesive). The one time I was pulled over by a cop he took a very long look at it, as he obviously tried to figure out if it was forged in some manner.
Fortunately, this time the installers used a better technique. They applied a torch to the front side of the old windshield, which heated the window (and naturally the adhesive on the other side) enough to allow him to just peel it off and put it on the window. The lower left hand corner (where he touched it) didn't have enough adhesive left to fully attach to the window, but this was FAR better than I expected.
Well, that's about it. After about an hour of work, we wrapped up the installation of another BMW windshield. Hopefully that will be the last one until I put this car out to pasture in a few years. As always, if you have any questions about the process that I haven't answered in either the original article or this follow up, let me know. Safe driving!