


Debugging STM32 with OpenOCD and a Segger J-Link on Linux

This article describes a debugging solution I assembled for a custom hardware project based on the STM32 series of microcontrollers. These devices, like most ARM devices, use the SWD (Serial Wire Debug) interface in combination with a Debug Probe and some software (OpenOCD) to connect it to the host platform (in my case, Linux). My initial debugging occurred on the STM32 F3 Discovery board.
Segger J-Link Debug Probe
Many companies provide debug probes. ST provides the ST/Link, Keil sells their ULINK product, and NXP markets the LPCLink. These companies also offer development boards like the STM32 Discovery that embed a probe on the board so there is no need for an external probe.
The problem I have with all of these probes, embedded or not, is that they are of a proprietary nature. This tends to encourage if not enforce the use of integrated software solutions including specific IDEs. Many of these IDEs are provided with onerous licensing restrictions, including severe limitations on object size in the so-called "free" variants. Since I am a champion of open source and don't like using software at any price that intentionally prevents me from using the full capabilities of the hardware I've purchased, I researched debug probes that worked well with OpenOCD.
I wound up buying both the Olimex ARM-USB-OCD, based on the recommendation of the developer of the OpenOBC Project, and the Segger J-Link EDU because of their reputation for quality products and post-sale support. The J-Link happened to arrive first and I wound up sticking with it throughout my project. I never did get around to using the Olimex probe, though I did wind up buying several Olimex JTAG to SWD adapters and found they work nicely to convert the 20 pin connector on the J-Link to a 10 position IDC cable that can ultimately be connected to the ARM-standard 10 position SWD interface connector (a 2x5 position 1.27mm pitch IDC type).
Incidentally, the downside to developing on the STM32 Discovery board with an external debugger is ST's failure to incorporate the ARM standard SWD interface connector. I wound up taking some wire clip leads, cutting off one end, stripping and soldering those ends to an Adafruit SWD (2x5 1.27mm) Cable Breakout Board and then plugged the IDC cable from the Olimex adapter into that. All in all, a pain in the ass. In retrospect I should have sourced a development board with the proper connector but if memory serves I had a hard time finding development boards equipped with the F3. In any case, my solution worked. I successfully transitioned my software load to my custom hardware, and in the end that's all that matters.
OpenOCD
The only snag I ran into when trying to integrate the J-link with OpenOCD was the lack of SWD support in the somewhat older version of OpenOCD packaged with my OS. I solved that problem by removing the older version and building OpenOCD 0.9 (latest available at the time) from source. At that point it worked with the J-link in SWD mode perfectly.
To configure the daemon I assembled four files from some examples I found:
-
openocd: I built this to manage the OpenOCD daemon. I tweaked this file to work in my environment. If you grab it for your own purposes you'll need to do the same.
-
stm32f3-discovery.cfg: A top-level configuration file which selects the jlink interface, provisions SWD mode, and sources the following files.
-
stm32f3-target.cfg: A target-specific configuration script that I used largely unmodified from its original source.
-
stm32f3-proc.cfg: A file containing two procedures I constructed for convenience. These procedures are intended to be executed at the openocd prompt (>).
I built the procedure stm_flash to automate the instructions required to burn a new software load to the embedded flash on the device (256k on the Discovery board F3 device), and use that routinely. The stm_erase procedure is only used when I want to simply erase the flash and NOT program a new load. This was required because all STM32 Discovery boards come equipped with a demo firmware image programmed to the device and I needed to know how the device would behave in a "bare-metal" scenario, as would be the case with my custom hardware assembled with a part acquired without programming from my distributor (e.g. Digikey).
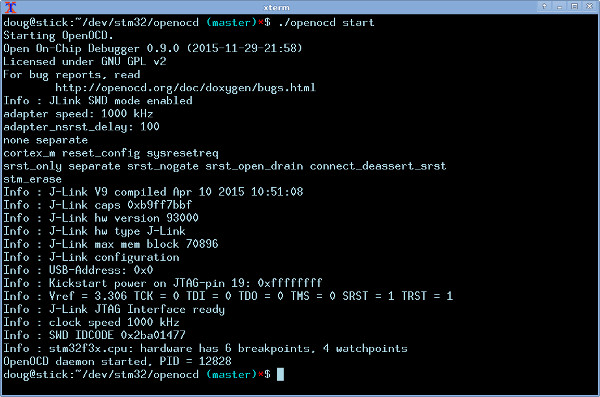
To connect to OpenOCD I start the daemon by executing my init script, usually from the same directory as it resided to avoid having to set the PATH variable. Note the preceding dot-slash.
$ ./openocd start
I usually connect to the debug probe via the telnet server built into OpenOCD over port 4444:
$ telnet 127.0.0.1 4444
and then execute commands from that shell. In cases where I use GDB I configure it connect to OpenOCD over port 3333.
In either case, to verify the interface is working I typically execute the "reg" (display registers) command at the openOCD prompt (>). Other commands are naturally available.
Lastly, to stop the daemon I make sure I close the telnet session and then execute:
$ ./openocd stop
I've found it's important to close the telnet session and stop the openocd daemon prior to disconnecting power to the board because otherwise a bunch of error messages spew to shell and force me to open another shell to stop the daemon.
One issue I experienced was an occasional inability to connect the probe to the target. It would happen randomly so I became quite frustrated. When this connection failure occurred I repeatedly received the following messages from both the telnet session and the shell in which I started the openocd daemon:
Polling target stm32f3x.cpu failed, trying to reexamine
Info : SWD IDCODE 0x2ba01477
Info : SWD IDCODE 0x2ba01477
Error: Failed to read memory and, additionally, failed to find out where
Examination failed, GDB will be halted. Polling again in 6300ms
Info : SWD IDCODE 0x2ba01477
Polling target stm32f3x.cpu failed, trying to reexamine
Info : SWD IDCODE 0x2ba01477
Info : SWD IDCODE 0x2ba01477
Info : SWD IDCODE 0x2ba01477
Info : SWD IDCODE 0x2ba01477
Info : SWD IDCODE 0x2ba01477
Info : SWD IDCODE 0x2ba01477
Info : SWD IDCODE 0x2ba01477
Error: Failed to read memory and, additionally, failed to find out where
Examination failed, GDB will be halted. Polling again in 6300ms
I ultimately determined that this failure occurs because the device is provisioned to sleep while IDLE, and that impacts the clock provided to the SWD interface. Therefore, when the J-Link attempts to communicate with the SWD interface it acts as if it's dead (and it is, in a manner of speaking).
I ultimately eliminated this problem by building my OS / application with flags needed to disable sleep while idle, but in cases where I needed the device to sleep I was able to connect by holding down the reset button (keeping the STM32 device in reset), starting the openocd daemon, and then releasing the button, allowing the STM32 to boot normally.
Conclusion
If you have to work with the STM32 (or any other device for that matter) and want to use an external debugger like the J-Link be sure to find a development board equipped with the ARM standard 10 position SWD connector. I used a boxed part with extractors on my board to enforce keying (to prevent connecting the cable incorrectly), minimize stress on the PCB and eliminate the possibility of damage from misalignment, but any connector is better than no connector.
The J-Link works flawlessly with OpenOCD, mostly because Segger openly endorses and contributes to its development. The EDU version is extremely reasonably priced, but of course only for non-commercial projects. In case your project is commercial in nature I still recommend the J-Link, despite the price, mostly because it just works, but also because it will serve as a reward for playing nice with the open-source community. Very few companies in this space do, unfortunately.
For those wondering, if you use the J-Link EDU on Windows with the official software provided by Segger you have to acknowledge a stupid EDU-version license every time to connect the probe. When you use the EDU version on Linux with OpenOCD, that does not happen. As if you needed another reason to develop with free software on Linux...