Doug's 2006 Acura RSX
Stereo Installation
Page 2 of 3
Headunit and XM Adapter
I was really torn about buying a headunit. It's truly sad what passes for car audio gear today. Too much flash, ridiculously small buttons, unreadable displays, stupid rotating faceplates, and in general, too little emphasis on what matters -- AUDIO QUALITY, ergonomics, and reliability.
I've long been a fan of Alpine gear, but their designs have sucked lately and the high-end '05 models have proved horribly unreliable. While I had plans to purchase one of the top-end 985x Alpines ($400+), I wound up buying the bottom end 9847 ($200) because it lacked several of the "features" of the high end units that I knew would break.
I also bought the Terk XMDirect adapter for Alpine radios ($50) as well as the universal receiver ($50). On the day I installed the headunit, I installed only the XMDirect adapter because I knew I'd have to think a bit more about where to position the antenna, how to route the antenna cable, and where to locate the universal receiver. As it turned out, there was no room for it behind the headunit.
Incidentally, I briefly considered buying the Alpine headunit with integrated XM receiver to avoid this headache, but that unit didn't support changeable illumination to match that of the RSX's dash and I ultimately realized I didn't want to be locked in to XM, though I am more or less locked to XM for satellite weather delivery in my aviation pursuits.
I also bought the headunit from Crutchfield for convenience and warranty support -- they are an authorized Alpine dealer and will support me after the sale. If this were 10-15 years ago, when Alpine equipment NEVER failed, I probably would have gone with a discount house and taken my chances, but the stuff is made in China now. What else can I say?
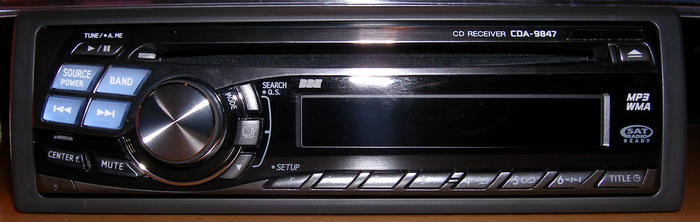
Check out the closeup of the unit...note, no stupid glidetouch controls. A nice simple display that's actually readable in direct sunlight. It's still not the display I would have chosen for the unit had I designed it but it works. On the downside, the buttons are not laid out well and are too damn small, but at least they got the rotary encoder right this time -- the knob is a bit farther out from the face than older models so it's easier to grab.
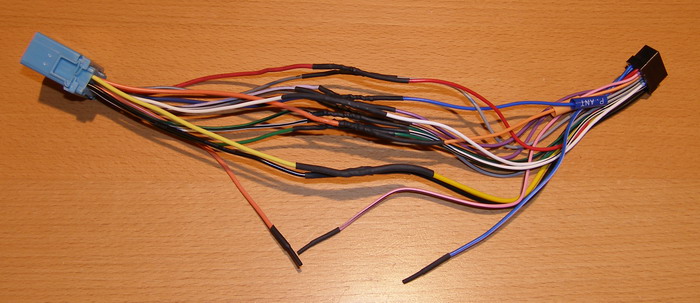
The first thing I did was build up the harness. I'm big on reliability so I bell spliced, soldered and heat-shrinked the wires. Unused wires were cut and then capped with heat shrink. The RSX provides an illumination circuit, so I made sure I hooked that up to prevent the headunit from GLOWING in the dark.
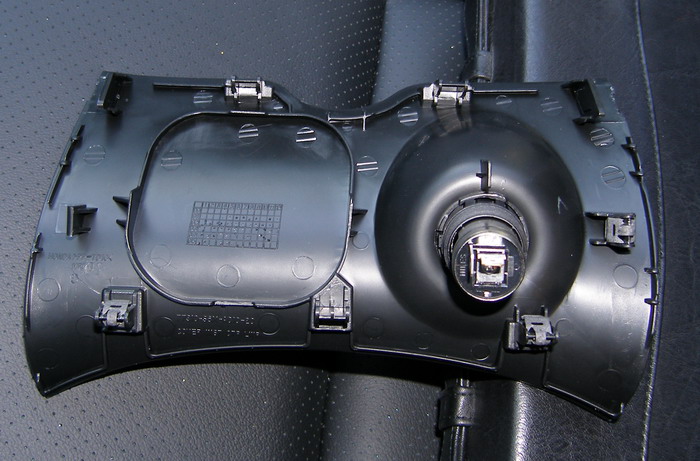
To remove the headunit on the RSX, I pried off the curved cover on the dash that contains the power outlet -- just above the center console. The cover is removed by sticking a screwdriver (covered with some thin cloth to prevent scratches) into two small slots near the top left and right of the cover. Once the top is pried out, I wedged my fingers into the opening and pulled the top of the cover out of its retaining clips.
I then pulled the entire cover toward the rear of the vehicle to remove it. I made sure not to pull it that hard because the power outlet cable is relatively short and may be damaged otherwise. The rear of the cover is shown below, with the top of the cover facing the top of the picture. If you look closely, you can see the extraction slots near the top corners.
When I first researched how to remove the headunit, I learned that there were two combination 8mm hex head / philips screws at the base of the rack that held the headunit in the dash. A couple people told me I absolutely needed a rachet set with a flexible shaft, etc. to get at these screws. In reality, a stubby philips screwdriver did the job. Now, let me tell you...those screws are not easy to remove or replace and VERY easy to drop down into the bowels of the console, never to be seen again. I scraped my hands a bit futzing with the screws, but I got the job done.

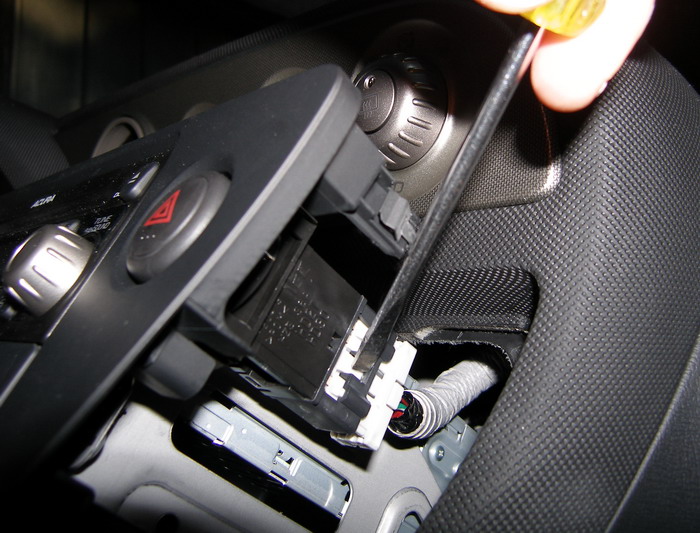
Once I removed the screws, I reached into the hole in the dash where the power outlet cover used to be, grabbed the bottom of the rack and pulled it out. Initially, it's important to push the rack out only as far as required to remove the hazard slight switch wiring as the wiring is short and forcing the rack beyond that may damage the connector or switch. Note that a screwdriver or awl is essential to depress the connector release. This one wouldn't respond to fingernails. :-)
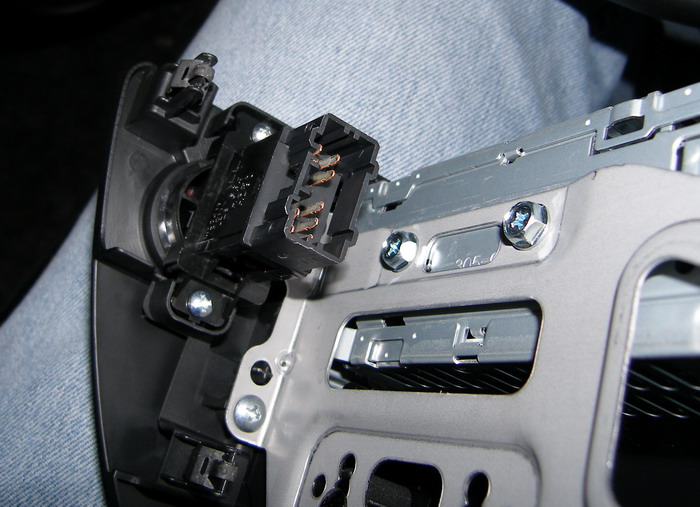
Below you can see the two screws holding the right side of the stereo into the rack. Those are the same size and type used to hold the rack in from below (8mm / philips), though if I recall correctly they're a bit shorter than the rack screws.
The hazard switch blocks access to the front headunit mount screw so the switch must be removed to remove the screw. To remove the switch, I removed the two smaller philips screws installed above and below the switch connector.
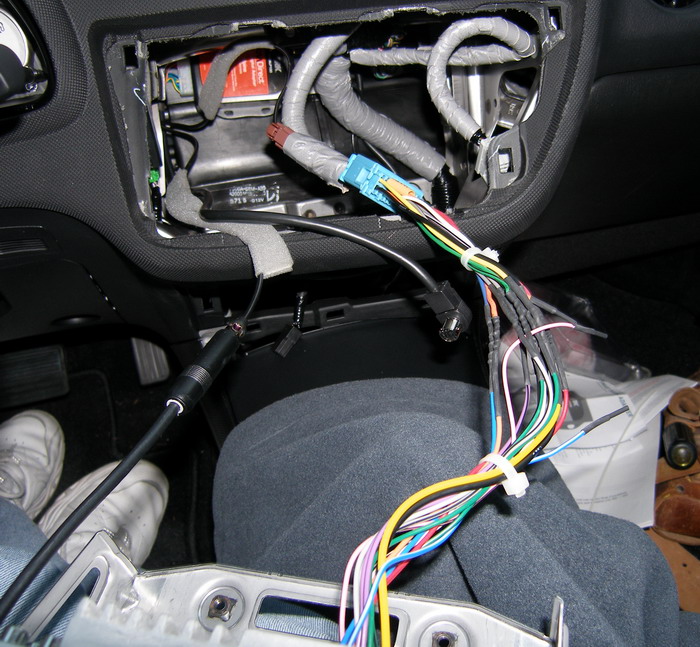
In the following picture I have the new headunit mounted in the rack and attached to all the necessary wiring. From left to right, you can see the antenna connection, the extension tail for the AI-Net bus (unused in this installation), and the headunit harness.
If you look closely, you can see where I mounted the XMDirect adapter with velcro. A word about doing this, however. While I routed the wire going to the universal receiver down and along the right side of the console, given that I eventually installed the receiver in the left rear of the console, it would have helped if I rotated the adapter clockwise 90 degrees and routed the receiver wires down and on the left side instead.
Note that you MUST keep the wires to the far to the side as you route them down into the console, or the lid on the cup holder may hit the wires when it is pushed in (retracted). A word to the wise -- after you remove the power outlet cover but before you remove the console to do the remainder of the installation, open and close the cupholder lid a few times to get a sense of how to route the cables. With the console removed, this will be out of sight, out of mind, until you reinstall the console and realize your mistake. Ask me how I know!
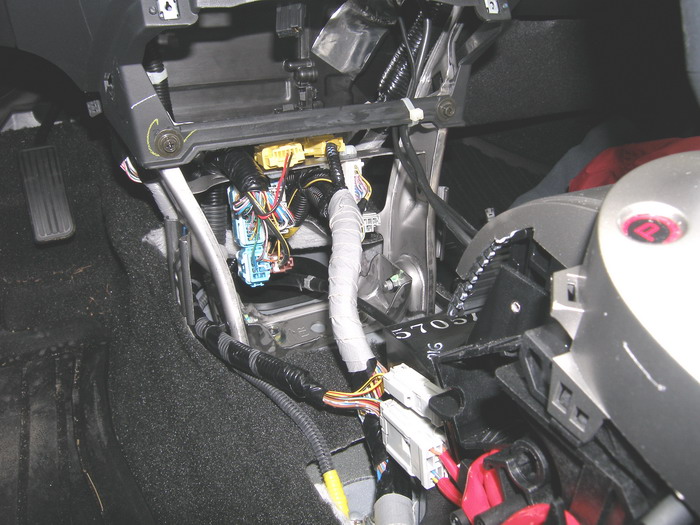
Also -- keep in mind that there are lots of airbag / restraint system-related wiring in this area labeled with yellow connectors (shown below). It's essential to route any power, speaker, or antenna wires clear of these wires so RFI / EMI doesn't cause a fault in the restraint system.
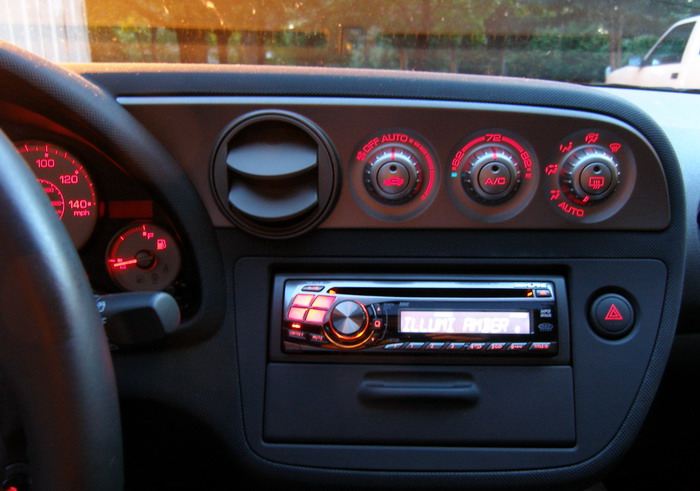
Here's the headunit installed. The unit provides blue, green, amber, and red illumination. Note that Alpine went cheap, though. That illumination control only really affects the four button cluster to the left of the volume knob and the display backlighting remains white under all circumstances (though the crappy picture might otherwise convince you that it's amber too -- sorry). The other buttons only switch between green and amber. In any case, I left it on AMBER for the consistency in the color on the unit.