


Doug's 2006 Acura RSX
Stereo Installation
Page 3 of 3
XM Universal Receiver and Antenna Installation
I saved this to last (and in fact did it several weeks after I installed the headunit for lack of time). The biggest problem with the Terk adapter/receiver system is that the signal cables connecting them are about 3 feet long and cannot be extended (or so the manual says). This means the adapter and receiver need to be mounted within 3 feet of one another. Since the adapter was located behind the headunit, I had limited installation options for the receiver. I eventually settled on the center console.
And as difficult a decision as that turned out to be, the most challenging aspect of the installation was realizing that I had to mount the antenna on the exterior of the vehicle and somehow figure out how to cleanly route the cable to the interior of the vehicle in a way that would avoid any leaks.
I seriously considered mounting the antenna inside the vehicle since I'd seen several people do that, but the manual specifically states not to do this. The reason is because the new "micro" antenna design (which is significantly smaller than prior generations) requires a sufficiently large ground plane to achieve the gain required to receive XM satellite signals under challenging conditions. Will an antenna mounted inside work? Yes. Consistently? No. I proved this through experimentation with this antenna and that of my Garmin 396 GPS which receives XM Weather and Audio.
The manual also states that the antenna should be located a minimum of 4" from the edge of any metal panel and this is to ensure that the ground plane is symmetrical. Rock and Roll have very powerful transmitters (required in no small part because of the small receiving antennas designed for the system) but get a cloudy, rainy day and drive under some trees with lots of wet leaves and the signal will be marginal at times. Antenna placement is critical.
When I emailed a Crutchfield rep to locate some adhesive-backed wire channel to protect the antenna cable on the roof (which wasn't included in the Terk kit believe it or not) the rep told me I could avoid the need for the channel if I mounted the antenna close to the edge of the rear window or offset to the side. When I pointed out that I thought offsetting a black antenna on a silver car would look like crap and that the manual said to mount it away from the edge of the panel, he responded "it won't really matter where you put it as long as its outside". The problem is that may have been true with the older generation antennas which were taller and not as sensitive to installation, but I think it's bad advice to current buyers of XM satellite radio gear.
I ultimately decided to install the antenna just in front of the rear window washer jets in the rear center of the roof. I routed the 3" or so of exposed antenna cable around the washer jet. That's not the best looking installation, but it's unobtrusive enough to pass for "professional" and meets Terk's requirements.
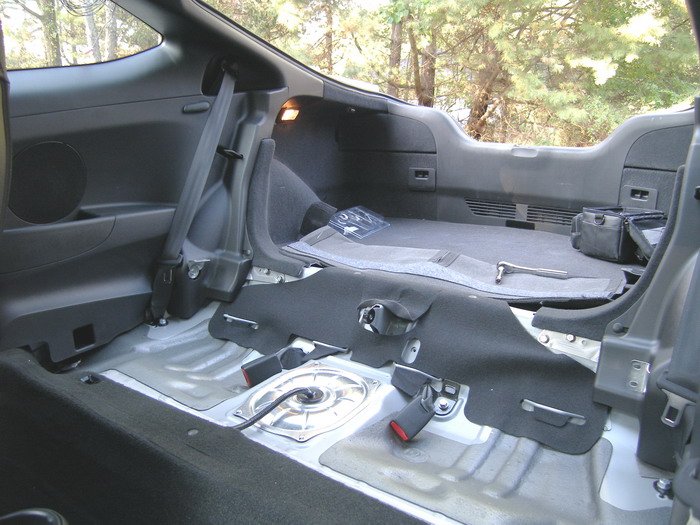
I then routed the cable in front of the hatch down to a rubber boot used to route wires for the FM antenna and rear window defogger into the right rear quarter panel area. Unfortunately, this required removal of the right rear quarter panel interior trim. The trim is split into upper and lower sections. The upper section requires removal of the lower section, which in turn requires removal of the rear seat (both upper and lower portions).
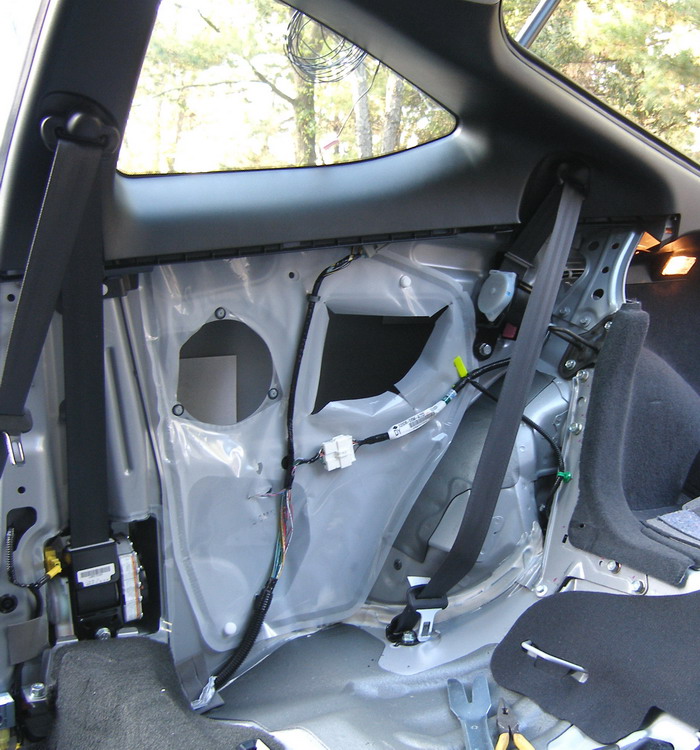
The picture below shows the cable coming down from the hatch weather boot. The black sheath does not extend through the boot, so I used a piece of #12 copper wire (from a piece of Romex I had lying around) to fish the antenna cable through the hole into the pillar. I formed a loop at the end of the fish wire and compressed it with a pair of pliers to give it more of a rounded edge so it didn't dig into the wiring or the boot as I pushed it through the boot. Once the fish wire appeared outside of the boot on the exterior of the vehicle, I taped the antenna lead to the wire and carefully pulled it back through the boot into the interior of the vehicle.
And if you're wondering how I got that pink connector body through the boot, simple. You remove it. If you remove the small white tab holding the cable in the rear of the connector body you can (carefully) pull the RF connector out of the connector body, tape it up to prevent damage, and route it as required.
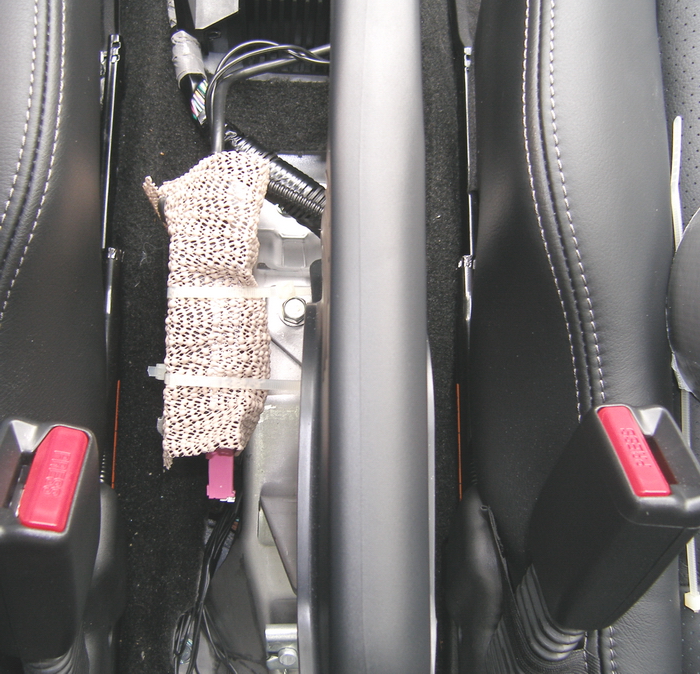
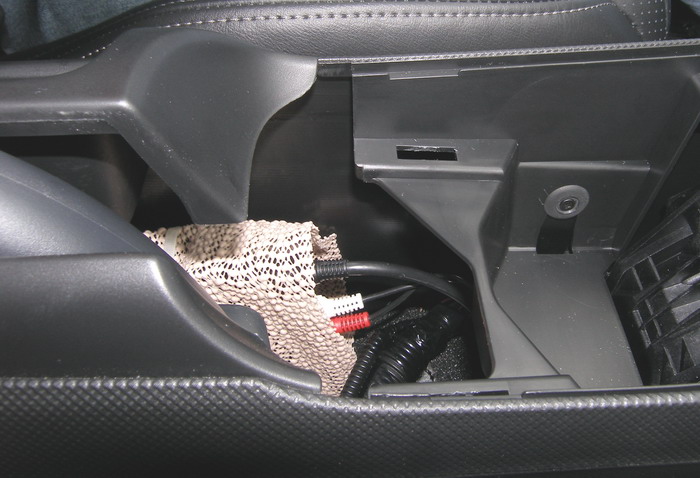
I then routed the cable from the right rear quarter panel, under the rear seat support frame, and under the carpet to the console area. Once I removed the console according to the service manual documentation, I surveyed locations for the receiver. The optimal location turned out to be to the left of the emergency brake handle, mounted vertically with the headunit connections facing forward. As it turned out, the antenna interface was on the rear face of the receiver down near the carpet so that worked out perfectly.
Before installing the receiver with tie wraps to the emergency brake mounting frame, I wrapped the receiver in some of that non-skid foam padding used under throw rugs. This worked out great for a number of reasons. First of all, it's perforated so it allows the receiver to breathe (the instructions specifically say not to put it under carpet or wrap in up in such a way that cooling is compromised). Second, it provided just enough shock and vibration resistance while still being relatively thin. I could have used some latex foam rubber or something similar, but space is tight in there when the console is in place.
You'll note that the receiver is installed a location that allows maintenance access. Little did I realize how helpful this would be and how quickly it would come in handy. One evening a few days after I installed the system I started the car in prep for the drive home from work, selected XM, and saw nothing but a flashing "LOADING" on the headunit display. Essentially this meant that the headunit was talking to the XM radio adapter (otherwise pressing BAND wouldn't bring up an XM Radio option) but it wasn't able to communicate with the receiver.
I popped the shifter trim ring off and pulled the top center console panel off to expose the receiver. I found the data cable not fully seated so I reseated it and the system came back to life. What could have been a 30 minute inconvenience involving removal of the console turned into a 5 minute quick fix.
And if you're wondering why I didn't install the receiver under the dash above the driver or passenger foot well, it's because I heard installation in those areas caused airbag system faults and a warning light that would reappear after being cleared. Like it or not, we're dealing with RF equipment here, and RFI is a very real possibility. I saw others somehow manage to install it under one of the seats but in my case the wiring from the adapter wouldn't reach and even if it did I wasn't sure I wanted to poke the holes in my carpet necessary to route the wires cleanly.
Conclusion
The total cost for the equipment thusfar is around $450 and I put about 6 hours total into the installation, including fabricating the harness. While I could have done something else with my time and paid someone to do this, I wouldn't have learned anything. I consider the money well spent, since since I actually enjoy the drive to work again.
Very high volume levels aren't the system's strong suit, but I'm long past the "impress the guy at the light" phase of my life. The quality of sound is also pretty good considering I've done no environmental analysis and the headunit's onboard parametric equalization capabilities are very limited.
The one thing the system definitely needs is a subwoofer. Being a hatchback, there's simply no low-end. I'm not looking for thumping bass -- I merely want the low frequencies properly represented, so there's likely a subwoofer and amplifier installation in my future.