


Scheduled Maintenance:
A Tale of a 50 hour Inspection
Part 2
Pesky Gremlin
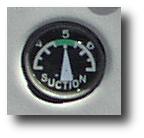
I figured out on the way home from my last trip to Marty's hangar that the pesky gremlin was still hiding in our vacuum system. While the vacuum was about 1/2" higher on average than it had been, the vacuum gauge still acted like a tachometer and at a mere 1500 MSL was down at the bottom of the green. Clearly, we still had a problem, and now, after replacing every component in the vacuum system to the tune of (well...I don't want to think about it) we knew exactly where it was -- where my instinct told me it was six months ago -- the regulator.
 A few
days later I found the time to call Marty and ask him to find a
regulator. By this time I had done the legwork and figured out
that PMA-approved regulators could be had for around $250. I try
to buy Cessna parts when possible, but the same part from Cessna
(Airborne, actually) turned out to be $950. The $250 new Rapco
unit promised to do everything the OEM part would...at nearly 1/4
the cost. That was a no-brainer decision...I told Marty to order
the Rapco. Thank God for the PMA process.
A few
days later I found the time to call Marty and ask him to find a
regulator. By this time I had done the legwork and figured out
that PMA-approved regulators could be had for around $250. I try
to buy Cessna parts when possible, but the same part from Cessna
(Airborne, actually) turned out to be $950. The $250 new Rapco
unit promised to do everything the OEM part would...at nearly 1/4
the cost. That was a no-brainer decision...I told Marty to order
the Rapco. Thank God for the PMA process.
Since I knew we'd have to pull the cowling to replace the regulator, I figured we'd try to do some preventative maintenance at the same time.
While this aircraft is impeccably maintained, as with all 30 year old aircraft, there's always something to work on, so it didn't take me long to find something. Various electrical system components stood out like a sore thumb, specifically, the battery and starter solenoids, as well as the system noise filter.
All three components looked every bit of 30 years old. In fast, they were so badly rusted that it was impossible to find any kind of identifying information on them. Marty had to go to the parts book to find replacements, which turned out to be a LOT more reasonably priced than I thought: roughly $25 each for the solenoids and $45 for the noise filter. When I considered the very real possibility of having one of these ancient parts fail on us so many miles from home or at 500 ft in the soup on an ILS, this was another no-brainer decision. Sold!
50 Hour Inspection, Take 2
A week or so later, I manged to snarf some time off from work and once again found myself at Marty's hangar. We began as we did previously, by removing the cowling, and then removed the battery box cover before we removed the battery to allow us to safely change the electrical system components.
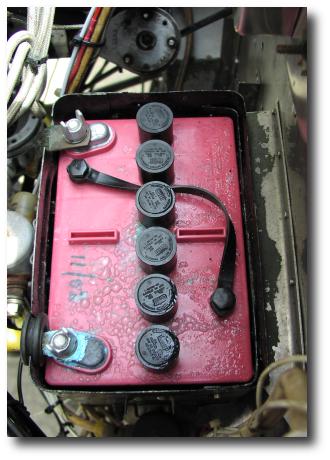
We were both surprised to find that, after only 7 months since replacement of the battery at the last annual, some corrosion had formed on the positive terminal and a fine corrosive dust coated portions of the top of the battery. In order to prevent the particles from blowing around and finding their way into various nooks and crannies (like the one you can see where the battery box mounting flange attaches to the firewall), Marty sprayed some neutralizing solution (Zep 40) on it. The bubbles you see in the picture are the result of the neutralizing reaction.
Shortly after we'd given the solution time to work its magic, we pulled the battery out and Marty took it over to his "battery bench" for a quick check and recharge while we continued with the items remaining for today.
 Stop Whining

Next step was to replace the RFI filter. We didn't happen to have any problem with alternator whine, but again, the existing part was not labeled (thus not traceable) and capacitors are known to fail in far shorter periods than 30 years.
As you can tell, from the picture, this is simply a part manufactured by one of Cessna's suppliers and thrown in a non-descript box with a Cessna part number and barcode. I'm sure Cessna paid about $15 for it.
The installation was pretty simple. While you can't see it here, the unit is held to the firewall by two sheet metal screws. We initially thought there might be a tinnerman clip holding these screws in, but a quick look under the panel showed that not to be the case.
The screws came out easily enough (in retrospect, too easily), and we soon had removed the unit to reveal a rust stain created by corrosion of the filter backing plate and dirt on the firewall leftover from when we originally cleaned the firewall of primer (if you can believe it, someone painted this beautiful stainless steel firewall with zinc chromate!).
 Marty broke out some lightweight
teflon-based lubricant in a spray bottle (Zep 45) and used a
Scotch-Brite pad to clean up the stainless steel. Marty mentioned
that the oil really helps the lift stains from the stainless
steel, and he wasn't kidding. It came out beautifully. The only
problem was that it made the remainder of the firewall look poor
in comparision, and it was pretty damn nice looking to start
with... :-)
Marty broke out some lightweight
teflon-based lubricant in a spray bottle (Zep 45) and used a
Scotch-Brite pad to clean up the stainless steel. Marty mentioned
that the oil really helps the lift stains from the stainless
steel, and he wasn't kidding. It came out beautifully. The only
problem was that it made the remainder of the firewall look poor
in comparision, and it was pretty damn nice looking to start
with... :-)
When we put the screws back in, they didn't fit as well, so Marty grabbed some tinnerman clips and held them under the panel while I tightened the screws. A couple of minutes later, Marty had reconnected the wiring and we were on to the solenoids.
Clitter-Clatter of Little Relays
The solenoids turned out to be about as easy to replace. The only thing we had to look out for was the simple fact that the solenoids are different part numbers - the battery solenoid is designed for continous duty while the starter is obviously for momentary contact.
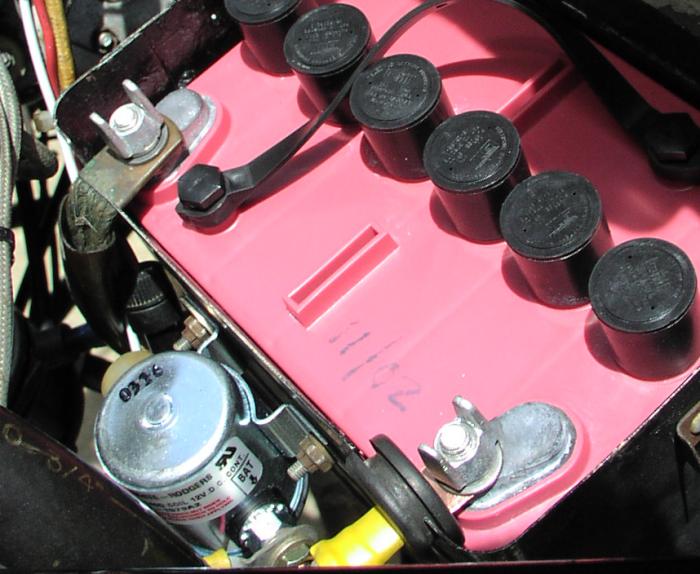
 Of course, I didn't have to
say a thing to Marty about cleaning up the various
connections...he just did it as a matter of good practice. A bit
of emery cloth removed a majority of the oxidation, and a follow
up with a Scotch-Brite pad futher polished the terminals. Check
out the result -- that is how a battery and terminals
should look!
Of course, I didn't have to
say a thing to Marty about cleaning up the various
connections...he just did it as a matter of good practice. A bit
of emery cloth removed a majority of the oxidation, and a follow
up with a Scotch-Brite pad futher polished the terminals. Check
out the result -- that is how a battery and terminals
should look!
You can see the finished battery solenoid installed on the battery box. The unit is mounted very close to the battery terminals in order to keep the battery leads as short as possible. This helps reduce power losses (so-called I^2R losses), which translate battery cranking power into heat created by the resistance of the cables.
Last But Not Least
In spite of these minor diversions, I could not have forgotten the reason I came out here. It was time to replace that pesky regulator.
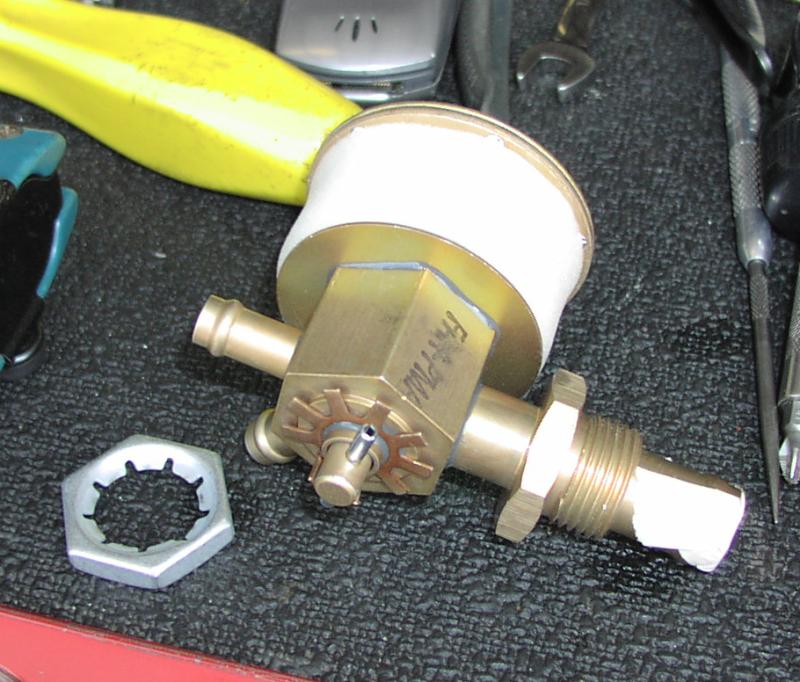
This was a pretty straightforward swap as well. The only snag
we encountered was the means of mounting the new regulator was
different from the original -- instead of two screws with nylon
locking nuts, the new regulator used a large metal nut that
threaded on to the 5/8" stem. The problem? 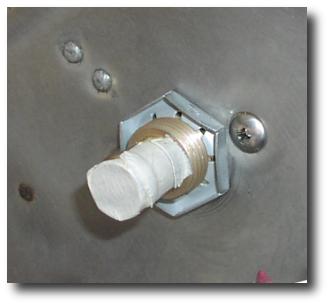 Those locking threads were
larger than the hole drilled in the firewall, so we were forced
to enlarge it.
Those locking threads were
larger than the hole drilled in the firewall, so we were forced
to enlarge it.
Marty used a Uni-bit (Vari-bit, whatever your brand choice) to open the hole in the firewall sufficiently for the threads to fit through, and then went under the panel to stick the unit through the hole in the firewall to me. I then used what had to be the largest crescent wrench I'd ever seen to carefully tighten the nut and firmly fix the regulator to the firewall. This was definitely a two person job, as some of the firewall insulation got in the way and made the process somewhat difficult. You'll notice that we just put the old screws back in the firewall (with locking nuts, of course) to close up the original mounting holes.
We then reconnected the hose going to the vacuum pump and ran the system up to check the vacuum. It was immediately apparent that we had solved the problem. The vacuum rose quickly and was near the bottom of the green by approximately 1400 RPM. By 1800RPM the vacuum had reached the nominal level. Any additional increase in RPM met with a fixed vacuum reading. EXACTLY as it should work. Hmmm...constant vacuum...what a concept!
Details, Details
 If you ever wondered why it's
important to clean the engine bay regularly, this is why. We
noticed a few new drops of oil on the lower cowling that had
obviously formed in the 10 hours since the last time I was here
and we washed down the cowling. We quickly traced the leak to the
oil return lines. Although we had snugged them up last time, that
wasn't enough because the short sections of hose were shot. Marty
made quick work of replacing the lines and cleaning up the
cowling...only took about 15 minutes.
If you ever wondered why it's
important to clean the engine bay regularly, this is why. We
noticed a few new drops of oil on the lower cowling that had
obviously formed in the 10 hours since the last time I was here
and we washed down the cowling. We quickly traced the leak to the
oil return lines. Although we had snugged them up last time, that
wasn't enough because the short sections of hose were shot. Marty
made quick work of replacing the lines and cleaning up the
cowling...only took about 15 minutes.
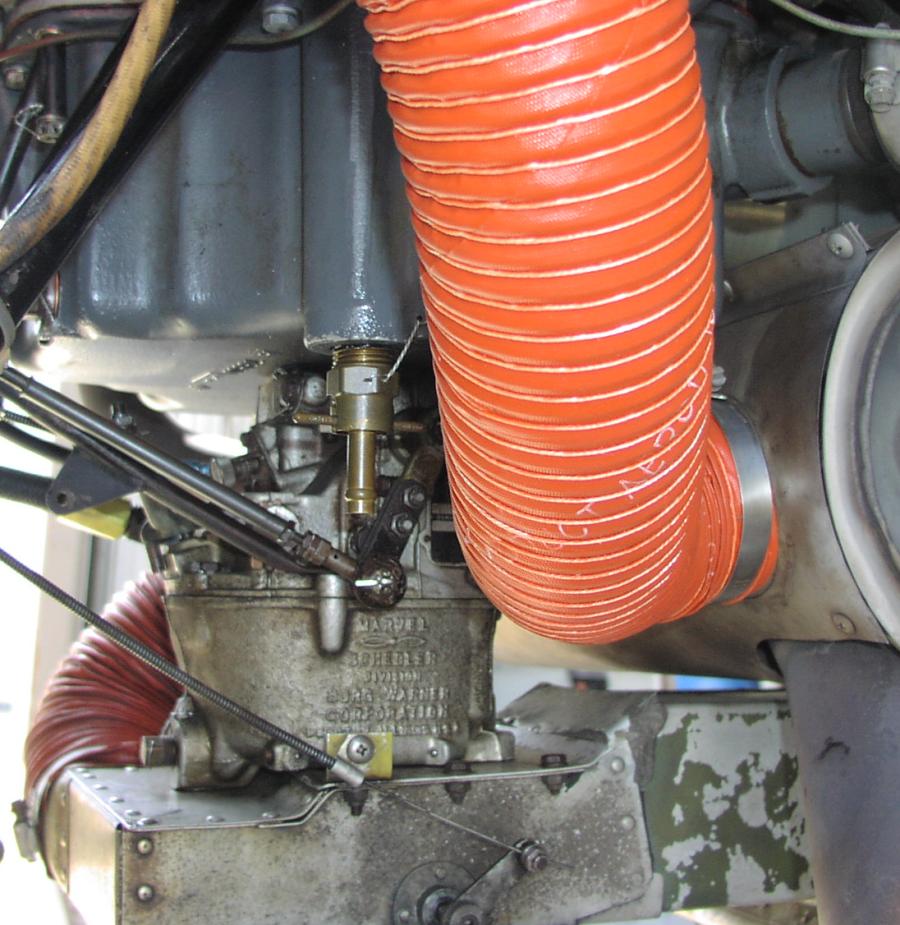
While he was doing that, one remaining item caught my attention. The 3" diameter SCAT (high temperature) hose leading from the heater muff to the cabin had a few holes in it that were obviously the result of rubbing against the sharp edge of the oil quick drain. When I looked at it initially I realized that the reason it was rubbing was because there wasn't much in the vicinity to which we could tie the hose to prevent it from rubbing. That's when Marty suggested a fix: he would cut a new hose and twist it to "load" in such a way that it would naturally remain clear of the quick-drain. I don't know why I didn't think of that, but it sure did work (see picture).
Grinning All The Way Home
 After a mere 3.5 hours
of labor, and 7.5 hours of labor overall for this 50 hour
maintenance binge, Marty and I shook hands and I flew home,
feeling secure in the work we'd done over the last several weeks
would lead to a lot more troublefree flying. Not long after that
my crew partner and I few the aircraft in low IMC with a
new-found confidence...something that only comes from a rigid
commitment to a program of scheduled and preventative
maintenance.
After a mere 3.5 hours
of labor, and 7.5 hours of labor overall for this 50 hour
maintenance binge, Marty and I shook hands and I flew home,
feeling secure in the work we'd done over the last several weeks
would lead to a lot more troublefree flying. Not long after that
my crew partner and I few the aircraft in low IMC with a
new-found confidence...something that only comes from a rigid
commitment to a program of scheduled and preventative
maintenance.
So, when was the last time you saw the inside of YOUR engine bay?