


Sunday, September 7, 2008
Swaybar Update
After driving for a week with the new rear swaybar endlinks and bushings I have to say that the car is much better behaved than I thought it would be, considering that the old parts didn't look that bad. The improvement is easily on a par with the results from the front sway bar service I conducted last year. The entire rear of the car seems "quieter" than before...and I mean that in a NVH (Noise, Vibration, Handling) sense, particularly at speed.
Turns at up to 80 MPH are definitely more predictable, particularly as I make the transition from braking before the turn entry to the throttle and quickly but smoothly steer into the turn to carry the car through the apex. At cruise, small bumps and cracks in the pavement don't transmit as readily to the seat of my pants, so the entire car feels smoother and more in control. That's probably why I had the confidence to bring the car up to 110 MPH on some smooth and straight road. I still find it truly amazing what this 11 year old car will do. It was designed in the early 90's and still blows the doors off of most of the new stuff out there today.
Surprise Brake Job
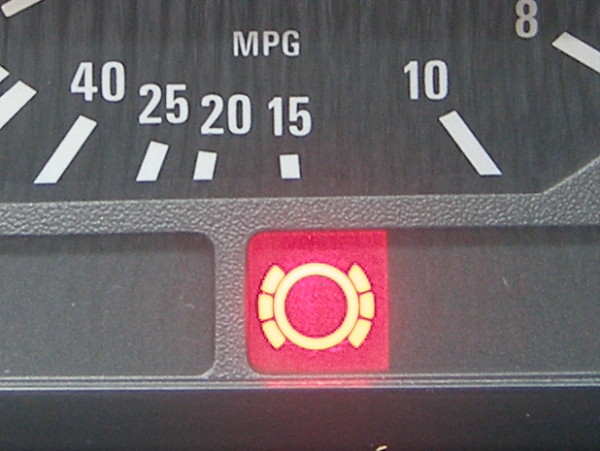 While driving to work earlier in the week I applied the brake
pedal to slow down (believe it or not, I do slow down on occasion)
and saw the red brake wear indicator illuminate.
As I continued the drive to work I contemplated what could be wrong. The brakes
weren't due for at least another 10K miles, so I initially assumed the indicator
was in error. After I pulled
into the parking lot at work I got out to inspect the brakes and much to my
surprise found the pads worn down to a level that would trip the
wear sensor. I immediately took this as a sign that I have been working too
hard and I resolved to order the parts and do the job this weekend.
While driving to work earlier in the week I applied the brake
pedal to slow down (believe it or not, I do slow down on occasion)
and saw the red brake wear indicator illuminate.
As I continued the drive to work I contemplated what could be wrong. The brakes
weren't due for at least another 10K miles, so I initially assumed the indicator
was in error. After I pulled
into the parking lot at work I got out to inspect the brakes and much to my
surprise found the pads worn down to a level that would trip the
wear sensor. I immediately took this as a sign that I have been working too
hard and I resolved to order the parts and do the job this weekend.
Later that night, following the usual check of realoem.com and the ETK for part numbers, I placed an order with Jason at Tischer BMW via mileoneparts. To the usual complement of pads, rotors, retaining screws and wear sensor I added two caliper guide bushing repair kits. Caliper guide bushings allow the caliper to slide smoothly, and worn (or greased) bushings can cause the caliper to bind up. Since it's hard to inspect the interior of the bushings I decided to file this under the heading of preventative maintenance. Needed or not, they would be replaced.
I completed the brake job this afternoon and found it went mostly as expected. The left front rotor didn't want to separate from the hub but a couple shots of WD-40 in the lug bolt holes, a 10 minute break, and some not-so-gentle persuasion with the dead blow hammer did the trick. Needless to say, I spent some extra time cleaning off the hub before wiping on a fresh coat of anti-seize in an effort to prevent this next time.
The only other snag came about when I tried to press the piston back into the caliper bore using my old woodworker's clamp. The right side eventually pressed in but the left side simply wouldn't budge. I didn't happen to have a c-clamp handy so I quickly changed clothes, hopped in the E46 and shot over to Home Depot to pick up a 4" c-clamp which ultimately worked like a charm. This task is all about leverage, and you need lots of it to work those pistons back in far enough so the thick new pads will fit over the rotors. Once I managed to push both pistons back into the calipers I checked the level of brake fluid in the reservoir to find it very close to the maximum level. As regular readers may recall, I intentionally left the fluid near the minimum level in anticipation of this during my recent brake fluid flush, so that worked out as expected. As we pilots say while training to fly in instrument conditions (in the clouds by reference to instruments only), the two most important things are the next two things. Translated: it pays to think ahead.
As for the shortened brake life, I think this is a simple consequence of running 18" wheels. It's not so much the weight as it is the mass farther away from the center of the wheel that places extra demands on the brakes. In that respect I will look forward to November when I plan to install my set of 16" winter wheels and tires.
Book labor on brake jobs are 2.0 hours per axle or $235 including tax at current dealer rates. Retail OE parts cost $278, but Tischer's discounts got that down to $221, or a savings of $57. I also bought a can of brake cleaner ($5), a pair of throw-away gloves ($2) and one tool (the c-clamp, $8) to complete the task. And for record keeping purposes, I also bought two jack pads for $21. They were not strictly needed for this task, so I'll file those under "extra parts". Total DIY savings: a bit under $300. Not bad.
I took some extra pictures this time around so expect an update to my Brake Job DIY soon.
Mileage: 165475, Parts $221, Extra Parts and Materials: $28, Tools: $8, Parts Saved: $62, Labor saved $235