


Sunday, June 20, 2010
Rear Suspension Overhaul - Miscellaneous Preassembly Tasks
Earlier in the week I spoke to my technician about two issues:
- How to press the axle shafts into the drive flanges. Specifically, I asked him whether it was possible to press them in most of the way by hand and then use the nut along with an air wrench to pull the axle in. He smiled and said "sure, you can do it that way if you want to ruin the axles!" He quickly retorted that the proper way to do that is to use the BMW special tool or an equivalent that bolts to the hub and threads into the axle shaft to pull the axle into the flange. Fortunately, he agreed to loan me the necessary tool. All I have to do is bring him one of the axles to make sure he gives me the correct threaded component. Have I said lately how important it is to maintain a good relationship with your local BMW technician? :-)
- How to align the trailing arm bushing carrier (what BMW calls the "console") for zero preload at ride height. I knew there was a special tool for this task but he said that he no longer had the tool in the shop because it broke and it really wasn't necessary in the first place. He said he uses a similar technique that involves a generic straight edge. I've known about that technique for some time but had hoped that I could use the tool because it takes the place of the extra hands that will no doubt come in handy while I hold a couple box end wrenches and torque the bolt to 110Nm (81 ft*lbs). If that doesn't sound challenging, consider that the torque is just shy of that required for a wheel lug bolt. Yea, that will be a piece of cake. Riiiiight.
Yesterday I did a bit of minor preassembly work while I waited for parts to come back from Don.
To start things off I picked up the new muffler heat shield from the dealer in the morning. While I was there, I asked the parts guys for three wheel lug bolts to replace the ones whose threads were damaged when I used them with the special tool to press the axle shaft out of the drive flange. Always willing to help, my "alternate" tech, K, overheard my quandry and responded with a gesture of three near-new lug bolts from his spare parts bin...free of charge, of course. Cool guy, eh? He also mentioned that he was looking forward to seeing the results of my efforts and I told him he'd see it soon for an alignment to wrestle the rear toe and camber back into spec.
Back at the garage, while pulling the old heat shield out, I realized that the heat shield actually comes in two separate pieces and I had only ordered the larger of the two ($55). A quick call to the parts department solved that problem. The smaller part ($35) is on order and should be here by Wednesday. As it turns out, one of the heat shield retaining nuts was also missing in action (it probably fell off some time ago since I certainly did not remove it during this project) so I ordered more. They were only available in a package of ten, but rather than something like 45 cents each retail the parts guy took pity on me again and gave them to me for one penny over cost, or 25 cents ($2.50). Those will be here Wednesday too.
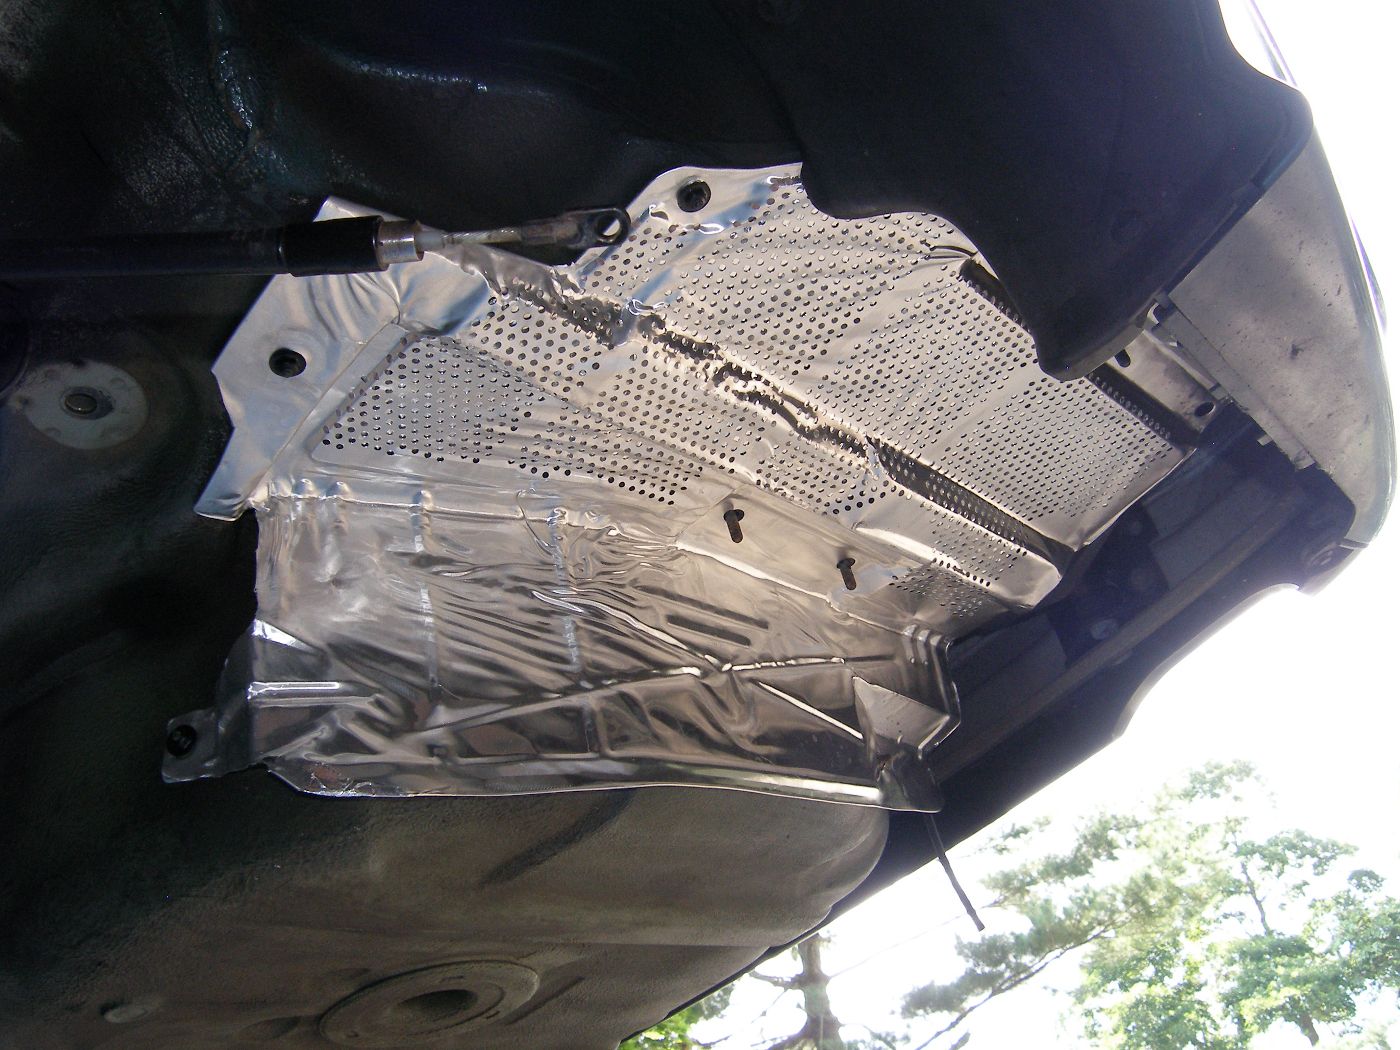 The new heat shield replaces a damaged part and should look at home with the refurbished suspension components. |
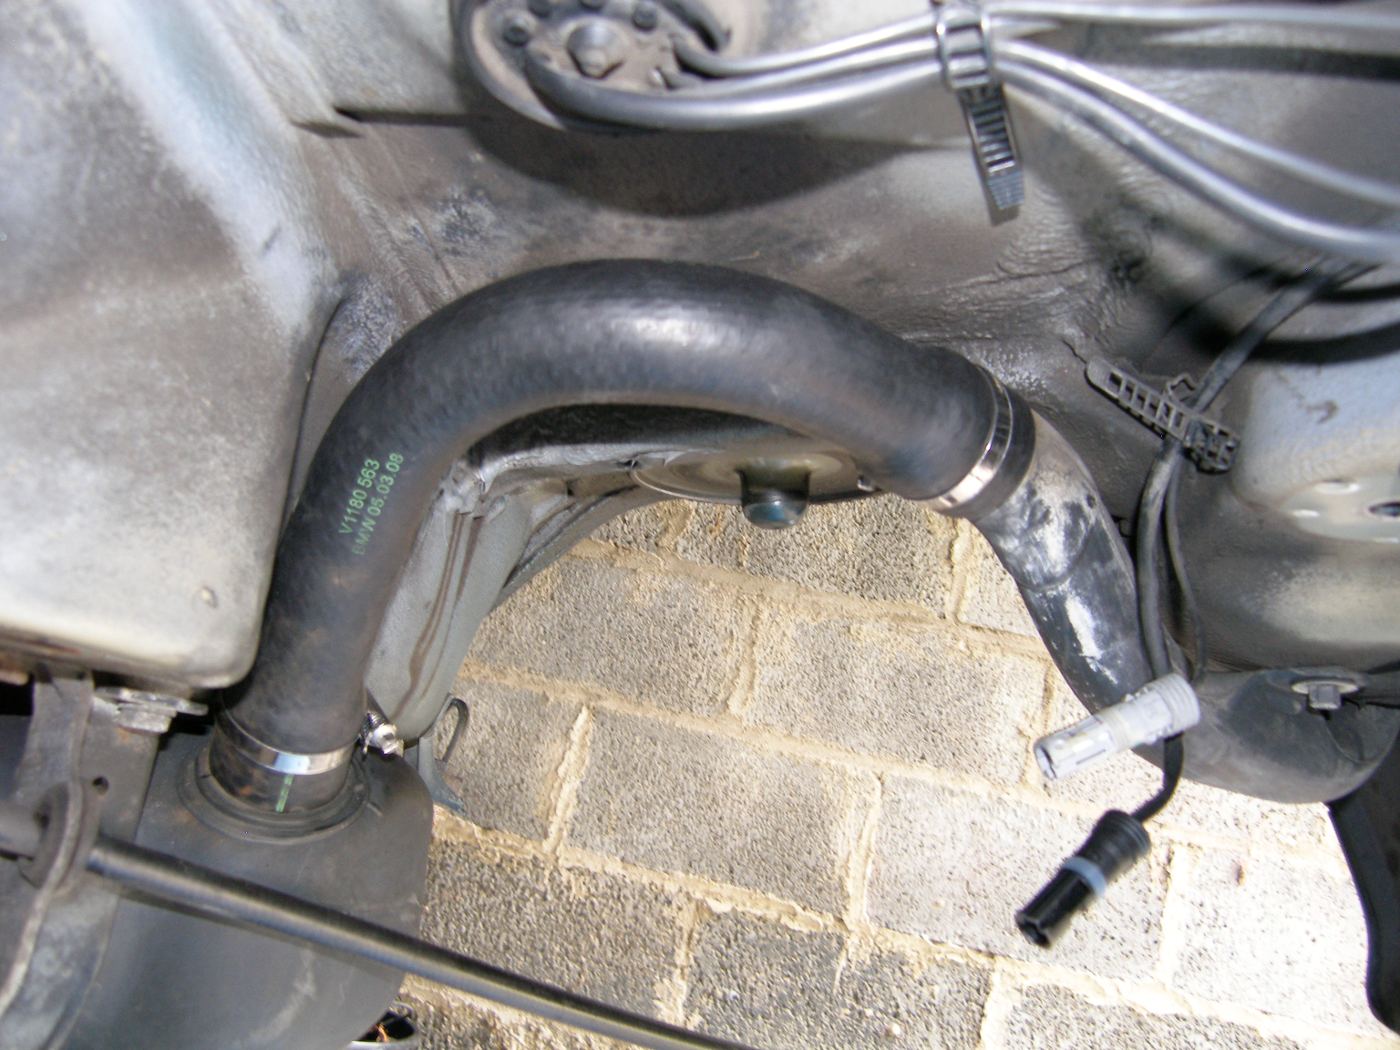 The new fuel filler hose replaces a weathered and heat-damaged hose and should help prevent vapor leaks in this area which can trigger a CEL. |
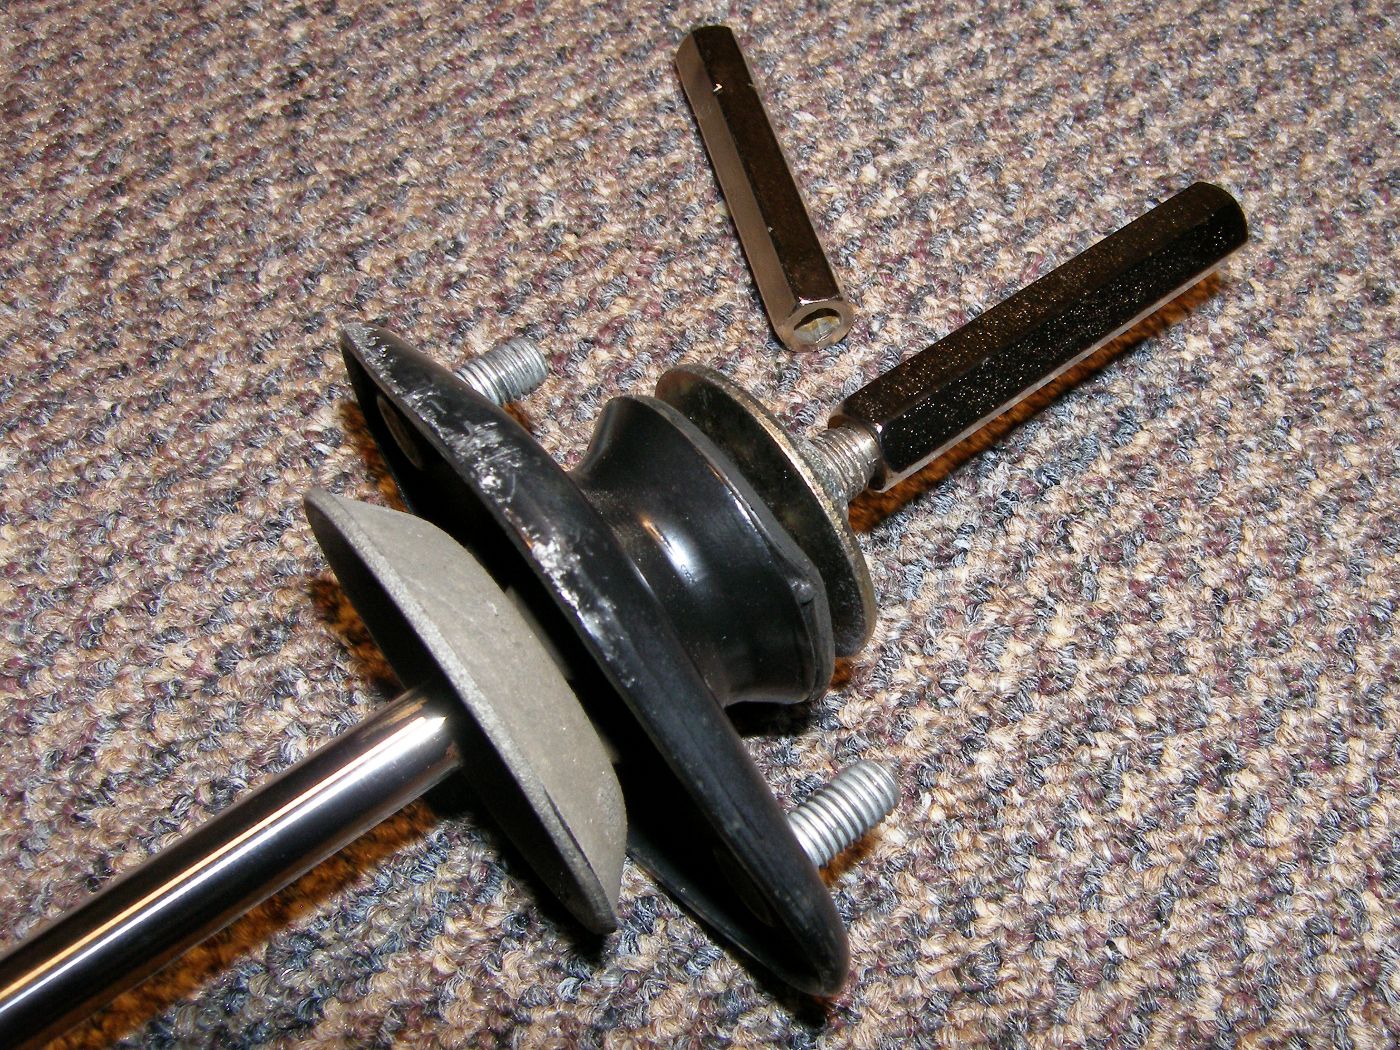 The special shock rod tool (oval socket) is the right tool to use to replace shocks. Beats the hell out of a pair of vice grips. |
I then installed the new fuel hose that connects the filler neck with the tank. The hose attached to the filler neck side easily but the end that attaches to the barbed nipple molded into the tank gave me fits as there was essentially little to no clearance between the nipple and the body of the vehicle. I finally managed to wiggle it on but I had even more difficulty trying to fit the clamp to far enough down the tank nipple. It's definitely on there now and it looks great, but what a needless pain in the ass. You'd think BMW had never built a car before this one. All they had to do was mold the tank to push the nipple a 1/4" farther down and this would be a non-issue. The perk of this task was that I realized I had picked the right time to do this. I can't imagine replacing the hose with the upper control arms, etc. in place as there is simply no clearance to get in there.
Next up was pre-assembly of the shocks. First of all, I discovered that I could not remove the top nut that secures the mount to the rod from the existing shock assemblies because I couldn't securely grab the shock rod and prevent it from rotating. This prevented me from reusing the top cup washer that I originally chose not to order because it seemed to be in great shape. This also highlighted the fact that if I couldn't remove the nut, there was a pretty good chance I wouldn't be able to tighten it on the new assemblies either. I also discovered that I neglected to order a very small washer that fits inconspicuously below the bottom cup plate, presumably to add strength to the cup plate where it rests on a small ridge machined into the rod. I thought briefly of reusing the washer from the old assemblies but closer examination revealed they were both badly rusted and unusable. A quick call to the parts department fixed the problem and new washers are on order.
I then reviewed the first task of reassembly – installation of the subframe. The subframe attaches to the body with two studs in the front and two bolts in the rear. Per the TIS, the studs must be torqued to 120 Nm (88 ft*lbs), while the two nuts that hold the subframe to these studs as well as the two rear bolts must be torqued to 140 Nm (103 ft*lbs). I soon wondered how to secure the studs to the body. While they have a hex nut cast into them, the stud shafts are too long for even the deepest of sockets so I concluded I'd need a 24 mm crow's foot socket to first torque the stud to the body and then a regular socket to torque the large grade 10 nut that would hold the subframe to the stud.
The last task of the day involved prep and paint of the fittings that mate the parking brake cable assemblies to the trailing arms. I used emory cloth to remove all the rust from the fittings but made a point of not painting the portion that mates with the bore in the trailing arm for fear that the close tolerances would prevent installation. You can see the results in the foreground of the heat shield picture, above.
Today I did some Googling to find out if there was a better solution for R&R'ing the shock mounts than a set of vice grips. Ultimately, the terms "oval shock socket" revealed what I needed to know, including the fact that Lisle makes a “universal” kit of oval sockets (Lisle Part number 20400). That led to the realization that my local tool shop, Eppy's, carried the kit. I ran over there today with one of the old shock assemblies and confirmed that one of the tools in the kit fit the BMW application before I plunked down the whopping $10 for the set. While there, I also picked up a set of metric crow's foot sockets ranging from 8 to 24 MM (Astro Pneumatic Tool Part number 7115) for $36 and considered it money well spent.
Mileage: 193332, Parts: $90, Parts Saved: $20, Tools: $50