


Thursday, June 24, 2010
Rear Suspension Overhaul - Assembly Day One
Yesterday I picked up the parts from Don and paid him for a job well done. He managed to get all of the bushings, bearings, and ball joints installed without scratching any of the parts. And as it turned out, he did not have to drill the trailing arm to secure the RTAB because he was able to press it in without using any lubricant. That in combination with the sandblasted surface and Vorshlag shims should keep the RTAB well positioned. He also finished the differential earlier than expected, complete with new bearings, seals, cover, speed sensor, and all new hardware along with a fresh paint job. It looks brand new.
Today I began the day by visiting Eppy's to pick up a small set of 1/2" drive extensions because I knew I'd need them today in several places. I tried to buy SK to match the bulk of my ratchets but they only had a set of wobble extensions in stock. So I was forced to buy a small set of three extensions (3, 5, and 8") from an offshore vendor. I also stopped by Home Depot and picked up a couple three foot pieces of 1/8" thick aluminum angle to help with the RTAB console alignment and a future task involved in the front suspension I expect to tackle in a few months.
 Collection of parts ready for installation. |
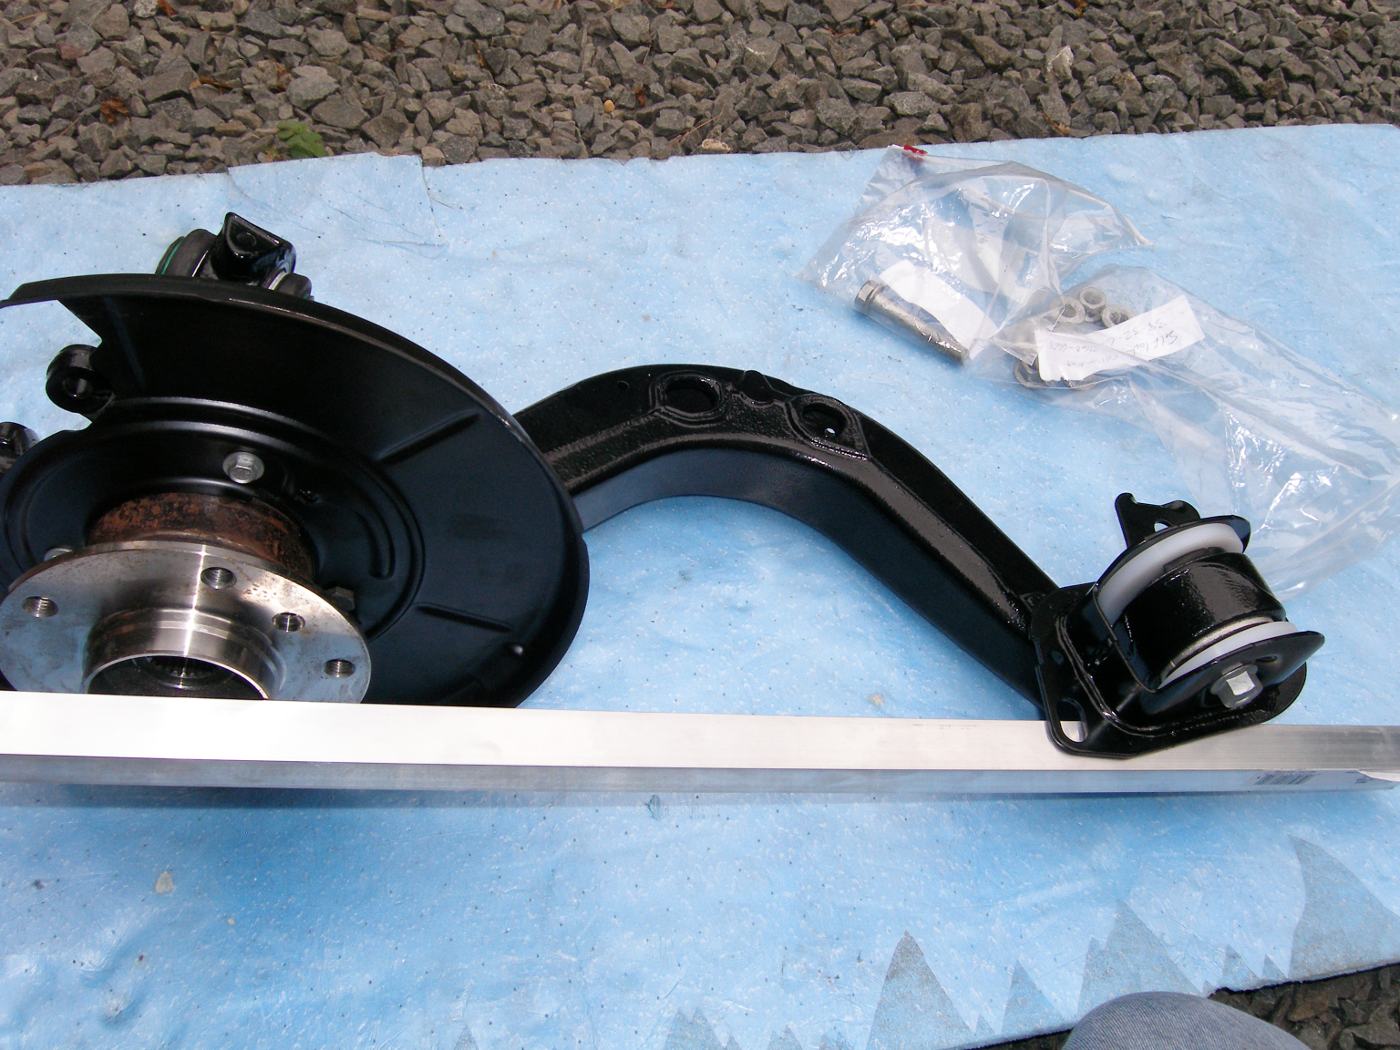 A piece of aluminum angle serves as an effective RTAB alignment tool. |
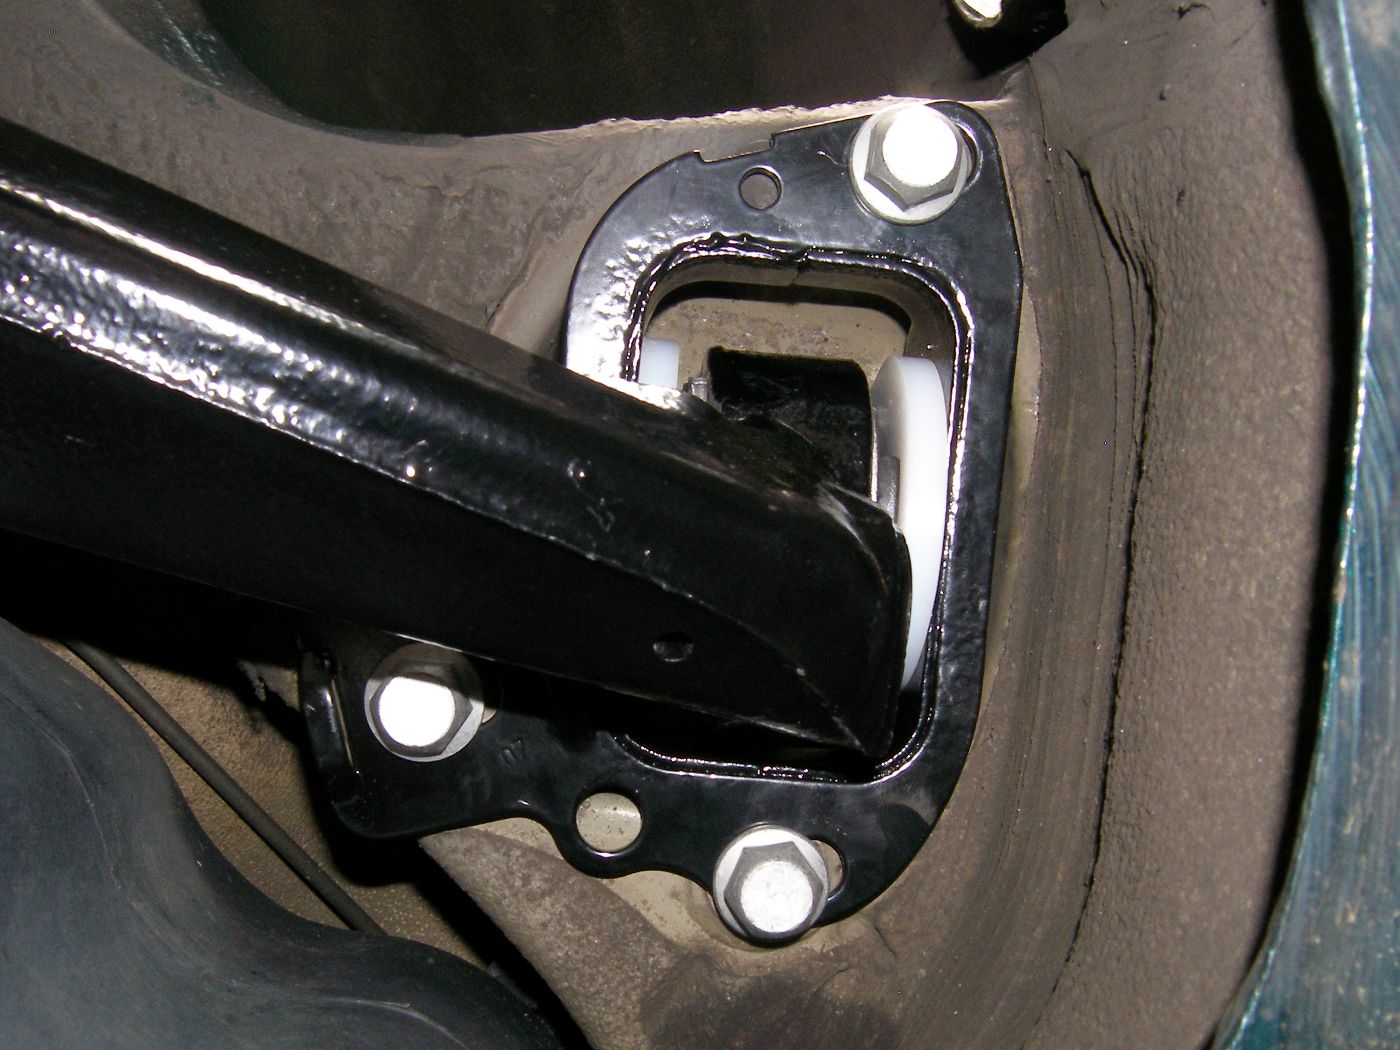 RTAB console installed on the body in a position that approximates the toe setting prior to disassembly. |
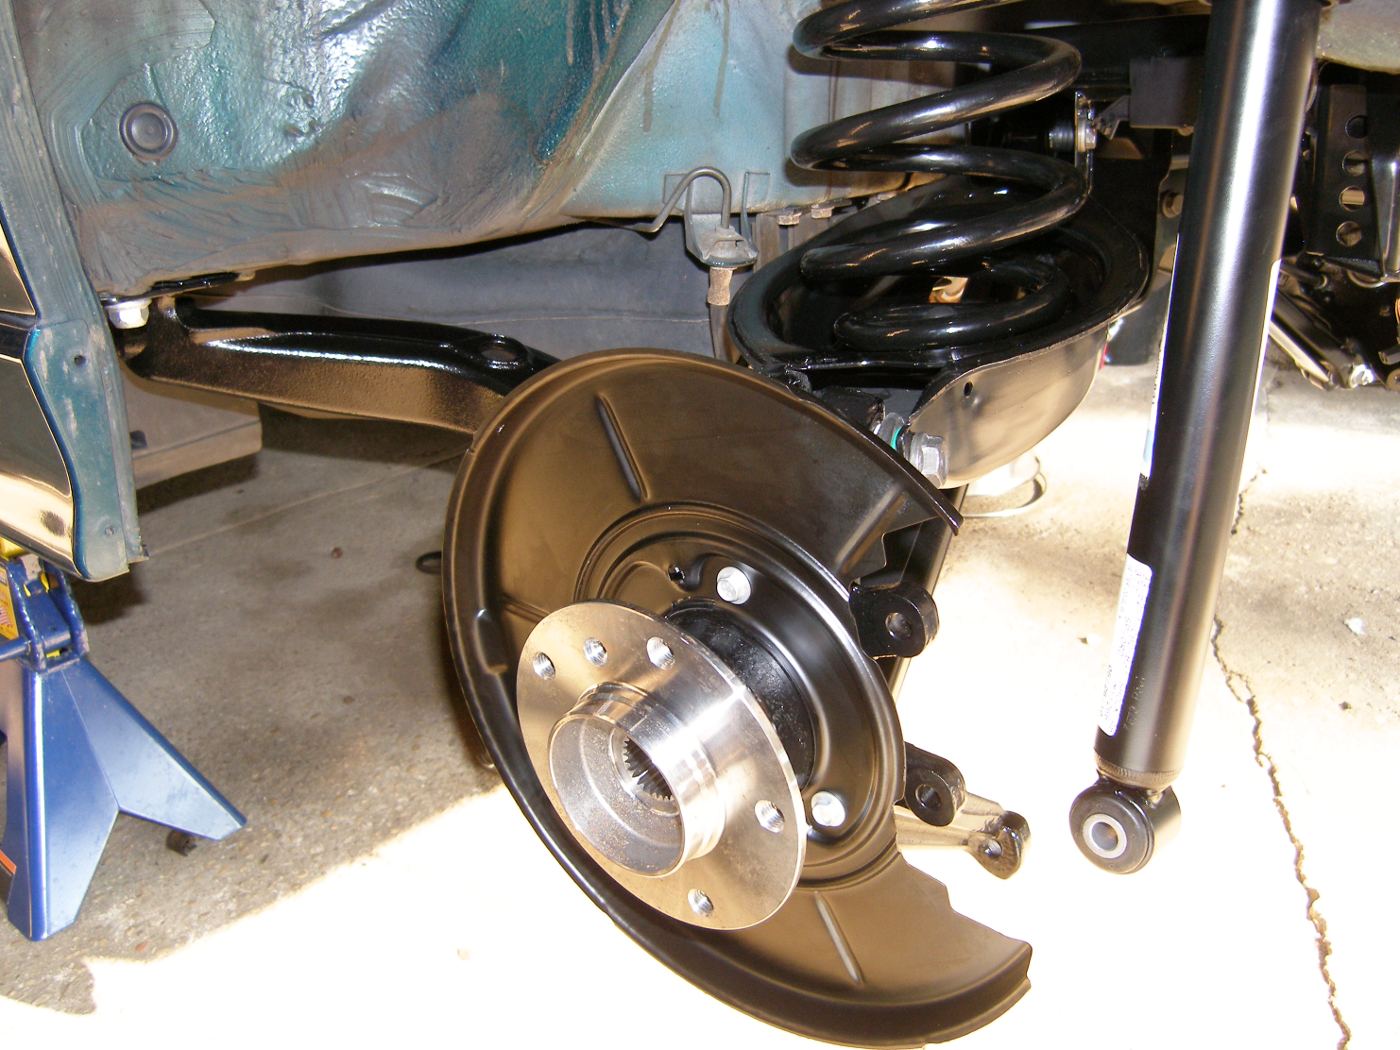 Perspective shot on the new left rear suspension. |
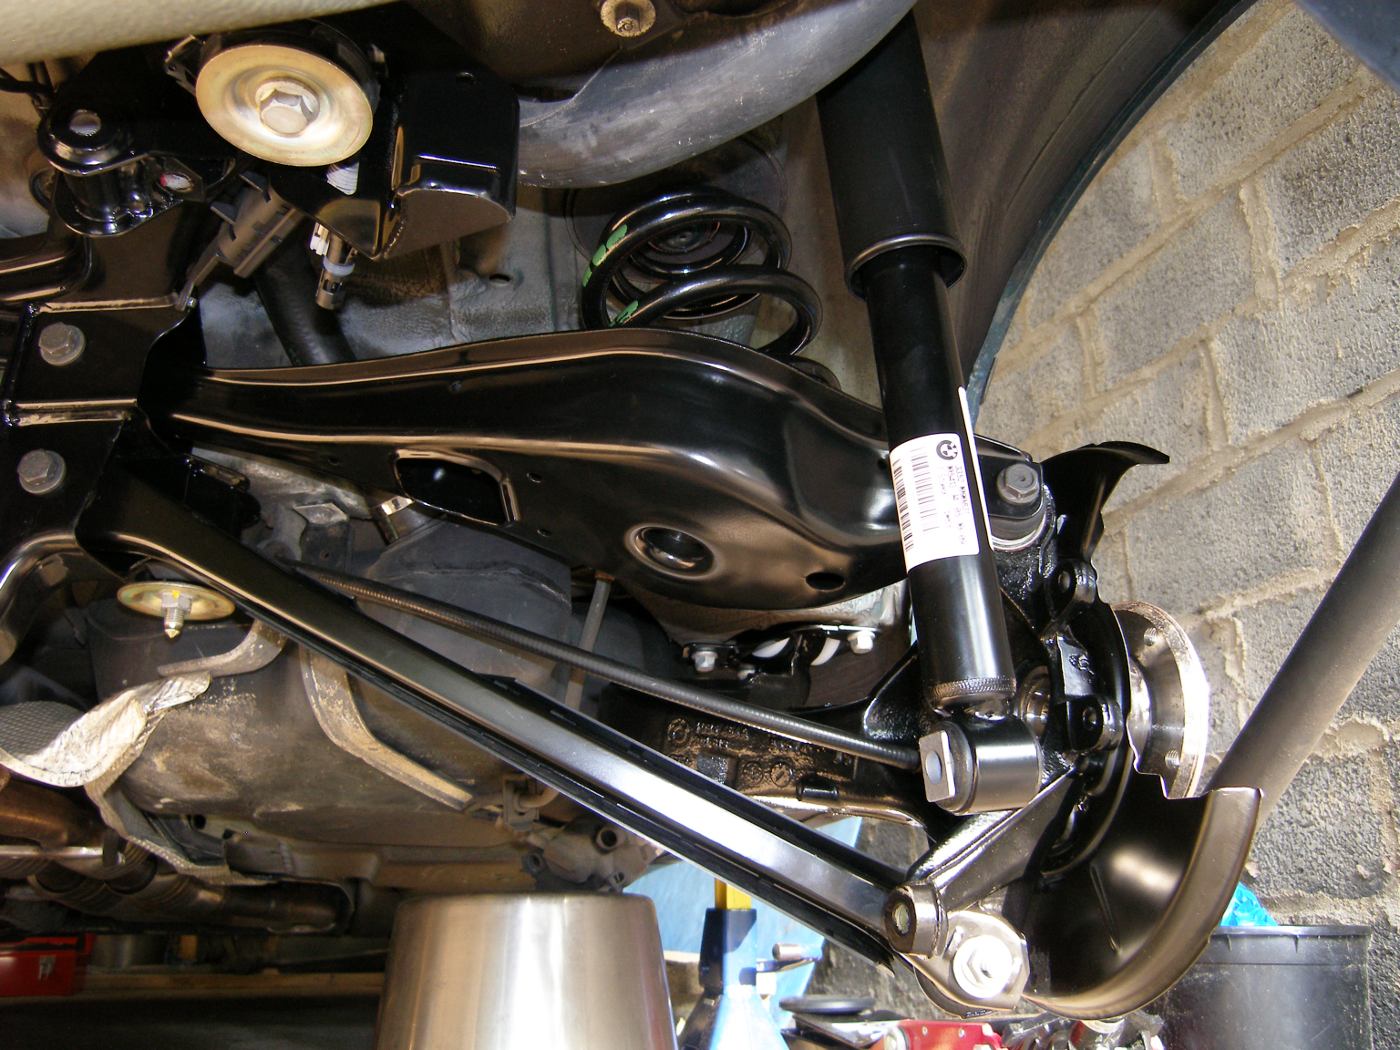 Another perspective shot on the new right rear suspension. This is literally better than new. |
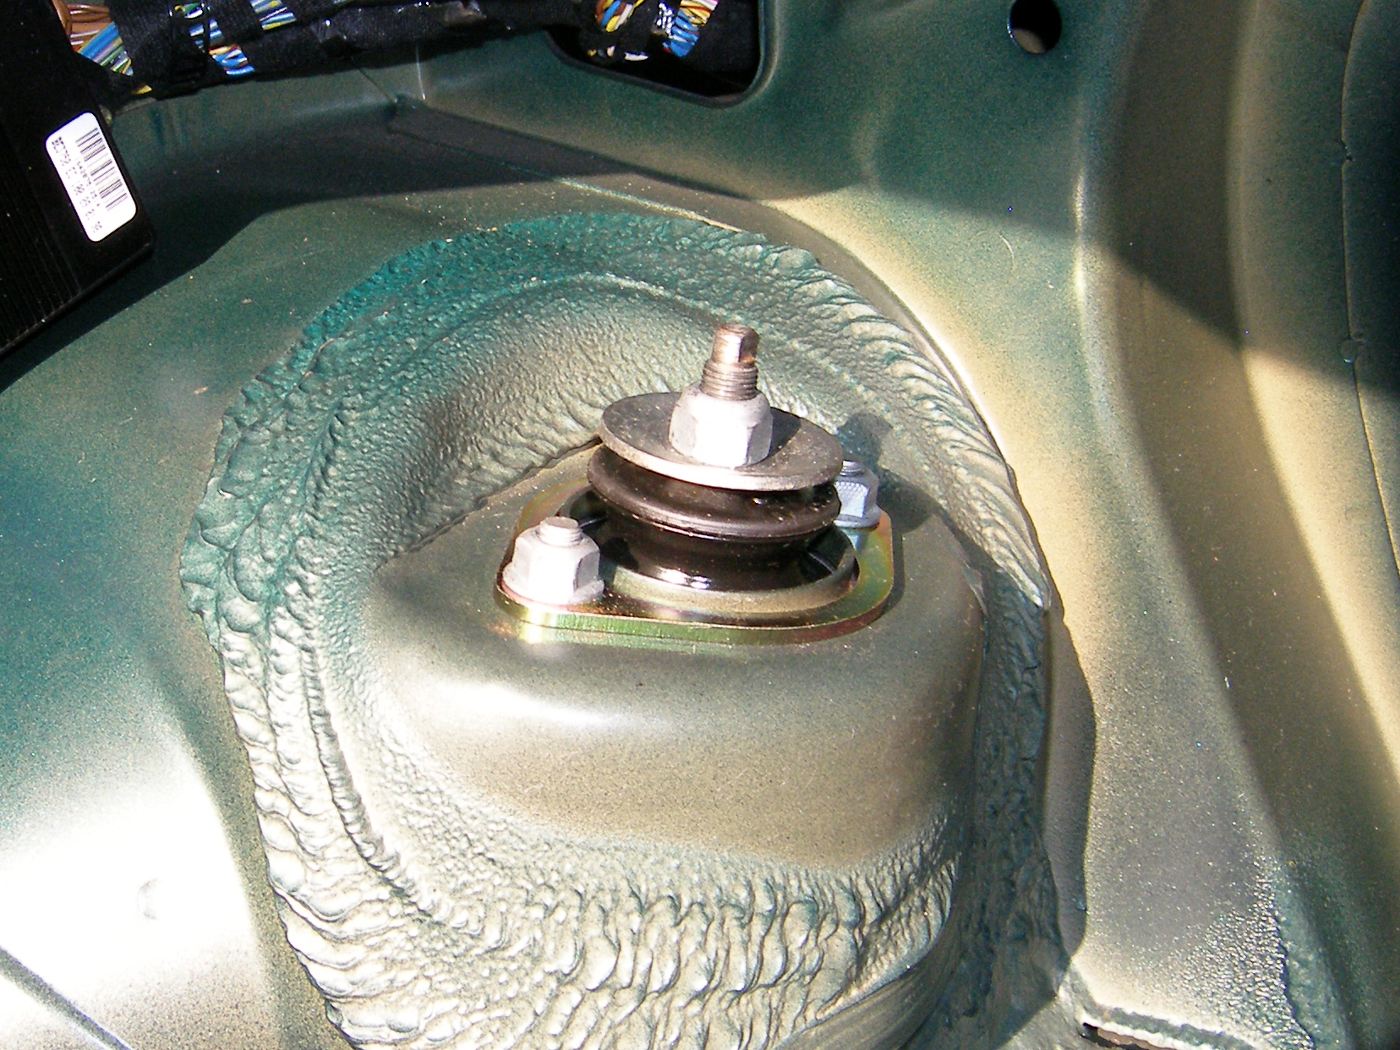 BMW OE shock tower reinforcement plates installed should help prevent cracks. |
By the end of a five hour work session in 95 degree heat I had managed to install a bulk of the suspension. It went largely as expected with a few exceptions:
- As I started to install the subframe I noticed that the inner diameter of the rear bushings were significantly (1mm+) larger than the bolts used to secure them. In my haste during disassembly I never noticed that so I called Don and he was kind enough to confirm it is normal. With that knowledge in hand, I installed the subframe in short order.
- When it came time to mount the RTAB and the shims into the console, the aluminum angle did an admirable job of taking the place of the special BMW tool, but I found it rather difficult to apply the required 81 ft*lbs of torque to the bolt. I quickly realized that the small box-end wrench I was using as a counter-holder was the problem and replaced it with my largest breaker bar. I then used careful pressure with my foot to prevent the console from rotating as I held the breaker bar with one hand, the torque wrench with the other, and finally managed to get the "click" from the torque wrench I expected. Then it was just a matter of wrestling the trailing arm up to the body and securing the console to the body with three new bolts.
- I also could not manage to torque the nut that secures the mount to the top of the shock rod, but I know pretty well what 10 foot pounds feels like so I just used the special Lisle tool I bought in combination with a 16 mm box end wrench and tightened it down until I was satisfied.
I managed to dial in both the camber and toe settings pretty well based on pictures I took prior to disassembly and applied the final torque on the control arm outer bolts. I could do this because they are ball joints and will naturally rotate as I lower the suspension down to normal ride height. I can't apply final torque to the inner bolts that secure the control arm bushings to the subframe because the preload on those bushings must be set at normal ride height and I can't achieve that until the wheels are reinstalled and they are lowered down onto a set of ramps for clearance purposes.
The remaining components to be installed include the parking brakes, wheel brakes, axle shafts, differential, swaybar and muffler. Tomorrow I'll install and adjust the parking brake and wheel brakes first because I'll need those functioning to prevent the drive flanges from rotating while I use a tool provided by my technician to pull the output shafts into each drive flange. Once that is done, I'll use my jack to lift and install the differential. The swaybar will be next next because it is easier to install without the muffler in place. Then I'll finish up by installing the muffler with new sealing rings and hardware. At that point, I expect to take it on a brief test drive around the block before I take it for an alignment sometime in the next few days.
Mileage: 193332, Labor: $950, Tools: $30