


Saturday, June 9, 2012
Front Suspension Overhaul - Day 5
Earlier in the week I took the subframe to my powdercoater to have him sandblast the areas to be welded. Although he initially quoted a two day turnaround he managed to get the job done the next day. I picked up the subframe and drove it over to Don at Mr. M Car so he could deliver it to his welder. Yesterday Don called and let me know everything including the subframe was ready to pick up.
While discussing the work he mentioned that everything went as planned except that he had to apply a good amount of heat to remove the broken bolt from the kingpin. As it turned out he installed the M3 bushings according to factory specifications (windows horizontal) and he applied some additional grease to the top of the guide support bearings as I requested. As I inspected the subframe with the kit installed I became somewhat concerned that I would not be able to get a socket into the hole provided to access the bottom engine mount nut. Don brought over the correct socket and realized my concerns were well founded as the socket would not fit so he installed an abrasive stone in his die grinder and removed a very small amount of metal until he obtained the required clearance. I paid Don $250 for his jobs well done plus $90 for the welder and headed for home.
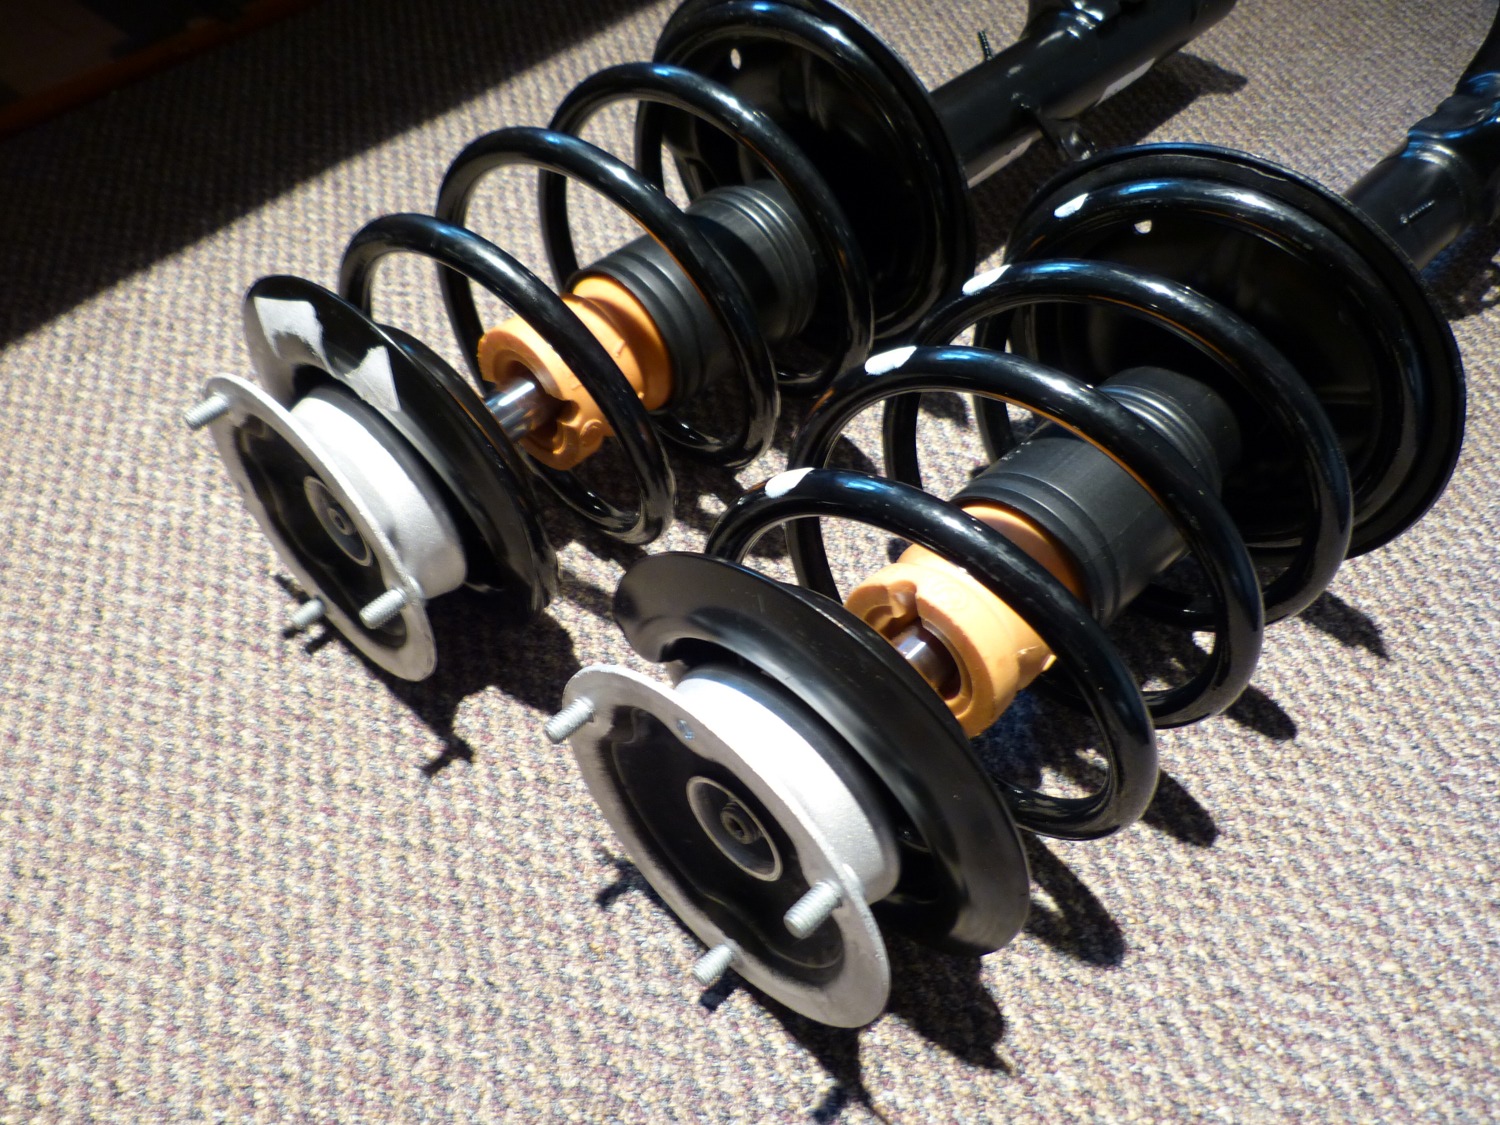 The new struts are a thing of beauty and literally better than new as they integrate the latest parts from BMW including Z4 guide supports. |
 The M3 bushings were installed according to factory specs. Even with the windows I expect significantly more road feel -- exactly the way an enthusiast wants it. |
 Don had some difficulty removing the bolt from the kingpin but he got it out. He then supplied a new bolt with a touch of anti-seize on it, and given that a wave washer is used I expect to do the same on the other side. |
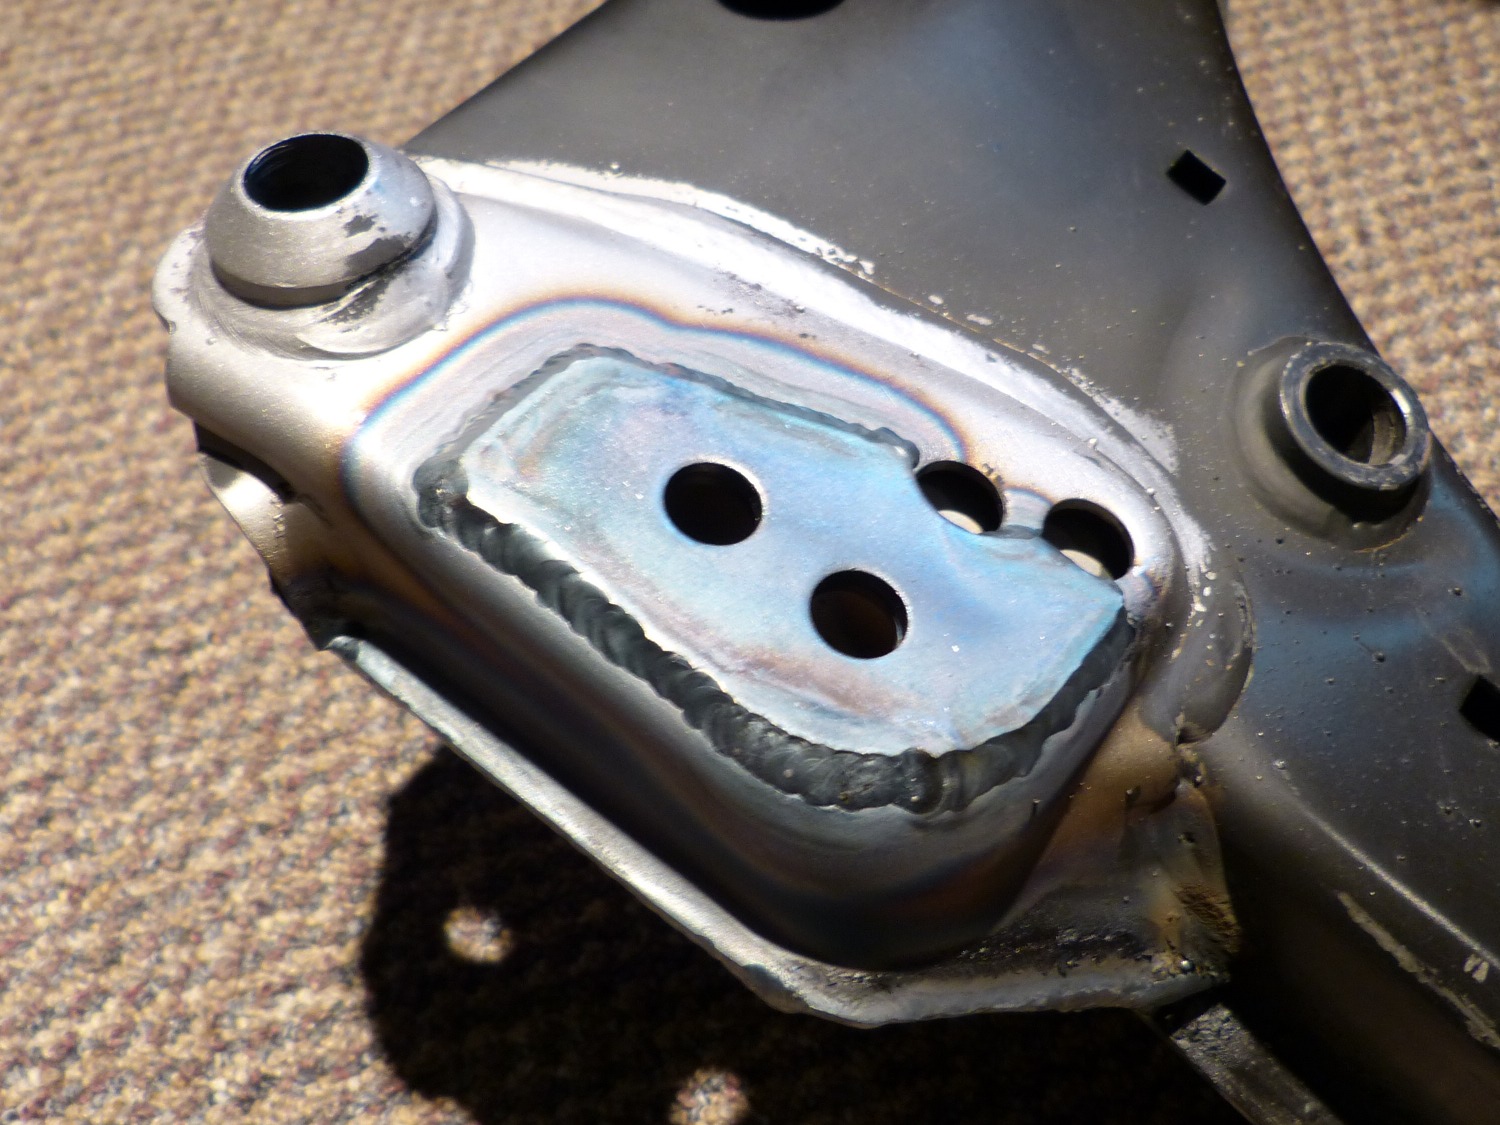
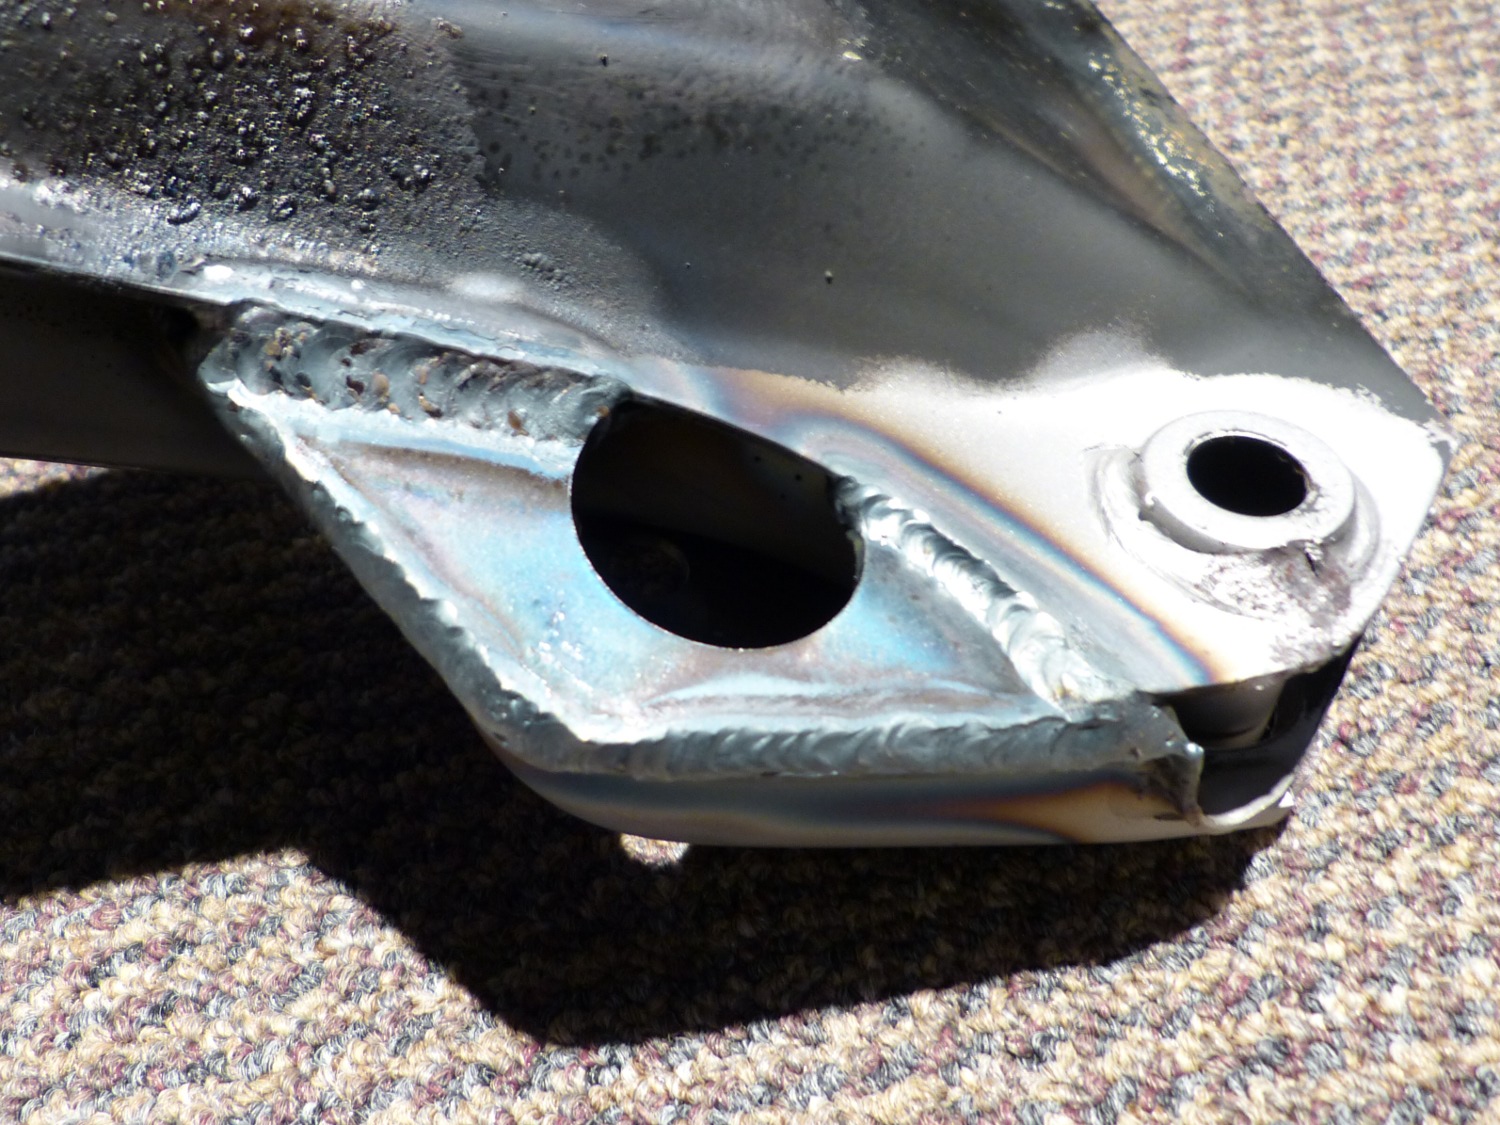 Top right TMS reinforcement plate TIG welded onto the subframe. |
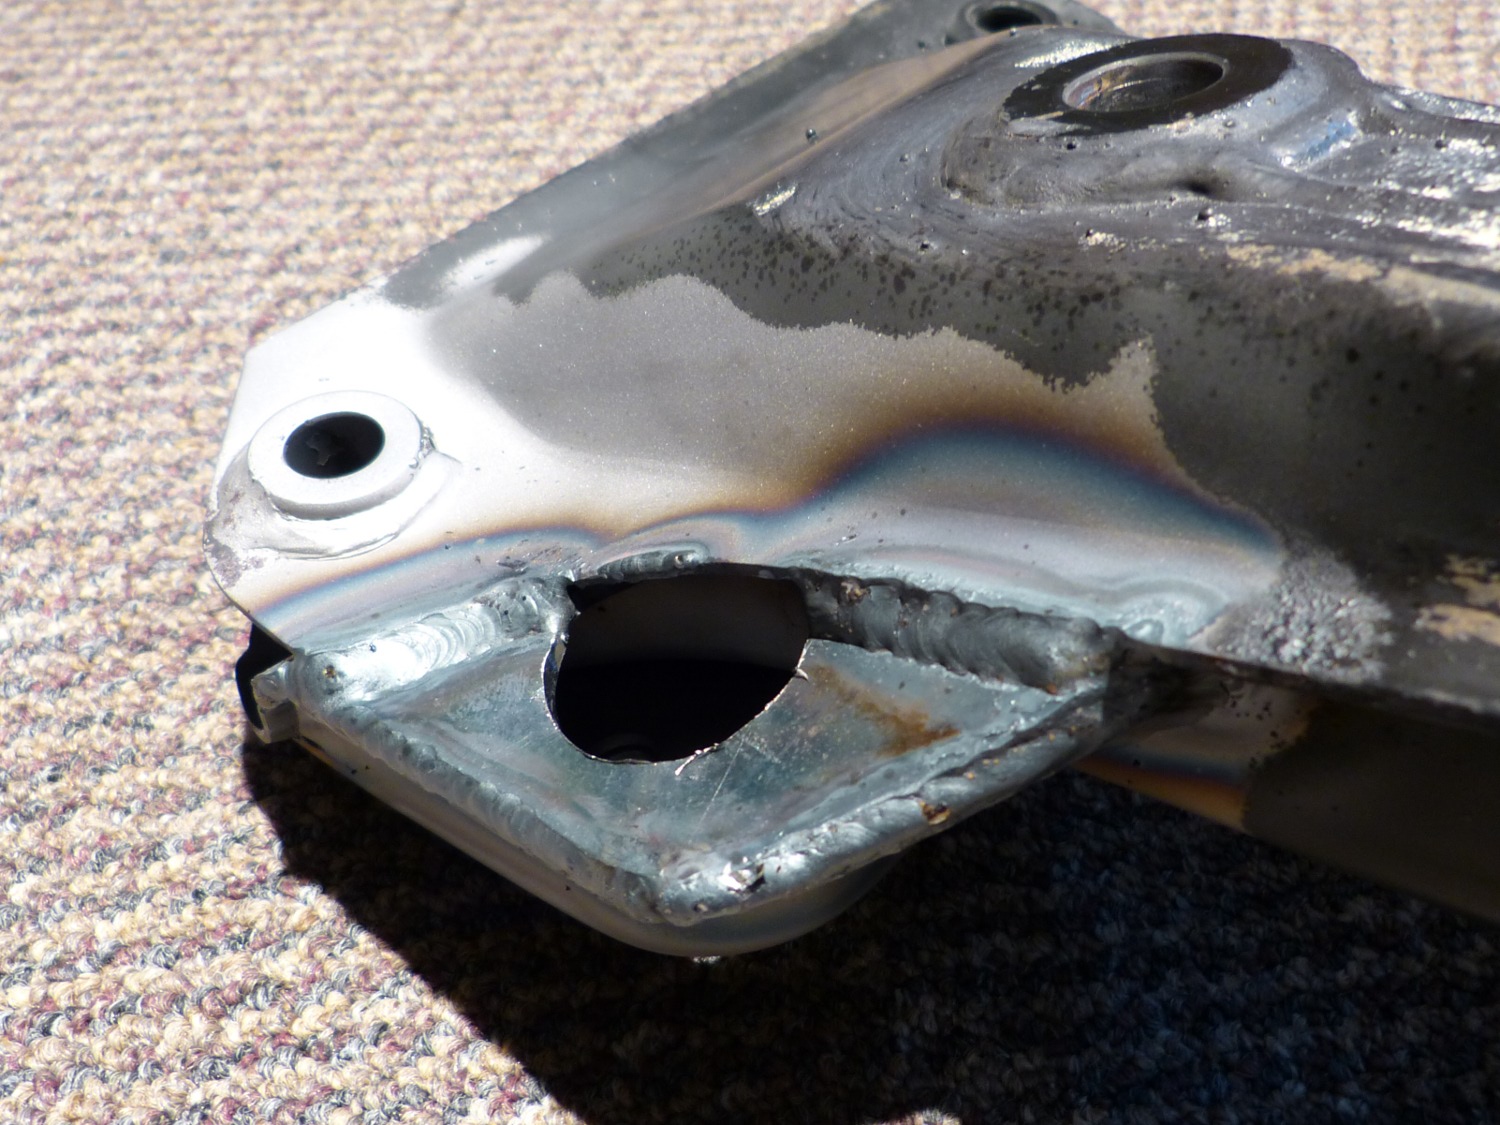 Top left TMS reinforcement plate welded onto subframe. Don had to take a bit of metal off the bottom of the crescent shaped hole you see in the plate so the socket would fit at a reasonable angle. |
 The doubler plates were installed on the outside to simplify and enhance the quality of the welding process. |
I had intended to start work in the garage mid-morning today but I first had to handle a higher-priority task: a new receptionist at the dealership heard of the organic pizza I make and insisted I bring her some so that took the better part of the morning. I mean, it's a dirty job giving beautiful girls what they want but someone has to do it. I brought enough for others to try and it was well received. Because I brought the pizza in a traditional commercial pizza box one guy asked for the shop where I bought it...and then looked at me in disbelief when I told him it was home made. Another guy violated his diet when he grabbed the last slice but felt better when I told him this was better for him than most of the cardboard they eat around there every Saturday. With the glamorous world of BMW DIY maintenance beckoning, before long I said my goodbyes and headed for the garage.
I began the work session by replacing the broken electrical connector for the brake wear sensor. Because I had done one of these connectors before during the rear suspension overhaul it took all of a couple minutes to successfully pull the old wiring out of the connector and install it in the new one.
Next up, I attempted to replace the rubber engine mounts but discovered that I would need to use a socket to remove the top nut of the mounts and yet there was little to no room to swing a ratchet. That convinced me to pull the mount supports from the block. The right side was easily removed as I was able to use a 13mm socket and ratchet to pull the needed four bolts. The left side, however, was more complicated not only because of clearance but because the power steering reservoir bracket attaches to the mount. I had to remove the remaining hose from the reservoir and loosen the clamp to remove the reservoir itself before I could gain access to the four bolts on the block. Since the reservoir is now out of the car and it's a PITA to pull it from the top I plan to replace it with a new part. I last replaced it at 140K miles and ZF recommends this be changed every 100K miles or following replacement of any major components (i.e. the rack) so that's close enough for me.
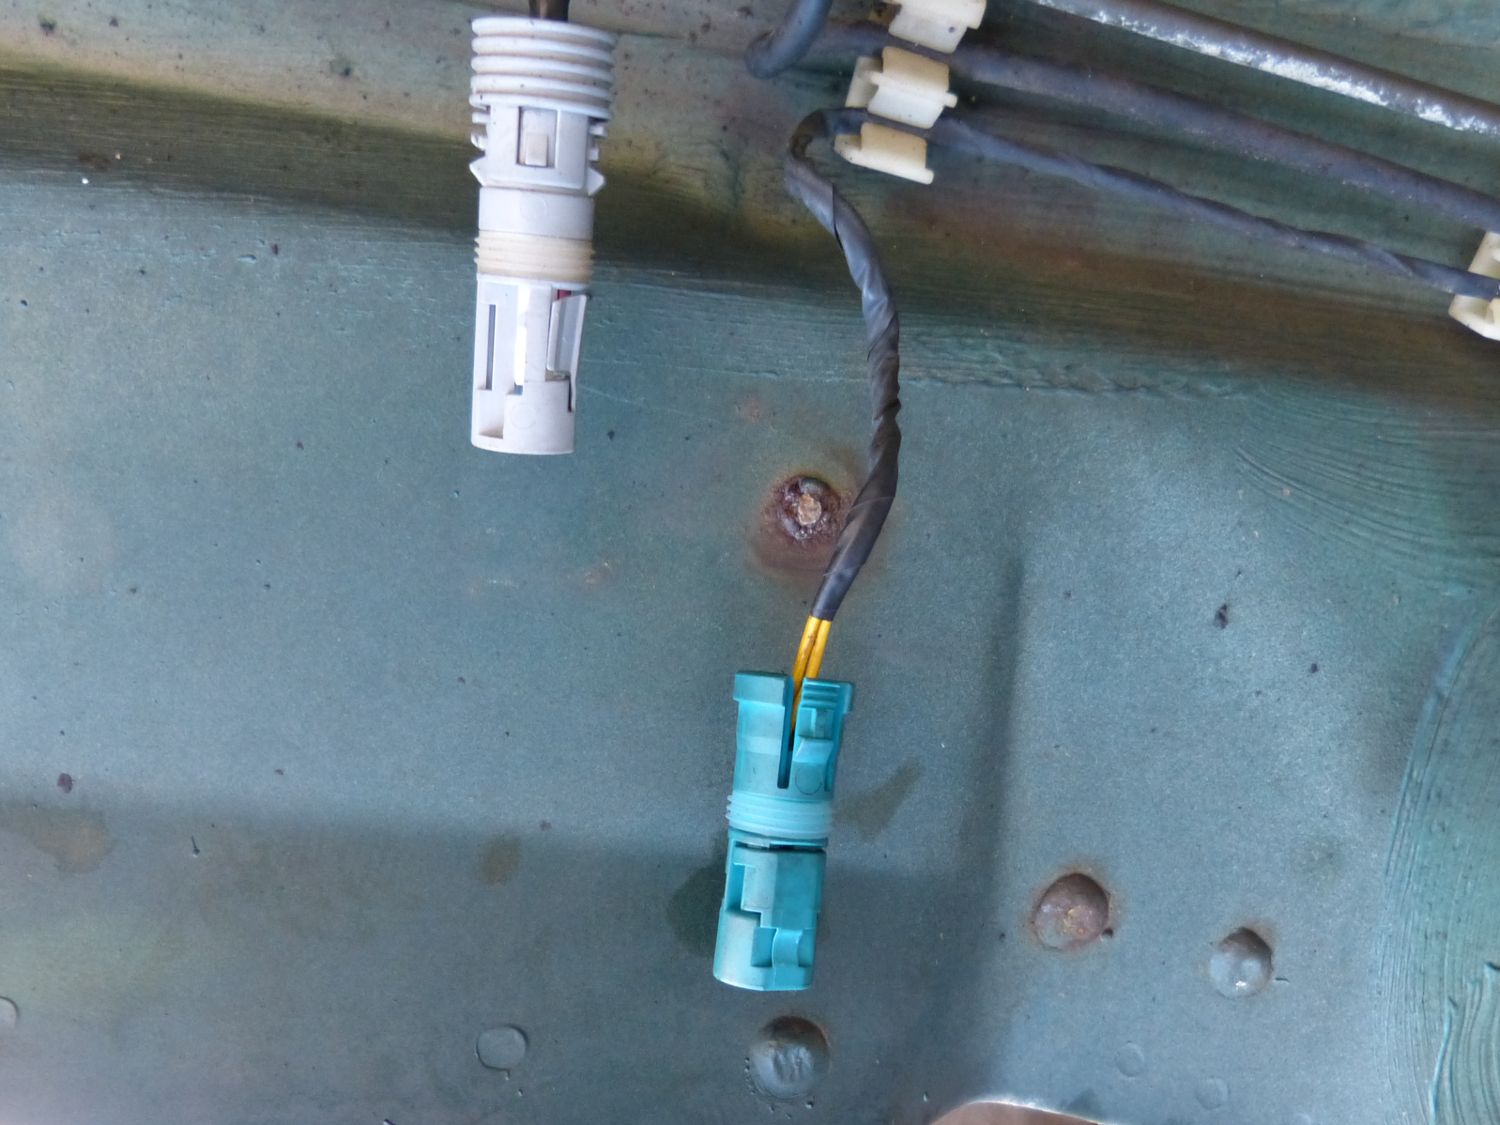 First job of the day -- to replace the broken electrical connector on the body harness to which the brake wear sensor connects. |
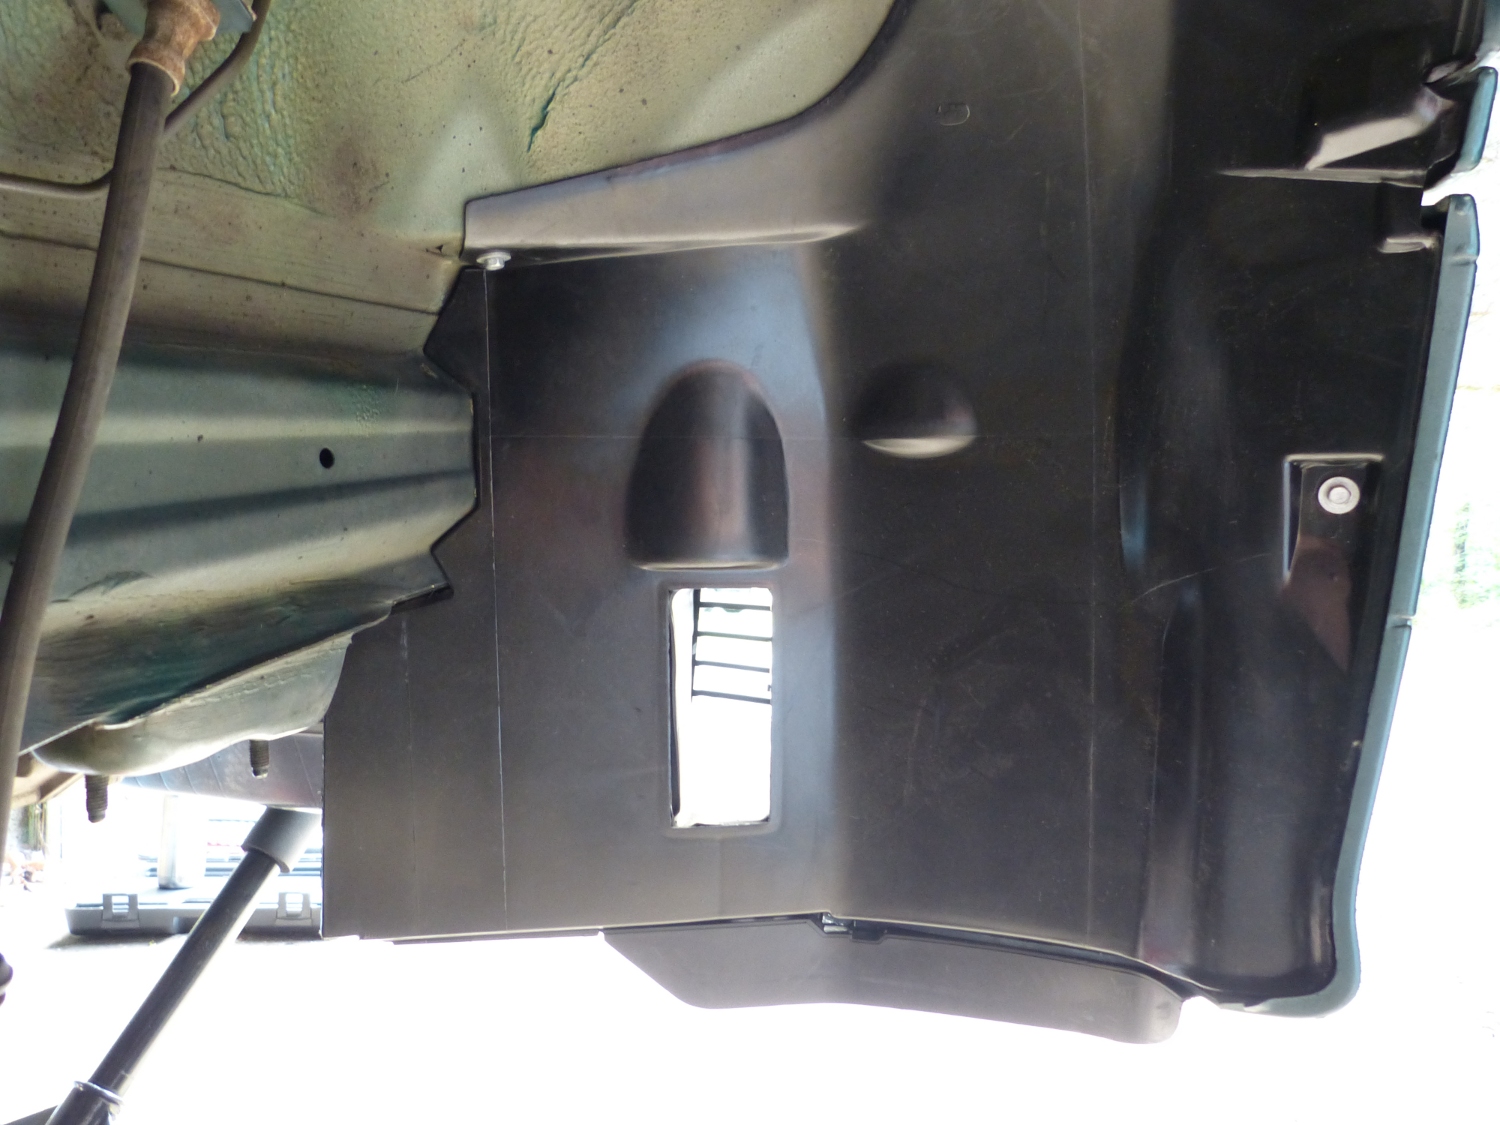
 A view looking toward the rear of the new left-side fender liner installed. Note the zinc-plated fasteners. |
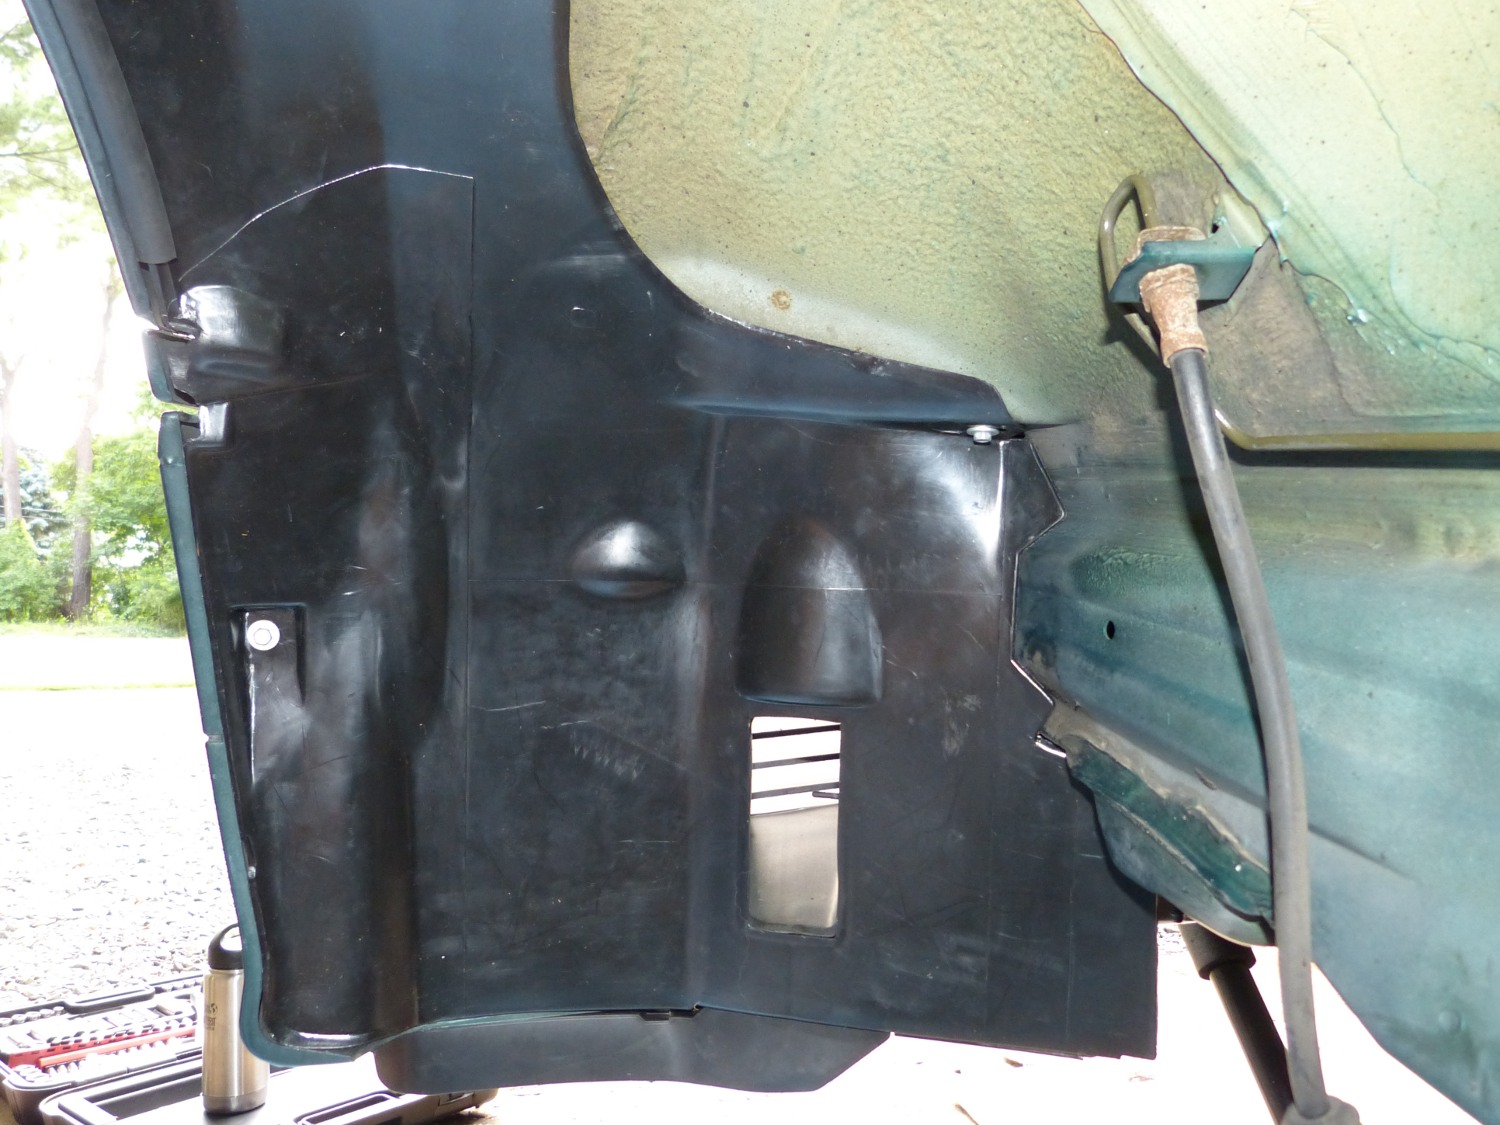 Looking forward at the new left side fender liner. The pork chop is installed and that tightly integrates everything including the brake duct. |
 Right side fender liner looking forward. More of the same, but easy on the eyes if you know what I mean. |
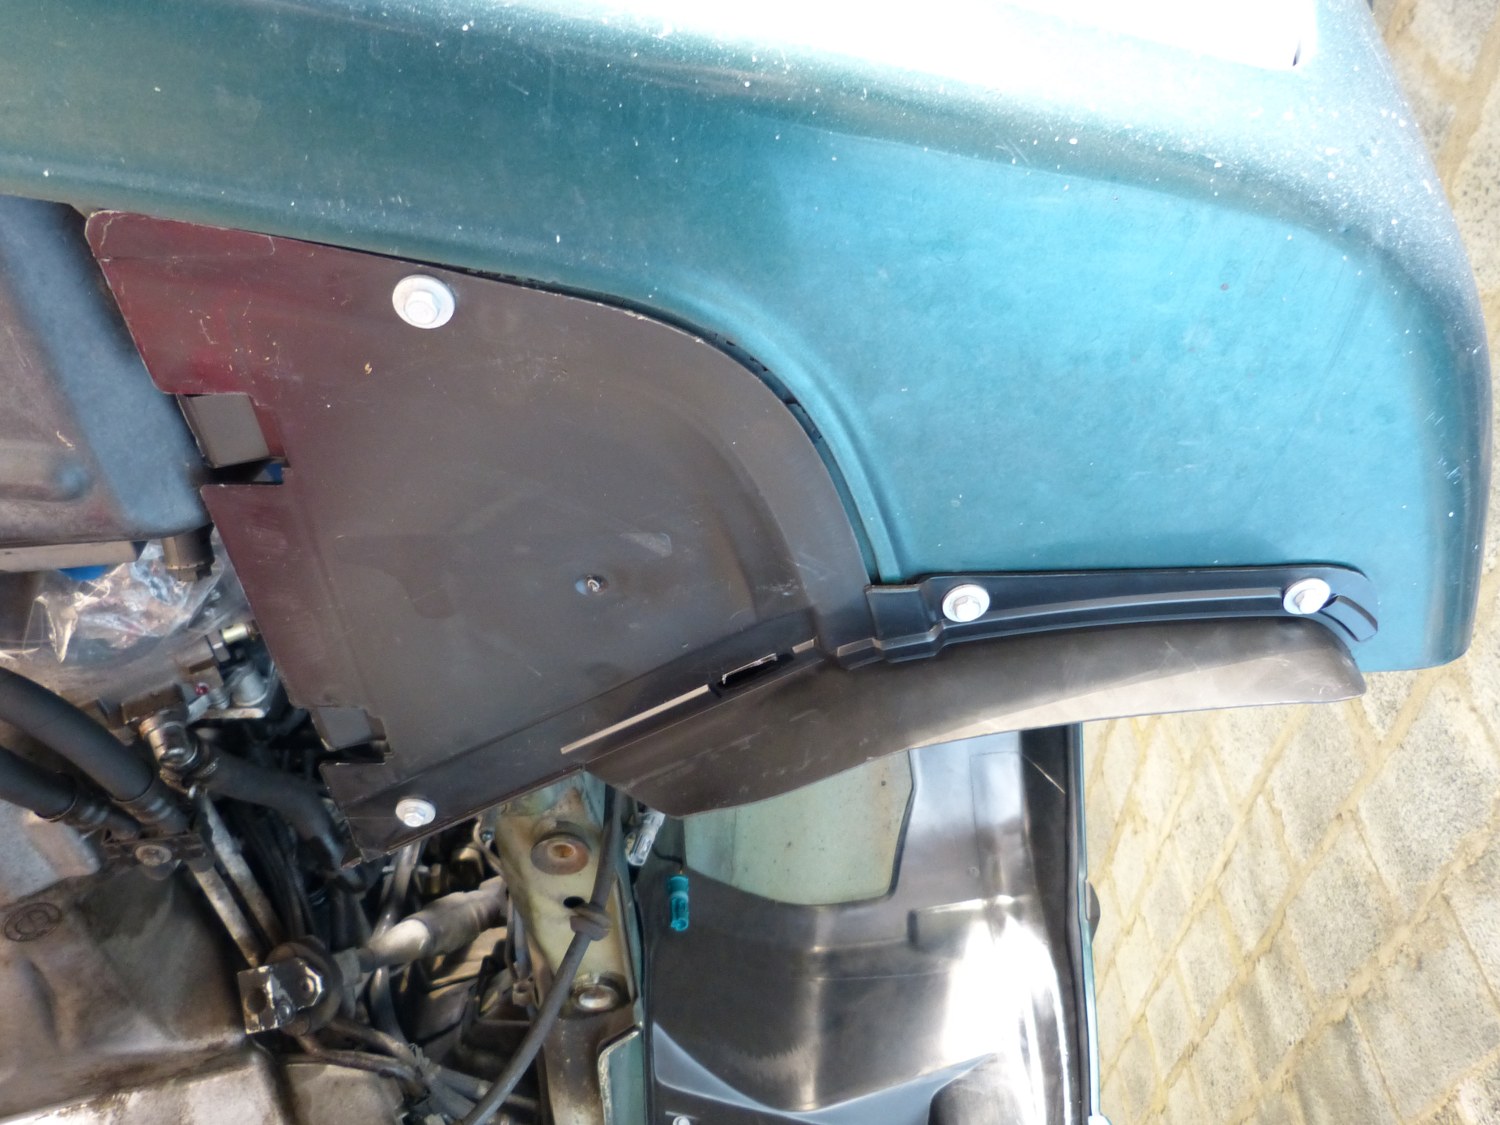 The left side pork chop fastened to the fender liner and fascia. A first in many years. |
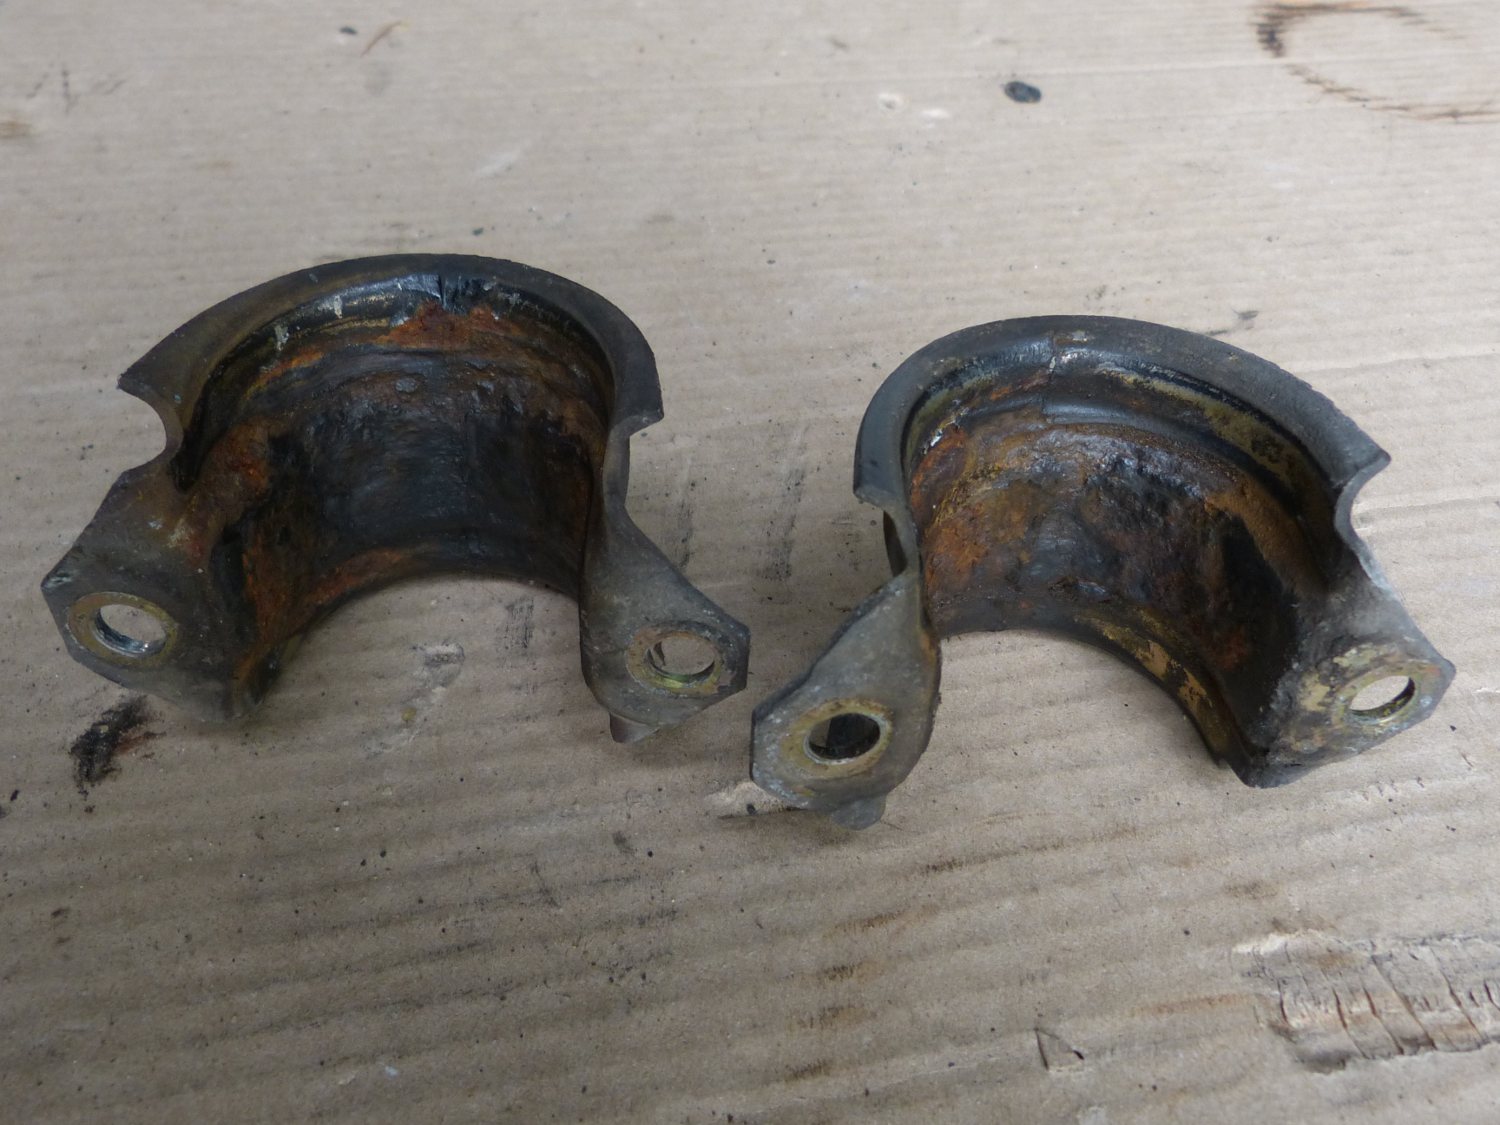 A closeup of the thoroughly rusted swaybar clamps. These will be replaced for safety reasons. The swaybar is in equally bad shape and will also be replaced. |
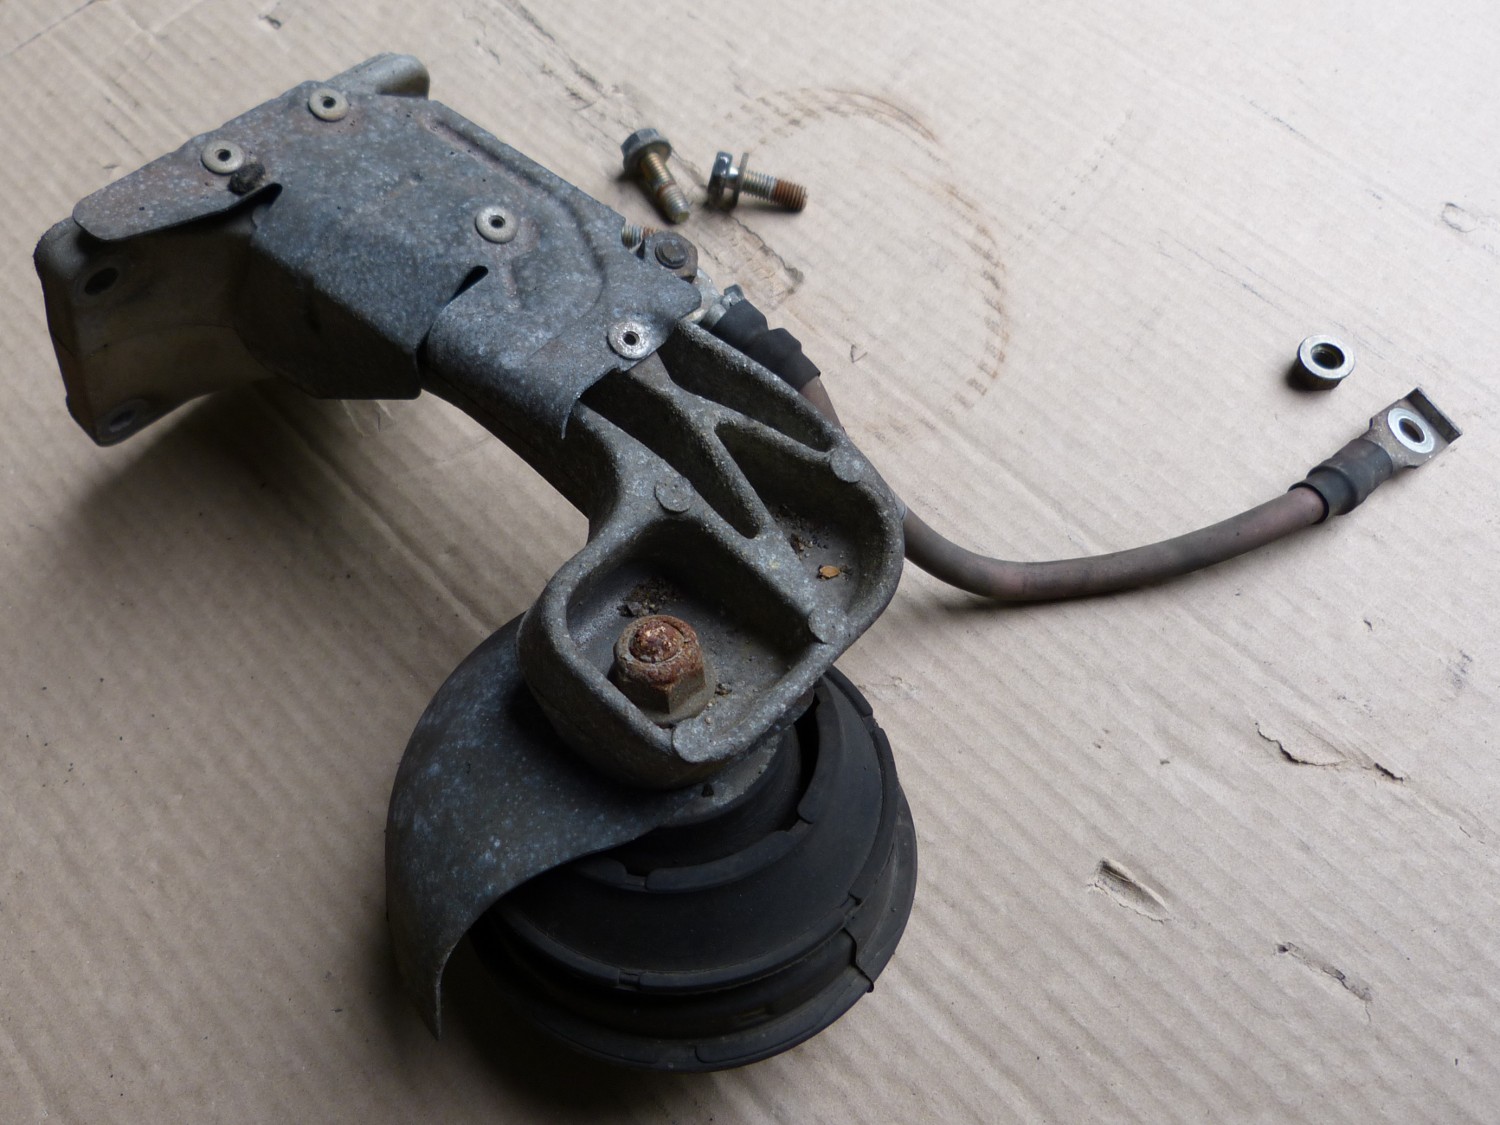 Right engine mount with heat shields and ground cable. I removed the cable and cleaned up the ends to promote good electrical contact when I reinstall it. |
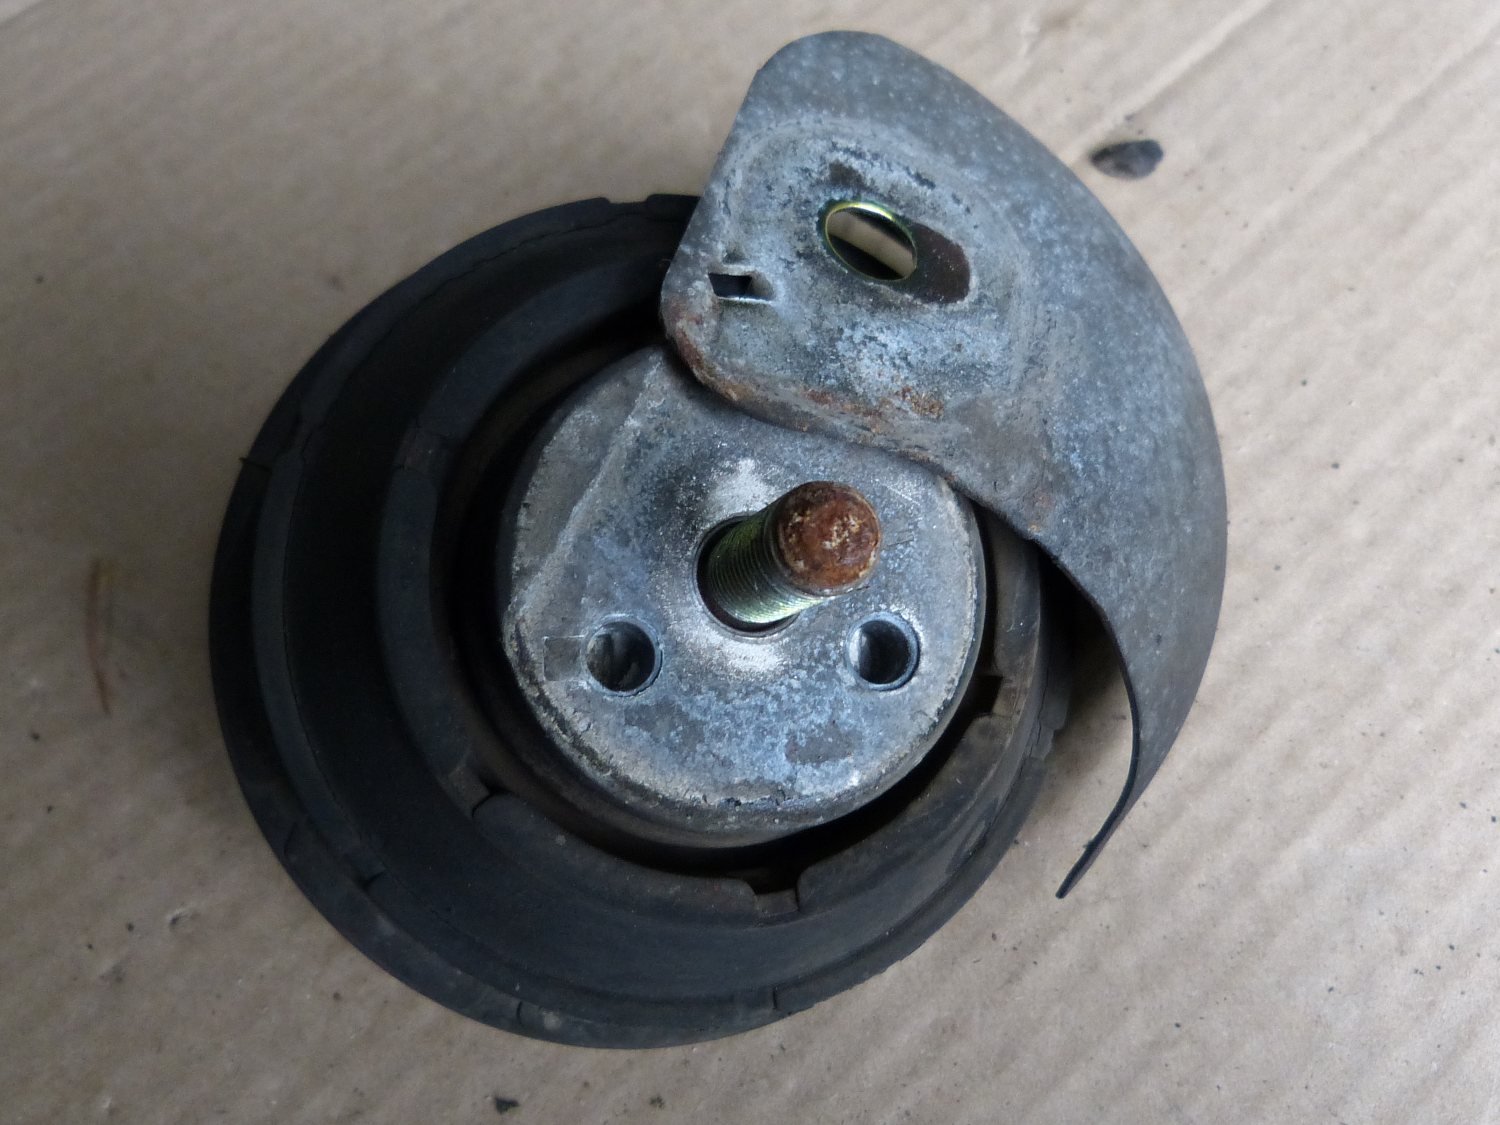 The heat shield that protects the engine mount has a small tang that fits into one of the holes on the top of the mount, thus preventing rotation. |
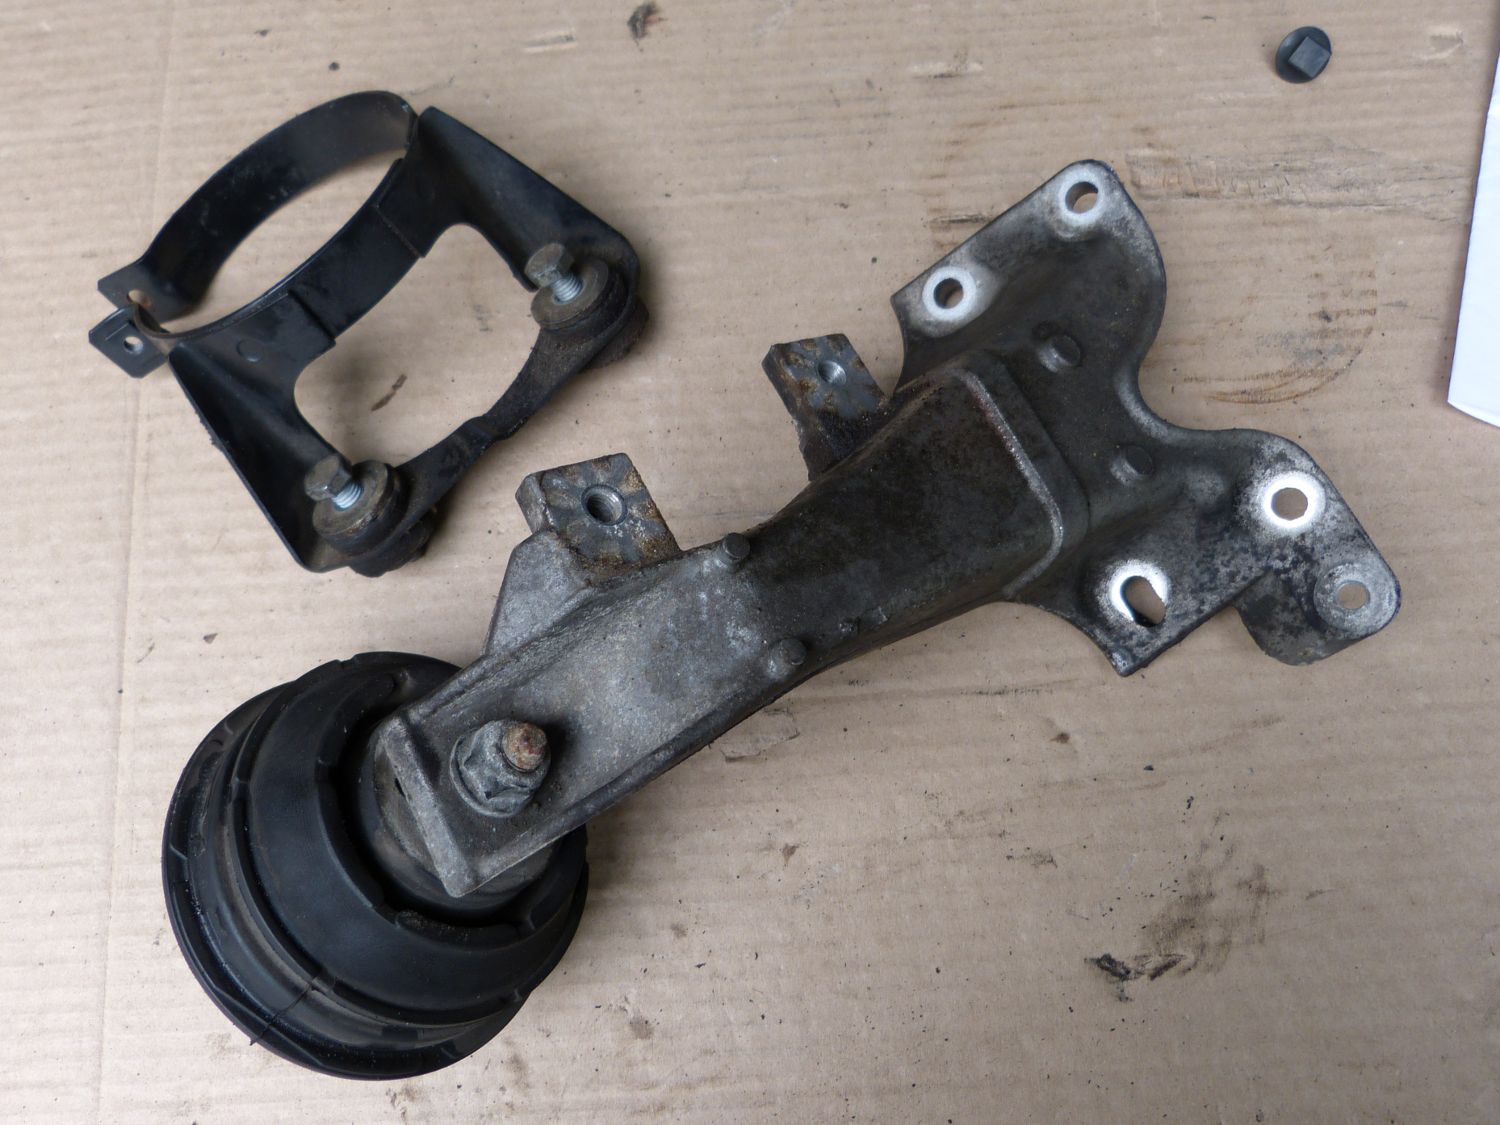 The left side engine mount support including the power steering reservoir support. Note the rubber isolation bushings. Those are pressed in and not replaceable...but I can't seem to find the same bracket in ETK. |
A closer inspection of the mount supports showed them to be in good shape structurally but they had obviously suffered a good amount of surface corrosion over the years so I have decided to have them powdercoated with the same silver or gray I expect to use for the fuel filter cover in order to help the parts reflect heat. If the powdercoater balks at getting them back to me in a reasonable time, however, I may consider doing everything in semi-gloss black as I did for the rear end.
Next, because I managed to pick up all the new fender liner hardware from the dealer yesterday I decided to install the fender liners and pork chops (yea, with apple sauce). As expected, all the new hardware is zinc plated so it should hold up a lot better than the original cad-steel garbage. I didn't pay particular attention to how the fender liners were installed as I removed them so I had to play around with them a bit to figure out how to fit them properly. After about 20 minutes I had managed to replace all the blind nuts and tinnerman clips and install the left side fender liner. With that knowledge fresh in my mind I made quick work of the right side. The new liners and zinc-plated hardware really dress up the wheel wells but more importantly it's nice to see the liners and pork chops properly mated for a change. All in all I think this was worth the effort.
Before I left the garage for the day I decided to assemble the items I expected to bring to the powdercoater on Monday. I had originally planned to powdercoat the metal swaybar clamps but upon closer inspection I realized the inside of the clamps were severely bubbled up with rust so I plan to replace them. I hope to have the new parts powdercoated as well but that will depend on whether they are still cad-steel and whether the schedule will permit waiting the time required to get them in stock.
The other surprise of the day came when I decided to look more closely at the swaybar itself. When I removed it I saw what I thought was a bunch of rubber residue on the bar in the vicinity of the clamps but I quickly realized the bar itself was badly rusted. When I grabbed a screwdriver and attempted to scrape away the rust I broke several rust blisters and found the damage deeper than what I would consider safe so I now expect to replace the bar. I haven't decided what bar to use but my guess is I'll punt and use OE, particularly if the OE bar is cheaper than the aftermarket bars, and that does indeed appear to be the case.
Videos:
Mileage: 222600, Parts: $324