


Sunday, June 17, 2012
Front Suspension Overhaul - Day 7
On Friday I got a call from the powdercoater a few days earlier than expected in which he asked me to come by his shop to inspect the silver parts he had completed. I found everything came out nicely except for the fuel filter cover which suffered some minor color shifts. He offered to rework it but I let it slide, reasoning that it was nothing more than an underbody panel that no one would really see but me. He let me know the subframe and kingpins should be ready next week as promised so I put the silver parts in the trunk of the E46 and headed back to the salt mine.
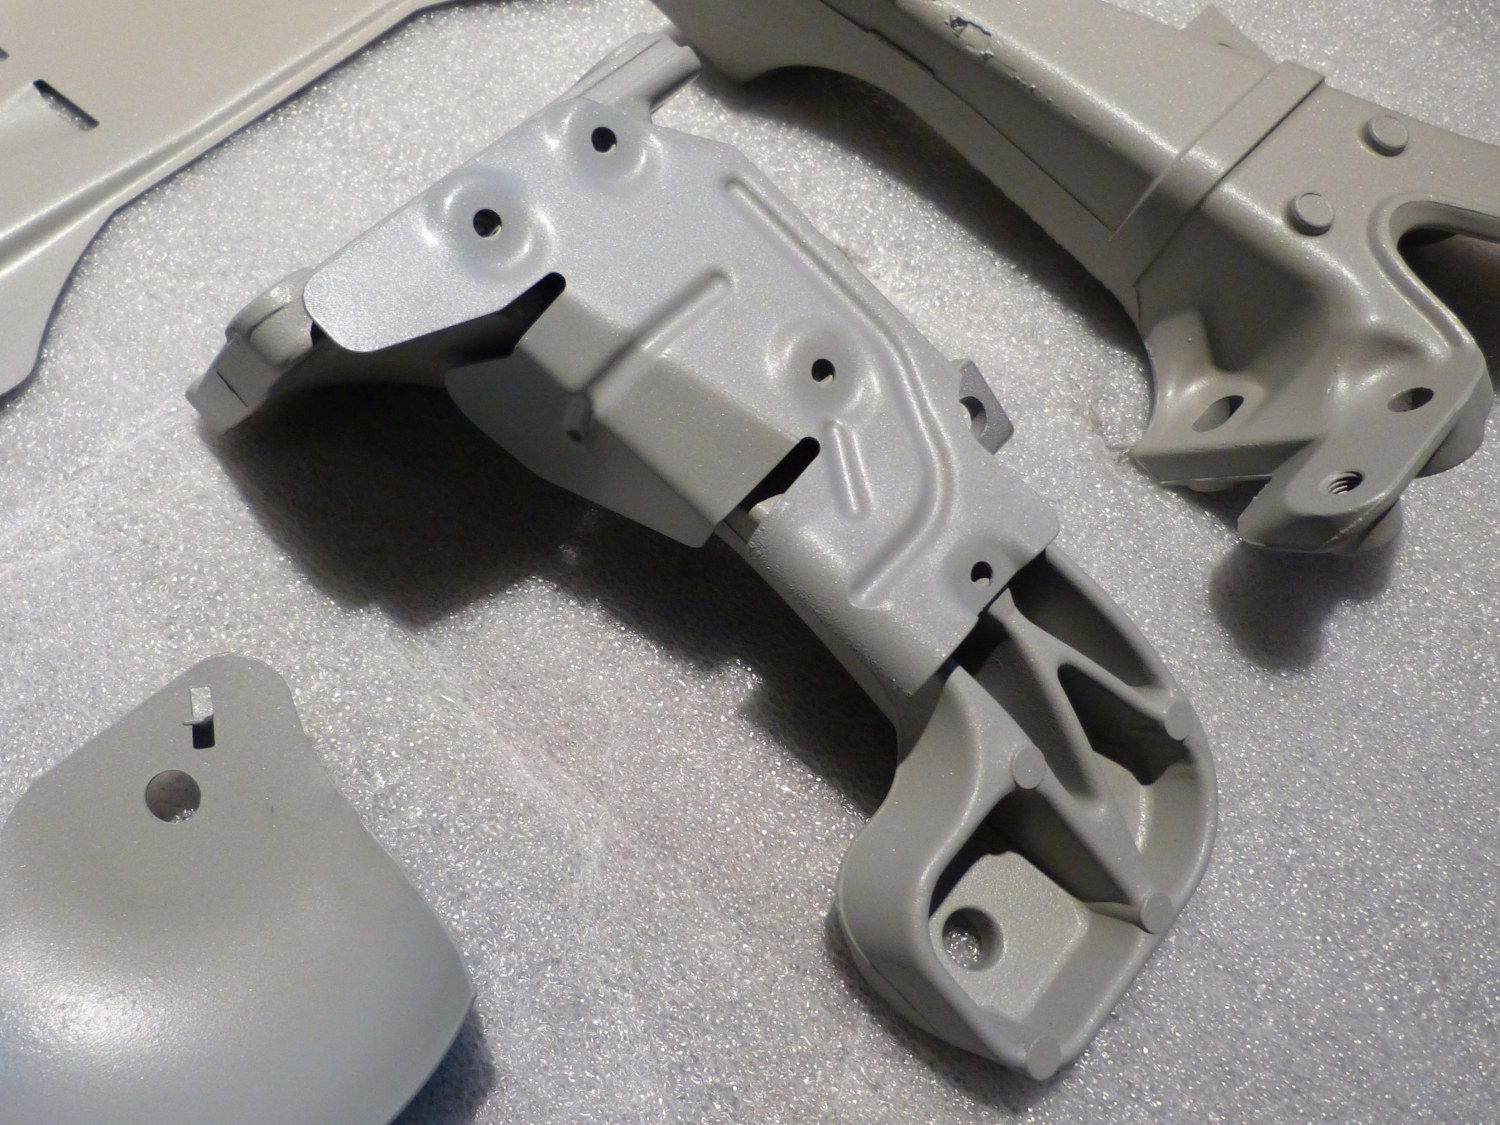
 Left to right: Right engine mount support, Left engine mount support, and engine mount heat shield. |
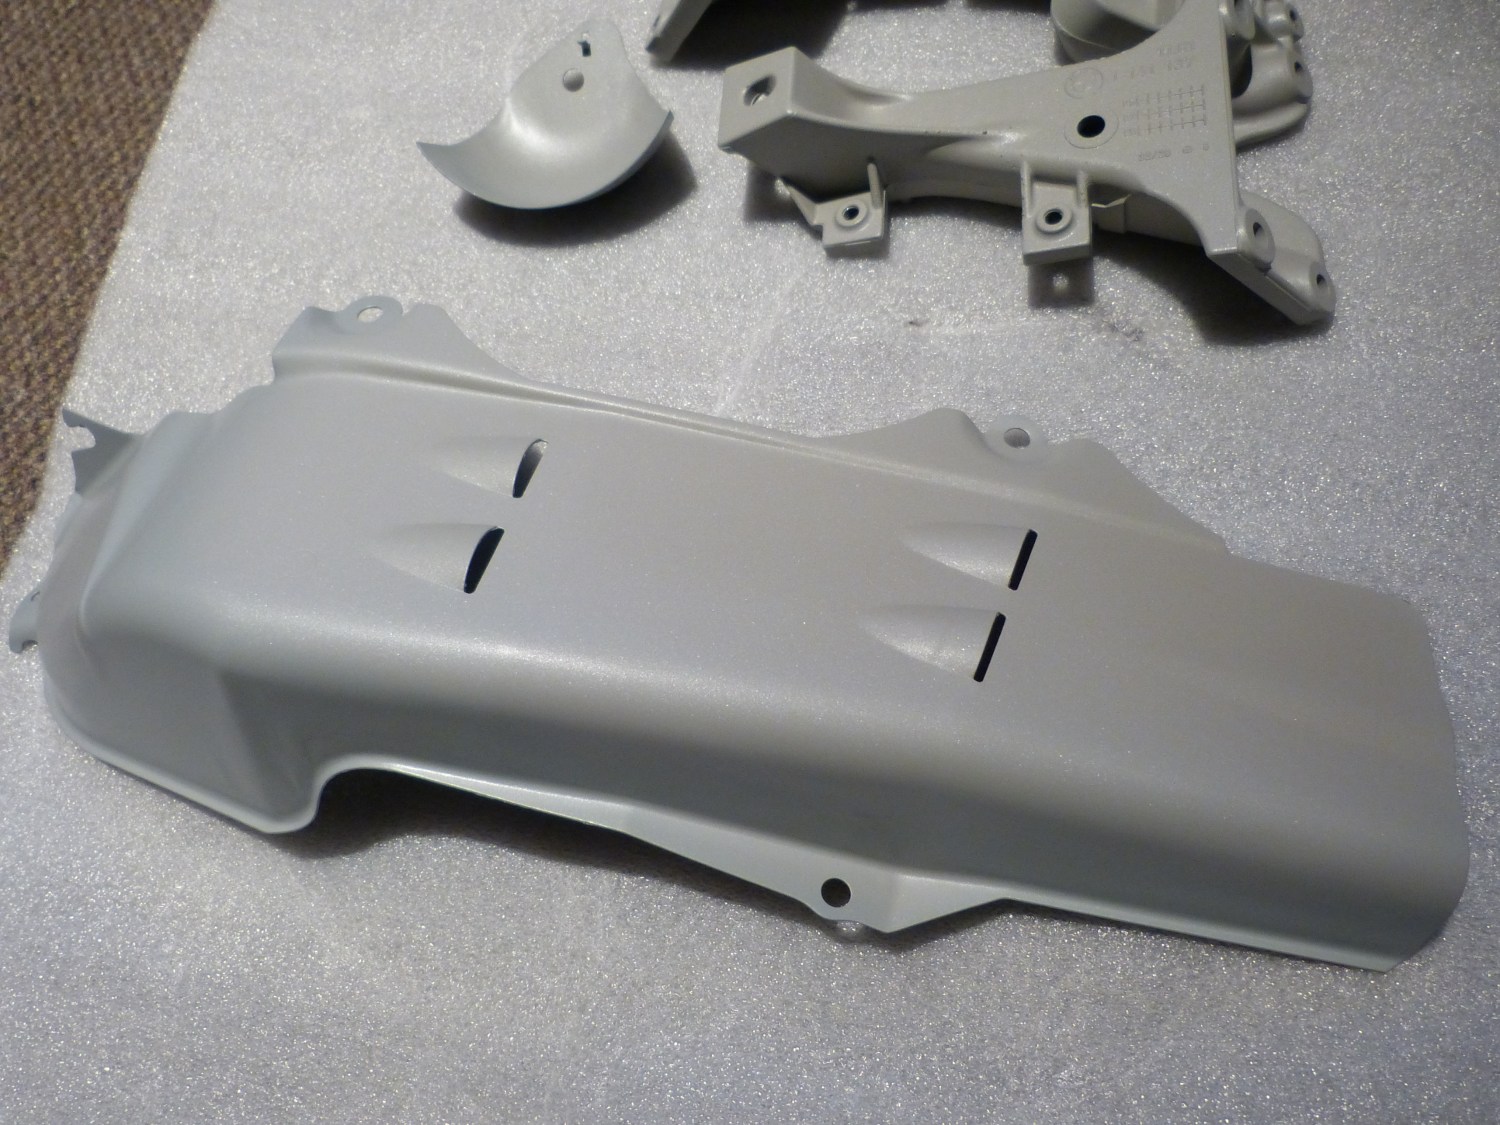 The color shift in the fuel filter cover is noticeable in normal lighting, but once under the car I won't care. |
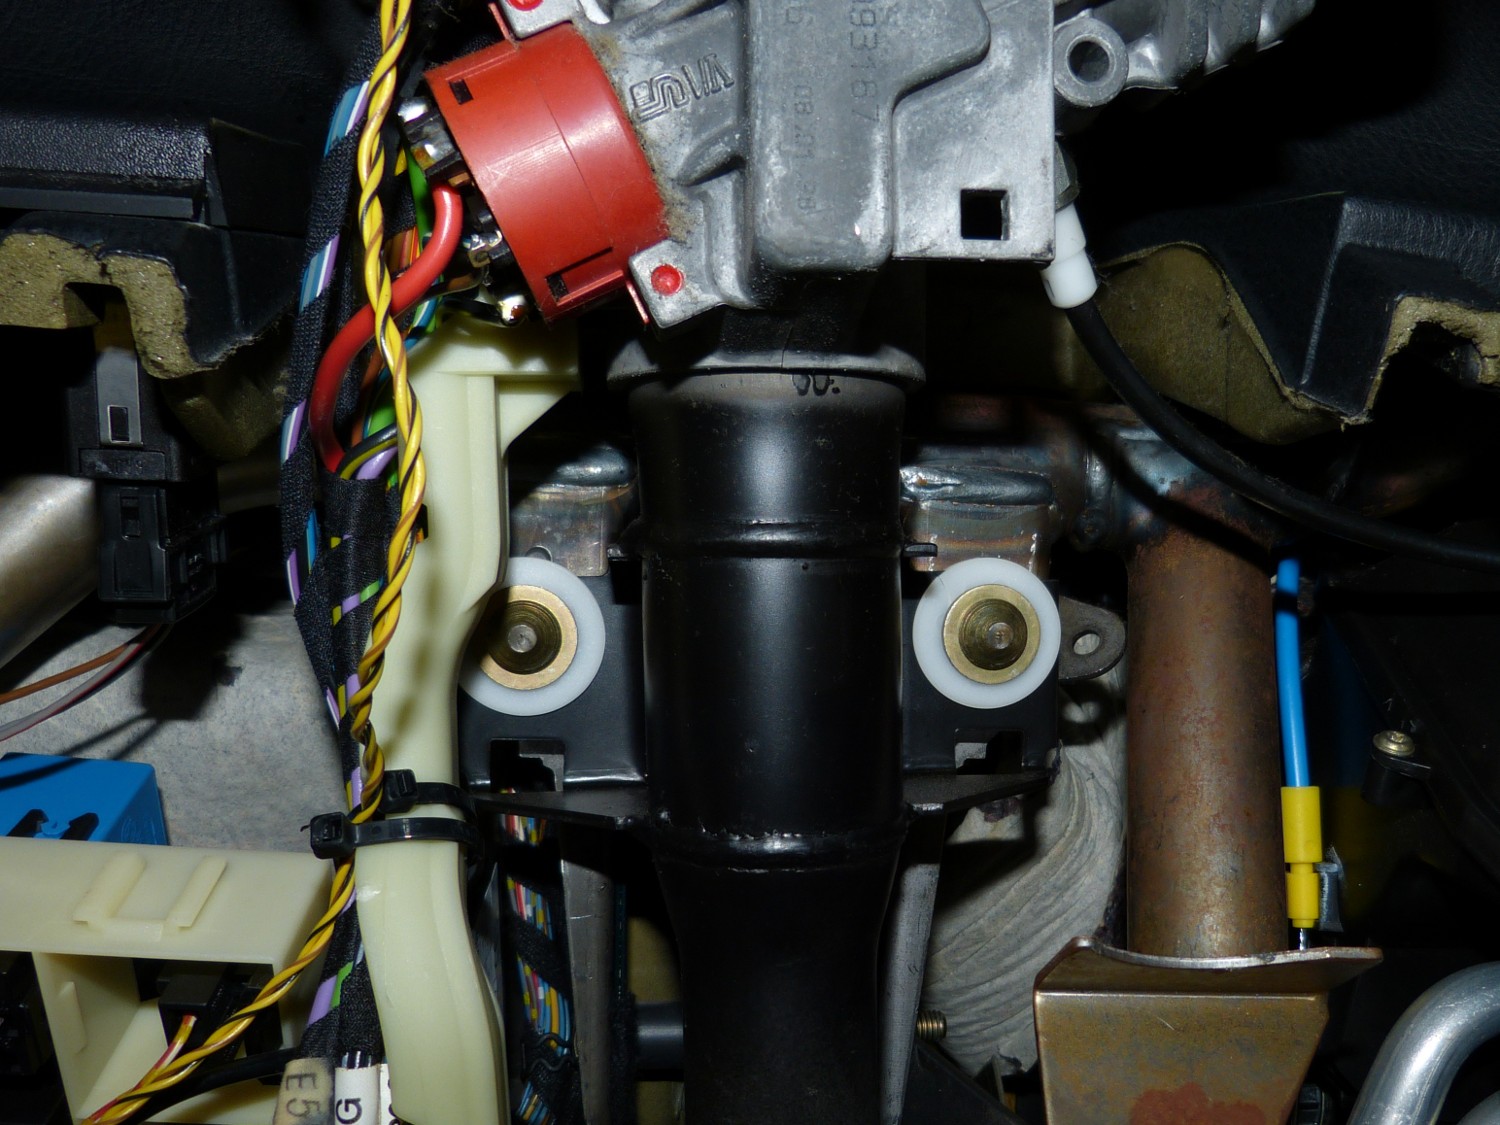
 Removing the heat shield has created another job -- reattaching it. I plan to drill and tap for M6 bolts. |
Yesterday I conducted my weekly parts run at the dealer to pick up the new swaybar clamps and nuts, engine mount support bolts, ATF reservoir and (wait for it...) two brand new OE front brake calipers ($285 each with my discount). Total bill with donation to the state was a cool $700. While waiting at the parts counter a tech who knows me well, “K”, noticed the new calipers and asked me what I was using for guide pin lube. I said “nothing...I've traditionally kept them dry because I was told not to use grease of any kind or the bushings would swell”. About as quickly as the expression on his face turned to one of obvious disapproval he said “wait a second”, got up, went back to his bay and returned with a small jar of “Silicone Paste Lubricant”, which he then applied with a brush to the insides of the guide bushings while I watched. “It will make them slide a lot more easily”, he said knowingly. So I learned something today – lube on the guide bushings isn't necessarily a bad thing – provided it's silicone paste. Obviously I'll be buying a can of that at some point and updating my Brake DIY to reflect this little revelation.
“K” then asked curiously how many miles were on the old calipers. When I responded with 225K he commented “the only reason you got that mileage out of them is because you drive it every day...they usually rust out because the cars sit all the time”. So if you've been searching for the justification to use a BMW as a daily driver this factoid sounds about as good as any. :)
Later that day I ran over to Eppys to pick up a metric tap set as required to reattach the heat shield to the right side engine mount support. After some experimentation and analysis with the various taps I ultimately determined that the best route would be to drill with the same 13/64 bit and tap for M6 bolts. 13/64, incidentally, is a couple thousandths shy of the official bit size recommended for M6 threads but I wasn't about to add fuel to the fire and buy a metric drill bit set when I knew this would be good enough. I expect a bolt depth of 8mm to work so I ordered a small box of M6x1x8mm bolts from McMaster-Carr today and expect them to arrive this week.
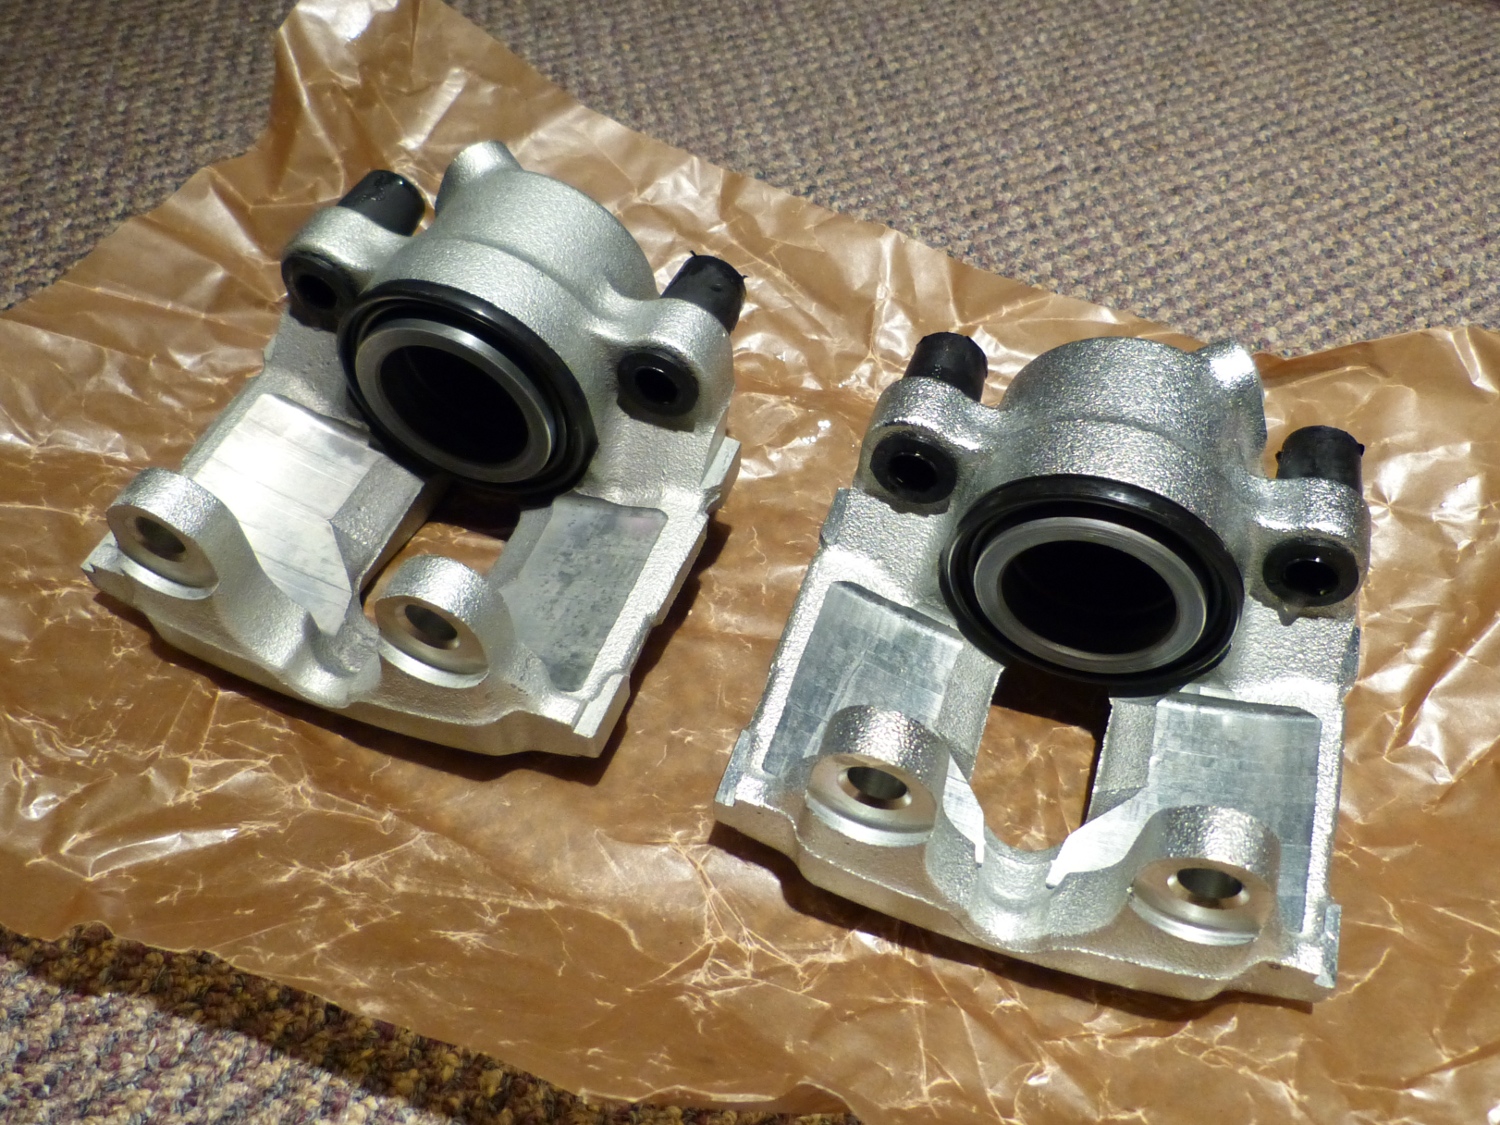 If auto parts can be sexy I think these new, shiny, and very expensive calipers qualify, don't you think? Complete with some silicone paste lube in the guide bushings courtesy of my local pro tech. |
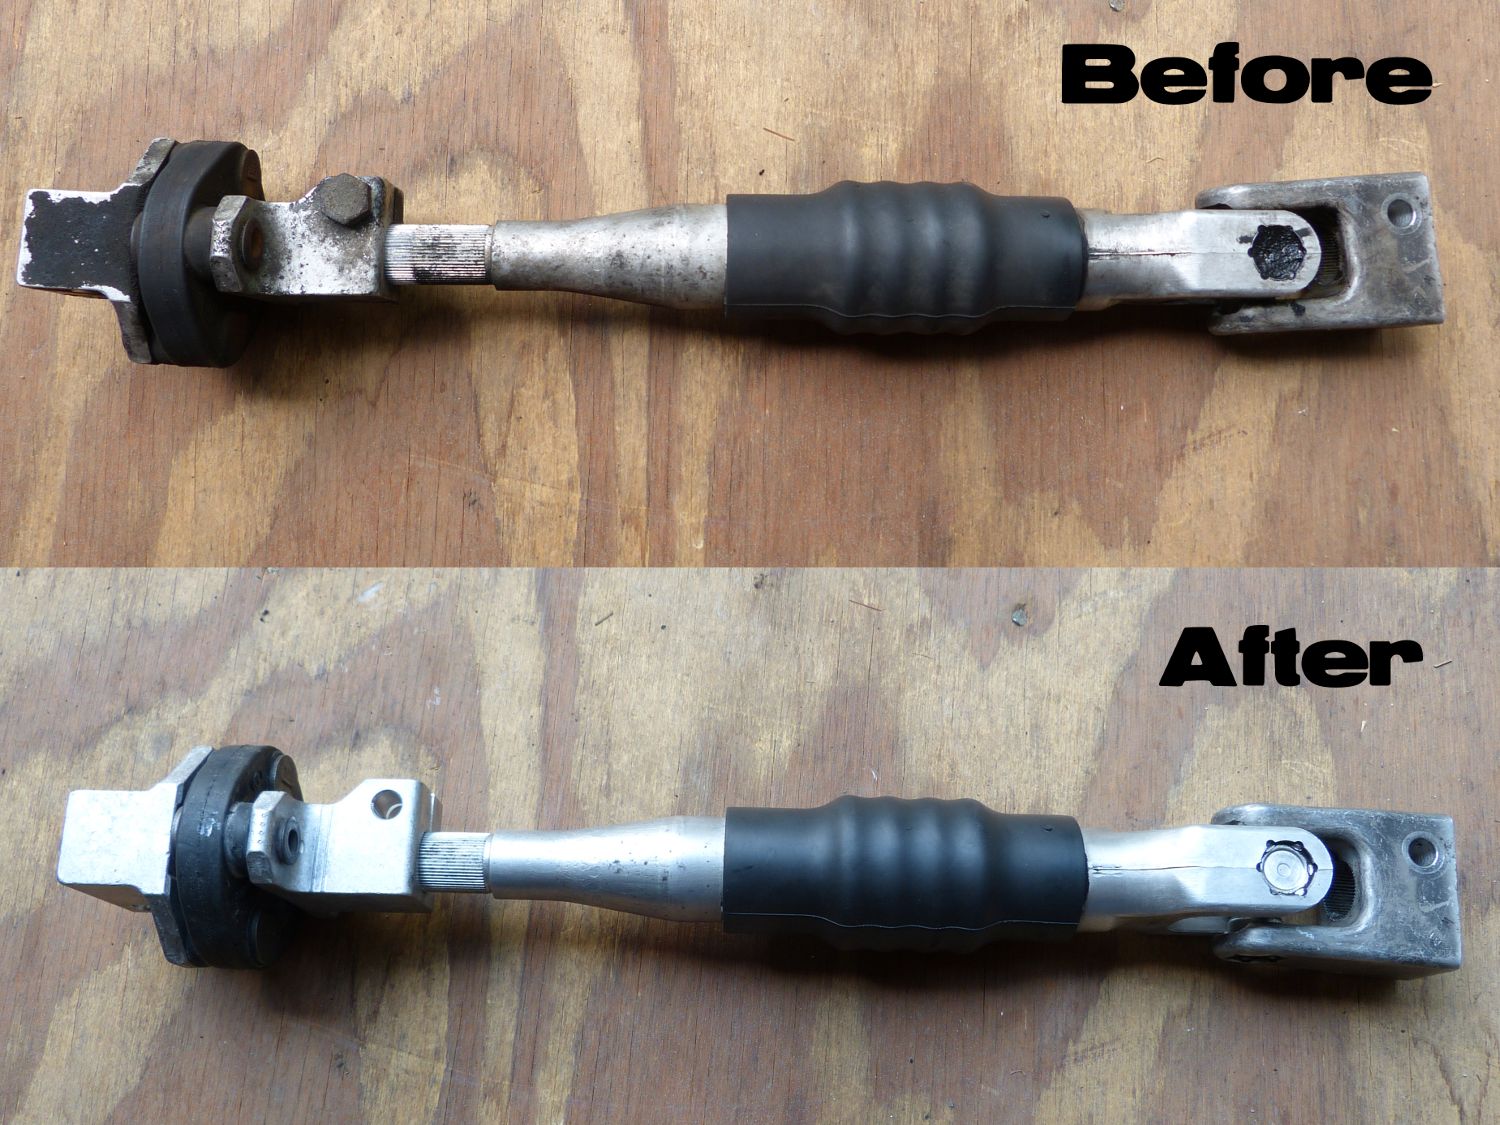 The original collapsible steering shaft is on top (partially cleaned...it looked worse than this when I pulled it off the car). Bottom shows the shaft after restoration. |
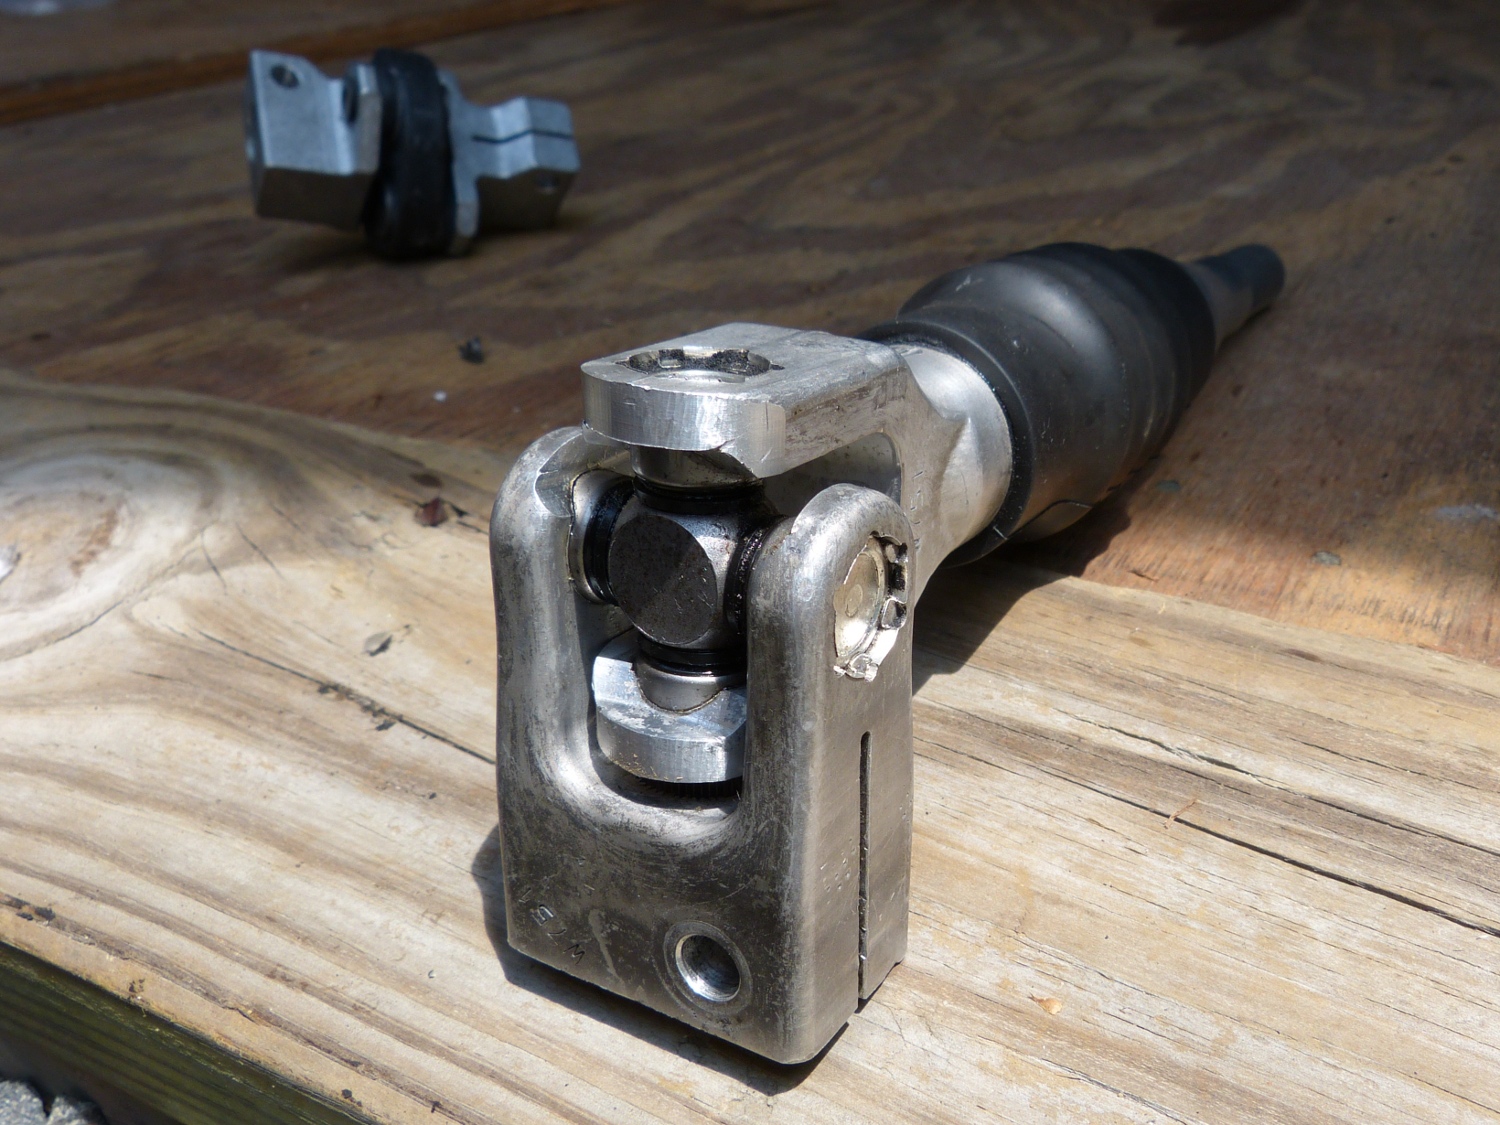 A closeup of the steering shaft u-joint. That joint was literally caked with oil/grease residue but looks quite presentable now. The joint is still very tight so this will be returned to service. |
Today I went to the garage in order to remove the steering column as required to replace the lower bearing which is presently on order. I first attempted to remove the collapsible steering shaft with U-joint from the fixed shaft that leads to the steering wheel. That proved to be rather annoying given the location of the bolt holding the U-joint to the shaft and because I found both components to be "intimately acquainted" with each other.
I first tried to pull the U-joint straight off the shaft, first from above, then on my back from below, in a concerted effort to get more leverage. No dice. Then I tried to get a small screwdriver in the split hoping to spread the splines apart sufficiently to release the shaft. No dice again. That's thick metal, folks...it takes a BIG screwdriver or pry bar to get the job done, neither of which I could get even remotely close to this joint due to lack of clearance. To make a long story short, the tricks of the day turned out to be PB blaster and wiggling the joint rapidly while pulling. Repeat: pulling straight off doesn't work. Wiggling at high frequency does.
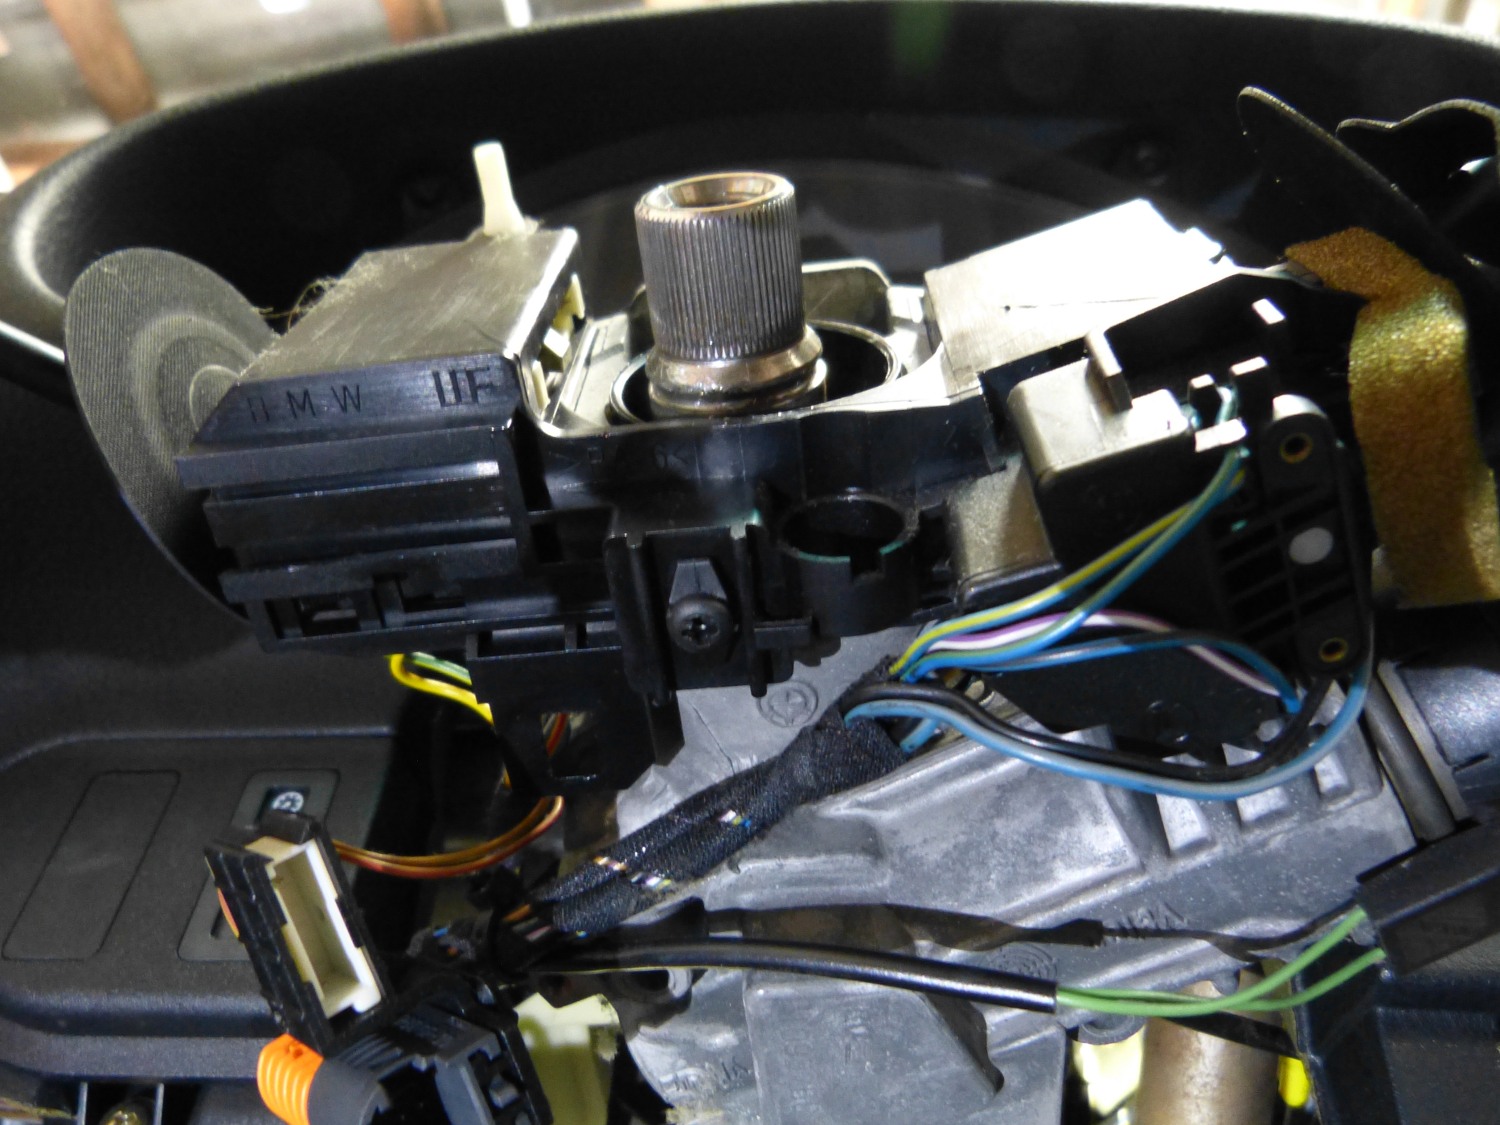 Here we go again. Steering wheel and upper bearing removed, just before I pulled the black screw you see to remove all the stalks and related wiring as a unit. |
 All the wiring is removed with the exception of the EWS ring antenna. That came off next. |
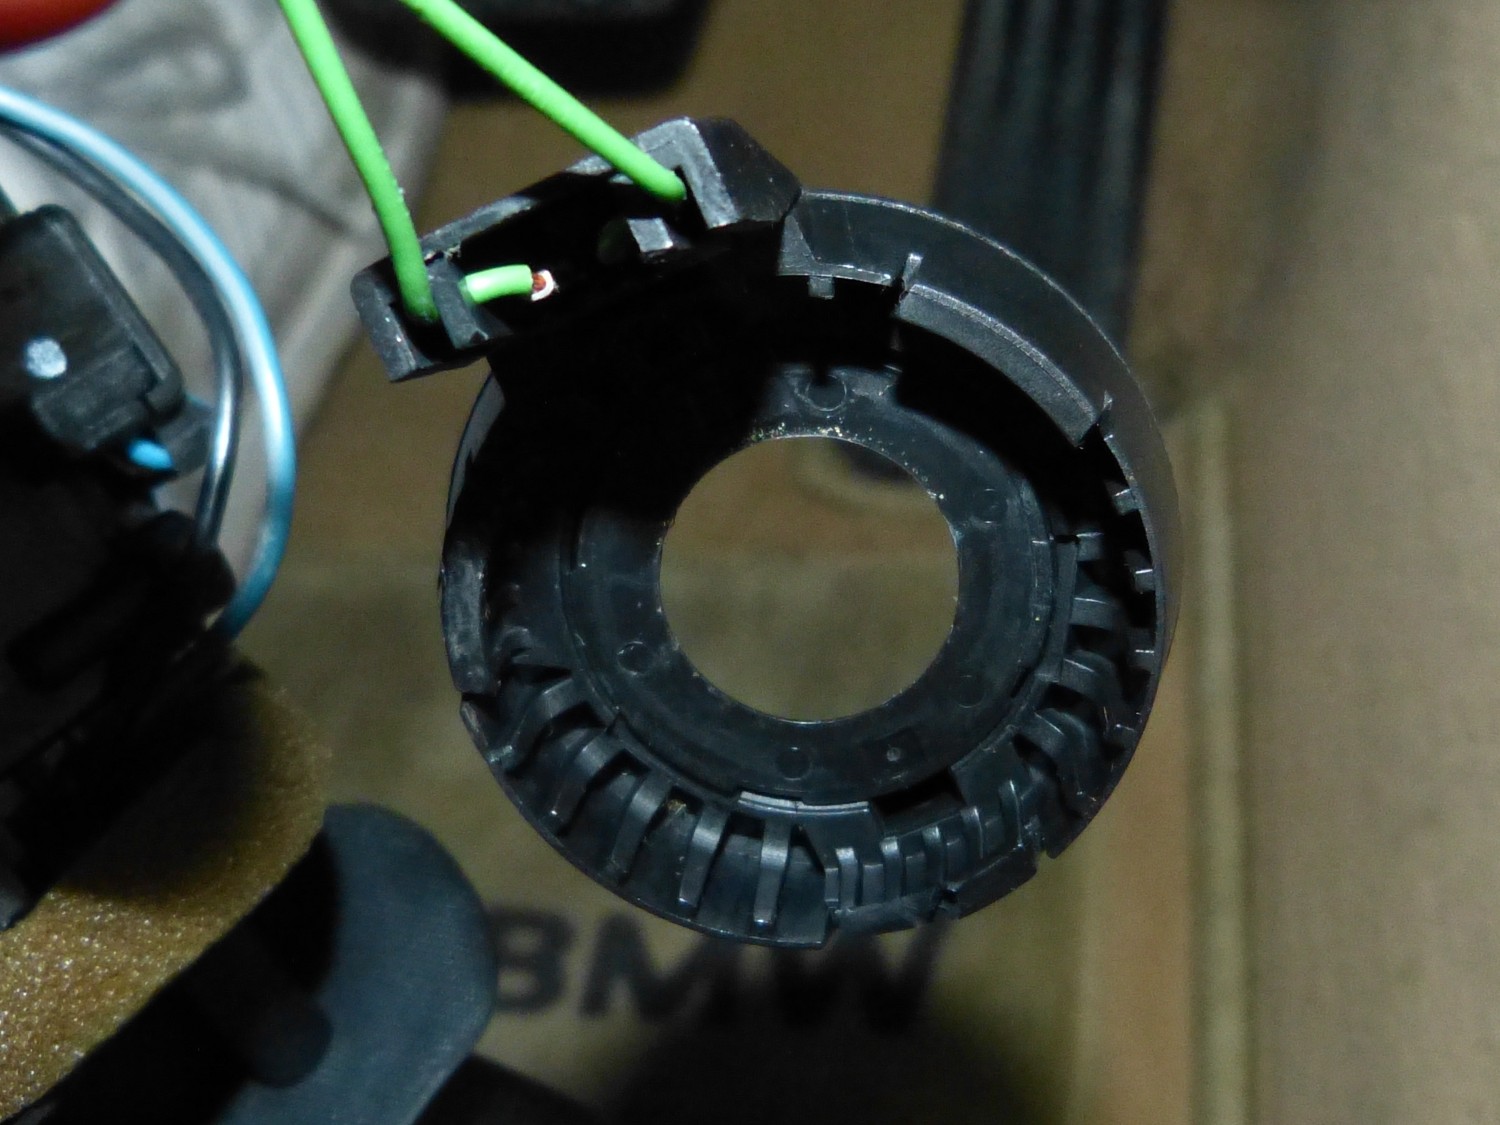 Despite being exceptionally careful trying to remove the EWS antenna I managed to partially crack one of the retaining clips. Only time will tell if I need to buy another one. Oh well. |
The good news is, of course, that I managed to pull the collapsible shaft off the car and clean it up sufficiently to inspect it and verify it can be reused. The primary contaminants were dried cosmoline and thick layer of oil sludge, left there from when I foolishly attempted to remedy the bearing squeak with lubricant shot from precarious angles. I also used a brass brush to clean the external splines, which are now so clean they mate perfectly smoothly with the new isolation joint...something I expect to make installation a lot easier. I was not able to clean the internal splines on the U-joint end as well but a pinky wrapped with a cloth doused with the same Zep 45 lube used to clean the remainder of the part seemed to remove a bunch of gunk.
Next I removed the driver's footwell panel, knee protection plate, steering wheel, and other components as required to fully expose the fracture bolts holding the column to the car. Despite all my research on this subject I learned today that there are actually TWO sets of fracture bolts on this car – one to mate the lock assembly to the steering column (this is the pair everyone talks about when replacing the lock assembly) and another to mate the column to the car. Given the fact that I can easily drill out the former bolts once the column is out of the car I decided to focus my work on the column bolts. The problem is they're more deeply recessed into the dashboard which will likely inhibit the traditional method used to remove them (i.e. using a chisel to rotate the bolts).
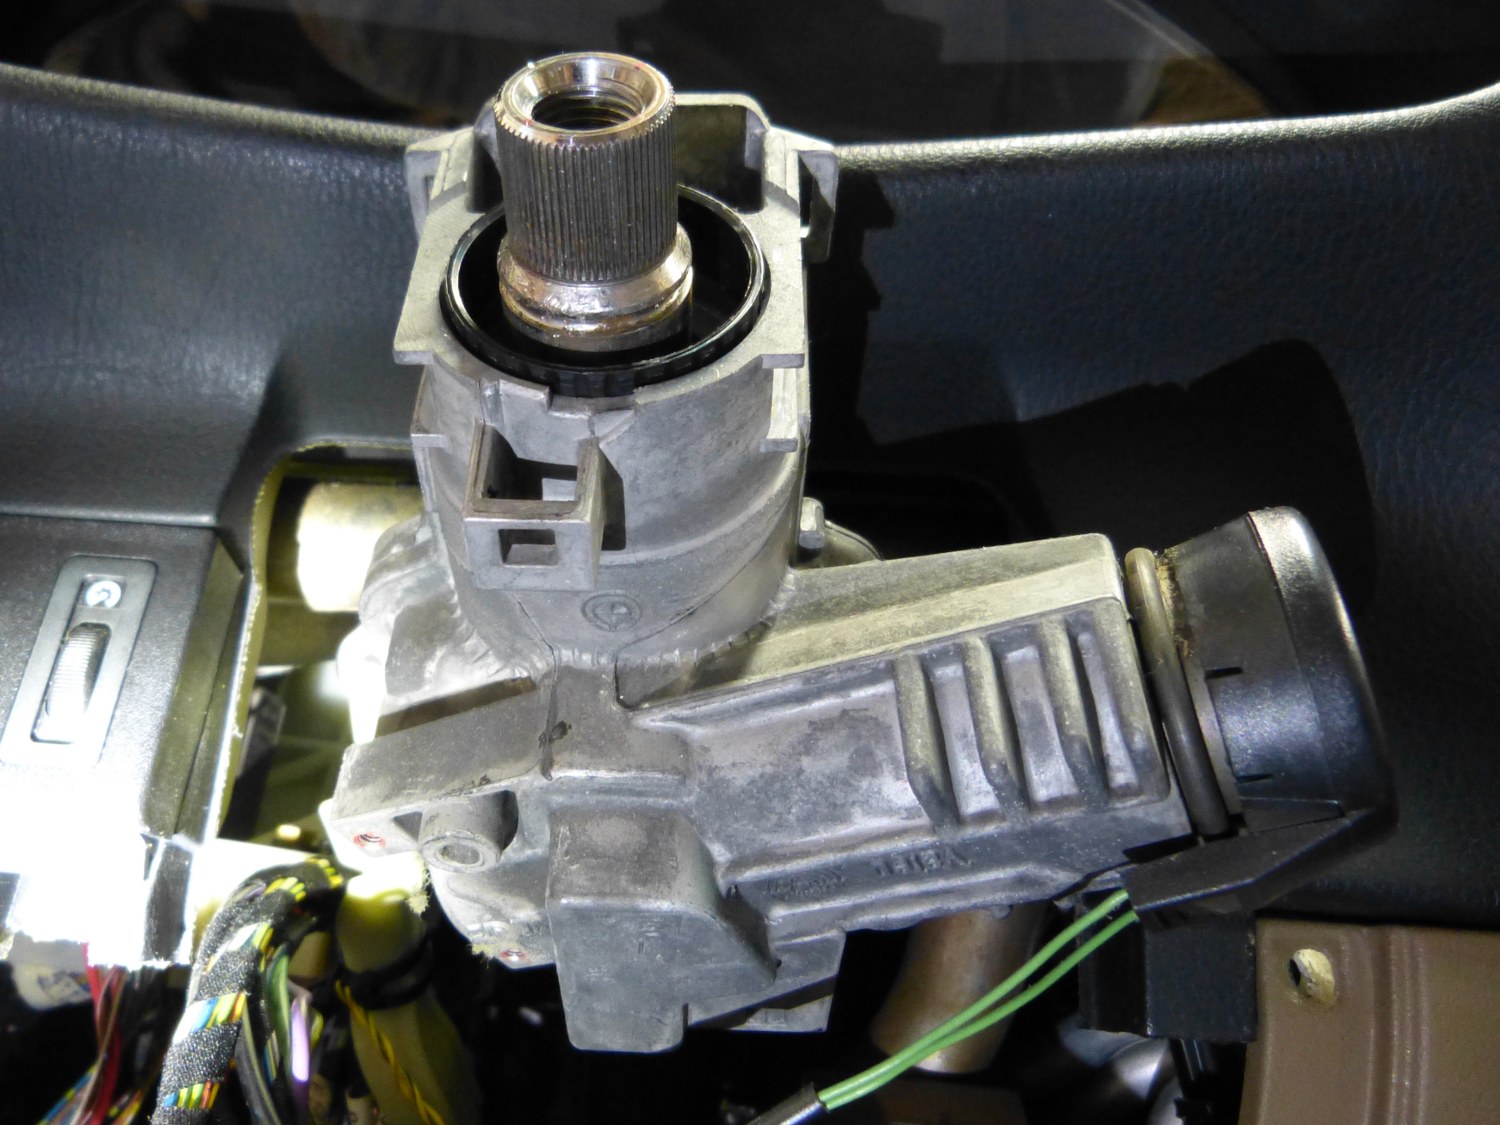
 This is what the upper steering column looks like with all the wiring, stalks, and EWS ring antenna removed. I don't plan to remove the lock tumbler because I have a new tumbler and lock body to install. |
 Ready for removal of the !@!$#@$! fracture bolts (the two bolts straddling the steering column with cone-shaped heads). I swear whoever had the idea to use these infernal things should be killed. Now. |
 Once the fracture bolts are removed I have to loosen the locking ring you see at the base of the steering column to release the column from the car. Stay tuned for that adventure. |
Unfortunately I ran out of time today before I could tackle that job, but all that means is I'll have the week to work up a strategy to deal with the bolts. At this moment I'm thinking of cutting a notch in the head of each bolt with my Dremel and using a large flat-blade screwdriver to remove them. Worst case is I'll break the heads off and remove the studs later. And if you're wondering, there is NO WAY IN HELL I'm installing a new set of fracture bolts. While I don't expect to ever remove the column or lock assembly again I won't shoot myself in the foot. The fracture bolts will be replaced with some good-quality hex or allen head bolts.
If you're wondering how I'm planning to get all this back together and properly aligned, it's simple: I bought the Turner Motorsport E36 rack centering tool earlier in the week. This simple and ingenious tool makes it possible to keep the rack precisely centered while the steering wheel is installed on the correct spline. More on that tool when the time comes.
Sadly, I was only able to work on the car one day this weekend so I see this project getting pushed out longer than desired but that's the cost of doing things the right way and learning along the way.
Video:
Mileage: 222600, Parts: $700, Tools: $130