


Thursday, July 5, 2012
Front Suspension Overhaul - Day 13
Yesterday I ordered new socket cap head bolts for the lock housing from McMaster-Carr and expect them to arrive tomorrow. Since I knew I didn't need the lock housing installed on the column to install the column in the car and the column was holding up installation of the steering shaft, rack, and tierods, I decided to reinstall the column as is today.
To break the ice I started with something simple: I decided to tap the hole in the lock housing required to accept the screw that fastens the wiring loom support. Using the thread pitch gauge in combination with the taps I determined the thread was the familiar M6x1.0 so I once again dipped the tap in some spare ATF and created the necessary threads in under a minute. Practice makes perfect, as they say.
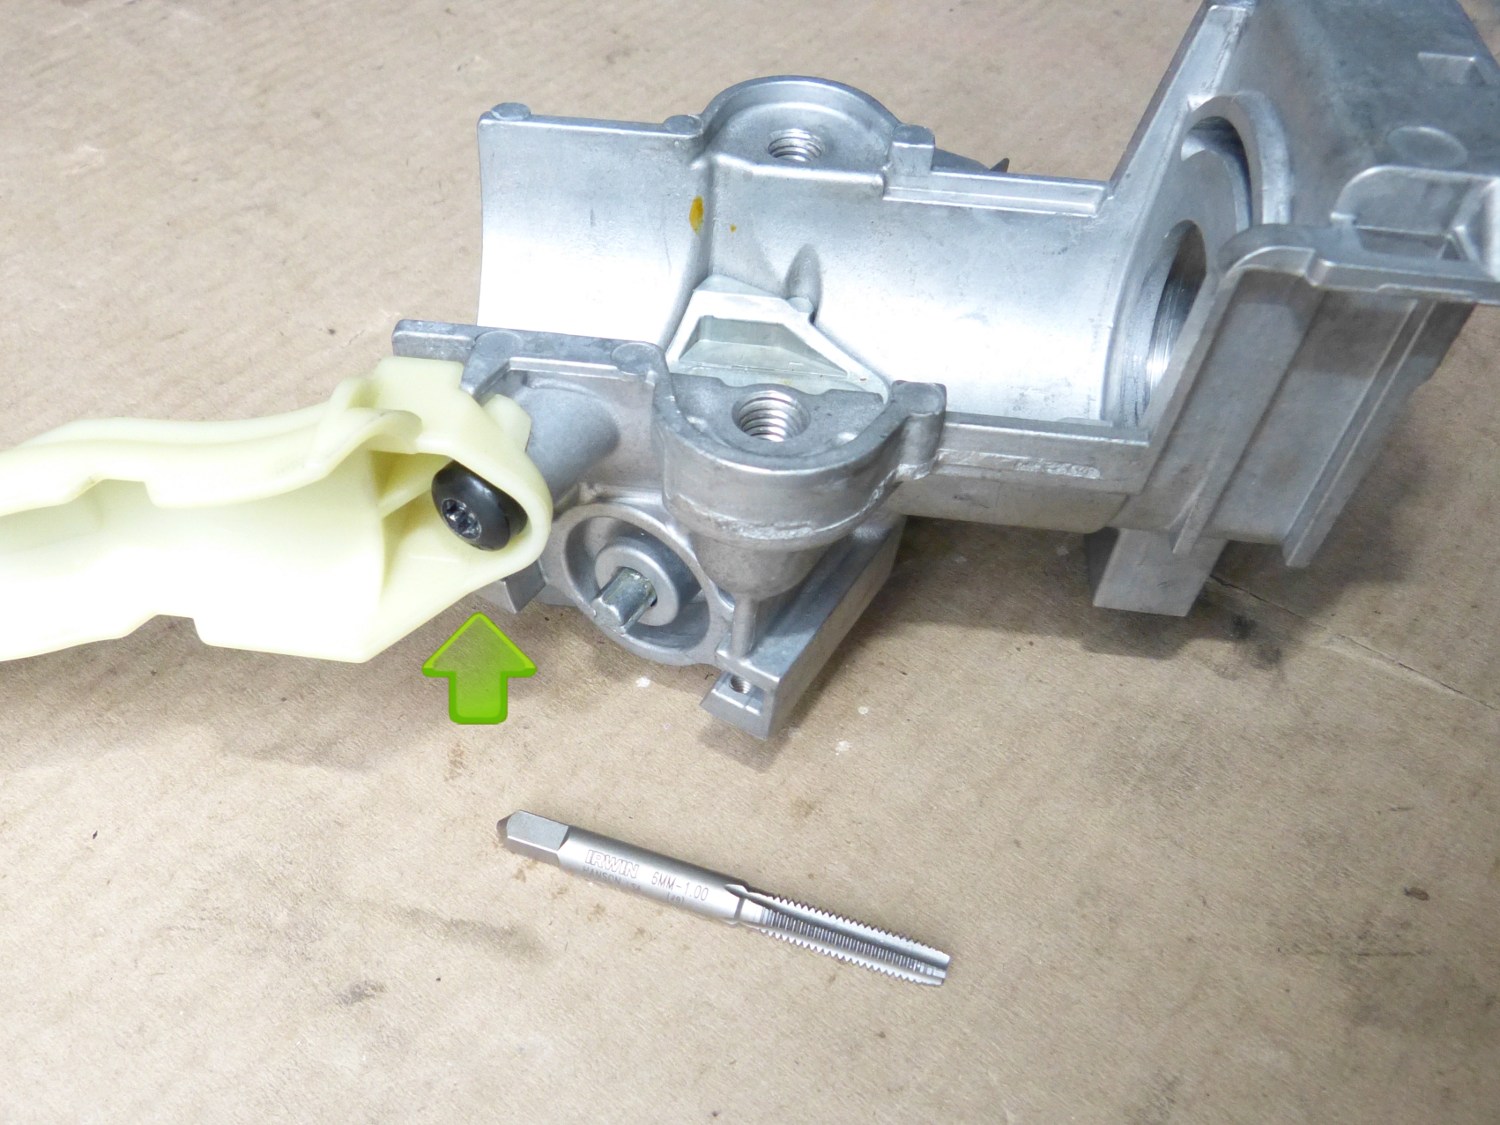 To start off the day I tapped the hole in the lock housing required to fasten the wiring loom support (green arrow). It's an M6x1.0 thread as the tap shows. |
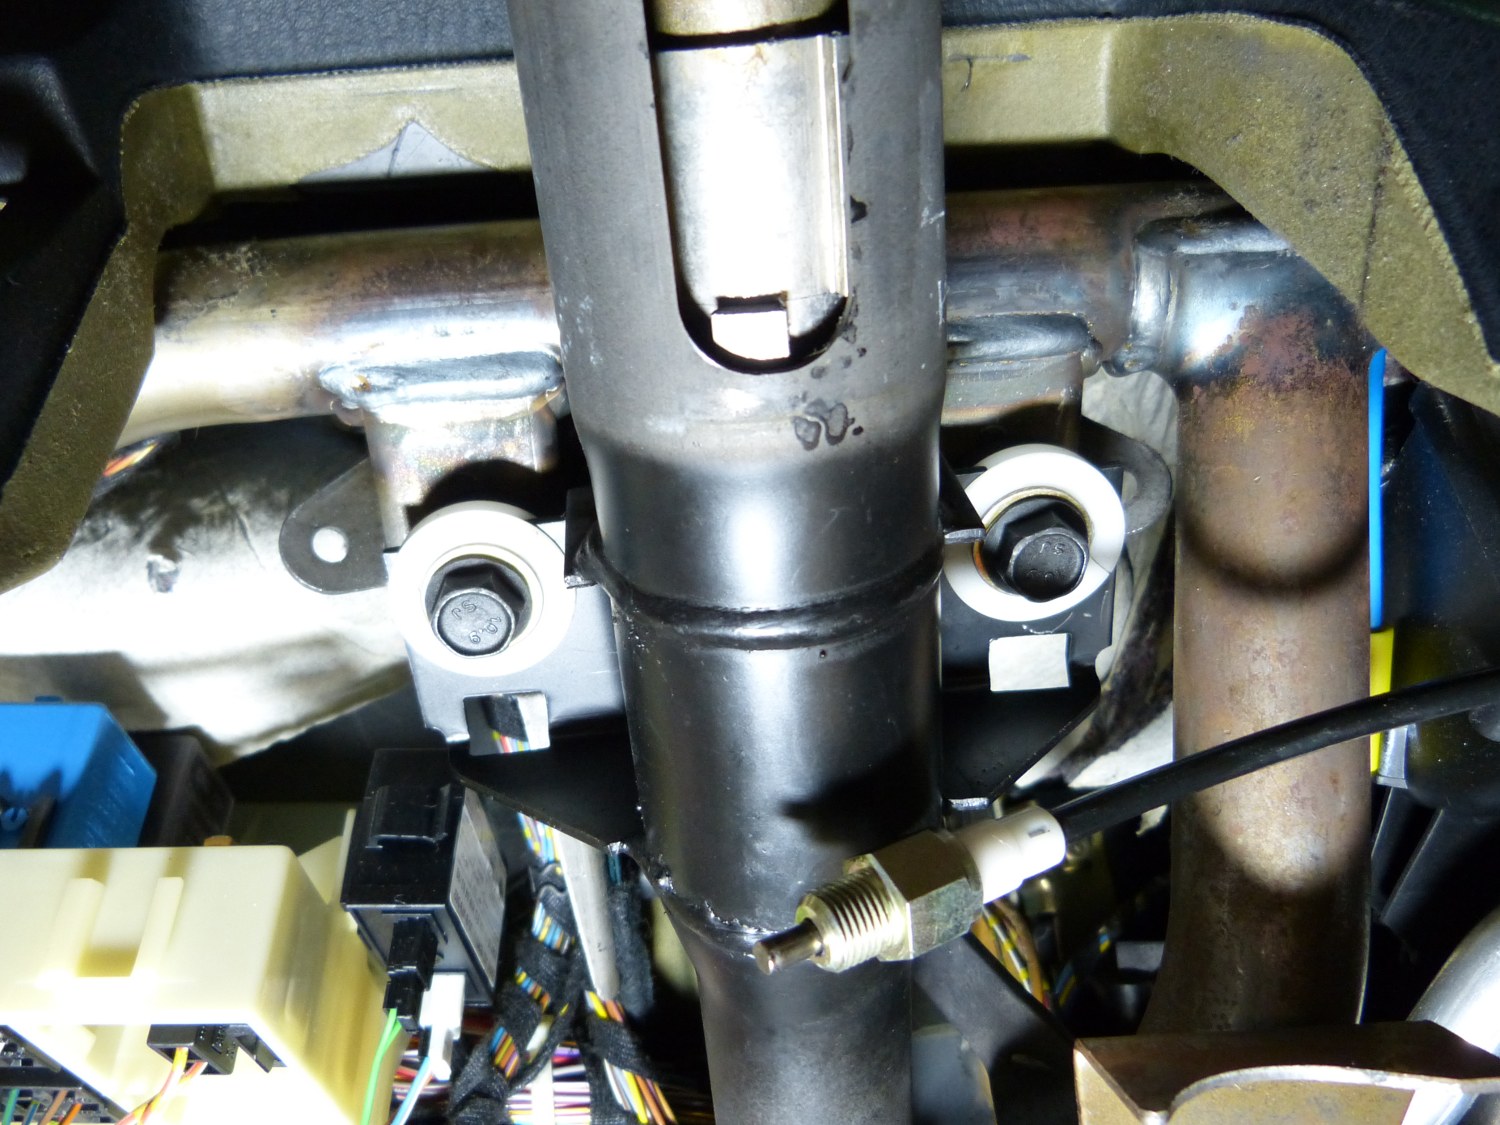 Out with the OE fracture bolts and in with the new M8x1.25x25 class 10.9 flange head bolts and cad-steel flat washers. These are shown hand tightened. |
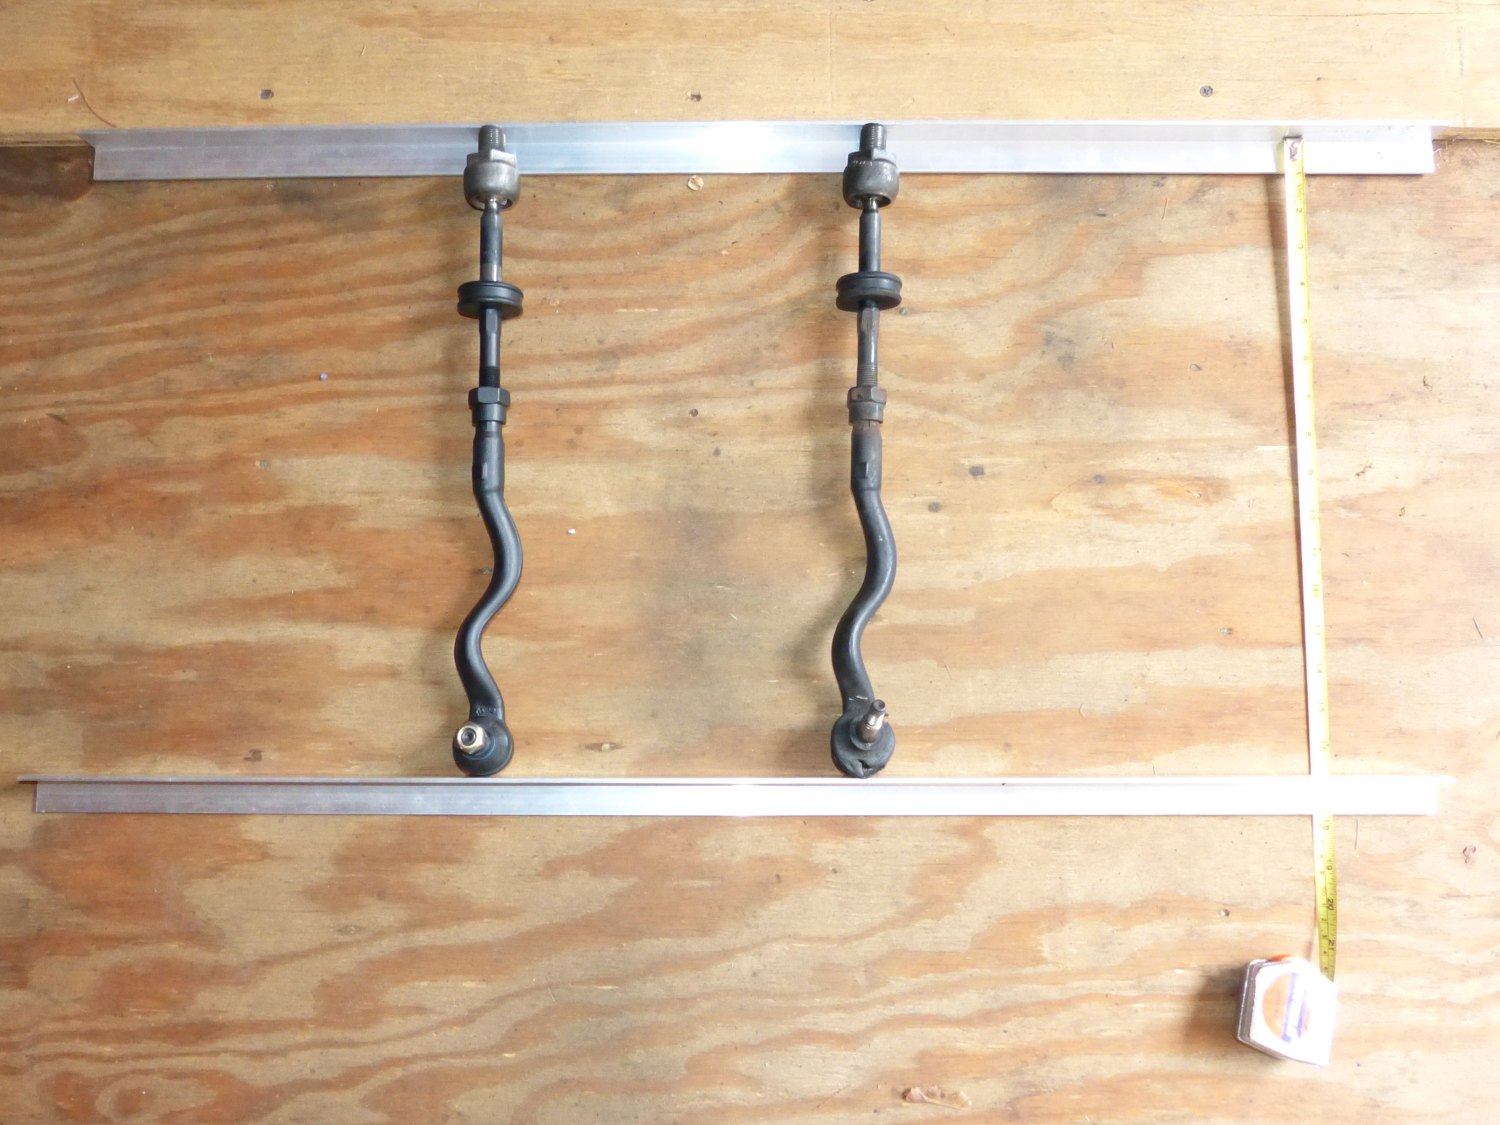 My tierod alignment rig. If the aluminum angles are parallel to each other then the tierods are of equal length. |
With that out of the way I installed the steering column and hand tightened the M8x1.25x25 bolts that I backed up with a couple cad-steel washers I had on hand. Before getting out of the car I rotated the steering shaft until the dimple in the face of the shaft used for steering wheel alignment was at the 12 o'clock position. I then attached the collapsible steering shaft U-joint to the column shaft such that the retaining bolt could be installed vertically as it was when I disassembled it. Since I was using new, non-corroded hardware the bolt slipped into the hole with ease. I held a 13mm box end wrench on the bottom nut while I used a ratchet with about 15" worth of extensions to snug the bolt. It sounds a little kludgy, but it actually made this a lot easier than cramming the ratchet down close to the head of the bolt as I did when I disassembled it. Live and learn.
The next natural step was to install the rack in the subframe. I inserted and then hand tightened the right side bolt and nut. I did not install the left side bolt at this point so I could pivot the left side of the rack in and out of the subframe as required to mate the rack's splined shaft with the isolation joint. Because the isolation joint was new and I took the time to clean up the splines on both the rack and the collapsible steering shaft all the components assembled with surprising ease.
A couple notes about the isolation joint. First, while it looks like the part is more or less symmetrical it can, in fact, only be installed one way. This became obvious as I attempted to insert one of the bolts and it wouldn't fit. Second, while the part can technically be installed on any available splines I made a point to position it such that I could gain access to the nut and bolt on the top and bottom of the part with the tools on hand. The part resides in close quarters so this must be taken into consideration.
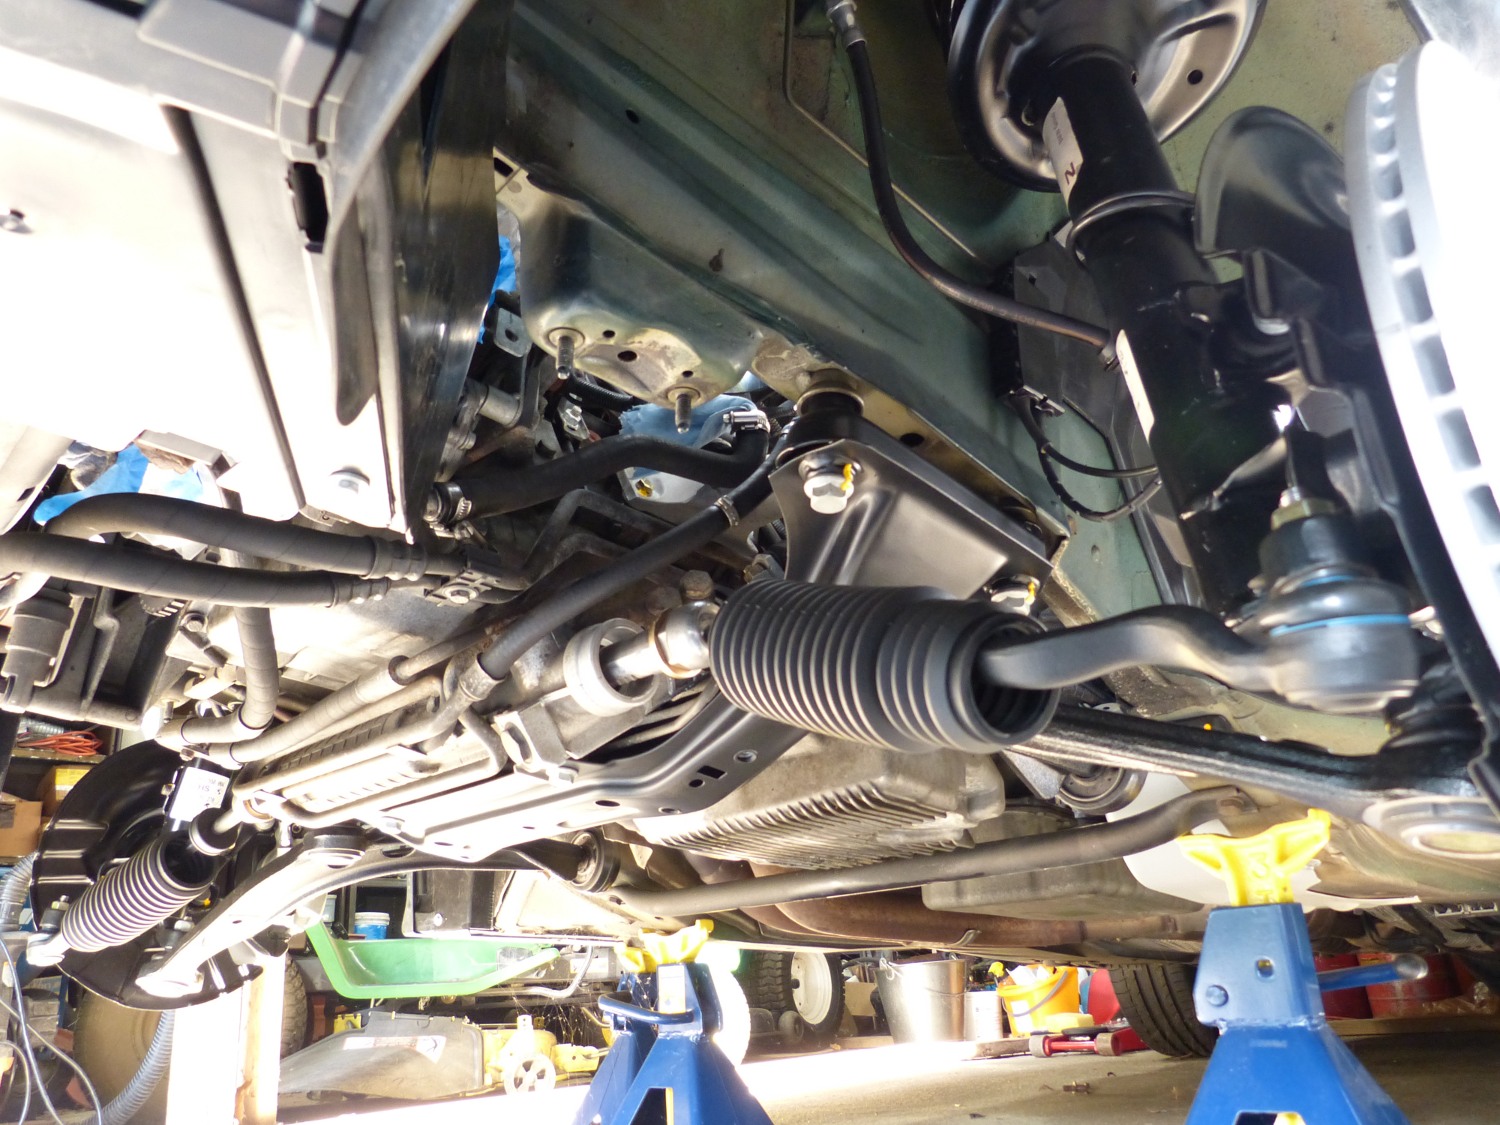 A perspective shot with the rack reinstalled along with the new tierods. |
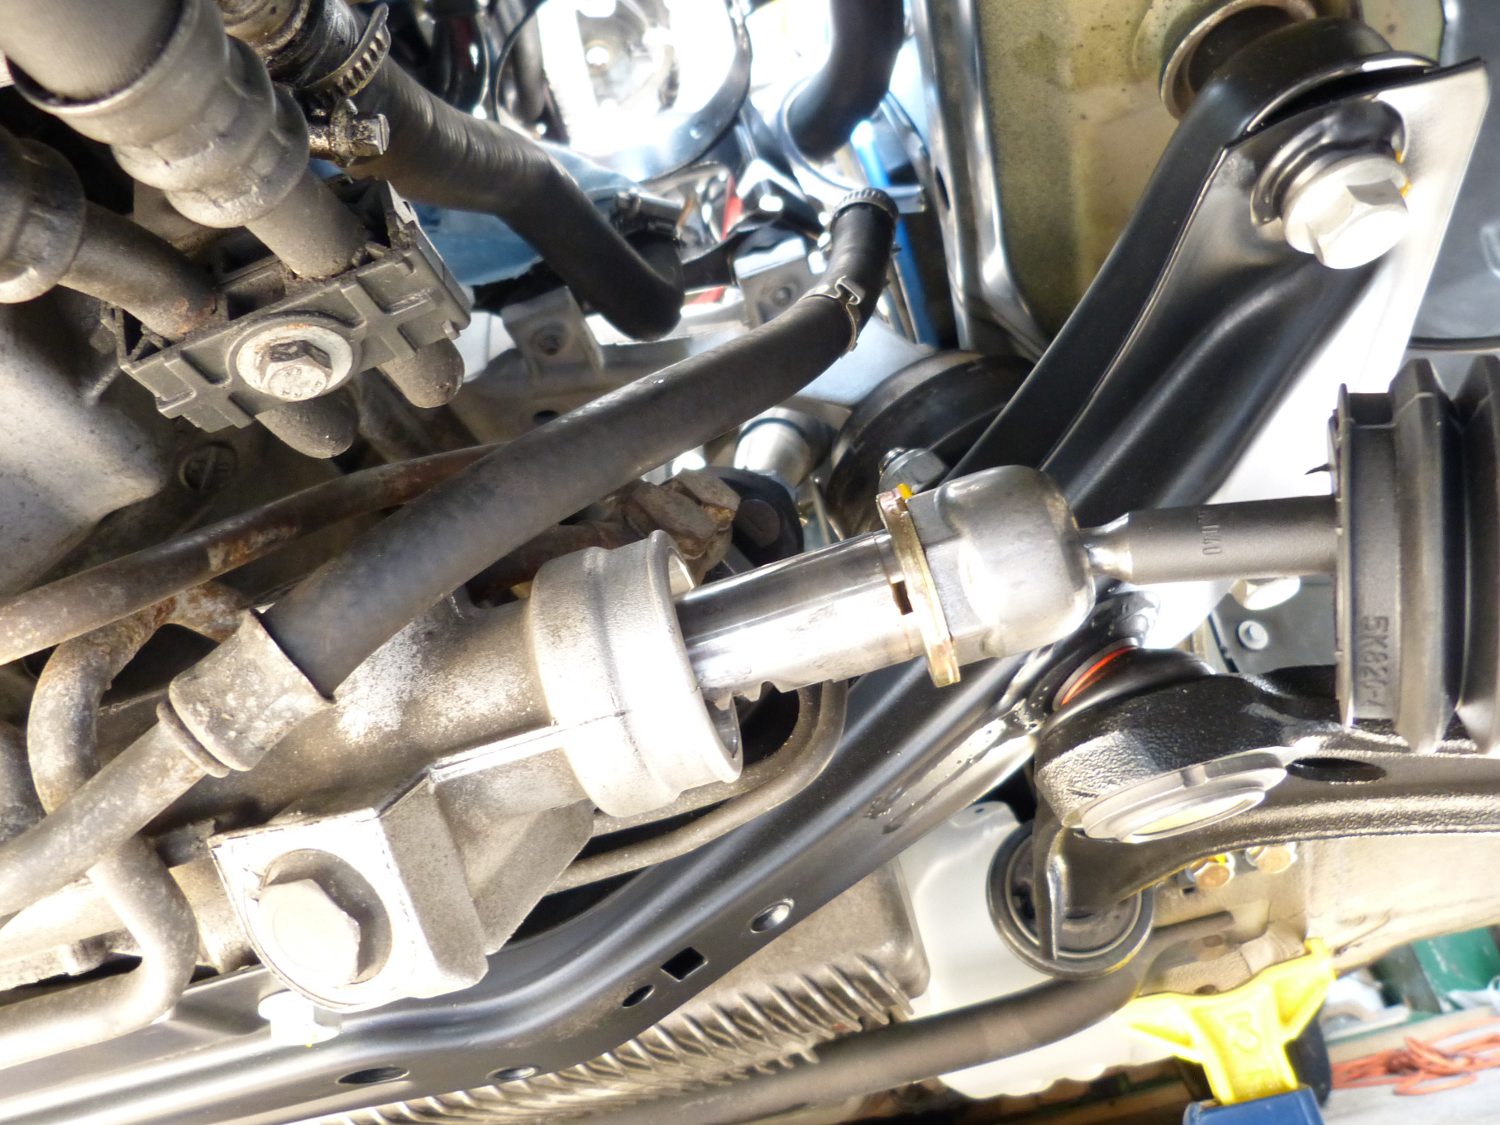 A closeup of the new inner tierod installed. The locking ring is not yet bent over the inner tierod nut. |
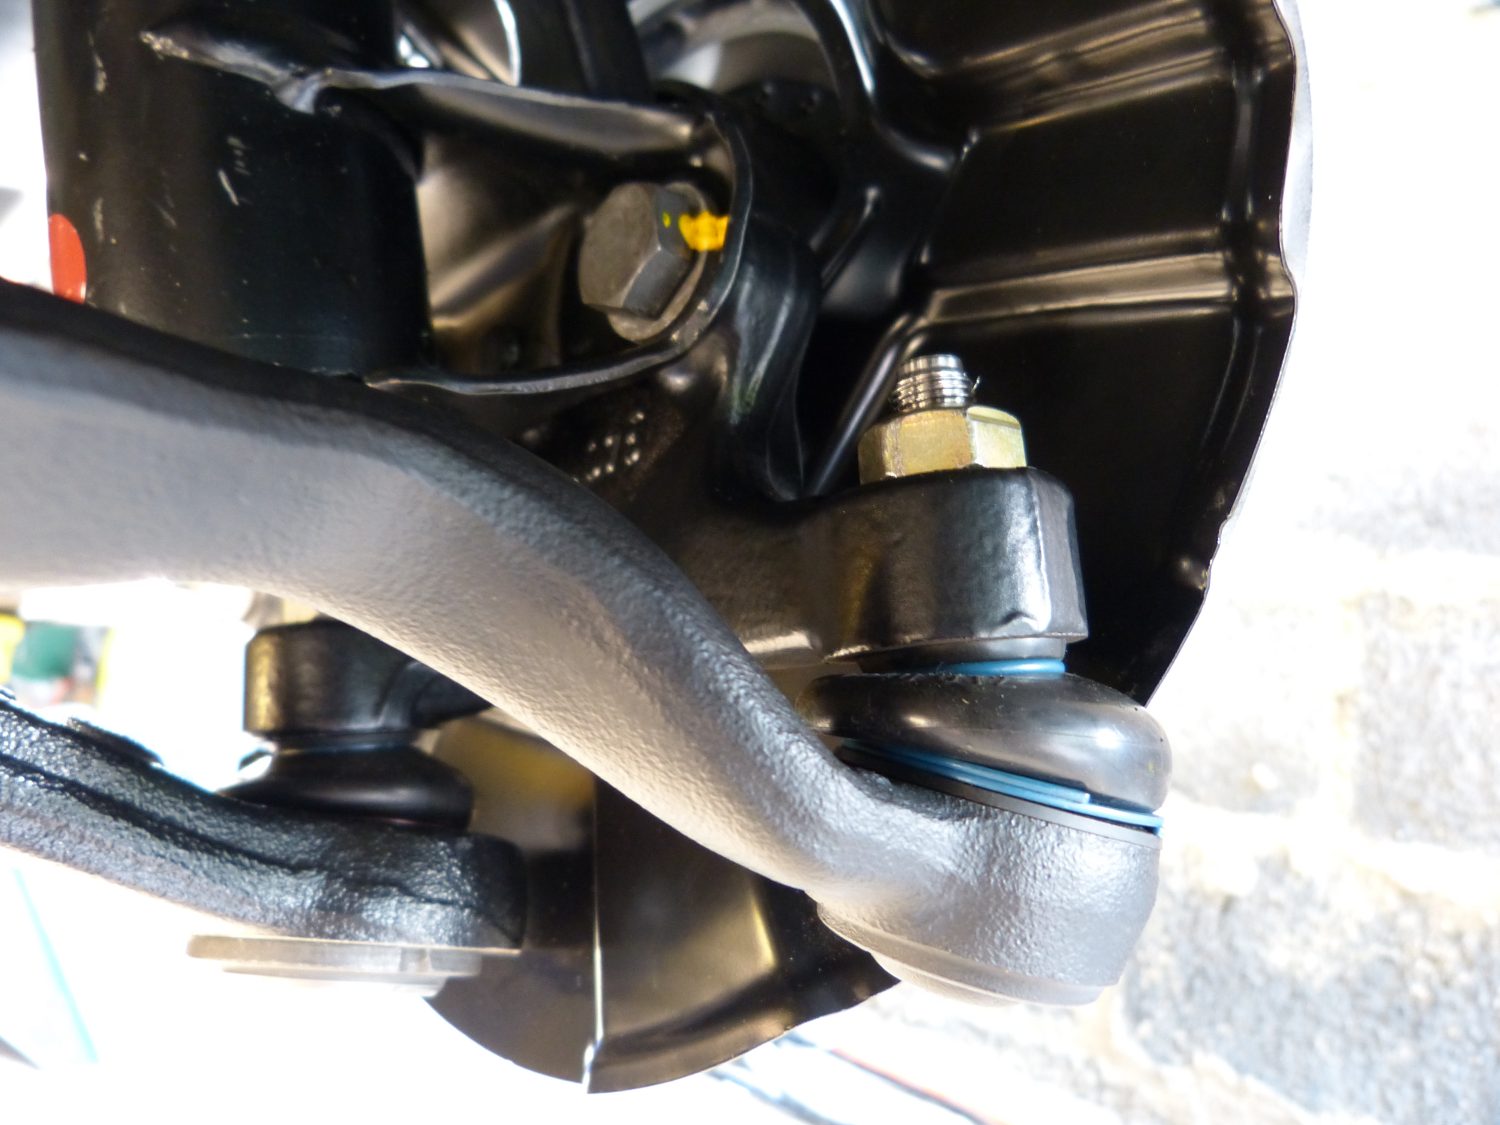 A closeup of the outer balljoint of the new Lemforder OEM tierods. And yes, they're made in Germany. |
I then decided to match the length of the new tierods to the old. For that task I aligned two three-foot pieces of aluminum angle parallel to each other separated by a distance equivalent to the length of the old tierod. I then placed the new tierod about 6-10 inches away from the old and "squeezed" the two pieces of angle up against the tierods. I then used a tape measure to check the distance between the ends of each angle. When both were identical, I assumed the tierods were matched in length. I'm not sure if there is an easier/better way to accomplish this, but my technique seemed to work.
All this turned out to be for naught, however, when I installed the tierods, centered the rack using the TMS special tool and stepped back to take a good look at the result. I found both rotors canted to the left by an obviously unacceptable amount. The rack centering tool can be installed in two ways so I double-checked that it was installed properly. I stopped to think a bit and even called Turner. Their tech staff were occupied with other tasks so they took my information and I went back to thinking. I eventually surmised that the only way this could happen is if the rack had been off-center since it was replaced at 90K miles and both tierods had been adjusted during the subsequent alignment(s) to accommodate that error.
According to Turner's literature, the entire point of the tool is to ensure the rack is centered, because an off-center rack can exacerbate bump steer. I wasn't about to perpetuate this condition so I decided to adjust the tierods by eye, using, among other references, the number of exposed threads on the tierod adjustment to keep the toe consistent from side to side. Note that this technique does not give me any precision whatsoever with respect to toe-in or out...just that the toe is approximately equal side to side, and for the short trip to the alignment shop I think that's all that matters.
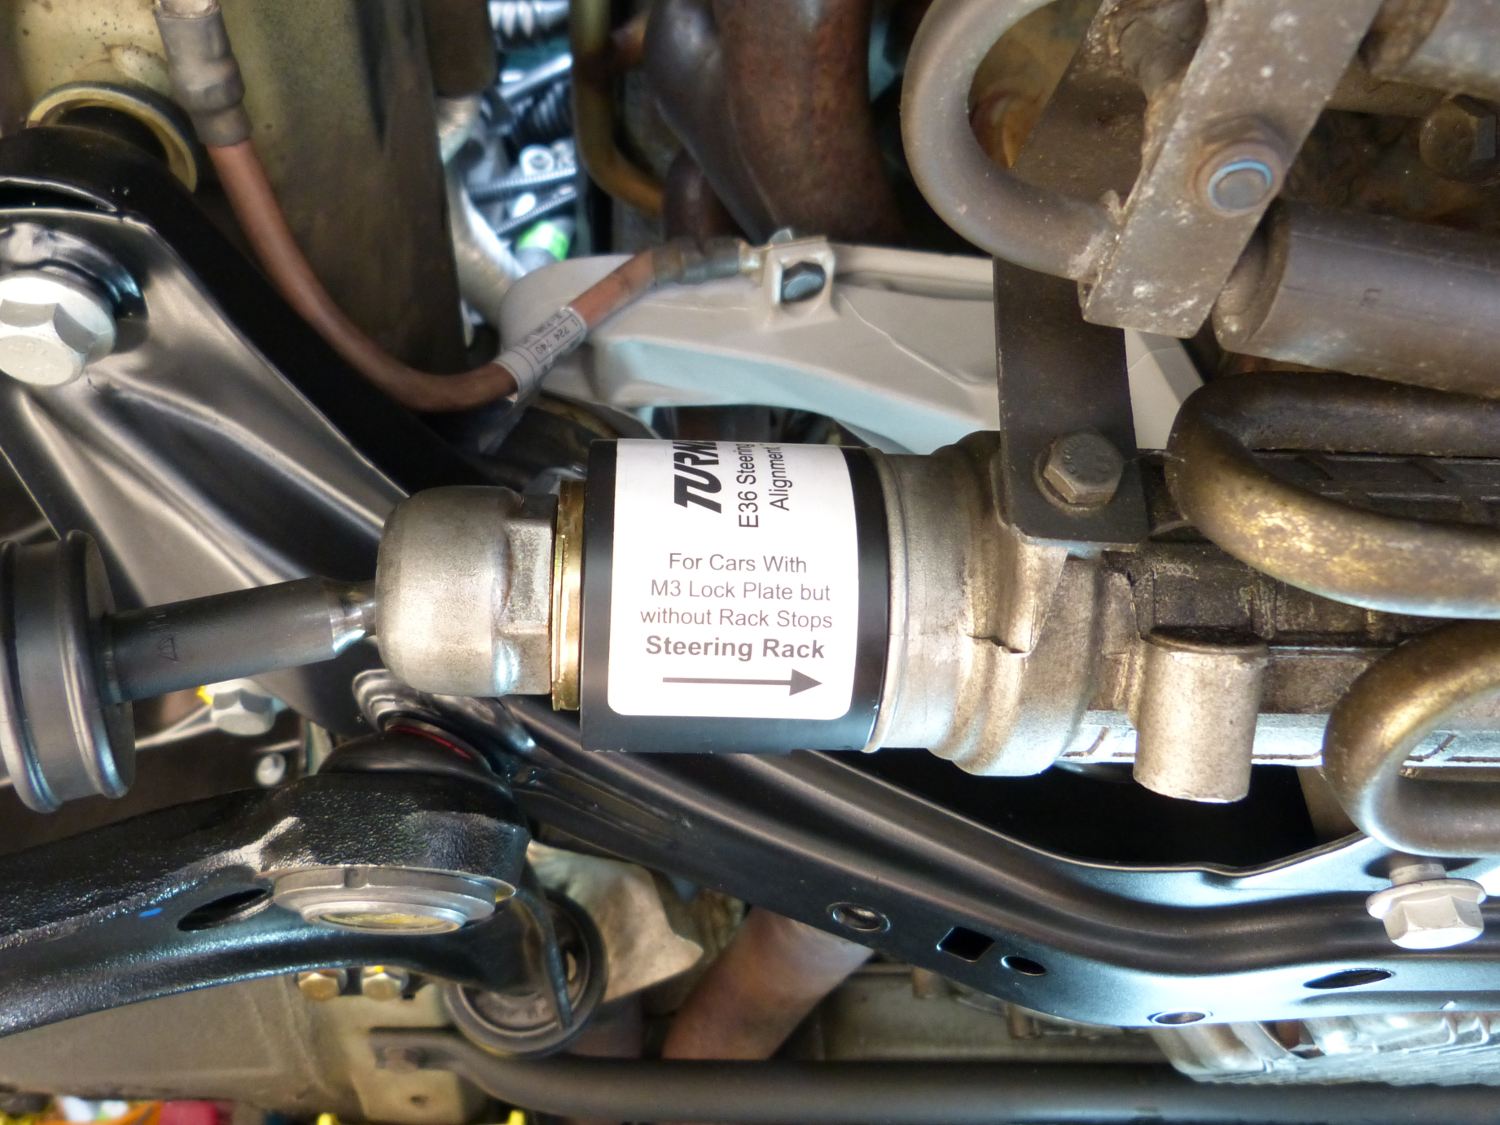 The Turner Motorsport rack centering tool paid for itself already -- I found my rack was not centered for at least the last 140K miles. |
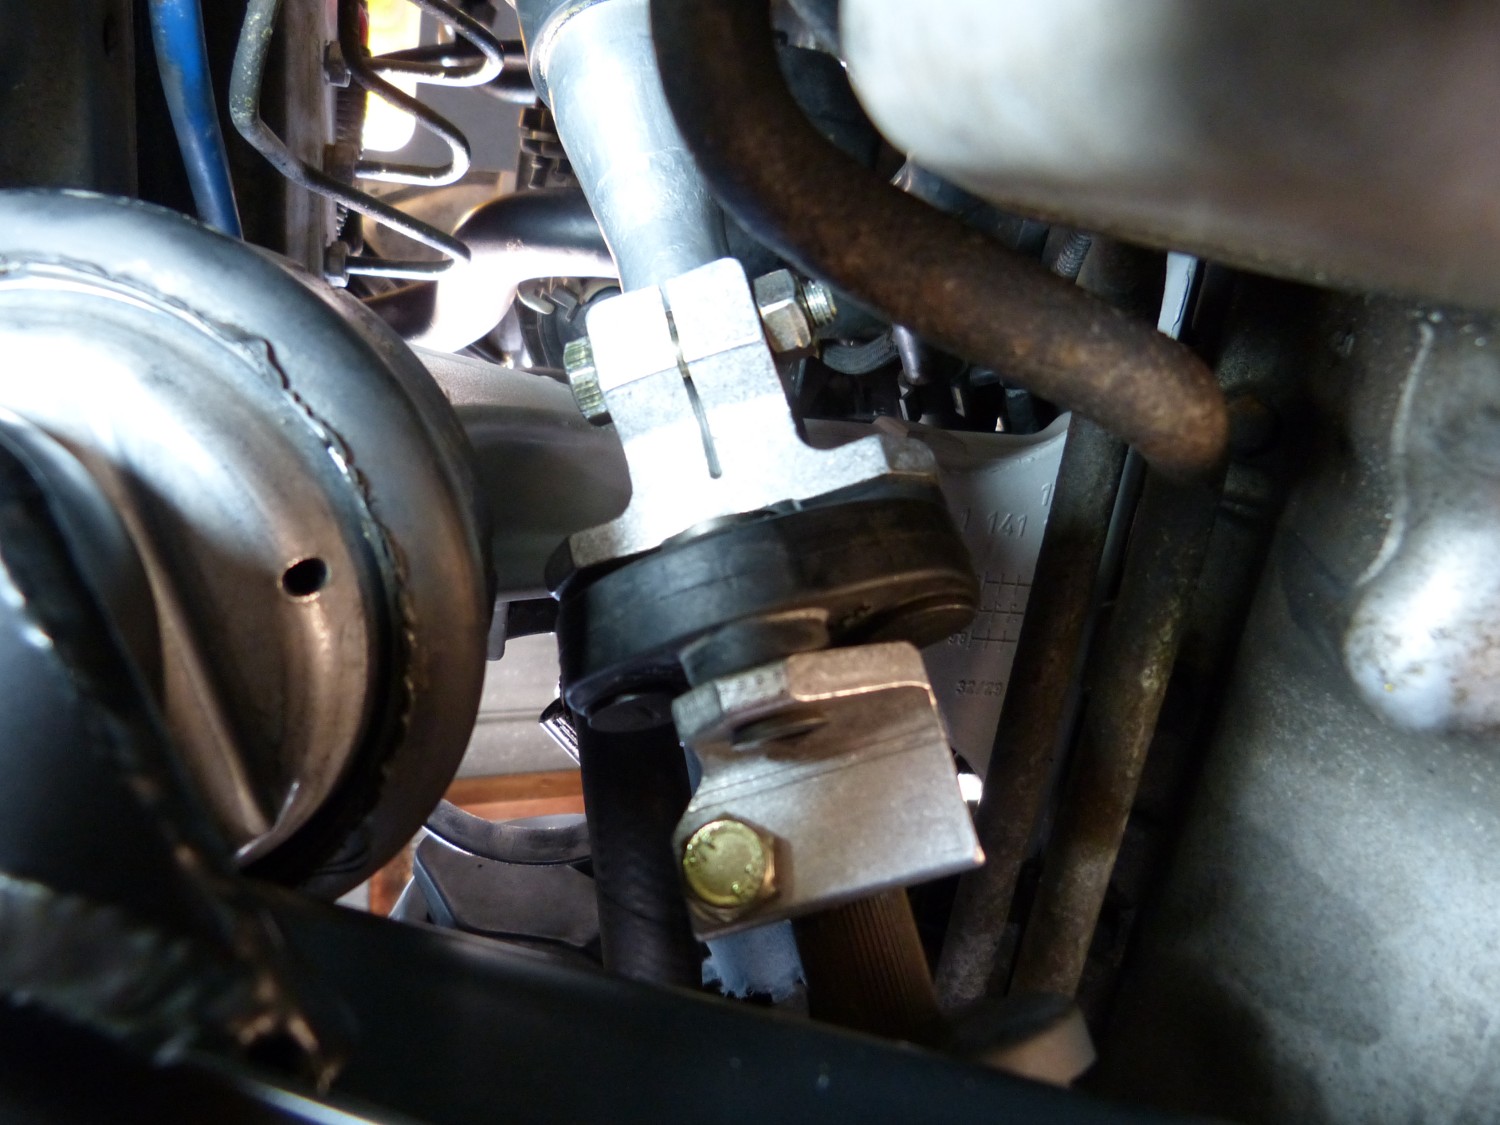 The new steering shaft isolation joint installed with new hardware. Because I cleaned the splines on the rack and collapsible shaft it went together easily. |
 The new fuel filter cover installed with refurbished and new fasteners. Note: the hole in the very front of the panel accepts a ty-wrap (to be installed) to keep the wiring bundle in one place. |
When I had everything together I torqued the rack bolts to 41 ft*lbs and tightened the 32 mm inner and 17 mm outer nuts by hand. As usual, I had to use the floor jack to press the tapered shaft into the kingpin so the shaft wouldn't rotate while I snugged the metal locking nut.
When I called the parts desk earlier today to order the fuel hose, vacuum hose, and foam piece required to clean up the fuel filter area they told me that the vacuum hose and foam needed to come from Germany, which means about a two week delivery time. So rather than wait for those parts I decided to install the new cover now and tackle the refurb when the parts come in. Despite this setback it still looks a hell of a lot better than the original, which will be sent to its timely death at my local metal recycler. Incidentally, I cleaned up and sprayed the "flat nuts" with semi-gloss black I had on hand. As for the other screws it turns out they are the same used to fasten the fender liners to the car and I had one extra of those so I put it into service here. The other fastener, as well as the plastic blind nuts they screw into are original and I intend to replace them when the time comes.
All that remains is to bleed the brakes, install the lock housing / tumbler, steering wheel and related electrics, double-check all my fasteners, and then throw the wheels on and go for a test drive.
Mileage: 222600