


Sunday, July 15, 2012
Front Suspension Overhaul - Day 16
Yesterday I picked up a bunch of parts including the power steering system sealing rings and radiator cover. I also received the new vacuum and fuel line I expect to install those when I replace the fuel filter. The fuel line, incidentally, came in a three foot length for the ridiculous price of $40. I mean, come on, BMW. This is not carrying oxidizer to the turbopumps if you know what I mean. It's fucking low pressure fuel line. I know it's high quality stuff that lasts damn near forever but either BMW needs to get a program or I need to find another source for this stuff. The upside, I suppose, is that three feet will be enough to replace the smaller segments on either side of the fuel filter and then some.
When I arrived at the garage today it was unbearably hot and humid. I almost said "screw this" and headed back to the air conditioning but I was motivated to finish up the car today so I sucked it up and got to work. I began by installing a ty-wrap to secure the fuel and vacuum lines as they enter the front of the fuel filter cover. If you're wondering why I chose not to replace the filter, vacuum and fuel lines at this point, it came down to a simple matter of priorities. They're not required to test drive the car. I'll do that work eventually.
With that done I installed the new radiator cover. I had to install new blind nuts because someone who worked on the car at one point (likely one of the body shops following one of my deer hits) used the wrong screws. The clue was the fact that they had body color paint on them. I looked around the front end and found some screws missing from the radiator supports. These larger screws stretched the blind nuts so they would no longer accept the proper screws for this application. Strictly speaking I didn't have to replace the two tinnerman clips but the originals had seen better days and I had extras from the fender liner installation so I put them to good use. The new zinc-plated screws I installed to wrap up this task were, incidentally, the same part number used to secure the fender liners. While I'm happy with the overall installation, I definitely have to find another solution to the plastic rivets on the far left and right side because they're a pain in the ass to remove.
Since I received the sealing washers for the power steering system I placed a ring on either side of the banjo fitting, inserted the hollow bolt, mounted it to the pump and torqued it by feel before filling the ATF reservoir with new fluid. The system took only a small fraction of the total required because the pump needs to run in order to push the fluid through the rack but that will happen soon enough after the engine awakens from its deep slumber.
If you recall I managed to break the cheap plastic mount used to secure the fuel vapor recovery line (the blue hardline) to the side of the body just prior to point at which it connects via a flexible rubber hose to the purge valve. I knew from some research that the body nuts would accept the threaded stud of a rubber isolation mount (the same part number, incidentally, used to mount the airbox) so I bought that mount. I screwed it into the body nut, wrapped the fuel vapor line with a 1/2" Adel clamp and then secured it with a stainless steel lock washer and nut I found in my spare parts box. This mount secures the line in such a way that it does not rub against any nearby structures, and for a completely off-the-cuff solution I'm very happy with the result.
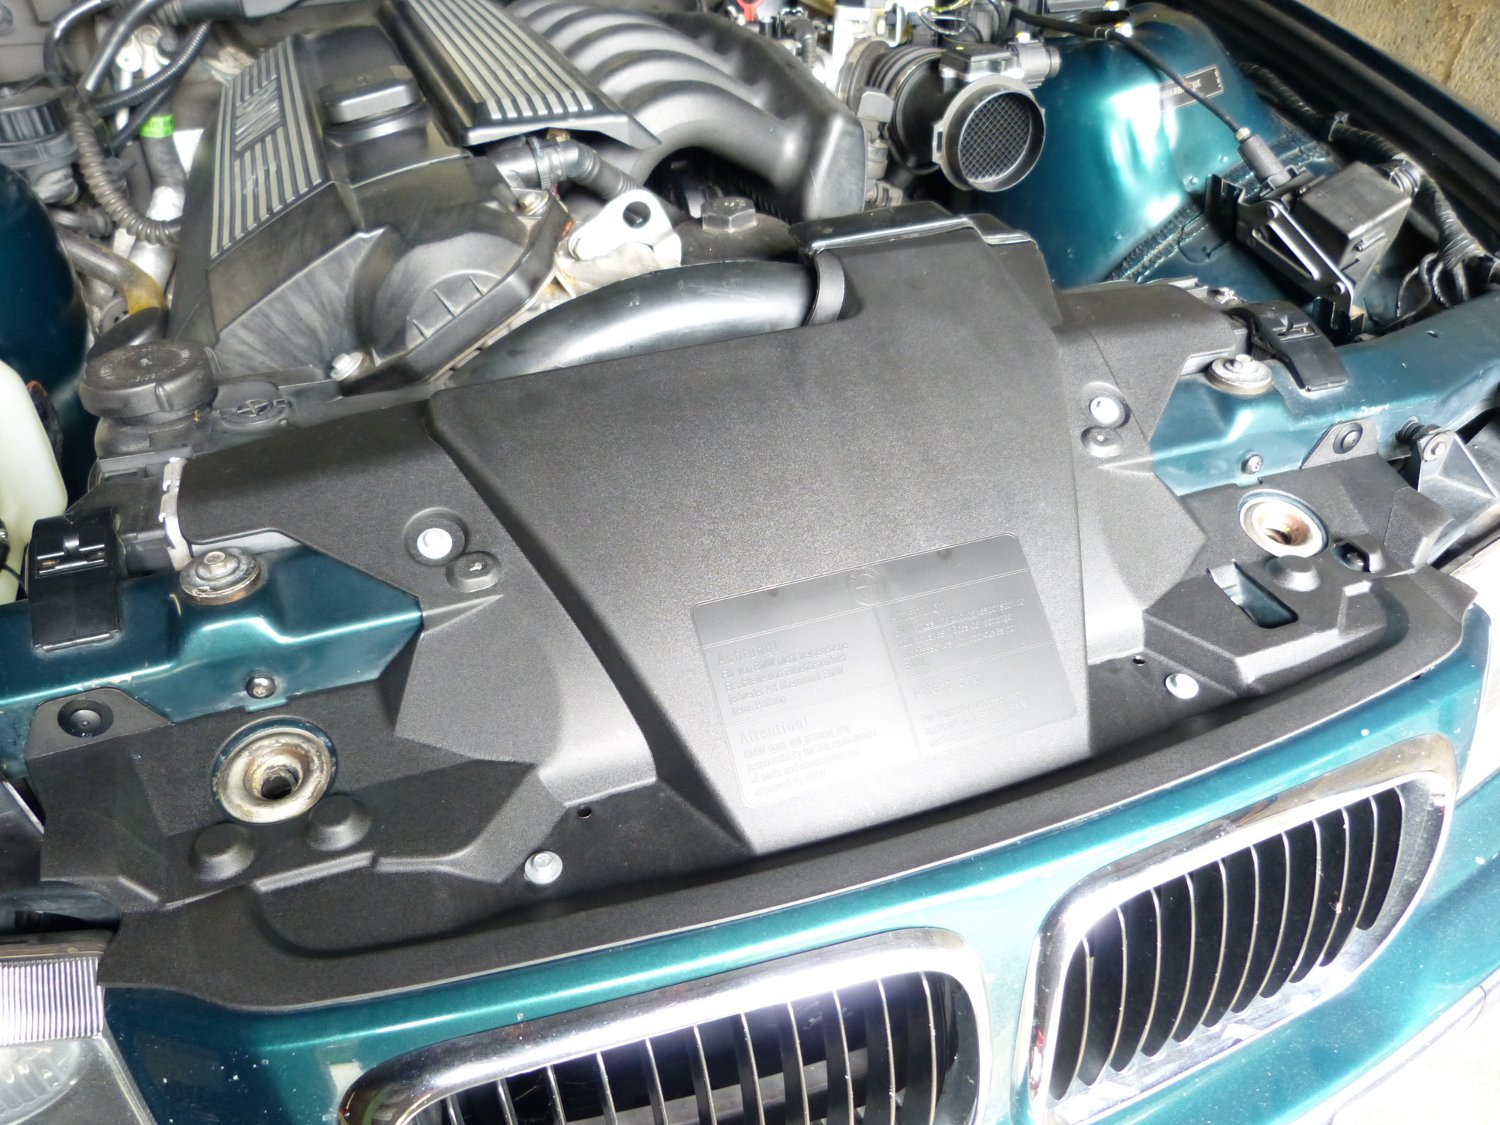 The new radiator cover dresses up the front end nicely. |
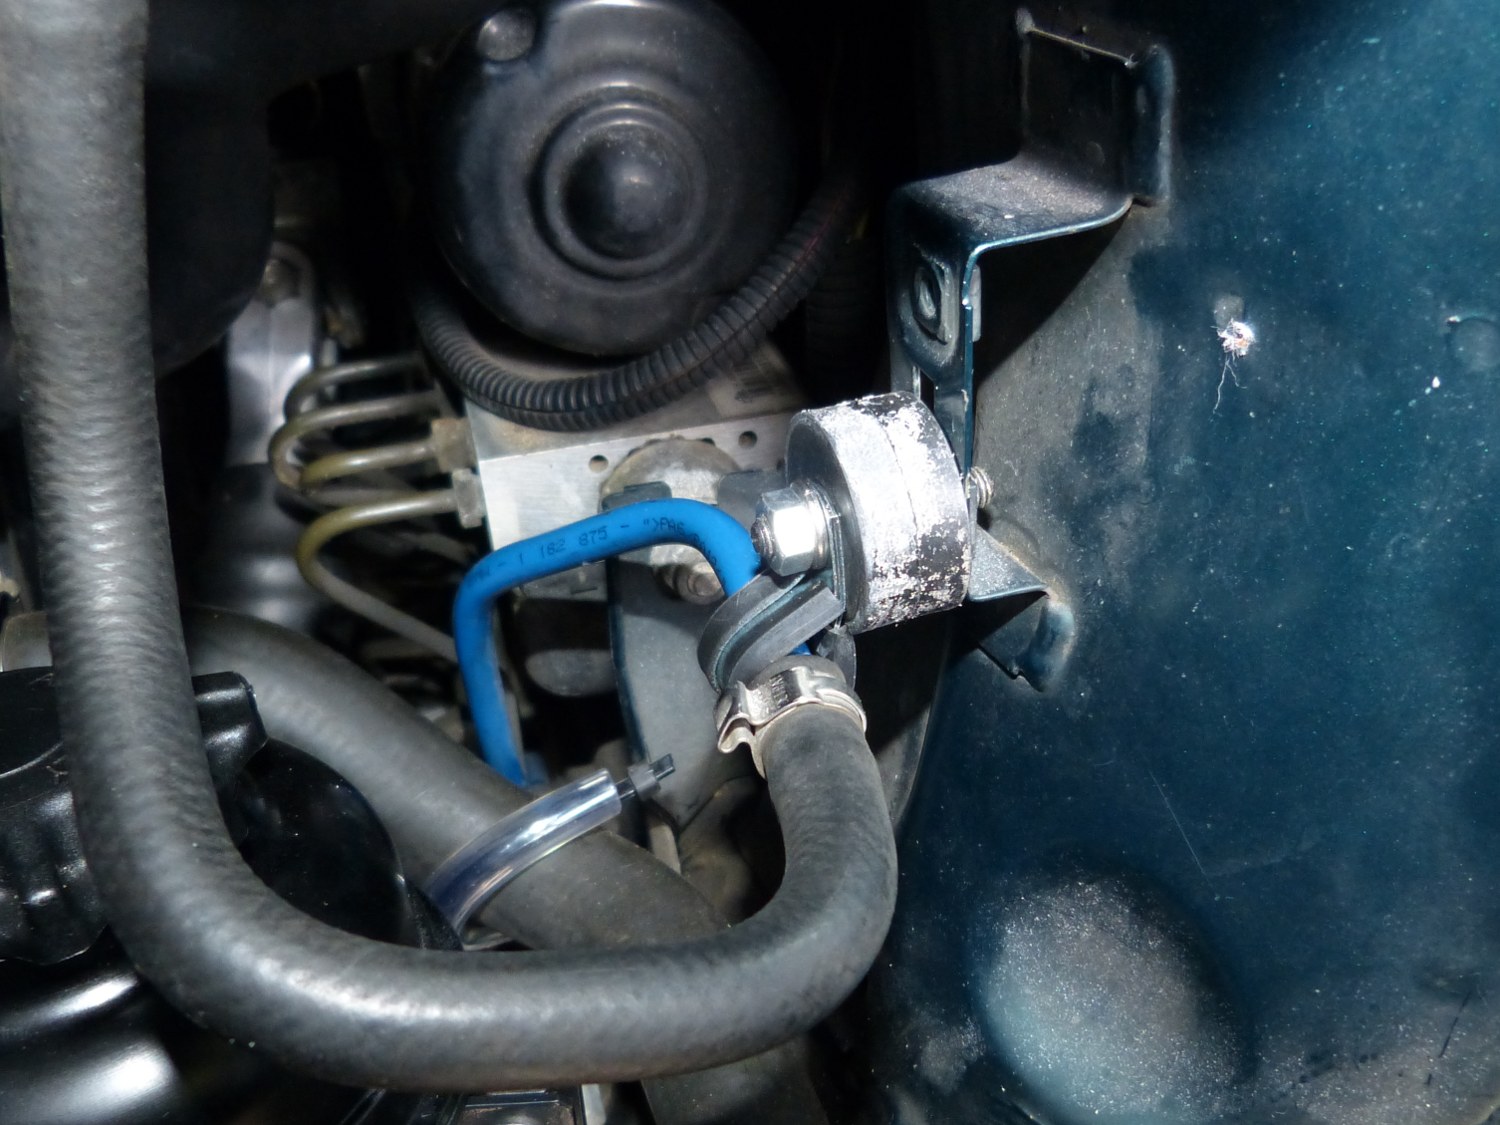 My off-the-cuff solution to a broken vapor recovery hardline mount. |
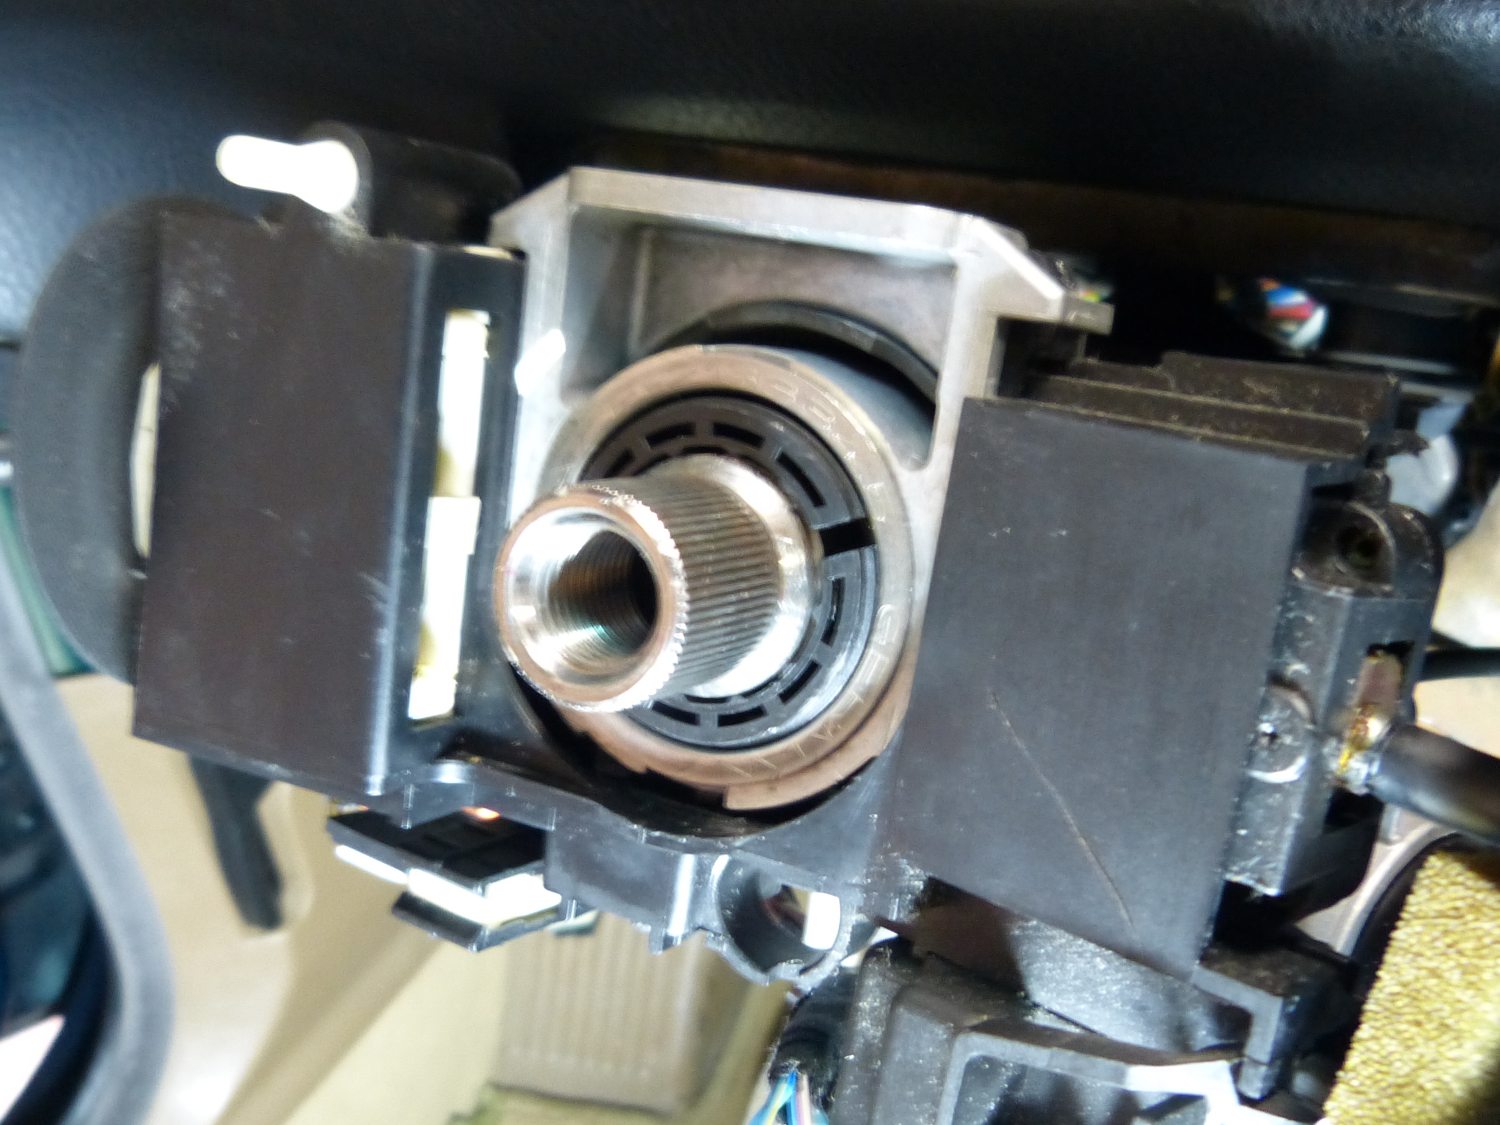 This is what the steering shaft looks like if you don't preload it against spring pressure. |
Once I completed the fuel line mount I reinstalled the airbox and got to work on the steering column. As you may recall I temporarily installed the M8x1.25x25 flange head bolts so I pulled them out individually, put a drop of blue loctite about half way up the threads and then torqued them to 10 ft*lbs. Of course there is no published torque spec for the fracture bolts but 10 ft*lbs seemed appropriate given the effort required to remove them.
I then mated the lock housing to the column and secured it with the new M8x1.25x16 socket cap head bolts obtained from McMaster-Carr. A lack of clearance between the top of the bolts and the dashboard prevented the use of a ratchet, or a torque wrench for that matter, so I used an allen key to tighten the bolts to an estimated 5 ft*lbs. As the bolts firmed up nicely I'm confident they won't loosen up, even at this light torque, so I did not use any loctite.
I thought I'd attempt to install the new ignition switch at this point but I quickly realized that the switch must be keyed with the shaft driven by the ignition key / tumbler so I knew I had to install the tumbler first. I must admit I fumbled with the tumbler for a few minutes before I got it to snap in place. I rotated the key "off", oriented the special tool access hole in the tumbler at the 12 o'clock position, pushed the tumbler into the lock housing and turned it clockwise until it locked into place. As I threaded the gear selector lockout cable into the housing I heard the steering shaft lock engage exactly as I expected.
With the tumbler now in place I was able to turn the key to rotate the shaft as required to install the new ignition switch. Once I saw the switch mated flush with the housing I installed the setscrews easily enough. I then reinstalled the EWS antenna on the ignition tumbler and ty-wrapped the wire bundles before turning the key on and off several times to hear the reassuring "click" of the ignition switch when in the "start" position. The new lock assembly feels great, if not a bit stiff, but that's to be expected, especially if I bother to compare it to parts with thousands of cycles on them.
Thinking I was home free I pressed in the upper steering column bearing into the lock housing, but quickly noticed something was not right: only roughly 1/2" of the steering shaft splines were exposed beyond the face of the bearing. The steering shaft was clearly recessed too far into the lock housing. When I tried to insert the steering wheel retaining bolt into the steering shaft and pull on it as I usually do to install the snap ring I found the shaft wouldn't budge. That was when it dawned on me: the steering shaft must be preloaded.
I reasoned that of the three points in the steering shaft where parts fit together (rack splines to isolation joint, isolation joint to collapsible shaft, and collapsible shaft to fixed steering shaft), the only joint that was designed to be adjustable is the isolation joint to collapsible shaft. So this meant I would need to loosen the associated bolt/nut, pull the steering shaft upward against spring pressure, and then tighten the joint before releasing that pressure.
Try as I might I knew it was not possible for me to be in two different places at the same time so I asked my brother for help. He pulled on the shaft until the spring fully compressed and then released just a bit, while I tightened the bolt/nut. When I told him to release the shaft I noticed the rubber in the isolation joint flex a bit and also recognized I could now see a good 1/2-3/4" of splines exposed on the collapsible shaft -- exactly as I now realized it appeared originally. If you look back at the pictures I took last week of the new isolation joint installed you'll note that no splines are showing. For the record, that's wrong.
Although I could have attempted to wrestle with the snap ring at this point I decided to call it quits for the day in large part due to my waning patience, but also because I wanted to try a different technique to install the snap ring brought to my attention by a reader. More about that next time.
So while it appears the E46 will get another week of exercise, once the snap ring is installed I estimate I'm no more than an hour away from the test drive. I'll wrap up the project by installing the fuel filter and related new parts, flushing the rear brakes so I can count this as an "official" brake flush, and completing a routine oil service.
Mileage: 222600