


Sunday, May 29, 2016
ZKW Projector Installation Begins
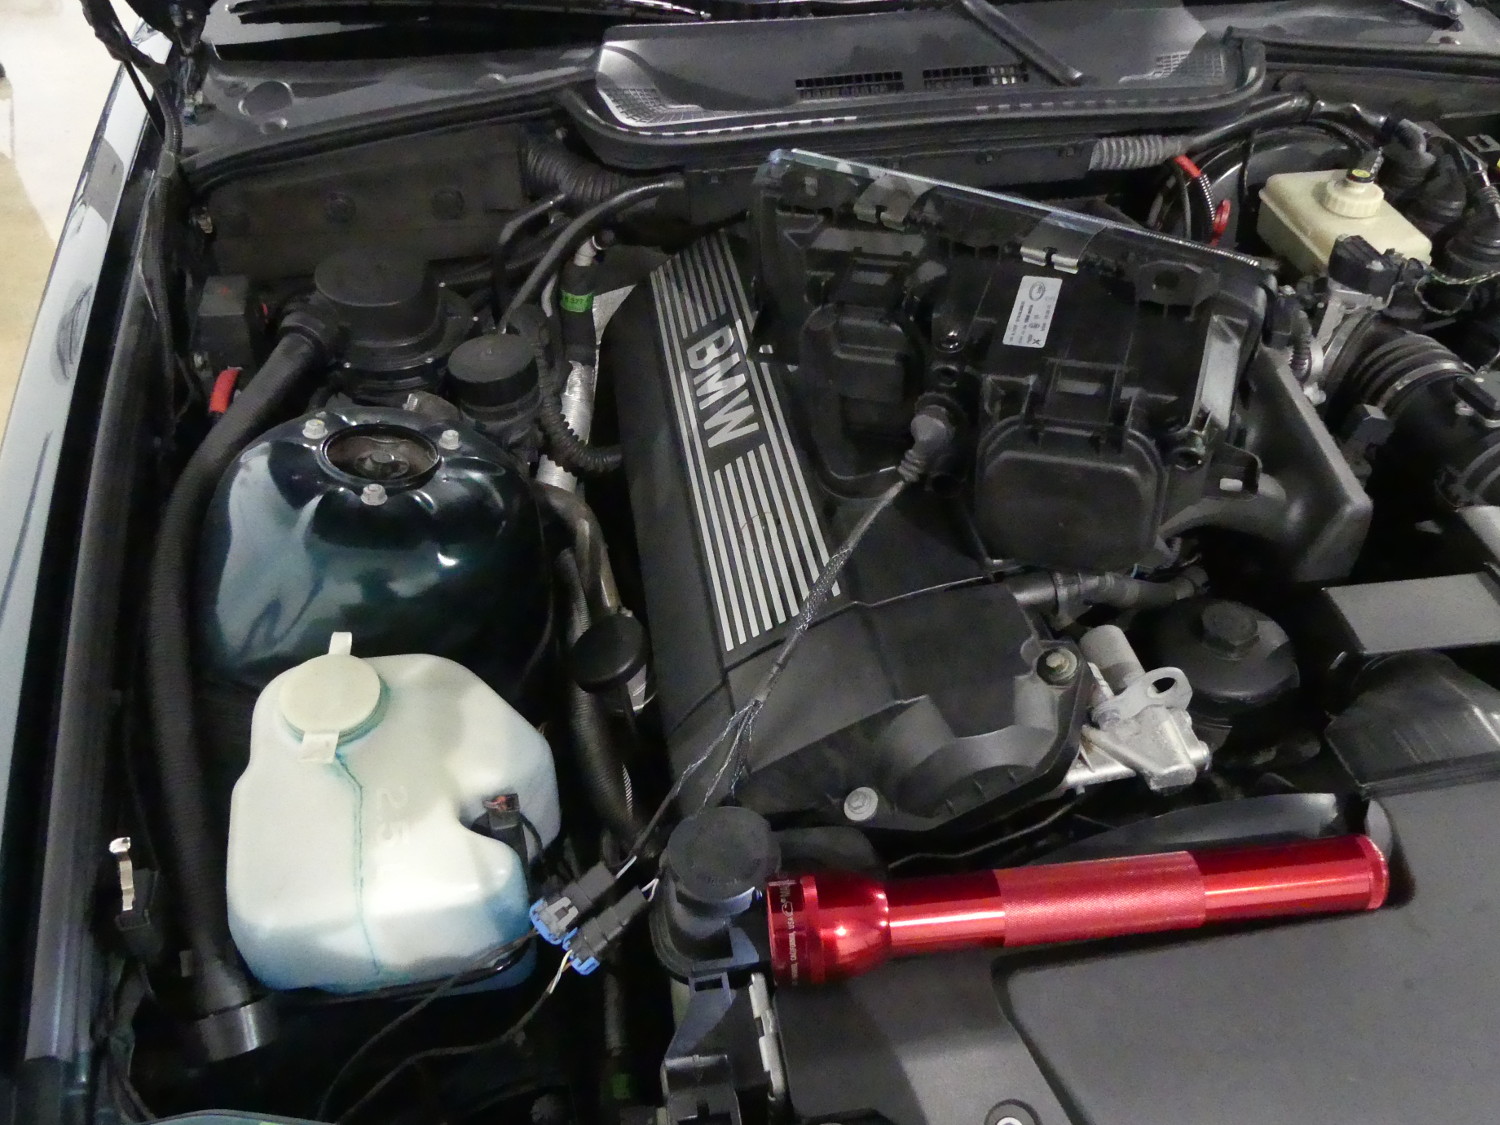
I finally managed to arrange some time in my brother's toybox to swap my old DOT headlight assemblies for the ZKW projectors. As usual, I managed to pick the hottest day of the year so far to do this work (90 degrees and high humidity) but as the heat just arrived this week and the huge slab of concrete was still relatively cool I found the climate in the building far more tolerable with the doors shut. Although this would have been a good opportunity to test the A/C it had not yet been activated.
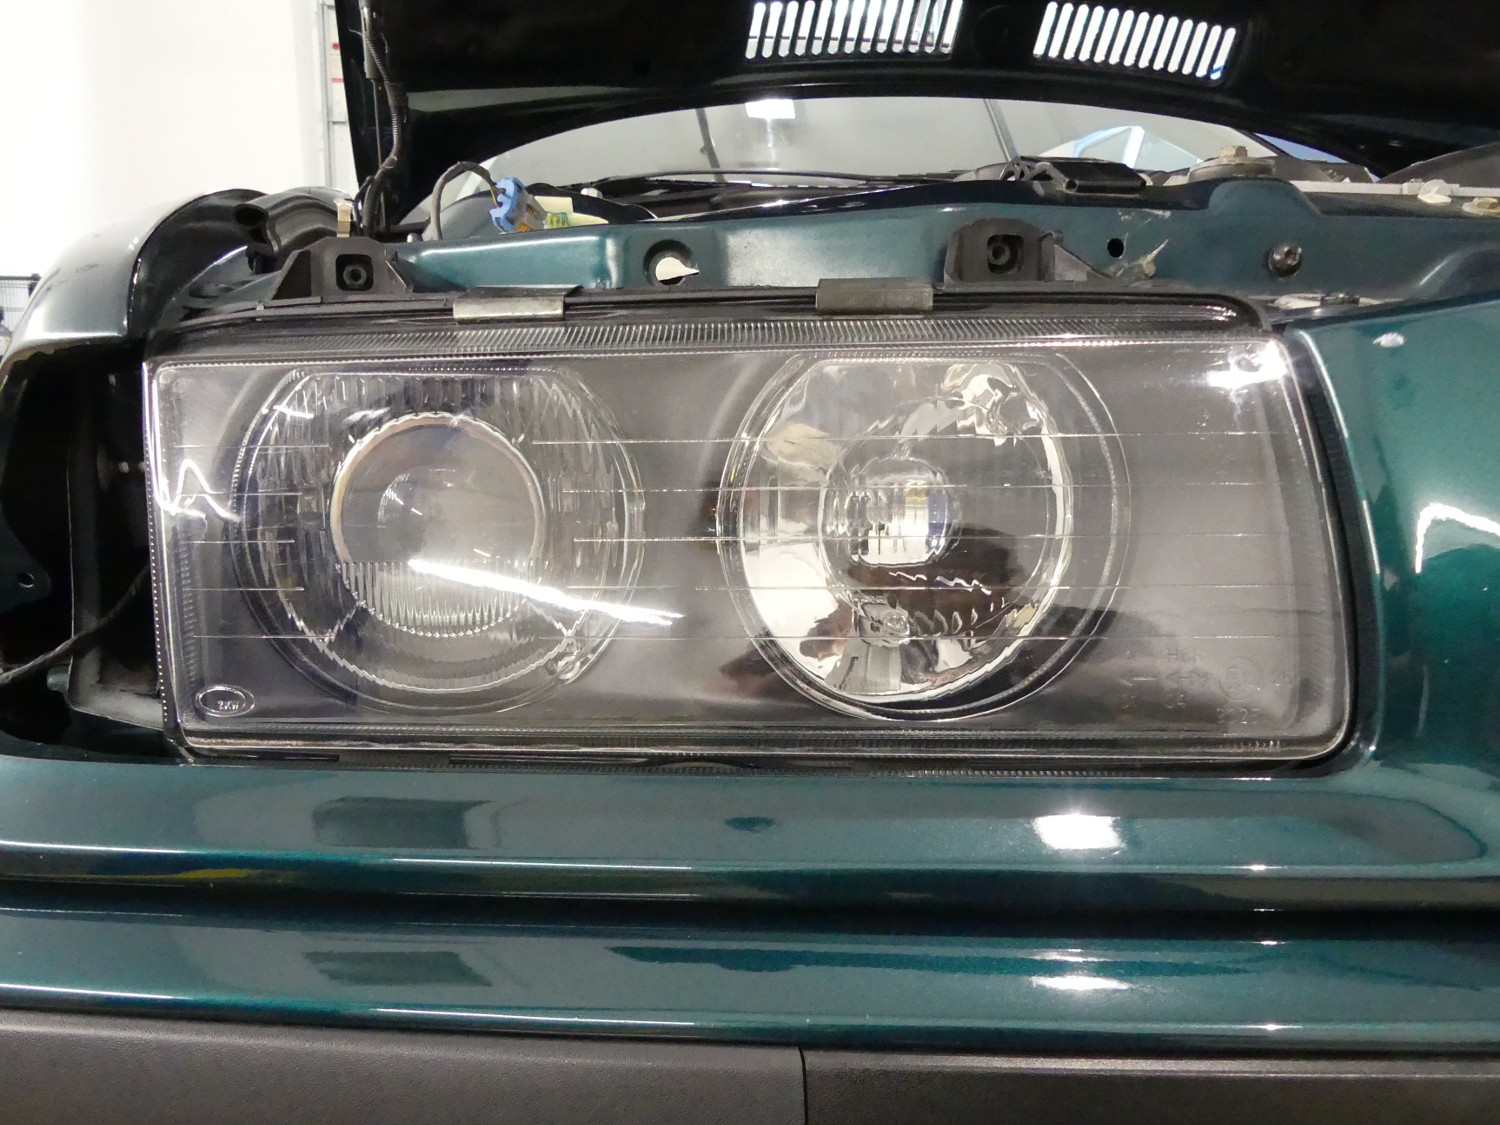
Despite finishing the ZKW adapter cables over a year ago I had never tested the headlights connected to the vehicle so I decided to do that first. While I stated previously that the connectors are keyed and thus the high and low beams cannot be connected to the body harness reversed (low to high, high to low) the poor design of the connectors allows them to mate with reversed polarity. And while the locks on the connectors do not engage in this state, it is nevertheless possible to create a short condition if you're not paying attention.
Of course, I managed to do this and wound up blowing a fuse -- my first in 263K miles. Fortunately BMW was thinking 25 years ago when they designed the fuse box and decided to include a few spare fuses attached to the fuse box cover. I did a quick continuity test to verify that the driver's side high beam fuse had blown and cautiously replaced it with another. Once I connected both headlight assemblies I positioned them on the top of the engine facing backward toward the driver seat so I was able to turn the low beams on, flick the high beams, and verify everything worked.
 The length of my adapter cables came in handy during initial testing, and despite the poorly keyed connectors I was able to verify the cables were wired correctly and both low and high beam bulbs worked prior to committing to their installation. |
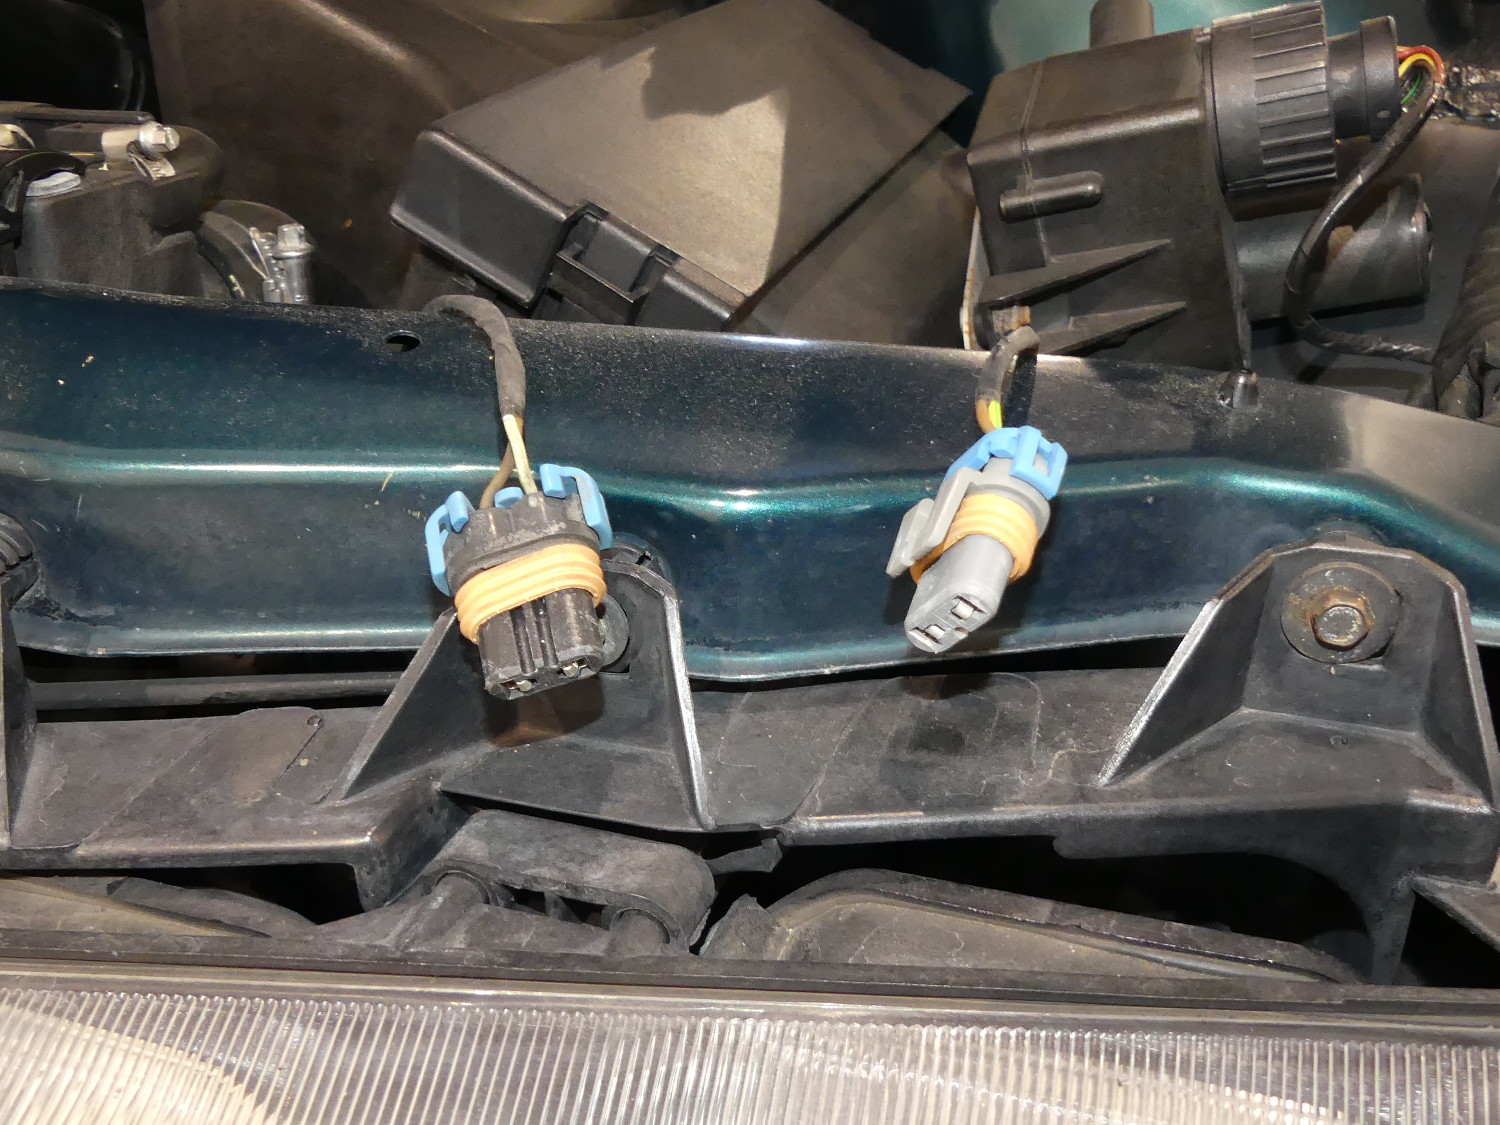 I took this picture primarily to serve as a reminder that the low beam connector contains a single keying notch while the high beam contains two notches. Unfortunately they are otherwise symmetrical and can be mated with reverse polarity. |
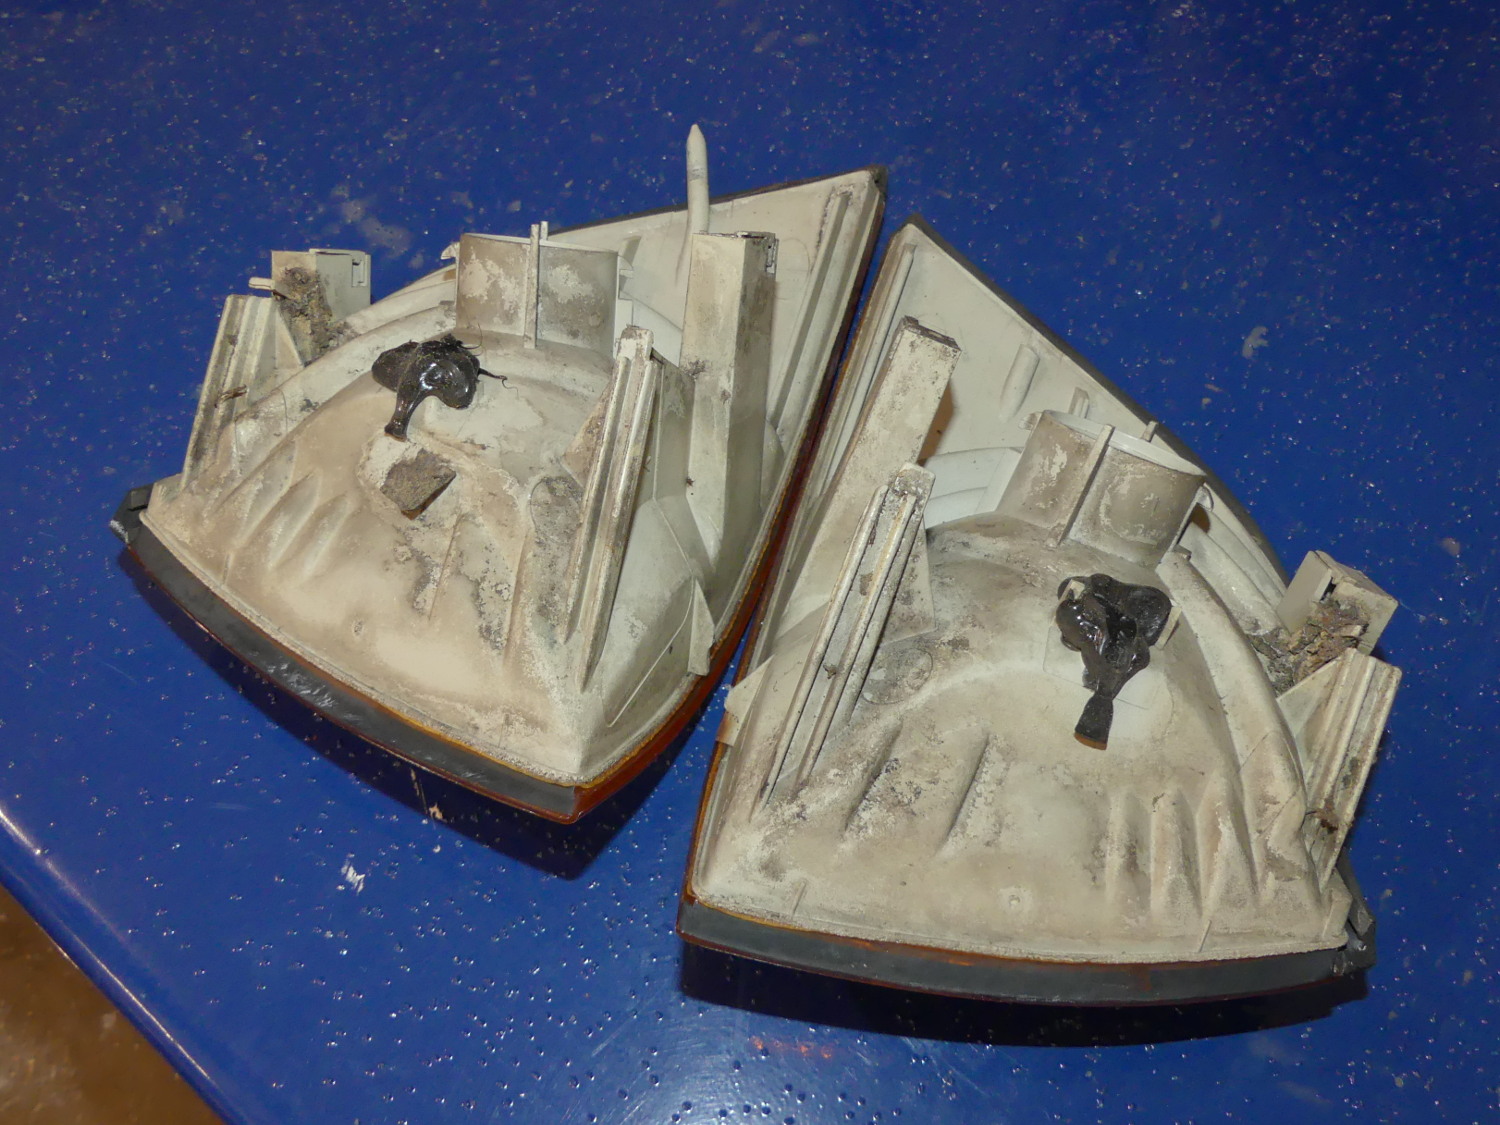 I'm glad I never had to replace the turn signal bulbs before this. Had I attempted to remove the turn signal housings I would have been presented with a problem not easily solved -- how to secure these broken housings again. Not happy the body shop hid this from me. |
I began removal of the old headlight assemblies by removing the black cover that directs air to the alternator, as required to get to the inner lower bolts that hold the headlights to the car. When I tried to access the plastic clips required to remove the turn signals I found the clips broken off and the turn signals glued to the headlight assemblies with a gray RTV-like material. Obviously, two years ago when I had the car fully disassembled for paint the body shop did not know how to remove the signals properly, broke the clips and then, rather than telling me, covered their tracks. Given that I had new turn signals in a box ready for installation my blood pressure remained in check and I moved on.
I then removed the five screws holding the headlight assemblies to the car, and then swapped in new plastic worm-screw adjusters I picked up at the dealer. I was glad I did this, as the old units were kind of crusty and in some cases covered with paint, which made them extremely difficult to turn. The new units, however, turned easily.
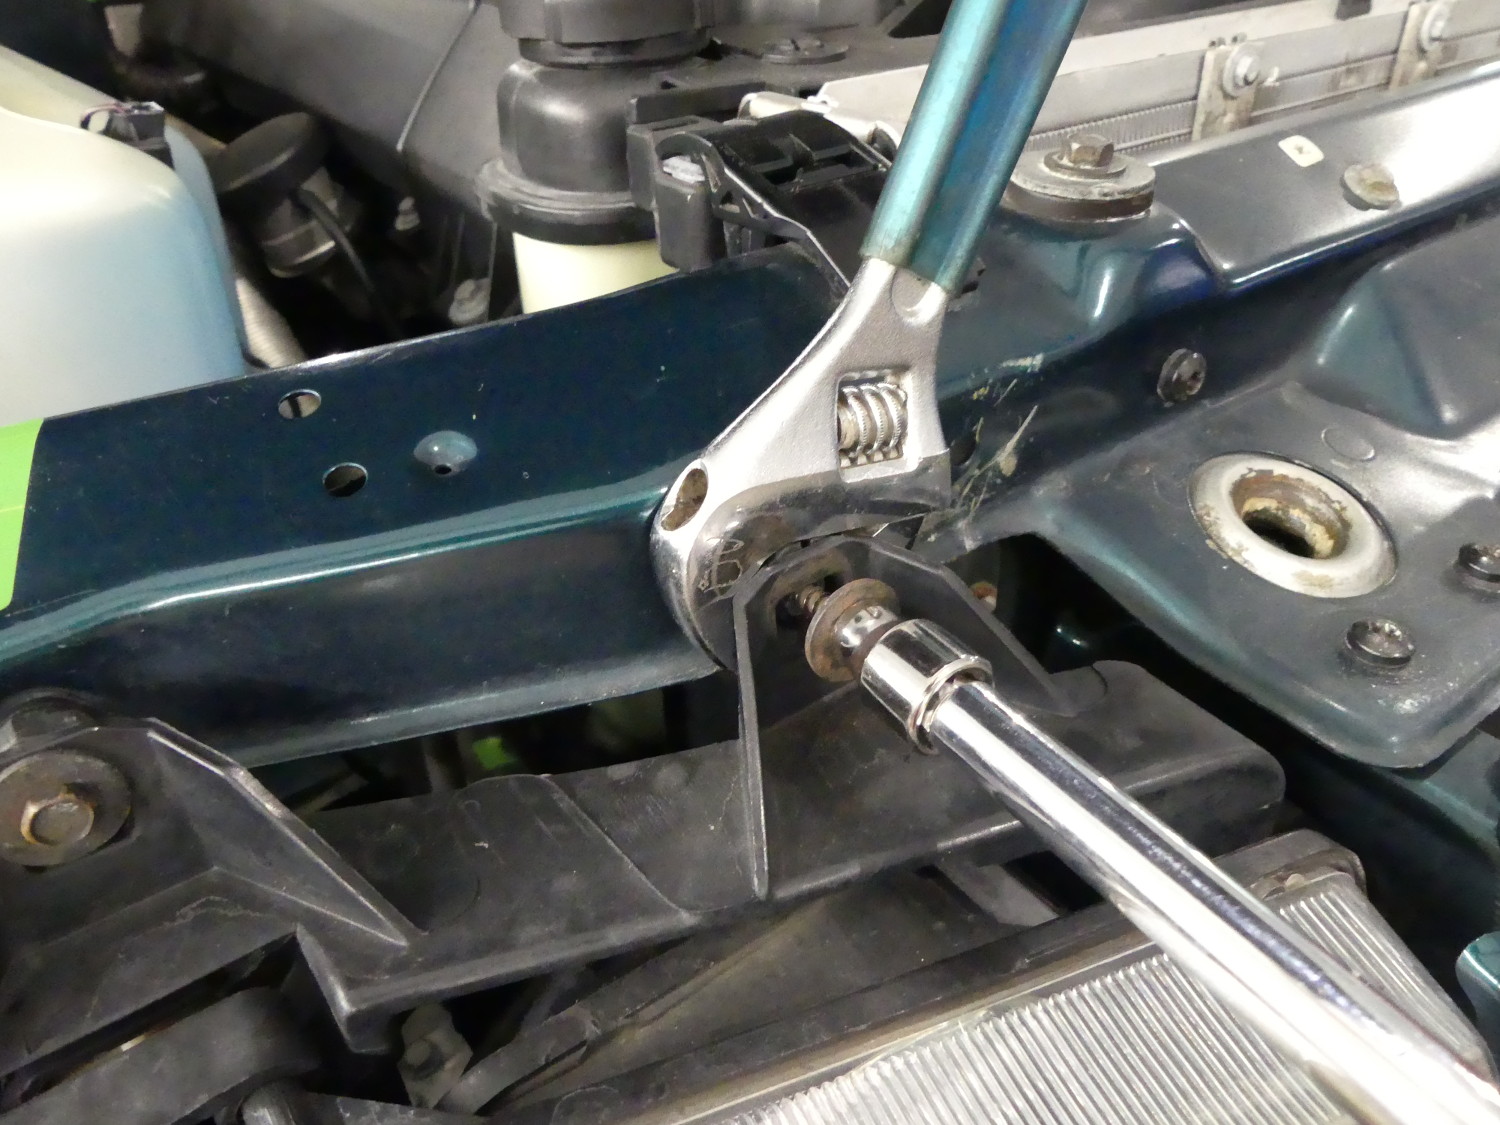 As the screws and adjusters are designed to turn together, pulling the screw out requires holding the adjuster. Here I'm using an adjustable wrench, but I could have used a 19mm open-end as well. |
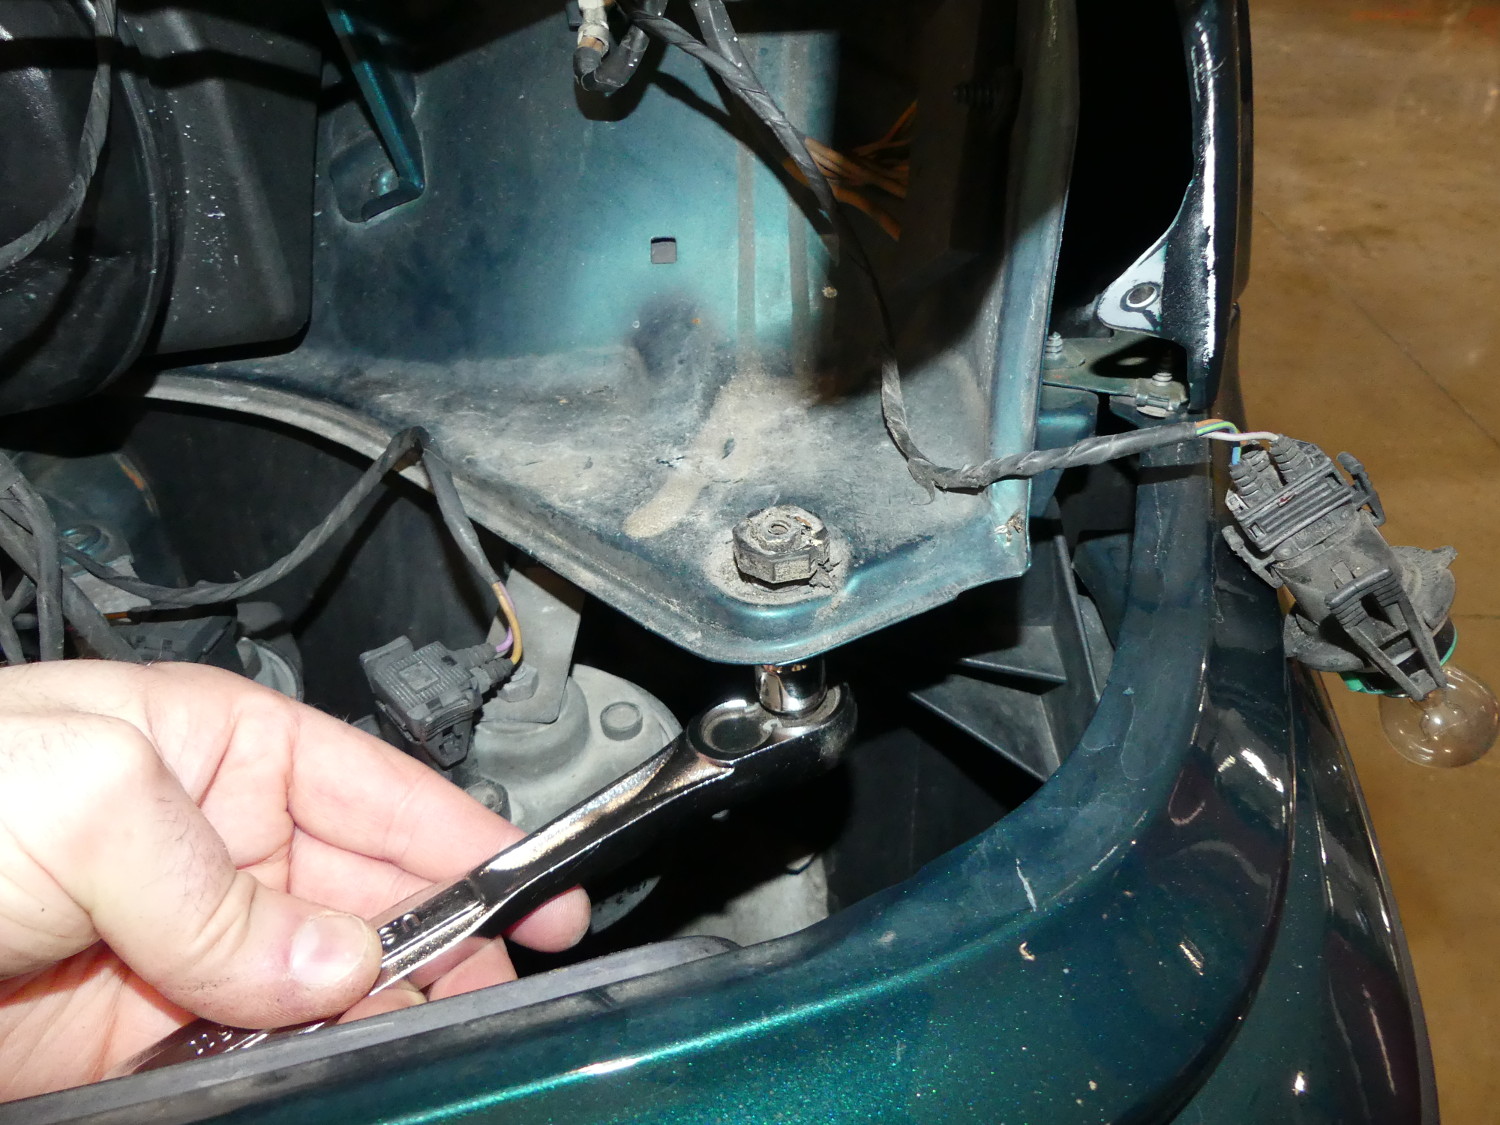 Unfortunately the 19mm end of this adjuster was sufficiently destroyed that I had to use the 8mm nut molded into the bottom of the adjuster to remove it. A small ratchet or box end wrench is needed for this due to clearance. |
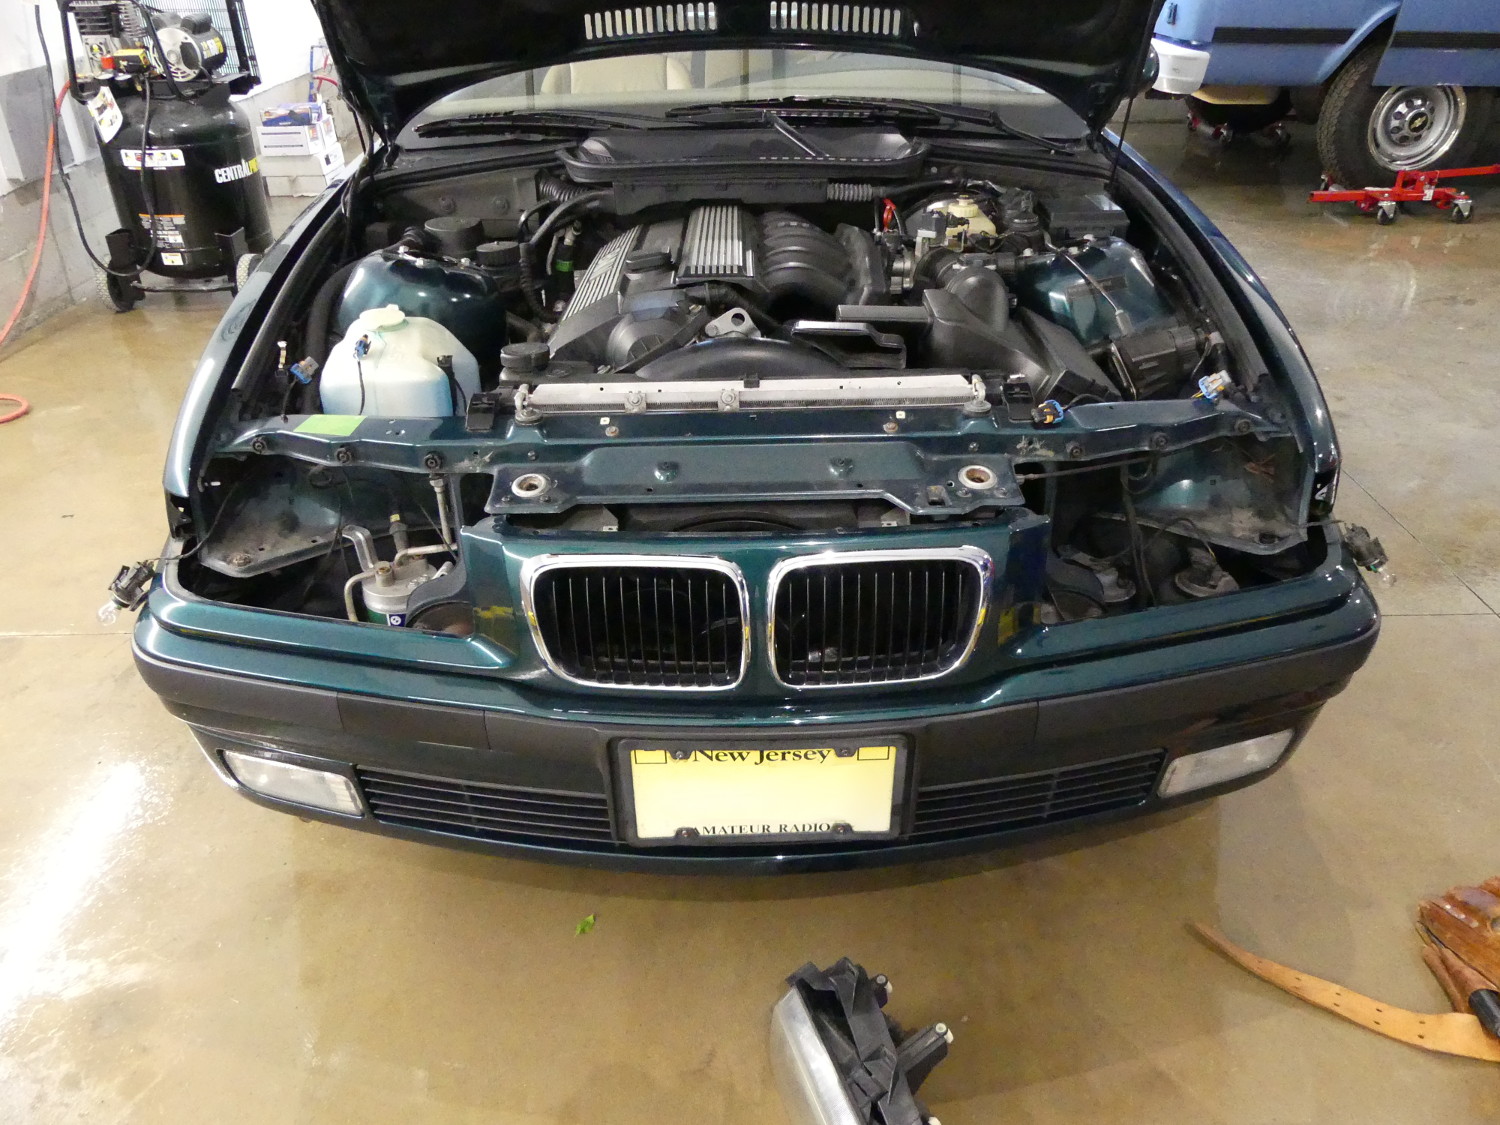 A perspective shot showing my legally blind E36. Both headlights and turn signals have been removed. The old, sandblasted fog lights are still installed at this point, but I made quick work of swapping those for new laminx covered parts later. |
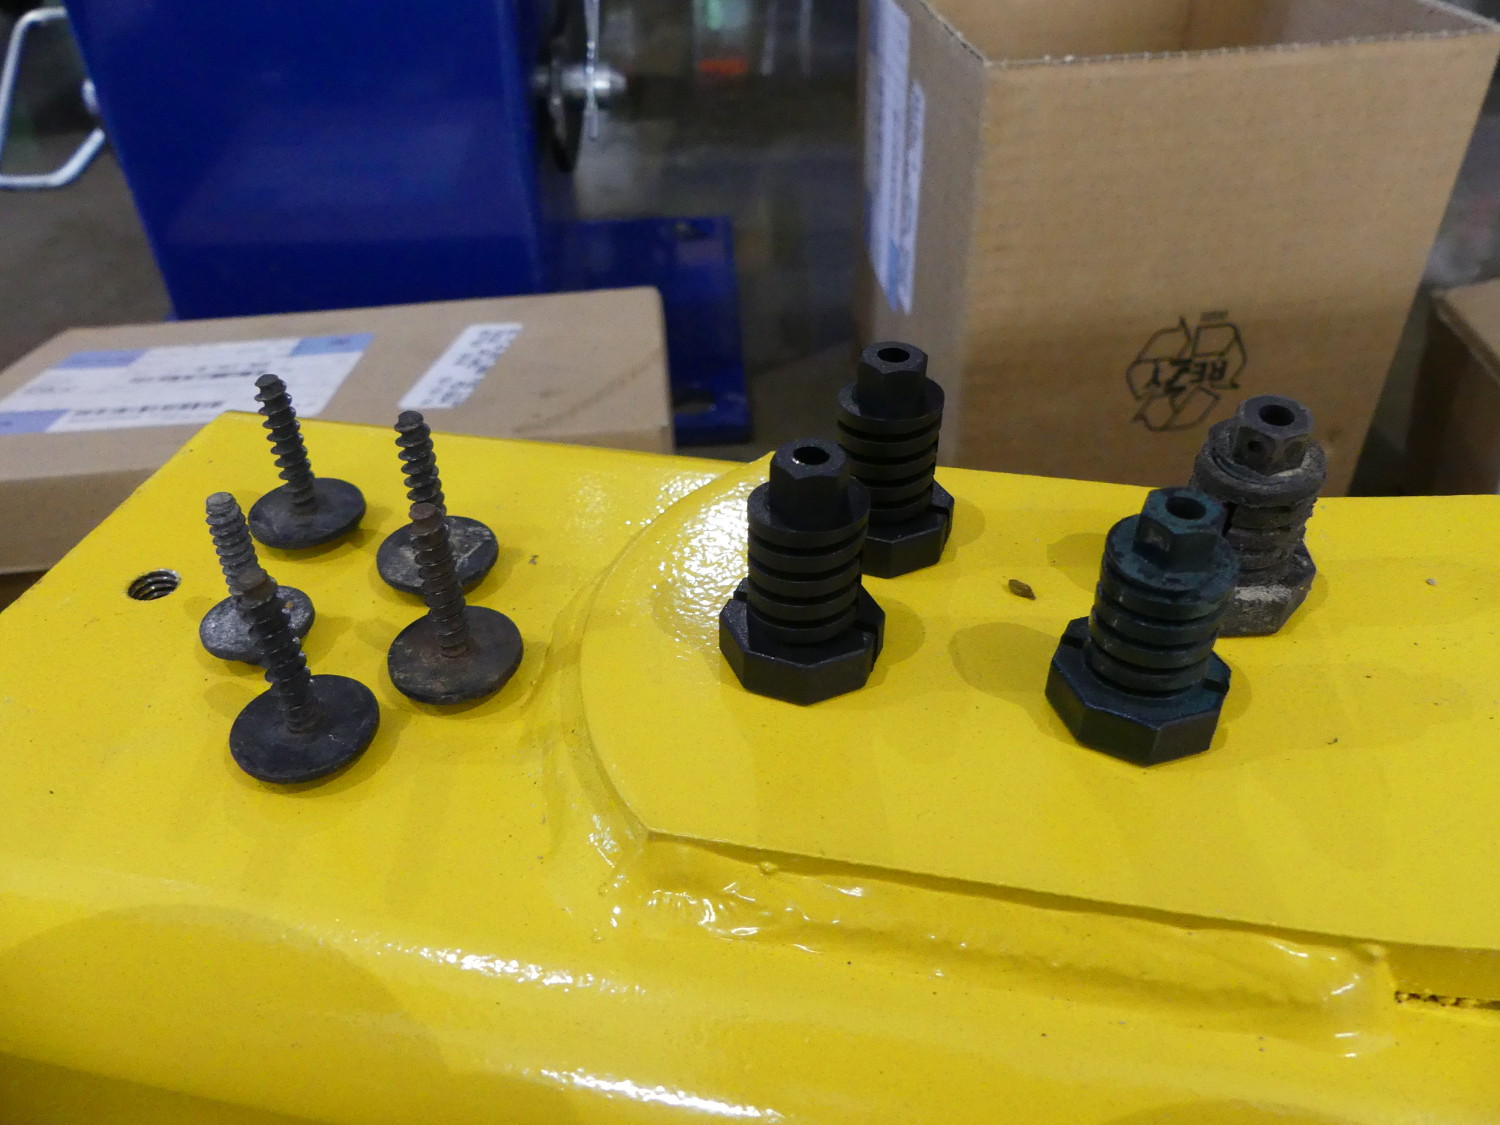 A group picture showing the five screws fastening the DOT headlights to the car (replaced with new parts), as well as a couple original adjusters and the new parts that replaced them. |
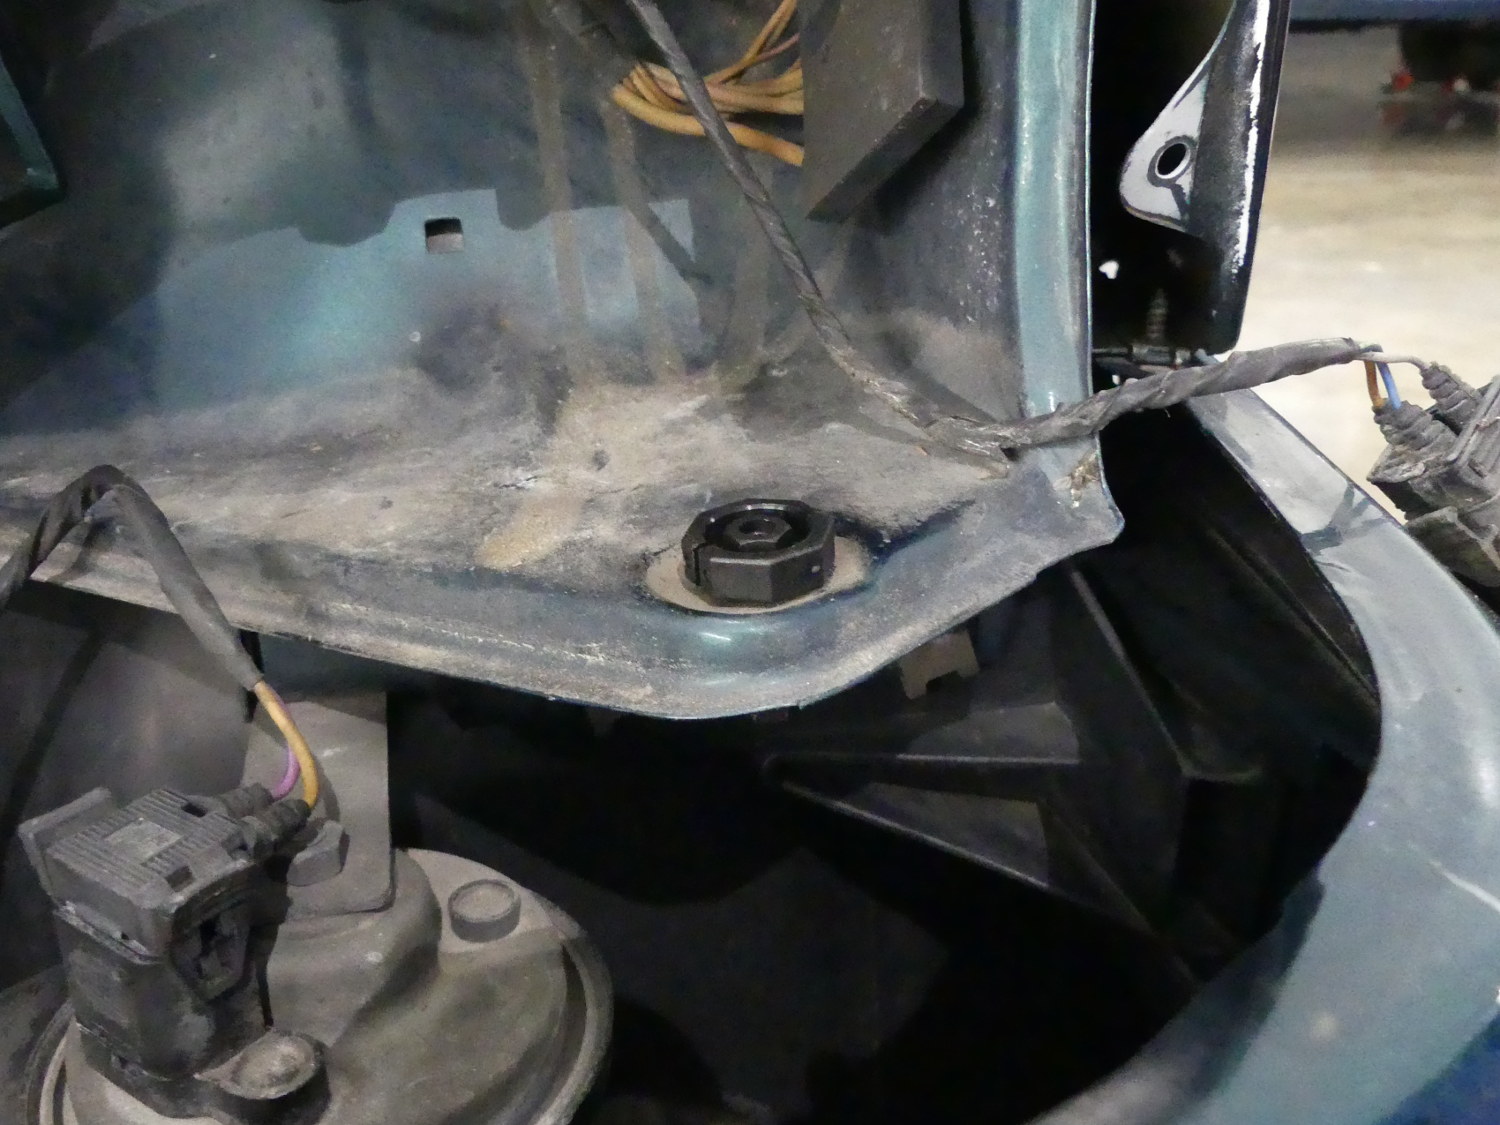
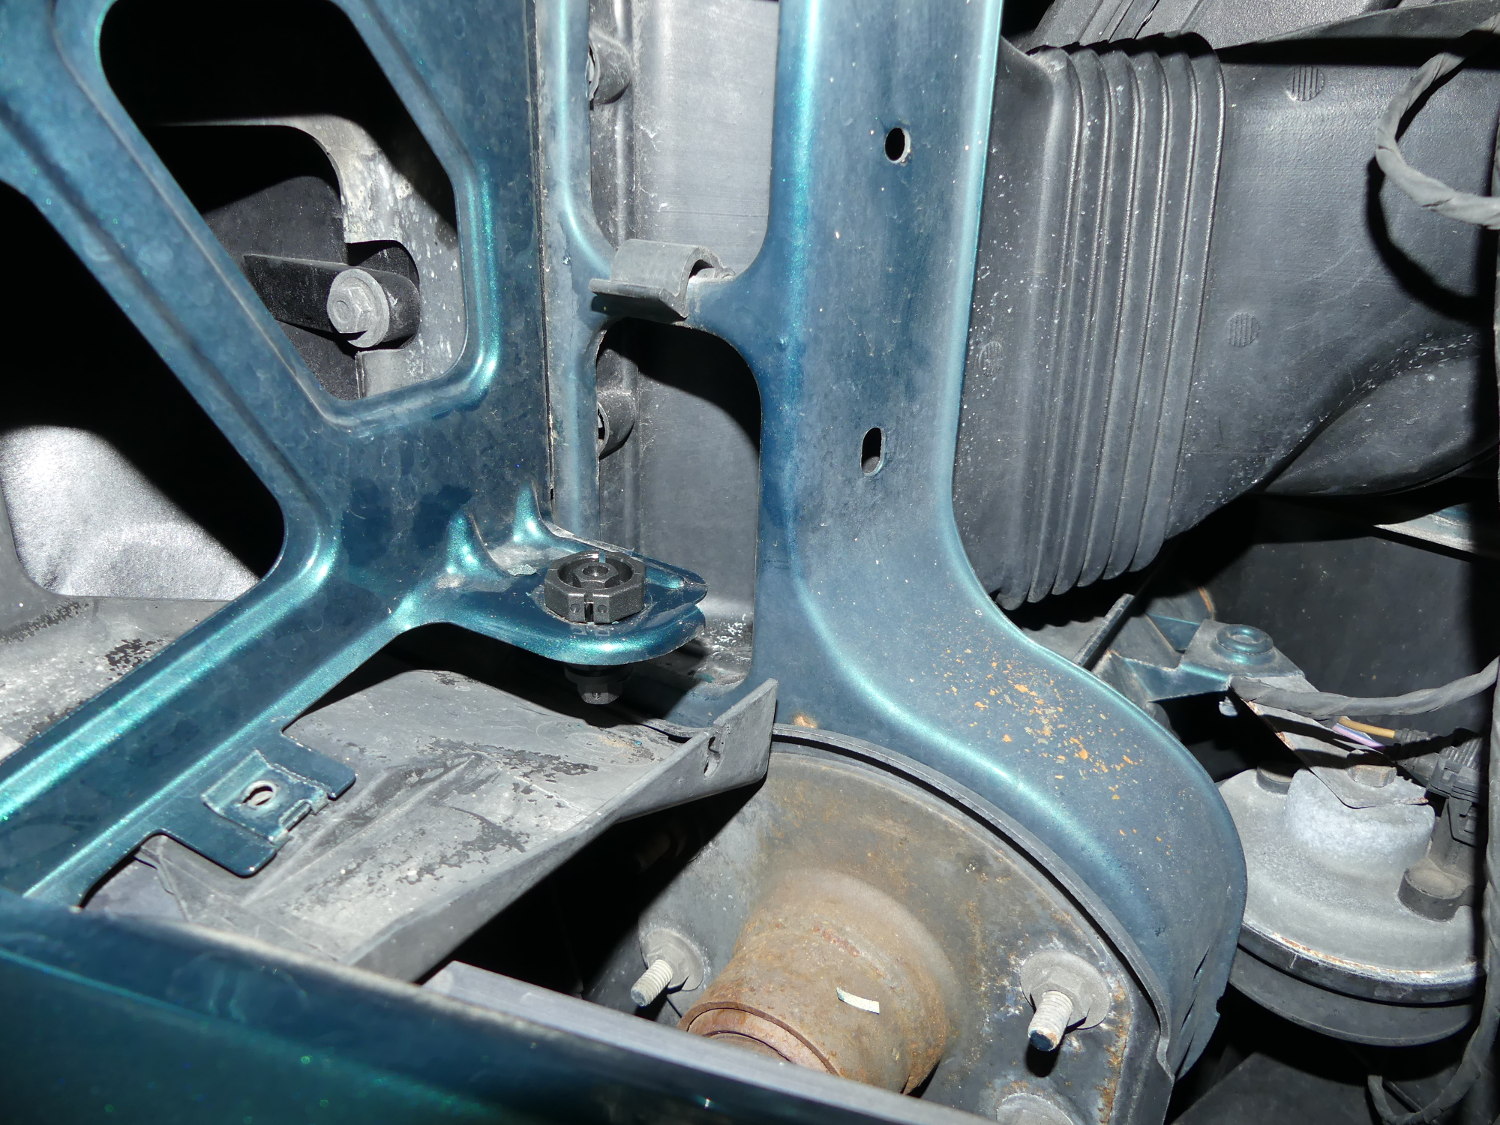 The driver side inner lower adjuster is the tricky one. Note that access to the lower 8mm nut of this adjuster requires removal of the airbox and the tube feeding it (accordion-like structure behind the body-colored support structure). |
 This new adjuster replaced a crufty one, an essential step to allow easy alignment of the headlight assembly when the time comes. |
I was forced to learn how the adjusters work on the fly because none of the DIYs I read went into any great detail. It turns out the adjusters serve as a nut for a coarsely-threaded self-tapping screw. As the screw is initially tightened the adjuster turns with the screw until the adjuster bottoms out against the body structure (or is held with a wrench). If the adjuster is fixed, turning the screw taps the adjuster. When the screw is fully tightened it secures the headlight flange to the adjuster.
The headlights will not align correctly with the body structure, nor will the beams hit their required targets with all the adjusters fully tightened so they must be loosened to some degree. At this point the screw and adjuster turn as a unit, so turning the screw counter-clockwise loosens the adjuster, pulling it upward and away from the body structure, while the screw remains tight relative to the adjuster. This ultimately permits the headlight to be adjusted within the opening in the body structure and the beams to be grossly aligned to their respective targets on the wall as well.
Complicating matters is the fact that all the headlight mounting flanges have elongated holes that allow further degrees of freedom in the adjustment process. With respect to the lower mounting screws this not only controls the vertical position of the glass relative to the body structure, but the longitudinal (fore/aft) position as well. So to keep the glass nicely flush with the nearby body structure it seems the first step is to worry about the longitudinal position of the headlight, tighten down the screws so the flanges do not move relative to the adjusters anymore, and then turn each screw (adjuster, in reality) to tweak the gap.
You'll no doubt reach for a couple aspirin when I point out that the adjusters cannot be tweaked in isolation. For example, changing the position of the upper adjusters pulls the top of the headlight in and naturally raises the beam. But at the same time, as it pivots relative to the bottom adjusters, this increases the gap between the lower edge of the glass and the body structure. Don't want that? Then you have to reduce the height of the lower adjusters, hopefully without disturbing the longitudinal position of the flanges you worked so hard to achieve. If you do get tired and/or pissed-off enough to change a single adjuster like the inner lower, you'll note that this wracks / twists the headlight such that the low beam then moves up and to the left. Not good.
Oh, and did I mention that to gain access to the lower inner driver side adjuster with a wrench the airbox and its associated plumbing must be removed? For what it's worth I've just added headlight mounting and alignment to the (thankfully short) list of stupid engineering blunders on the E36.
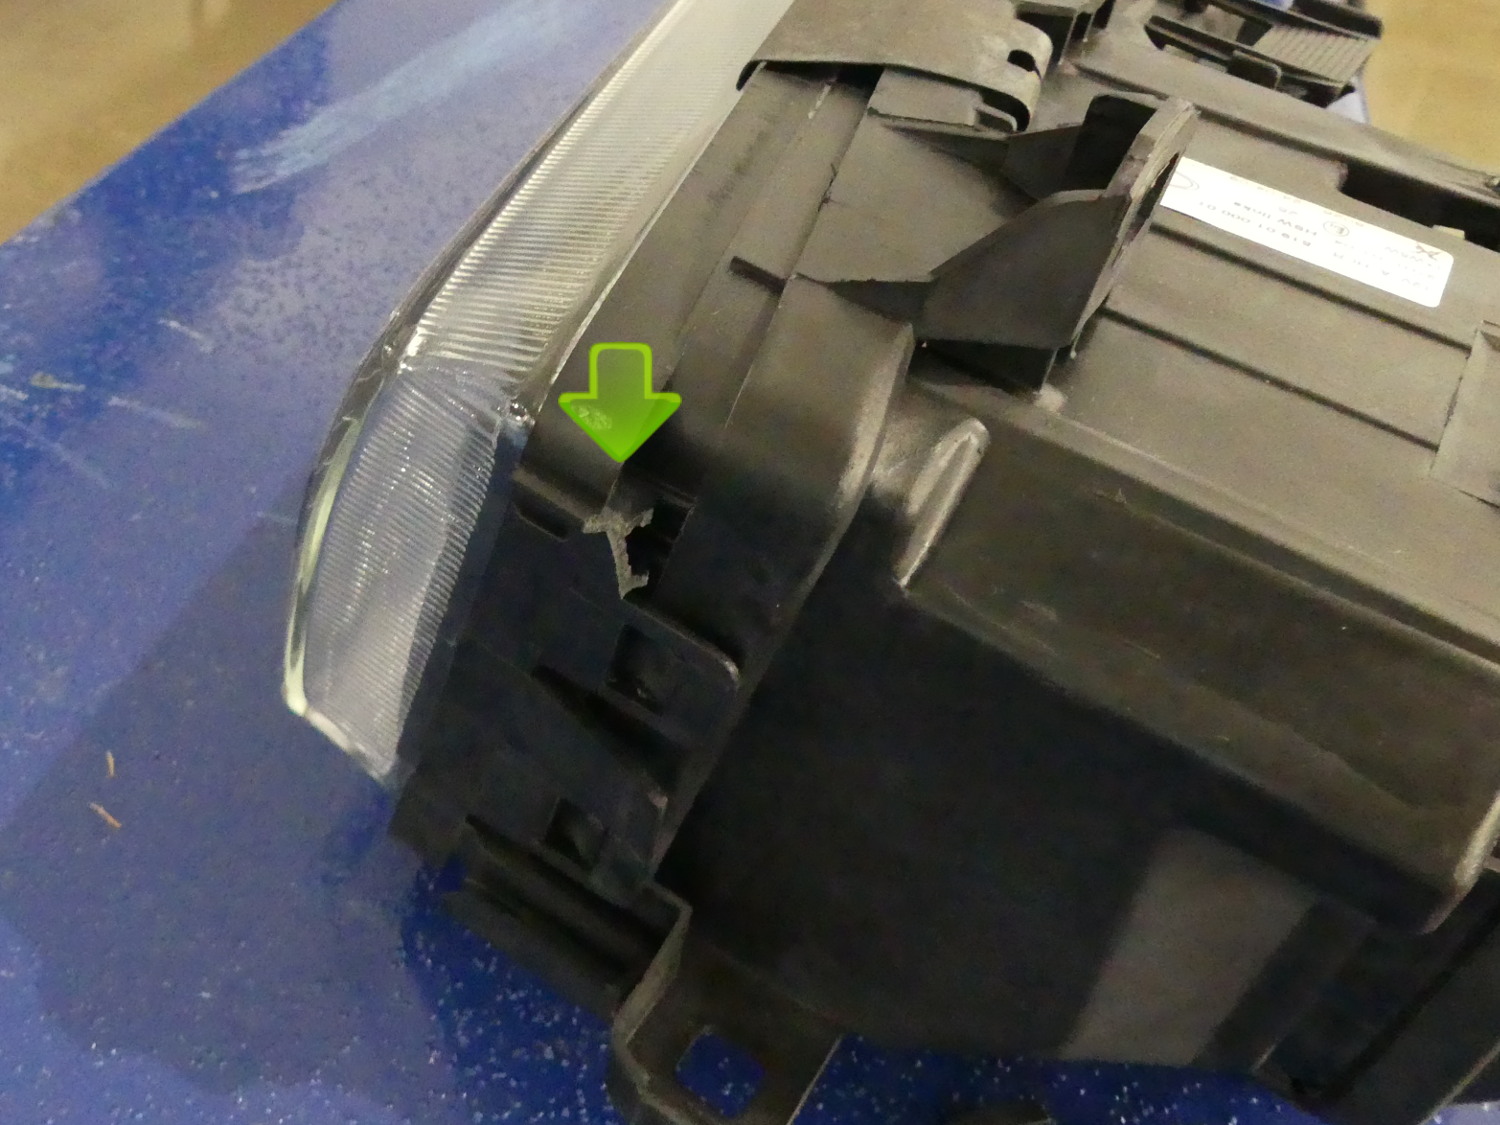 Behold the incompetence of the ZKW projector headlight turn signal mounting rail design. The rear of the rail is completely unsupported and manufactured from a shitty brittle plastic that breaks if you so much as breathe on it. Way to go, idiots. |
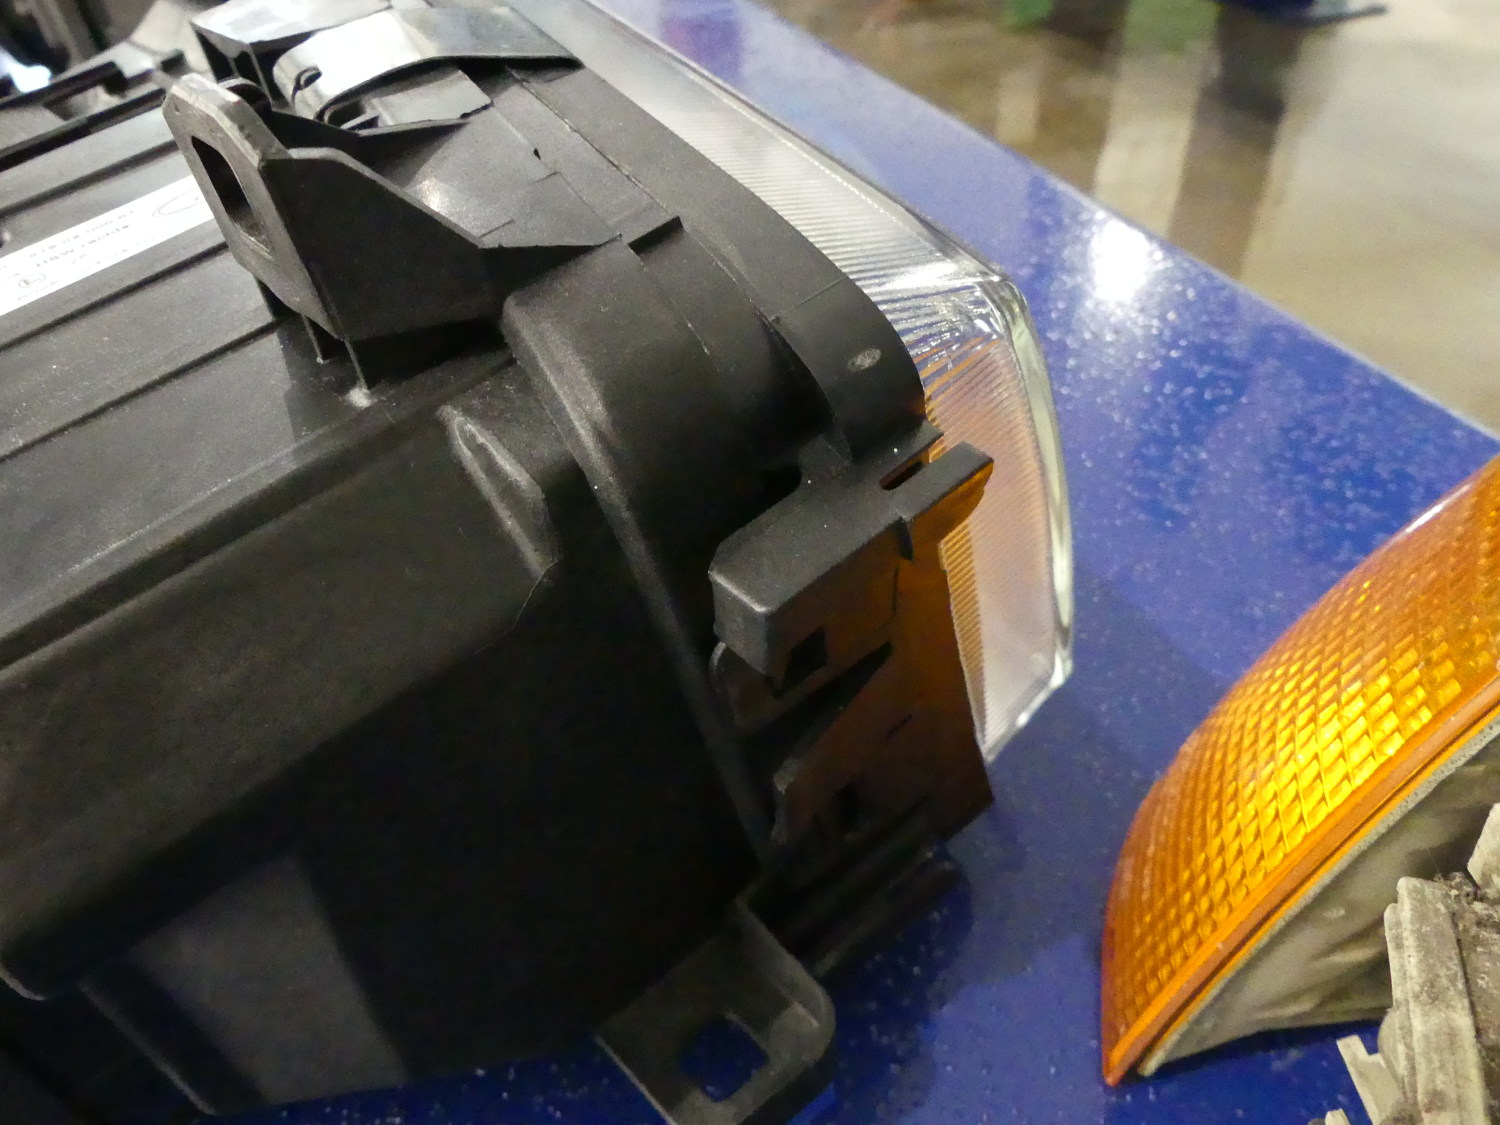 For reference, here's a closeup of a (as yet) unbroken rail. The rail is part of the glass frame rather than the headlight body, but I don't think the frame is available separately. I will no doubt confirm that shortly. |
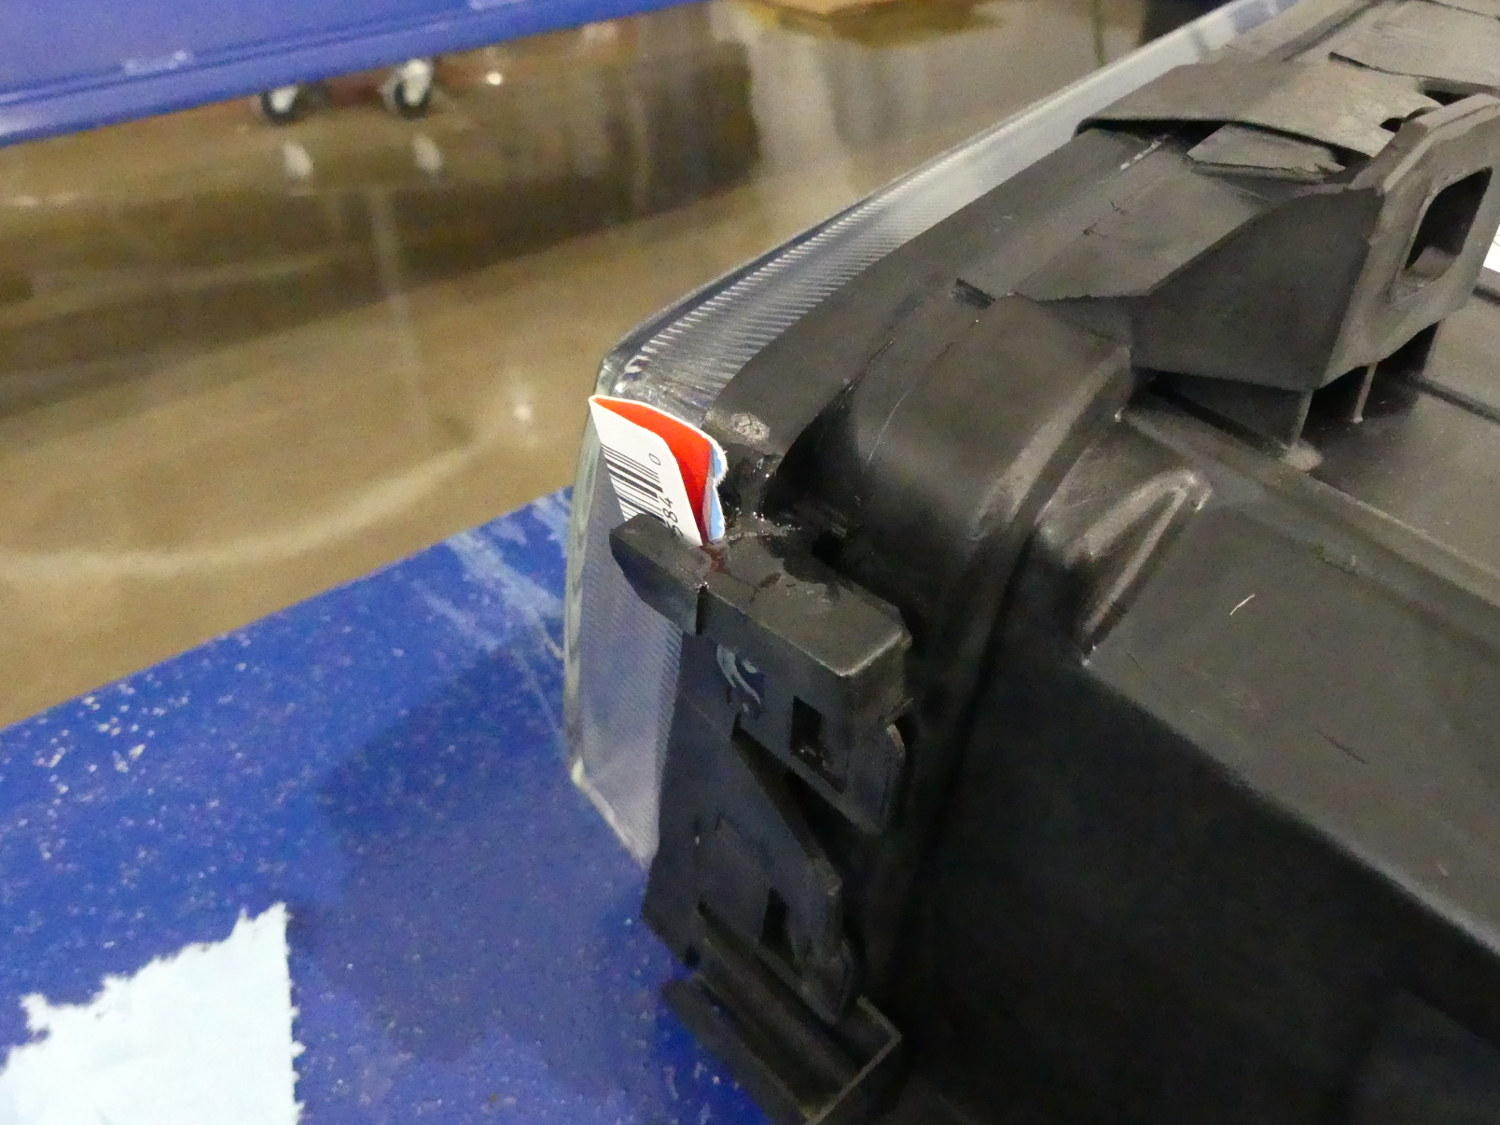 I mixed the epoxy and held it per the instructions for the full five minutes, but it was still quite weak. As the epoxy cured it tended to pull the rail in on itself so I had to rig up a spacer to prevent that. Had I not done this it would have been difficult or impossible to insert the turn signal mounting rail. |
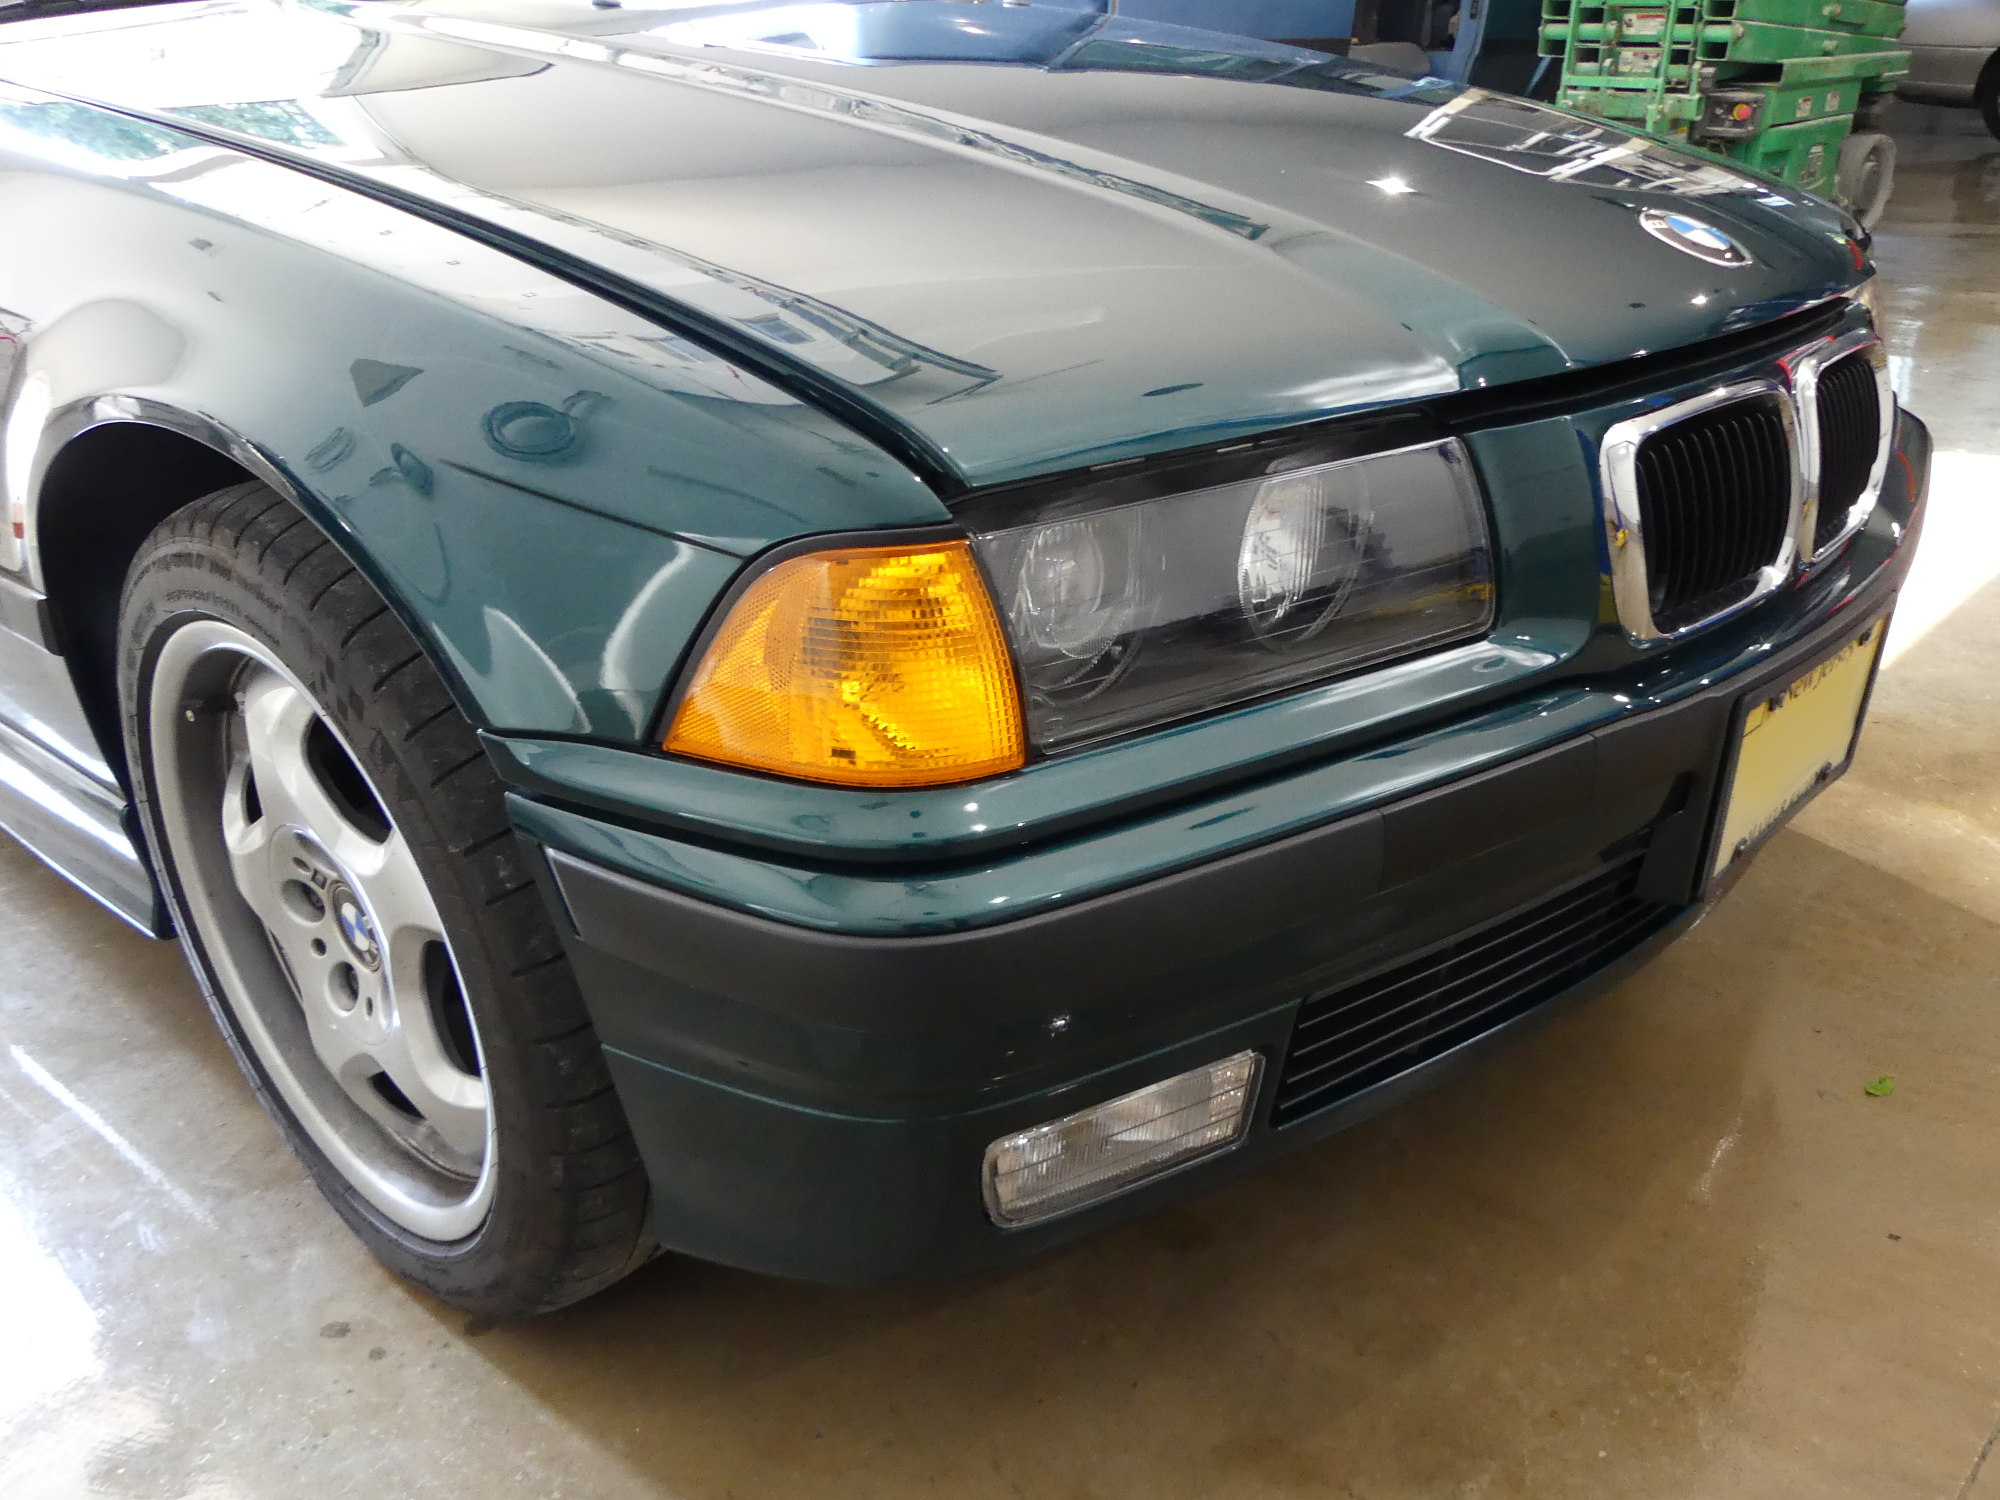
 The passenger headlight was undamaged so I was able to install it. I adjusted the headlight so it was properly framed in the body structure and it turned out I got lucky -- in this position the beam was almost perfectly aligned. |
 Here you can see the light pattern produced the first time I turned them on. I got really lucky on the passenger side and will likely not modify that further. The driver side is high and to the left, but I found this easy to tweak via the coarse adjusters. The fine adjusters I found almost worthless. |
 A satisfying perspective of the passenger headlight and turn signal. Note that the turn signal is not fully seated here because I'm waiting for new bulbs. Once I have those, I'll fully seat both signals. I like how the new foam surrounding the signals closes the gap with the body. |
When I pulled the driver's side ZKW projector assembly out of the box my heart sank. I looked in the bottom of the box and saw a piece of plastic that appeared to be broken off the headlight. A brief analysis determined it to be the top rail used to align and attach the turn signal to the headlight assembly. I almost lost my shit, since I've always treated these parts with kid gloves. The only thing I could think to do was go to Home Depot and locate some plastic-specific epoxy, with the hope of repairing the rail. I wasted a good 45 minutes on that trip only to apply the epoxy and find it still somewhat flexible after a couple hours, despite the package boasting a 5 minute cure time.
Adding insult to injury, while moving the driver's side turn signal bulb around during the initial alignment the bulb blew out and I uncharacteristically neglected to pick up new bulbs. This being Memorial Day weekend, I knew I'd have to wait until Tuesday, at the earliest, to get two new bulbs and install them. I did wind up installing the headlight and fog light assemblies in any case, mostly out of sheer frustration with the state of affairs (I demand progress even if the world is falling apart) but ultimately had to abandon the project and swap the car for the E46 so I could drive home.
The plan at this point is to obtain and install two new turn signal bulbs, attempt to install the turn signal housings, and pray that the broken driver's side turn signal mounting rail holds up. In the meantime, I'm expecting to acquire either a new lens frame (assuming they are available separately) or....yes...a second set of ZKWs to serve as both a solution for the current dilemma as well as a spares kit.
Mileage: 263300