


Sunday, July 10, 2016
GAHH Cover Update
During the disassembly of the covers I realized that BMW integrated a custom plastic piece into the covers that cannot be eliminated from the installation or an exterior trim piece that mates with this part cannot be installed. Thus, I felt it necessary to write up a set of instructions to send in with my covers and include the requirement to transfer this part from the old to new cover.
GAHH received the covers I sent in for patterning just before the holiday weekend and my contact there was kind enough to call me shortly after the holiday and let me know. In addition he pointed out that the guy who does their patterns had spent some time with them before he went on vacation for a week, and that they had received the written instructions I included with the shipment. He did not see a problem with transferring the old plastic piece to the new cover. We shall see.
Rear Seat Trim Repair
While waiting for the covers I directed my attention to the trim piece (shown as #3 in the ETK drawing). The part is made of an off-white plastic and sports two black plastic end caps, one of which was clearly glued to the trim piece. I wish I could tell you how the other caps are supposed to attach to the trim piece but when I pulled the seats out neither had a second end cap, I ultimately found only one end cap in the trunk, and that appeared to have no visible means of clipping onto the trim piece. In fact, the only thing I found on it was a dried glue residue, which makes me think that BMW's suppliers glued it on after sliding the trim piece onto the seat.
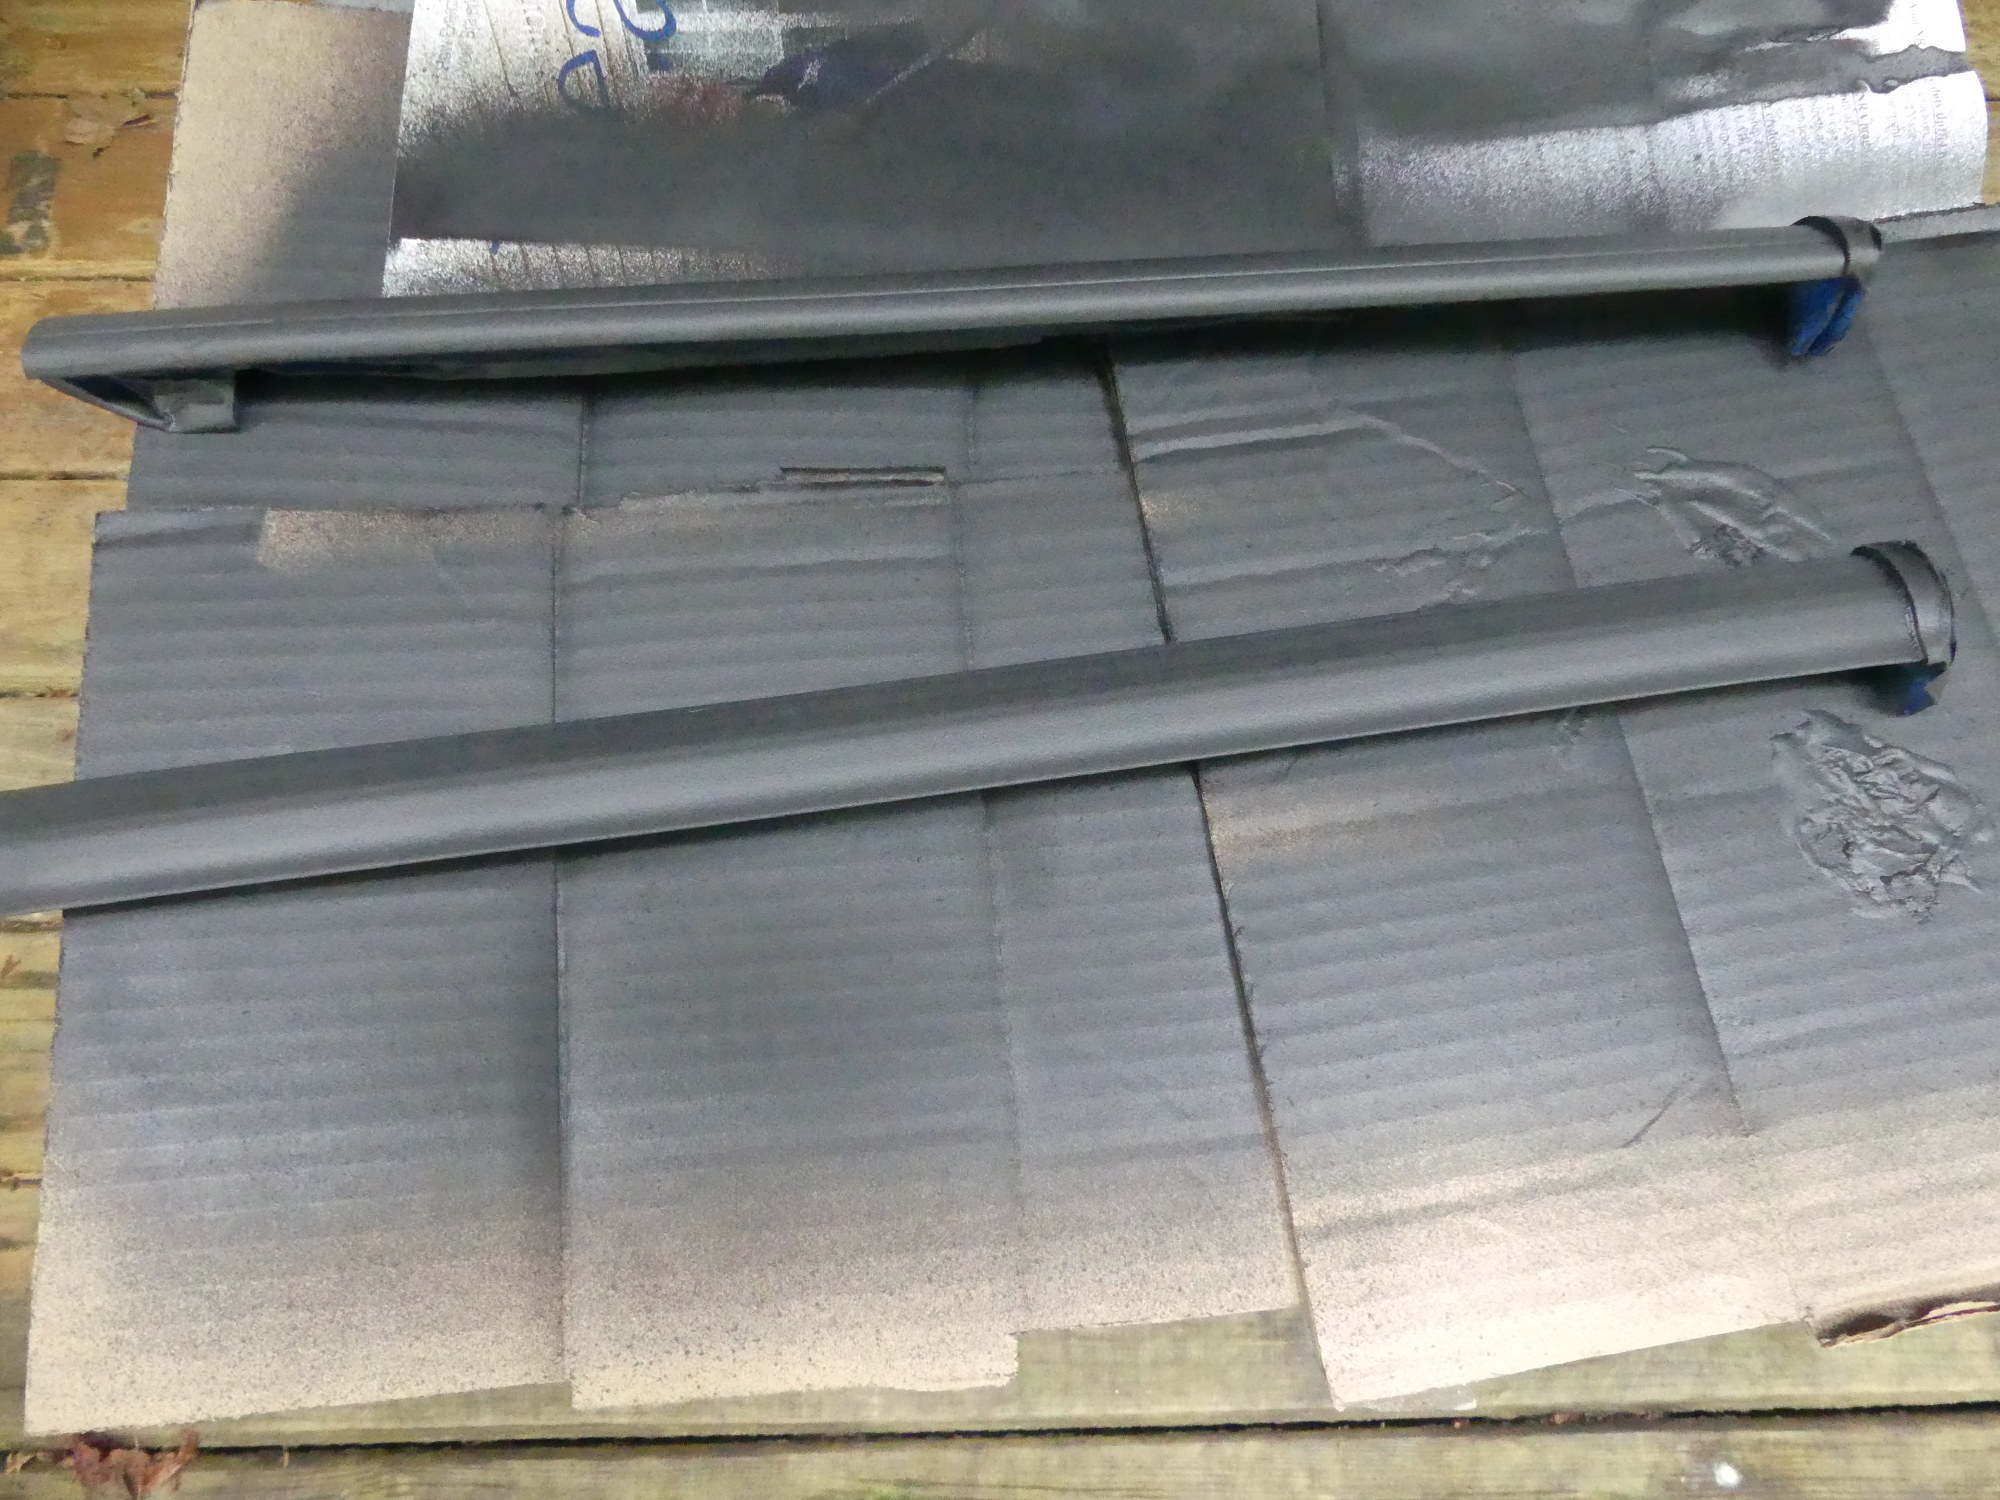
The exterior of the trim pieces came from the factory equipped with a thick (approximately 1mm) rubber film. Unfortunately, several years ago I noticed the upper portion of this rubber coating had succumbed to the effects of sunlight (UV, really) and turned into a sticky, gooey mess. This meant every time I unlocked the rear seat backs and pulled them forward to gain access to the trunk I had to be careful and not touch the top rear corner of the seat. One time I did, and without realizing it, transferred some of this black gook to the face of the leather. It took a good 20 minutes and a lot of elbow grease to remove so I vowed to do something about this. At the time the only solution I could think of was a piece of black vinyl electrical tape but this too eventually became compromised by sunlight and made a bad situation worse.
A closer inspection of the parts revealed cracks several inches in length that had started at the top of the trim piece and progressed into a line that molded into the trim. I have no idea why this mold line exists, as it significantly reduces the overall thickness of the plastic in that area and thus compromises the strength of the part. I quickly realized the only possible cause for these cracks: my habit of returning the seat backs to their upright and locked position by pushing them back and allowing them to lock under their own weight. Big mistake. Pro tip: if you own an E36 with the split rear folding seats always latch the seats by smoothly returning them to the upright position and pushing gently rearward until they lock. Don't just "drop" or "slam" them into place. You'll break these pieces. In any case, my first instinct was to replace these trim pieces with new parts but I quickly learned that, like most of the interior parts of the E36 at this point, they were no longer available. So that left one option: repair.
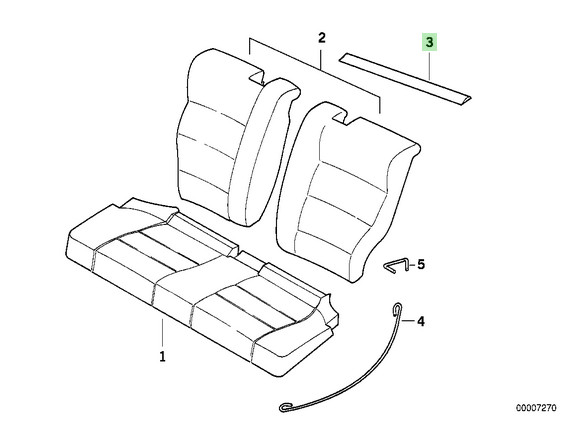 The trim piece I'm being forced to rework is labeled as #3 in this ETK diagram. Tip: Everything depicted on this diagram aside from the hog rings is no longer available. Enjoy your restoration! |
 Here I'm in the process of applying six coats of Plasti-Dip to the exterior of the trim. I carefully masked off the rail underneath the piece to ensure these would be easy to reinstall. I also masked off the endcaps. |
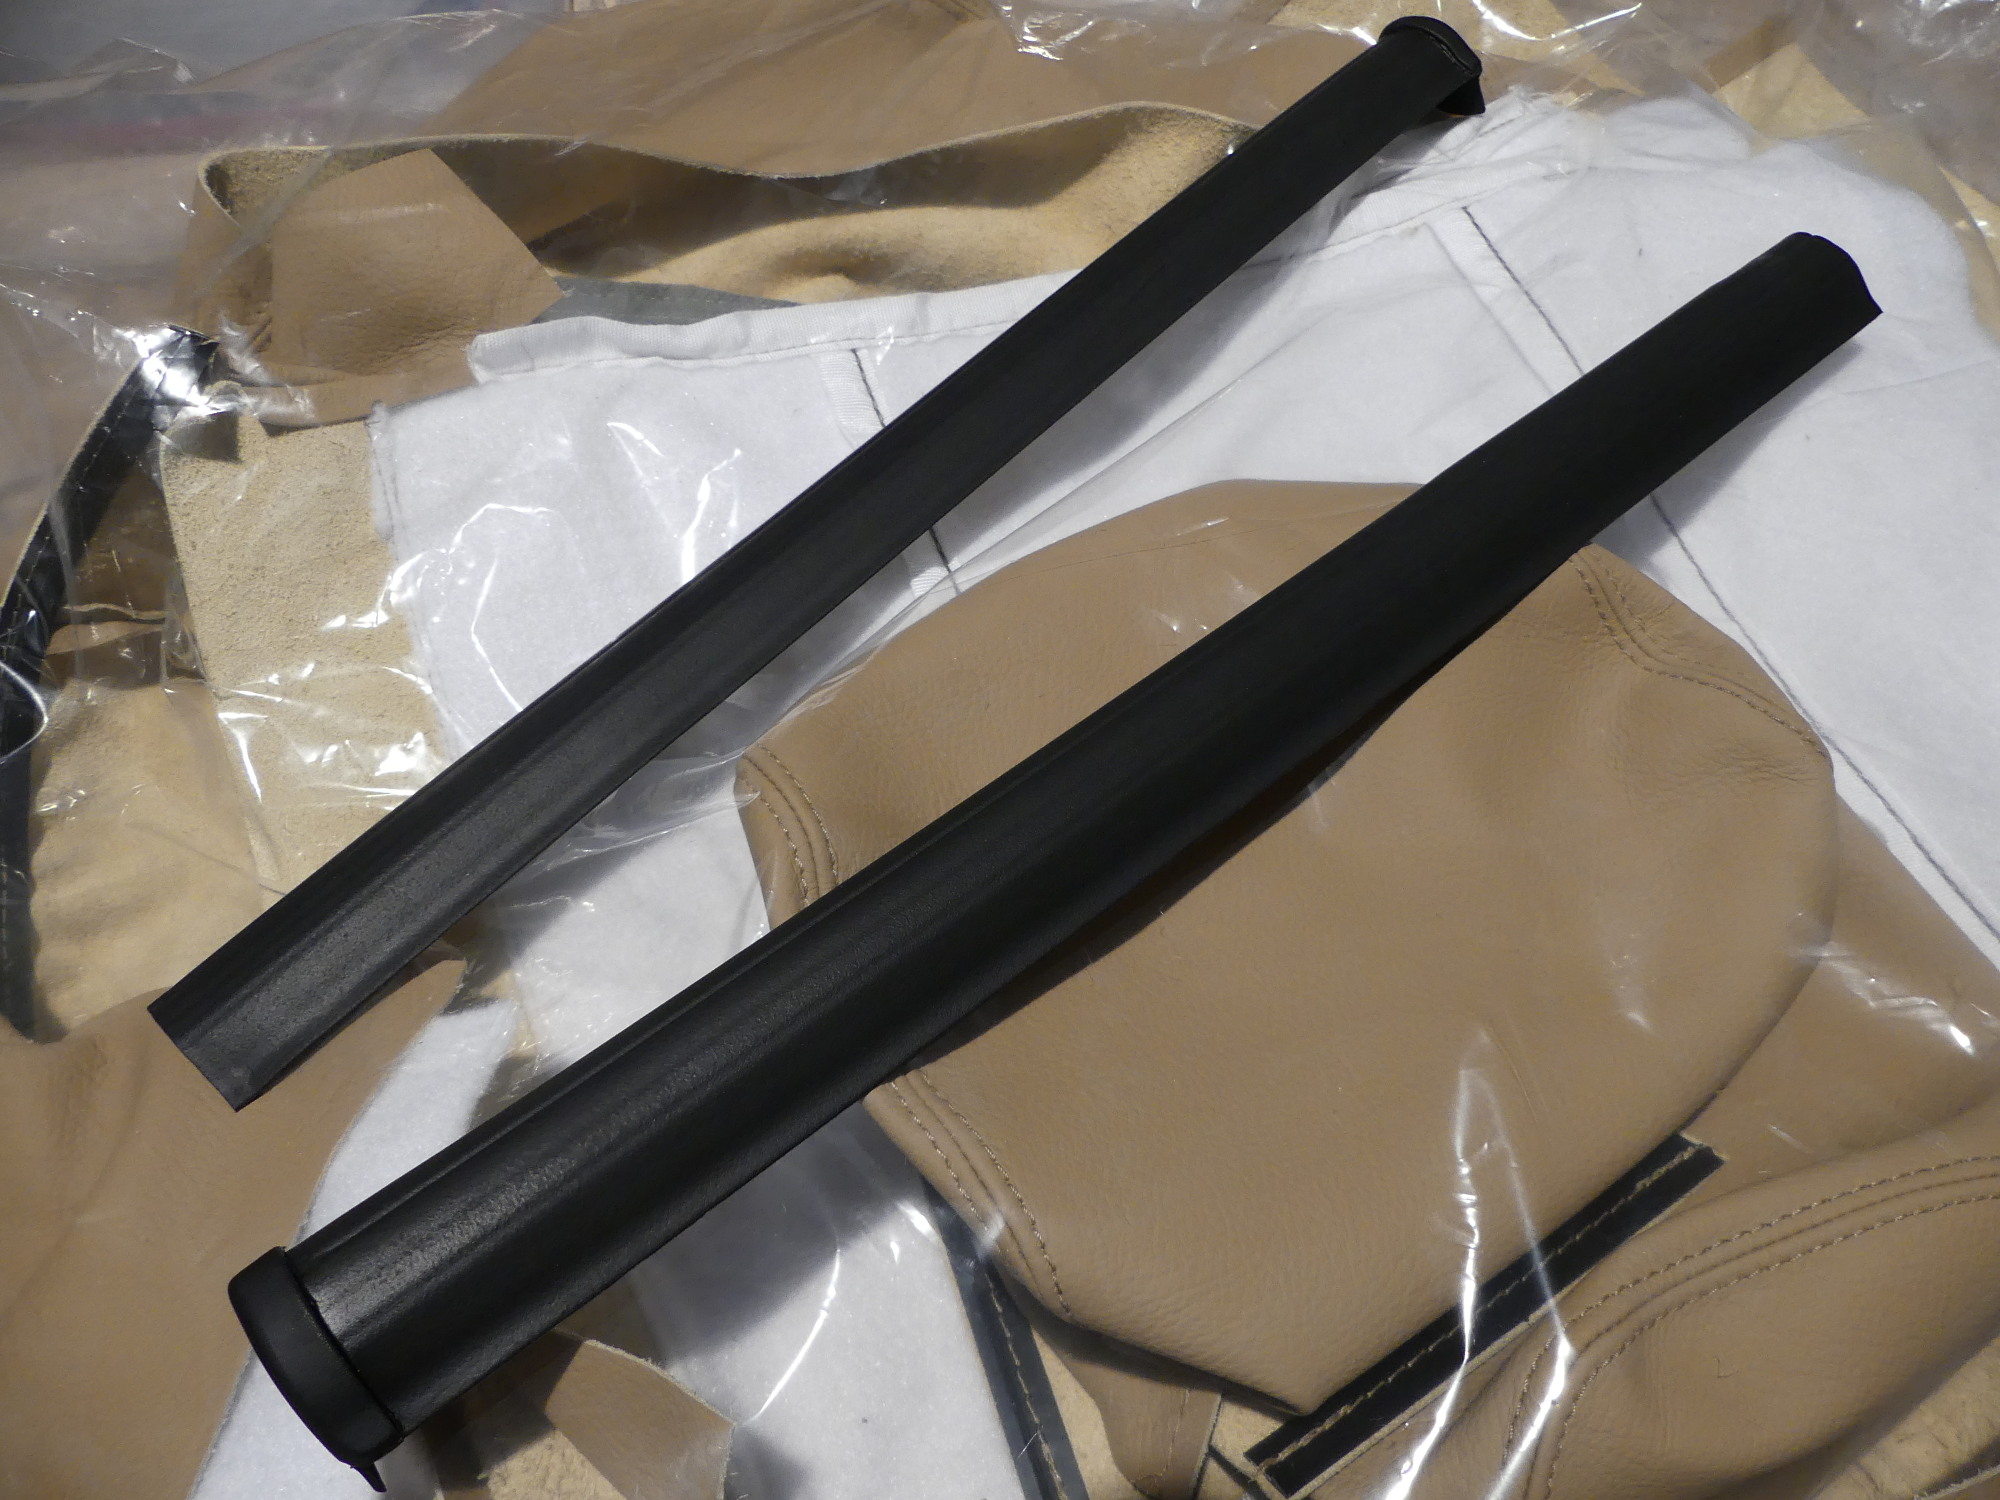 I used a razor blade to ensure a clean break between the Plasti-Dip and the end caps and this is the end result. These look brand new and are ready for installation when the covers arrive. |
I began by trying to remove the rubber coating and found the lower portion of this material (that was not exposed to UV) was easily removed. It peeled away relatively easily, sort of like Plasti-Dip does. In fact, this is what gave me the idea to use Plasti-Dip in this project, but more about that later. The upper third of the coating was another story: it was like a thick adhesive paste. After some experimentation I decided to position the part over a small garbage can and use a putty knife to remove the material. It stuck to everything it touched, including the knife, but I was able to remove the bulk of the material in five minutes or so. A bunch of the material remained behind the the form of an uneven film so I decided at this point to transition to a solvent.
I have found Goo-Gone to be good at removing lots of....well...goo, including the relentless adhesive left behind from inspection stickers, but it did nothing here. I went into my lab in search for acetone. The closest thing I found was the last of a 50/50 mix of acetone and IPA (Isopropyl Alcohol) I once used to clean flux from printed circuit boards and this did the trick. I used a good amount of the mixture and some blue paper towels to remove the remaining film.
I then applied a piece of blue painter's tape to the exterior face of the parts where the cracks occurred to keep the pieces aligned, mixed up a batch of 5 minute plastics-compatible epoxy (same stuff I used to repair the ZKW headlight assemblies) and applied it while I mounted the components with tape to the work surface at the right angle to ensure the epoxy self-leveled over the cracks. After 4-6 hours I found the epoxy fully cured and ready for prep and paint.
I began by using some sandpaper to smooth some of the epoxy that had oozed through the crack and then used a Scotch-Brite pad to promote adhesion, after which I applied a couple coats of Krylon Fusion Flat Black. The directions indicated that while the material would be dry to the touch in an hour, full "chip resistance" would not be achieved for seven days, so that's how long I waited to continue with the next step: several coats of Plasti-Dip.
The Plasti-Dip instructions indicated that a minimum of 30 minutes should elapse between coats so I decided on an hour. Six hours later with six coats applied I brought the parts inside to fully dry. The interesting thing about Plasti-Dip is while it applies with a stippled appearance it quickly self-levels into a relatively smooth surface. So at the end of the process I had a smooth and thick rubber coating on the parts that looks every bit as good (if not identical) to the factory rubber coating. Total time invested in these parts is probably 2 hours a piece. Are you sure you want to restore an old car?
Mileage: 263700