


Sunday, July 31, 2016
Leather Installation Begins
After a delay of about three weeks GAHH finally delivered the new rear seat covers. A couple weeks ago they requested I send them the covers I hadn't already sent them so that various parts made of unobtainium could be transferred from the old covers to the new ones. A week later they let me know all of the covers were done.
Rear Headrest Covers
I did have a couple issues with the headrest covers and had to modify them slightly. I'm not sure why, but the black plastic retaining strips sewn onto the cover were a bit too long so I had to carefully cut the plastic back about 1cm on the ends to prevent the plastic from causing an unsightly ridge in the leather near the lower sides of the headrests. As this plastic material was not in direct contact with the retaining clips in the plastic slot and thus not serving any purpose I saw no harm in doing this.
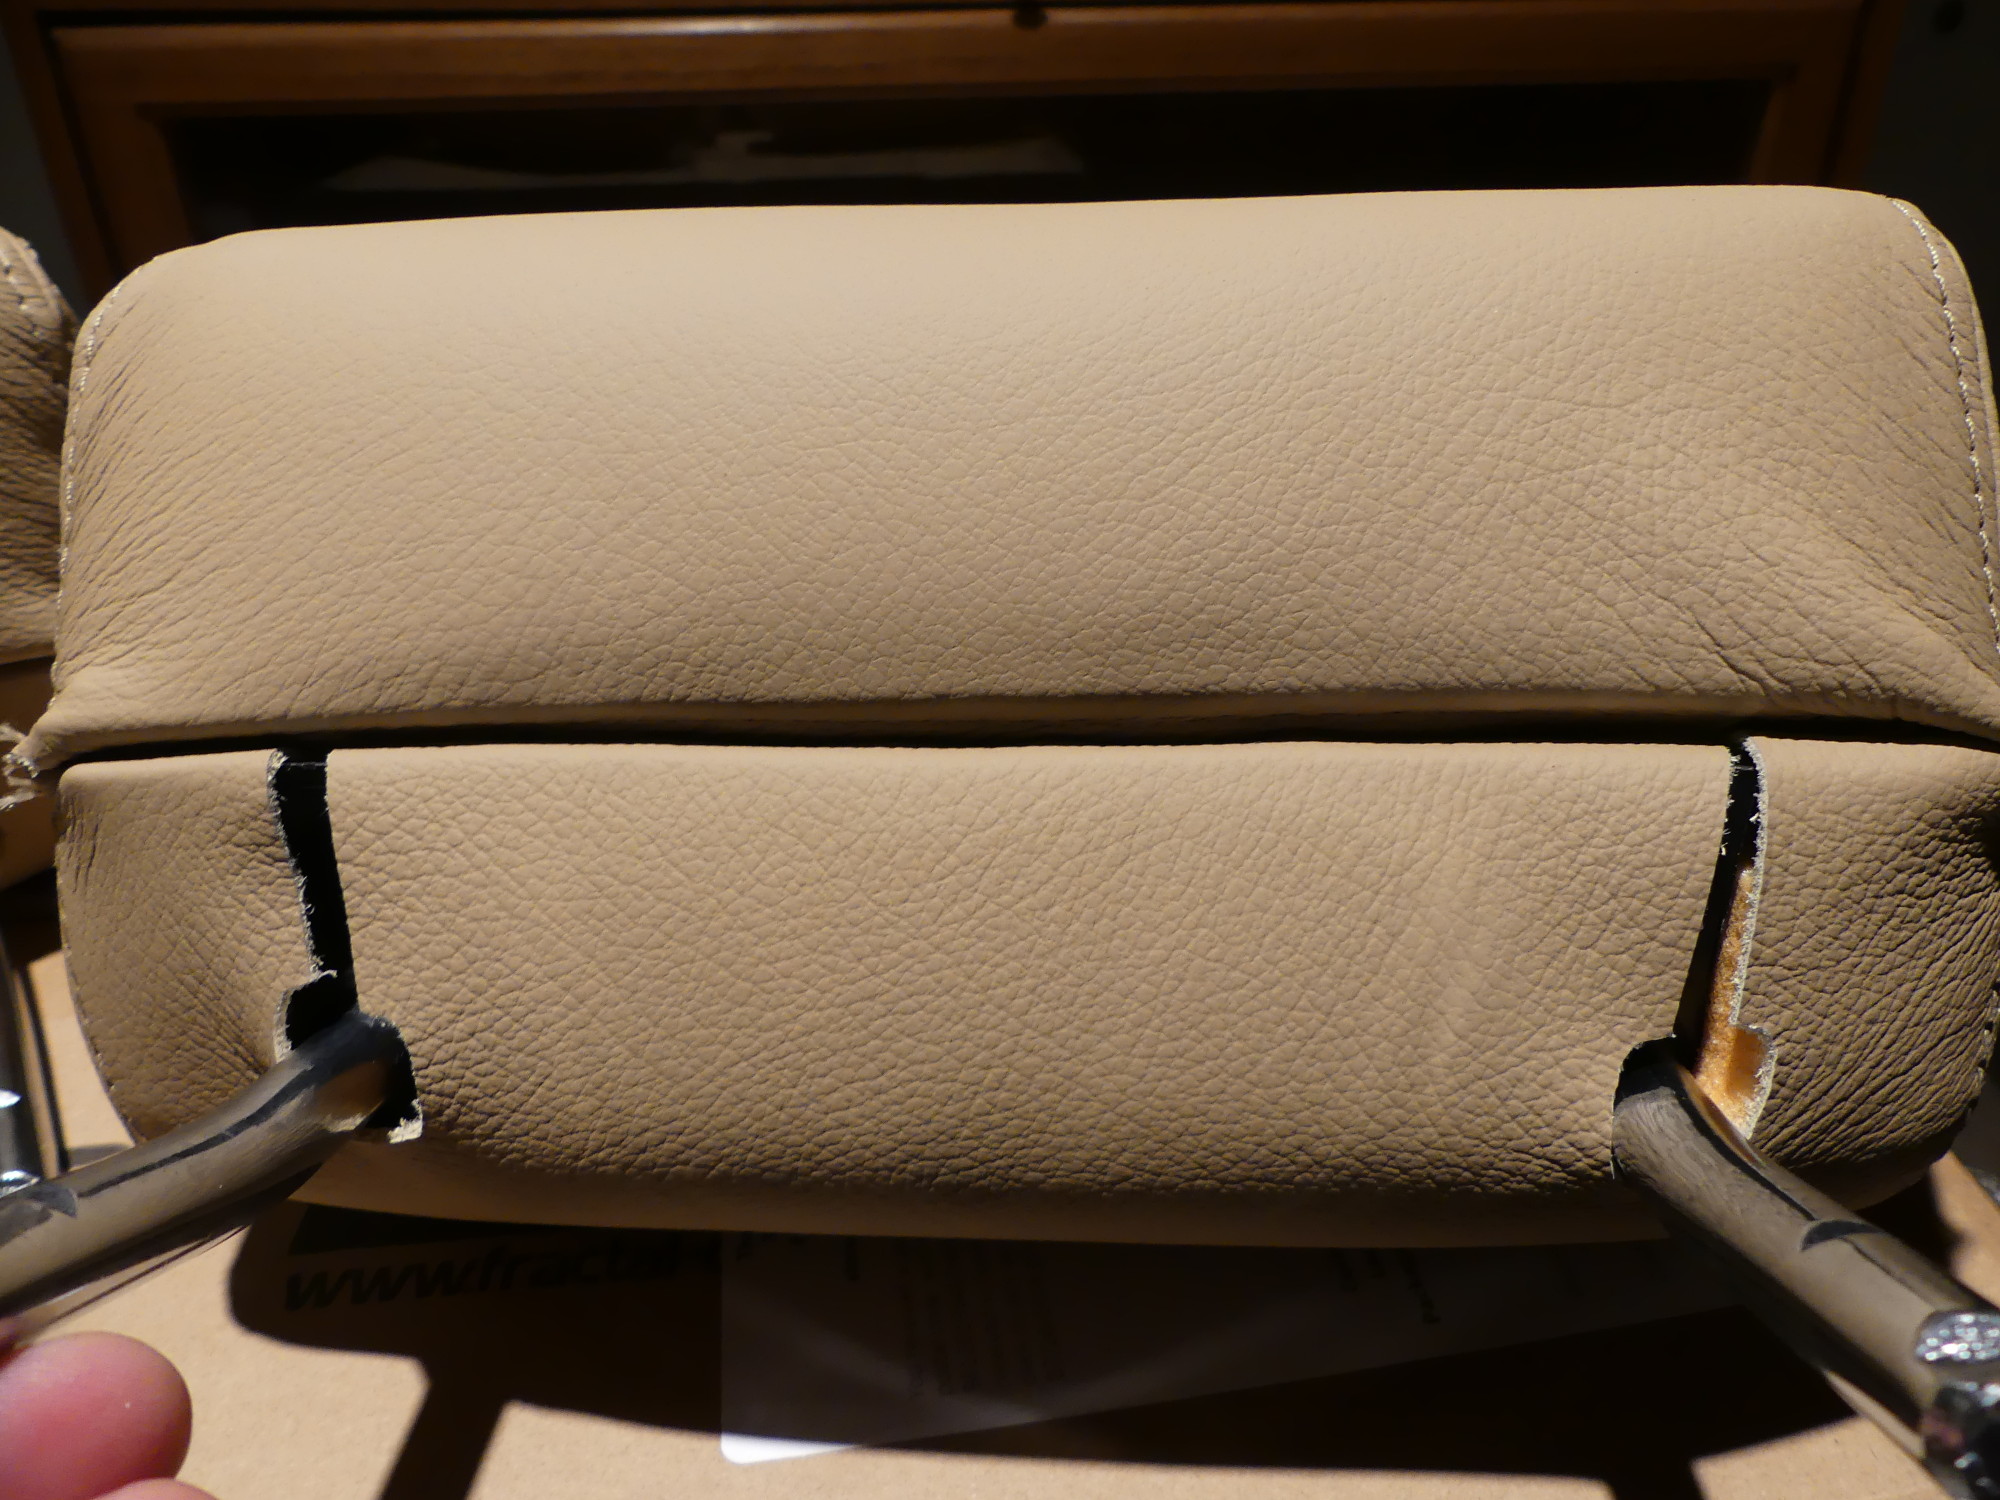 A closeup of the bottom of one of the headrests following installation of the new cover. This is the better of the two covers. The first I did I managed to crack the slot retainer so it isn't as tight. |
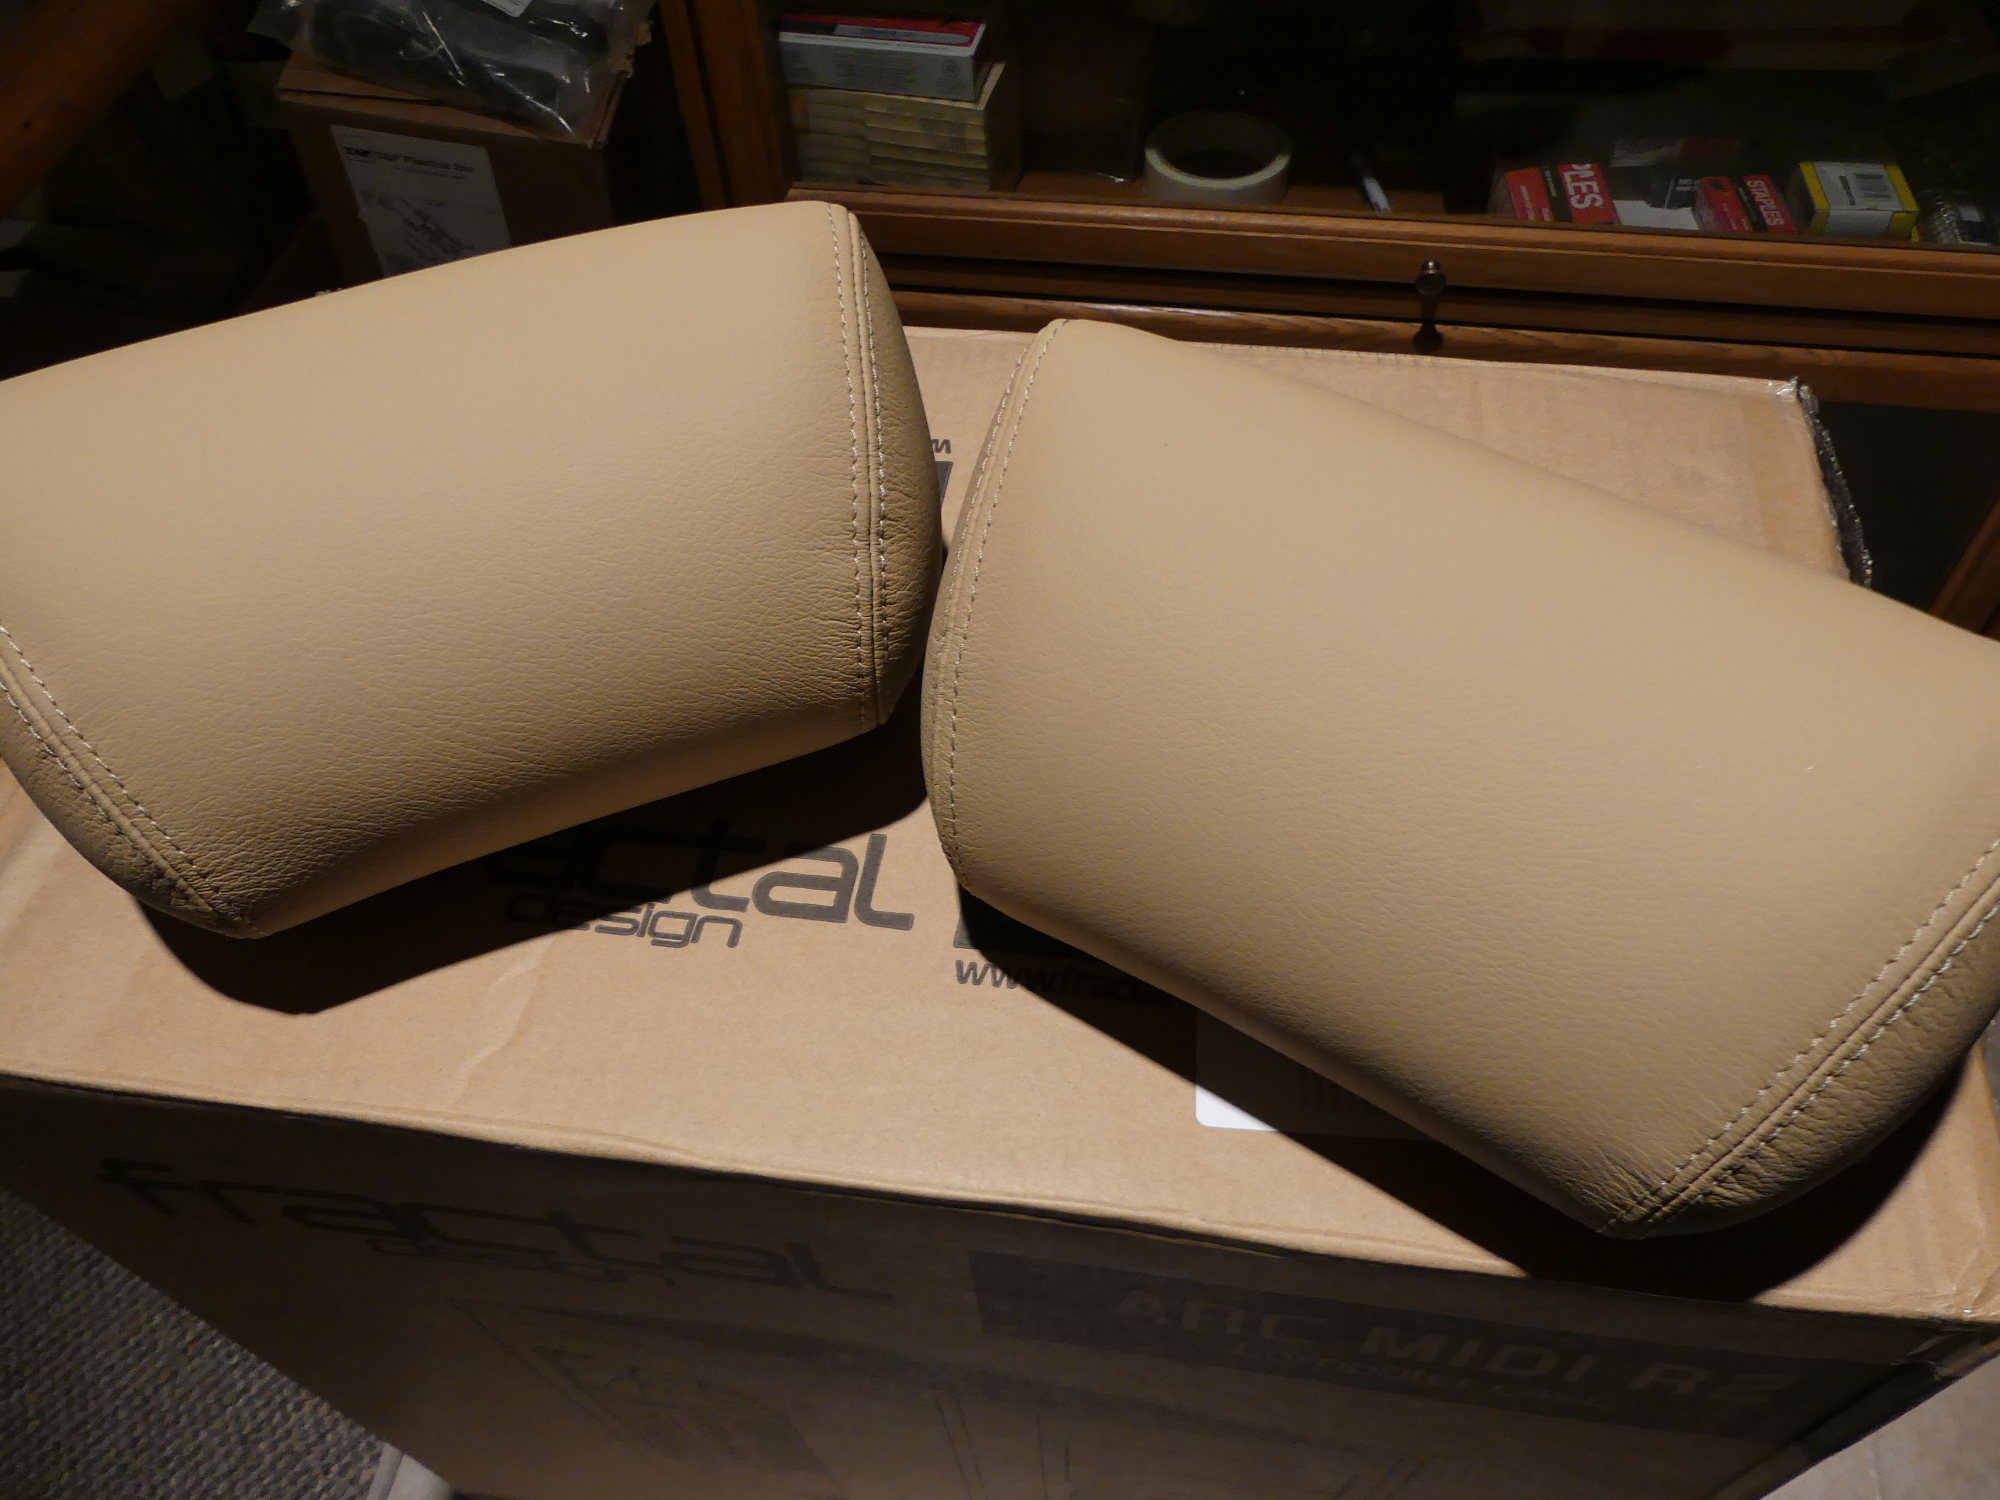 Both covers do look at lot better from the top. The leather is nice and soft, while the original leather cover was only soft on the bottom. The top was very hard, almost like thin cardboard. |
 The two hog rings on the far side closest to the top require use of 45 degree offset pliers as the straight units won't fit because they hit the near side of the bolster. |
The hardest part of this job was getting the foam into the cover. This took me about 10 minutes for each headrest, as I needed to make sure the headrest cover was oriented correctly before I risked installing the flaps otherwise they might not meet symmetrically over the slot, which would require removal and subsequent risk of damage to the clips in the slot. Sadly, on the first headrest I managed to break one or two tabs off of the weak part of the slot as I sent the plastic retaining flaps home. Both covers seem adequately secured to the headrest. If I notice them loosening up I could always get some thread from GAHH and sew them closed or perhaps put a dab of glue here and there just as the factory pieces used.
Rear Bolsters
With the headrest covers out of the way I began work on the bolsters. Although I had assumed that the bolsters would be converted to use the white fabric tubing and support-rod approach to fasten them, I pulled the covers out of the box and was pleasantly surprised to see that GAHH was able to migrate both the J-channel and gray fabric with black plastic piping to the new cover. This made installation identical to the original factory cover. I was also pleased that they paid attention to detail -- when moved over to the new covers the gray fabric was properly sewn as to prevent possible tearing of that fabric under tension.
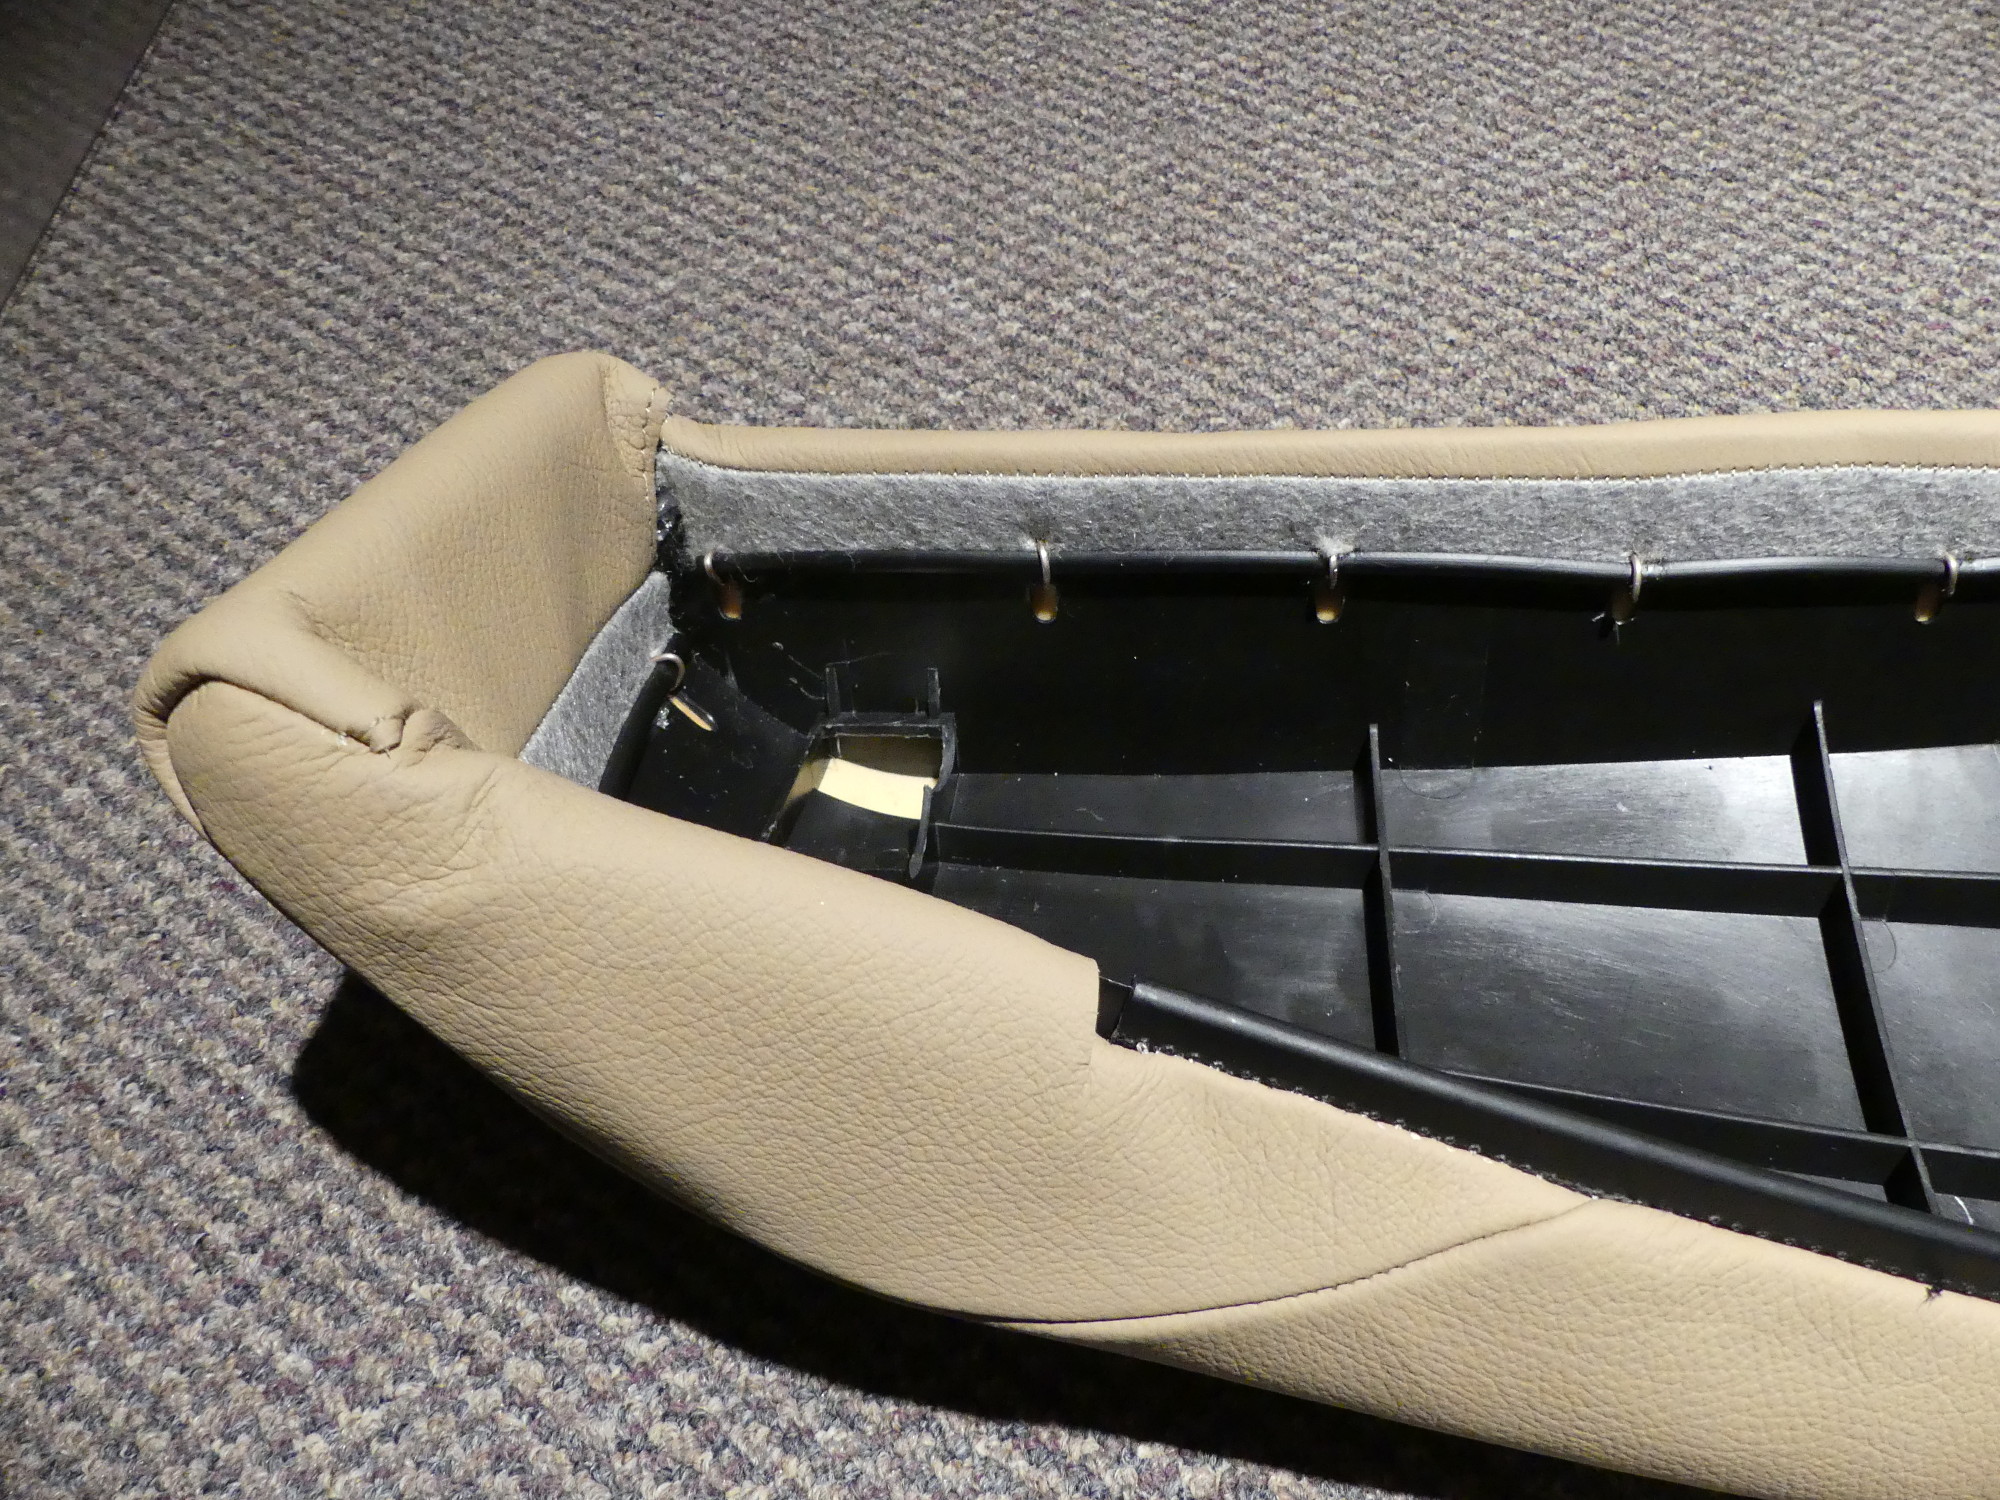
 My first experience punching the leather and using hotrings to bind the leather directly to the bolster shell. This technique will come in handy on the front seats in particular. |
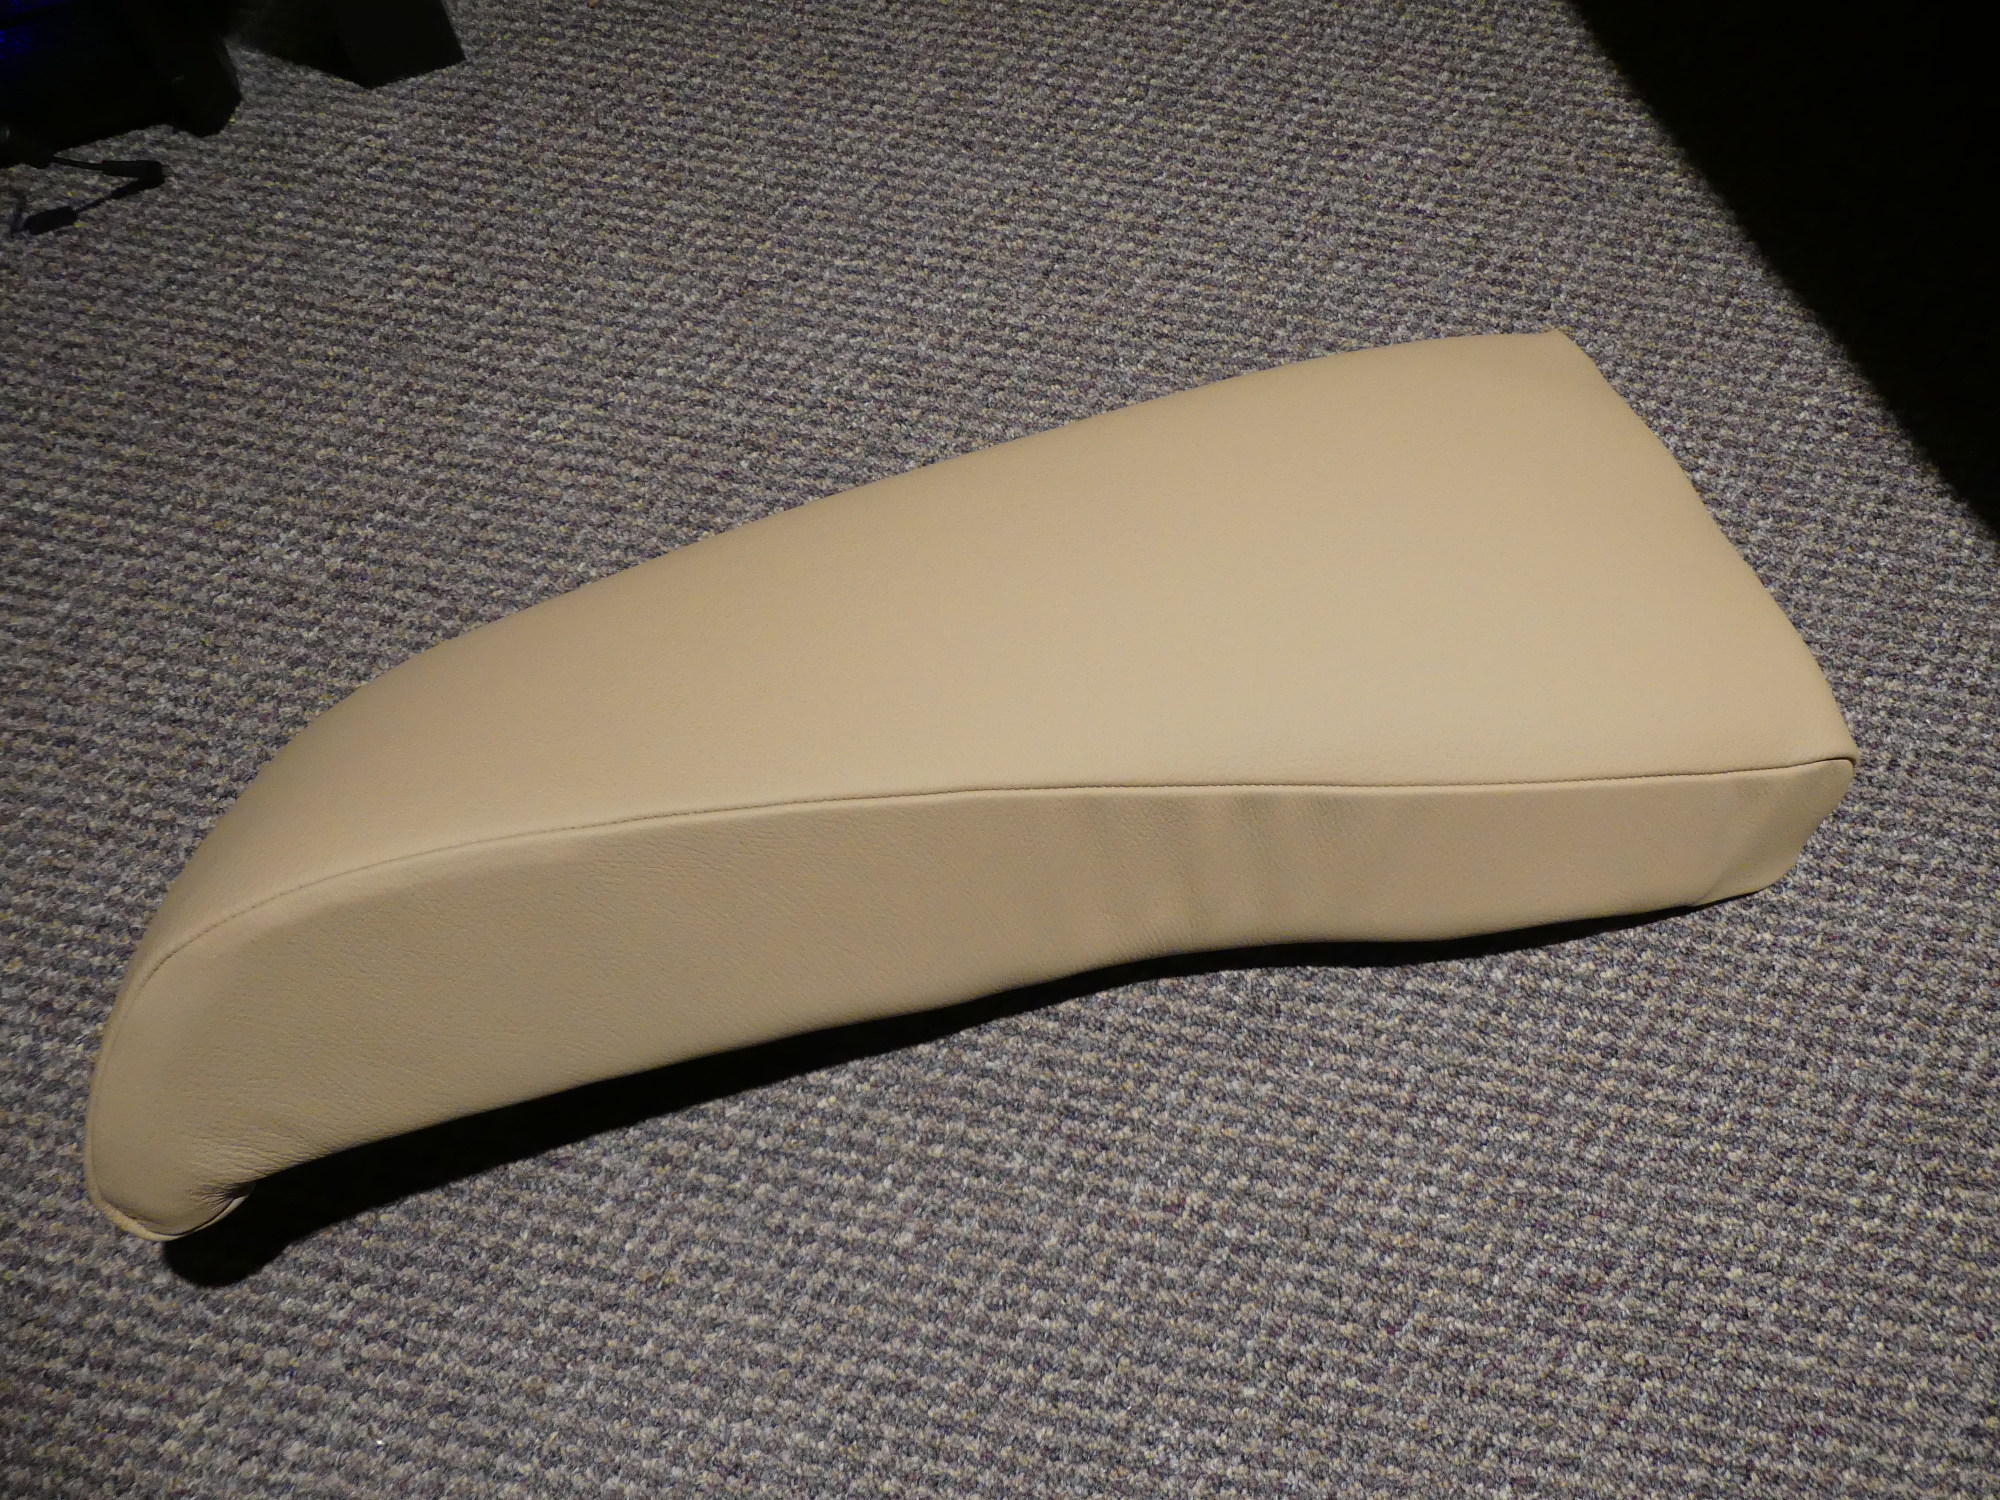 Of all the rear seat covers I was most pleased with the quality of the bolsters. They came out looking as good as factory pieces. All of the seams were sewn properly and consistently (look at that smooth arc!) |
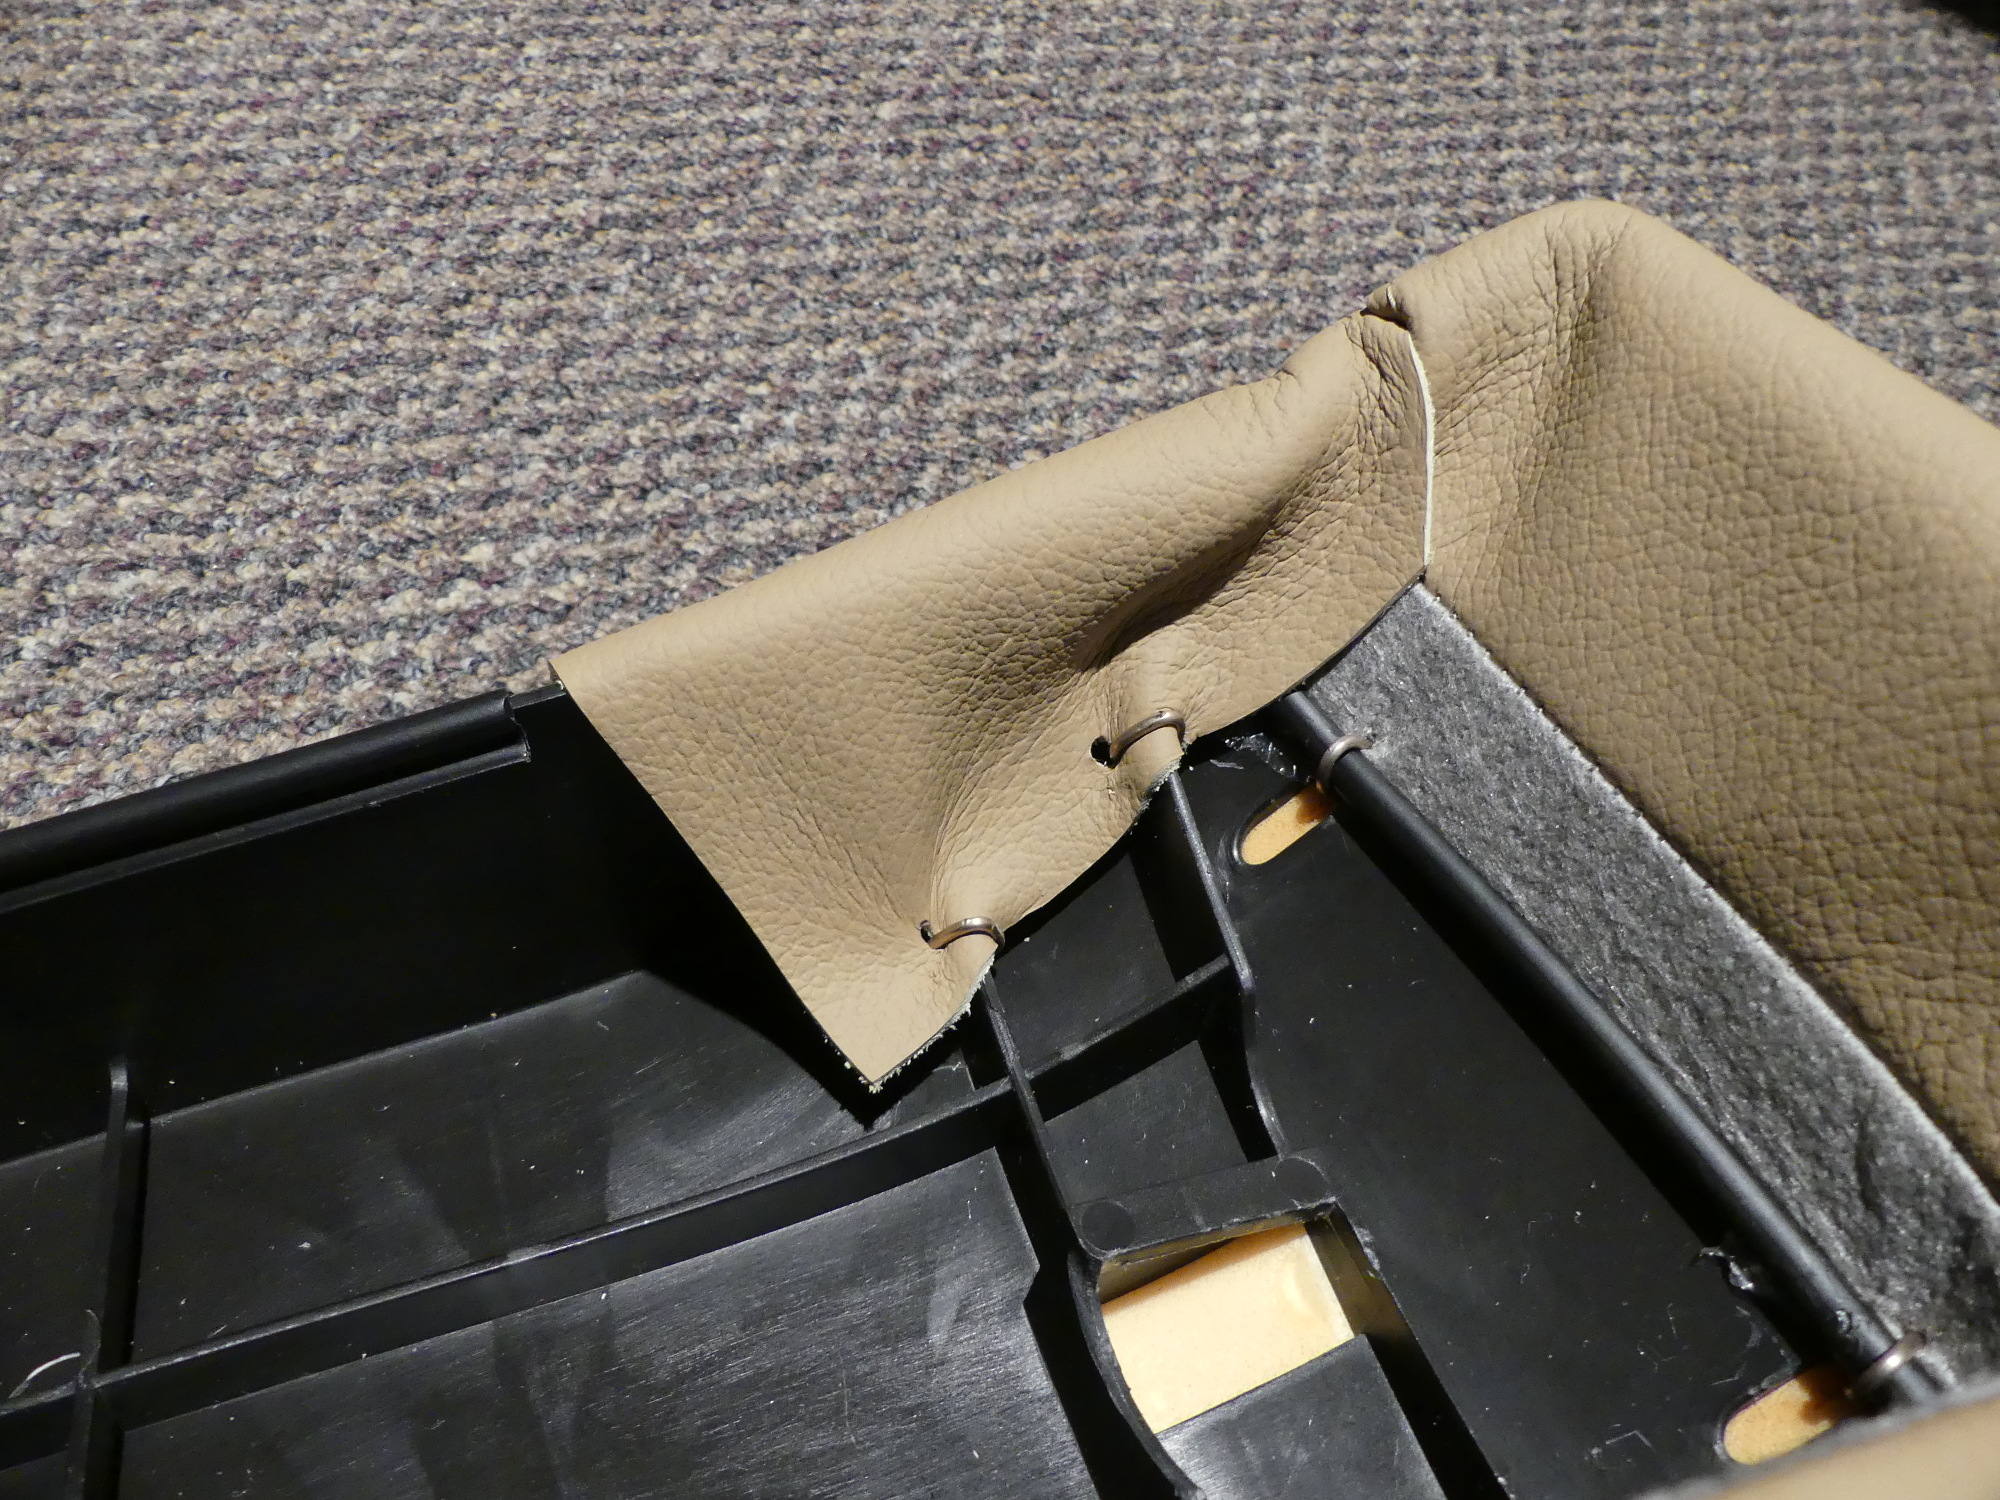
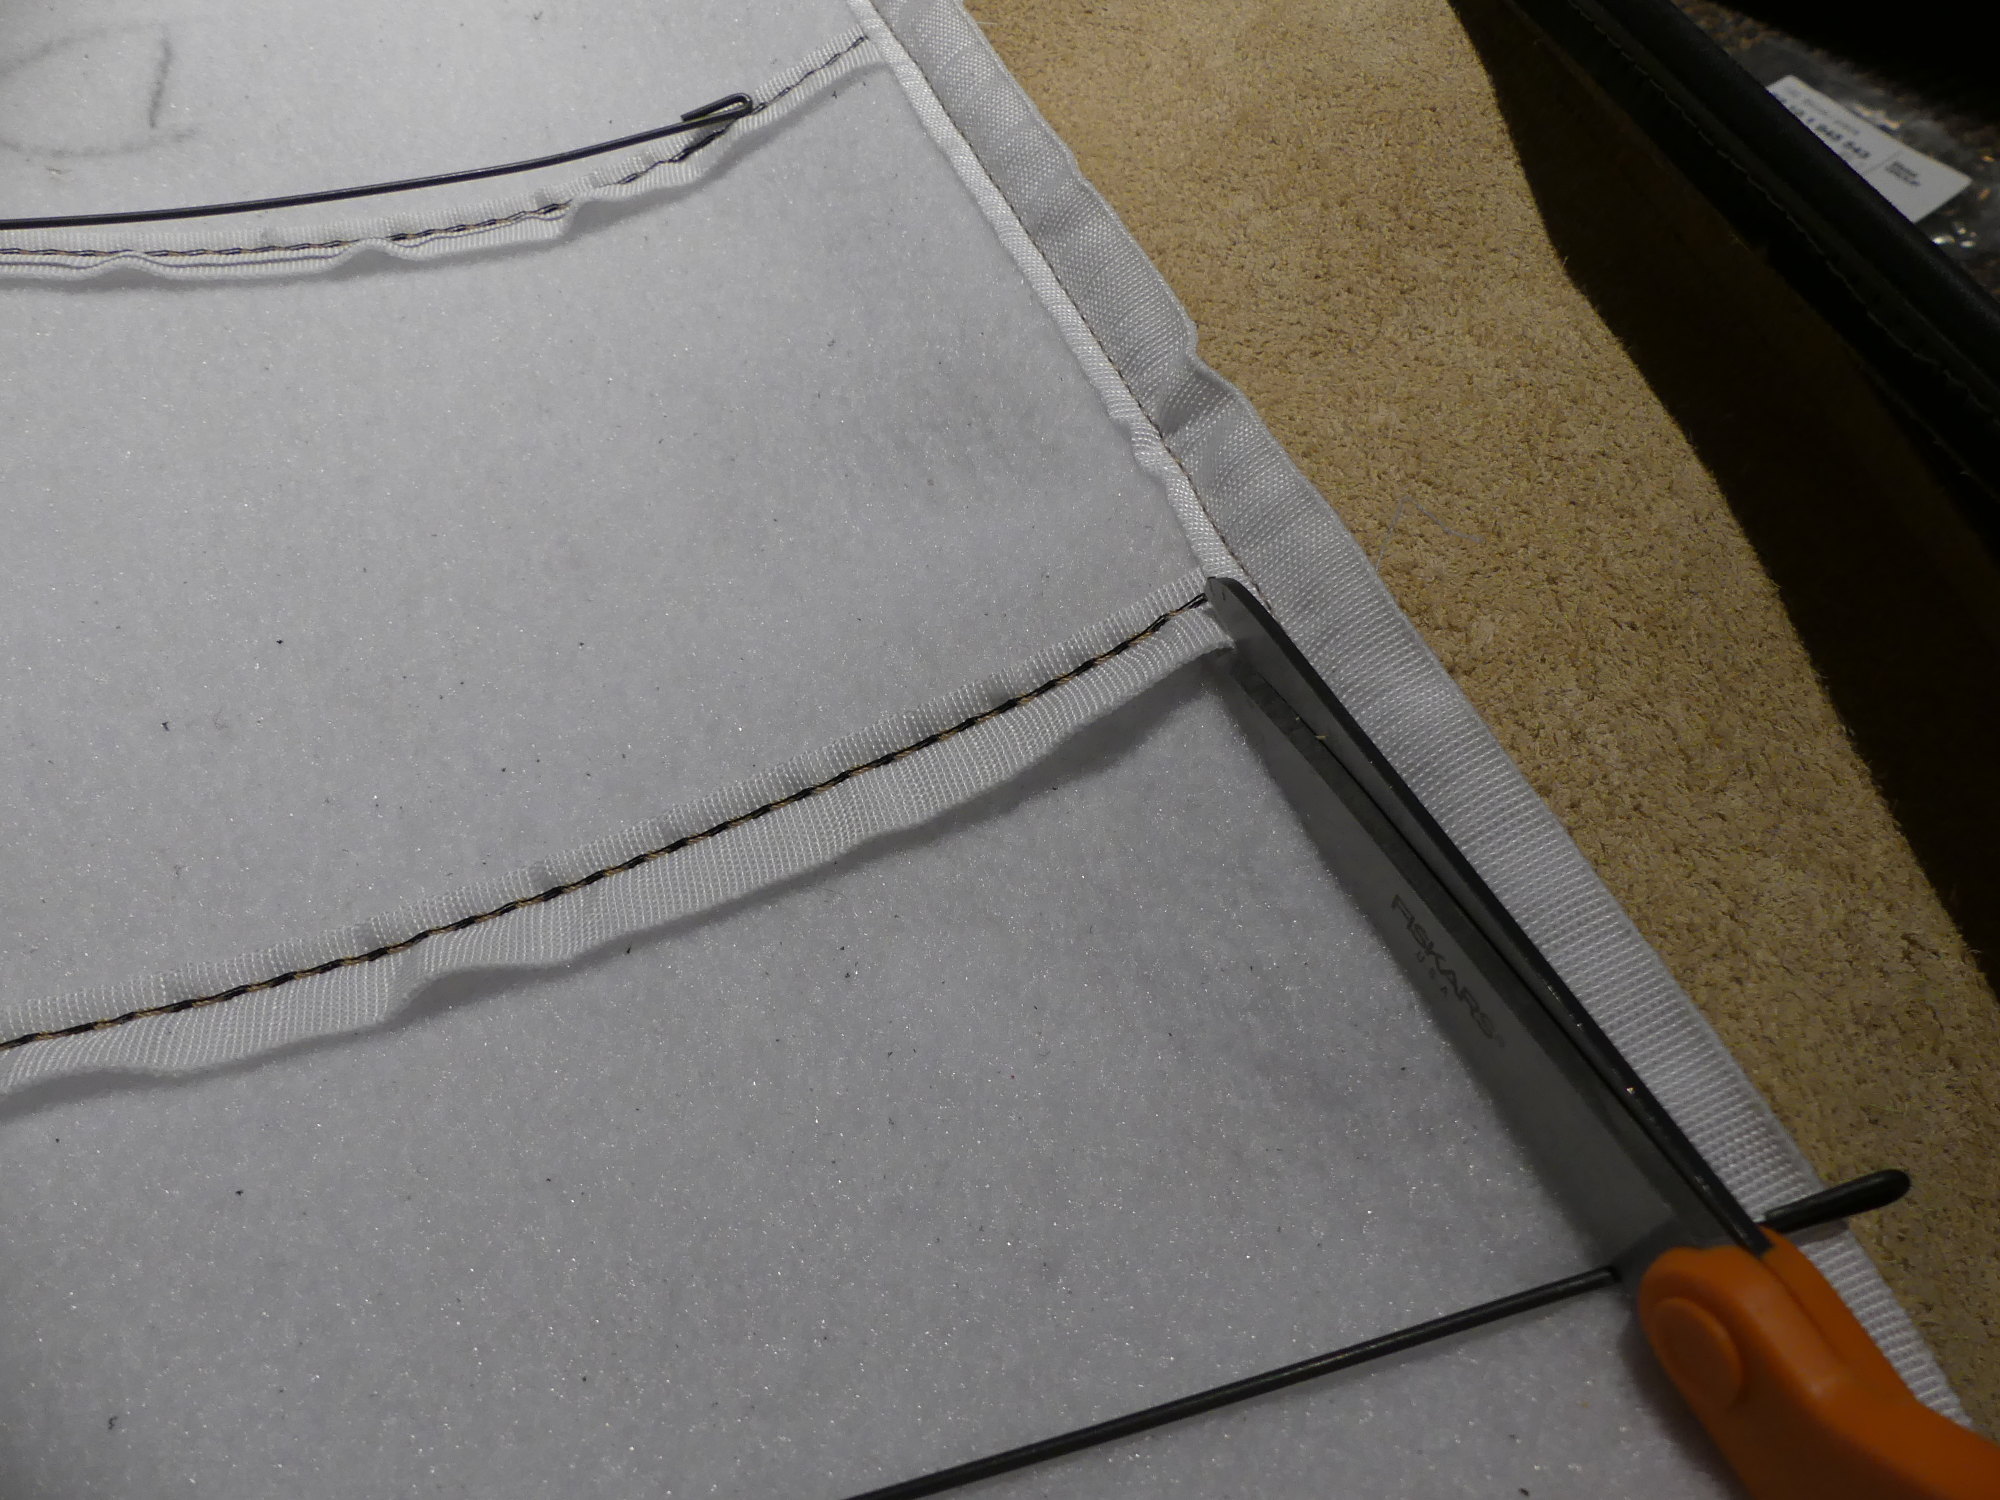 The GAHH covers come with the support rod fabric tubing uncut, so to install the support rods the first thing to do is cut the tubes using a sharp pair of shears. |
 I took this after I had installed 3 hog rings on each of the two upper horizontal support rods. You can clearly see how the rods pull the leather seams down into the gap in the foam and create texture between the seams. |
 I quickly developed the technique of mounting each hog ring slightly canted in the pliers. This exposed one sharp edge of the ring which I used to pierce the support tube fabric. |
 I installed the vertical support rod only after all three horizontal support rods had been fastened to allow me to curl the fabric back as needed to install the horizontal rods. |
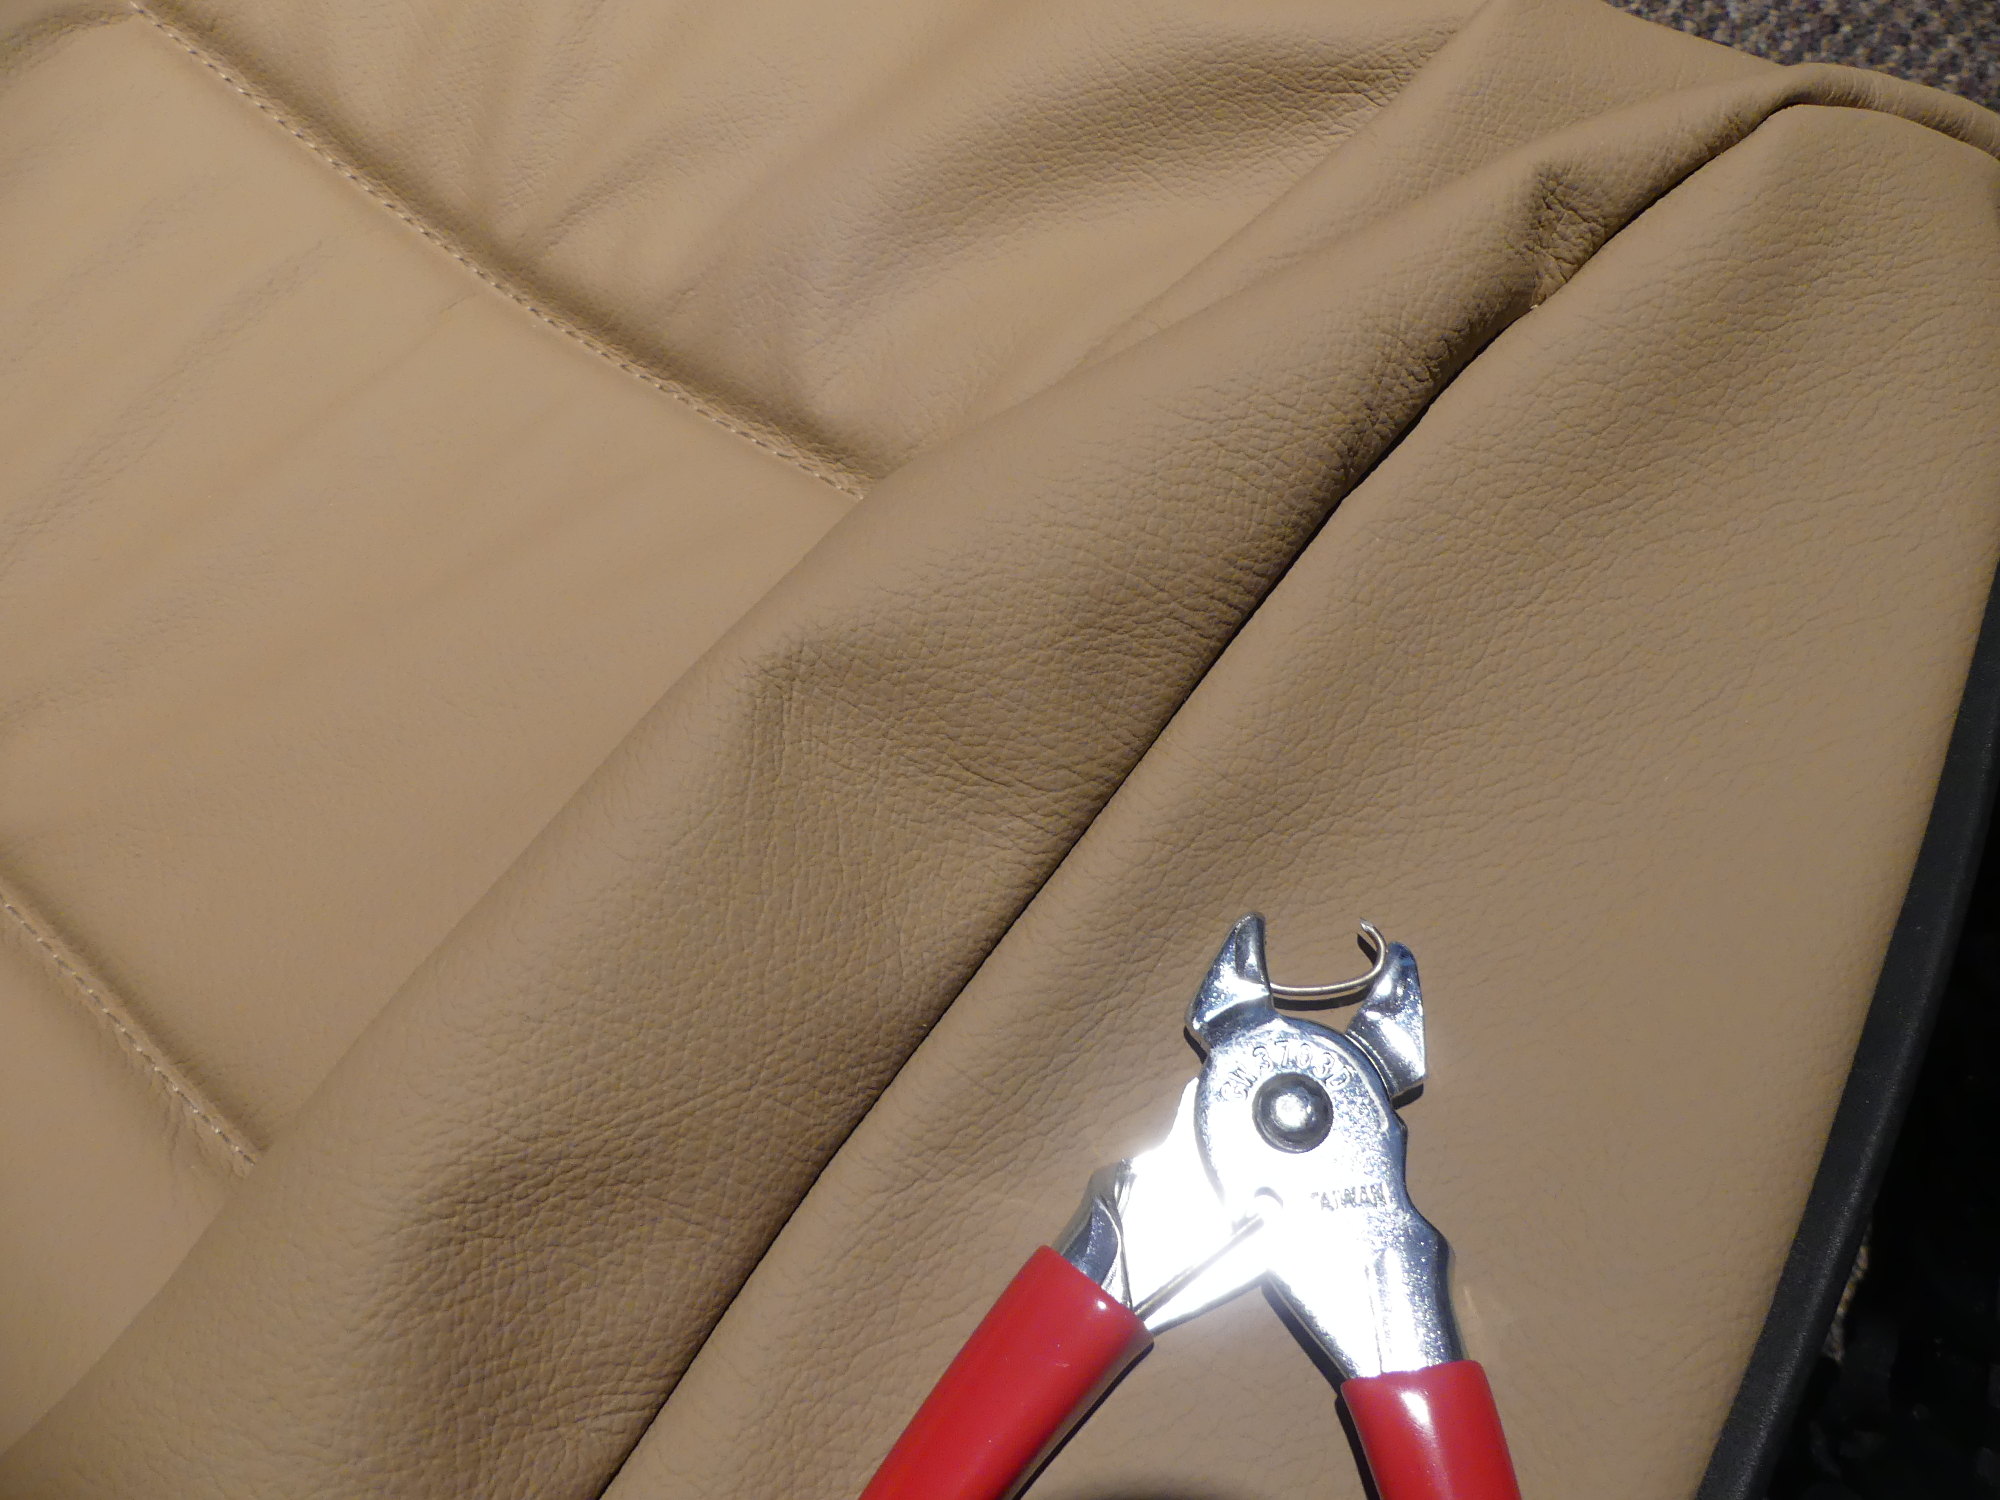
During the installation process I wound up using both the straight and 45 degree offset hog ring pliers, a leather punch tool, and for a couple of the more stubborn hog rings near a flap of leather at the base of the bolster, a pair of long-nose pliers to close the rings. The first bolster took me about 10 minutes to install and I failed to locate perhaps 3 hog rings so I had to cut those off and try again. The next bolster cover took about the same time, but for whatever reason my luck worsened and I had to cut off a half-dozen rings. They say practice makes perfect, but apparently not in my case.
Despite the setbacks I managed to install the headrest and bolster covers in about two hours. The actual time elapsed, however, was much longer as I had to be cautious and think each step through. And my advice to anyone crazy enough to attempt this work is to take it slow as well. One slip and you can destroy stuff that is simply not replaceable.
Rear Backrests
Encouraged with the results so far decided to bite the bullet and work on the backrests. I was really not looking forward to this job because the covers were a pain in the ass to remove, but as with most things, technique matters and I was able to come up with an installation strategy that made quick work of the task. The first cover took me about 25 minutes while the next took about 15.
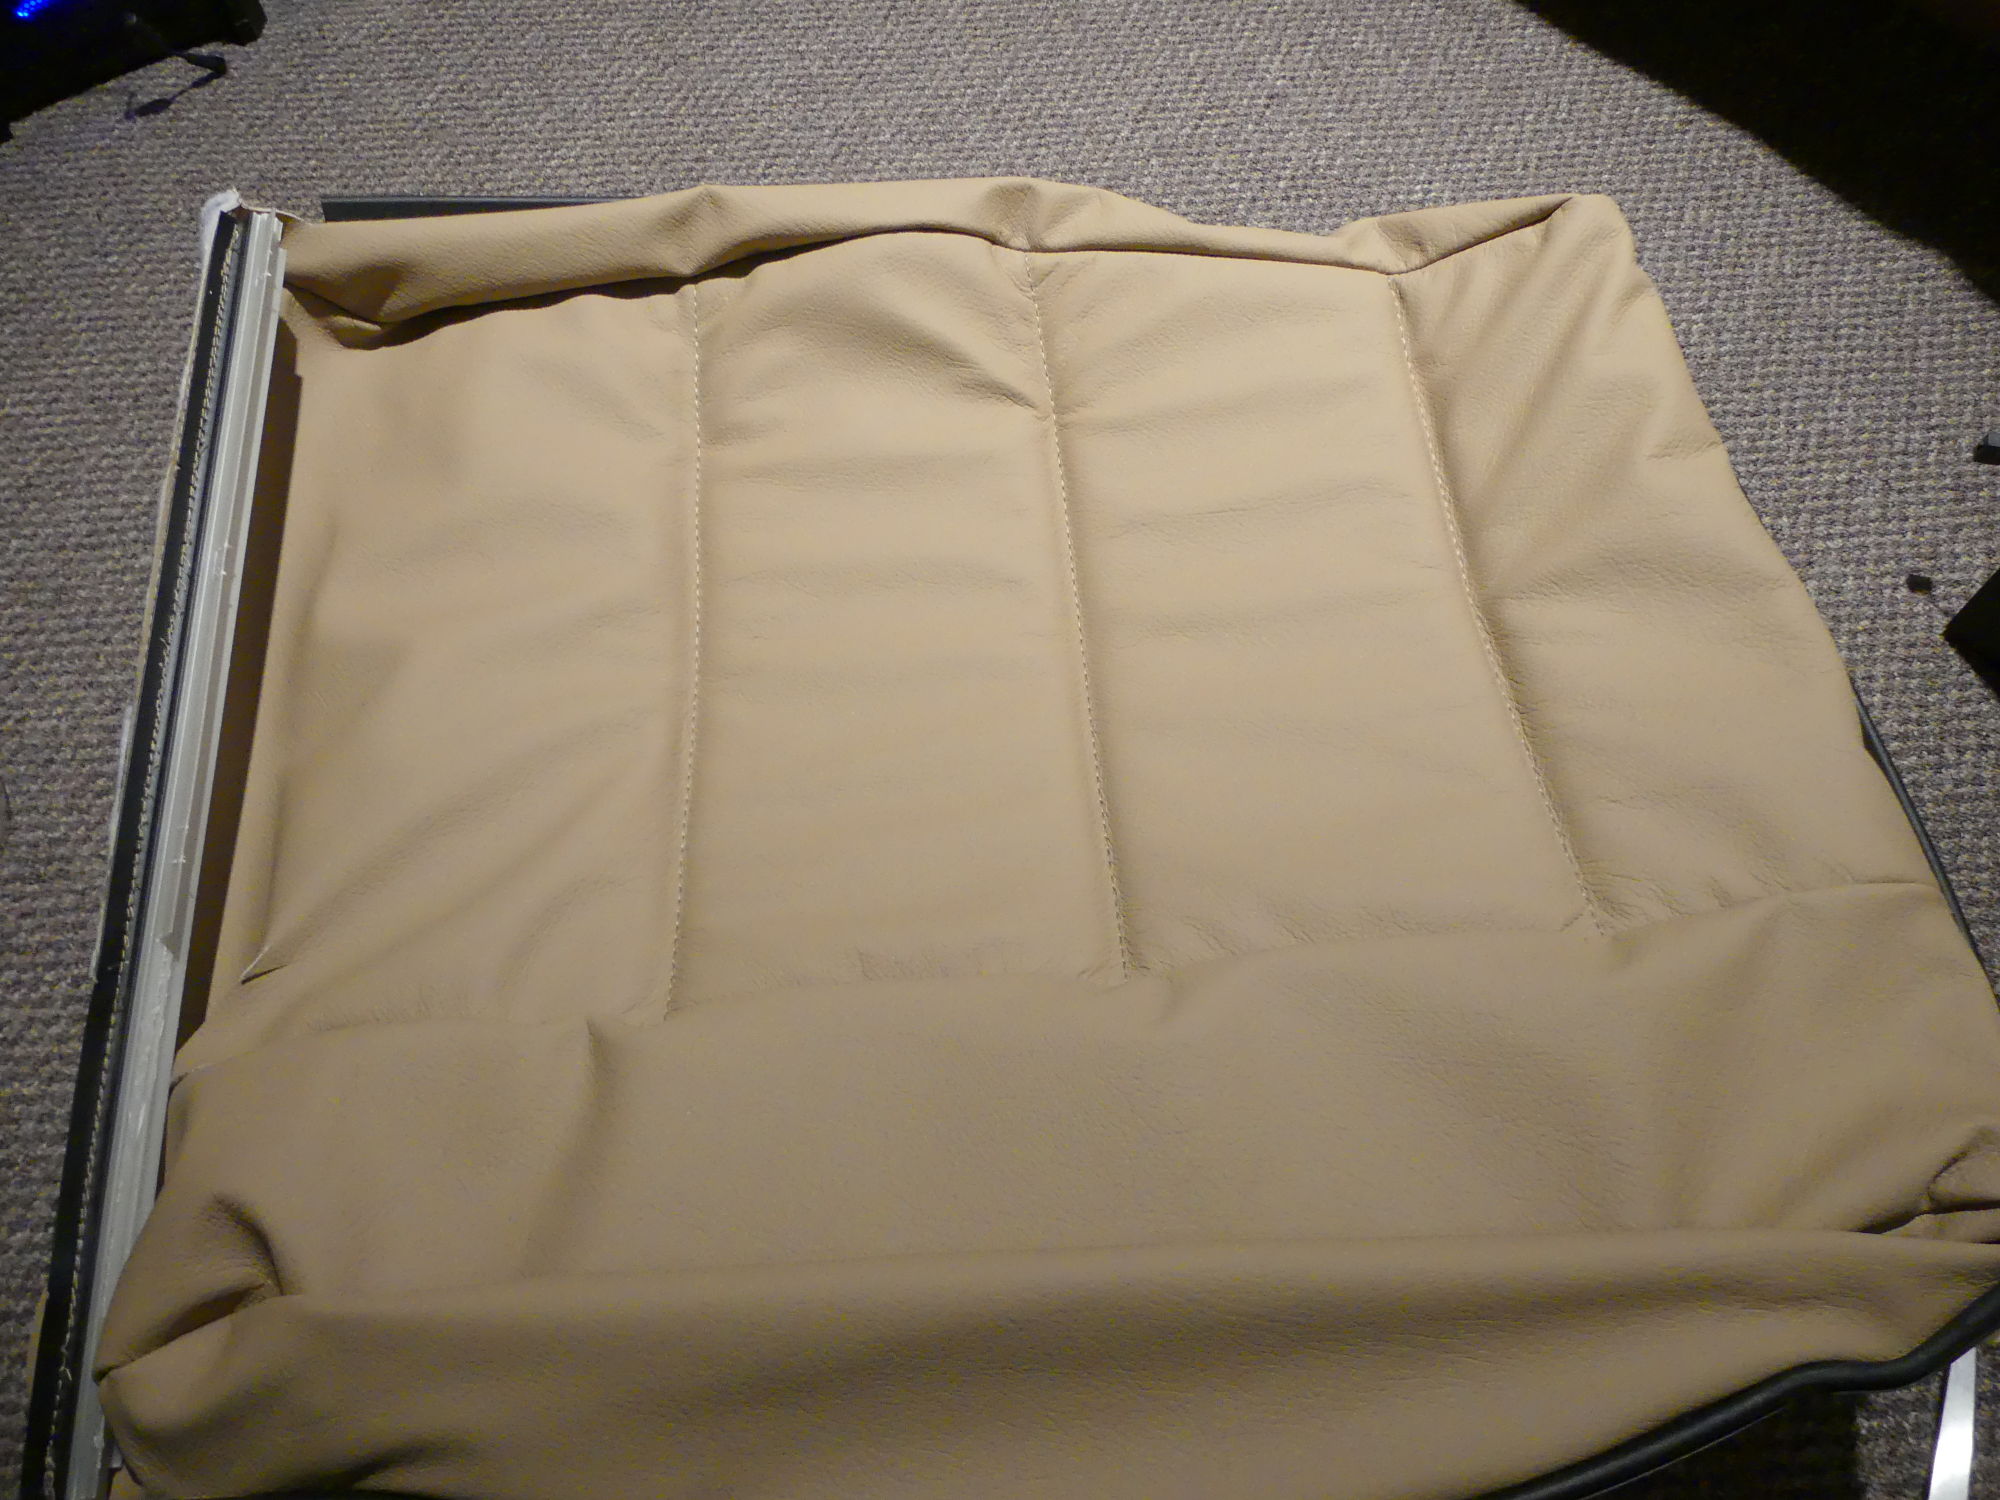 Here I'm showing the cover with all hog rings installed. The next step in the process was to pull the bottom and two sides down and reattach the J-channel to the edge formed into the seat. |
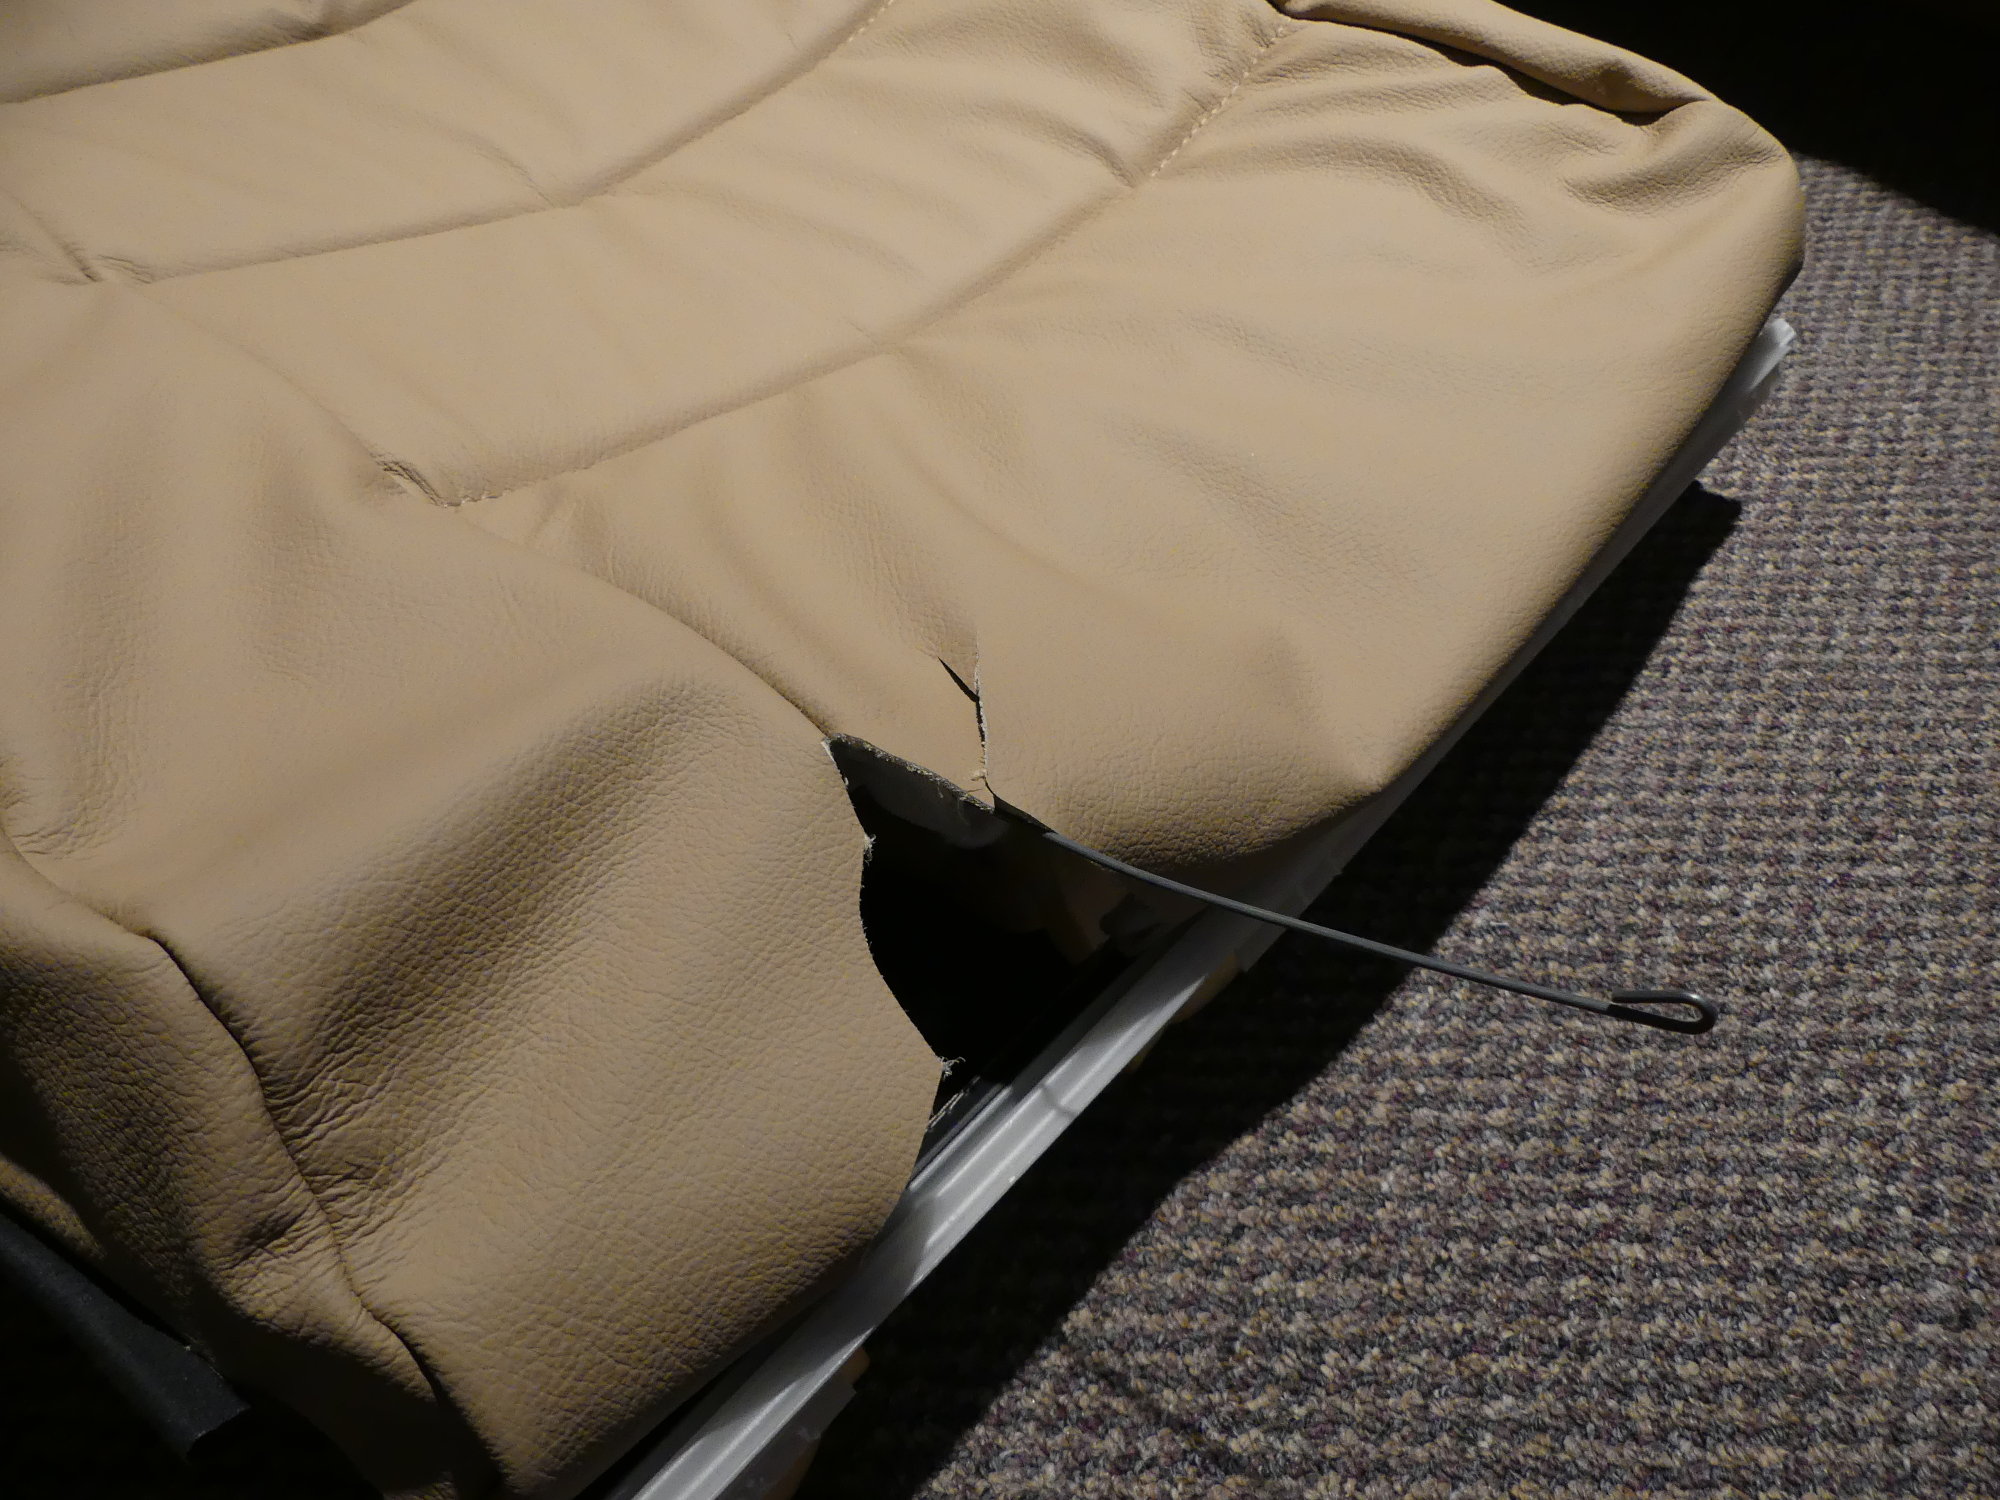
 The final step in refitting the cover was stretching the leather over the top and pushing the white plastic piece into the slot on the rear of the backrest. This was challenging because the leather was tight. |
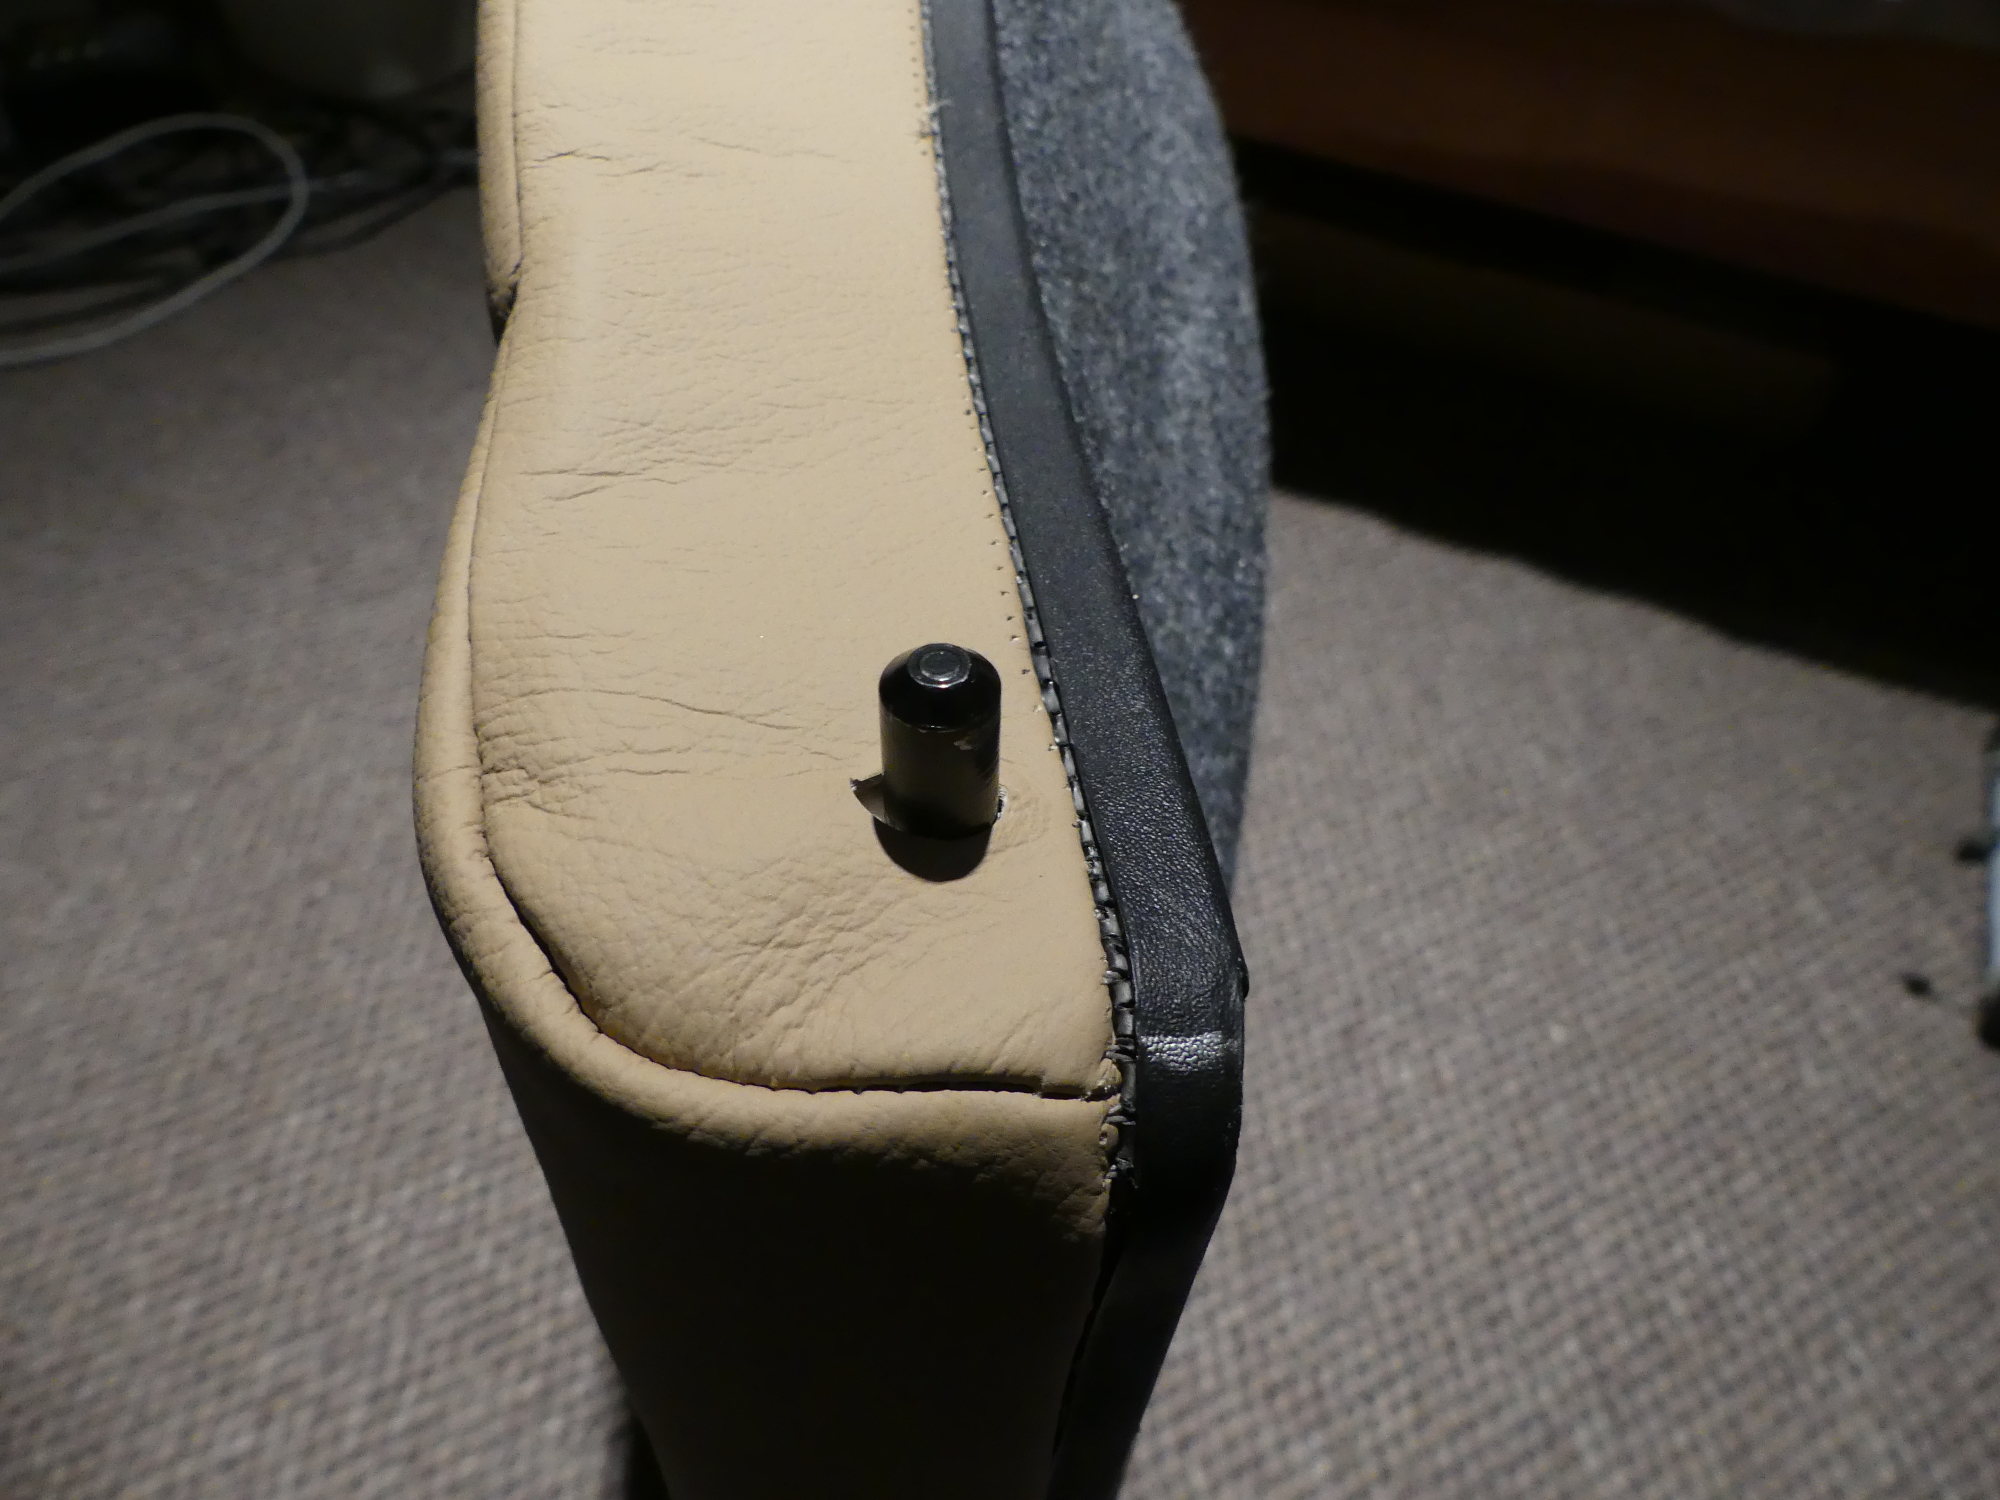
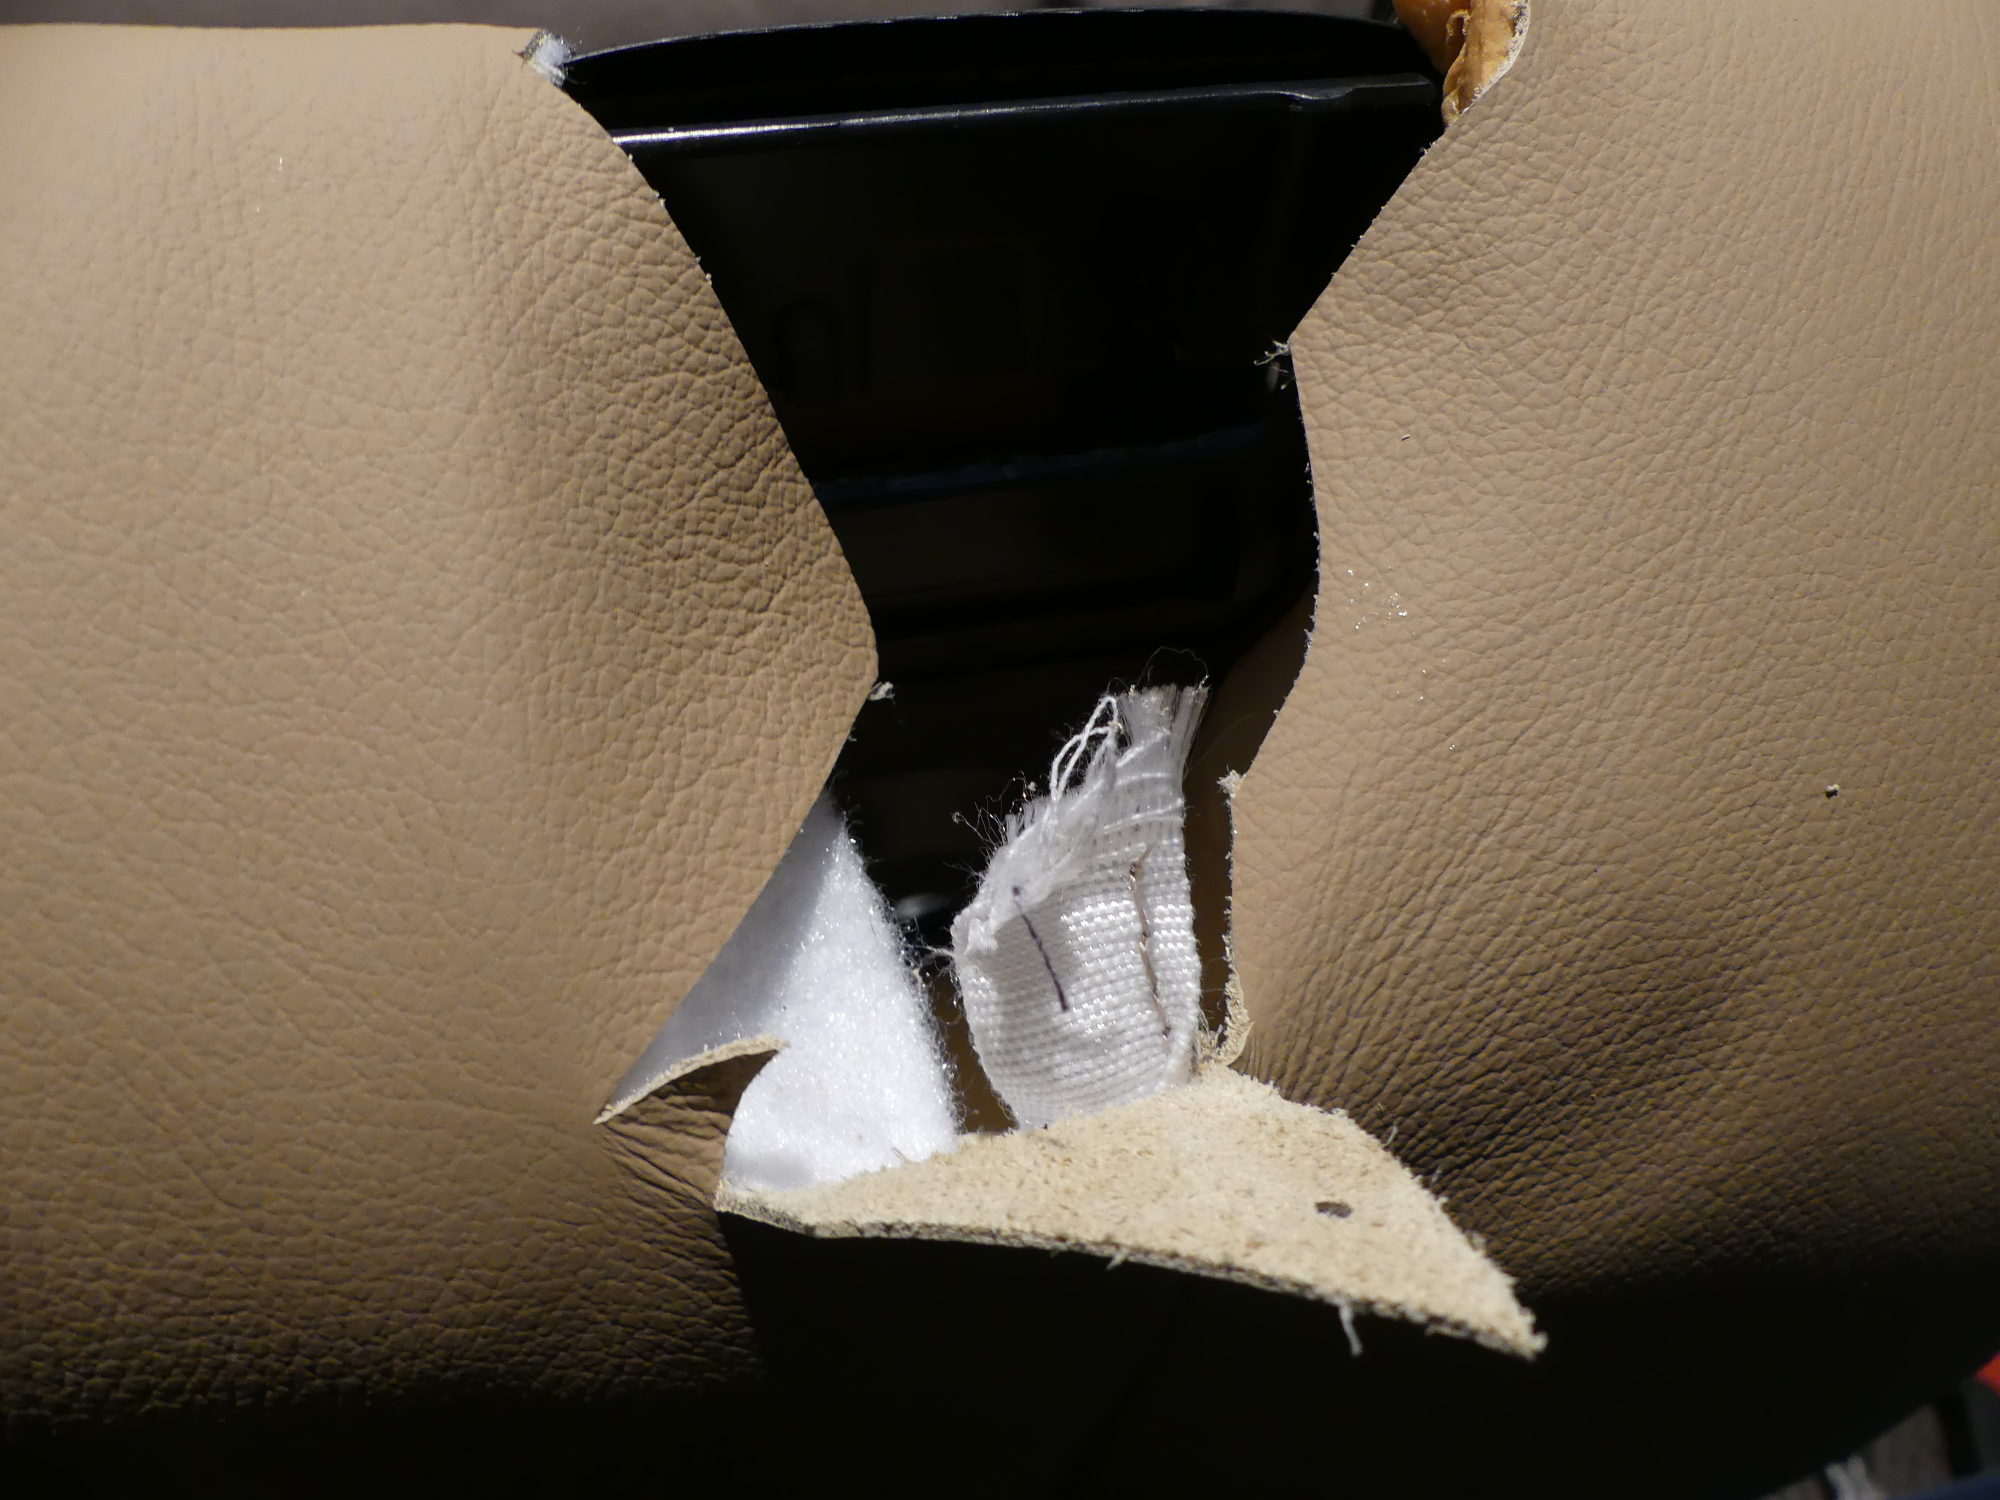 A closeup of the backrest showing the seatbelt mechanism pocket. Note the hole I punched into the leather flap and the white fabric tubing into which I inserted the vertical support rod. |
The challenge here was figuring out how to gain access to all the hog rings while not bending one or more support rods. I thought about it for a bit and decided to simply leave the vertical support rod out of the cover while I installed the hog rings on the horizontal seams. That would, I reasoned, let me curl the cover back as needed. Then, once those were fastened I could slip in the vertical support rod and tackle the four hog rings required to bond that rod to its mate molded into the foam. That technique worked beautifully and gave me some hope that the seat base may not be the giant pain in the ass I had assumed it would be.
The real pain in the ass today turned out to be dealing with the seatbelt mechanisms. The plastic covers were in really bad shape. They had cracked in several places, mostly on the rear edge, and on one cover a couple of the tiny and extremely fragile internal retaining clips had broken off, leaving no legitimate way to keep the covers attached to the mechanisms. I wound up using epoxy to repair the cracks much as I did with the black trim pieces but felt a little guilty using it to more or less permanently bond it with the mechanism. After a couple hours the epoxy had fully cured so I reinstalled the mechanisms into the seat backs. This took a couple tries as the mechanisms must hook into the seat back properly and my attempts kept missing the mark. Eventually I got them seated correctly so I reinstalled the 16mm retaining bolts and the gray plastic covers.
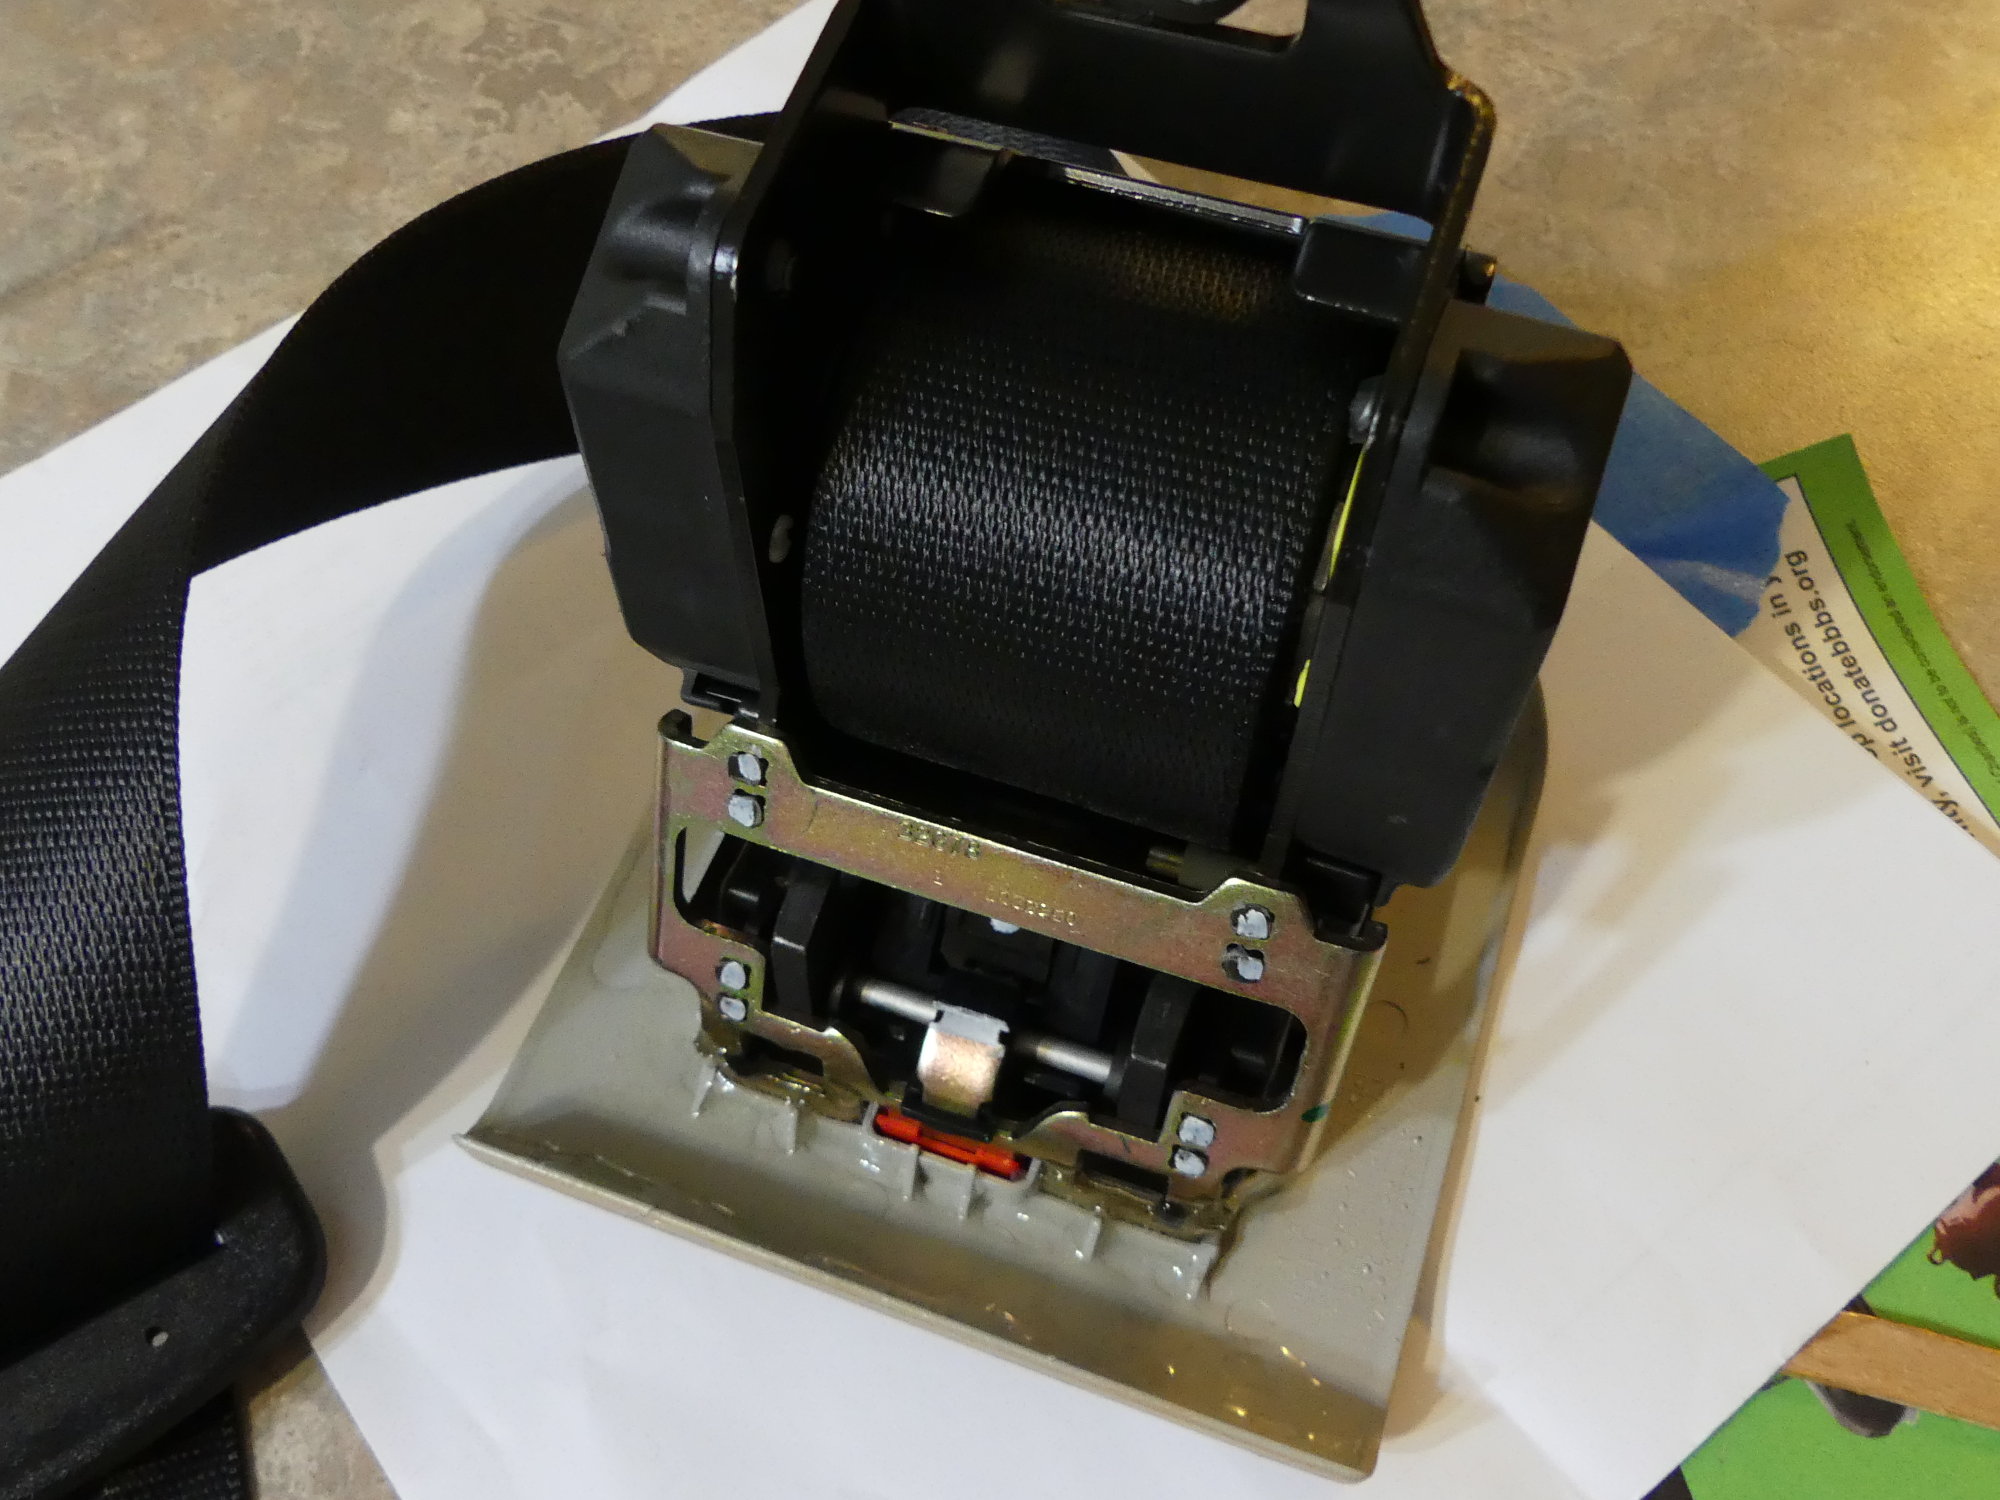 I really wanted to buy seat belt mechanism covers to replace the ones that had broken but as BMW has a bad case of penis envy with respect to General Motors, they no longer support their cars. Plastic epoxy to the rescue. |
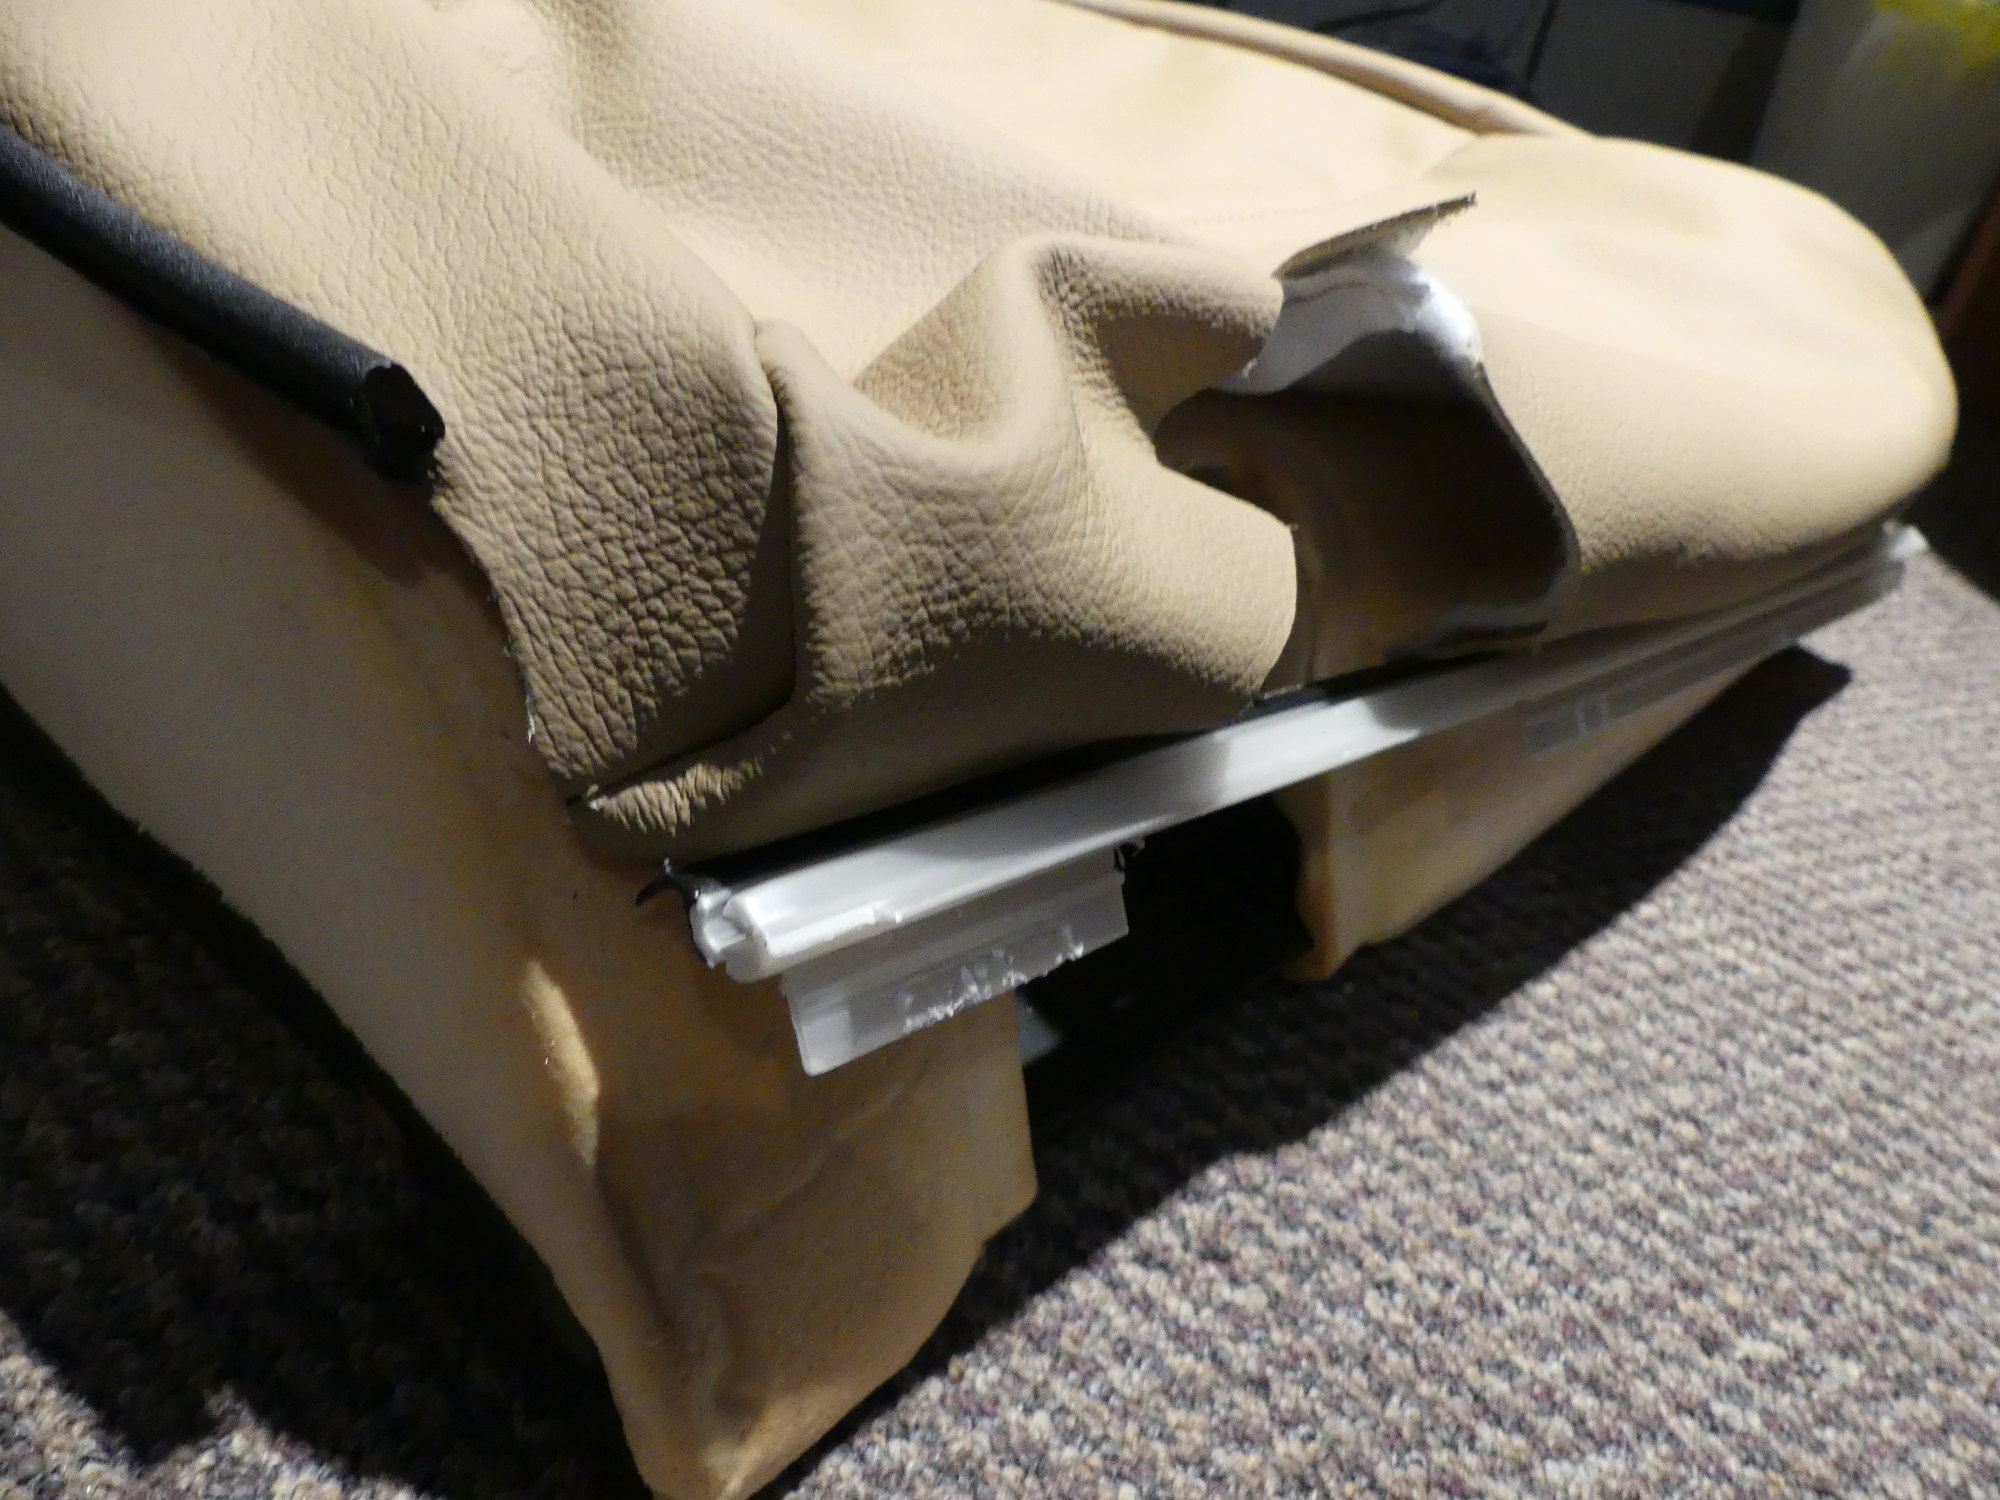
 I was pleasantly surprised to see this pre-cut hole in the leather and how it nicely fit the fixing post on the backrest. They cut the hole on the other side but forgot to do that on one of the covers. A problem easily fixed with a sharp razor blade. |
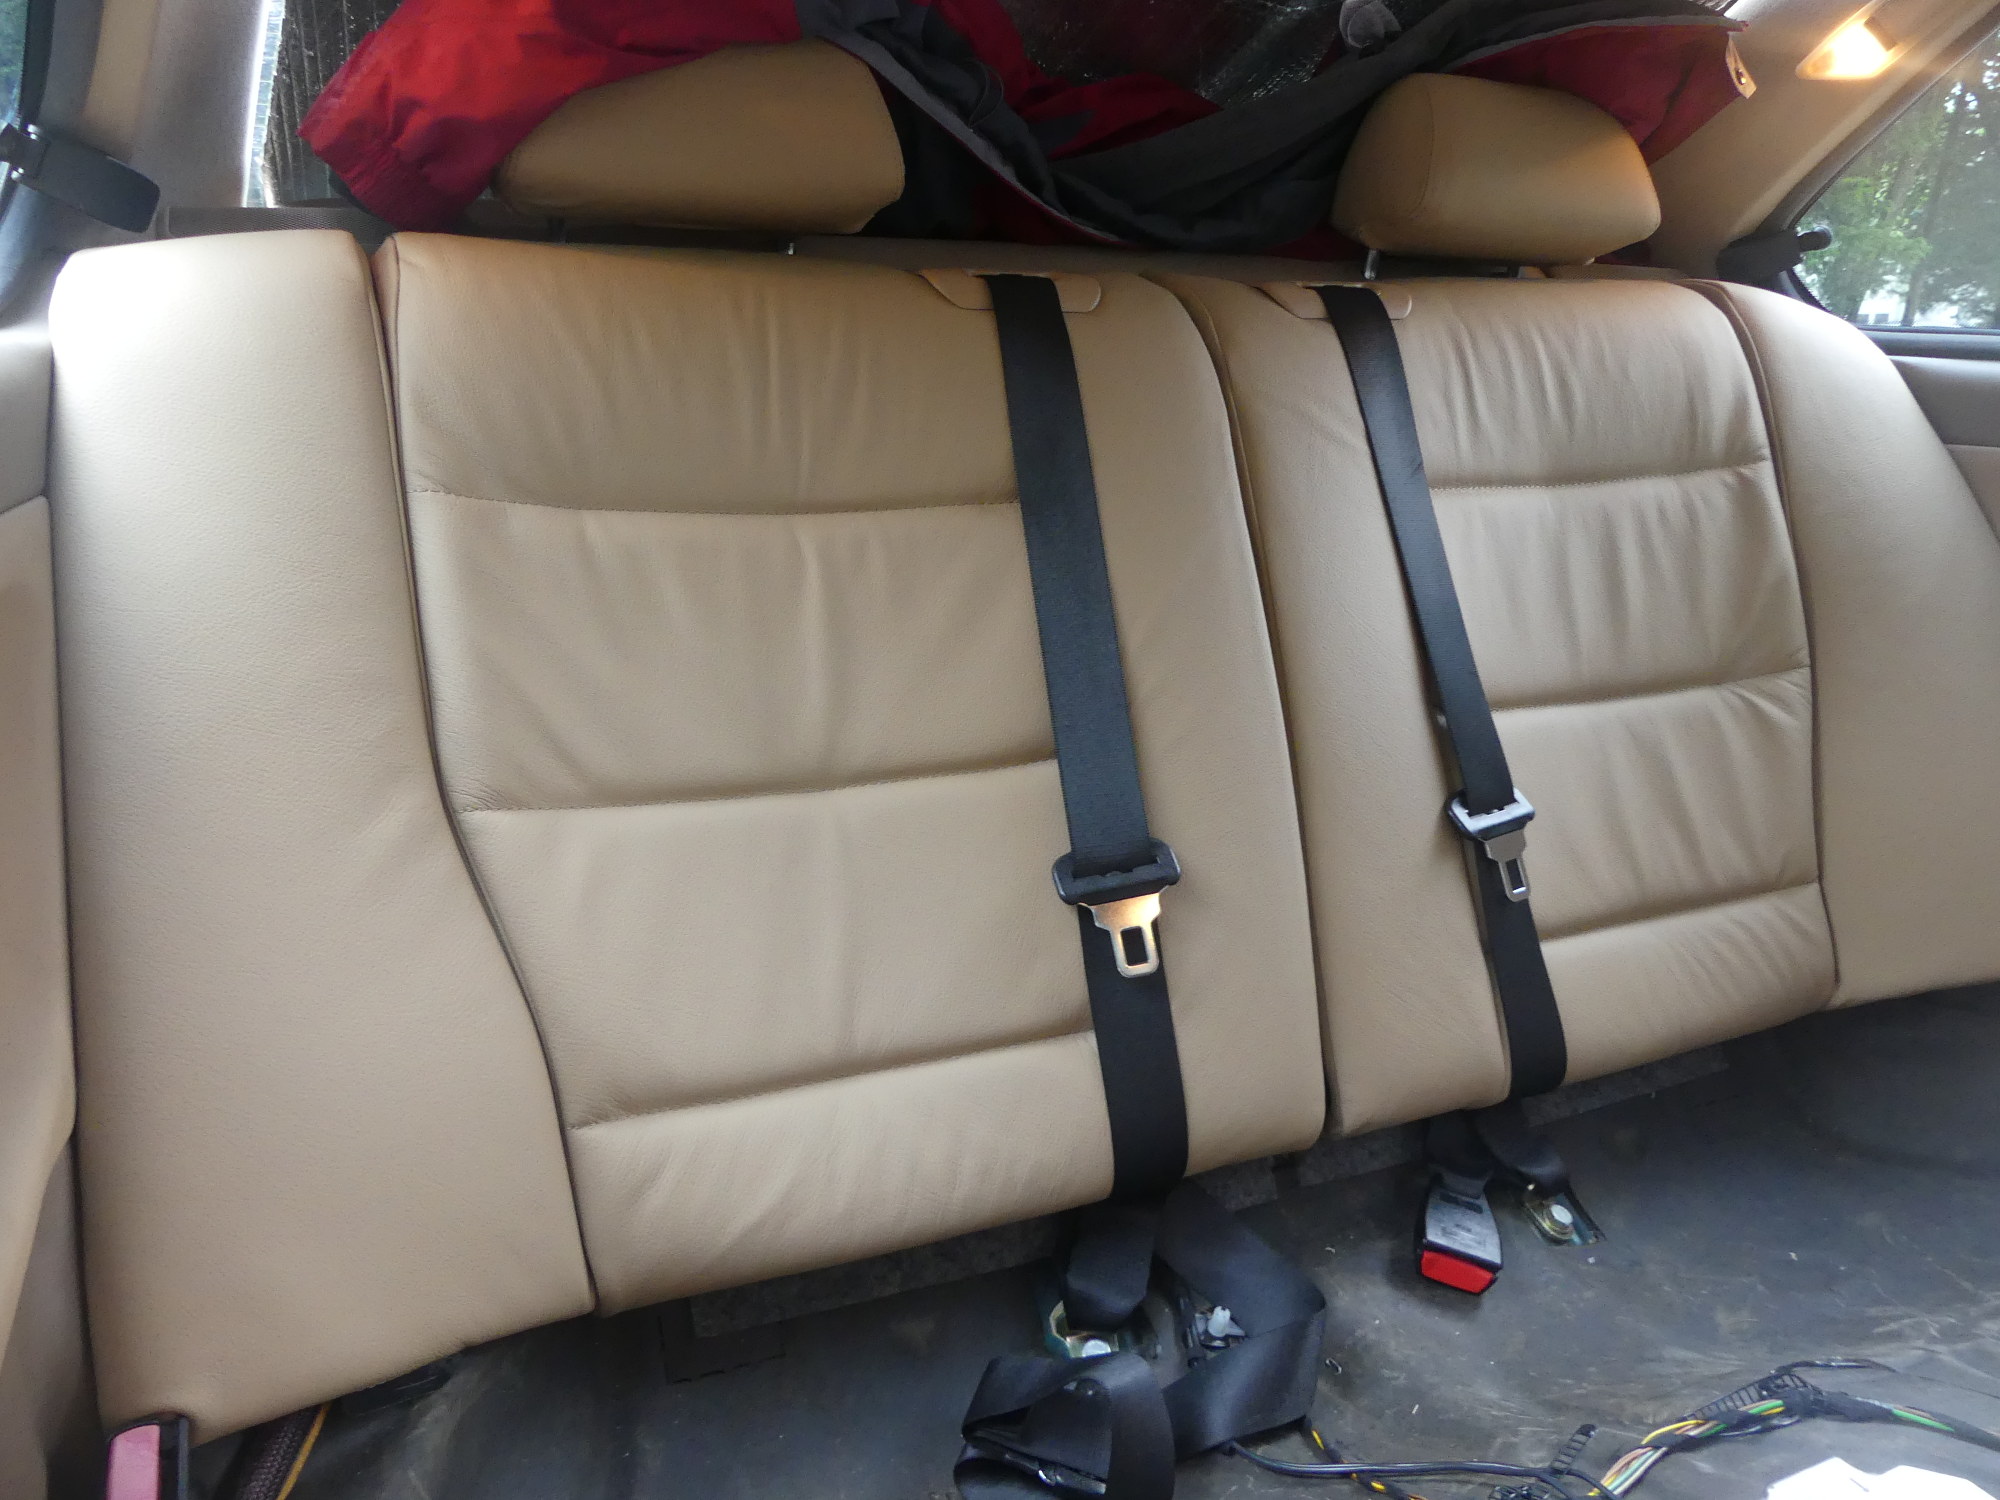
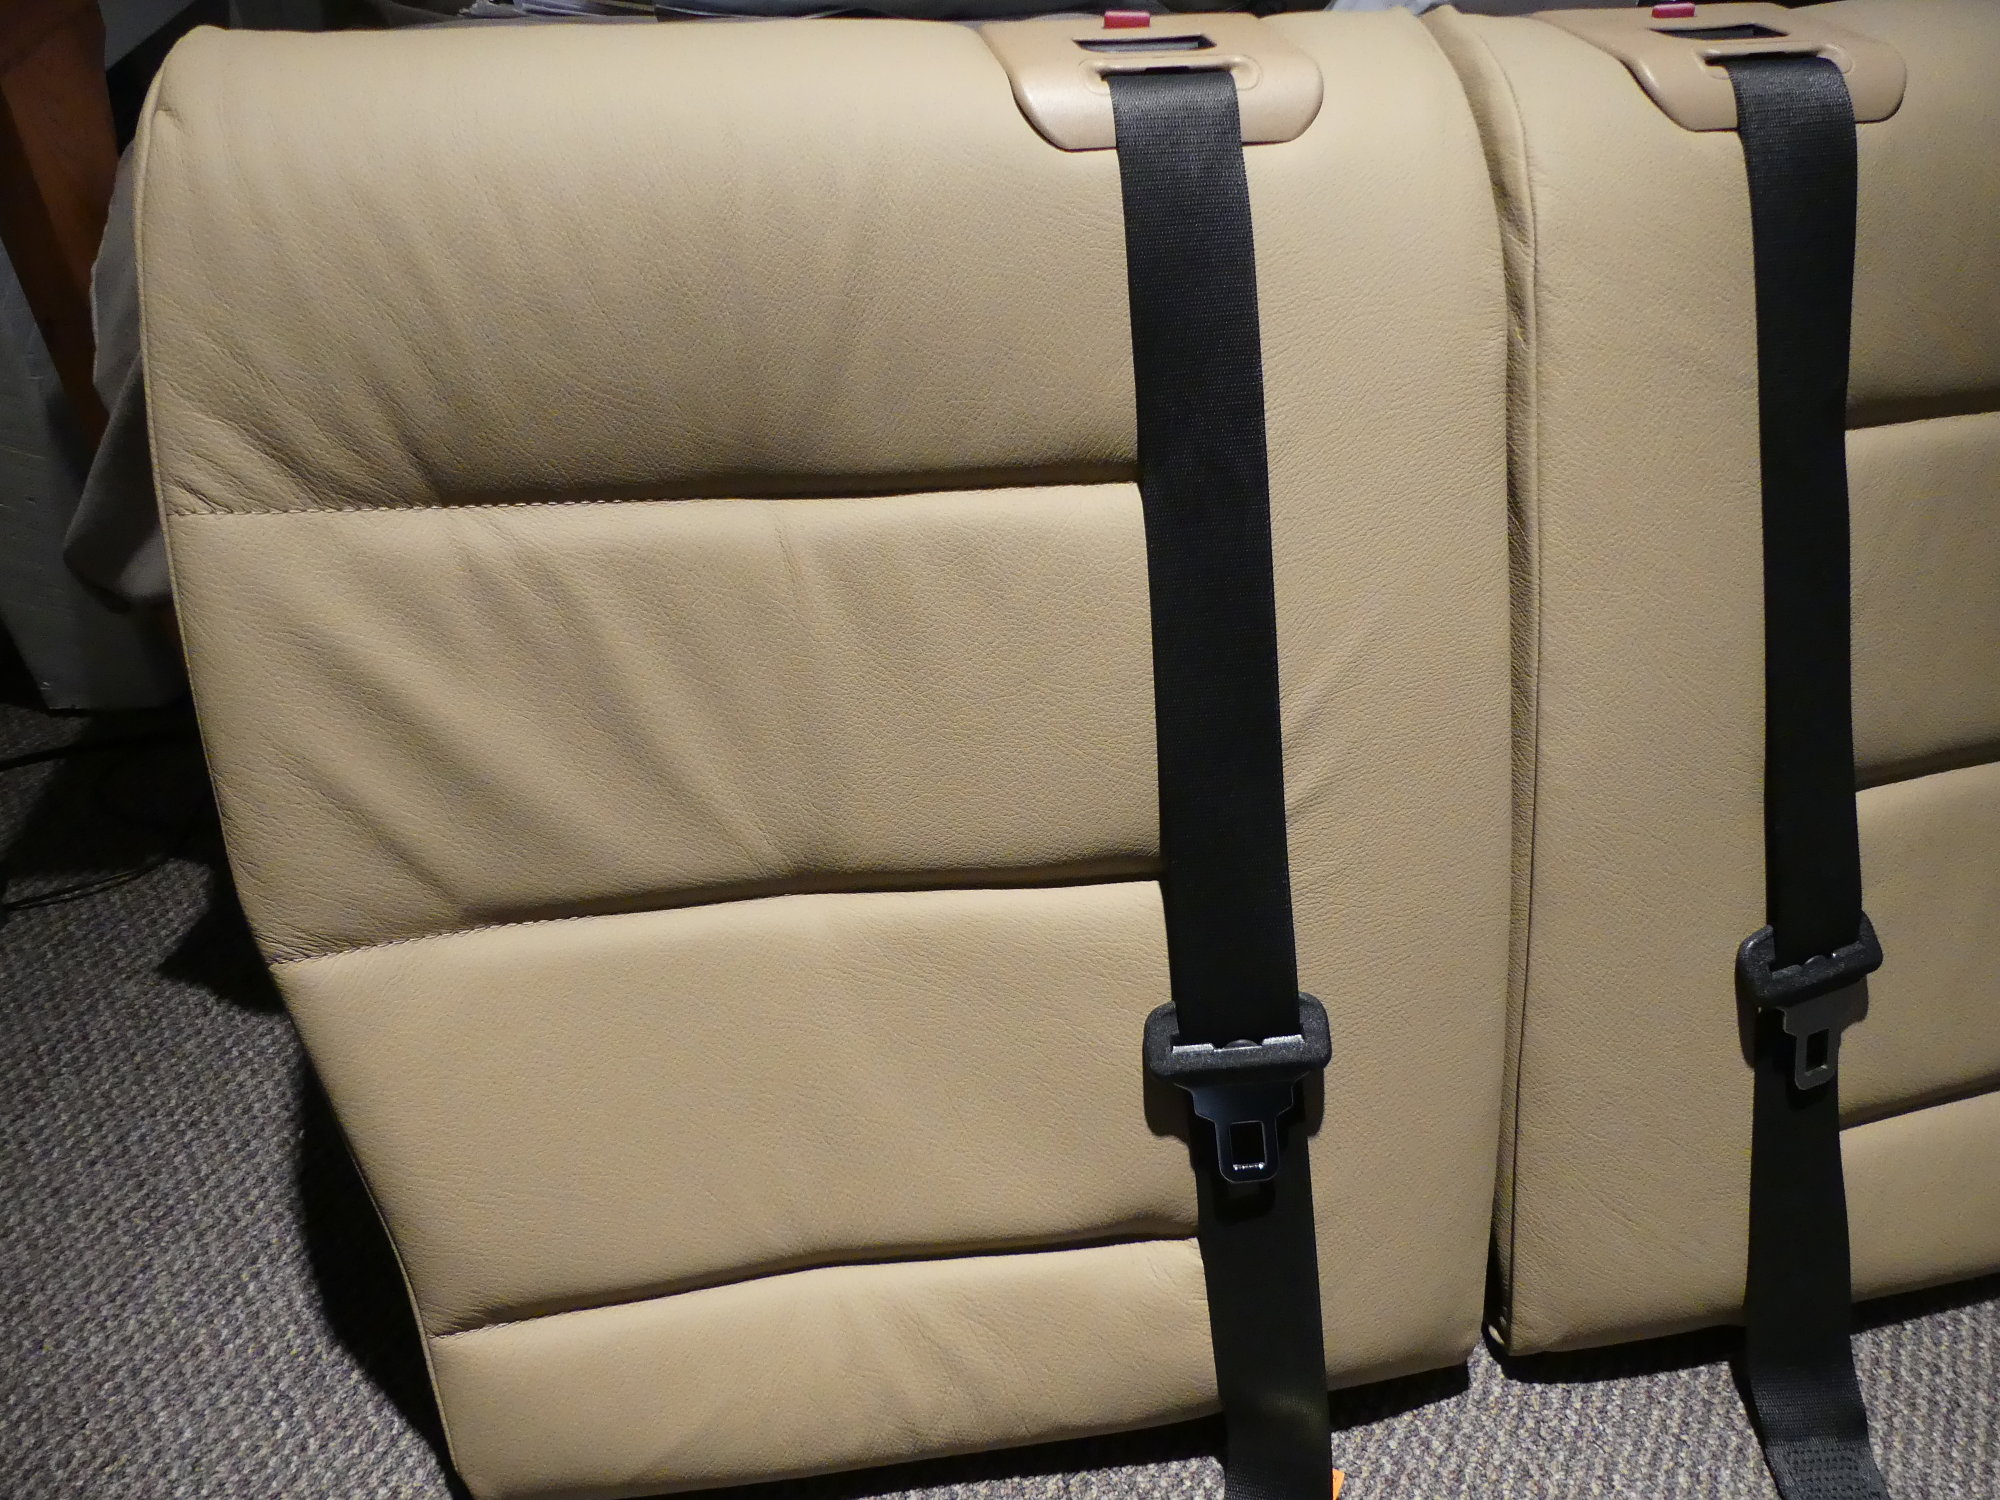 A shot of the backrests with seatbelts reinstalled, just prior to installation in the vehicle. I'm not 100% satisfied with the fit of these covers but it's a pretty good first effort. |
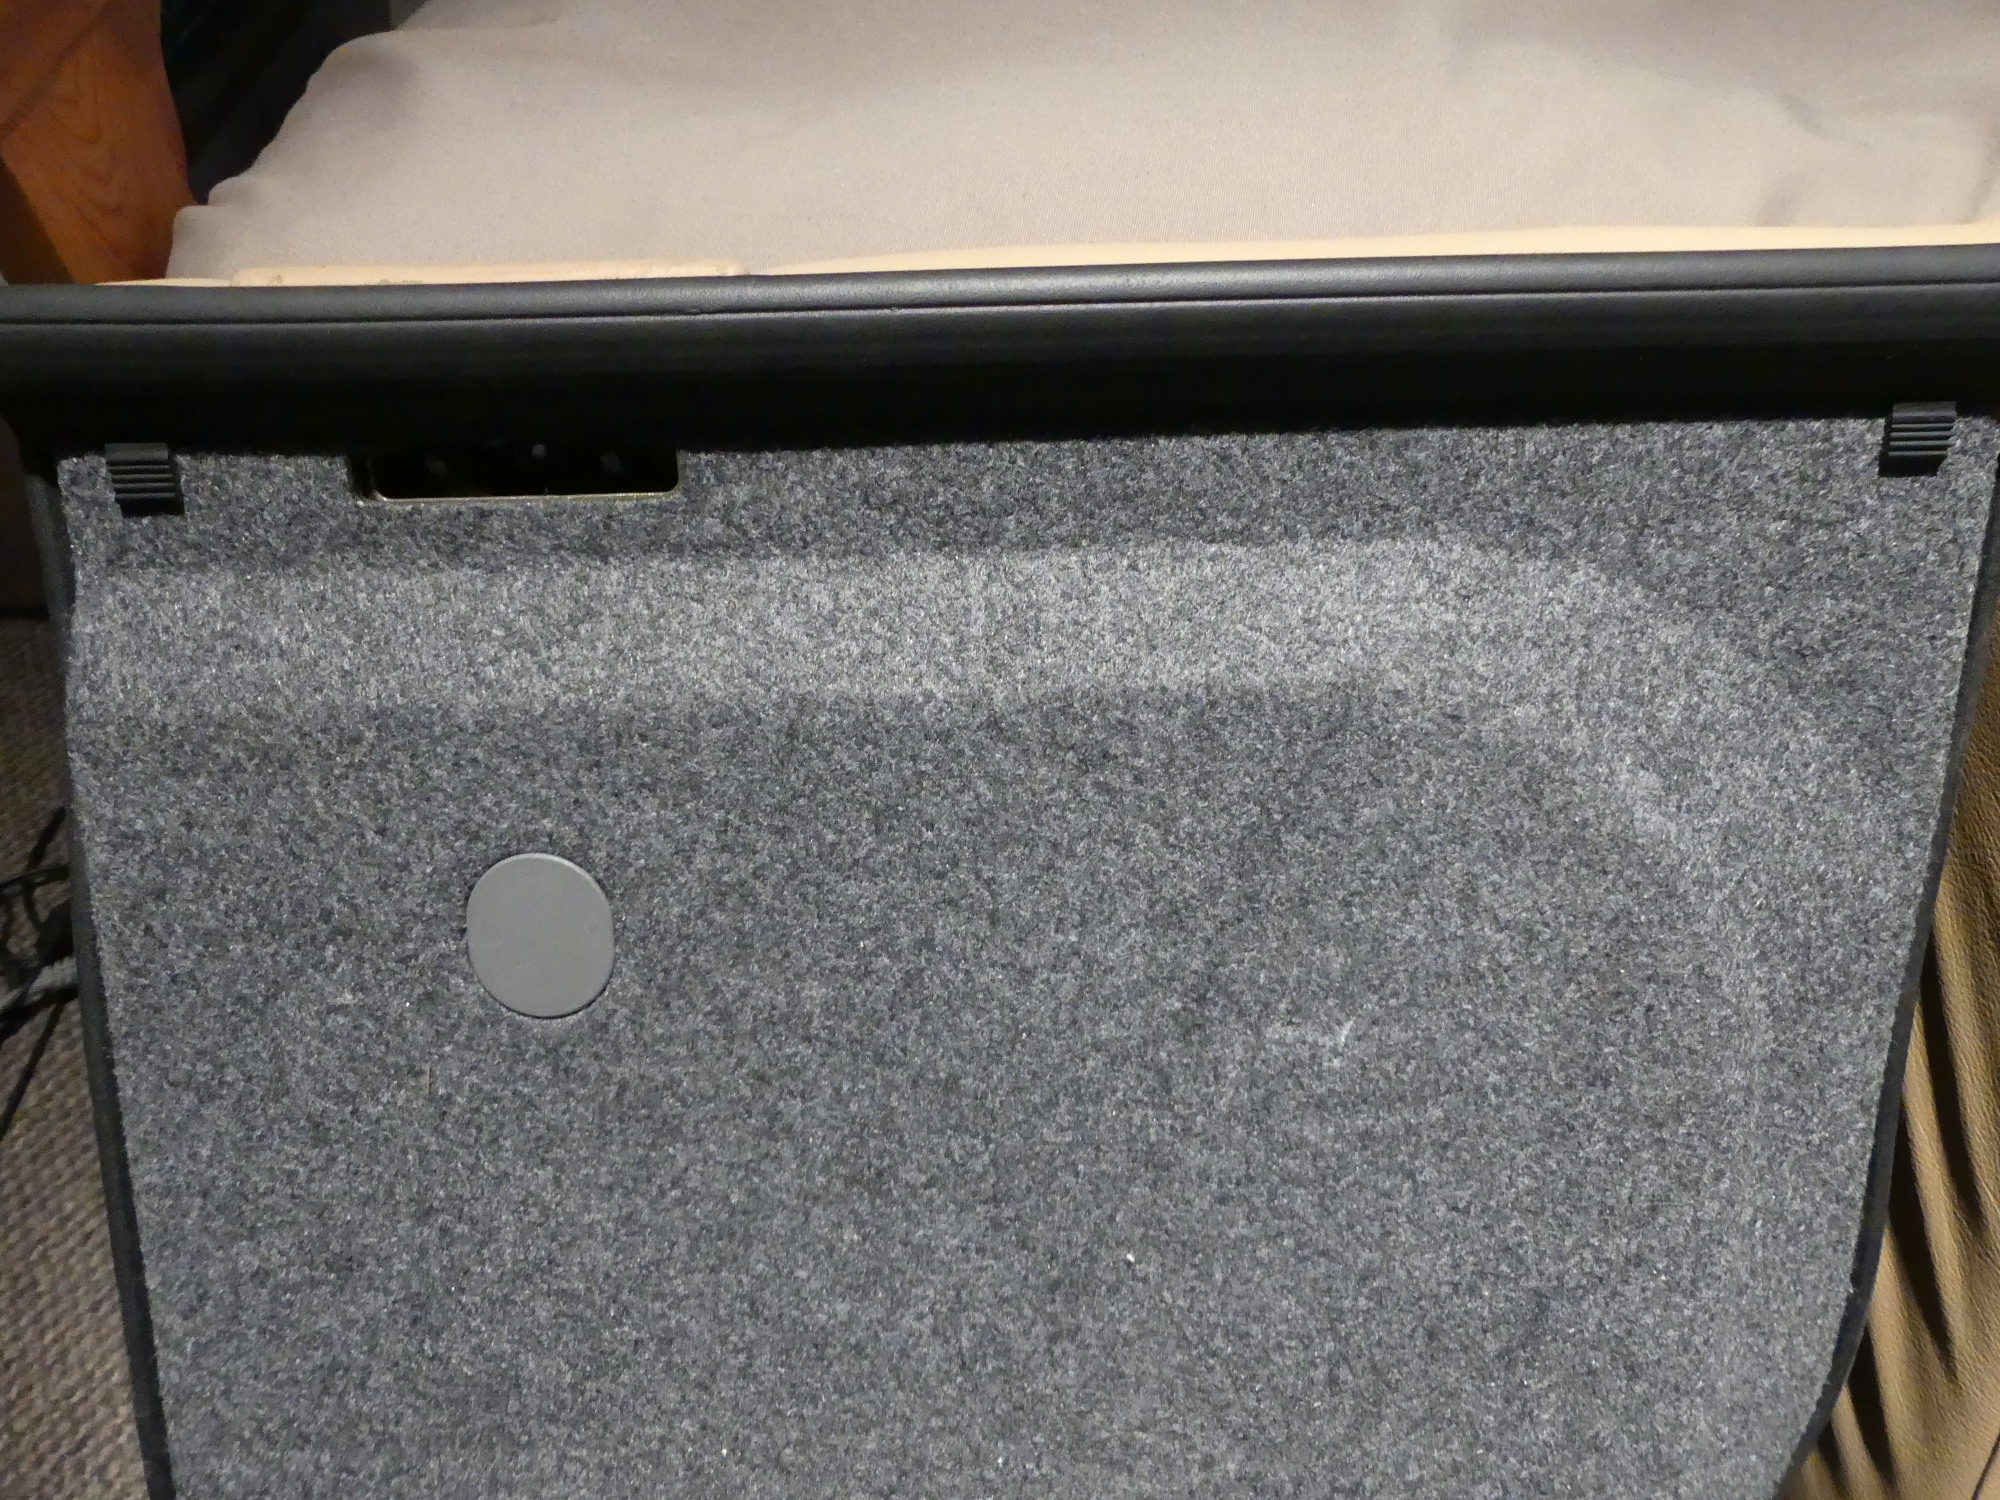
I wrapped up the work by installing the restored black trim pieces and I'm happy to say that they look great despite having one end on each exposed due to the loss of the end caps. Fortunately these serve only a cosmetic function and I will not see them with the seat backs secured so I'll just have to put those on my list of parts to look for when I go dumpster diving. For those keeping score, I'm now on the lookout for
- Rear bolster mounting bosses
- Rear seat belt mechanism cover plates
- Black end caps for the upper trim piece attached to the back rests.
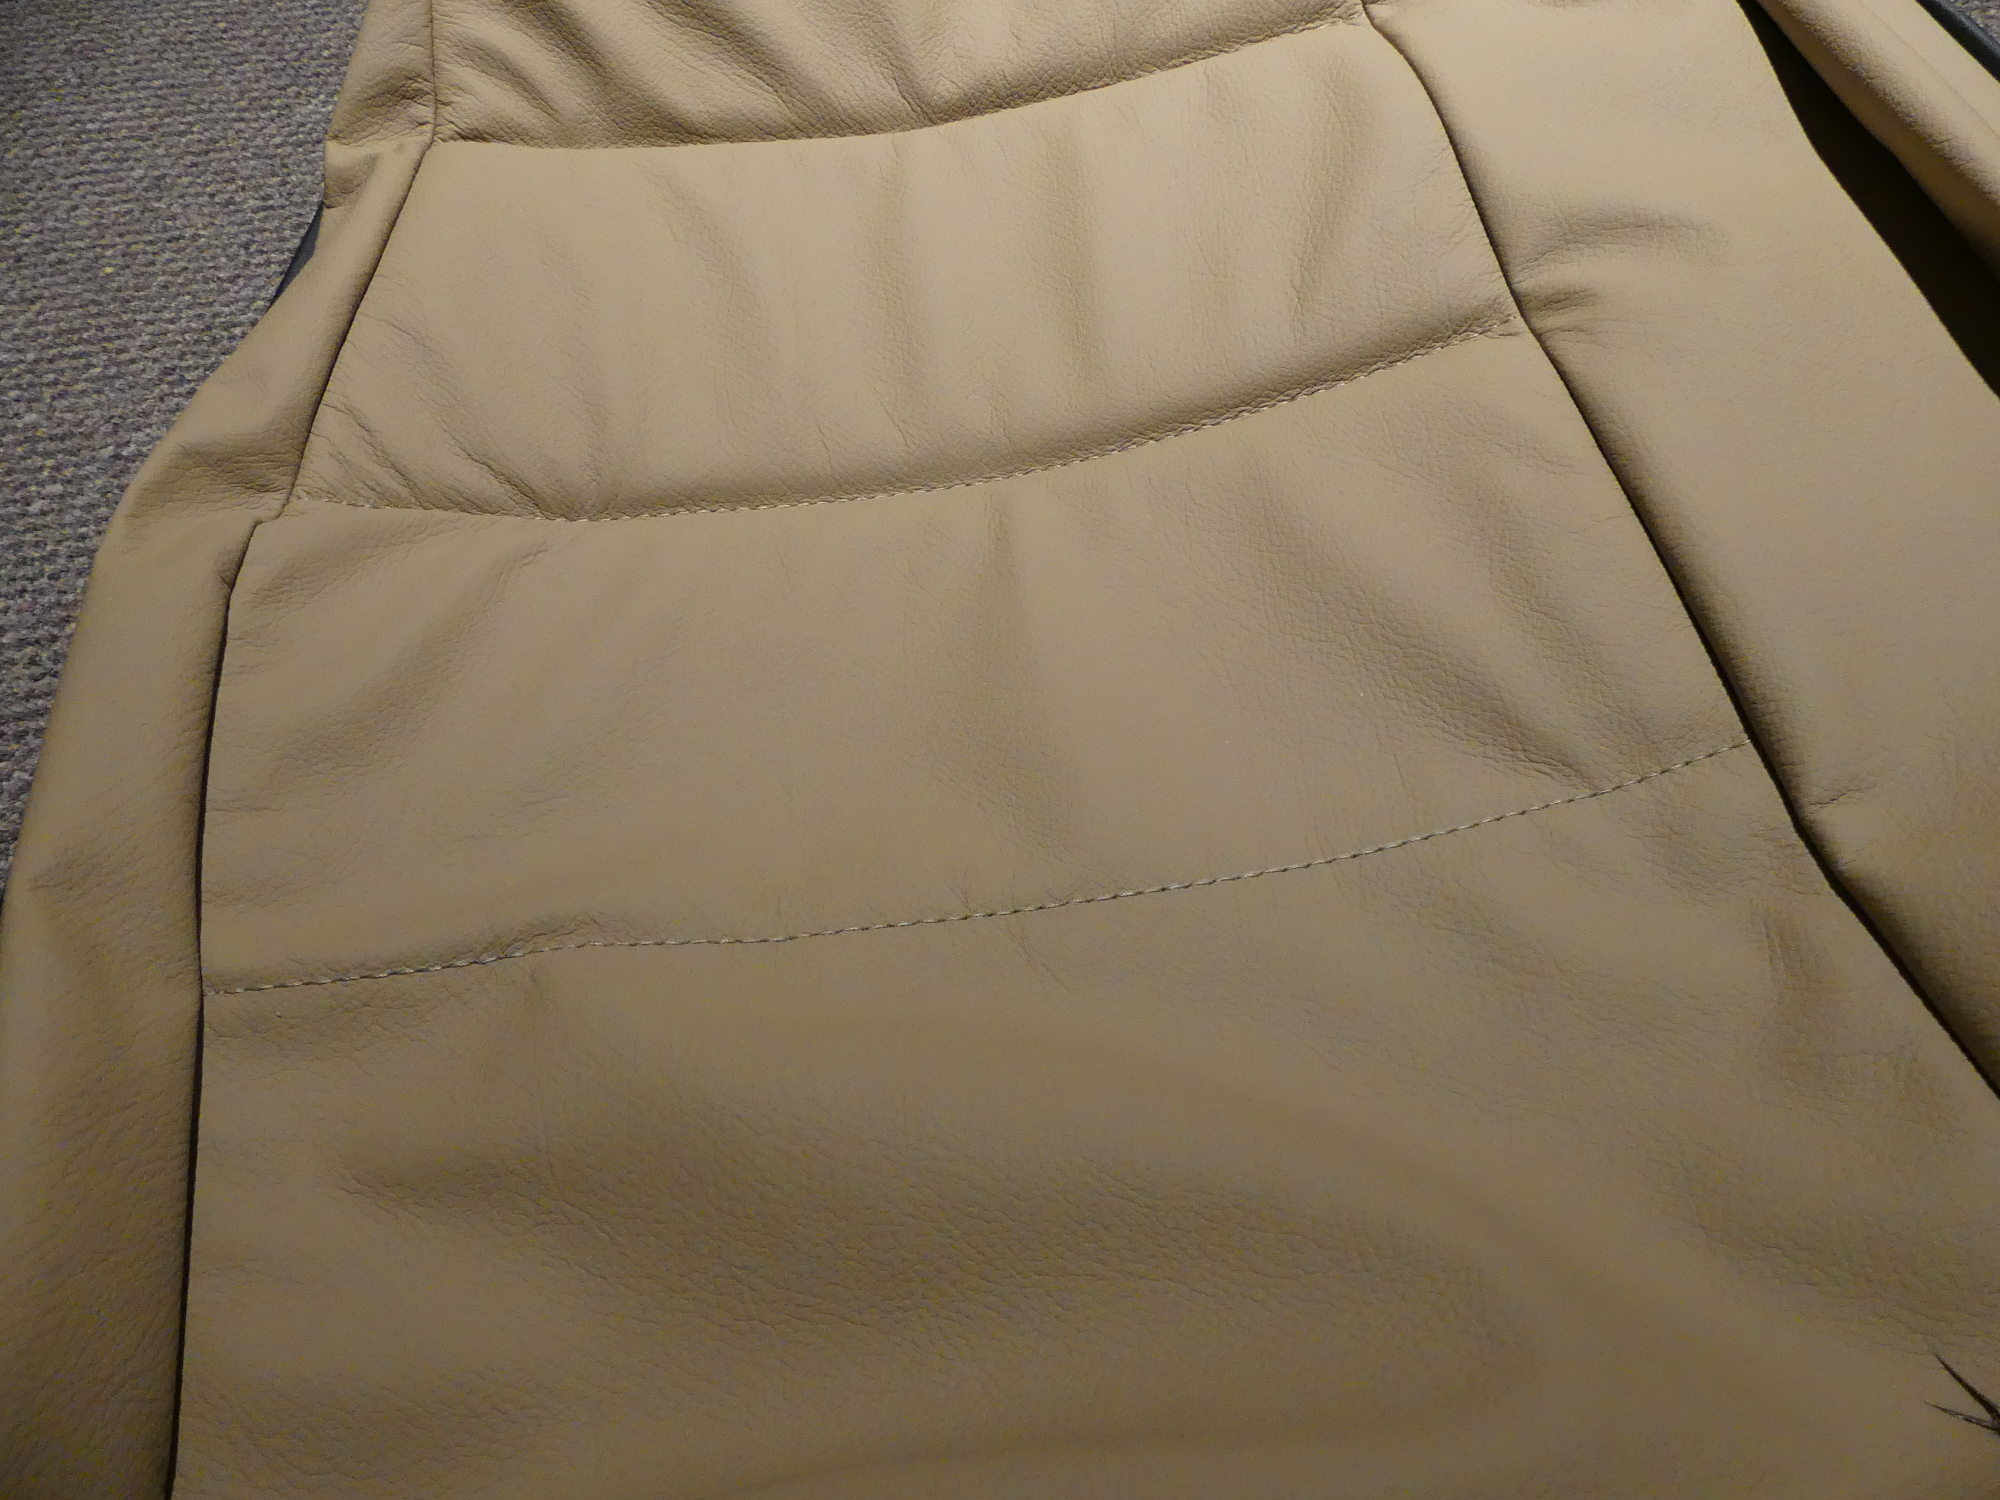
Looking at the backrests next to each other I have to admit I'm not particularly happy with the "interior" vertical seams and how they are rounded over near the top. This produces an unsightly gap between the seats where there was once a crisp 90 degree edge. But the reality is I can't do anything about this. The covers are not adjustable in any real sense and I am not about to take them off to send them back to GAHH, and risk further damage to the various fragile plastic components involved in this process. I often have trouble knowing when to quit, but I'm afraid this is one of those times.
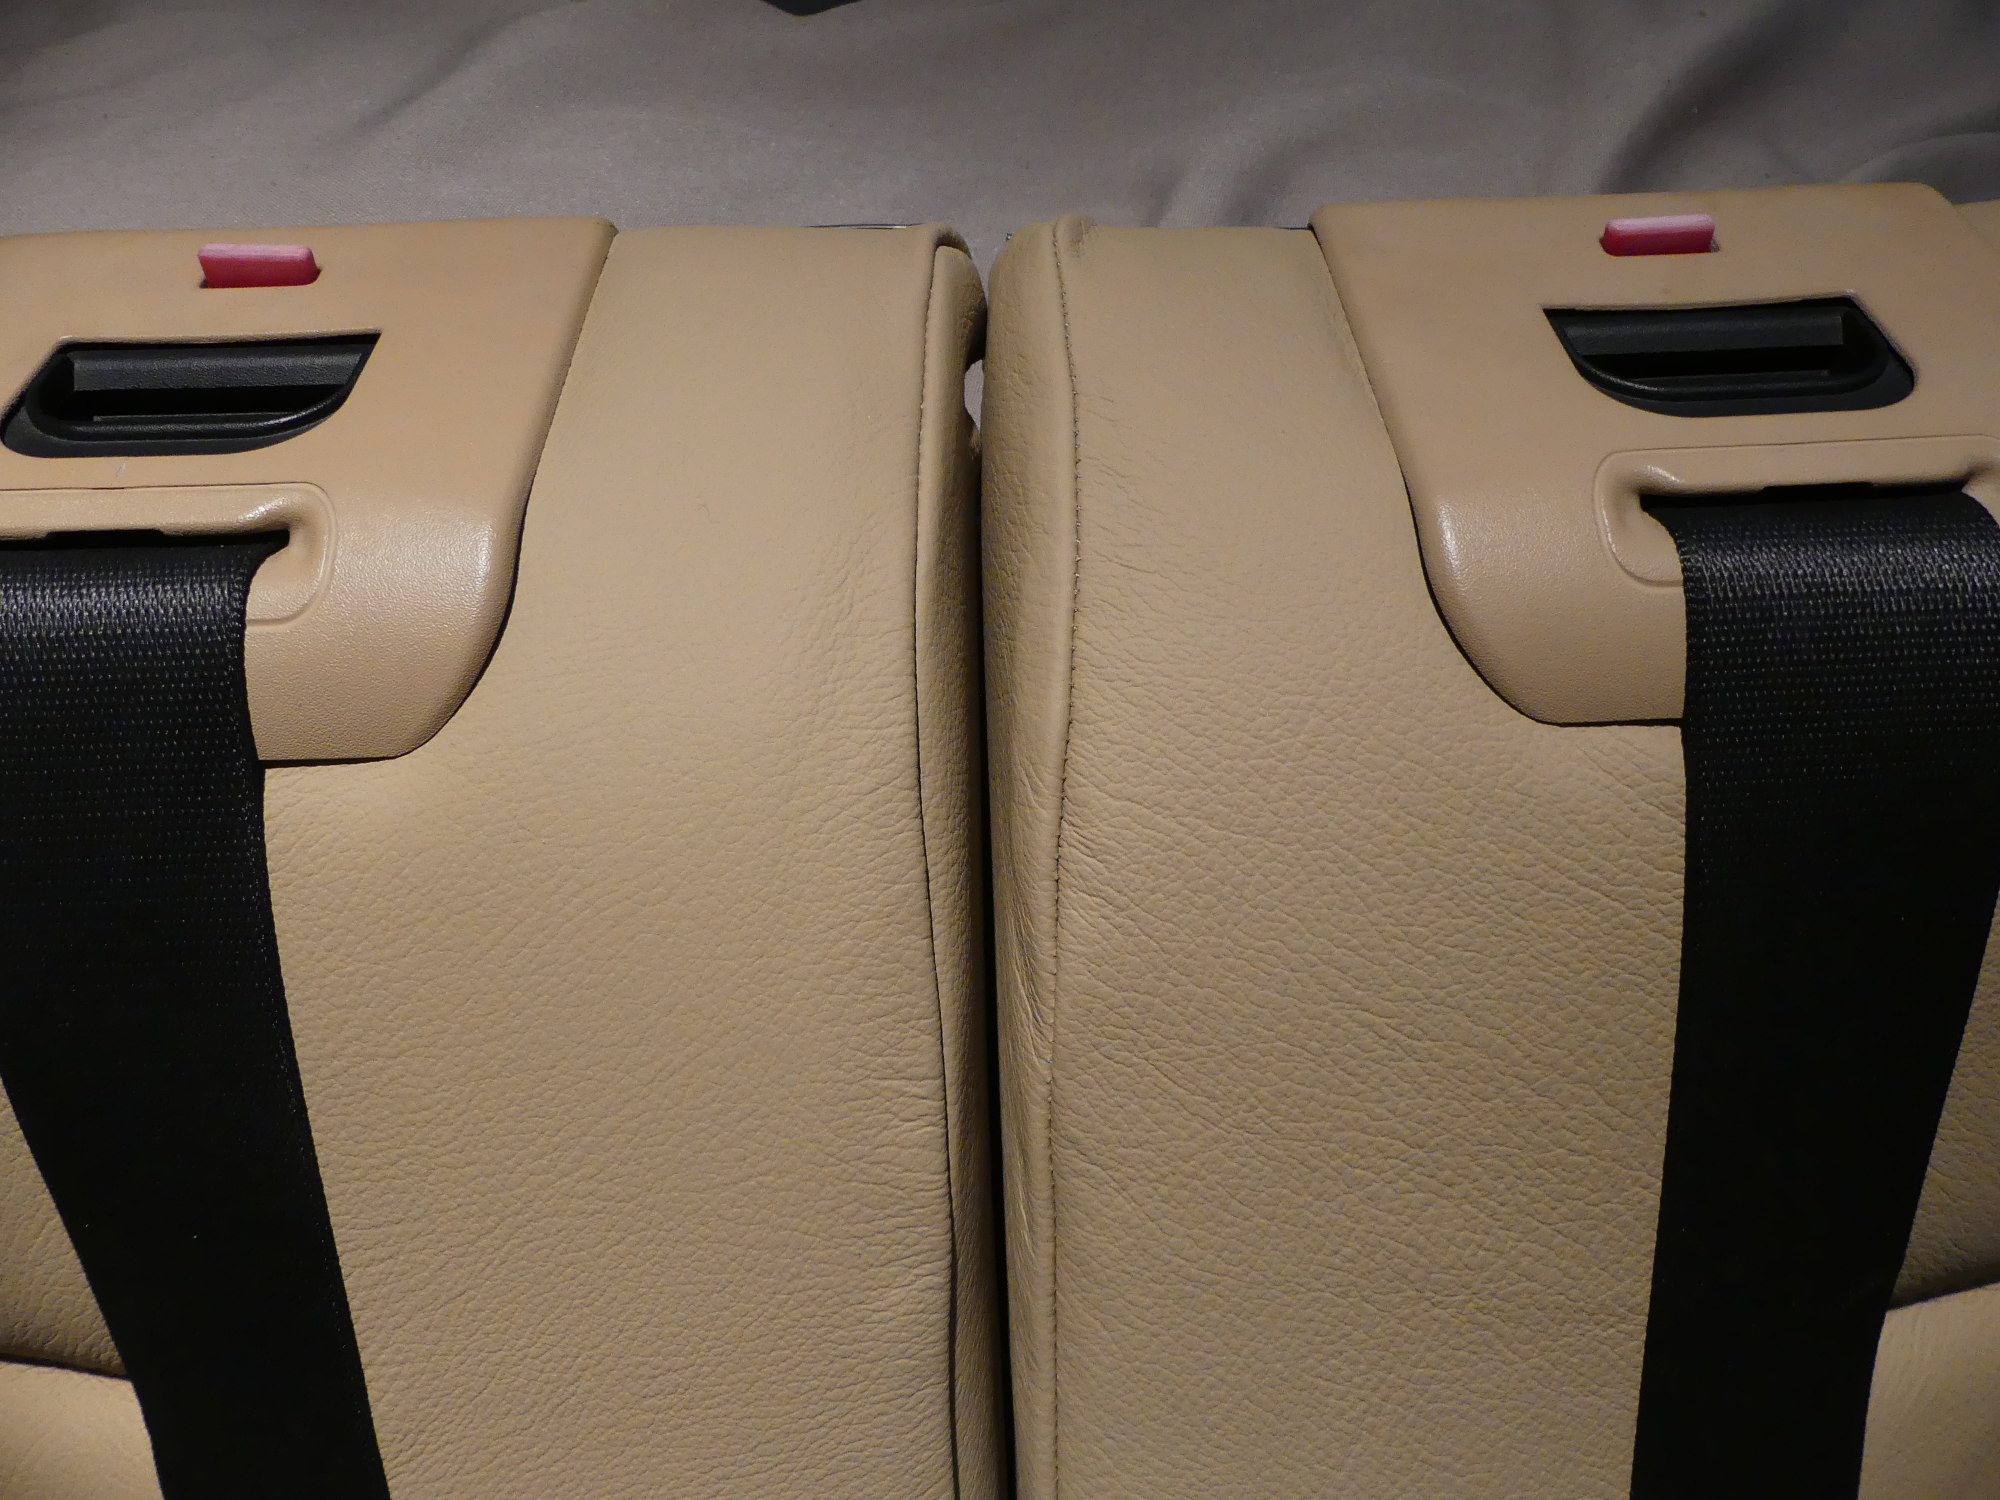 Here you can see what I'm talking about -- the seams were not sewn perfectly straight and the fabric is too tight across the top, so the end result is this unsightly rounded corner effect. The other side of the cover is perfect, though. |
 On the other hand, I'm really pleased how the refurbished black trim pieces look on the seats. The Plasti-Dip technique produced a finish almost identical to the original factory pieces. |
 A glimpse of things to come. The new covers are a vast improvement over the originals. I think I can safely call this a net positive for the vehicle. Now, on to the seat base... |
Installation and Wrapup
Clearly, the best part of the afternoon was returning the parts to the car. Although the rear seats are incomplete with the seat base still needing work the new leather looks a lot better than the original.
Speaking of the seat base, before I stopped work today I temporarily fitted the cover to the foam to check the fit and it looks good. I'll probably set aside some time between marathon coding sessions this week to install the cover so I can get the base back in the car and start thinking about how I'm going to address the front seats. Until then...