


Thursday, August 4, 2016
Rear Seats Complete
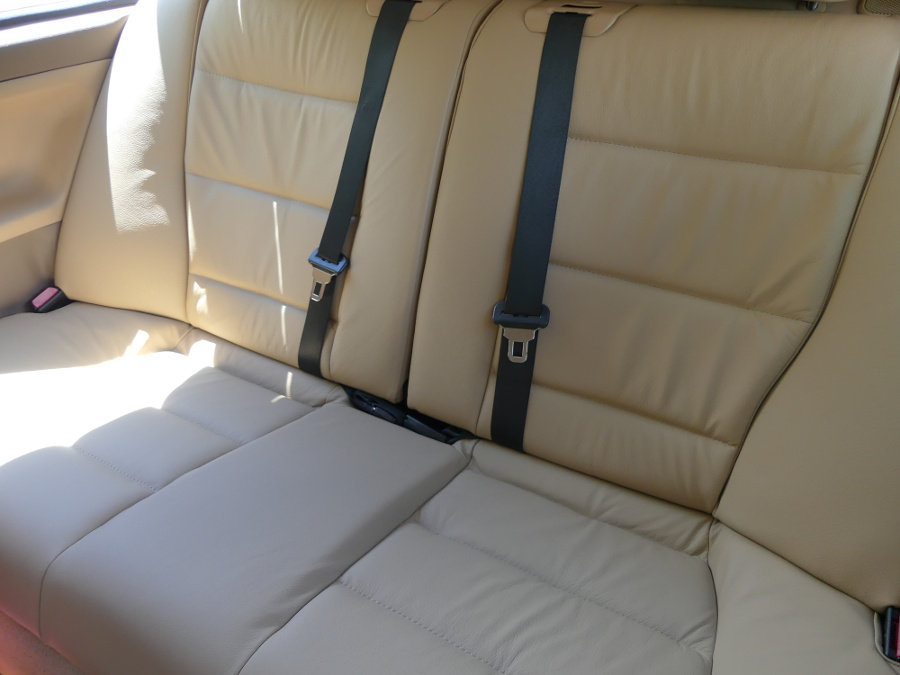
I found some time today to install the rear seat base cover and I can say I'm very happy with the results. In fact, considering the complexity of the cover design I'm impressed GAHH was able to copy it with such accuracy. It fits just like the factory cover.
The technique needed to install it was fairly straightforward, but did require some thought for a couple reasons. First, I did not remember exactly how I disassembled it so I couldn't use that procedure in reverse. Second, because assembly and disassembly are different operations, requiring different tools and different degrees of access to each attachment point.
For example, when cutting hog rings the cutter is inserted sideways (handles facing left/right) and relatively flat to the surface of the foam because the hog ring is mounted vertically. But installation requires the pliers be placed with the handles facing up/down and the tool held at an angle relative to the foam because the handles must remain open until the hog ring is ready for compression and it's not always possible to lift the leather cover above the tool or compress the foam underneath it.
I ultimately settled on the following sequence of operations:
-
Insert the three horizontal support rods on the left side (doesn't really matter what side -- I chose left) and install the 3 hog rings on the rear support by folding back the rear flap of leather.
-
Install 3 hog rings on each of the middle and front horizontal support rods by flipping front of the cover towards the rear of the base as needed to expose them.
-
Grab the cover on either side of the newly installed rods and gently pull each side to help flatten out the leather. Brush your hand over the leather surface, gently pushing outward to assist. This will stretch the fabric as required to meet the vertical support rods on either side.
-
Lift up the left side of the cover and fold it back as required to insert the left outer vertical support rod and fasten the 5 hog rings. When done, lay it down (but do not attempt to fit it around the bottom of the base...that comes later.
-
Grab the far right part of the cover and flip it to the left to expose the left side inner vertical support rod. Install the vertical support rod and then fasten the 4 hog rings.
-
Lay the leather down over the center section of the seat base, as required to leave the right side inner vertical support exposed, insert the support rod, and fasten the 4 hog rings. You may choose to leave the front-most hog ring unconnected at this time to help provide access to the remaining hog rings, but I was able to accomplish the job without doing this. I did all 4 here at once.
-
Insert the three horizontal support rods for the right side and lay the leather down.
-
Install the 3 hog rings on the rear horizontal support rod and when done flip the leather back around the rear of the base.
-
Here begins the tricky part: install only the innermost hog ring on the middle horizontal support rod. This will be a bit difficult to access. The correct technique requires compressing the foam vertically to the extent possible to provide a near horizontal path to the embedded support rod, as the leather cover will not move upward as much as desired. In my experience, this is the most challenging hog ring to install. If you can get this one done, you're home free.
-
Next, install the innermost hog ring on the the front horizontal support rod. This will be a bit easier because it is closer to the front and at this time the leather isn't secured that far forward.
-
Repeat the last two steps, except this time working on the middle hog ring on both the middle and front support rods. Wrap this section up by repeating the steps again for the outermost hog rings.
-
Again, take time to massage the leather pulling it to the right. As you examine the right side outer vertical support the leather should be perfectly aligned with the near vertical foam that forms the bolstering in the seat base.
-
Install the outer vertical support rod and, starting from the rear, attach all 5 hog rings.
-
Flip the entire over (make sure the work surface is CLEAN. Do a "FOD sweep" as we pilots say, looking for hog rings, support rods, etc. Sharp edges will pierce the leather easily and ruin the day.
-
Insert the long rear support rod, centering it in the process. Install the left and right support rods, followed by the front.
-
Starting at the rear center, install all hog rings required, gently pulling / stretching the leather as required to closely mate the support rods into the heavy steel rods molded into the seat base. Work outward from the center to ensure the leather is stretched evenly.
-
Install the hog rings on the left and right sides. These may require some extra effort in stretching the leather.
-
Finally, install the hog rings on the front support rod, again working out from the center.
I wasn't watching the clock but it took me perhaps 40 minutes to do the top. The bottom was done in about 20 minutes, but as usual I wasn't rushing. Of the two sides, the bottom was definitely easier and, because of the easy access to each attachment point, actually somewhat fun and rewarding. Installation in the vehicle took all of 30 seconds and I think the results speak for themselves. Next up -- the front seats.