


Saturday, September 17, 2016
Rear Brakes Overhaul and Shocks
If you've been in an E36 with its rear seats folded down you've likely noticed the car is a lot noisier because the seat cushions normally provide substantial sound deadening. When I pulled out the rear seats to install new leather earlier this summer the car got noticeably noisier as expected, but the first time I approached a stop light with the seats removed I heard something I didn't expect: a disturbing low frequency grinding noise as I slowed below 30 MPH.
I had only heard a noise like this once before on this car and it turned out to be a bad wheel bearing so I was naturally eager to troubleshoot the problem. I quickly demonstrated that the noise only occurred when the brake pedal was depressed and for some time following its release, and mostly at low speed where, I presume, it was not masked by road and wind noise. To further investigate the noises I drove through a local strip mall with the windows open and heard the noise plain as day reflecting off the storefront glass. This also revealed a higher frequency periodic or cyclical scraping noise that occurred while coasting at low speed, i.e. without the brakes applied.
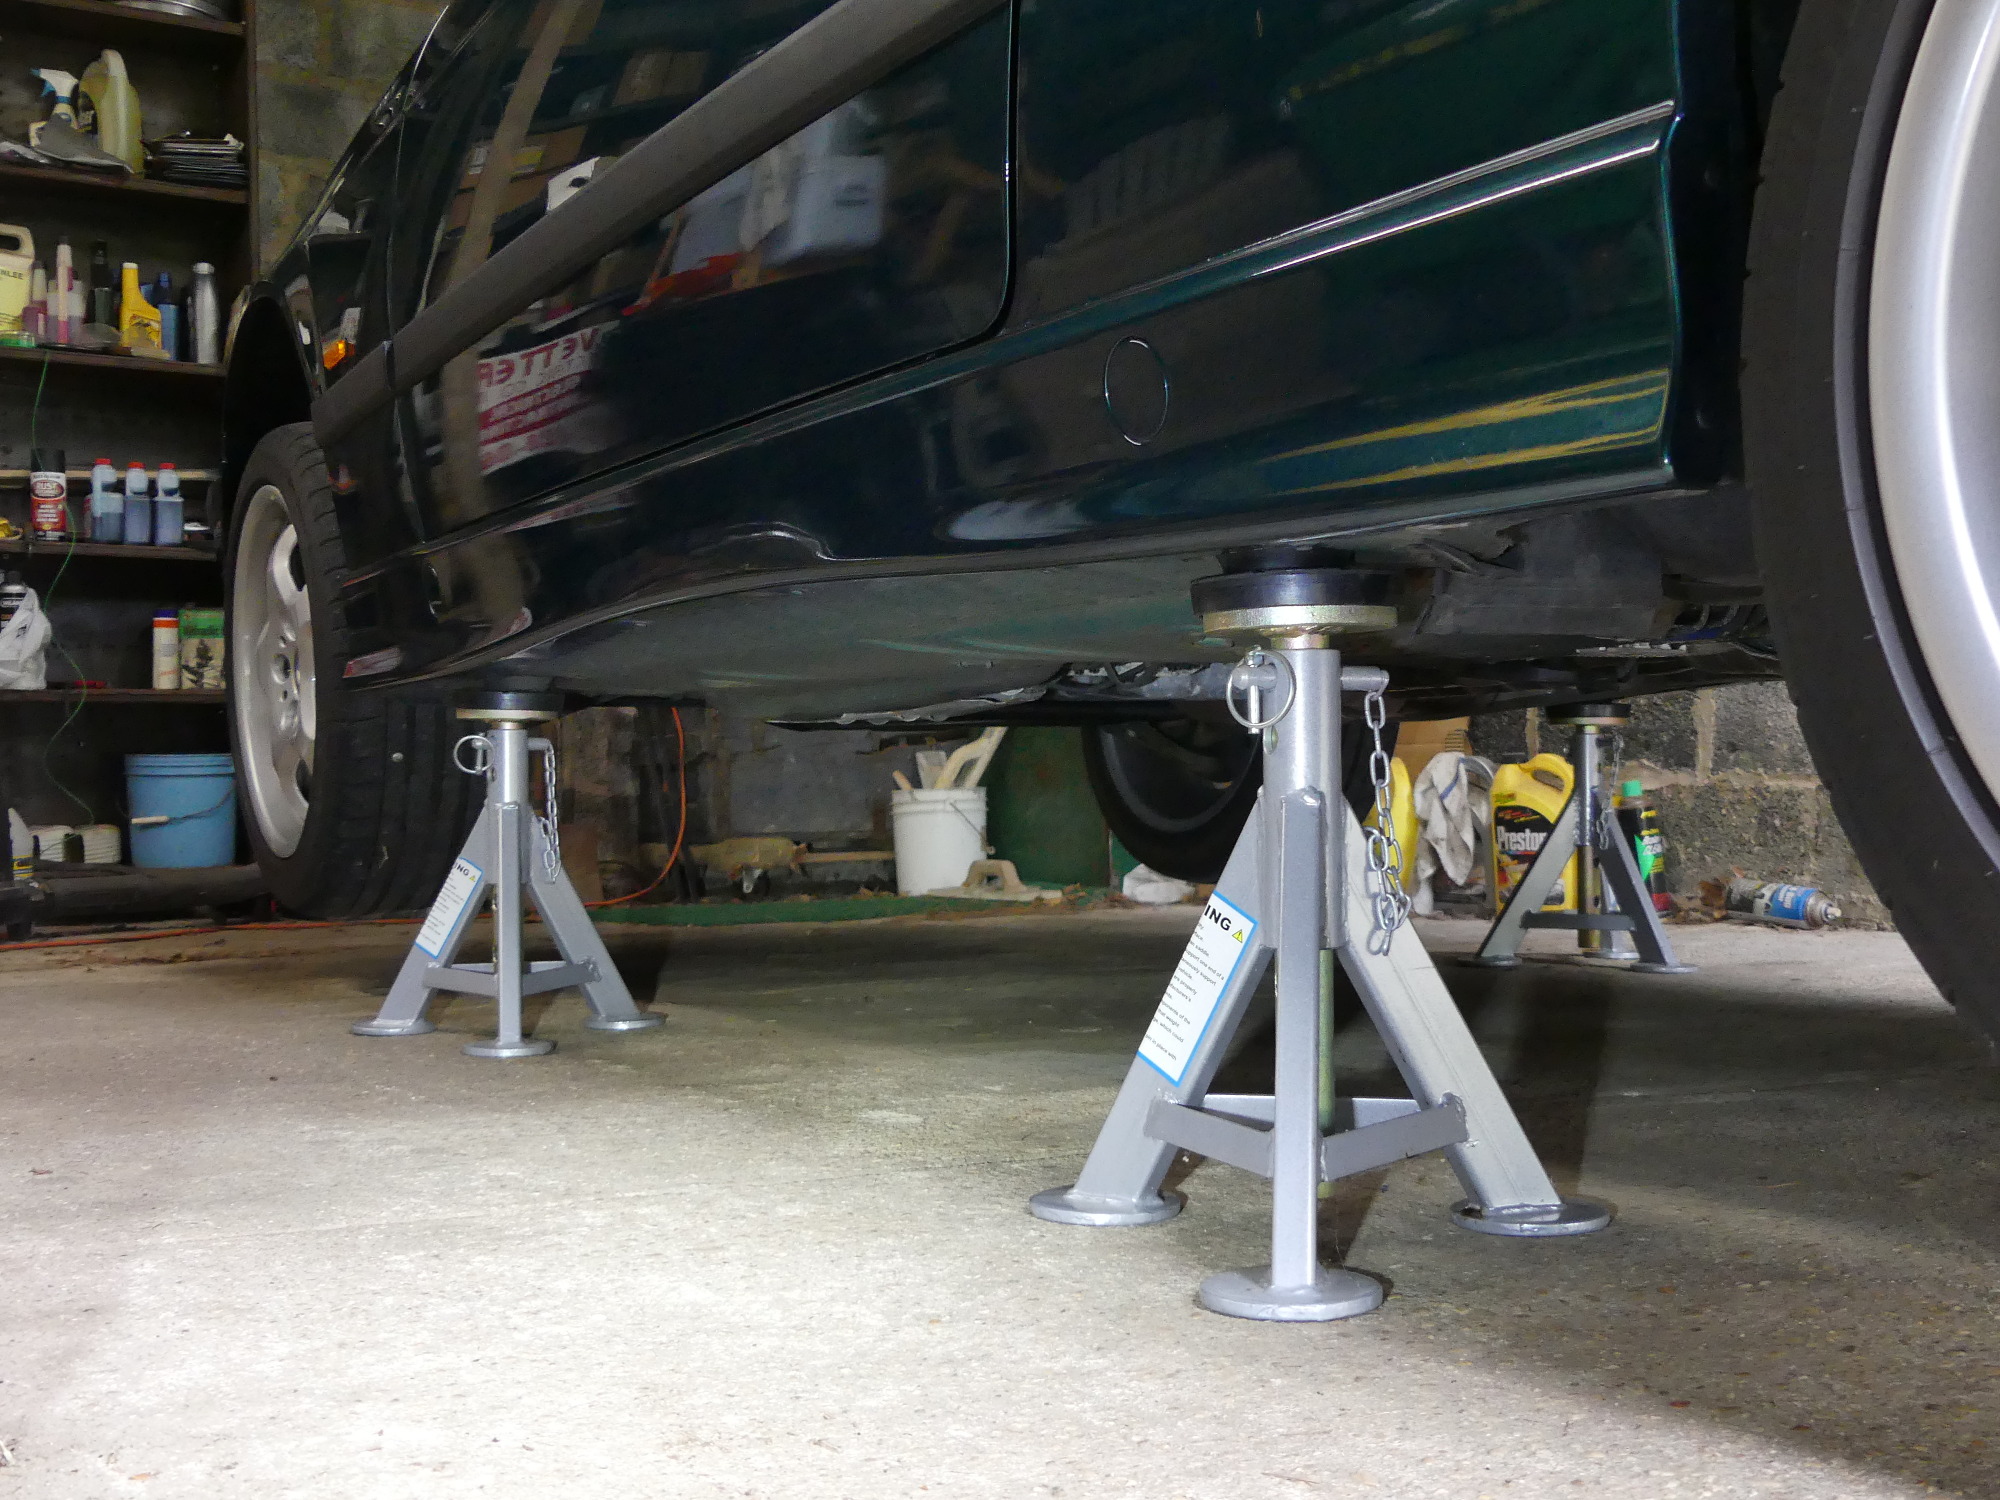 I've said in the past how I love the flat top jackstands and this is why. They fit perfectly with the mounting pads and this reduces the likelihood that the car will slip off the stands. I haven't used my old jackstands since I purchased these units. |
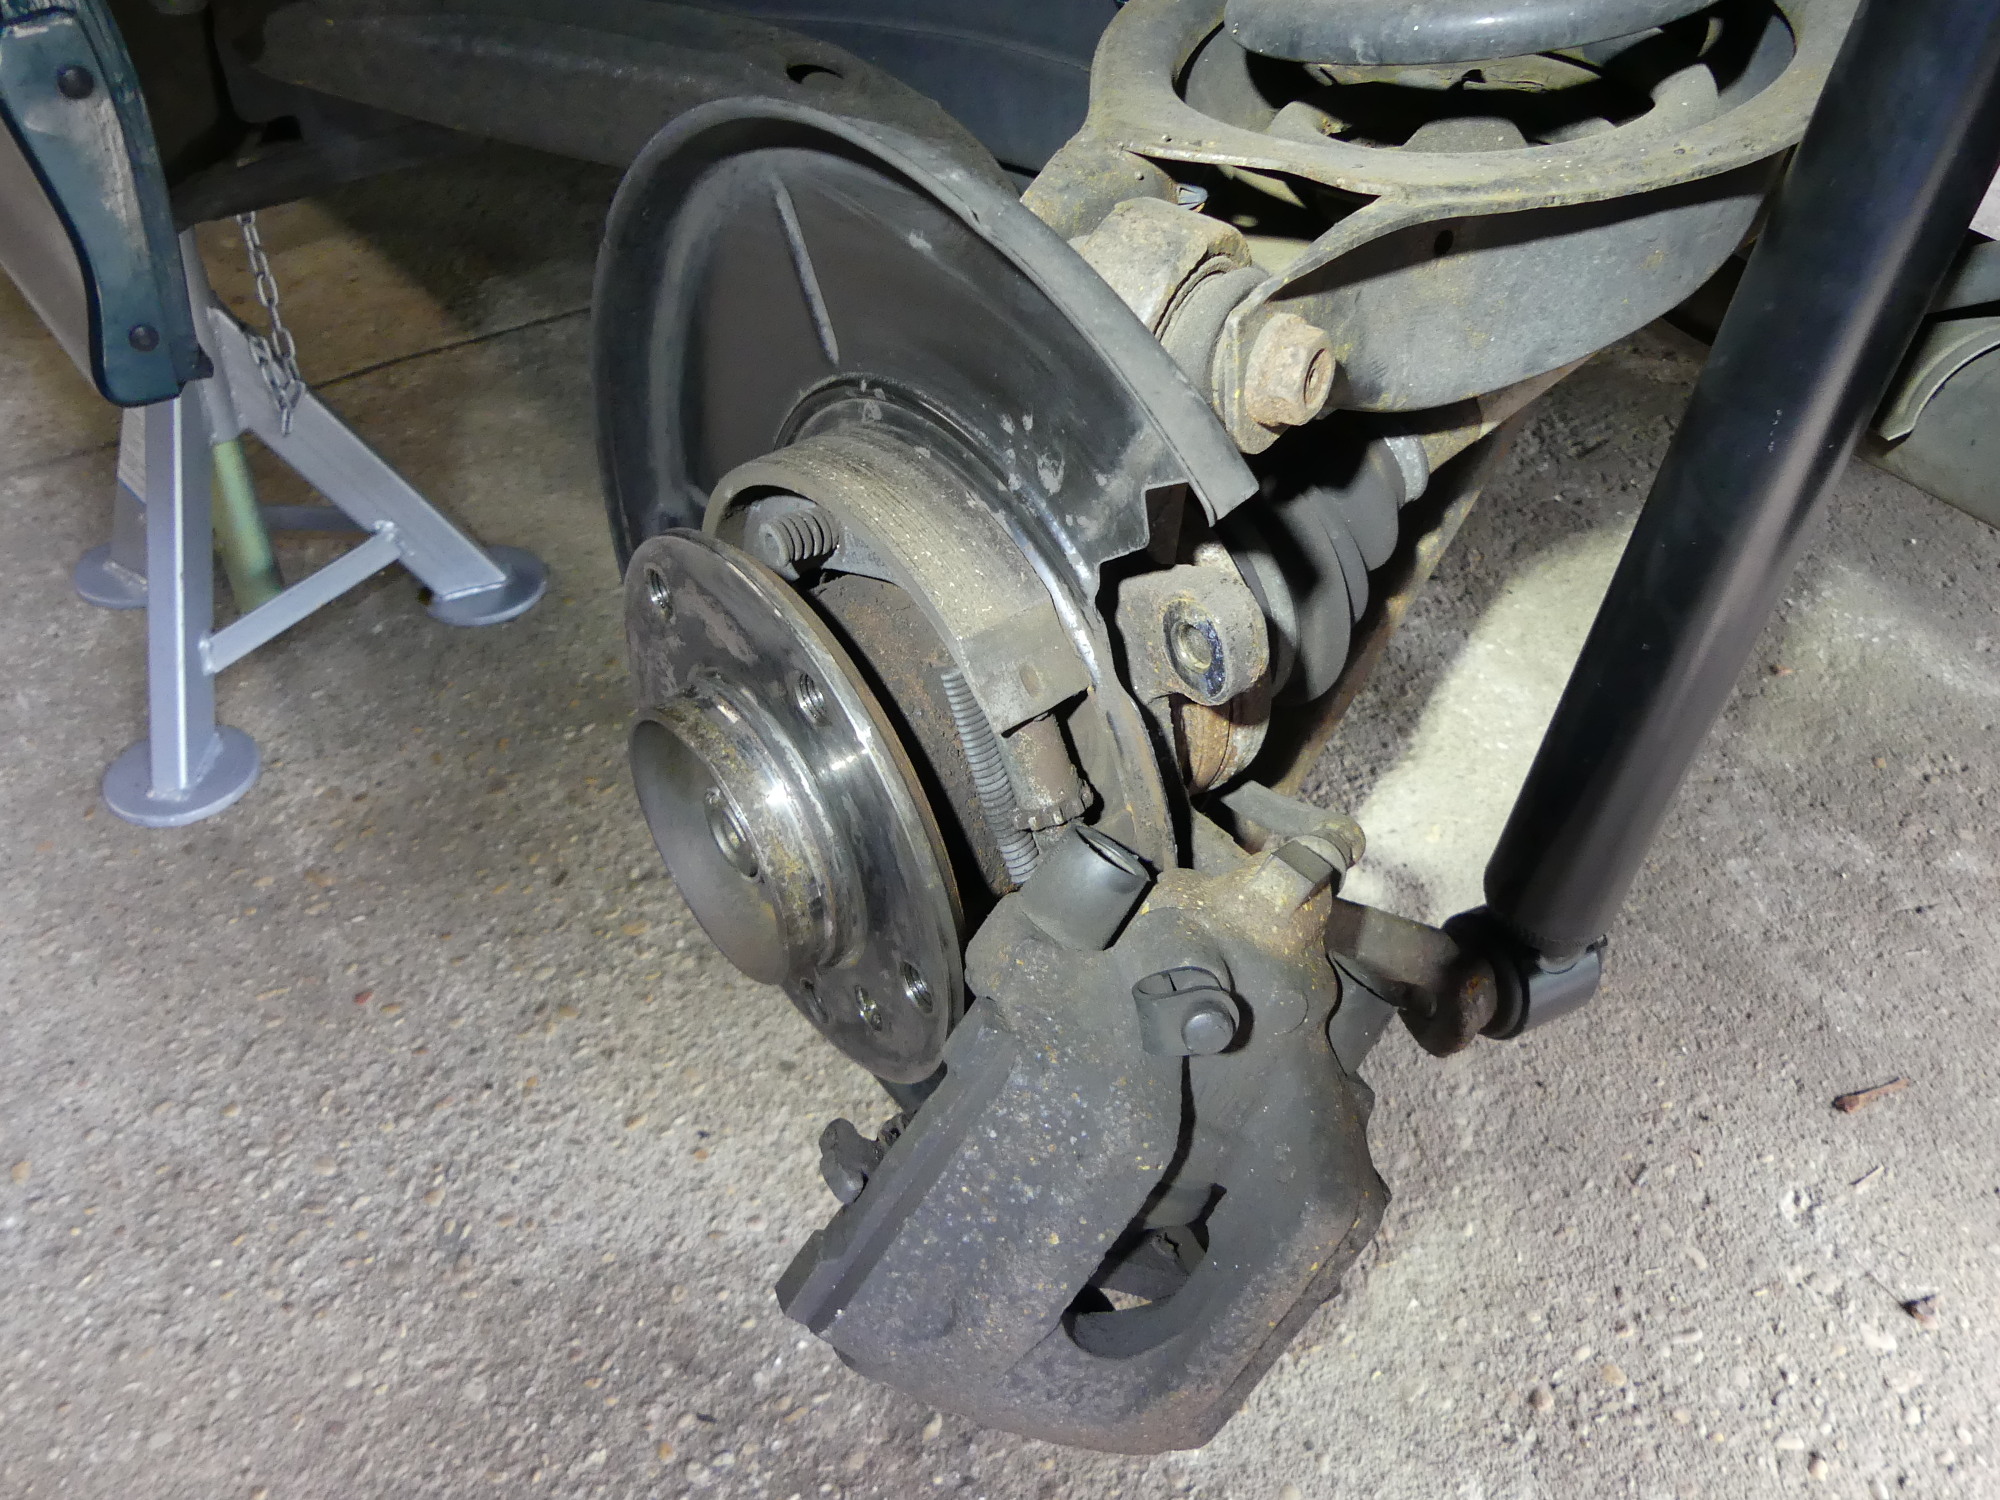 With the left side disassembled it's clear that the powdercoat I applied six years ago during the rear suspension overhaul hasn't held up particularly well. I'm not sure I would use this finishing technology again for anything but a show car that remains garaged. |
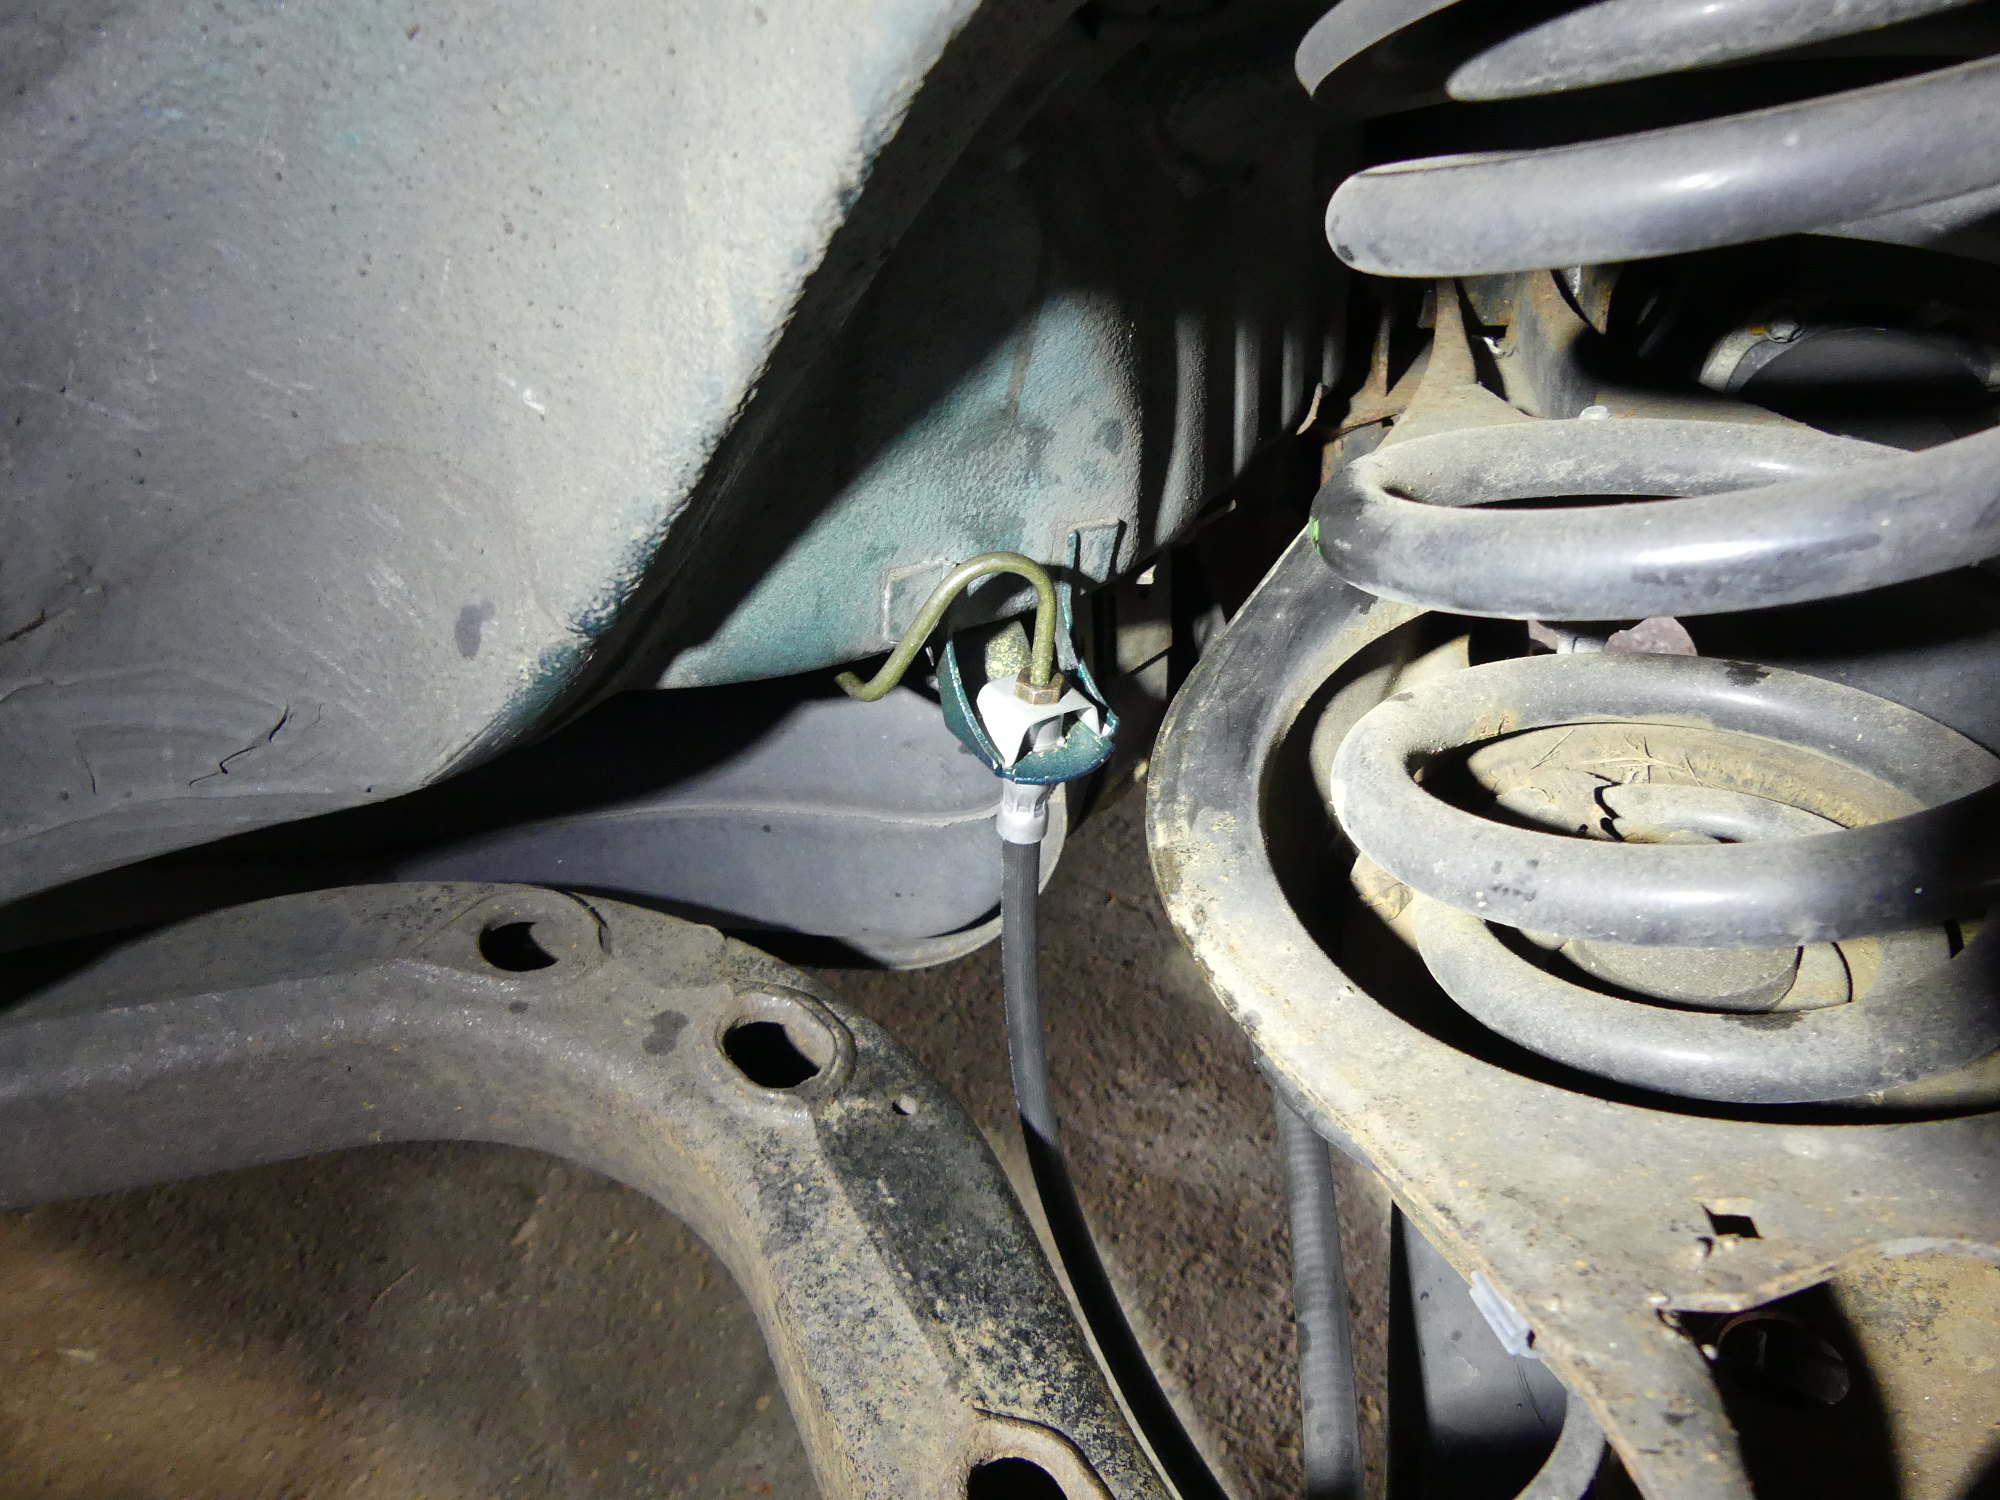
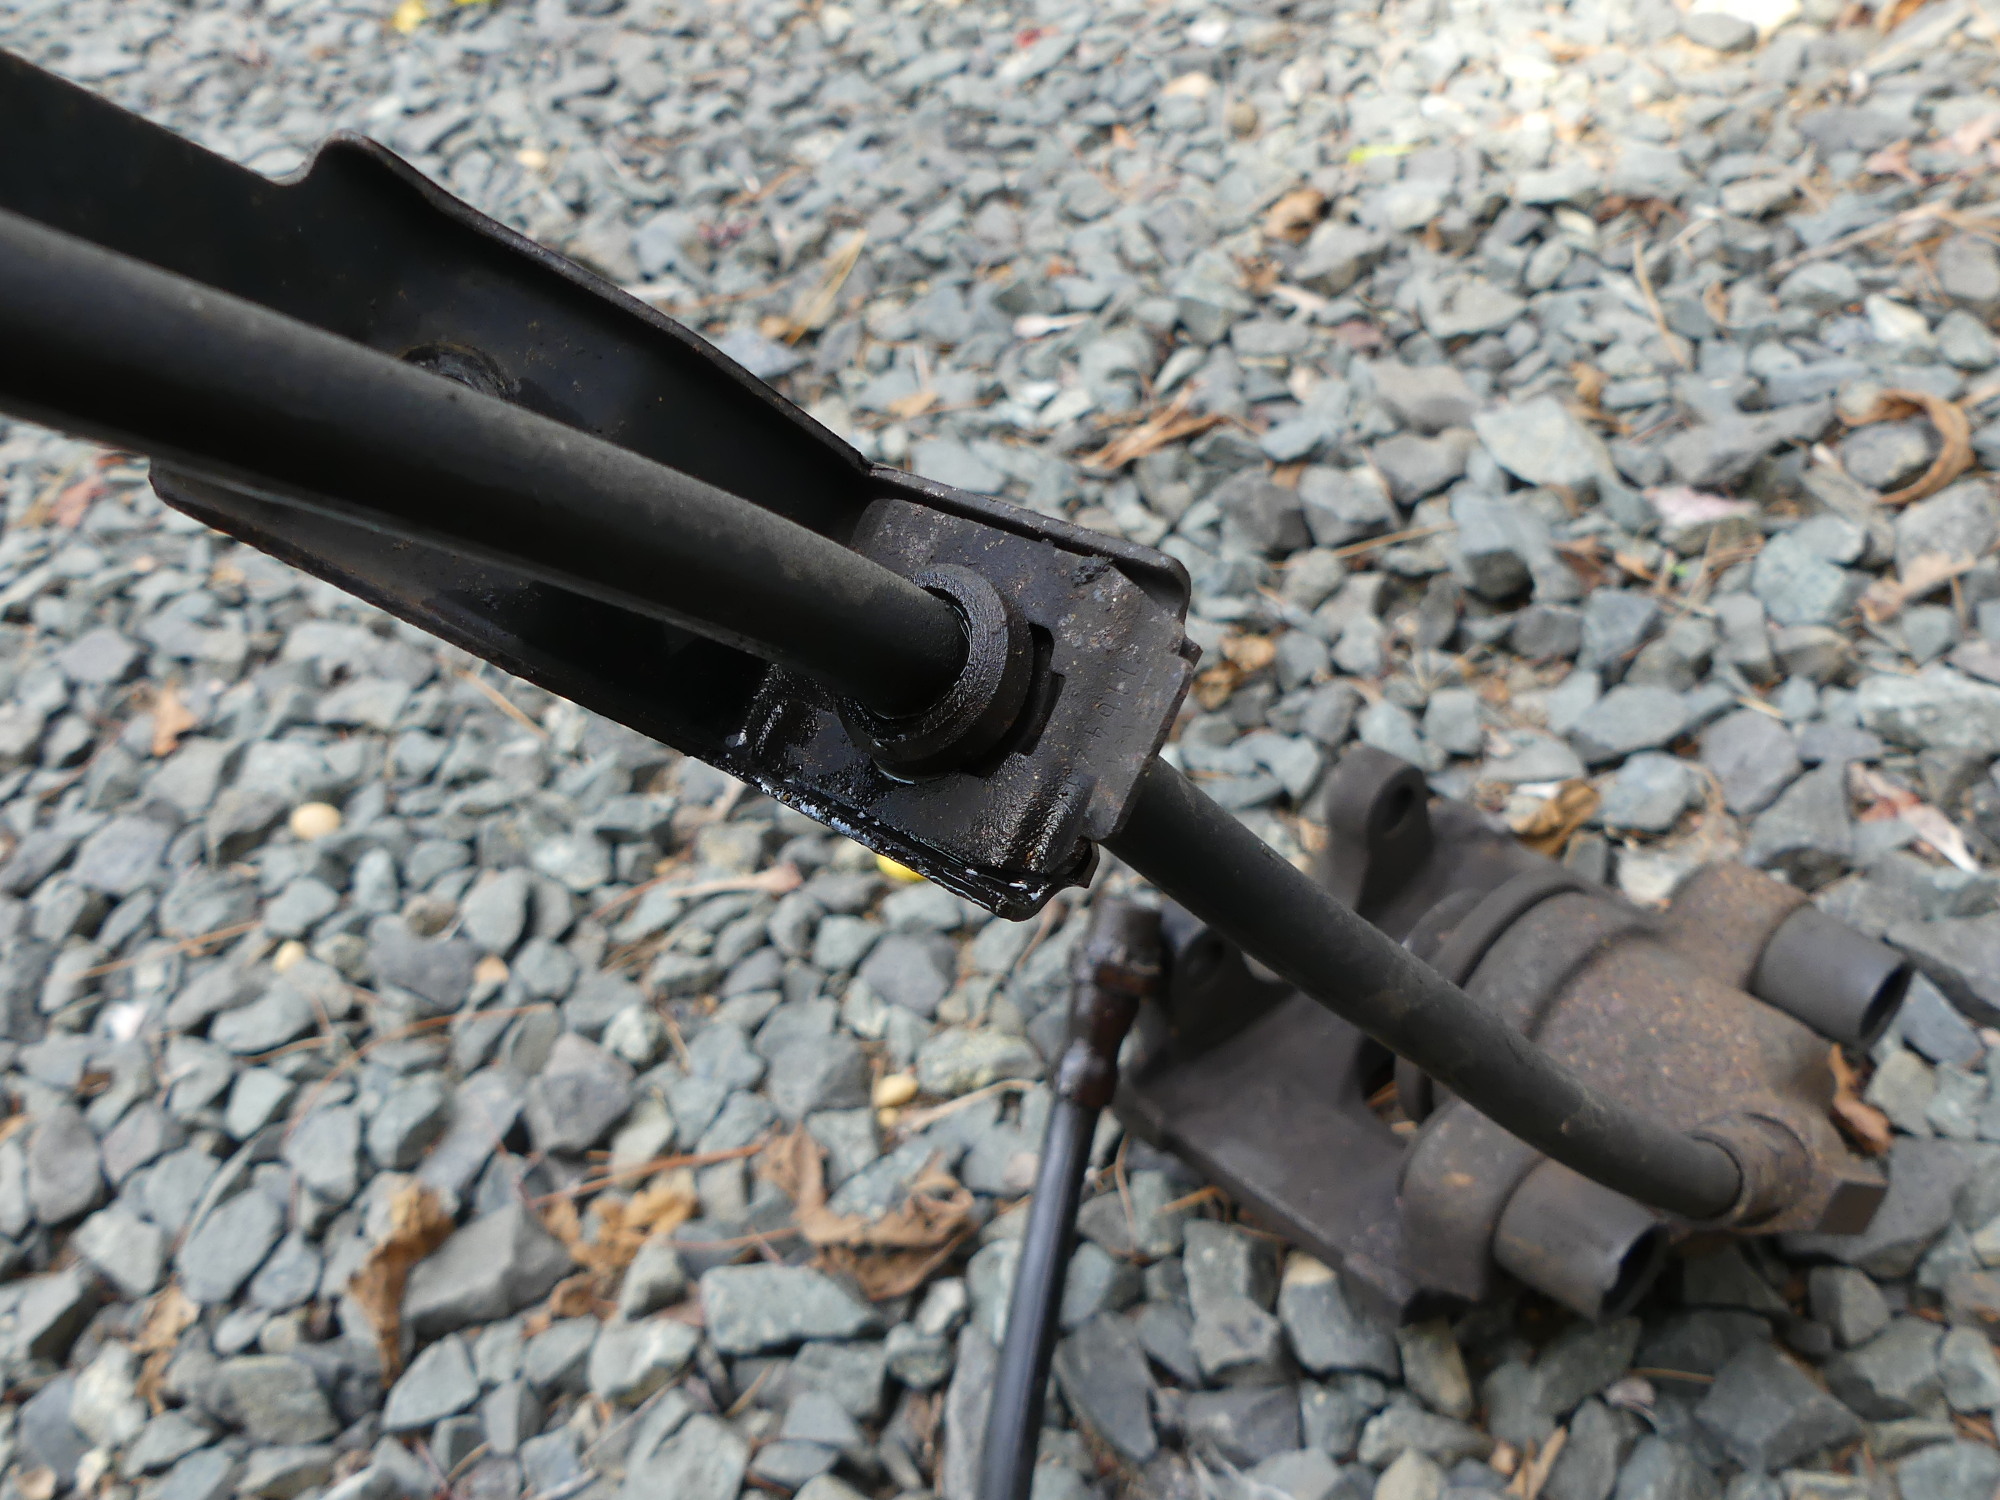 A closeup of the 18 year old brake caliper and hose removed from the vehicle shows how the retaining clip is inserted to hold the brake line in place on the bracket that is attached to the trailing arm. The new retaining clips are zinc plated and should hold up better than these did. |
While it wasn't much of a stretch to diagnose the problem as worn rear brakes the problem is these sounds are not normal on a properly maintained BMW because the wear sensors typically trip well before the pads hit bare metal, and in this case my wear sensor had not yet tripped. While I've found pads on a given axle (front or rear) typically wear evenly, backing up BMW's decision to put a wear sensor on one side only, localized problems can cause one side to wear more than the other. If the additional wear occurs on the side not equipped with a wear sensor the pads can wear down to bare metal without tripping the brake wear indicator.
The usual culprit of uneven pad wear is a sticking caliper, which can occur due to something as simple as lack of lubrication of the guide pins combined with dirt or rust (which occurs most frequently on cars not routinely driven), a corroded piston that doesn't move freely in the bore anymore, or both. Given the calipers have been in service for 18 years and I had to replace the front calipers due to corrosion back in 2012, I determined the most likely cause to be a corroded piston, so I decided to research my options for caliper replacement.
What I really wanted was a new set of ATE (OEM) branded calipers, as I knew those would be BMW parts without the price. I did find ATE branded front calipers but rears were not available. That left with me exactly two options -- Chinese rebuilds which, while inexpensive, had less than stellar reviews, or new BMW parts. If you've been reading this blog for any length of time you already know what I did. Fortunately, the discount level at my dealer put the price below any of the online vendors, and despite having to pay tax to our worthless and corrupt state government I think I got a pretty good deal.
Laboring on Labor Day
Labor Day turned out to be true to its name, as I went over to the garage to begin work because the weather was unusually cool on the backside of Hurricane Hermine. A quick review of my maintenance schedule revealed it had been slightly over two years since I'd completed the last brake fluid flush so I decided to put all four corners up on jackstands in prep for that work.
Pulling the wheels off I found two surprises -- a small nail/screw in two of the tires. With at least a couple months left before I switch to winter wheels I figured I'd take these to my tech to be dismounted, patched from the inside and remounted / balanced, as I'm done with gummy worms, especially for high performance applications. Unfortunately I discovered my technician was on vacation this week (in eastern NC no less, which got tossed by Hermine) so I knew this would have to wait until later...possibly much later if my technician was blown out to sea with the hurricane.
While idling the car the last few months I've occasionally heard a rattling under the middle / rear of the vehicle, so while I was under the car doing an inspection I looked for a loose heat shield and I found it -- one side had torn through one of the flanged mounting screws. As the shield is in otherwise good shape the solution will be a new fastener and a custom fender washer of sorts cut from some spare aluminum plate I have in stock. Why aluminum? Because dissimilar metal corrosion between a zinc-plated steel washer and aluminum heat shield would likely destroy both components in short order. Plus, the hole in the heat shield is already approaching the size of most readily-available fender washers and I don't want the thing coming loose.
When it came time to pull the calipers off the rear I found what I expected -- the pads on the left were essentially worn down to metal with less than 1mm of pad material remaining and the small ridge on the outer circumference of the rotors were worn down through contact with the pad base plate, hence the cyclical screeching sounds.
The pads on the right were worn down to the point that some metal was exposed on the wear sensor but it hadn't yet tripped. My guess is it would have tripped on its own in another couple hundred miles so new rotors and pads were certainly justified regardless of the uneven wear problem. I may have been able to reuse the wear sensor but I found it absolutely glued to the pad base plate for some reason. I tried to pry it out using a small screwdriver as I have done several times before only to have it break into pieces. Oh well.
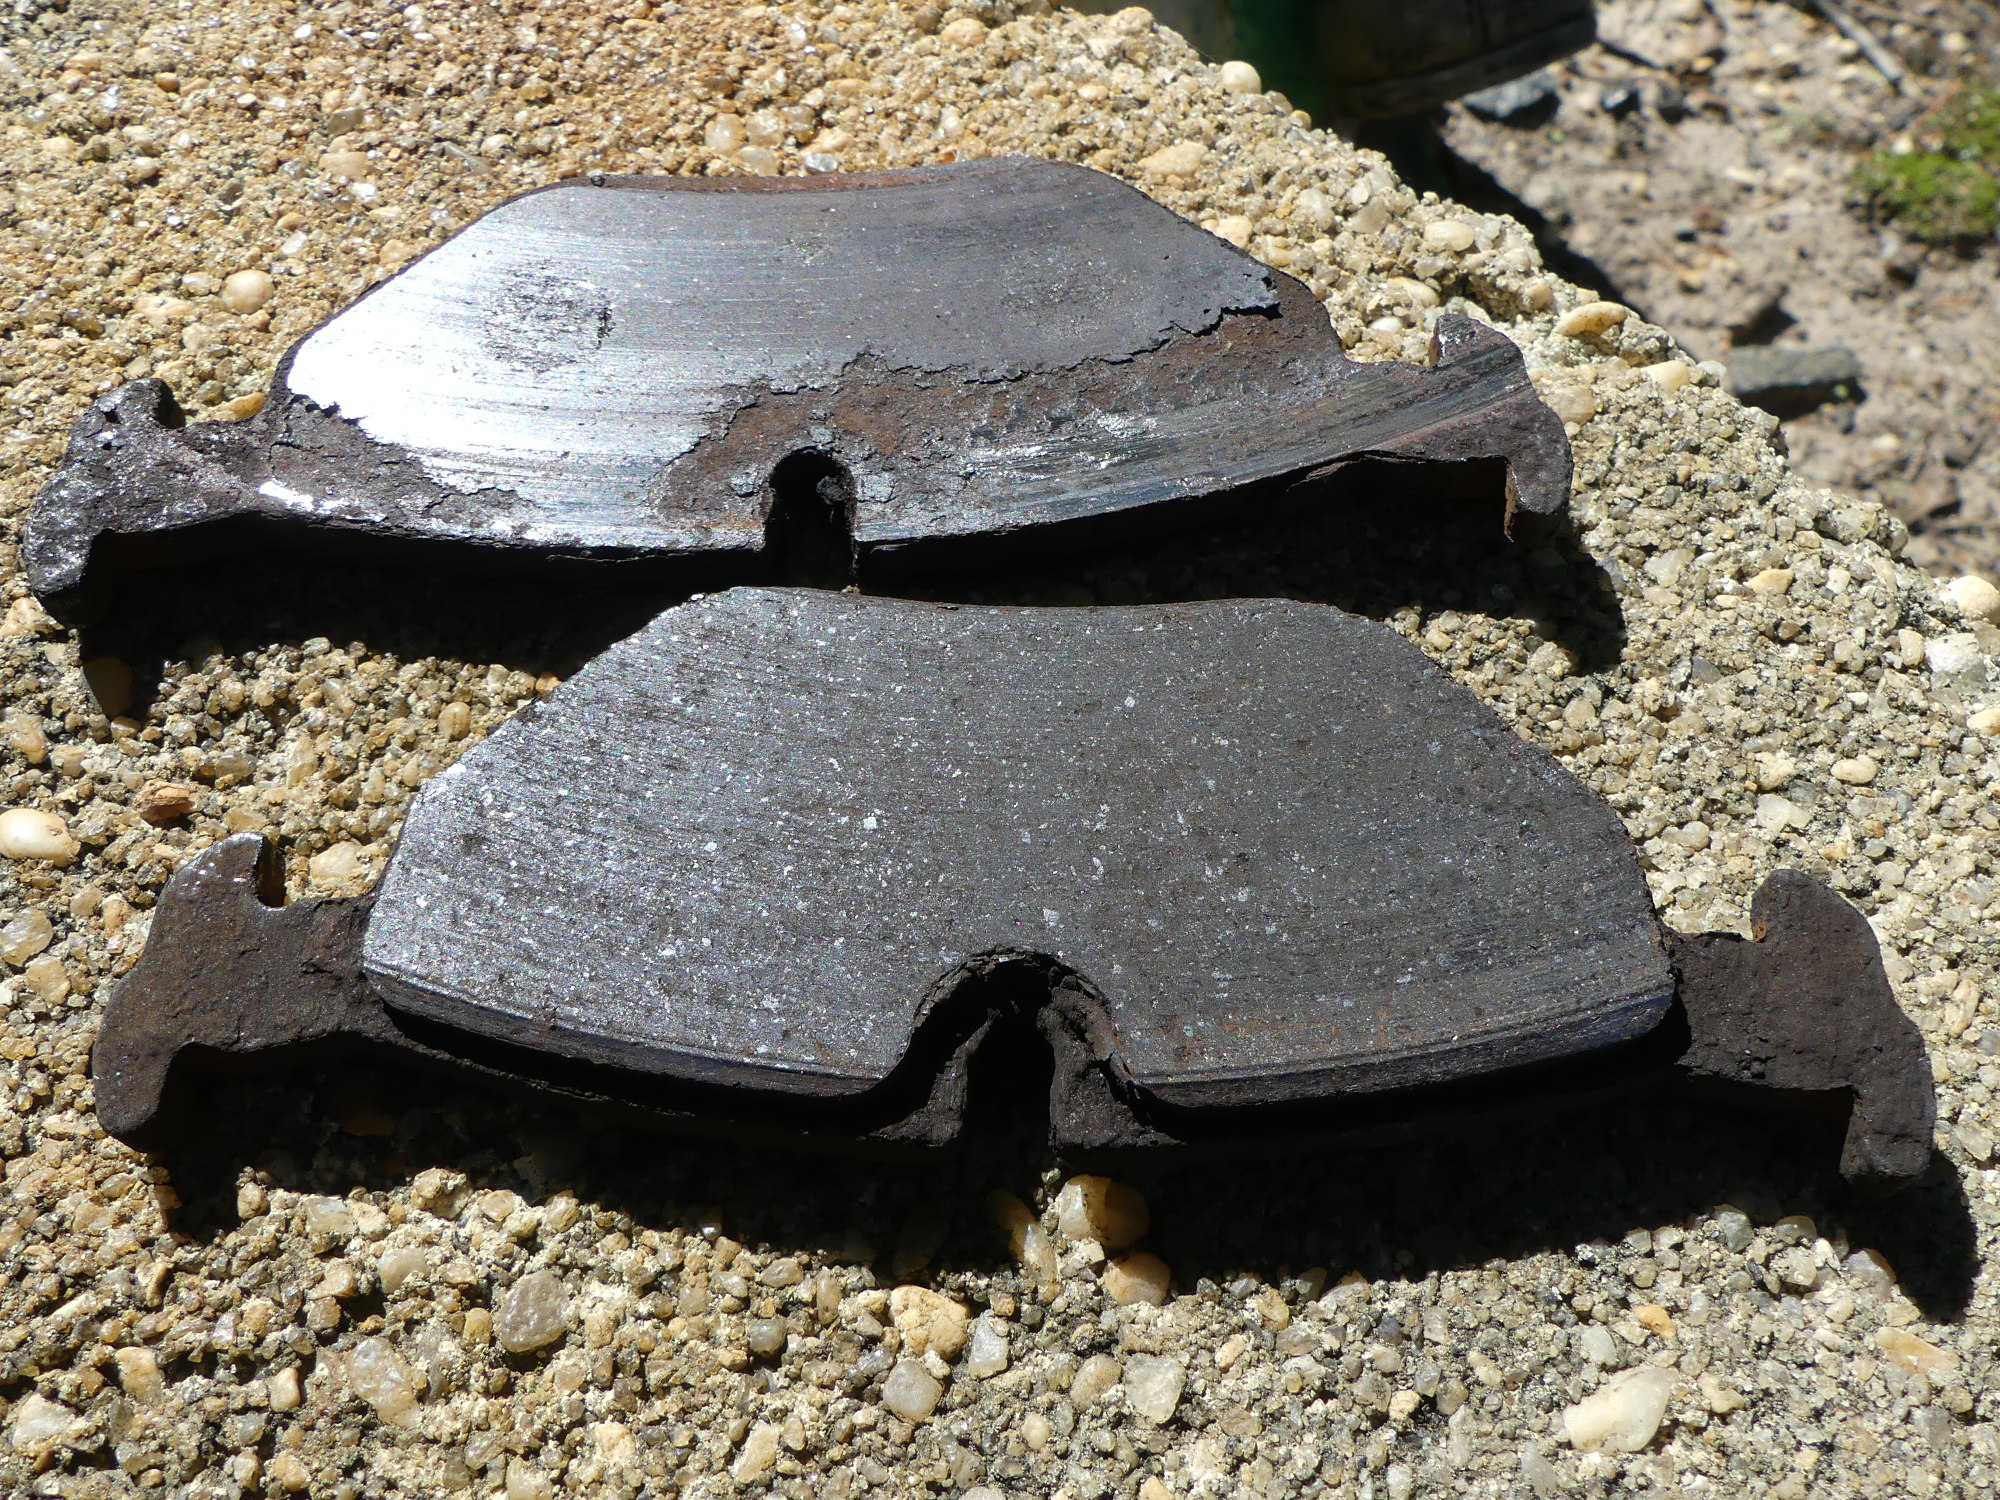 The outer left pad is at the top, while the right outer pad is on the bottom. The left pad was substantially more worn, to the point that the backing plate was in contact with the rotor. Yes, it made a horrible noise. |
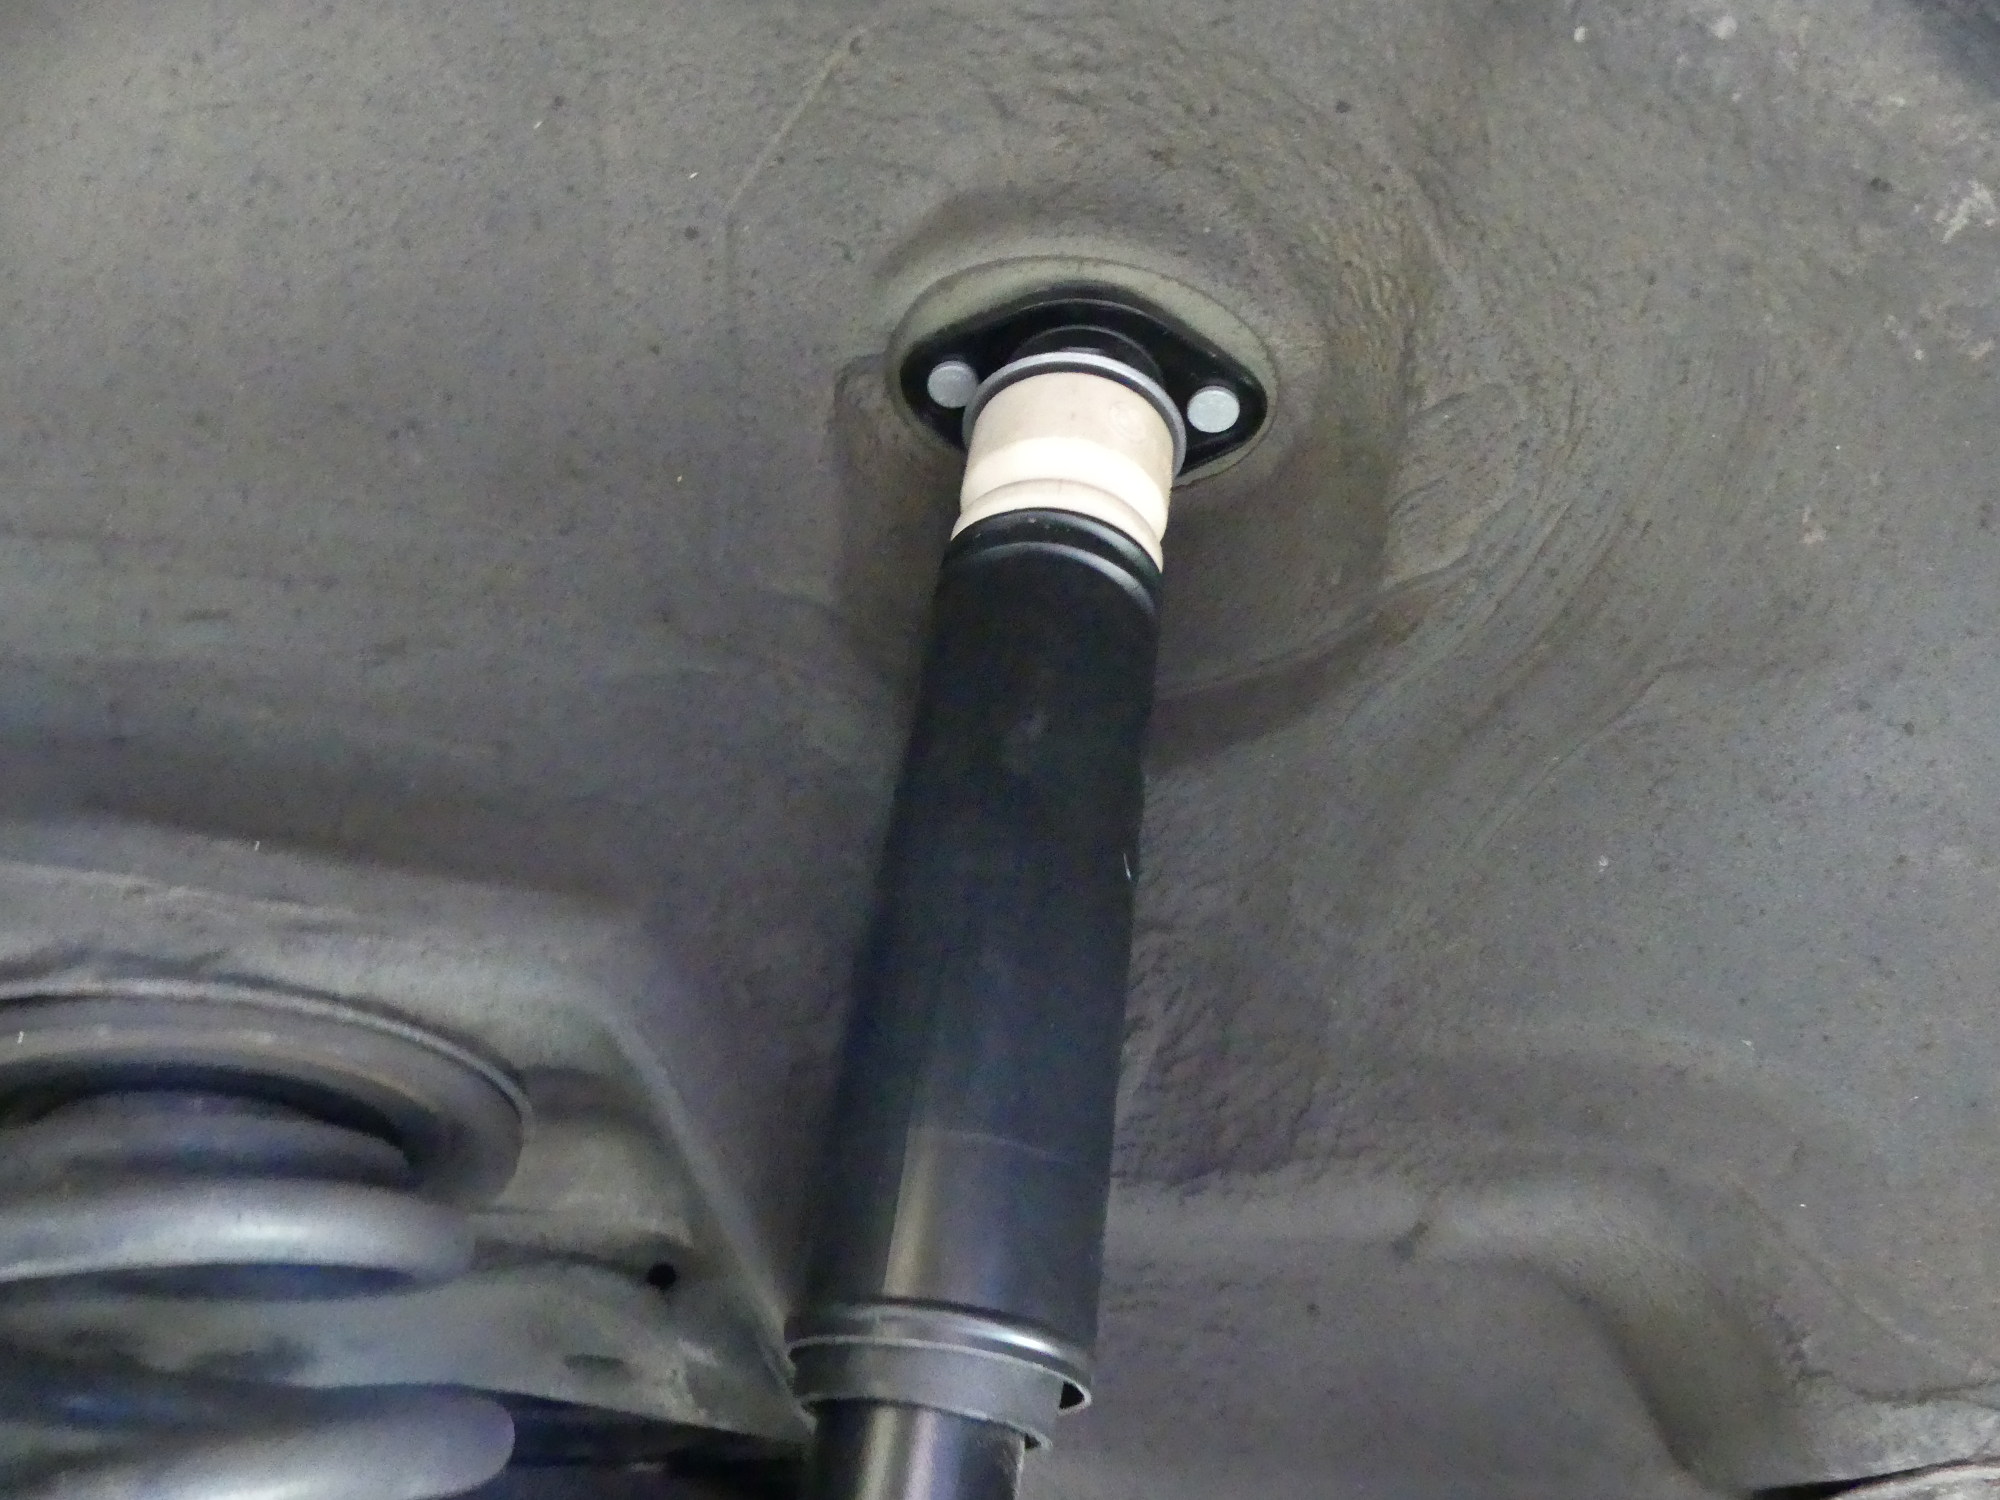 While momentarily delayed due to a parts shortage I installed the shock assemblies that have been sitting in my garage for a couple years. I was within 1000 miles of my service interval for these parts so I decided to fit them while the car was up on stands. |
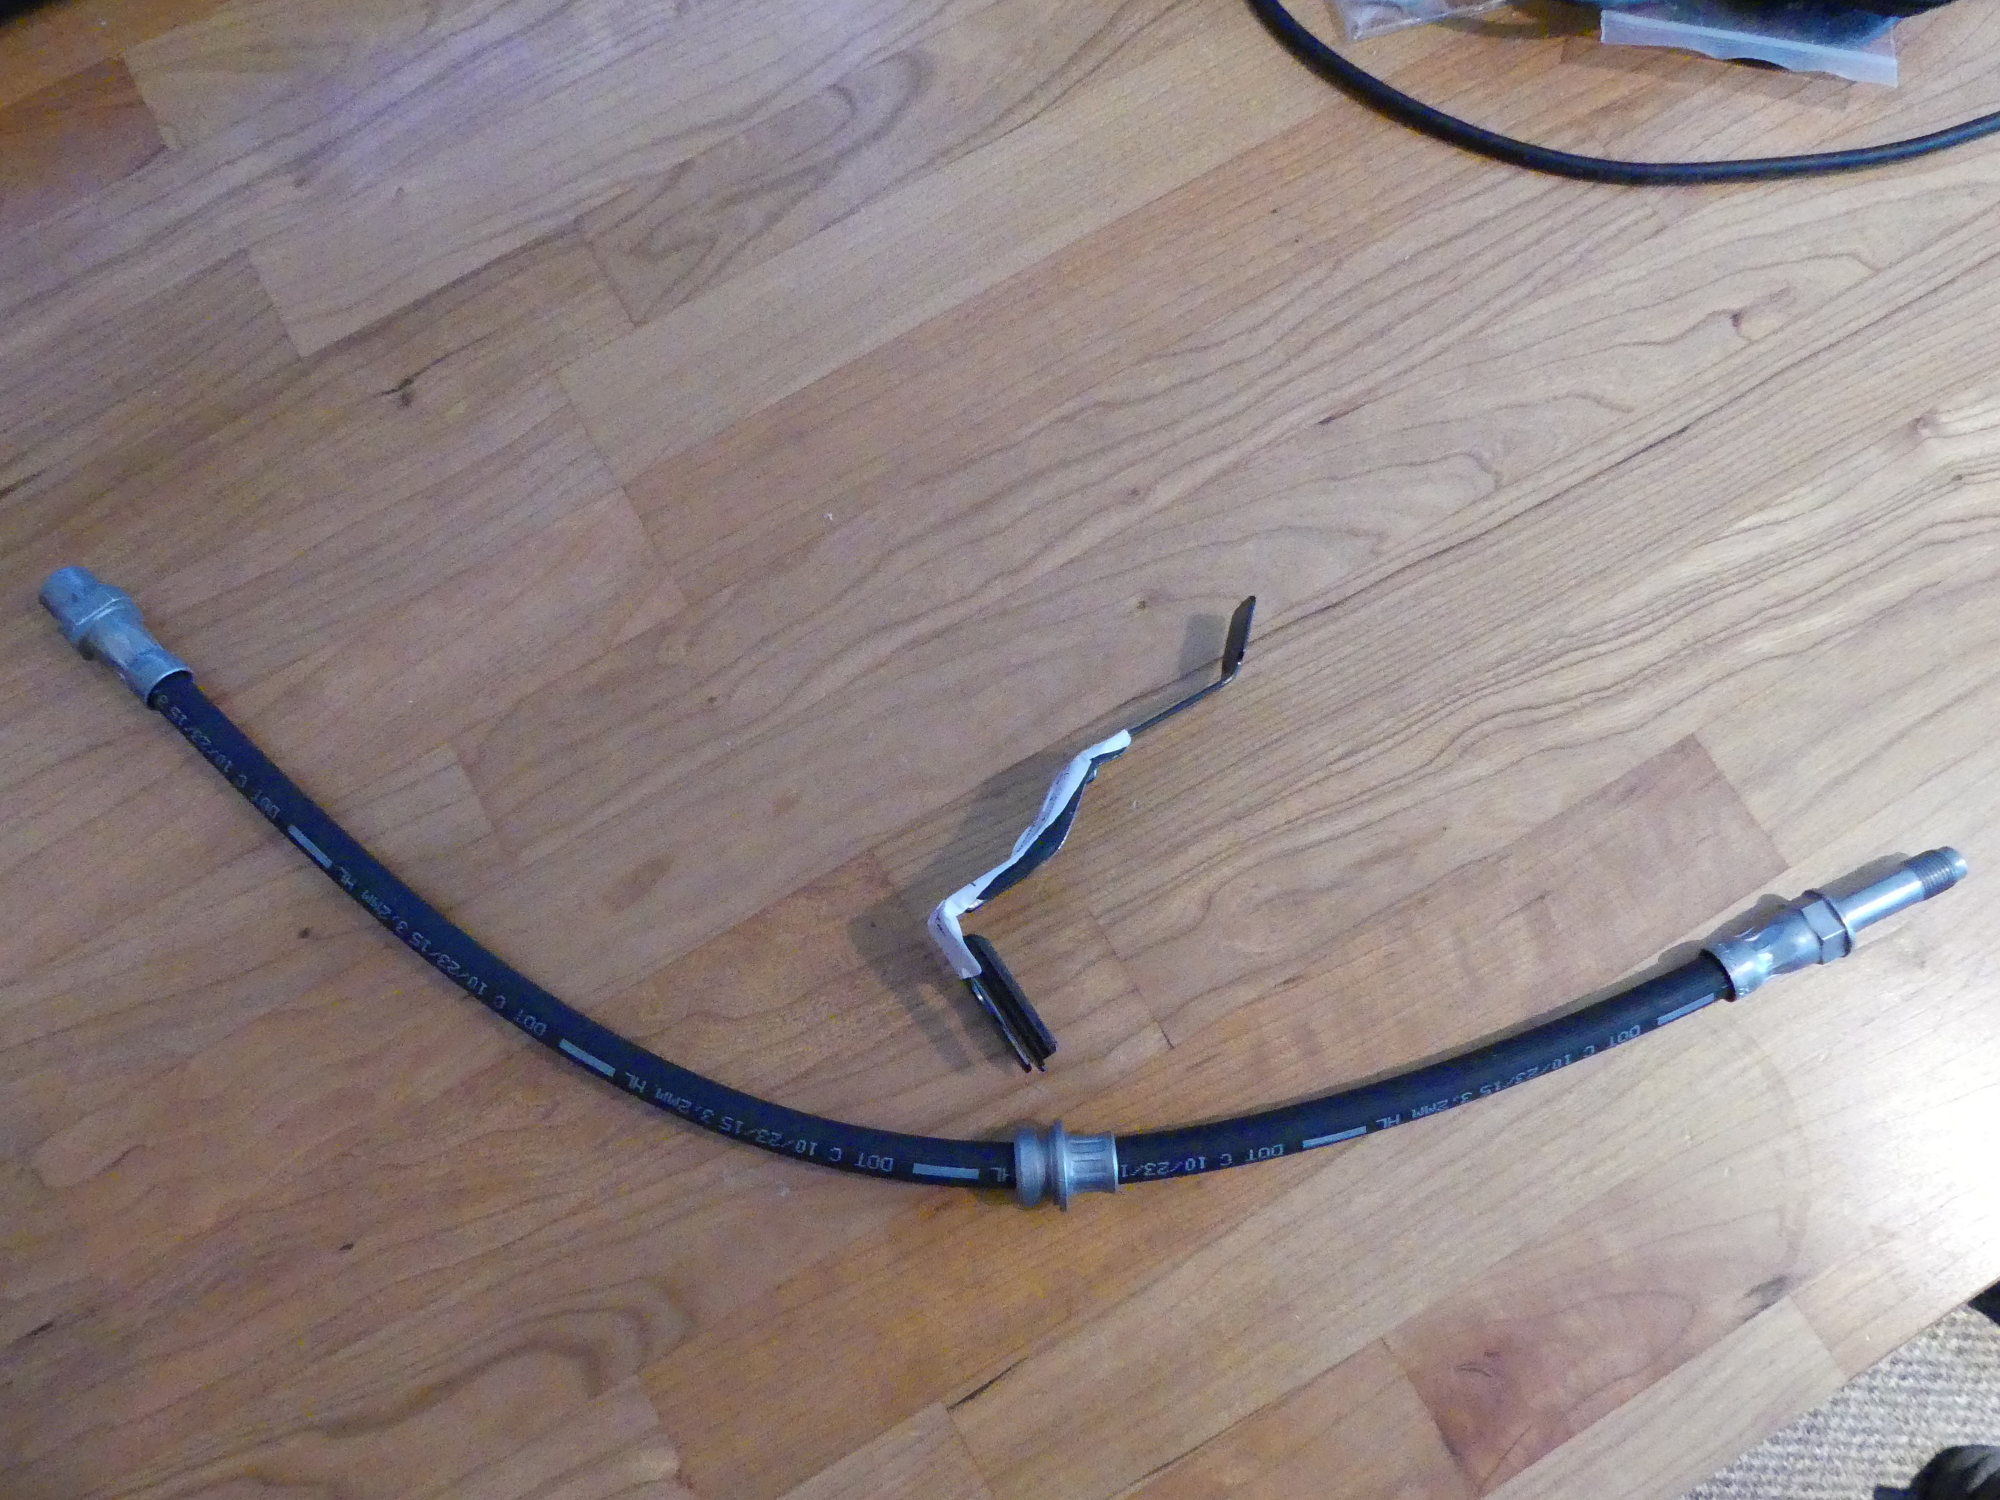 This is the rear brake line for E36's built 12/97 or later. It's a much simpler arrangement by virtue of the fact that no tubing benders are required to replace the components. The lines are somewhat expensive but cheap insurance, particularly given the age of the originals. |
While rummaging through my spare parts box I took notice of the pair of shocks, mounts and hardware I purchased a couple years ago. Another review of my maintenance schedule worksheet put the shocks within 1000 miles of my recommended service interval and a brief inspection of the units on the car noted some rust beginning to form so I figured this would be an ideal time to replace the components. An hour later I had assembled the shocks and installed them.
A Tale of Two Brake Lines
I had two brake lines in inventory leftover from my 2010 overhaul so I naturally assumed that was all I needed to install the new calipers -- until I took a closer look and realized that the flexible brake line on the car did not match what I had in stock.
Looking at the ETK diagram on realoem.com I couldn't quite figure out what part to order so while I was at the dealer for other parts I consulted with one of the guys who owns an E36 M3. He noted that his car was equipped with both a flexible hose and hard line attached to the trailing arm. As I did not have any such hard line on my car my initial assumption was that this was specific to model year or was a M vs. non-M thing.
Confused, I wound up ordering both flexible lines depicted on the diagram. One of the parts that came in turned out to be about double the length of the other. Installed at its midpoint was a compression-type bulkhead fitting designed to mate with the bracket that attaches to the trailing arm. Looking again at the ETK diagram it's now clear that BMW changed the design relatively late in the production run of the E36 and exactly one month prior to the build date of my car. This means prior to 12/97 builds there is a small segment of hard-line involved that when purchased new is straight and must be bent using appropriate tools into the S-shape required. For builds 12/97 and later a single flexible hose is used.
It may be possible to convert the old design to the new and I'd recommend doing that simply to avoid having to deal with a tubing bender. I should point out, however, that BMW tends to replace old parts with new ones where possible, and the fact that the other parts are still in the parts system may reflect the possibility that an upgrade is not possible. I didn't do any further research on the topic so if you have an older car you'll have to do that work yourself. If you happen to know the story here, please email me so I can update this article and point people in the right direction.
The brackets that attach to the trailing arm require a retaining clip to secure the brake line. These are removed by using a flat blade screwdriver to pry them out. The clips on my car were original and rusty, so a bit stubborn. When I went to order these parts I found that the ETK diagram did not depict anything that resembled them. It turns out the ETK diagram incorrectly depicts the retaining clips as identical to the mounting clip used where the hardline connects to the flexible brake hose on the body. But no matter -- the correct parts can be ordered by part number: 34306771981. Two are required -- one per brake line.
Powder Coating
While I'm not happy with how the powder coat has held up on the parts I painted during the front and rear suspension overhaul projects I can say that the front caliper brackets have held up uncharacteristically well since 2012. In fact, during the last front brake job I found the powder coat helped release all the dirt and grease quite easily and the brackets came away looking almost brand new again. So there is at least some justification to doing this besides bling.
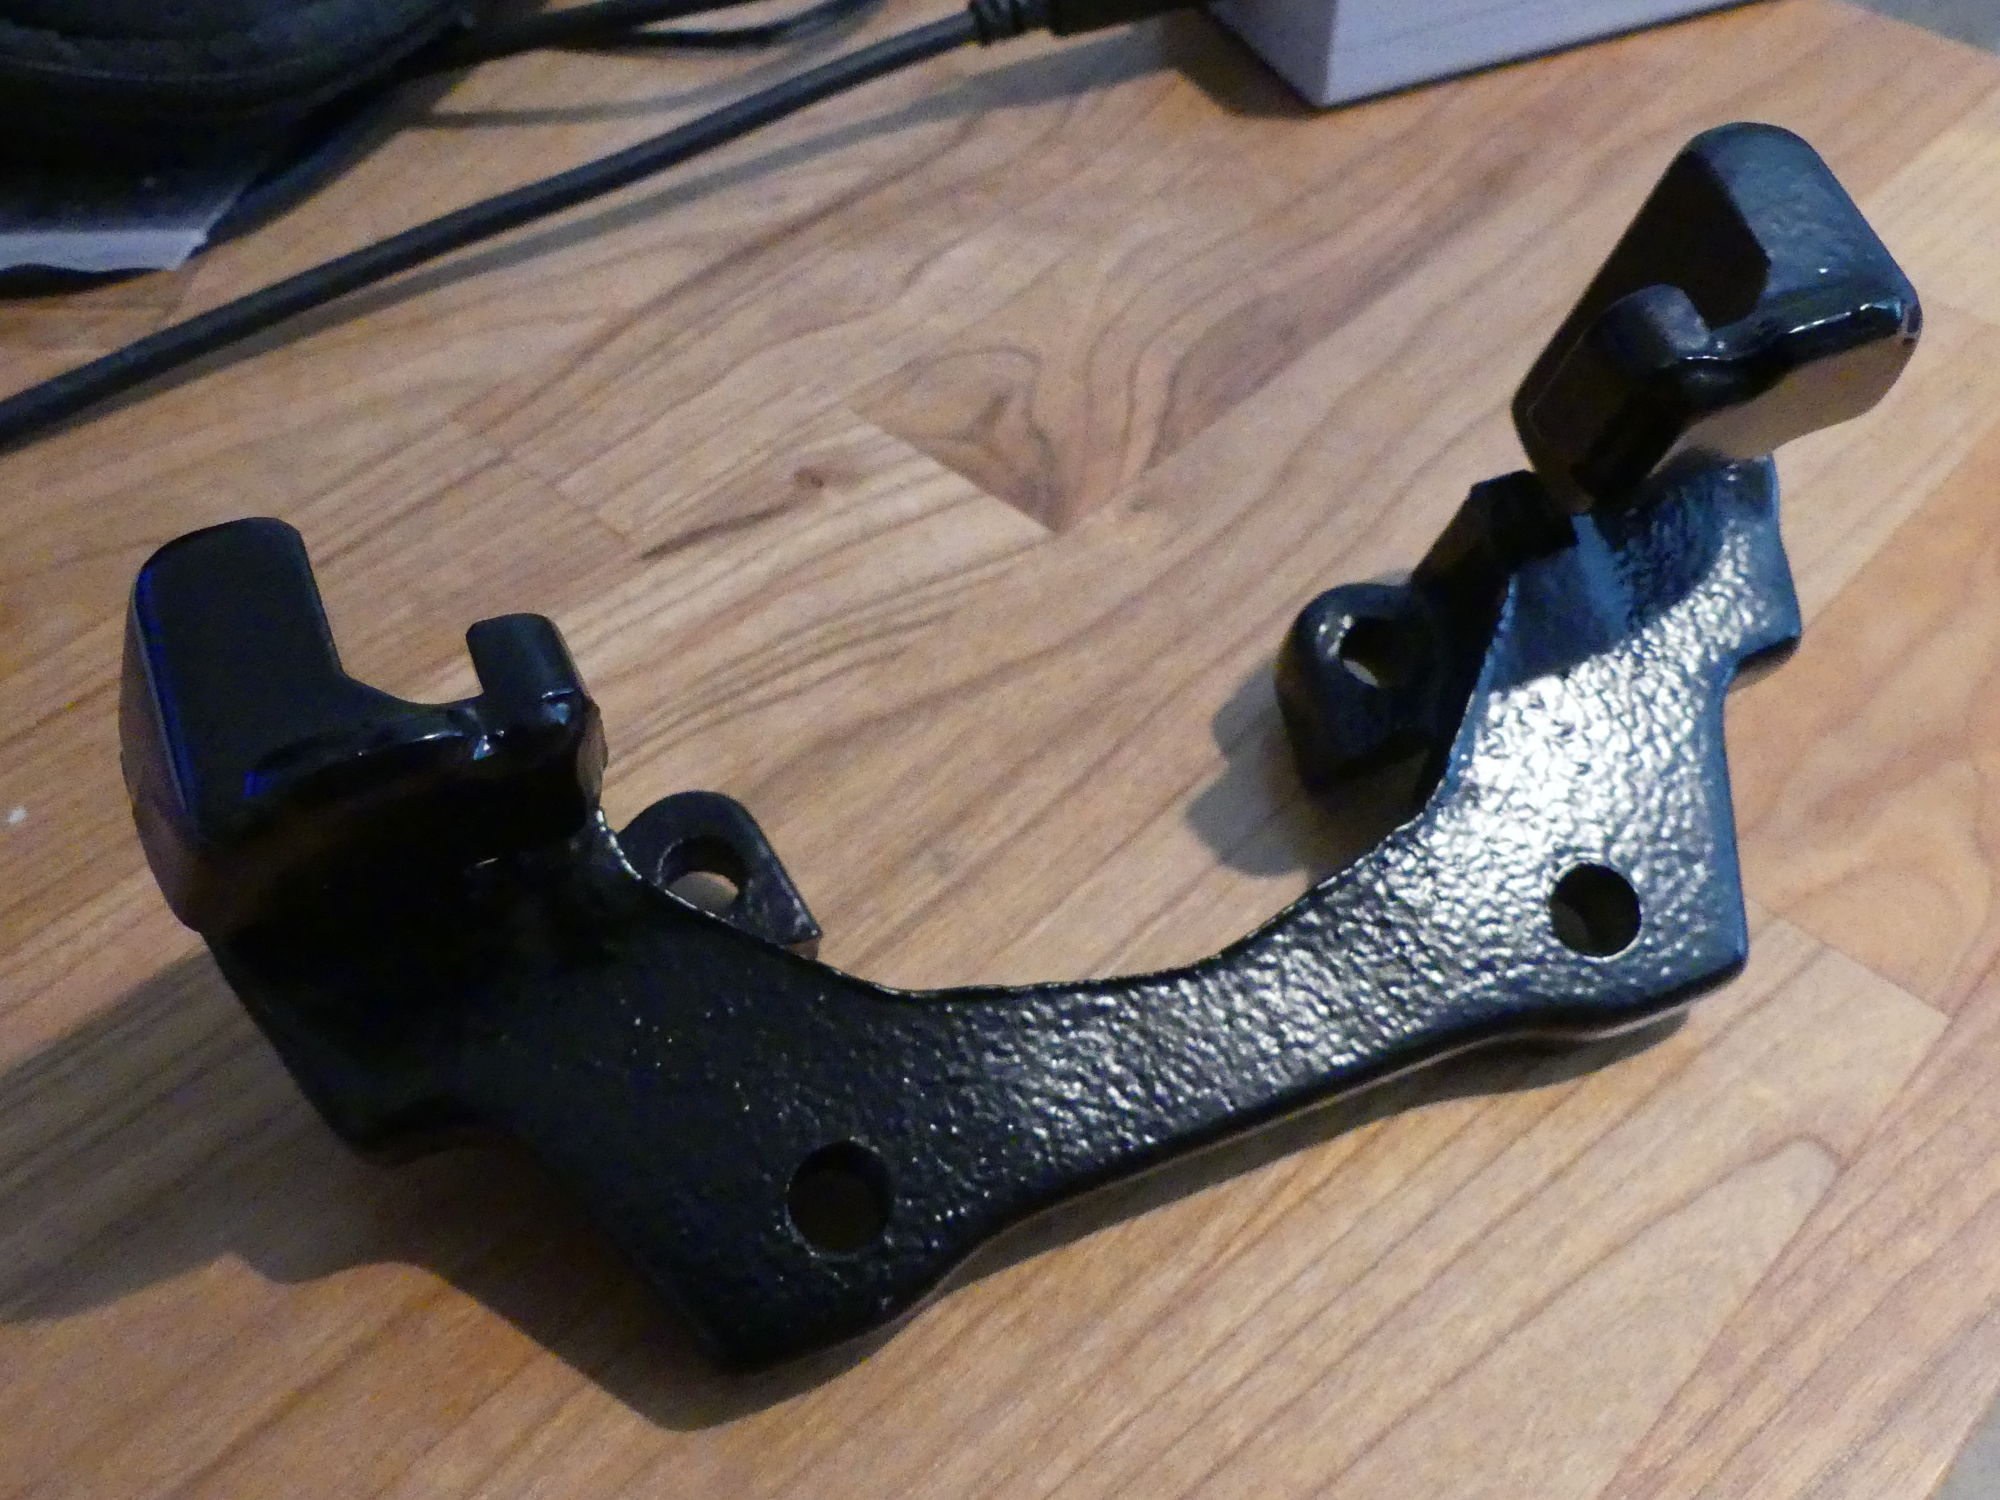 The caliper brackets were refinished with a light coat of satin black powder coat. Based on my experience with the front equivalents I did not bother to mask off any areas. Only the threaded holes were plugged. |
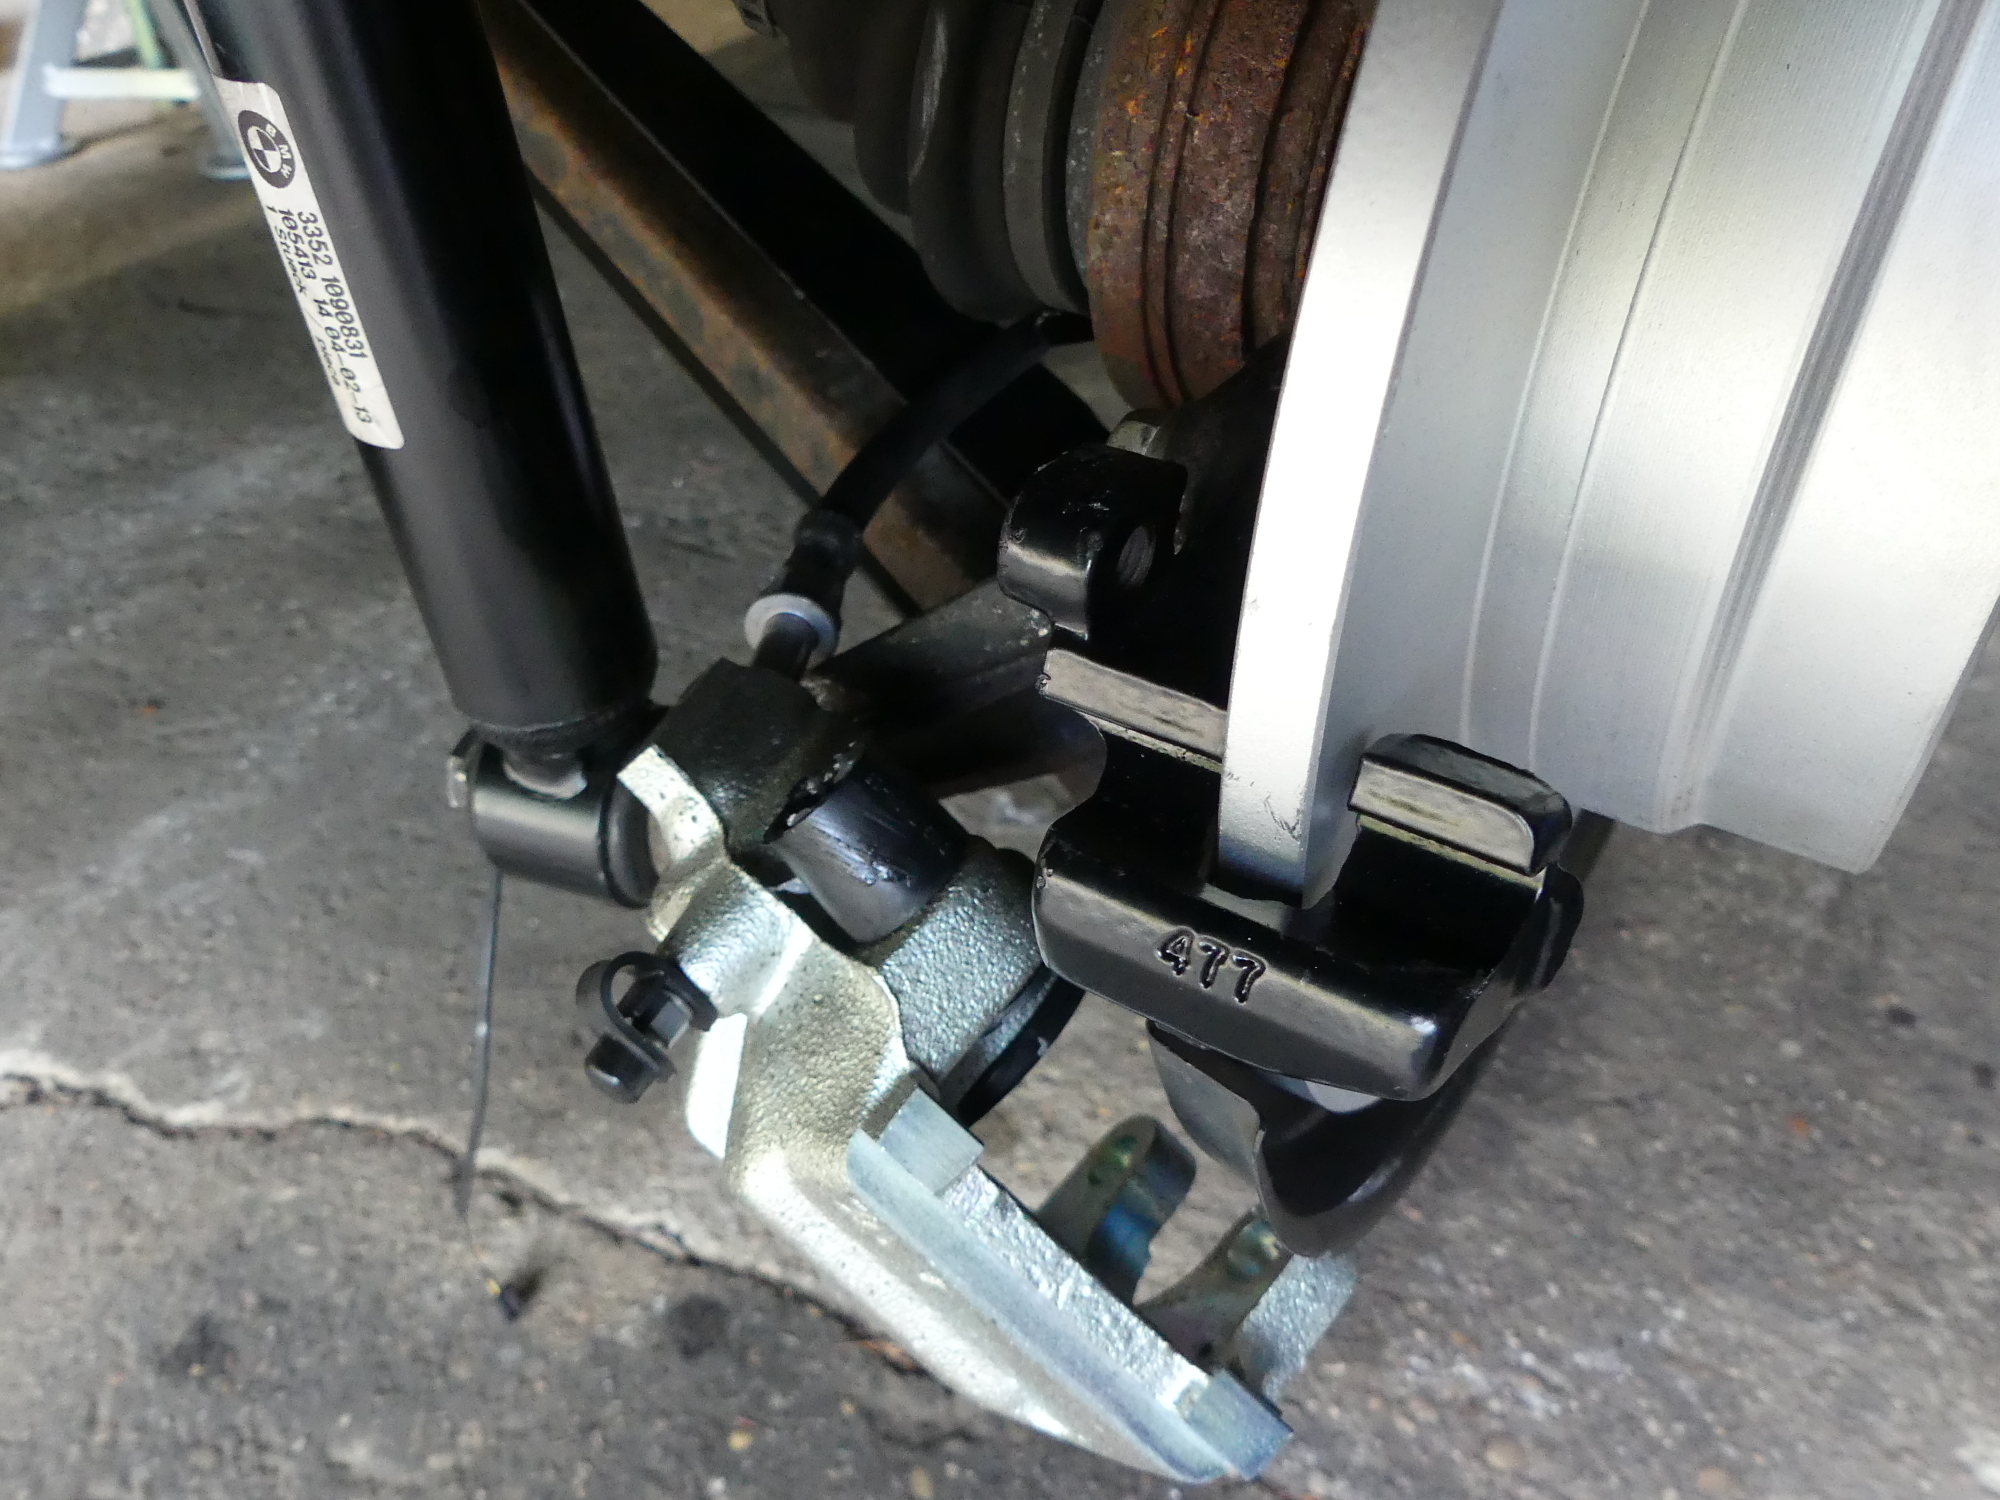 As it's never good to let a caliper hang freely because it puts too much stress on the hose I've started hanging it in this way. The ridge on the fitting that screws into the caliper hooks onto the trailing arm. |
 I took the opportunity to replace what I call the hard line mounting clips while I had the hardline disconnected. While I could have reused the existing units I had a couple in inventory leftover from the front suspension overhaul so this was a no-brainer. |
I'm not sure exactly why the powder coat on the brackets has held up and the finish on all other parts has not, but I'm speculating this is a simple matter of braking-derived heat routinely baking the parts and driving away the moisture that causes corrosion, so I decided to send the rear caliper brackets out for coating.
This time I looked for a new powder coating shop a bit closer to home. I'll spare you the URL of the company that wanted to charge $300 and take 2 weeks, as well as the company that took two days to simply return my call. Instead I'll report that Coast2Coast Powdercoating is less than 10 minutes from my dealer and quoted me $15 each as well as a two day turn because they do black nearly every day. Why didn't I use them back in 2010? They didn't exist at the time. Turns out they opened the shop a couple months after I started the overhaul work.
Three days later I went to pick up the parts and spoke to the shop owner about why the powdercoating on my vehicle failed so soon. His opinion? Prep. He said he puts parts through an acid bath to strip them of most of the surface crud, then media blasts them, follows up with another solvent wash and finally puts them in an oven to let them off-gas any remaining solvent. Only then are the parts painted. I mention this so if you are thinking of doing any powder coating you will know to ask them about their prep process.
Work Continues
A couple days later, with the newly powder coated brackets and other parts in hand, I was able to continue with the installation. After applying a thin coat of anti-seize to the hub I installed the rotors, followed by the caliper brackets and torqued the bolts to 50 ft*lbs. Next I disconnected the flexible brake line from the hard line, and it was at this point that I was glad I applied some PB Blaster to the fittings several days ago -- they came loose with a single "crack" of an 11mm flare nut wrench.
When it came time to install the new lines and calipers I looked around for my bag of rubber caps I had planned to use to seal the line temporarily but I couldn't find them. As it turned out I didn't need them. I just let the line drip for the 30 seconds it took me to install a zinc-plated hardline mounting clip and attach the new brake hose and caliper to the hard line.
Naturally, I applied a bit of 3M silicone paste lube to the inside of the caliper bushings and guide pins, as well as high temperature grease (Plastilube) to the appropriate areas of the caliper brackets and pads before installing them. This was a text book brake job until I tried to install the left caliper. I am normally able to press the pistons in by hand to create the clearance required for the new pads but the left caliper piston (fresh out of the box on a new caliper, mind you) was about 3mm proud of the caliper body and refused to budge. I reverted to a C-clamp for additional leverage but it too didn't really budge the piston that much. If it moved a half a millimeter I'd be surprised but with some persuasion I was ultimately able to get the caliper installed. In retrospect this difficulty should have raised a red flag but it didn't.
Just after I wrapped up the brake fluid flush and bleed my technician texted me to let me know the tires were ready. I went over to grab them and he handed me the tires as well as a small screw and a 10 penny nail (!). While the small screw had not penetrated the carcass of the tire my technician said he could feel the point of the screw just below the inner surface so he installed a patch over the area just in case. Looking at the long nail I couldn't help but make a wisecrack about now being ready to build my dream house.
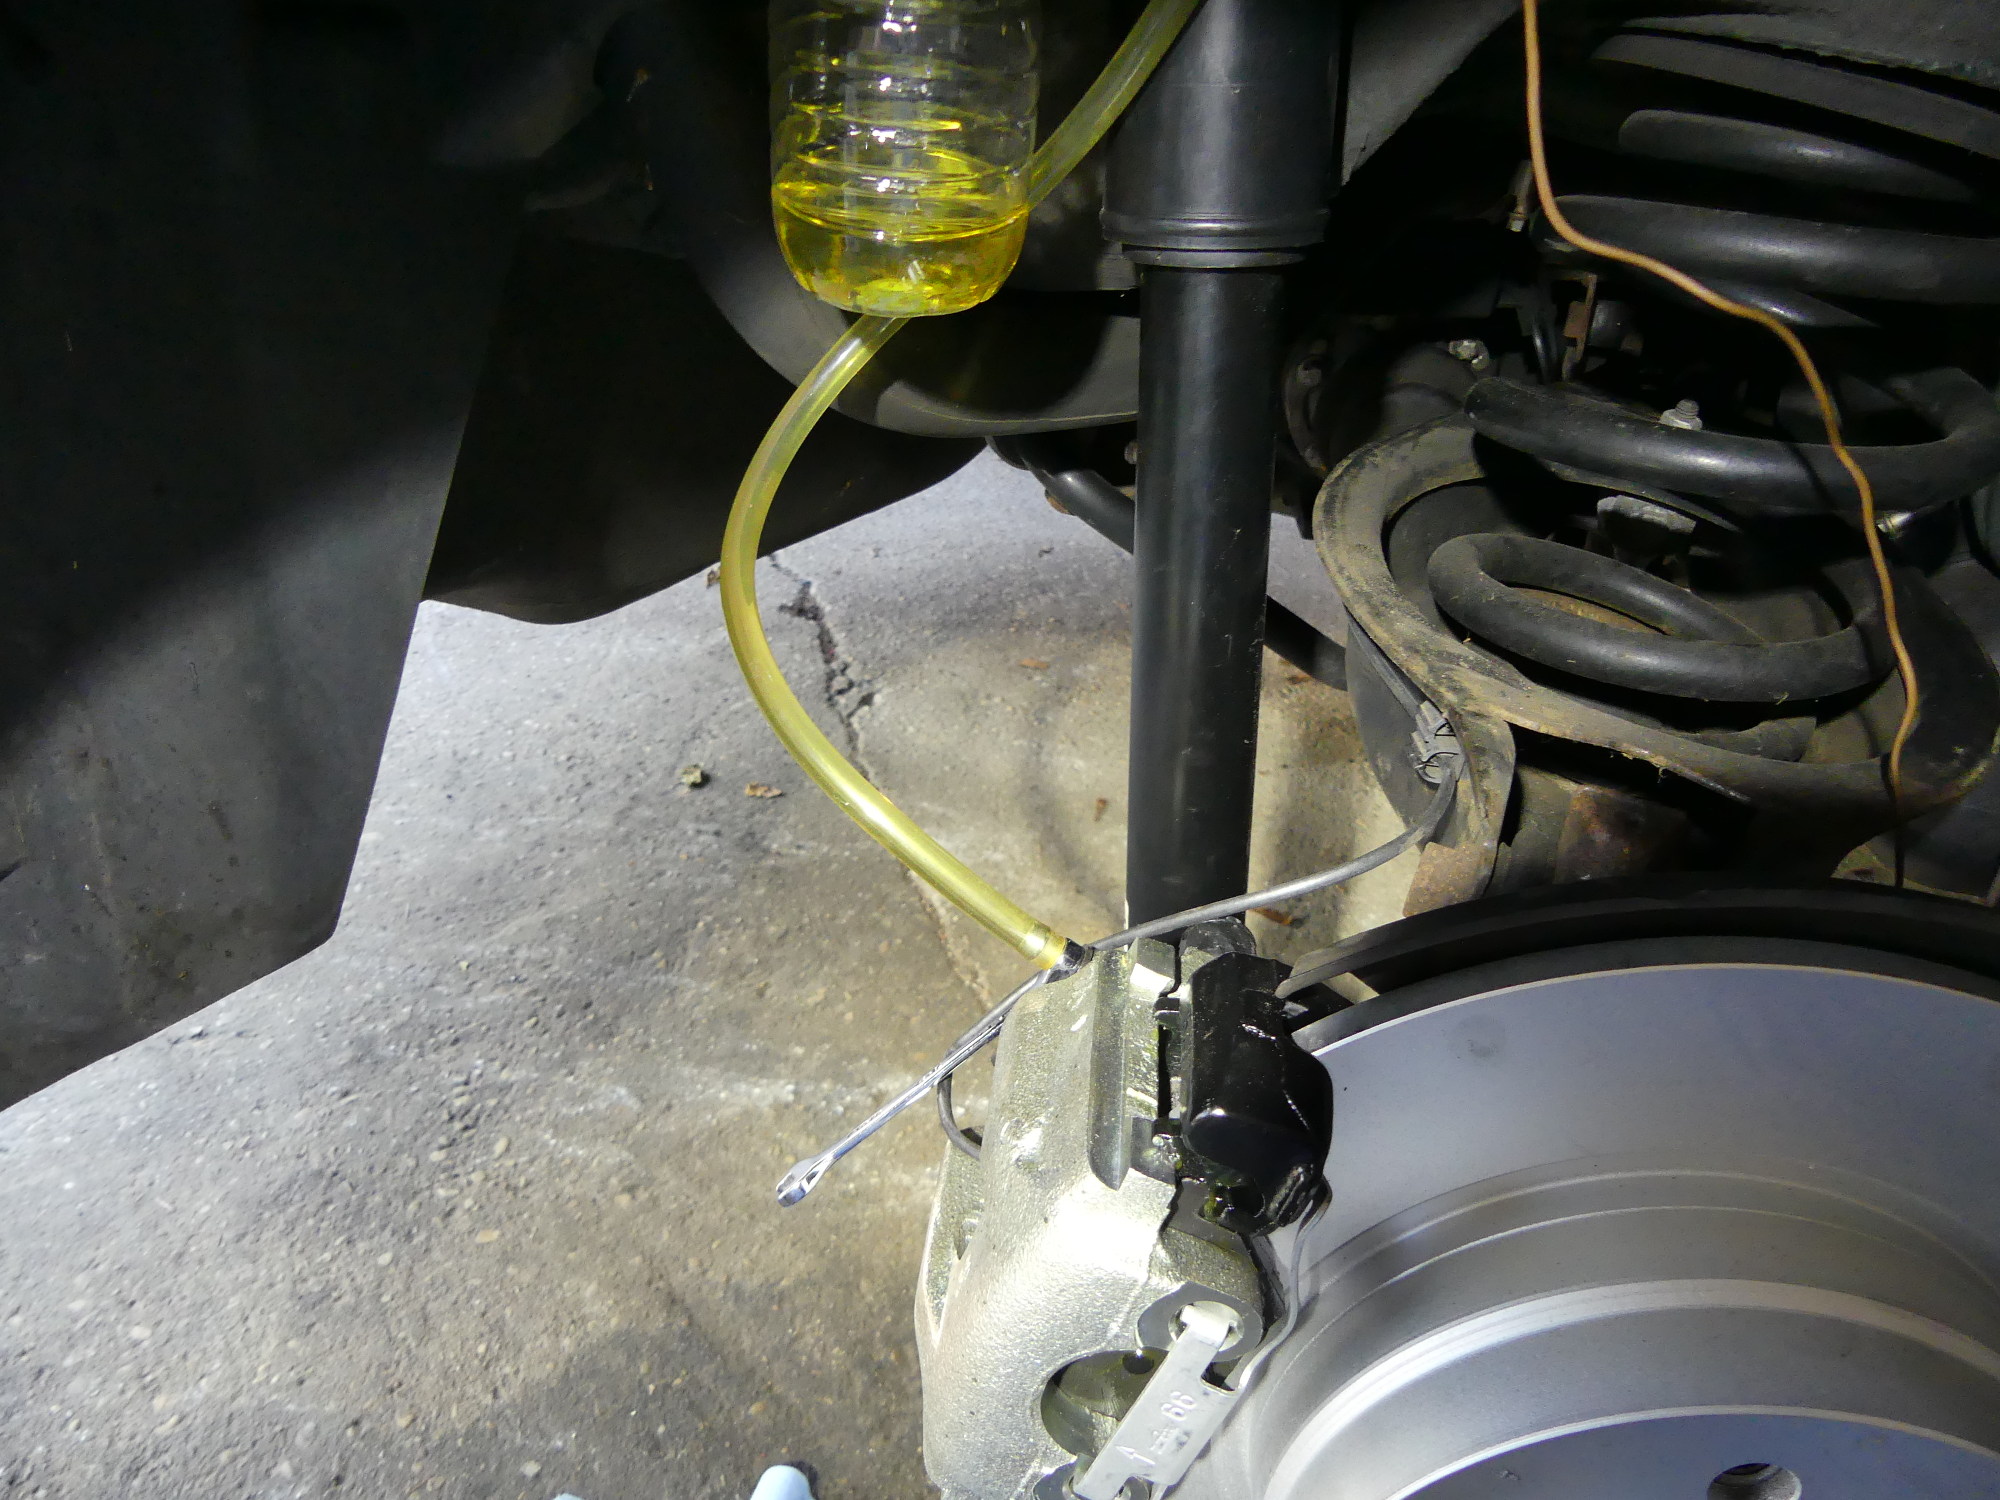 With two years on the brake fluid this time around I took the time to push nearly a liter of fluid through all four corners. The old fluid was a deep, rich gold color, but not obviously dark or burnt. A good thing. |
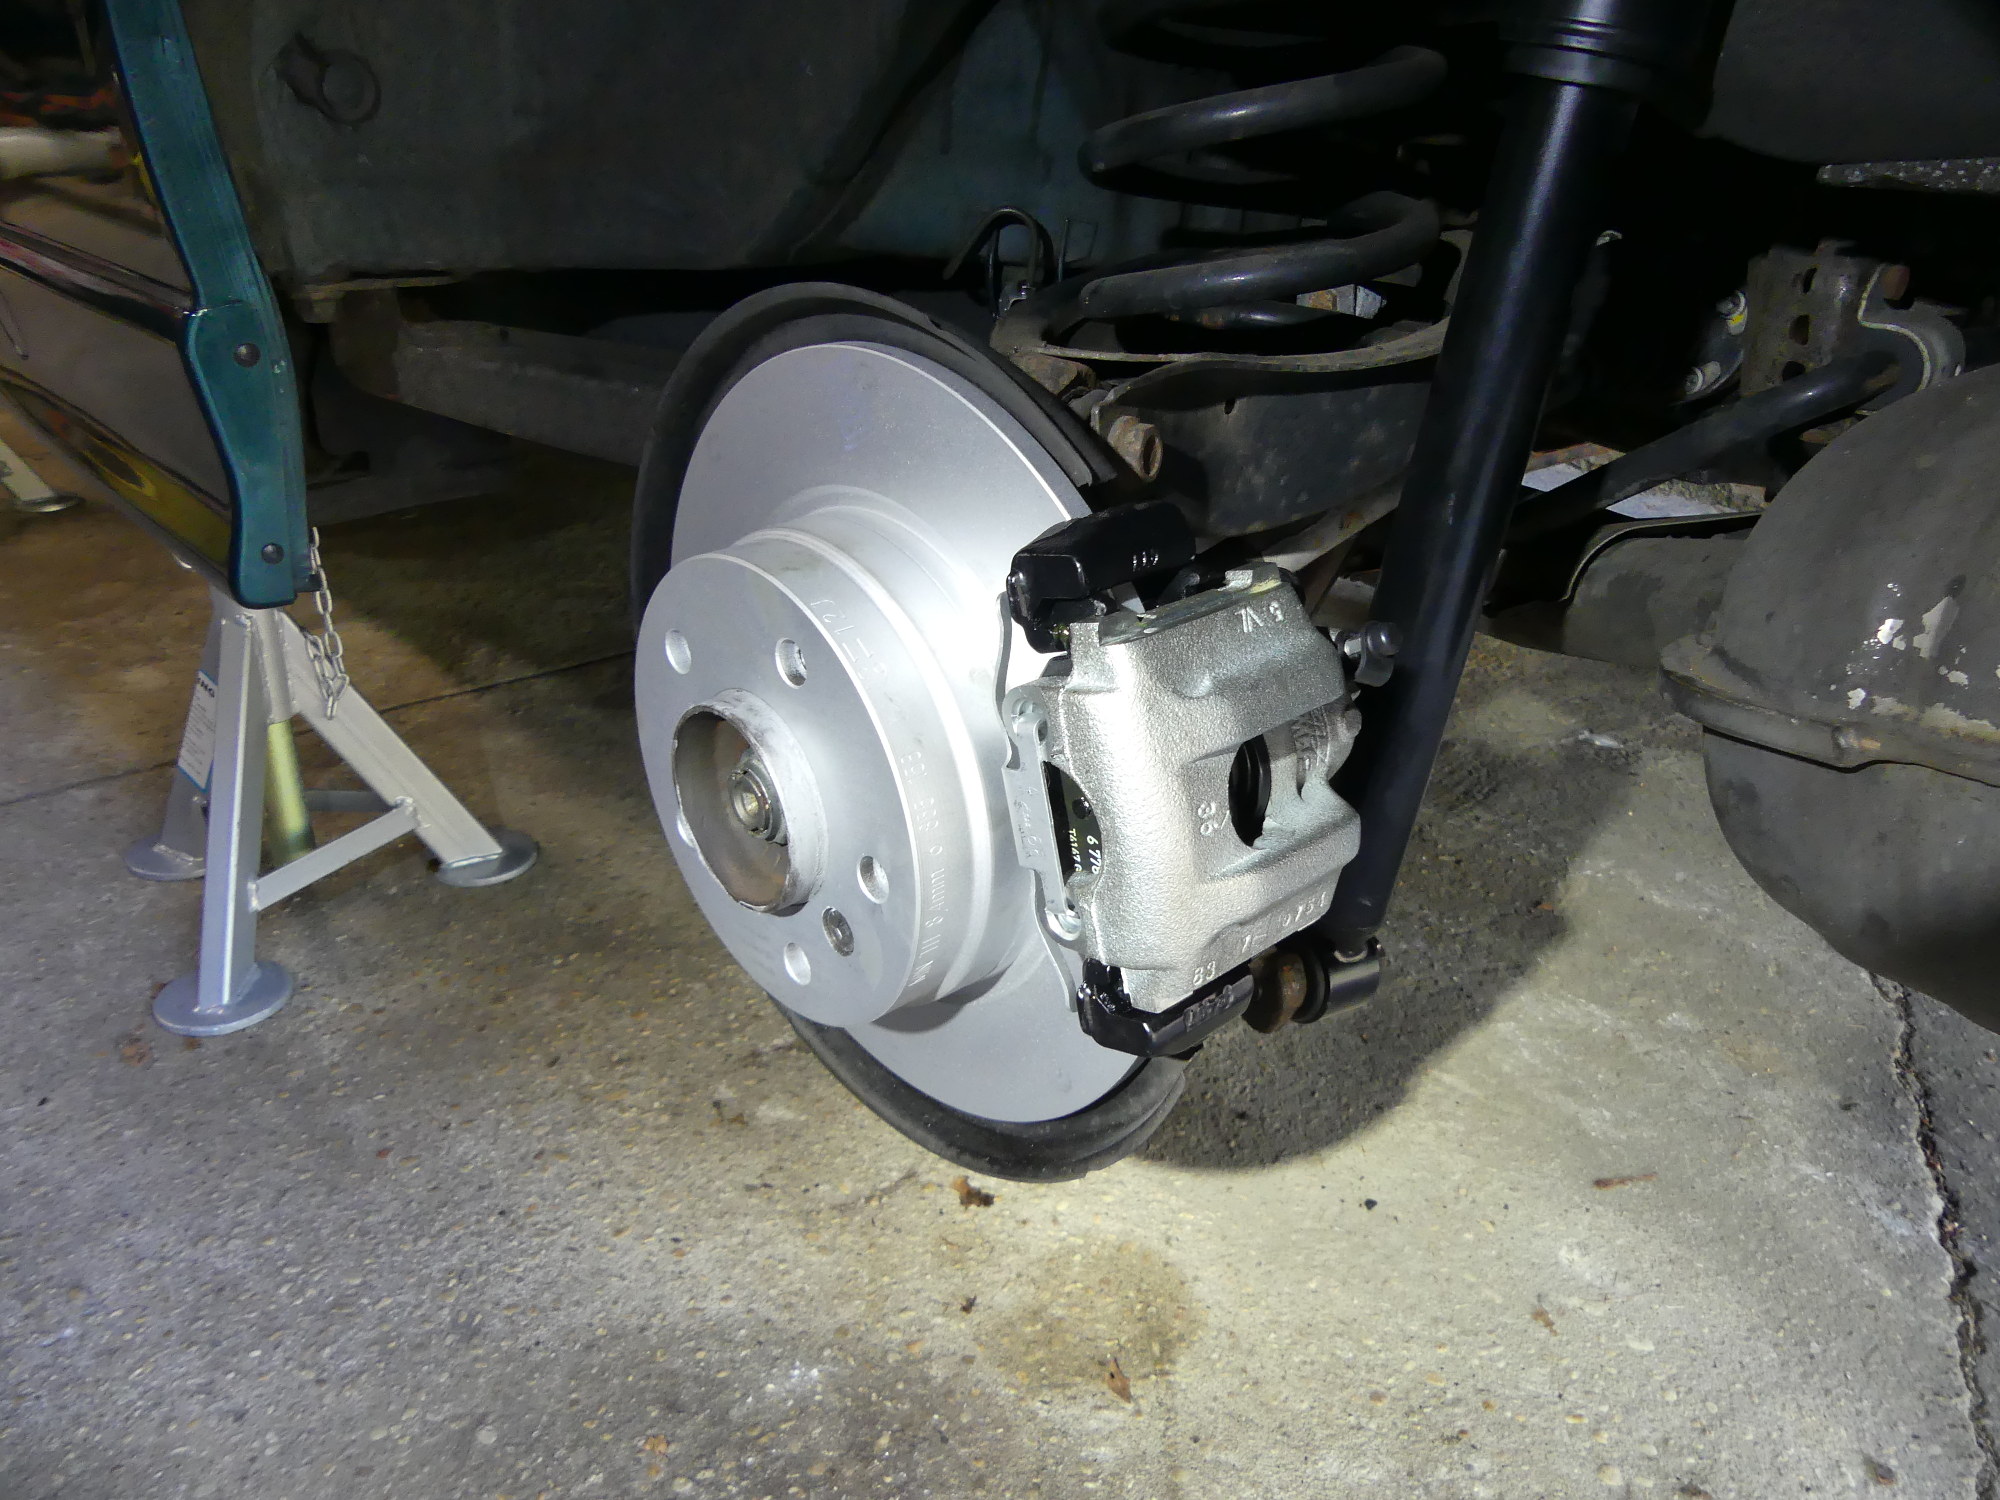 A shot of the left rear brakes completely overhauled. Unfortunately, as I was to soon learn, these new parts have not solved the original problem that necessitated this work. |
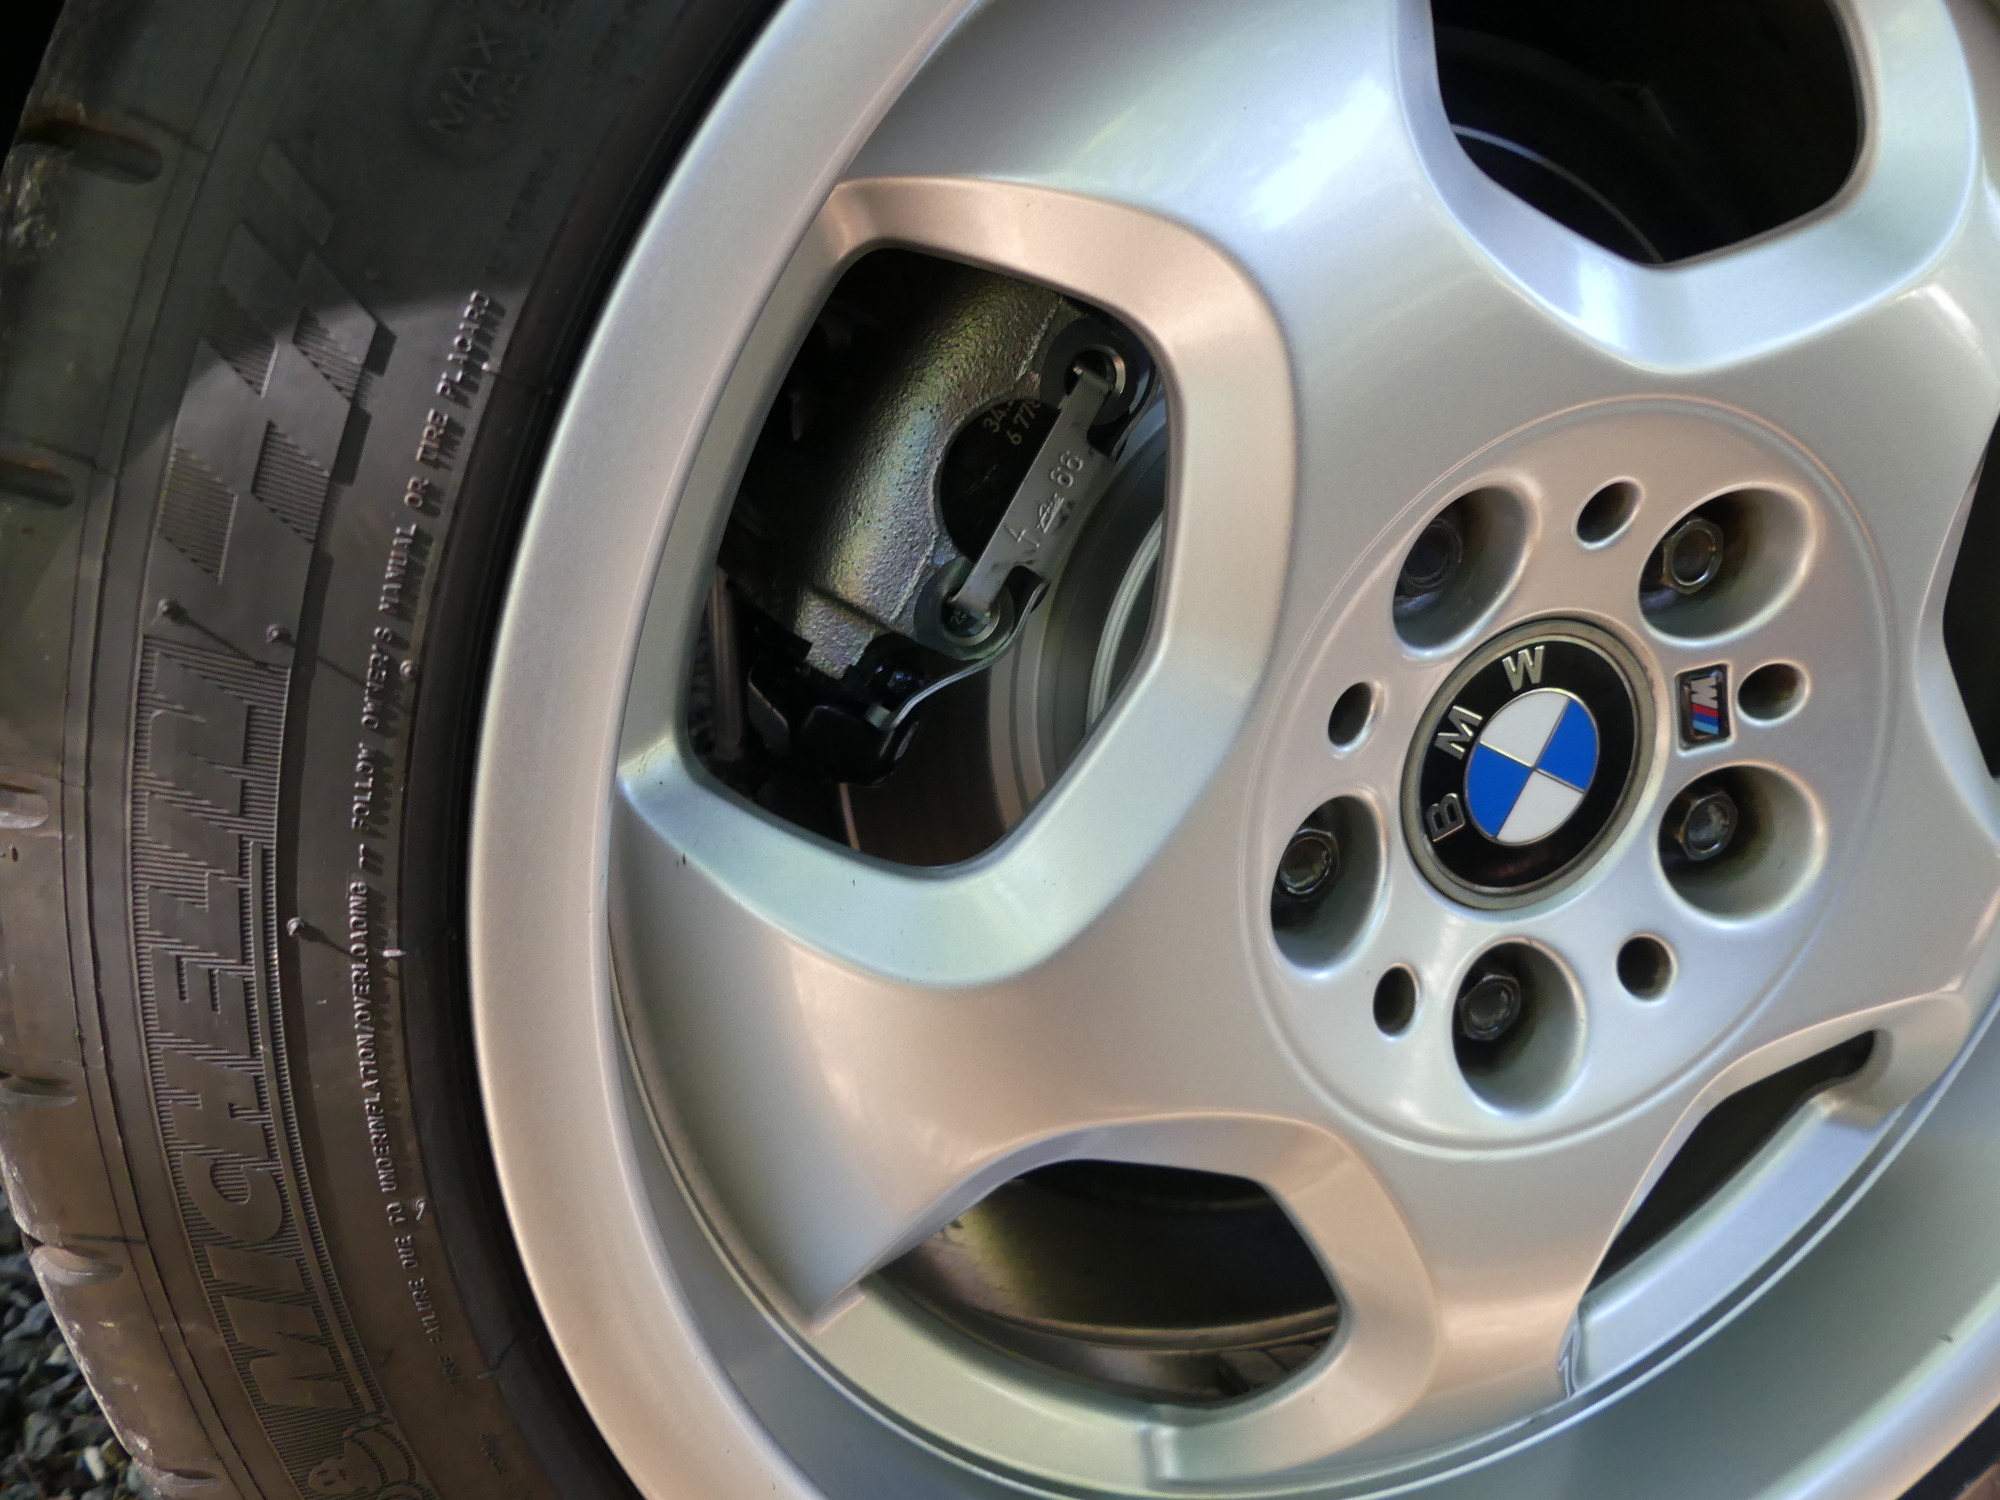 A gratutious glamour shot to show the end result -- new brake pads, rotors and calipers peeking out from behind the M Contour wheels borrowed from the M3. |
I should point out that BMW's official policy is to replace tires rather than patch them, so my technician did not have any patches. I had to acquire them at a nearby tire repair facility (for $7 each no less), and give them to my technician to install. If you walk into a BMW dealer with a nail in your tire, don't expect them to do anything but sell you a new tire.
Failed Test Drive
Back at the garage with the wheels remounted I took the car out on my short 1 mile test loop and never exceeded 25 MPH. Since this wasn't exactly a routine brake job and the left rear caliper installation issue was still fresh in my mind I pulled over about half way through the loop and got out to take a close look at the rear brakes. I noticed two things:
-
A slight smell of burning brakes, but I've smelled that before while bedding in the parking brakes so I didn't think much of it at the time.
-
The coating on the rotors was fully worn off on the left side but less than fully worn on the right side. My spider sense started tingling so I carefully headed back to the garage at low speed.
Back at the garage I got out to further inspect the rear brakes. Though I could feel heat coming from both rear brakes the left wheel was noticeably hotter to the touch than the right side. Since the car was very dusty I decided to spray it down with water. When the water hit the right rear wheel and brakes I heard the "tinking" sounds that result from relatively cool water hitting the brakes as I've heard countless times before. But the instant the water hit the left rear brake rotor it instantly vaporized, creating a cloud of steam -- something I've never seen before. This confirmed that the left rear brake was still sticking so I decided to put the car back in the garage for now and take the E46 home once again.
The next day I dropped by the dealer and caught my technician working on a soccer-mom transportation device, more popularly known in BMW parlance as a SAV. I explained what happened and he suggested I either had a pinched hardline or the new caliper was defective. Apparently he's seen cases where the seals are installed improperly and this prevents the piston from fully retracting into the bore. He then outlined the simple test for a pinched line: pump up the brakes and crack the left bleeder screw. If fluid shoots out under pressure the line is pinched, but if it dribbles out as one might normally expect, the cause is elsewhere -- likely a defective caliper.
Knowing that the ABS system has the ability to apply the brakes at each corner individually I asked whether he had ever seen a failure of an ABS system that produced symptoms like this. He said no. Considering the number of ABS-equipped BMWs he's worked on over his long career I think it's safe to say the problem is either the line or the caliper. After all, what else is there?
I apparently ordered the last left rear E36 brake caliper from US inventory so I'm now looking at a 1-2 week delay for a new caliper to arrive from Germany. When it comes in I'll put the car back up on jackstands, inspect the brake lines, perform the pinched line test, and install the new caliper. Until then I'll be piloting the E46.
Mileage: 264100