


Saturday, September 3, 2016
Leather Conditioner Applied
I was so happy with the result achieved when I applied the Dr. Beasley's leather conditioner to my E46's "ten year old but still new" leather that I decided to apply it to the E36 within a few days of completing the new leather installation.
As I write this it's been about a week since I applied the conditioner and am happy to say that not only has it not diminished the "new leather smell", it's actually become much stronger as the car has sat outside (under a cover, mind you) in warmer weather. As I went out on an errand the other day I was practically knocked over by the "new leather smell" when I opened the door. Could this be due to the conditioner re-moisturizing the new leather, which I'm sure sat in a warehouse on a shipping pallet for some time? Possibly.
After I was done applying the conditioner "in bulk" to the seats I used the applicator towel, which was at that point only lightly coated, to wipe down the door panels and selected black plastic and other materials on the center console and gauge cluster, mostly to gain some UV protection. I was pleasantly surprised to find the properties of the conditioner transferred to these materials and left behind no obvious residue or glossy finish. Black plastic appears to benefit most. I realize this is not the intended target material for this product but its effects cannot be denied.
Incidentally, the instructions indicate that if the conditioner is quickly absorbed a second coat can be applied immediately. I have decided to wait a few weeks and apply a second coat to both the E36 (mostly for additional UV protection) and to the E46 to further soften the leather. The 32oz bottle I purchased is down to 3/4 full following application to two full interiors, one of which was quite dry, so that means it should be good for at least eight full coats. Although I bought the 32 oz because it was the better deal and I have two cars to maintain I think the 16oz bottle would be more appropriate for a single car. That would be good for two initial coats and two followup coats over a period of 6-12 months.
Foam Repair Experiment
Although I'm clearly (and thankfully) done with the new leather project, before I discarded the old damaged seat foam I wanted to attempt a repair simply to see if the techniques I proposed were practical.
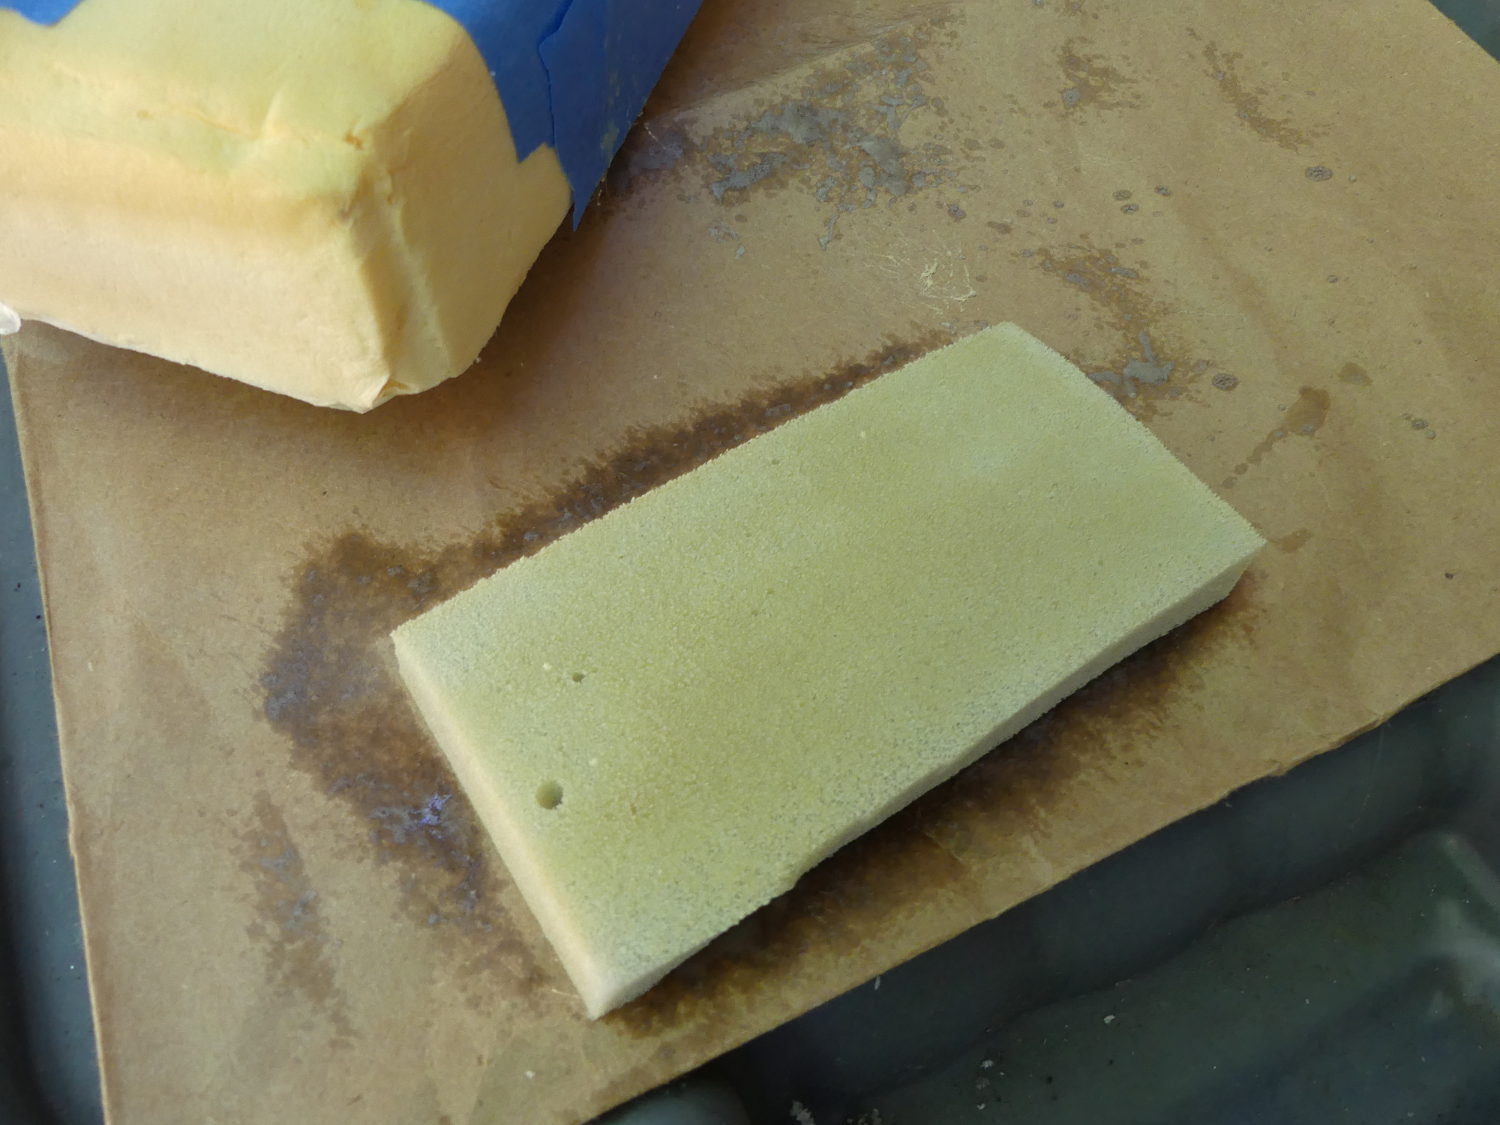
The thigh rest foam was the easiest to work on so I cut out the damaged section of the foam using an electric knife and that worked pretty well. I cut using a vertical slicing technique to define the perimeter of the foam to be removed and then came in from the side. The end result was a somewhat uneven surface but I knew it would be good enough for this test. I then cut a small section of the 1/2" foam I purchased and trimmed it to shape. As I initially fitted the foam piece to the thigh rest I noticed the top surface of the foam sitting proud of the thigh rest so I cut out a bit more foam.
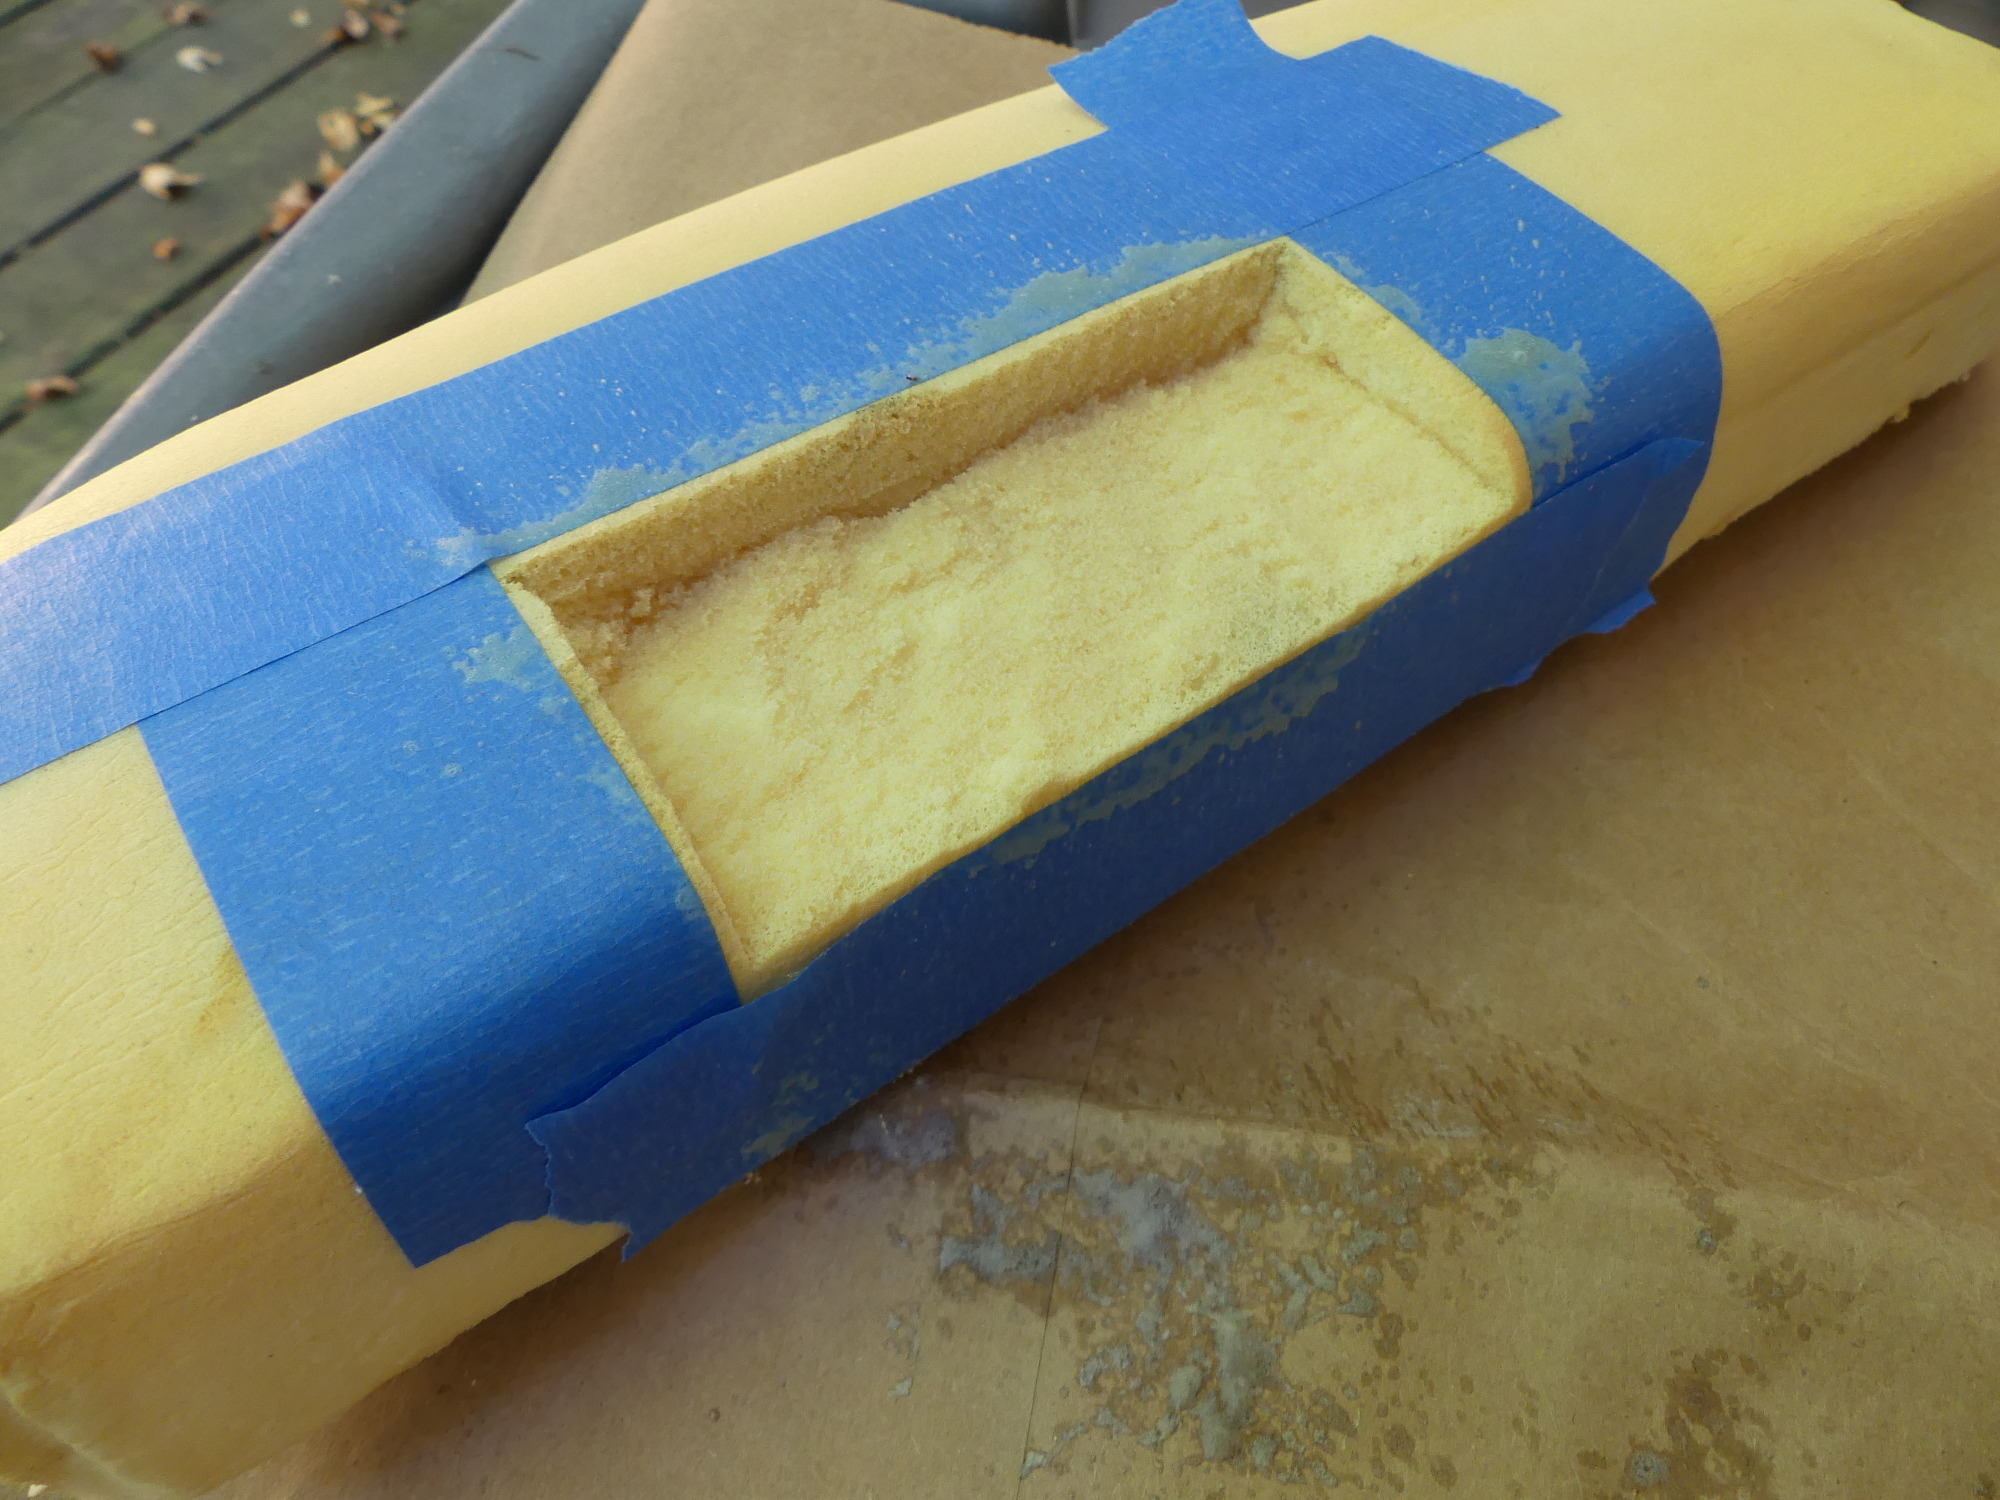 First step involved cutting the foam with an electric knife. I can't see doing this with an X-Acto knife or equivalent since the foam "grabs" too much. |
 The 3M 08090 adhesive is a contact adhesive so it must be applied to to both faces to be mated. I applied enough adhesive to get 100% coverage but not too much because, well, it's foam and it absorbs the stuff like a sponge. |
 Far from finished, but with a piece of leather or dacron cloth over it you'd never know there was a hole there. I think this confirms I could have repaired the foam if required. Thankfully, however, I had other options. |
When satisfied with the fit, which placed the top factory edge of the new foam ever so slightly above the surface of the thigh rest foam, I removed the new foam piece and applied some blue tape around the cutout to protect against overspray. Finally, I took both pieces outside to spray them with the 3M 08090 glue. Based on my prior experience with this glue I knew to wait 15 minutes so I came back later and then squeezed the pieces together.
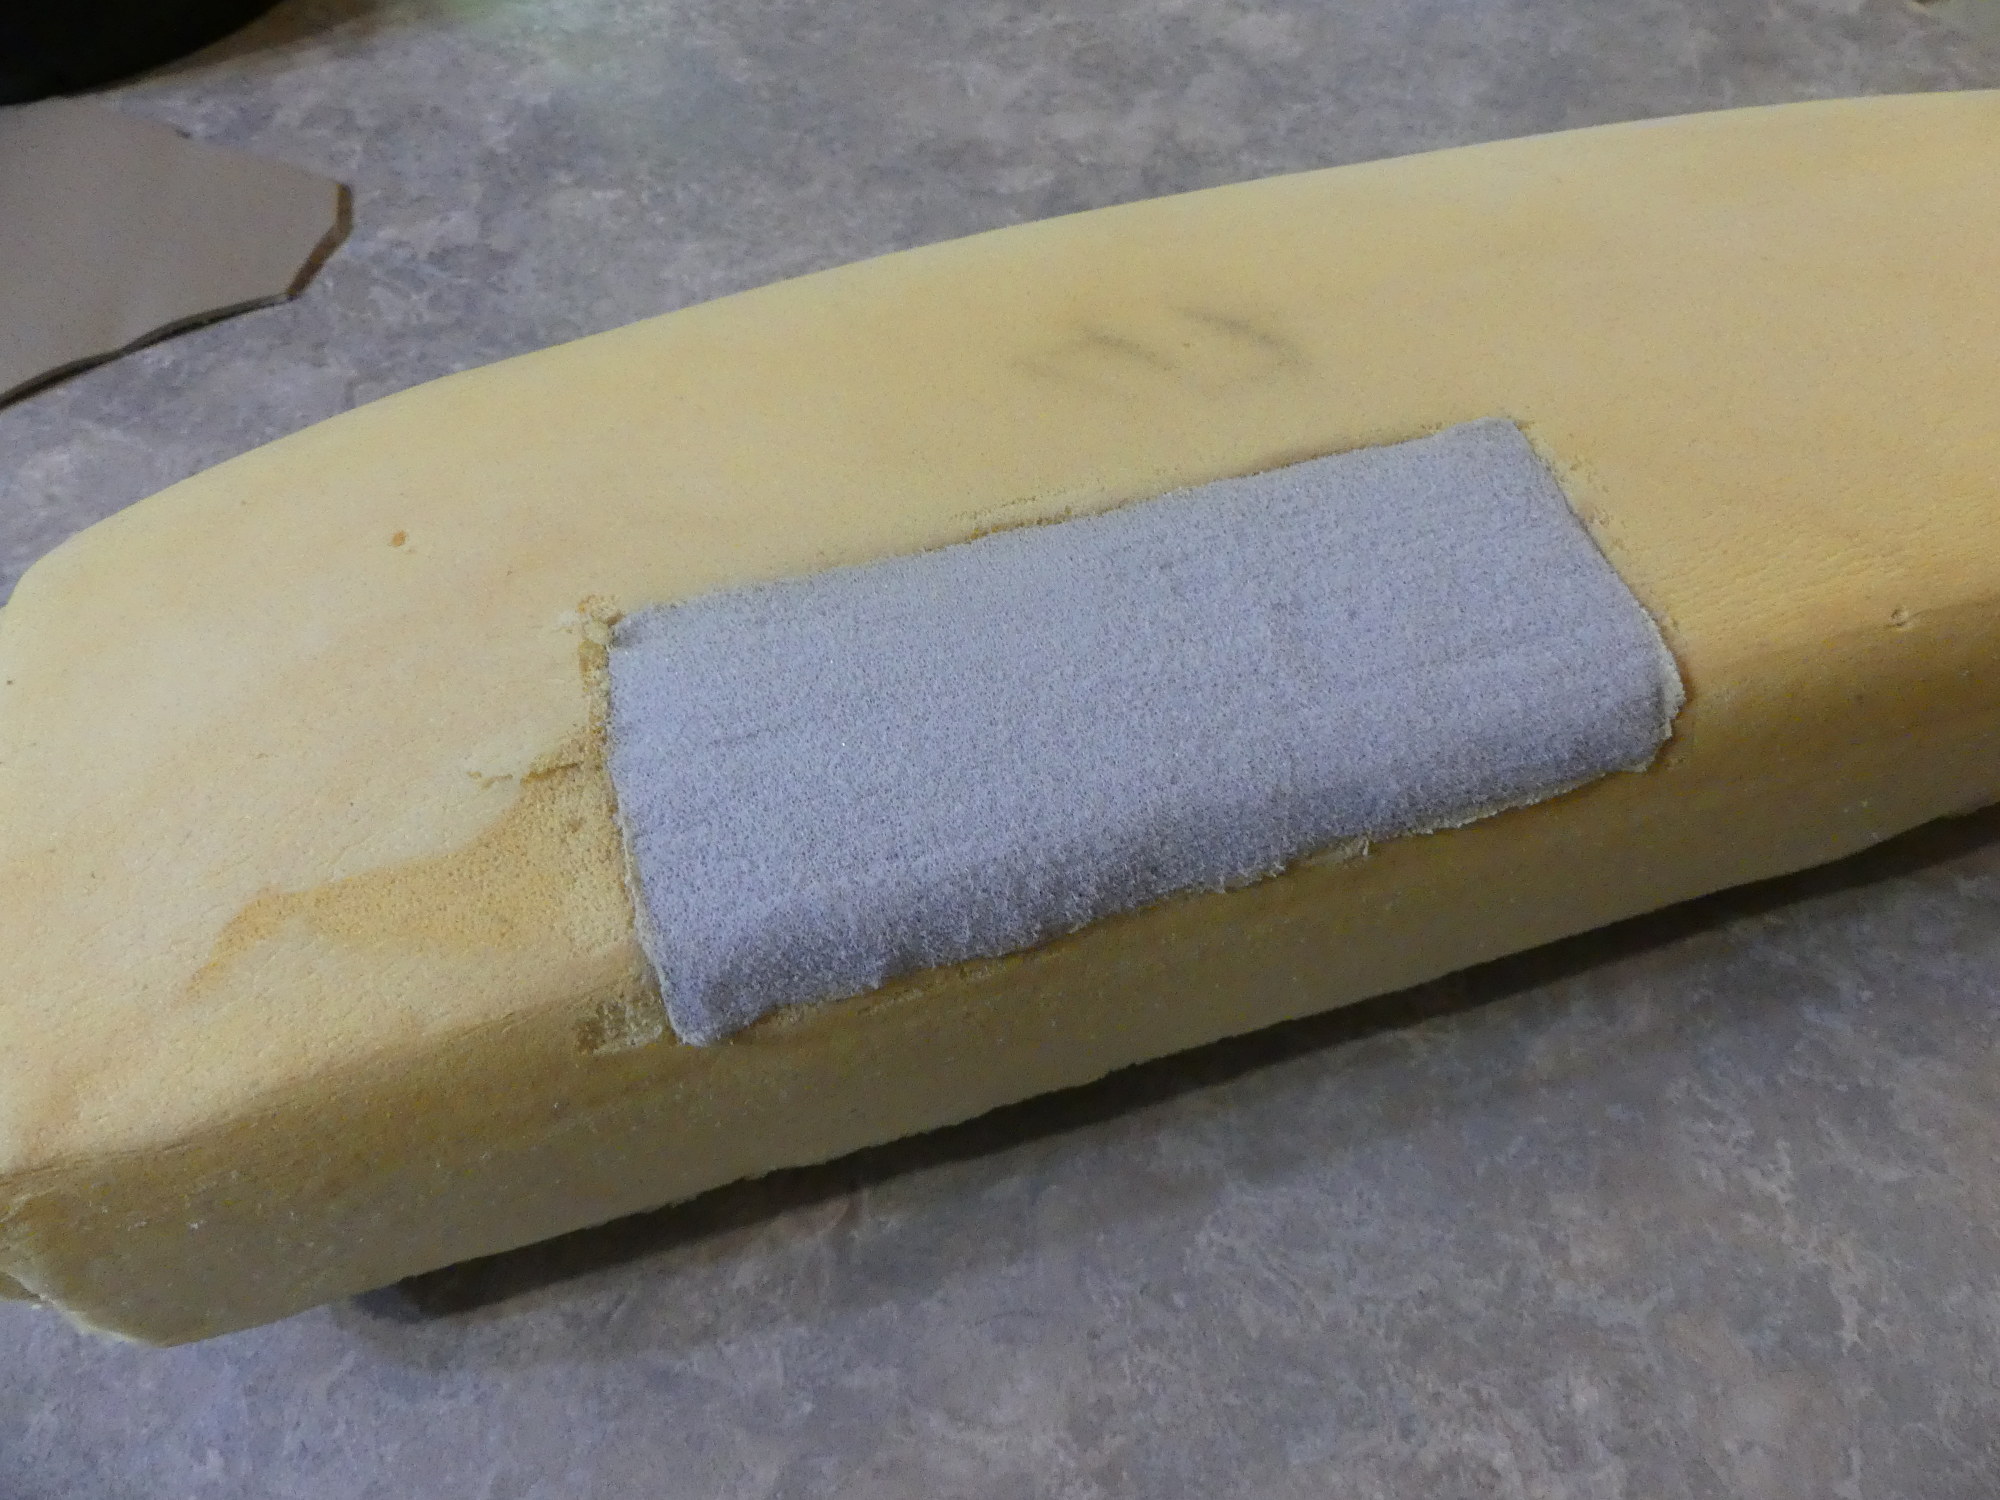
After a couple hours I pulled out my rotary tool equipped with a small sanding drum and contoured the foam. The good news is that, done properly, the sanding drum is more than capable of doing the job, but it does require bracing one's hand on the surrounding foam and making slow and steady sweeping motions across the foam to ensure that the drum does not dig in and gouge the work. Despite being careful, it happened of course, but as I found the drum more likely to dig in while sweeping in one direction, I quickly learned to sweep only in the opposite direction.
The end result is pictured. As was this was only a proof of concept I stopped short of what I would consider a finished product, but after putting a small piece of leather over the foam I can say that the repair would have worked. The only issue is that the glue applied to the vertical seams around the cutout region in the foam were obvious to the touch and affected the compressibility of the foam in those areas. This is detectable with the leather installed but I think the effect could be minimized by using some of the thin white dacron filler material that GAHH uses on the back of their covers.
The real question, of course, is whether the more complex backrest foam could have been repaired using similar techniques. I think it's safe to say that it could be done, but it would have taken considerably more effort. Were my schedule not insane I would be inclined to try.
Mileage: 264100