


Thursday, July 27, 2017
Vehicle and Parts Transported to Garage
The goal for today was to grab the car, engine, transmission and all the small parts from my tech's bay and get them back to my garage before a deluge of rain forecast to arrive tomorrow. This turned out pretty much as planned and, like any project of this magnitude, served mostly as an exercise in scheduling and resource allocation. For example, I made sure to call in advance for a flatbed yesterday so the driver would show up on time, or shortly after I finished loading the exhaust and other smaller parts into the pickup.
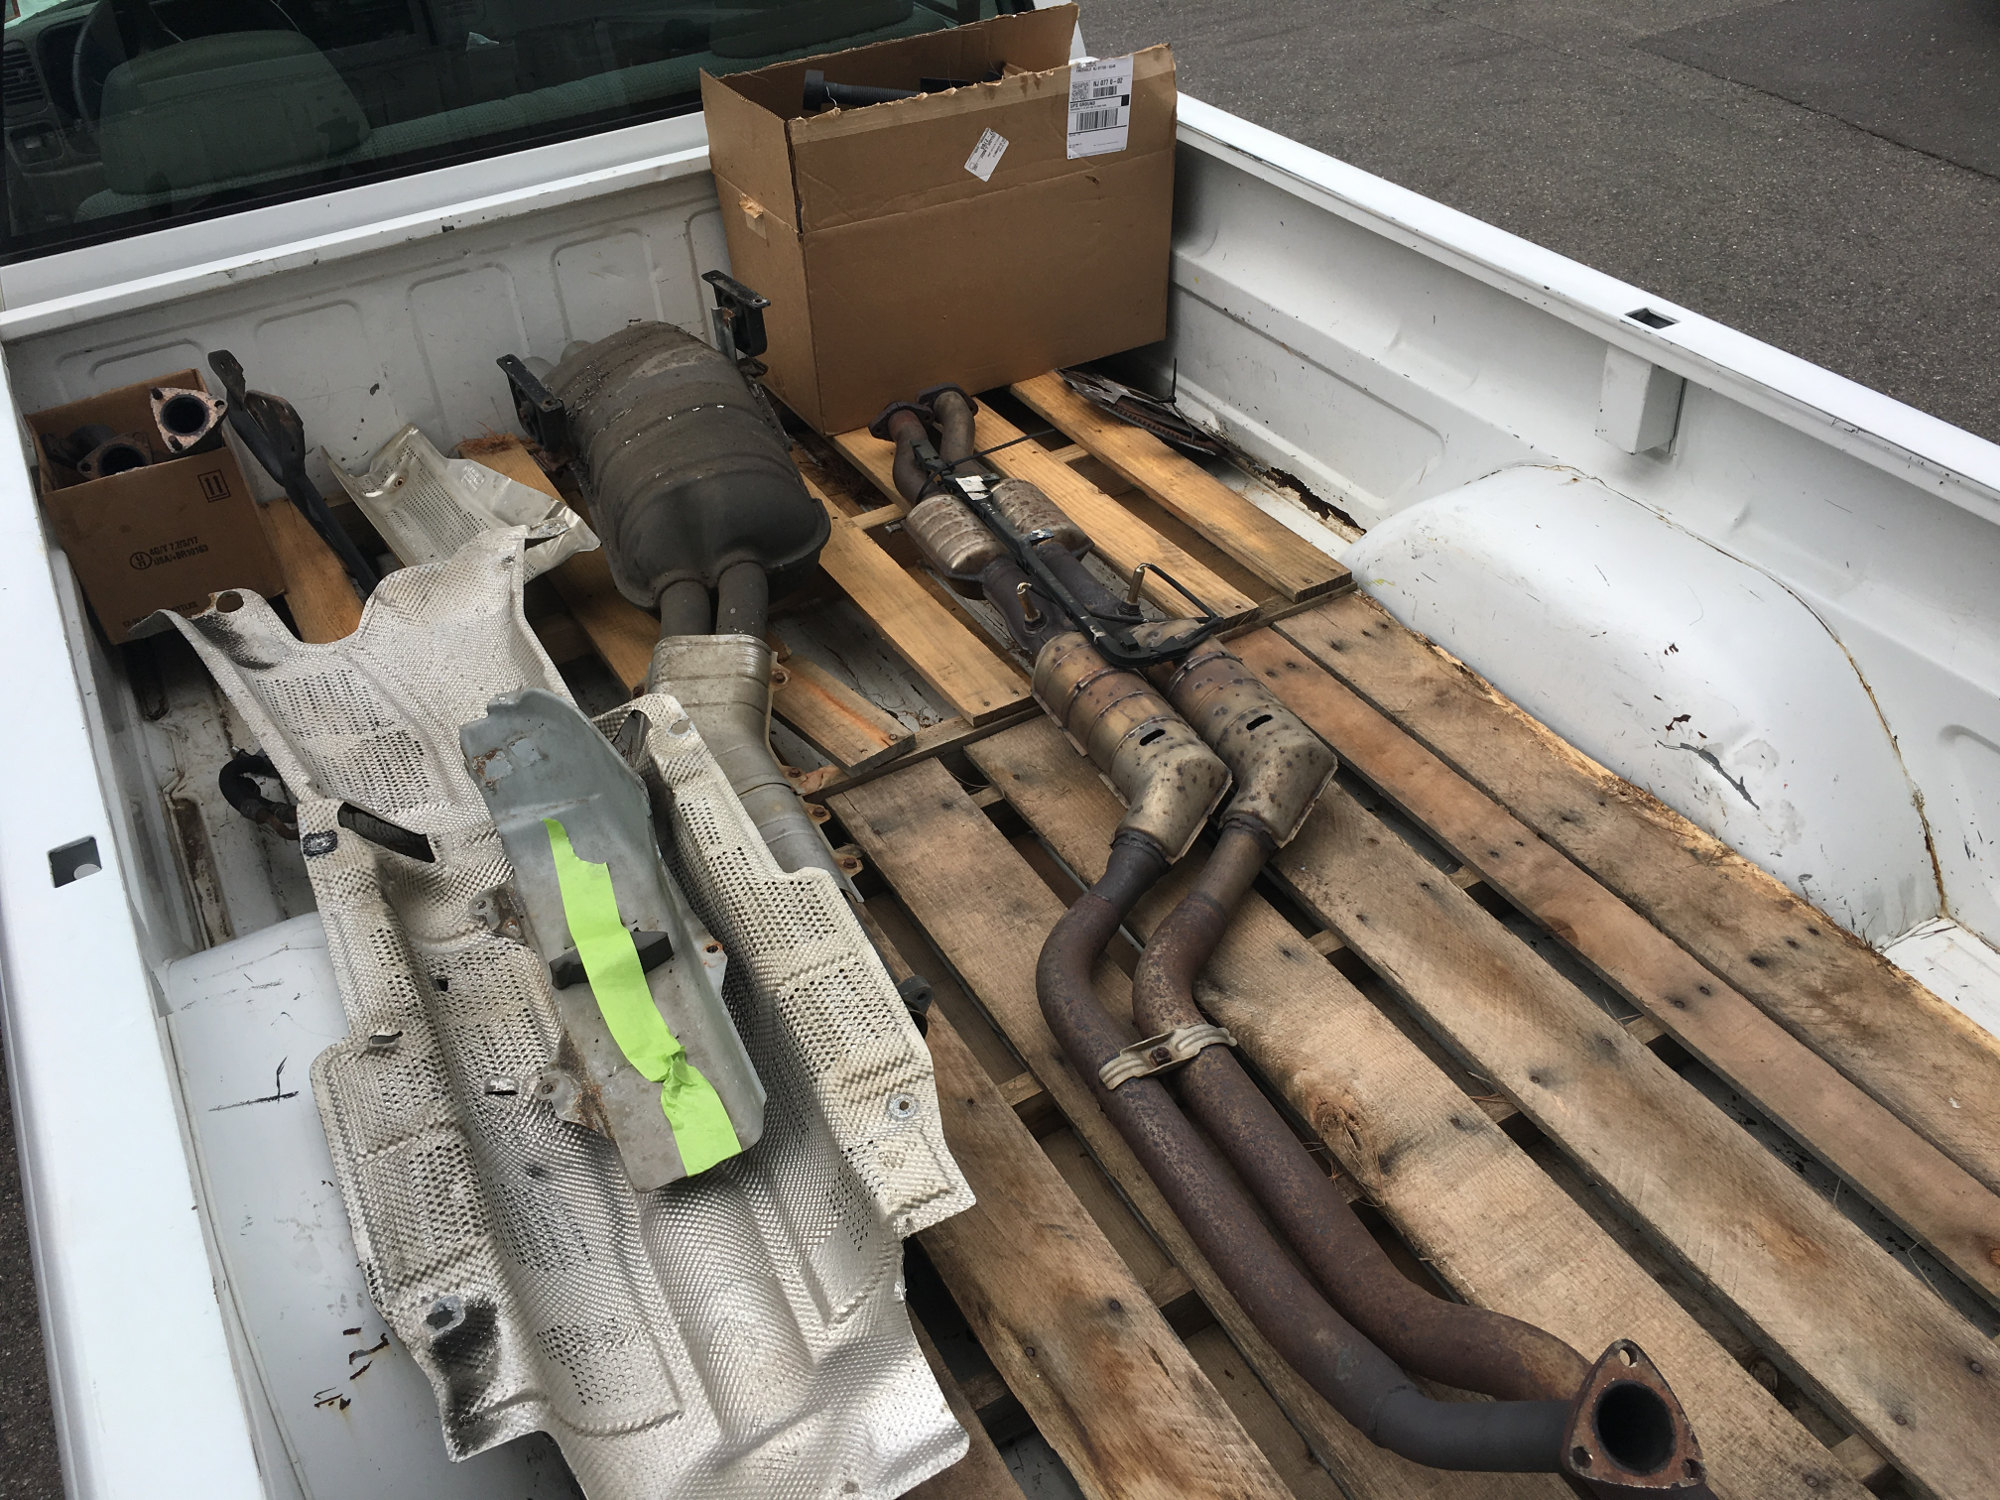 I had planned to bring the engine and transmission along with these parts but it would have taken me longer to secure the big parts than I had time available waiting for the flatbed, so I decided to make two trips. It turned out pretty well since these parts took up their share of space. |
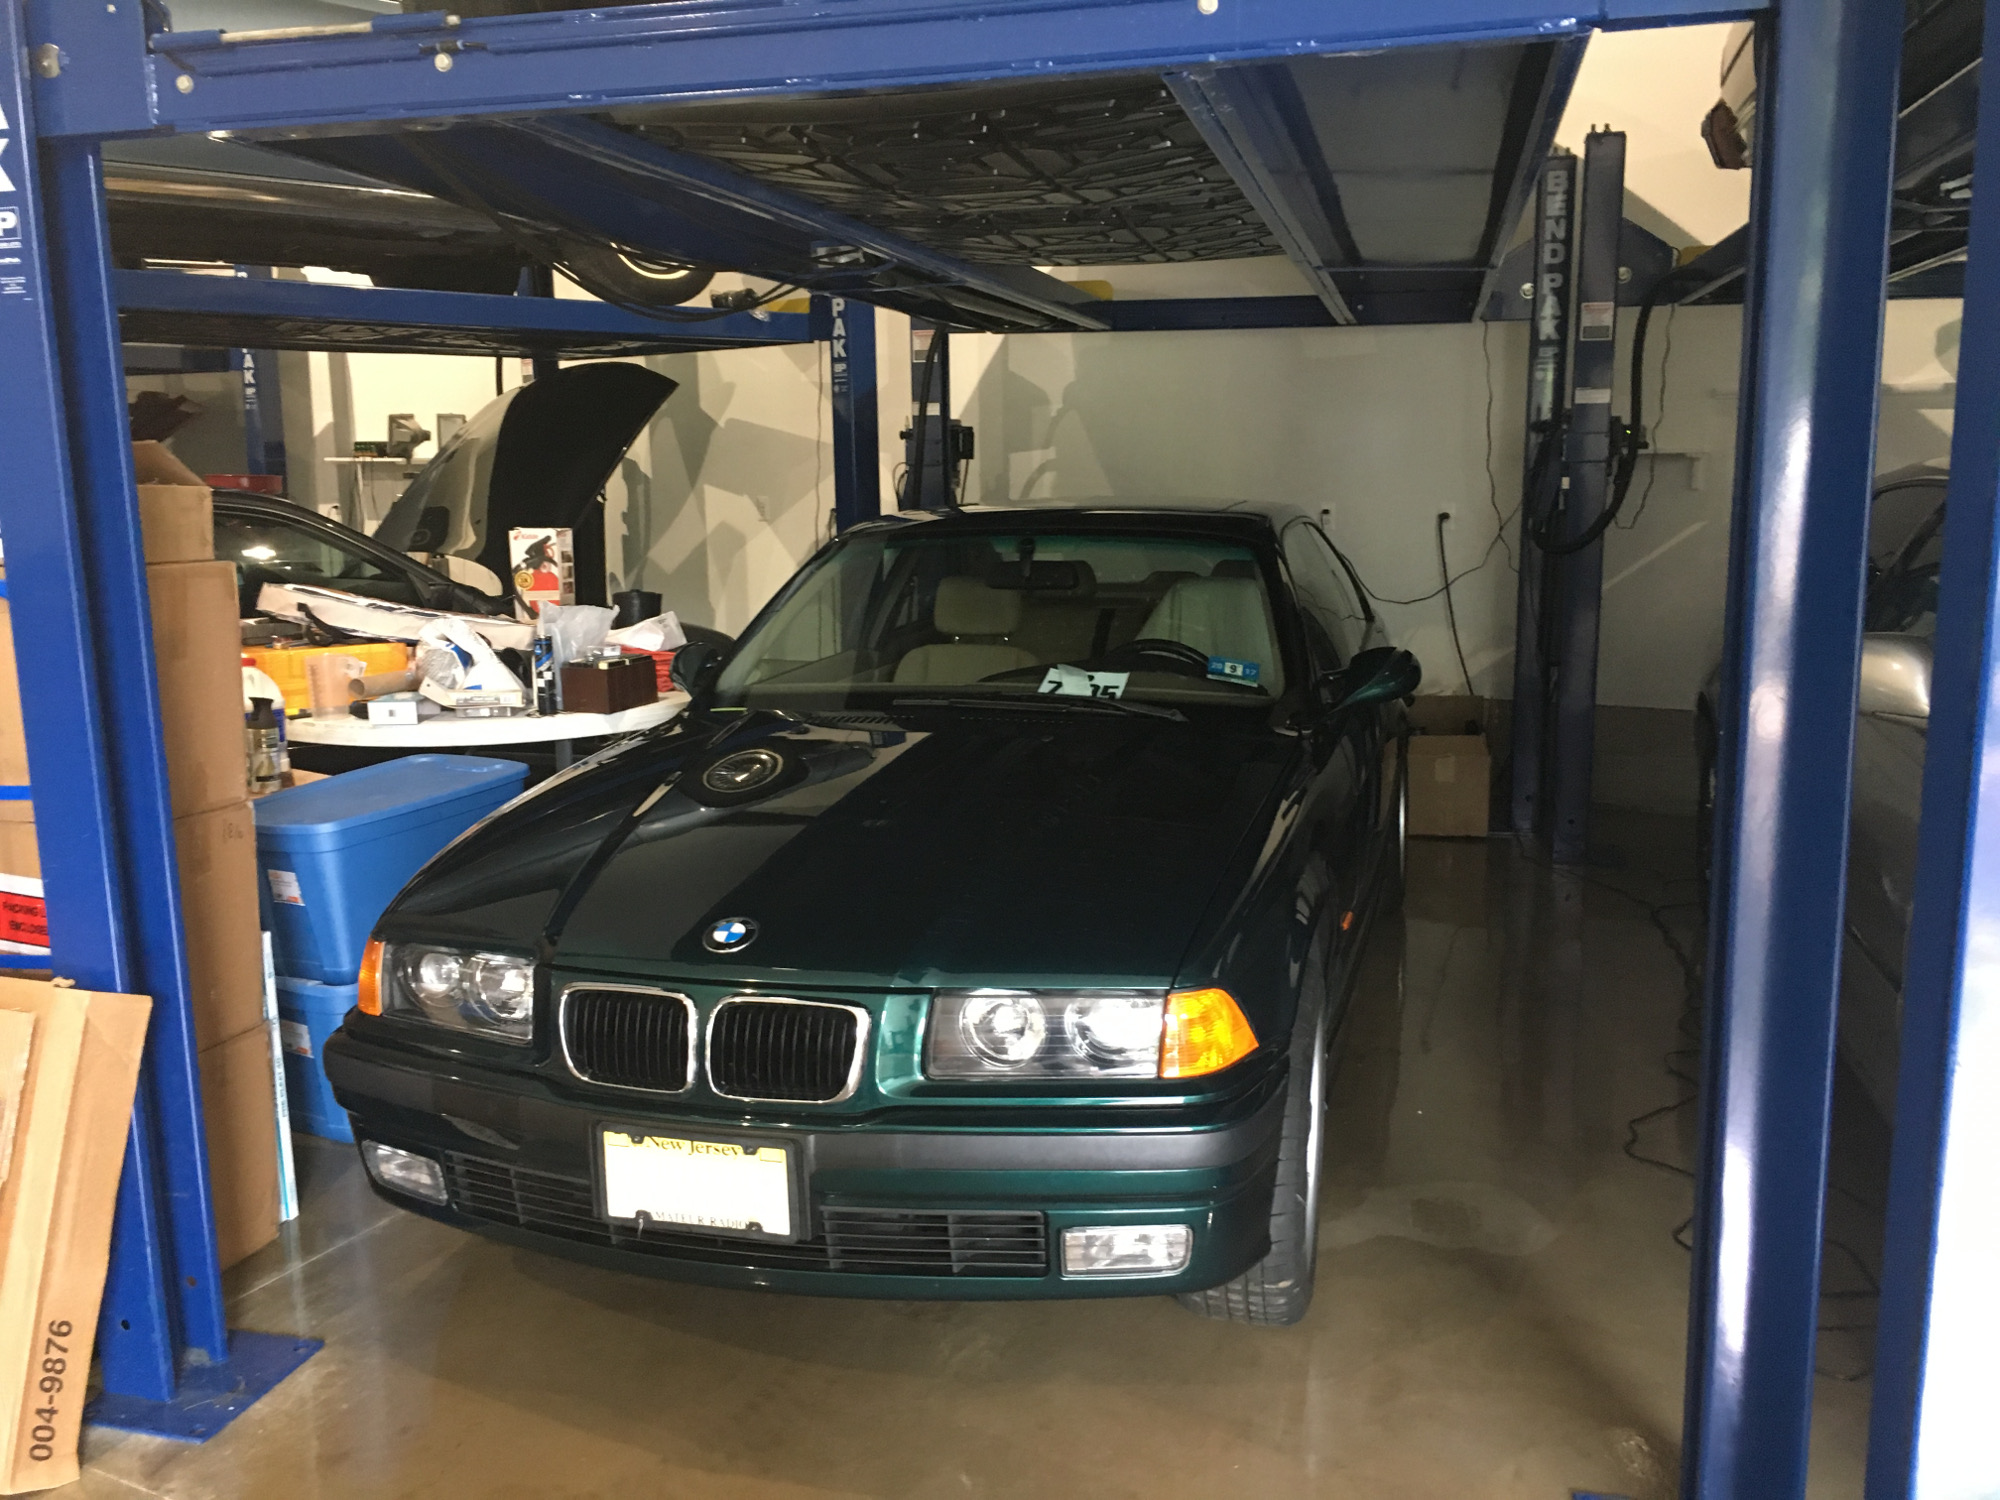
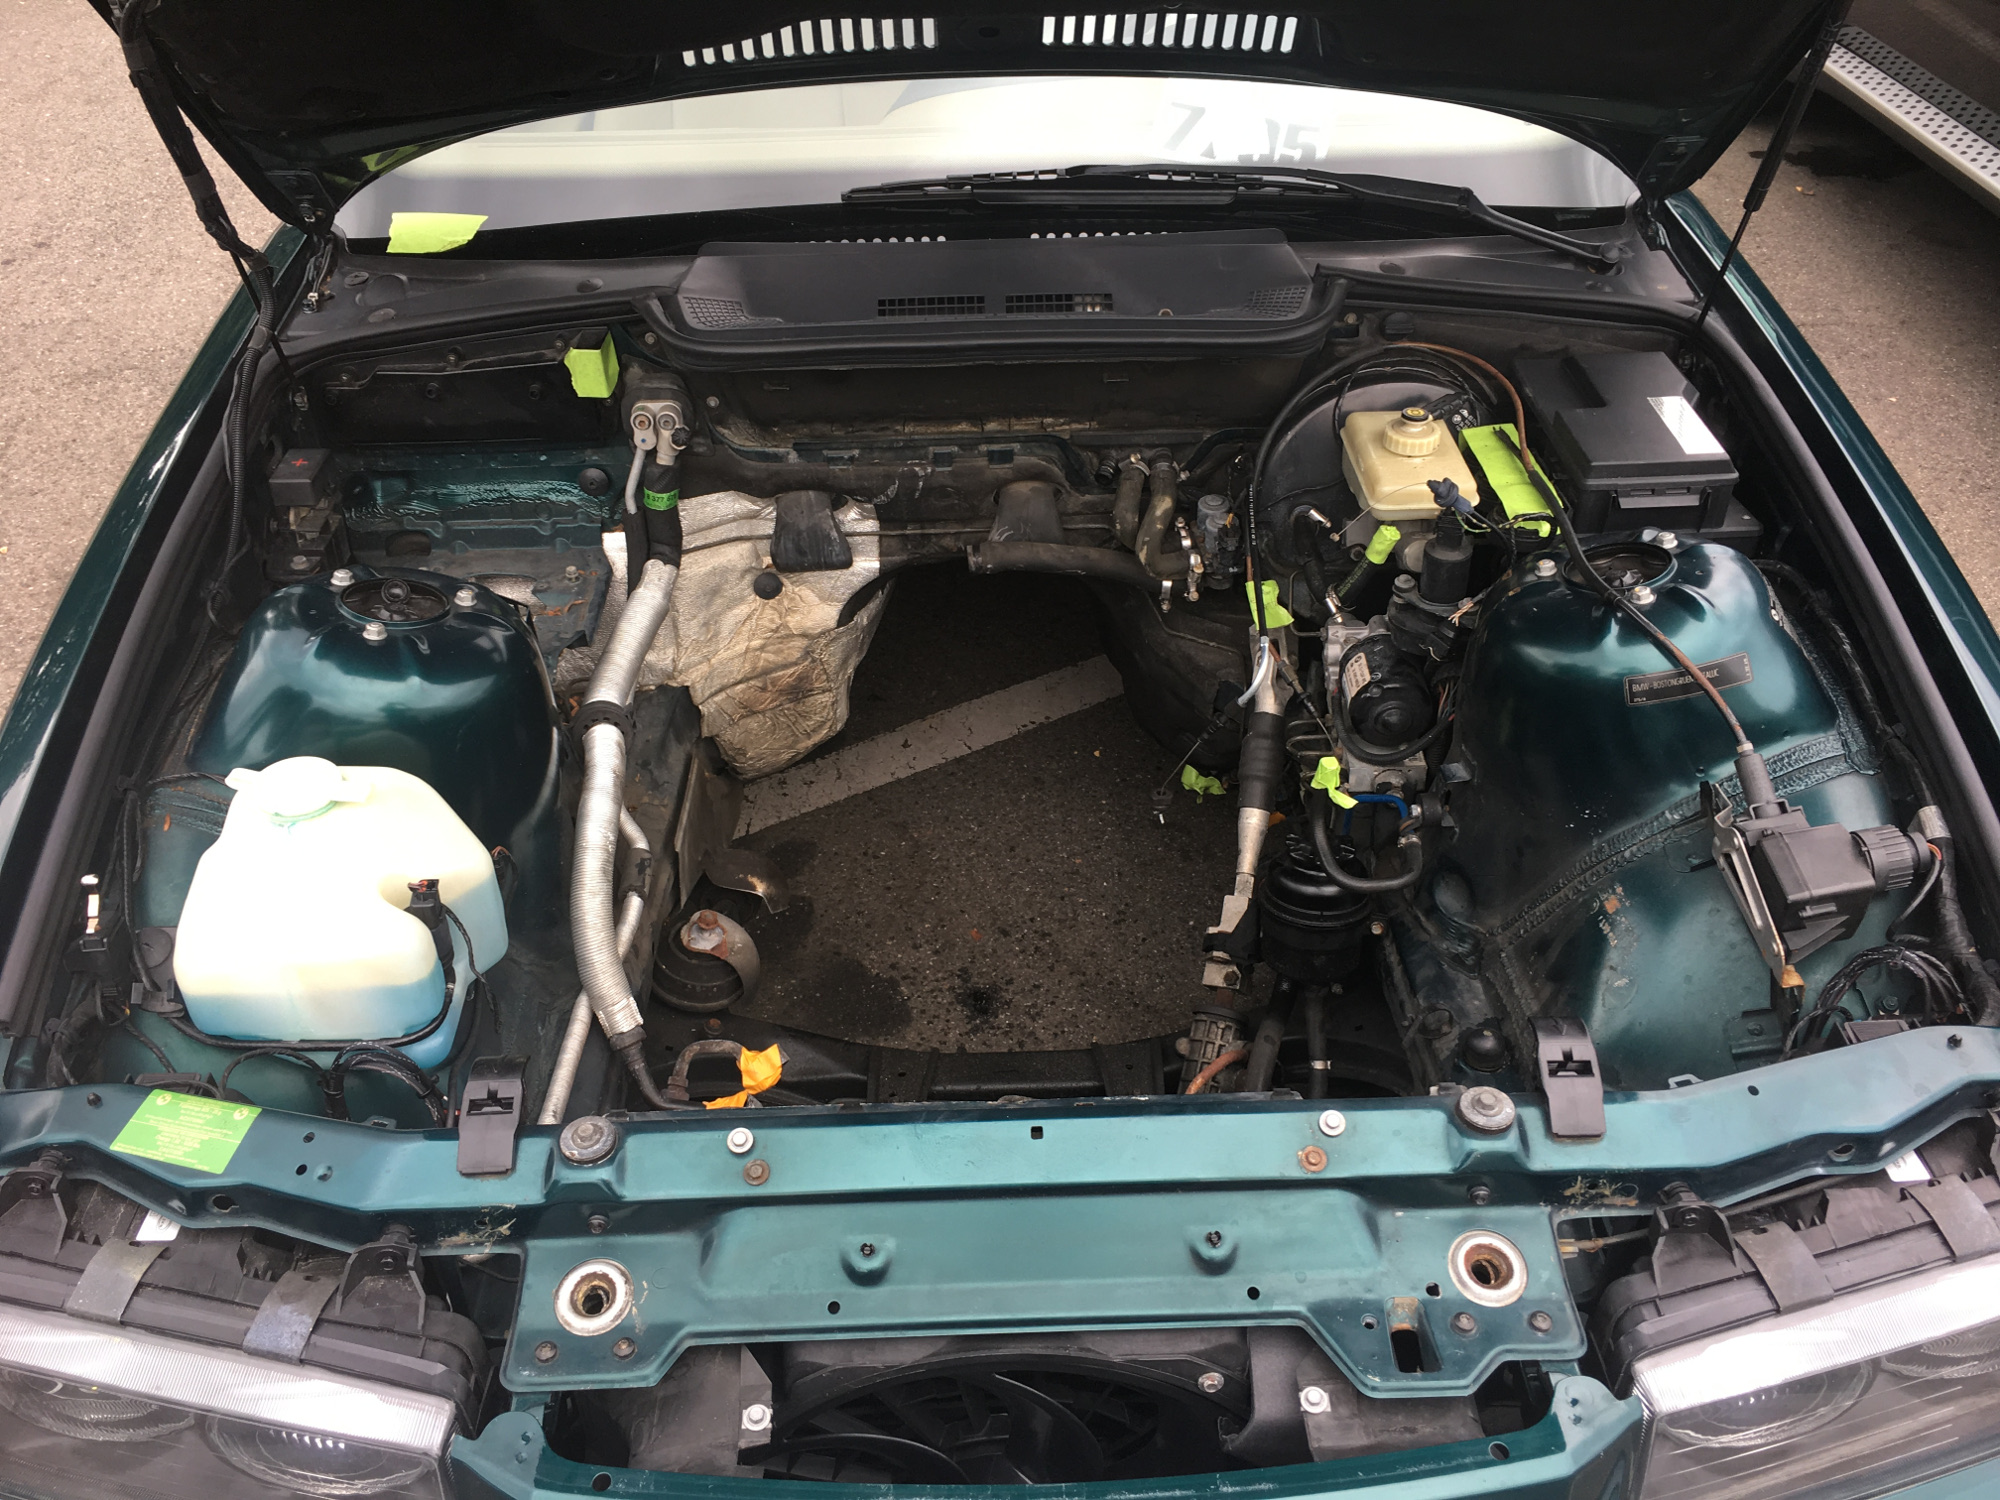 After nearly 20 years of ownership and tons of rebuild work this is the first time I've ever seen my engine bay lacking the most important part of a BMW -- the engine. The little pieces of masking tape everywhere are the result of my tech's attention to detail in protecting the various hoses and connectors while the car awaits its new heart. |
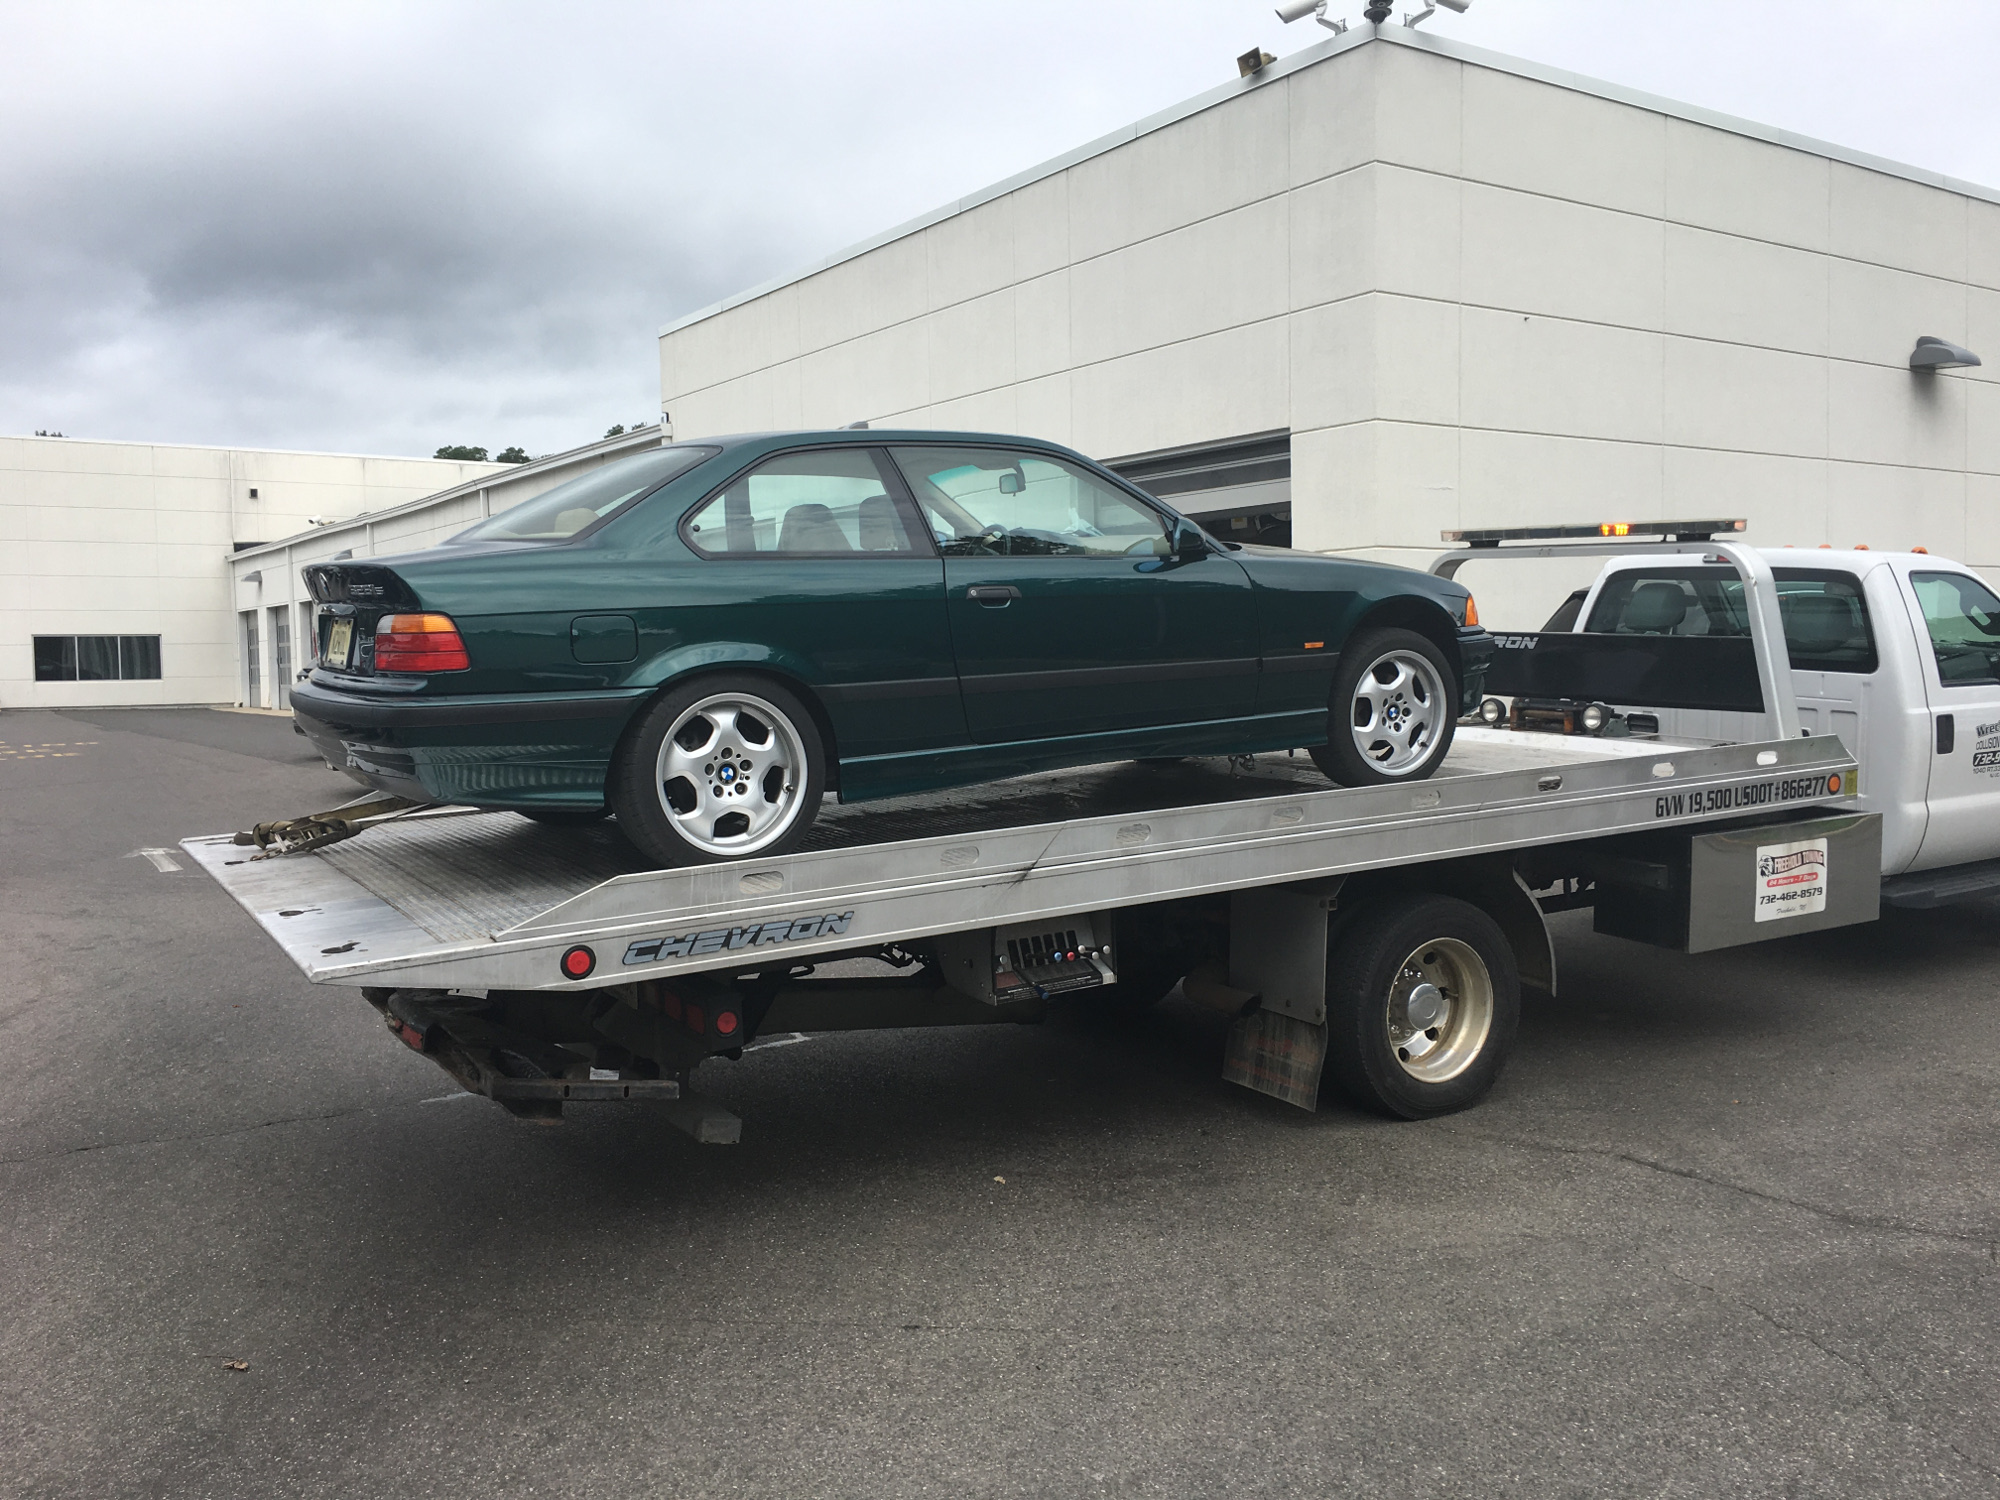 Over the 20 year life of this car I think I've put this on a flatbed a total of five times. BMWs get a reputation for being on flatbeds far too often and I suppose some of that is justified, but this time was intentional and expected. If you look closely you can see the excessive front wheel gap of the E36 pronounced because of the lack of weight in the nose. |
When it came time to lift the car onto the flatbed the driver initially considered hooking on to the control arms but I stopped him and instead popped the two front jacking pucks free of the body and had him insert the hooks into those holes. On the way home with the flatbed in tow I called ahead to my brother to tell him we were on the way and upon arrival I found him ready to assist moving the car into the garage. As we lowered the car off the flatbed a peculiar thing happened -- once the rear wheels were firmly on the garage floor the car stopped moving rearward dispite unwinding the winch. This occurred because with the driveline removed the weight was centered over the rear axle. To remedy this I simply opened the door, grabbed the B pillar and pulled the car the rest of the way down the ramp while the driver unwound the winch.
Once all four tires were back on the ground my brother brought out his four $60 HF mechanical ratcheting casters. These allowed us to lift all four tires off the ground enough so we could move the car sideways to align it with its parking space under one of the 4 post lifts. After raising the casters it took all of 20 seconds to move the car into position. Had we done it with steering input we'd probably still be busy at it. Word to the wise -- if you want to move your car easily in the garage get a set of these casters. They're worth it.
Once in its final resting position under the lift I made sure to pull up on the parking brake because so much as leaning on the vehicle would cause it to move -- quickly -- and without the transmission installed there is no parking pawl to engage and prevent the wheels from spinning. The thing I took away from this experience? Without its drivetrain the E36 is surprisingly light and easily moved by one person, at least on a level concrete floor.
 My brother's garage is laid out such that in order to move cars into certain parking spots it is necessary to manuever the car into place. If the car can't move under it's own power this is more difficult...unless of course you have access to some car casters. These made moving the car quick and easy. |
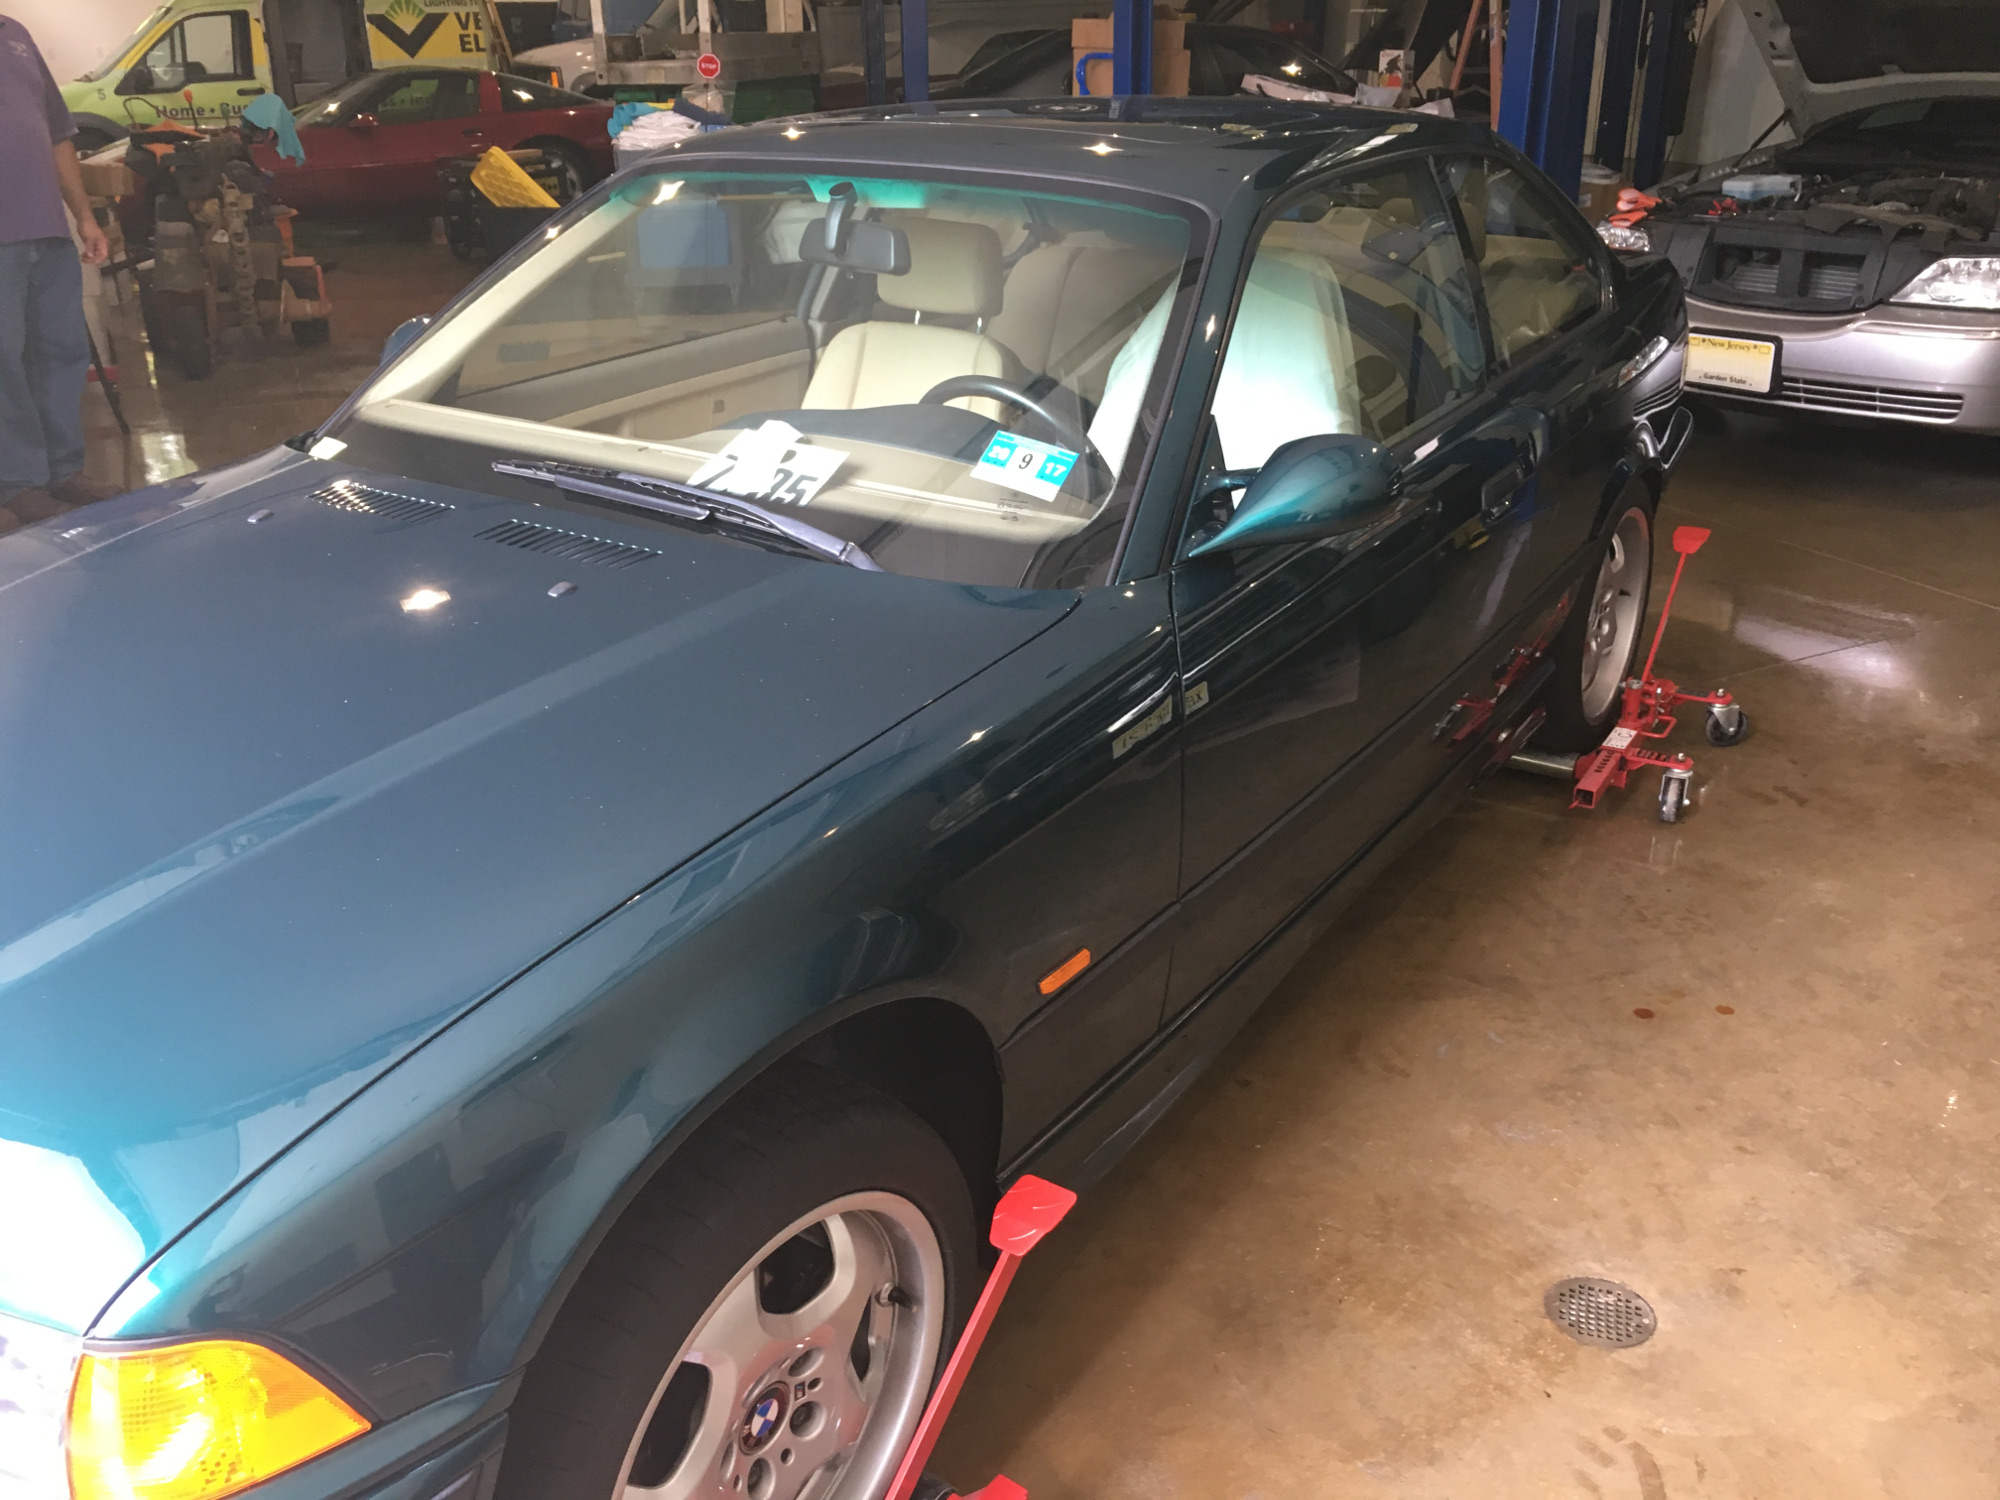
 The E36 in its temporary home under one of my brother's four post lifts. I plan to jack the car up in place here and allow it to rest on my flat top jackstands while I get to work remediating some rust and installing new fuel lines. This work will be done while I wait for my machinist to prep the block for assembly. No time wasted! |
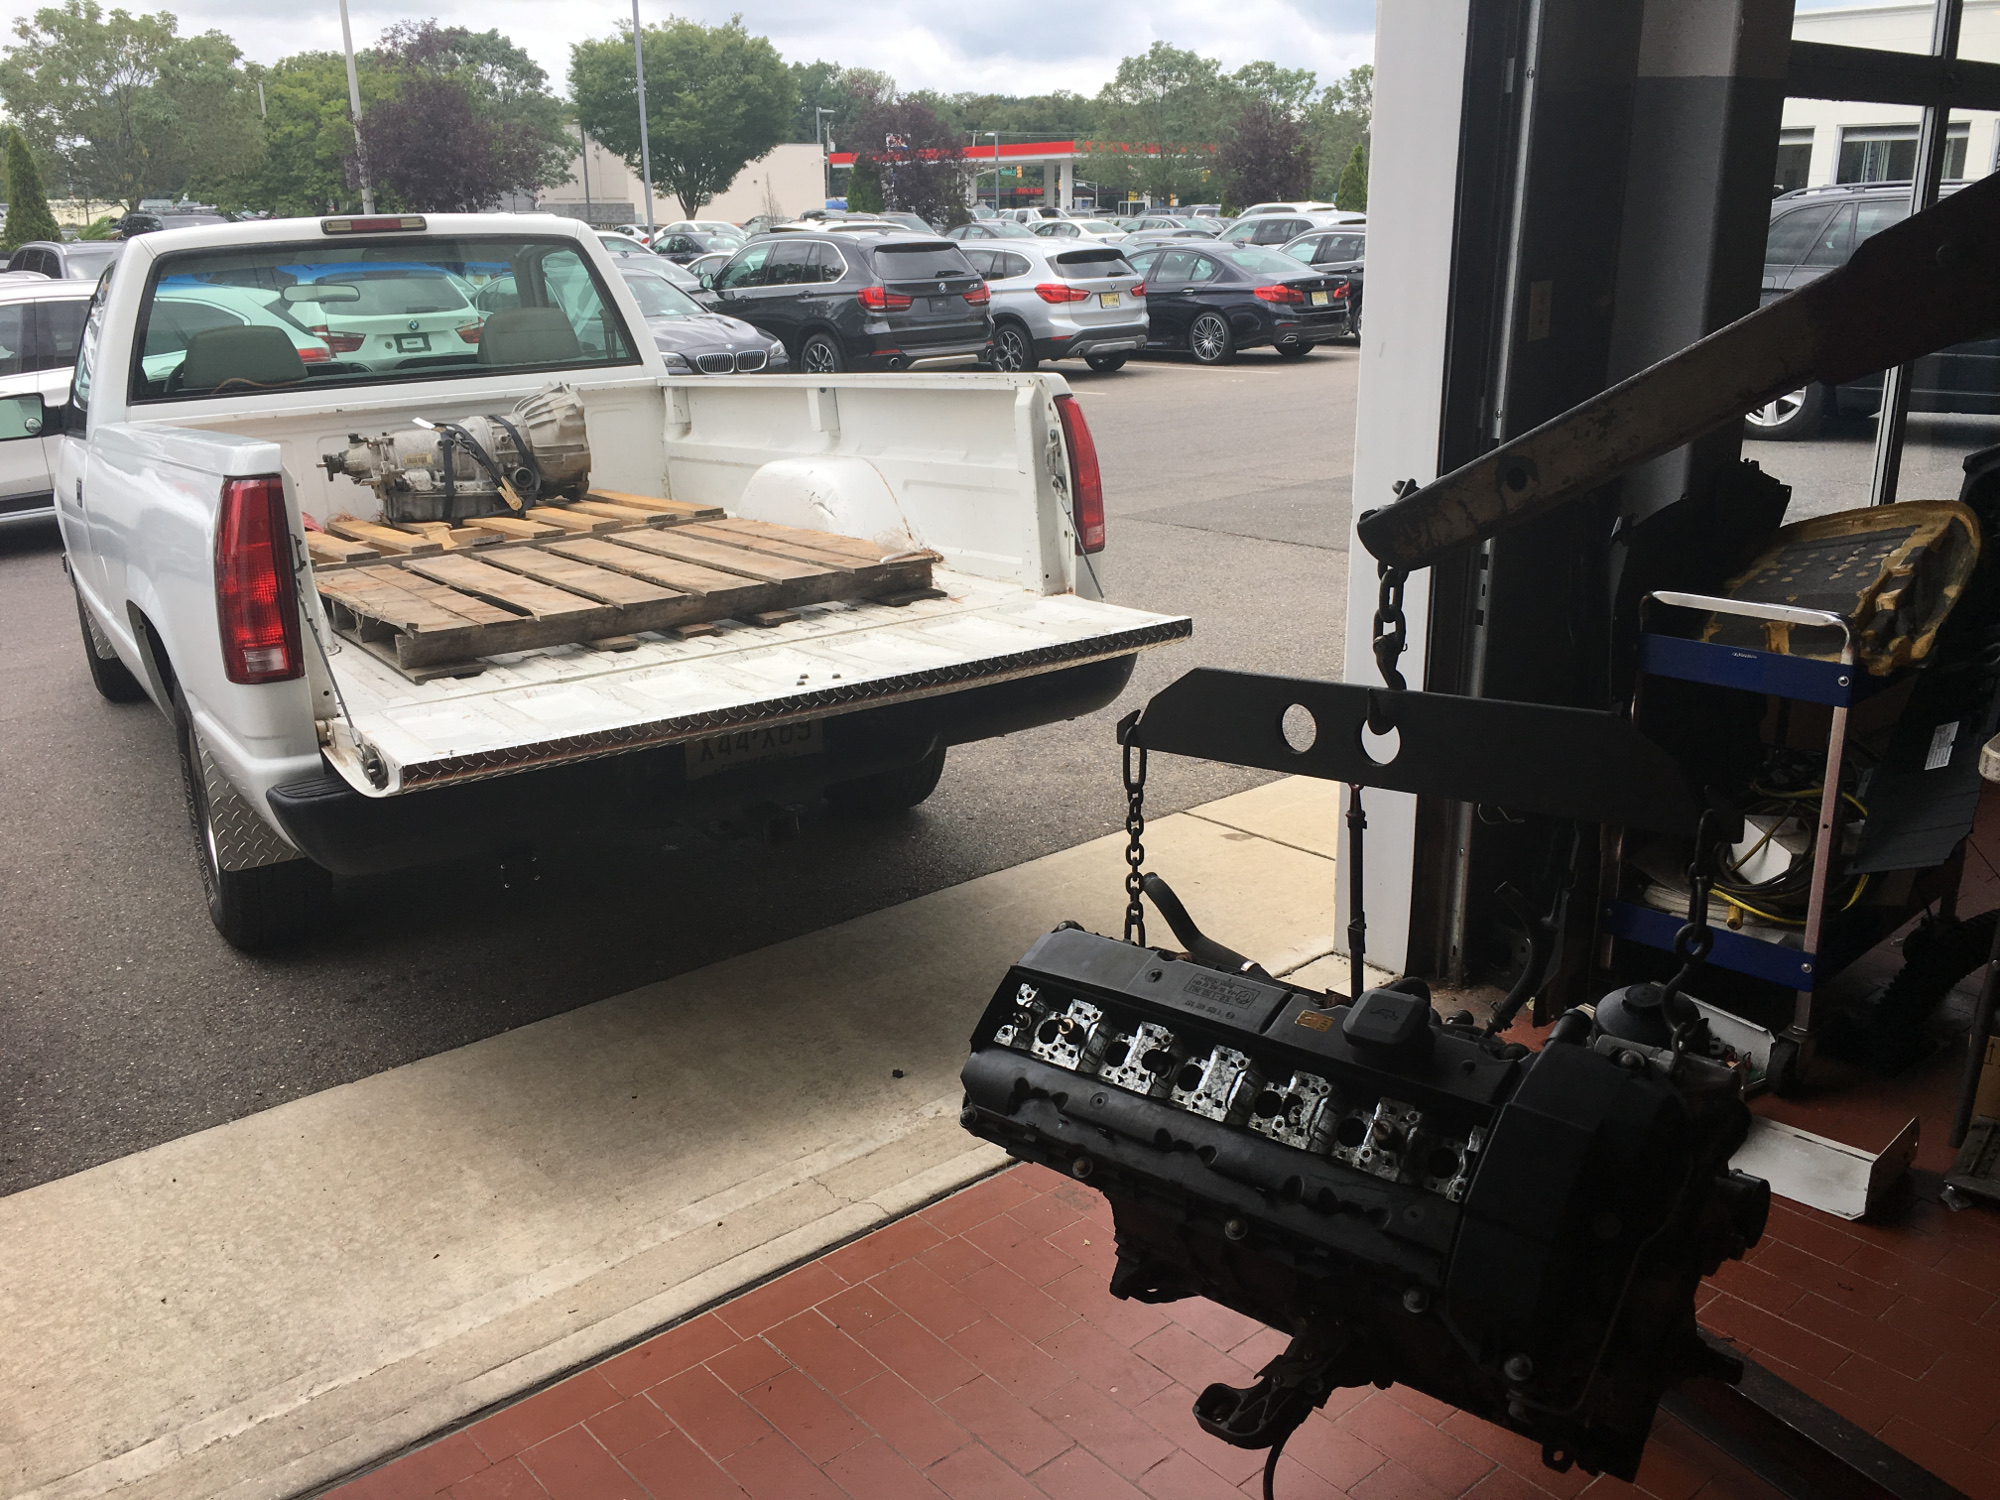 A second trip to my tech's bay to pick up the transmission (already shown here in the bed strapped to a pallet) and engine, which is hanging from a huge engine crane that my tech tells me was at the dealership when he was first hired there 35 years ago. And here I thought my E36 was a piece of history! |
With the car secure in its parking spot and my brother on to other tasks I went back to the dealer to pick up the engine and transmission. My tech left the passenger side engine mount bolted to the block and that allowed the engine to sit securely on the pallet without a need for a tire. I then used a nylon ratcheting strap to belt the engine and transmission to their respective pallets and drove back to the garage.
Engine Mounted to Stand
I prepared to mount the engine to the stand by changing the engine crane extension to the 1.5 ton position for a bit of extra reach. I then positioned the crane behind the pickup bed and pulled the engine toward it by sliding the pallet aft to the edge of the tailgate. Then I grabbed the load leveler and secured the L-brackets to the engine lift points before looping the chain through them and lifting the engine off the pallet. Those L-brackets saved the day, incidentally, as I quickly discovered that two links of chain combined with the thick mounting boss on the block were wider than the bolts I bought. The L-brackets are also more convenient than raw chain as the brackets make it very easy to take up any slack in the chain and prevent the need to crank the crane's lifting arm much above the horizontal. If you're wondering why this is an advantage, all I'll say is that I aged noticeably pumping up the hydraulic ram from the resting / storage position.
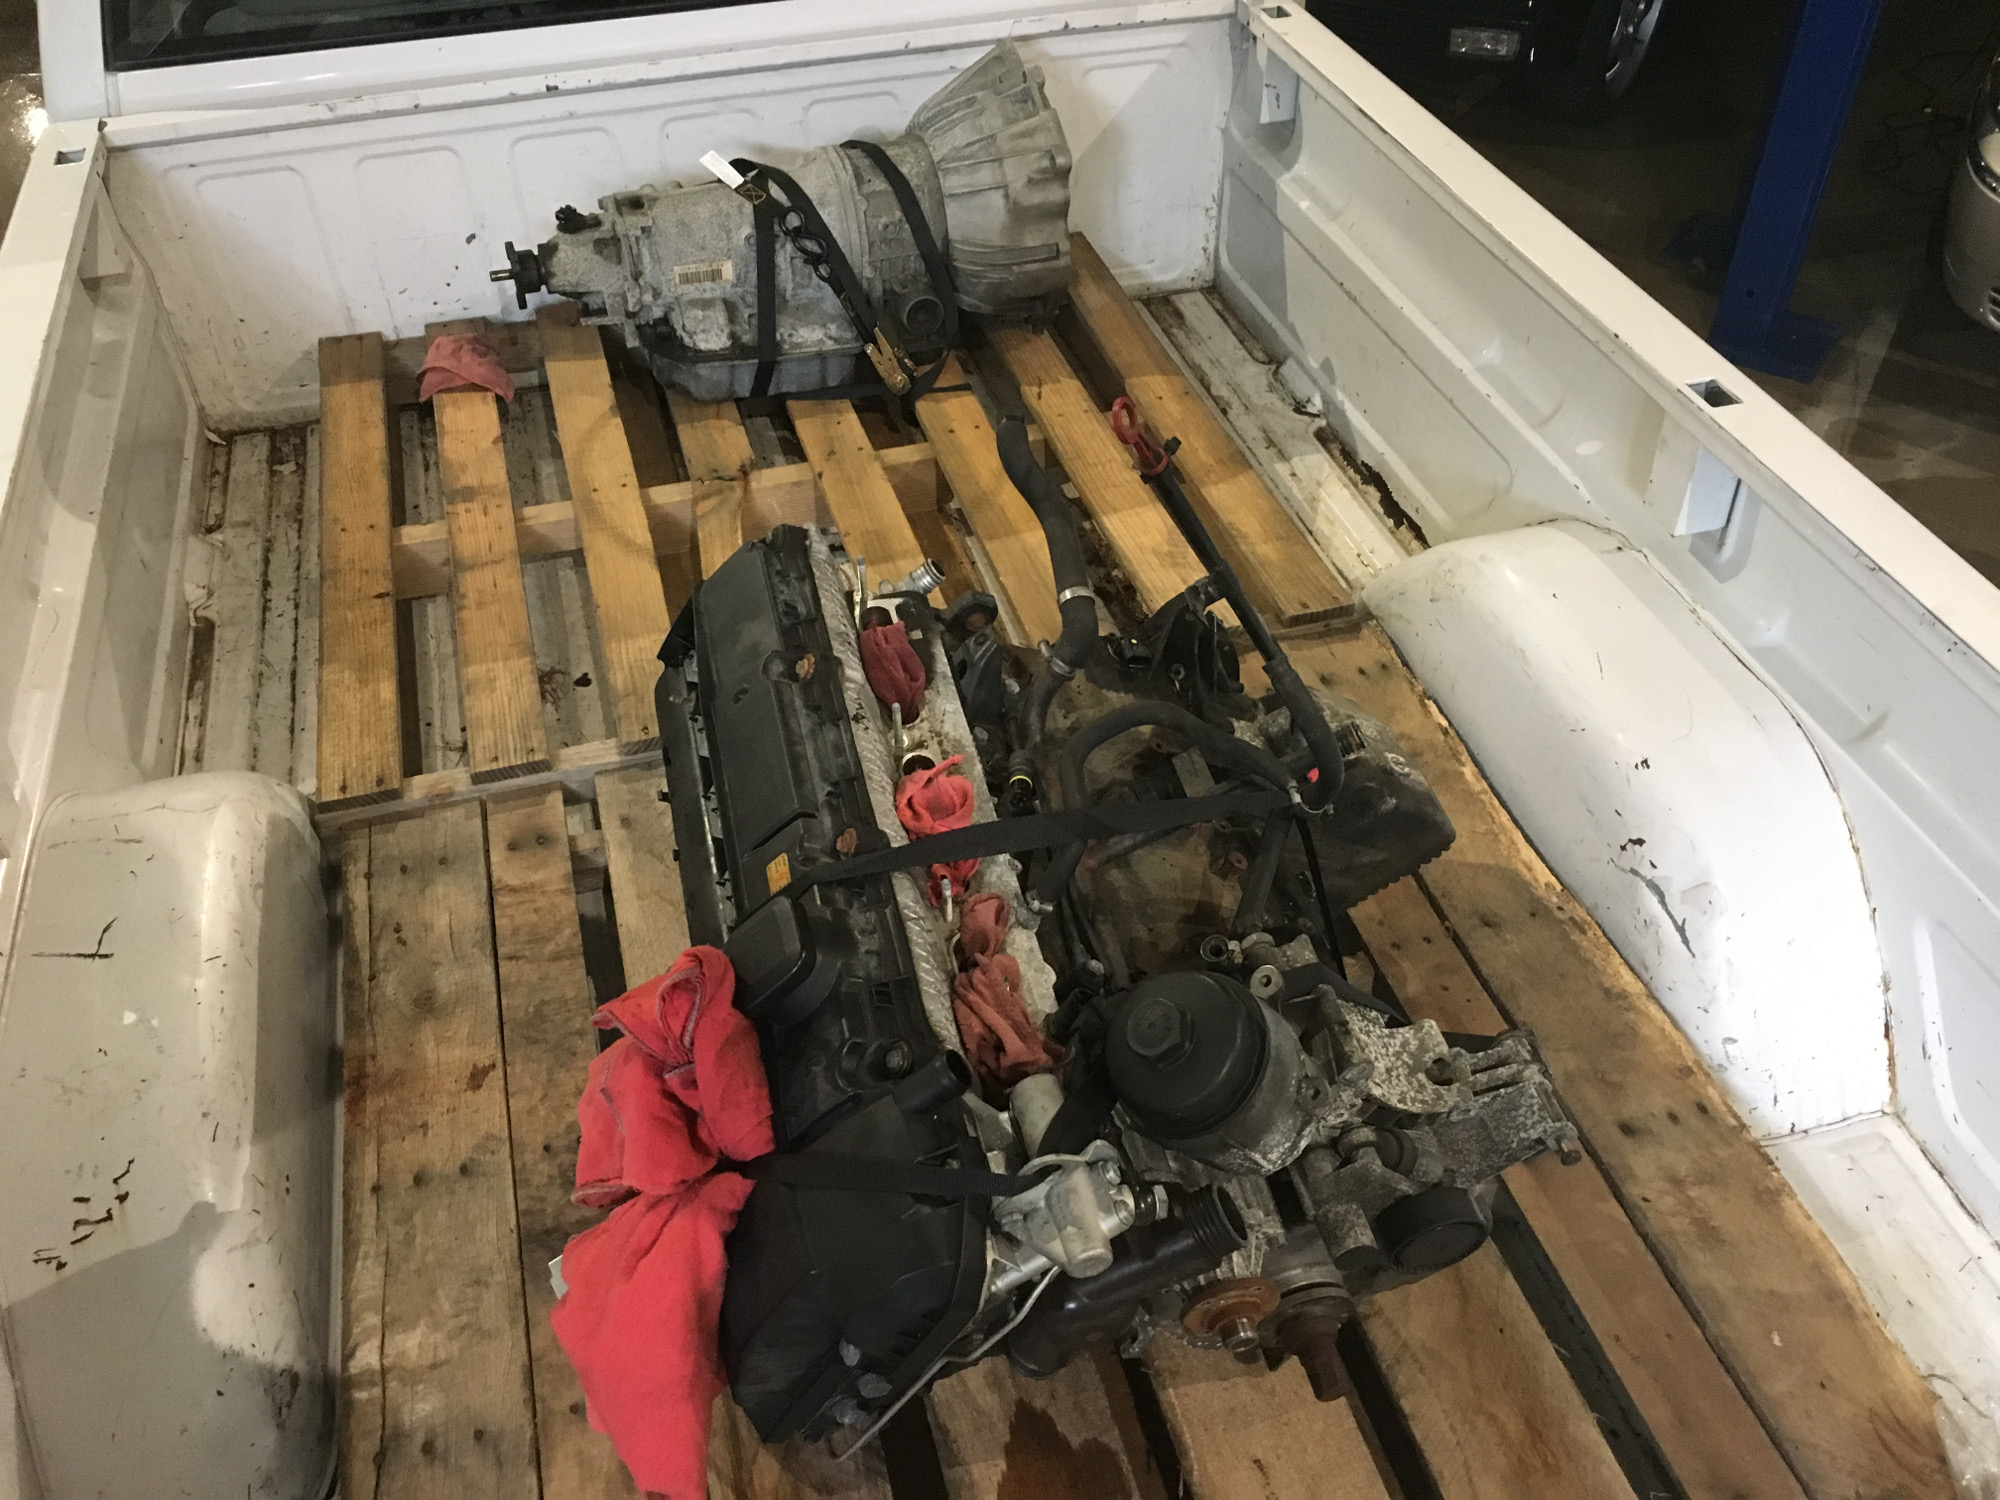 Back at the garage the engine is ready to be removed from the pallet and mounted to the engine stand. The transmission was not removed at this point because I had plans to transport it afterward to my local transmission shop for a full rebuild. The single nylon ratcheting strap used to secure each unit worked quite well -- neither shifted in transit. |
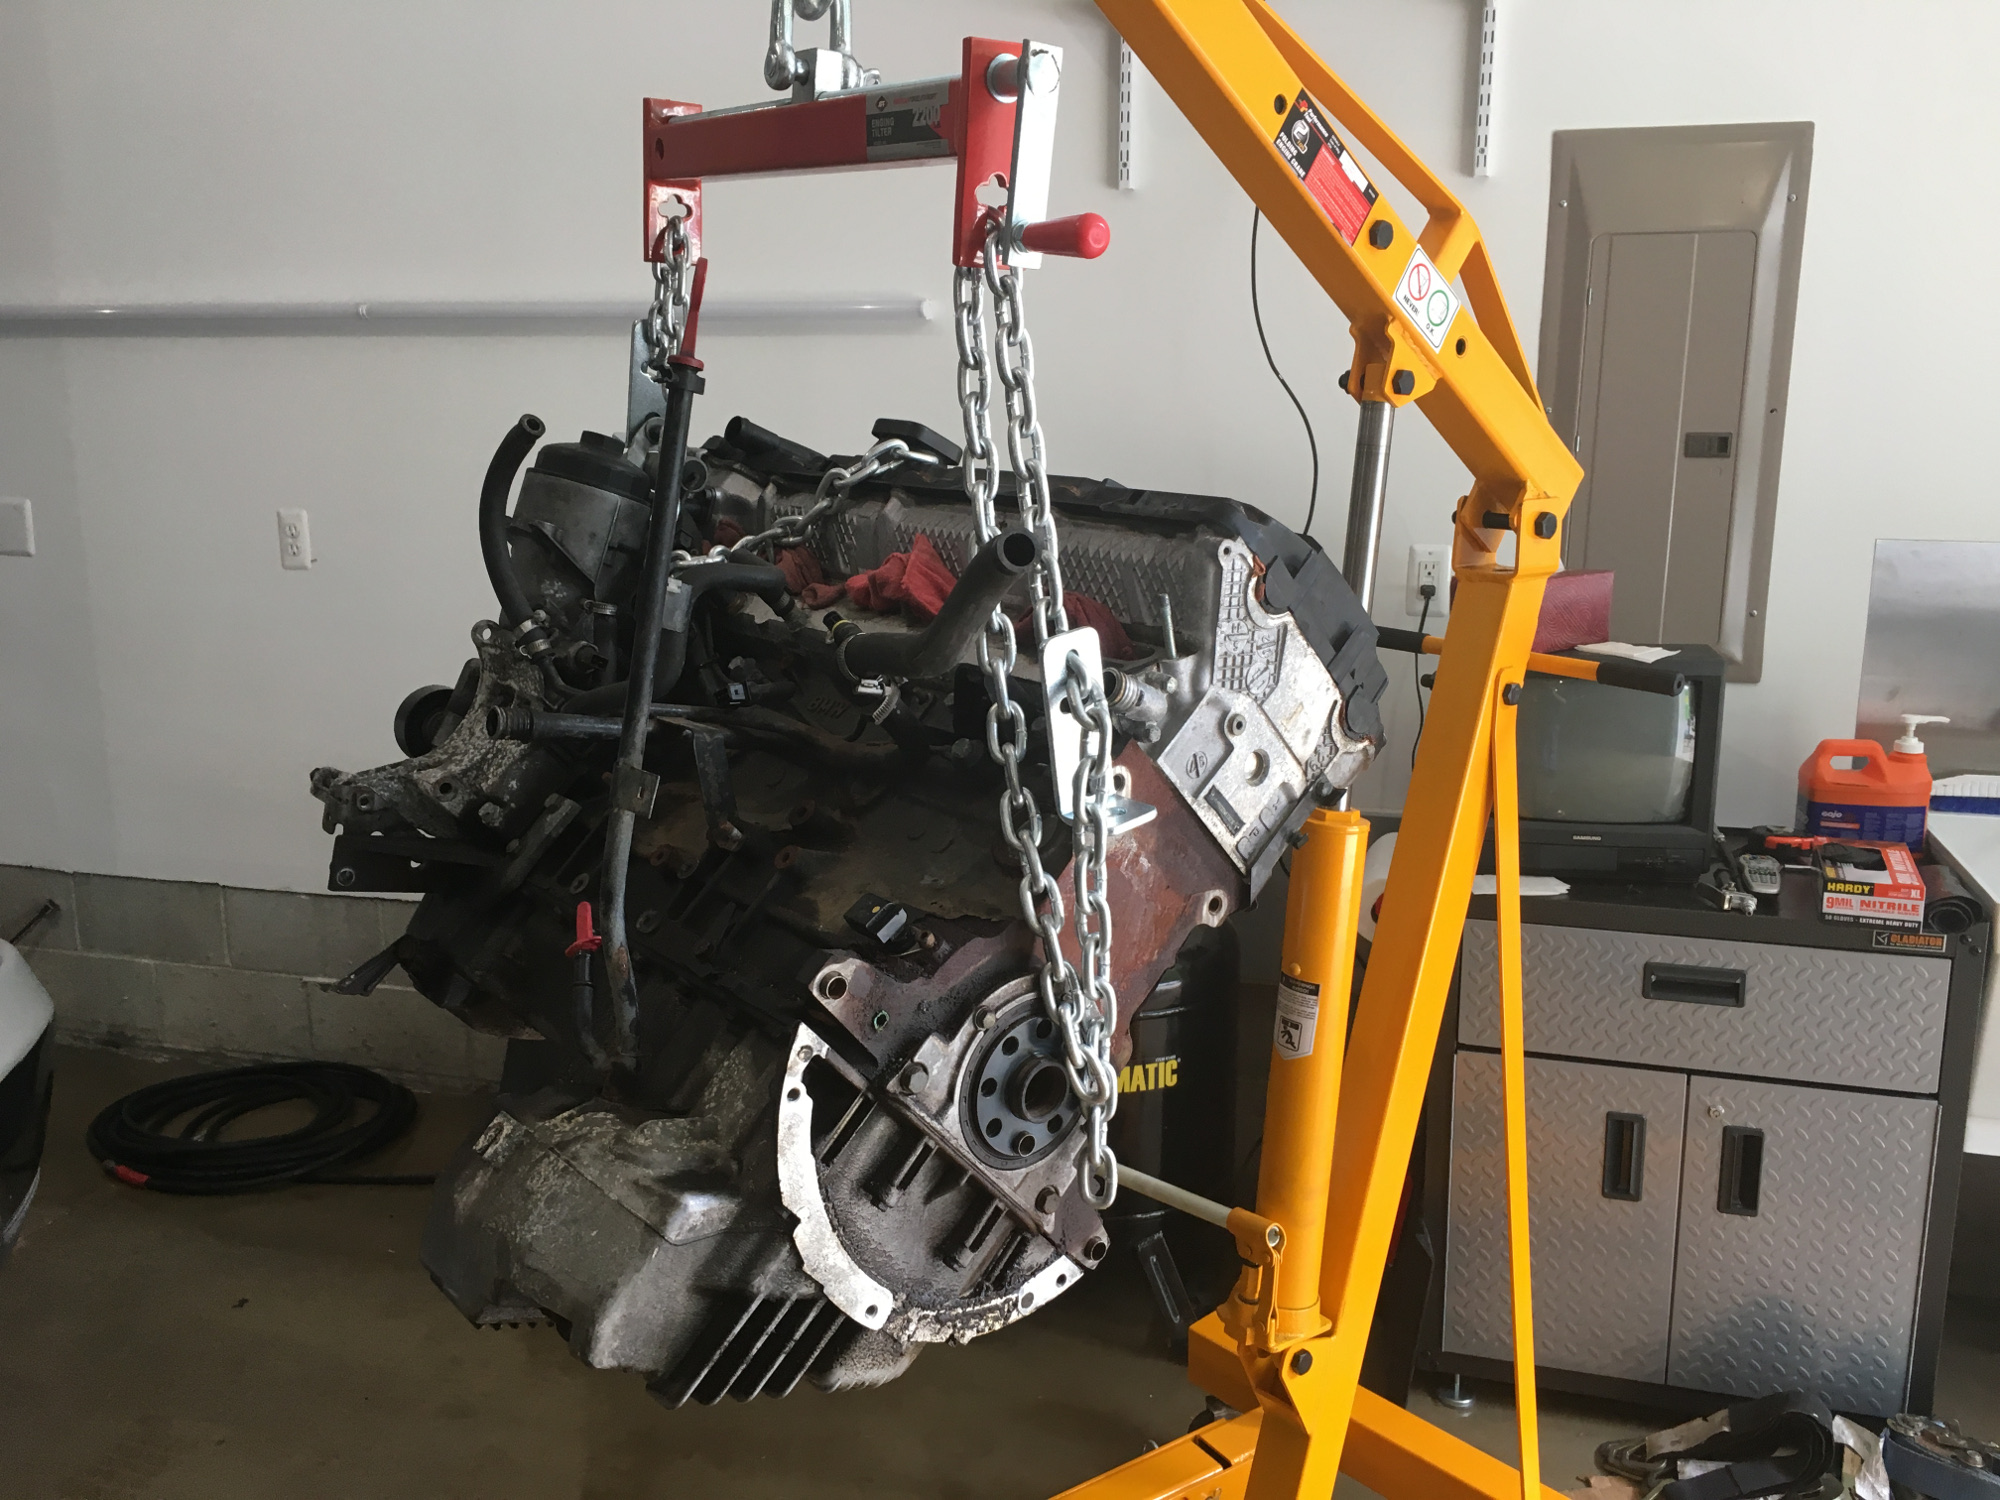 Here I'm showing the engine as it was removed from the pallet. Note the lack of a flywheel. My tech removed it for transport. I will have to reinstall it to mark my TDC dowels during disassembly. The crane seemed to work well, but it took forever to pump the unit up. Each pump only moves that lifting arm a centimeter or so. But what do you want for the money? |
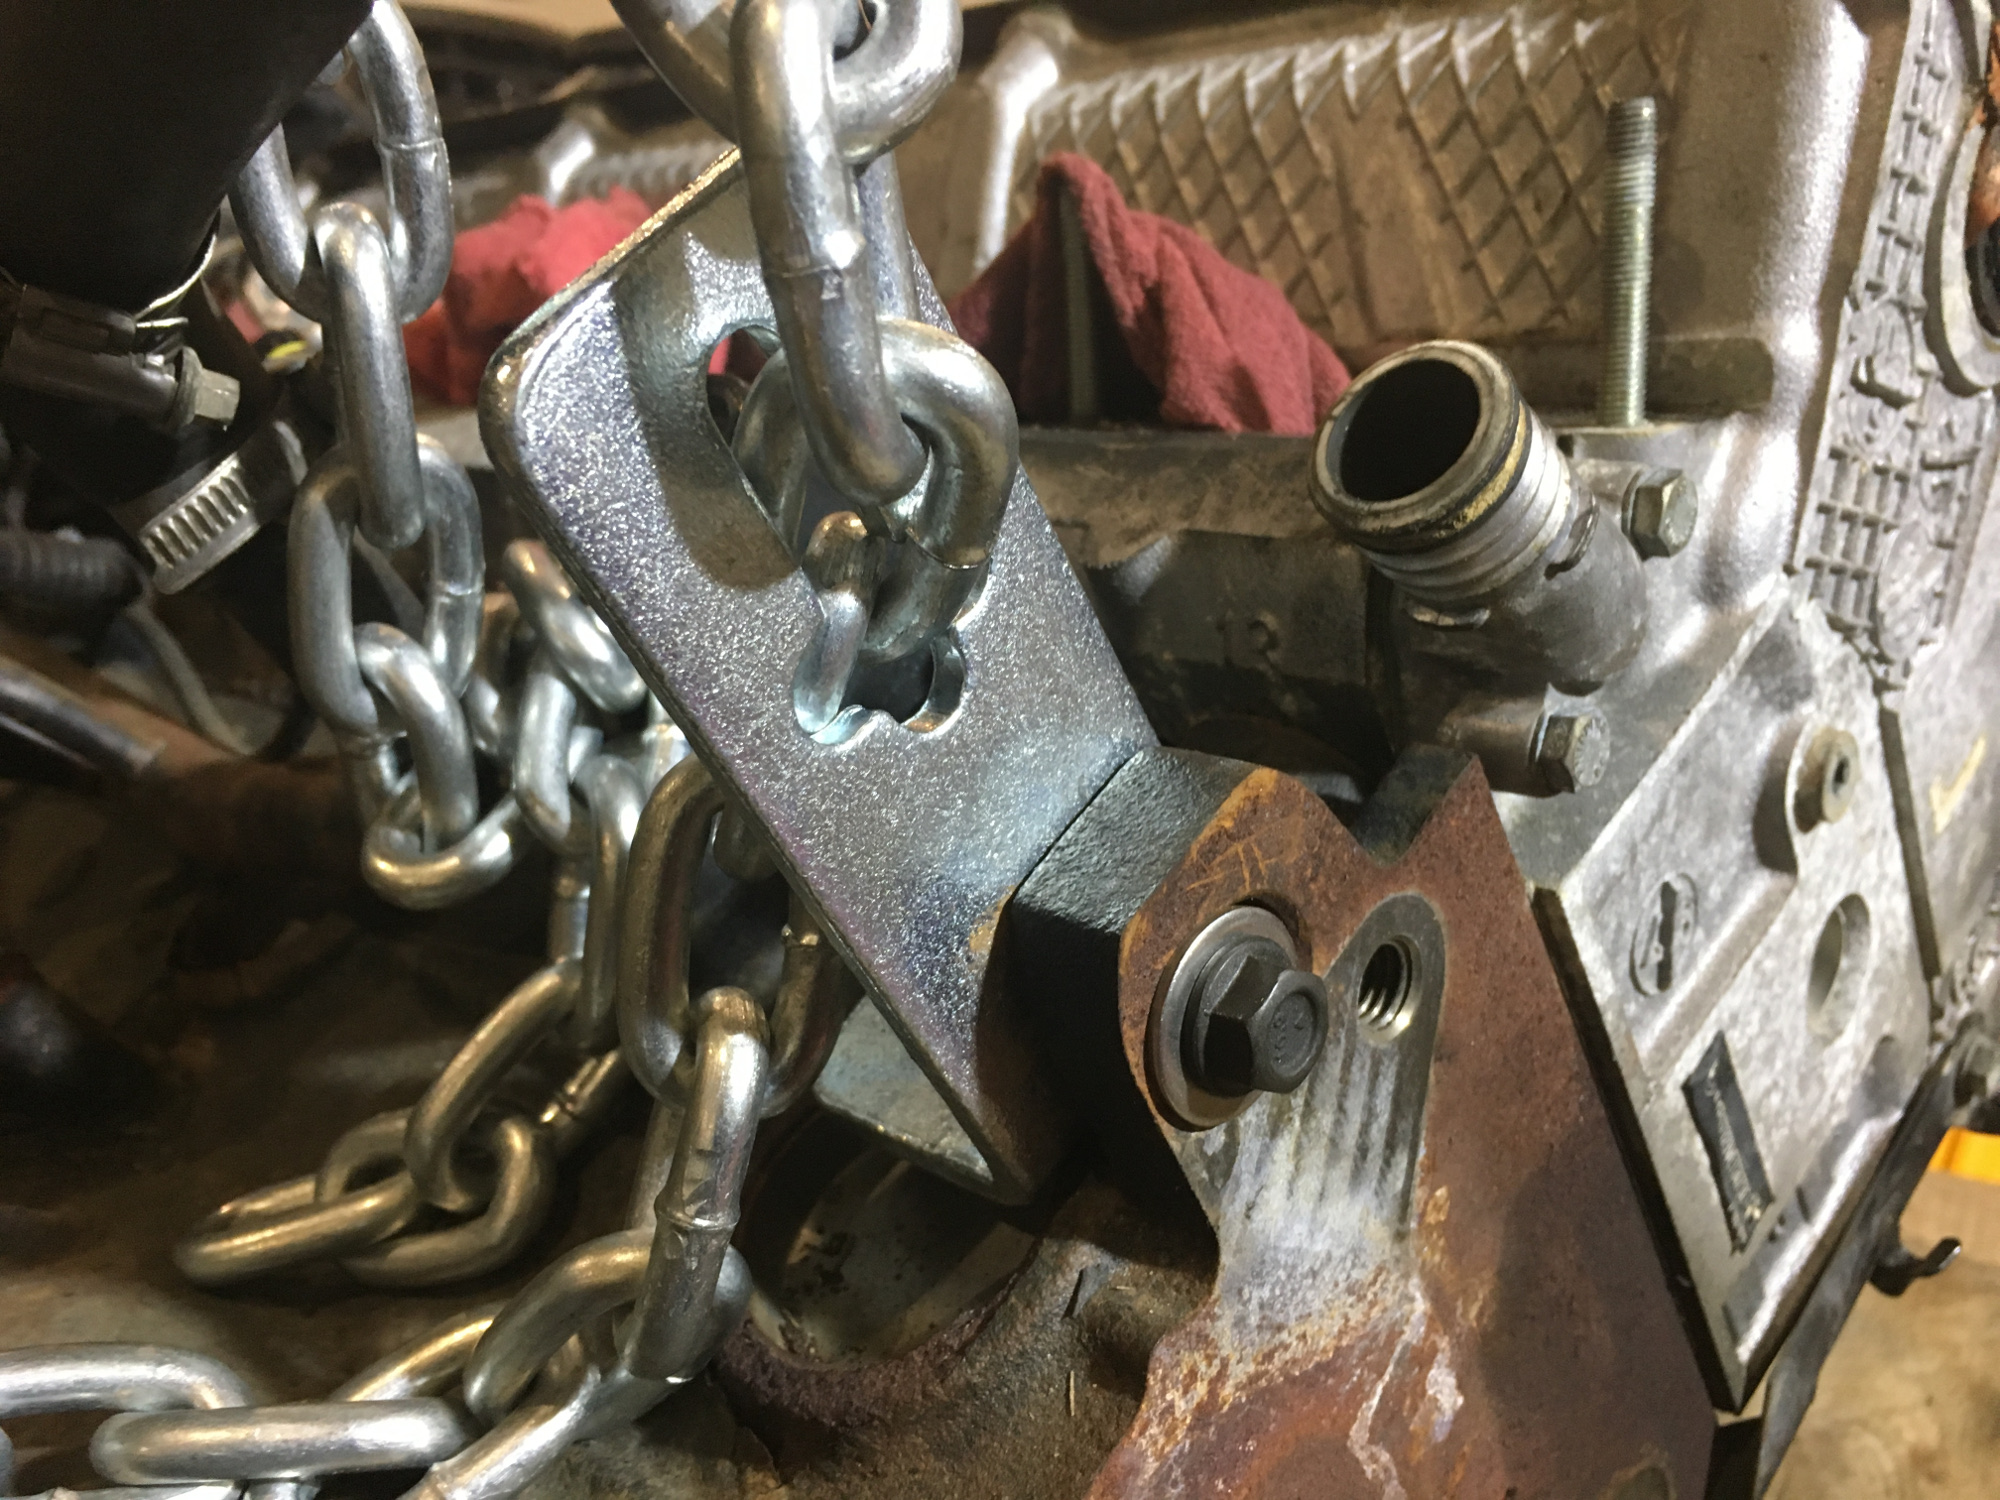 A closeup of the L-bracket included with the AFF load leveler attached to the left rear block lifting point. This is a pretty thick piece of cast iron and therefore strong enough to handle the load. The M8 grade 10.8 bolt and (essential) washer on both sides worked perfectly. Note how the bracket is designed to allow the chain to slip through it. |
Moving the engine toward my workbench proved to be a bit difficult as all of the wheels on the crane are of the castering type. I don't recall the Sunex stand doing this (the arms contained non-castering wheels) and I now know why. In any case I eventually wrangled the engine over to my workspace to begin mounting the engine to the stand. Thanks to 50sKid I knew ahead of time to remove the rear main seal before attaching the engine stand mounting plate, as the clearance between the rear of the block and the mounting plate is limited and thus it interferes with removal of the seal plate. So after removing the seal I mounted the plate to the block. The 90mm bolts recommended by 50sKid worked perfectly, incidentally. I'll add that there is about 20mm of thread extending beyond the mounting bosses so I can confirm that 90mm bolts are adequate for the HF 1/2 ton stand and should work for the Sunex stand, which comes with slightly longer mounting arm bosses.
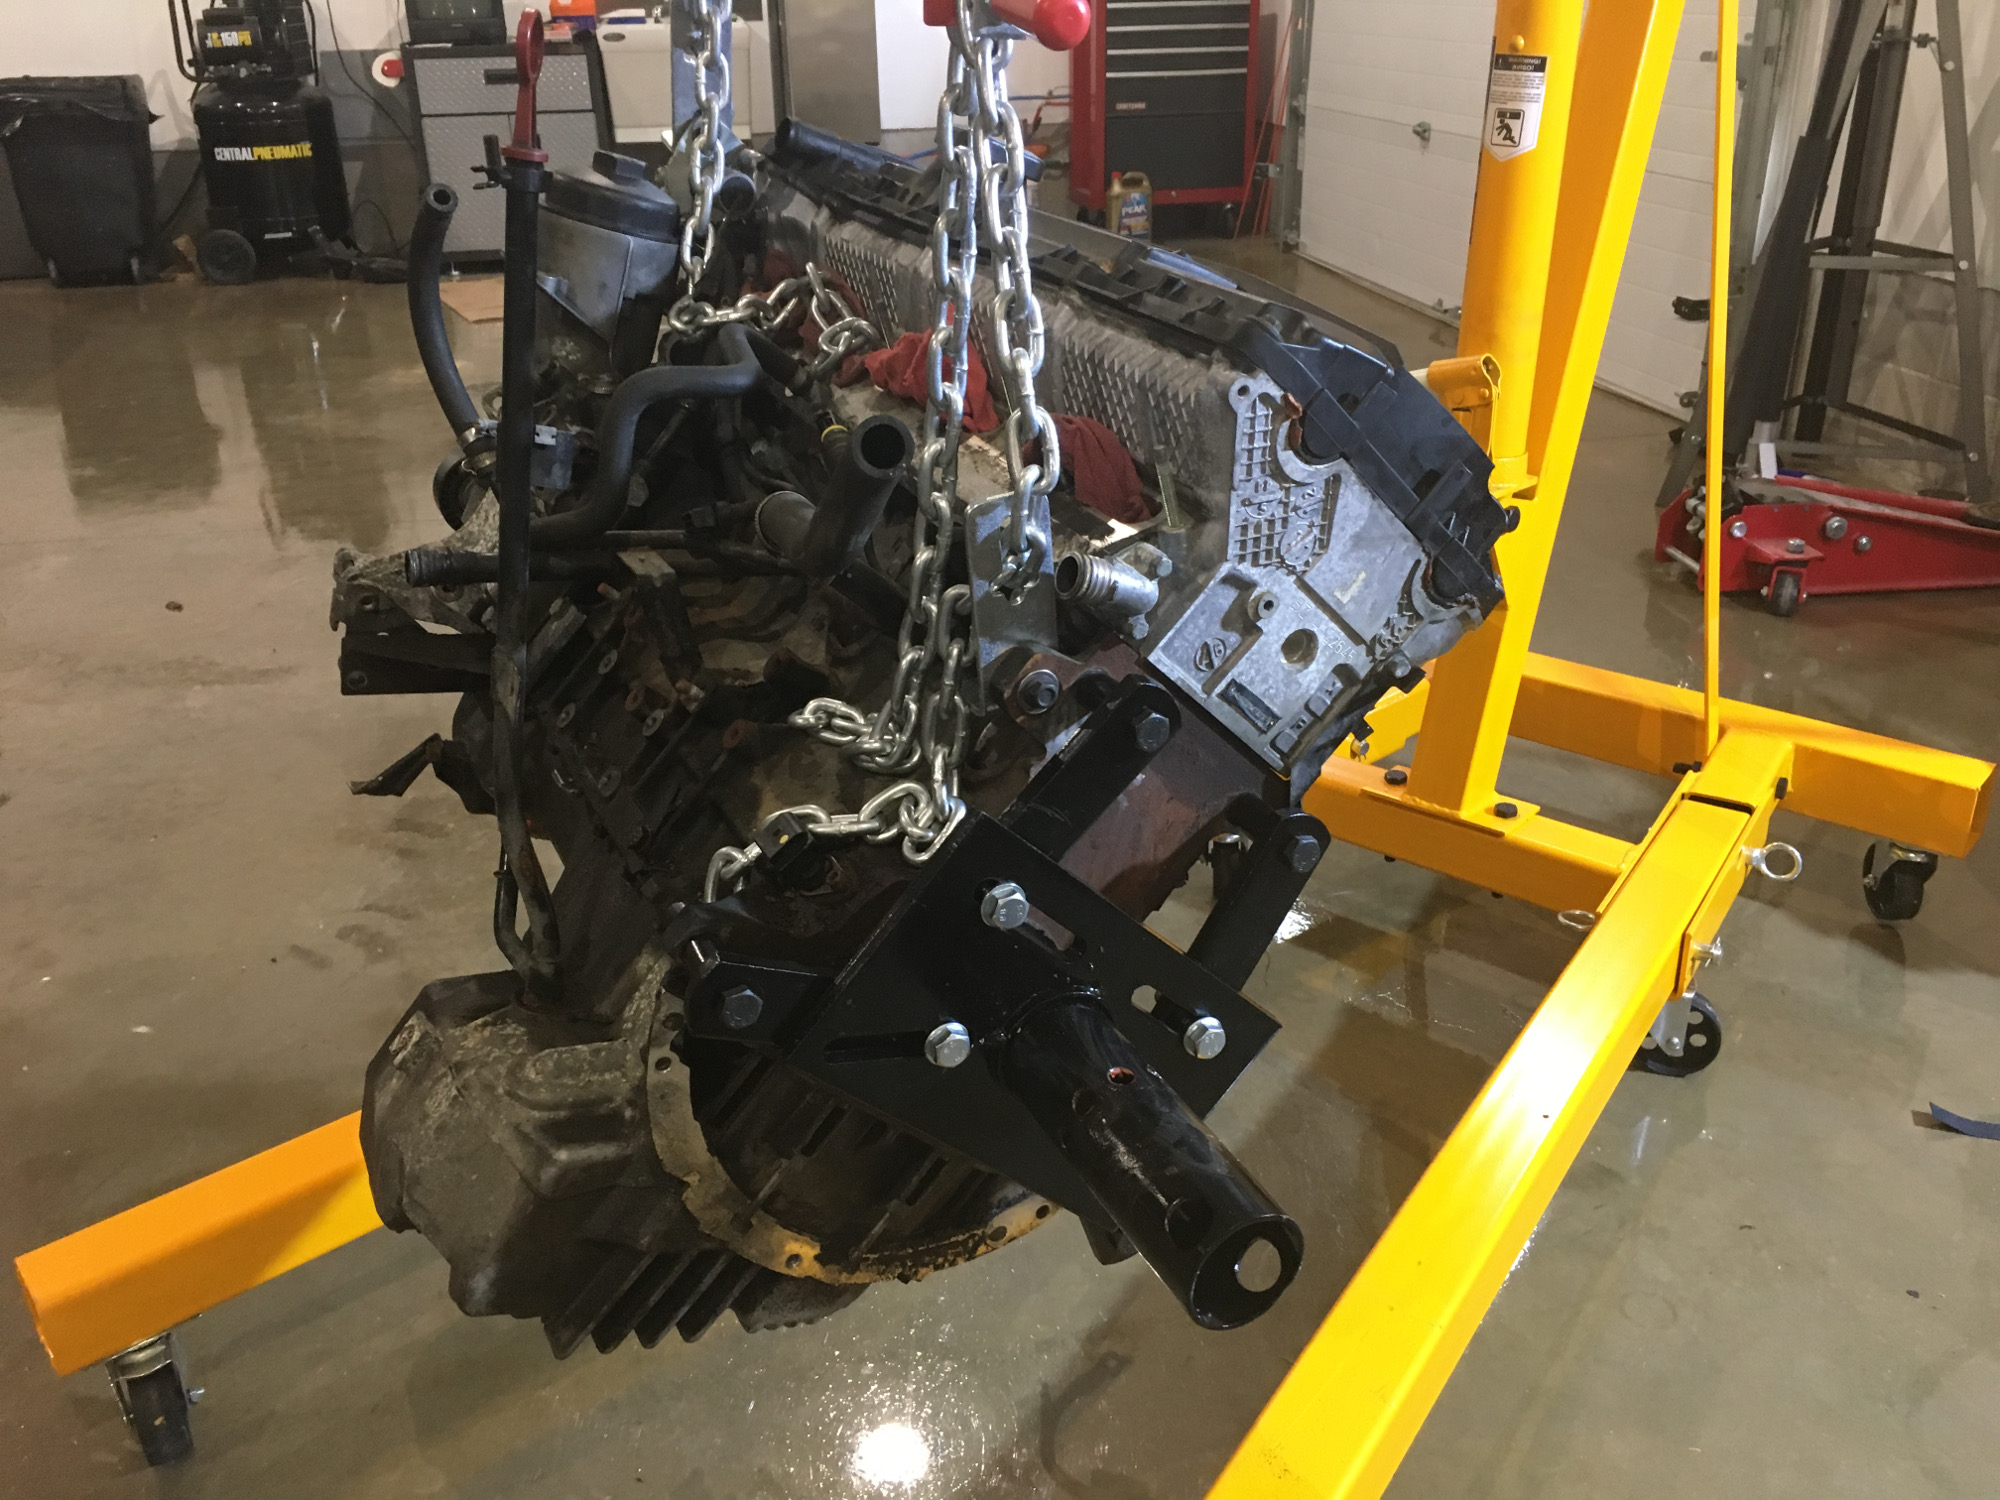
Once I had the engine stand mounting plate secured to the back of the block I moved the stand into position to mate the engine. At this point I learned the value of the load leveler. As it turns out the short section of pipe welded to the engine stand that receives the mounting plate boss is not perfectly level. I believe this is by design to compensate for the inevitable sag of the stand under load. This naturally prevents the mounting plate boss from smoothly entering the short section of pipe on the stand. But this turned out to be a non-issue for me as I rotated the load leveler handle and watched the engine tilt slowly but surely until the mounting plate slid right into the stand.
When hung from the two "authorized" points the engine sits at a slight angle -- much as it does when installed in the vehicle. This creates a problem if you want the engine block standing straight up relative to the stand. I worked around the problem by jacking up the engine and stand and pushing the base of the engine to one side as required to rotate it just enough to align it vertically with the stand and insert the locking pin.
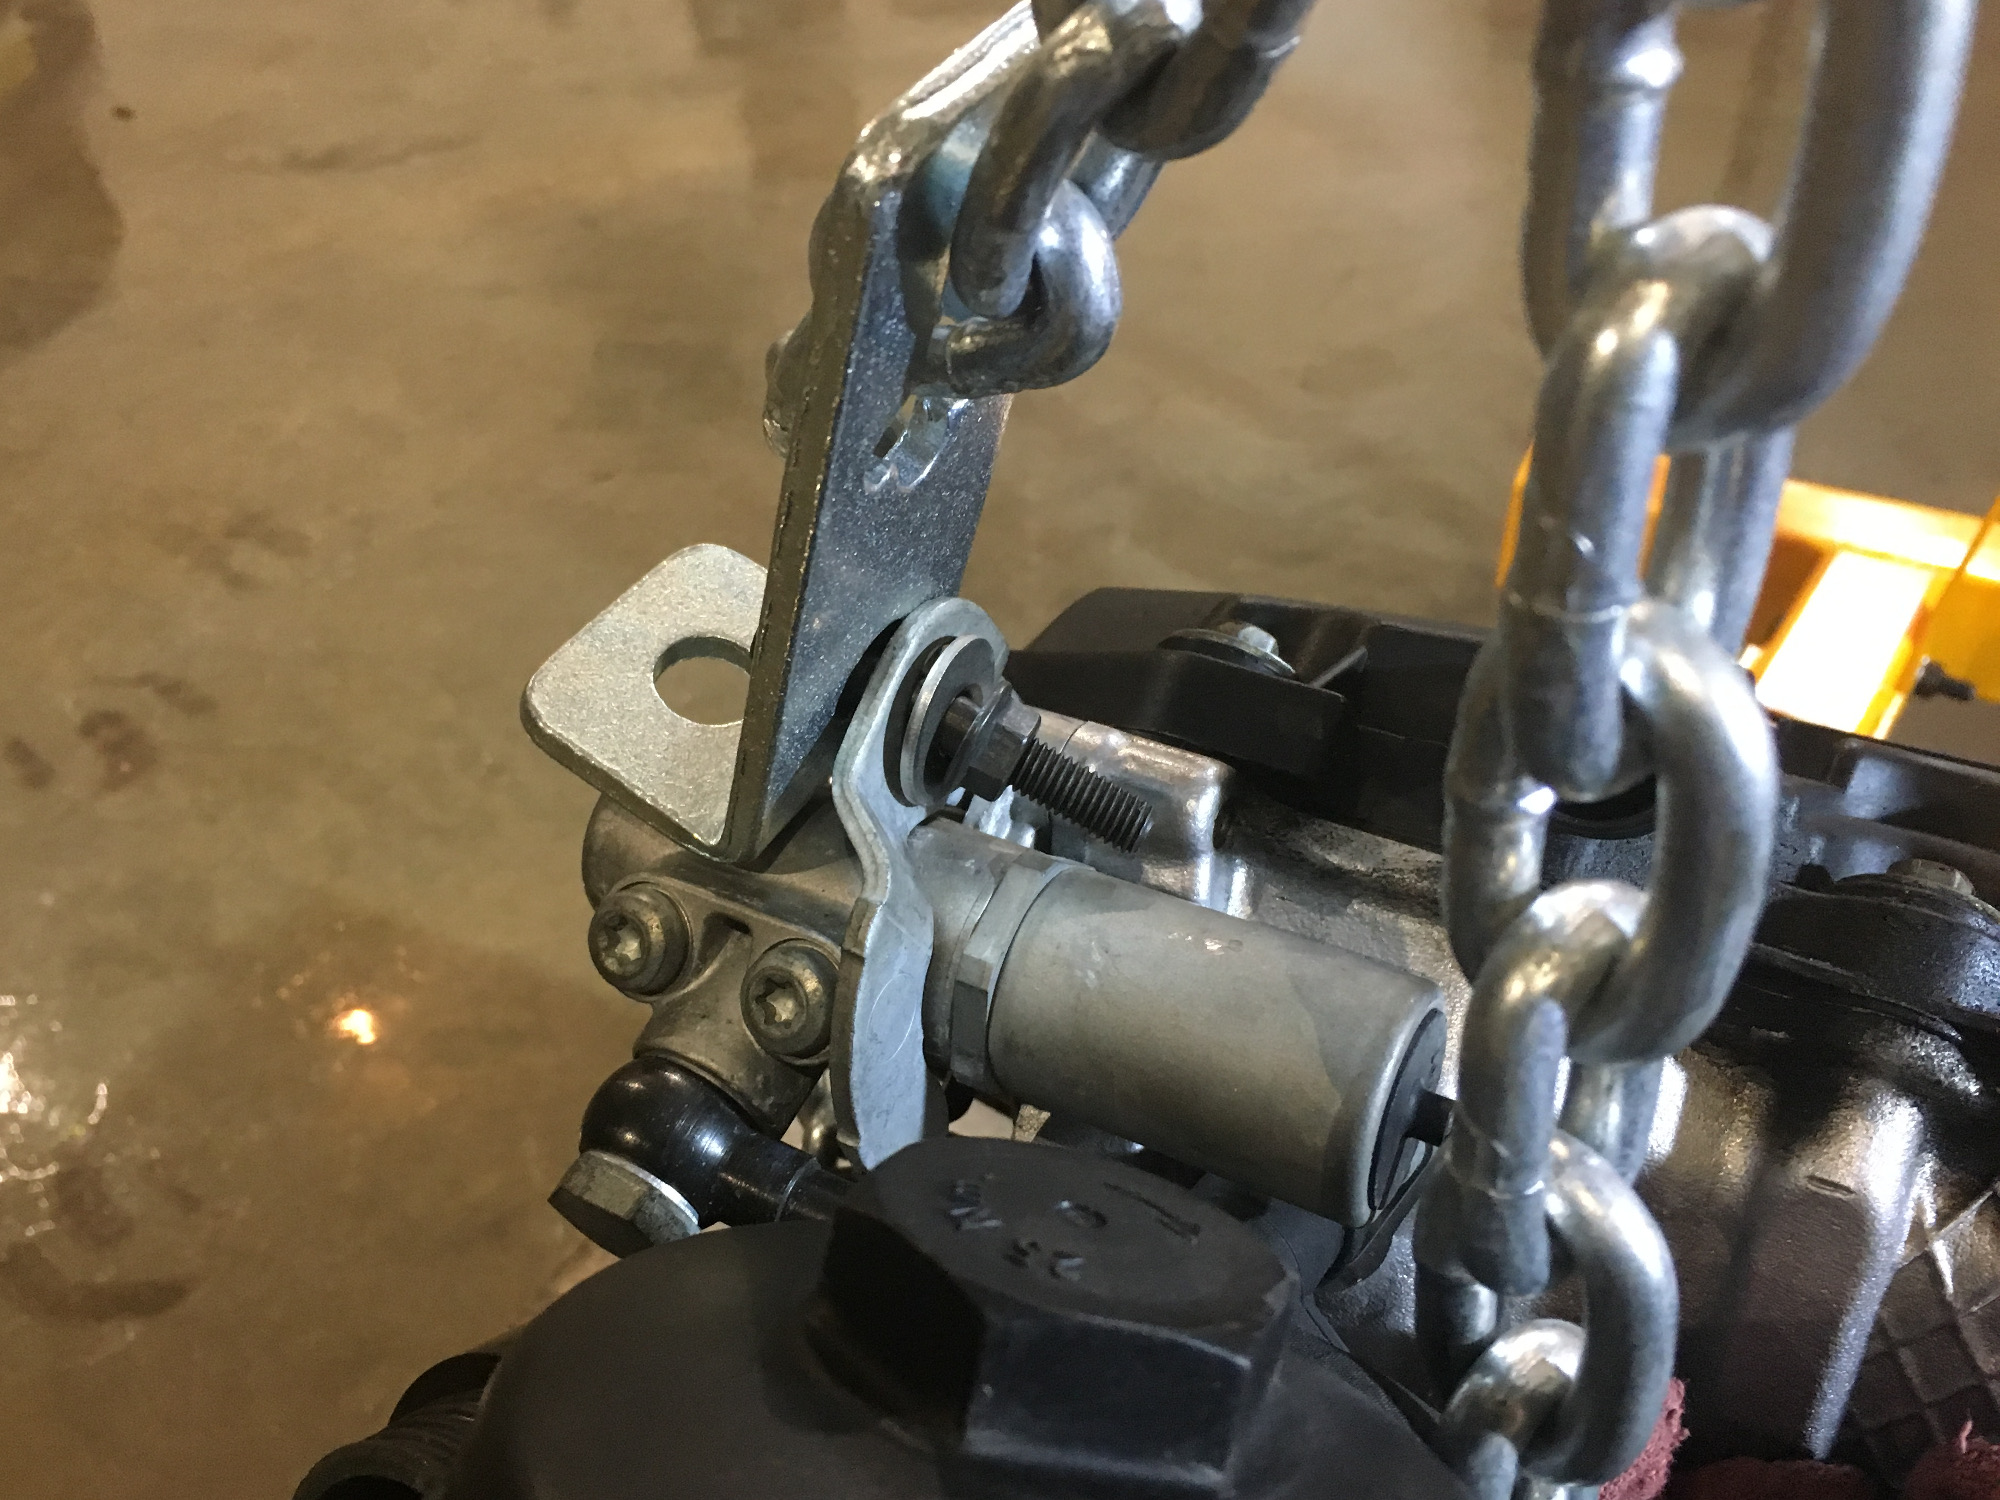 Another closeup, this time of the front attachment point. This point will be removed along with the head so if I have to lift the block after the head is removed I'll simply use the L-bracket in conjuction with a head bolt screwed into the block. The M8 bolts are only partially threaded so are somewhat loose here. That is intentional and acceptable. |
 Here I'm showing the engine stand mounting plate mounted to the rear of the engine with the M12x90mm bolts. I removed the rear main seal assembly before mounting the plate to avoid a conflict later. Of course, I mounted the stand in haste to meet a goal yesterday and I'm not sure it's positioned ideally at this point. I will likely move the plate upward a bit before I begin disassembly. |
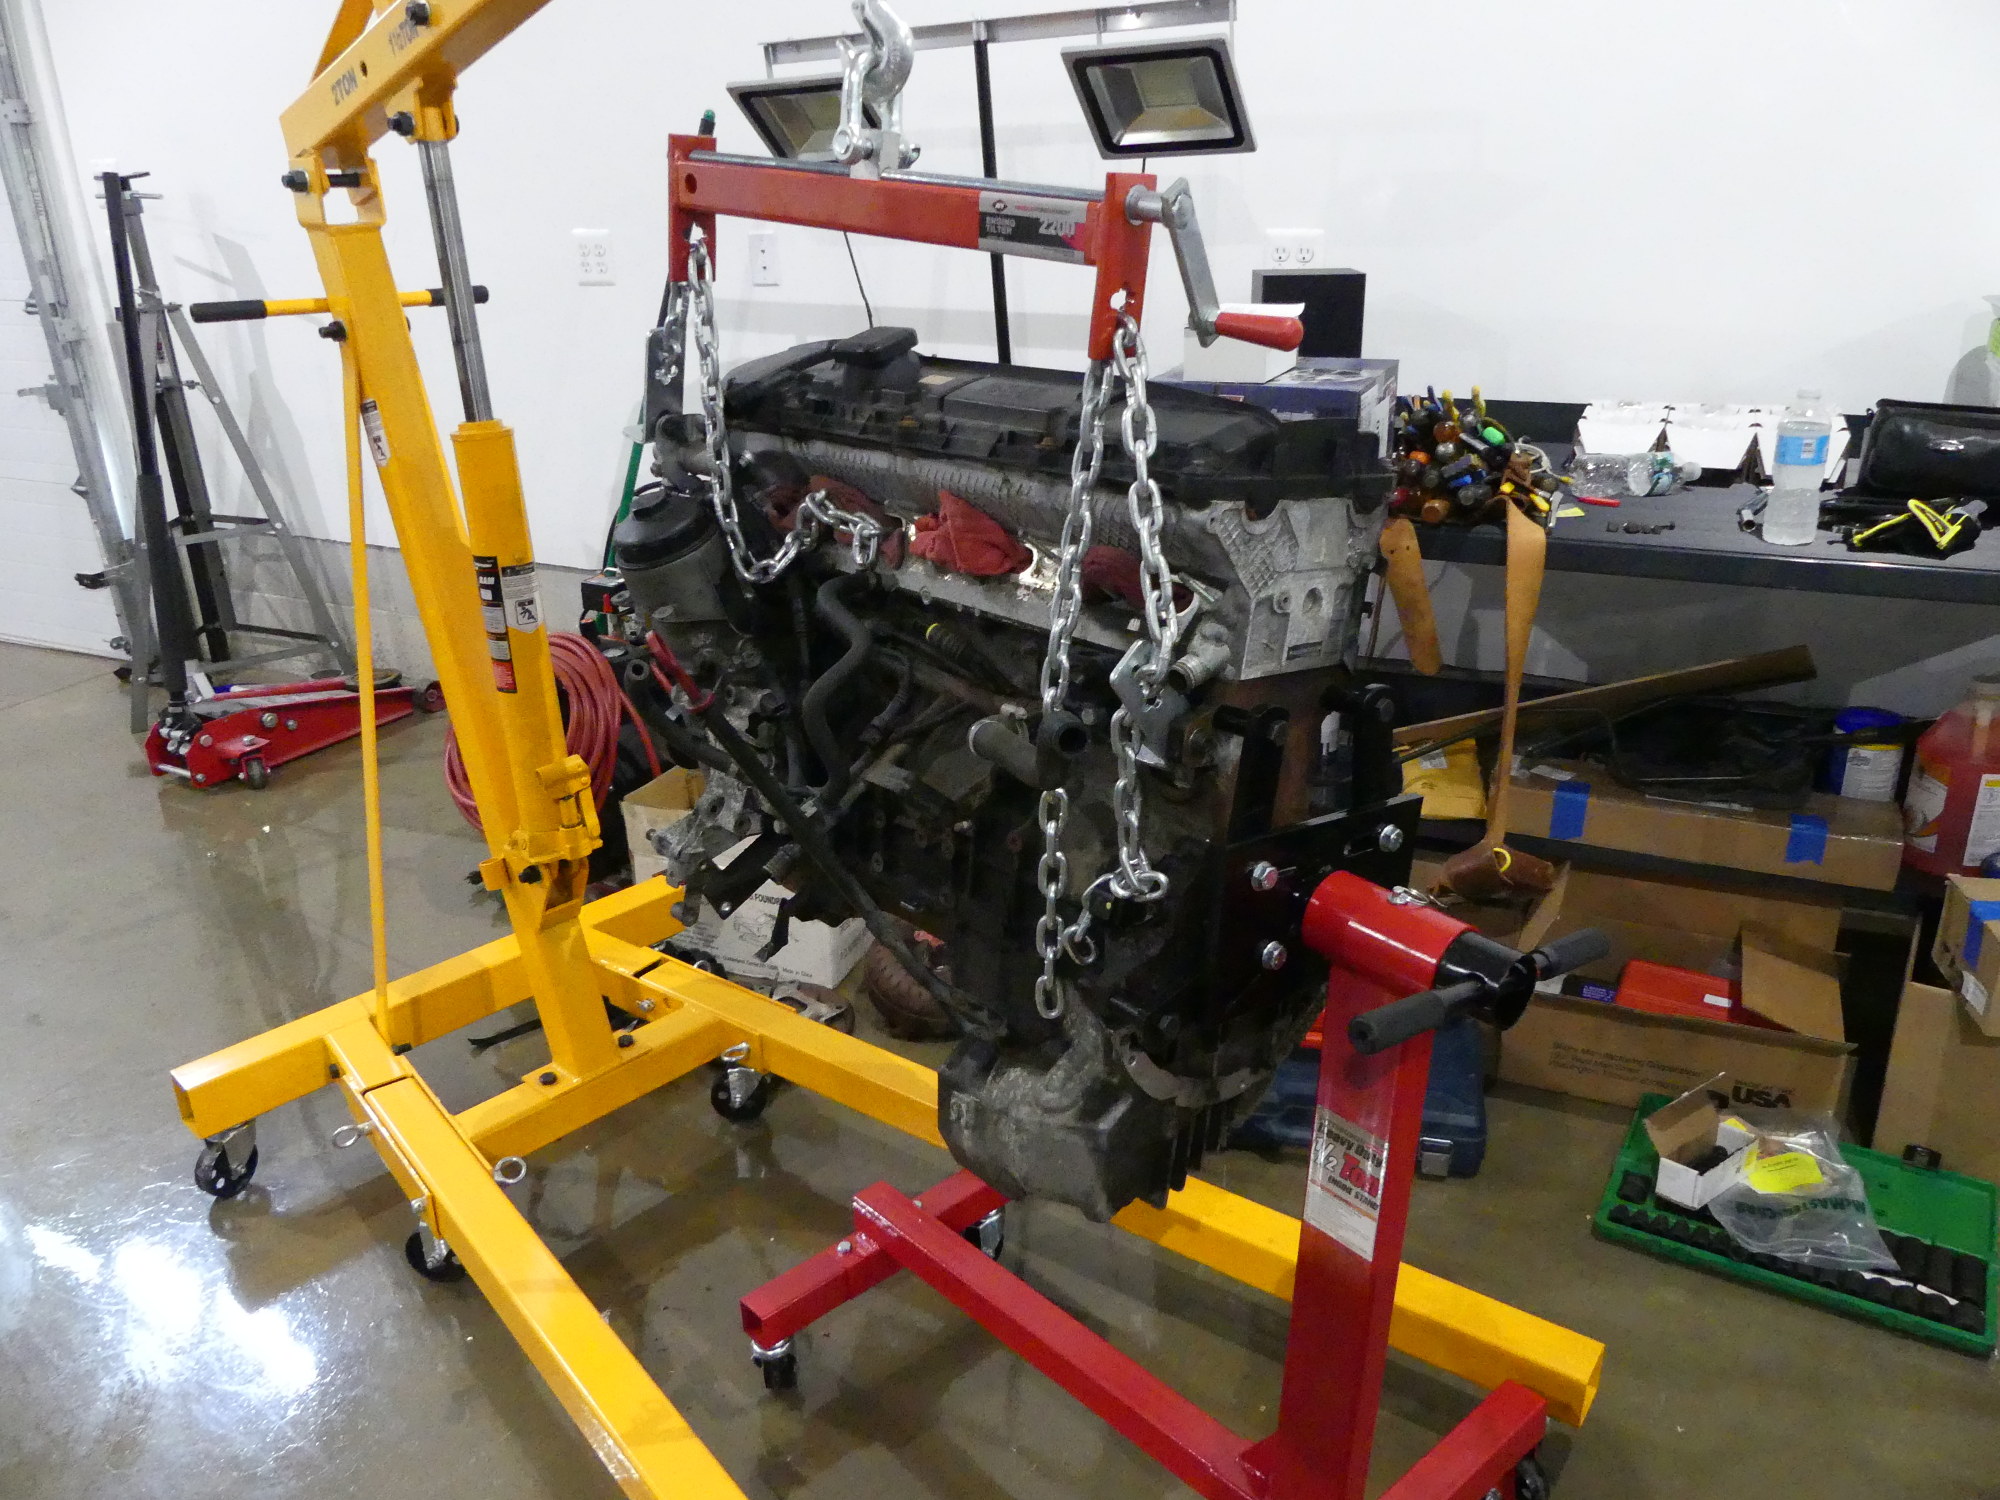 Mission accomplished. The engine is now mounted to the stand and the crane is just there for looks. This will allow me to begin disassembly of the engine. This weekend I'll mark my TDC dowels, remove the valve cover, VANOS, cams, and ultimately, the entire head, so I can ship the head to Autohead on Monday. |
I now understand why many people say the HF stands are unsafe with tall motors like the BMW I6. There is simply nothing to stop a top-heavy motor from rotating on the stand uncontrollably, particularly because the handle they provide is far too short to provide any meaningful leverage. The poorly designed locking pin does not inspire confidence either. If I had an unlimited budget or the desire to rebuild these engines regularly I would buy a unit with an integrated rotisserie. If you're using an HF stand (or even the Sunex equivalent), I recommend you do what I plan to do -- remove the head first to help balance the weight on the stand so the engine doesn't "fall over".
Transmission Delivered to Overhaul Shop
With the engine mounted to the stand, the only thing left to do for the day was run the transmission and a few parts over to the shop I've chosen to tackle the rebuild. The owner gave me a short tour of the shop and his capabilities. We also had a good conversation about my goals for the rebuild and it appears he'll be able to complete the job far earlier than needed.
Next Up
The next step is to begin disassembly of the engine and remove the head so I can ship it out to Autohead early next week. Once that's out of my hair I can begin the multi-day process required to blueprint the engine and generally verify its condition. Once I have all the data I need I can bring the parts to my machinist for rework and balancing. Although I'm expecting the machinist to take a solid week or more to get that work done, I won't be slacking off in the meantime. I'm planning to jack up the car and get under it as required to drop the tank and replace all of the fuel lines.