


Wednesday, July 26, 2017
Drivetrain Disassembly Complete
My technician called me this morning to tell me that the driveline was out of the car and the only thing left to do was pull the exhaust manifolds off the head. Predictably, he found the nuts and studs quite crusty so he soaked them in penetrating oil earlier this morning before going to work on another vehicle.
That led him to ask whether I was planning to replace the driveshaft. When I said yes he asked whether I would be willing to sell it. I said that I had I expected to return the unit for core credit but he explained that there is no core on BMW driveshafts as they consider them non-rebuilable due to the nature of how they are staked during manufacturing. Based on this I told him I had no plans for the unit and naturally asked why he was interested.
As it turned out the other vehicle he was working on that morning was an E36 sedan that coincidentally needed a driveshaft. The owner, obviously unwilling to pay BMW's ransom for a new driveshaft, had provided an aftermarket rebuilt driveshaft for my technician to install but it failed to fit, and when the owner arranged for a replacement that too failed to fit. As luck would have it the part number my tech acquired from my driveshaft matched that required in the other E36 so he proposed that the owner buy my old but otherwise functional driveshaft. I said that I would be willing to sell the driveshaft if I was guaranteed delivery of a new unit from BMW. Once my tech confirmed that they still had 4 in US inventory with more in Germany I asked him to place an order for my driveshaft and agreed to the sale of my old unit.
I arrived at the dealership later that morning to see that my technician had wrapped up the installation of my driveshaft in the other vehicle. I wished the driveshaft good luck in its continued journey in life and redirected my attention to my engine, which I found nearby hanging from their shop crane. After a quick walk around I said to my tech that the engine looked to be in better shape (at least cosmetically) than I expected. He agreed.
The black paint covering the block hadn't lifted except in a few areas so I expect the shot blasting to clean up the block nicely. I found the worst corrosion on the left side of the block near the crank sensor. I also found the sensor flange completely corroded so although I already had plans to replace the sensor this provided further justification for doing so. My technician seized the moment to warn me to make sure that the new sensor is fully seated as the o-ring tends to bind up. If it is not fully seated the engine will not run. He added that it is fairly obvious when the sensor is not fully seated -- there will be a gap between the block and sensor flange -- but that you have to look for it to see the problem. I plan to put a bit of oil on the o-ring as I install the sensor to prevent it from hanging up, but we'll see how that goes.
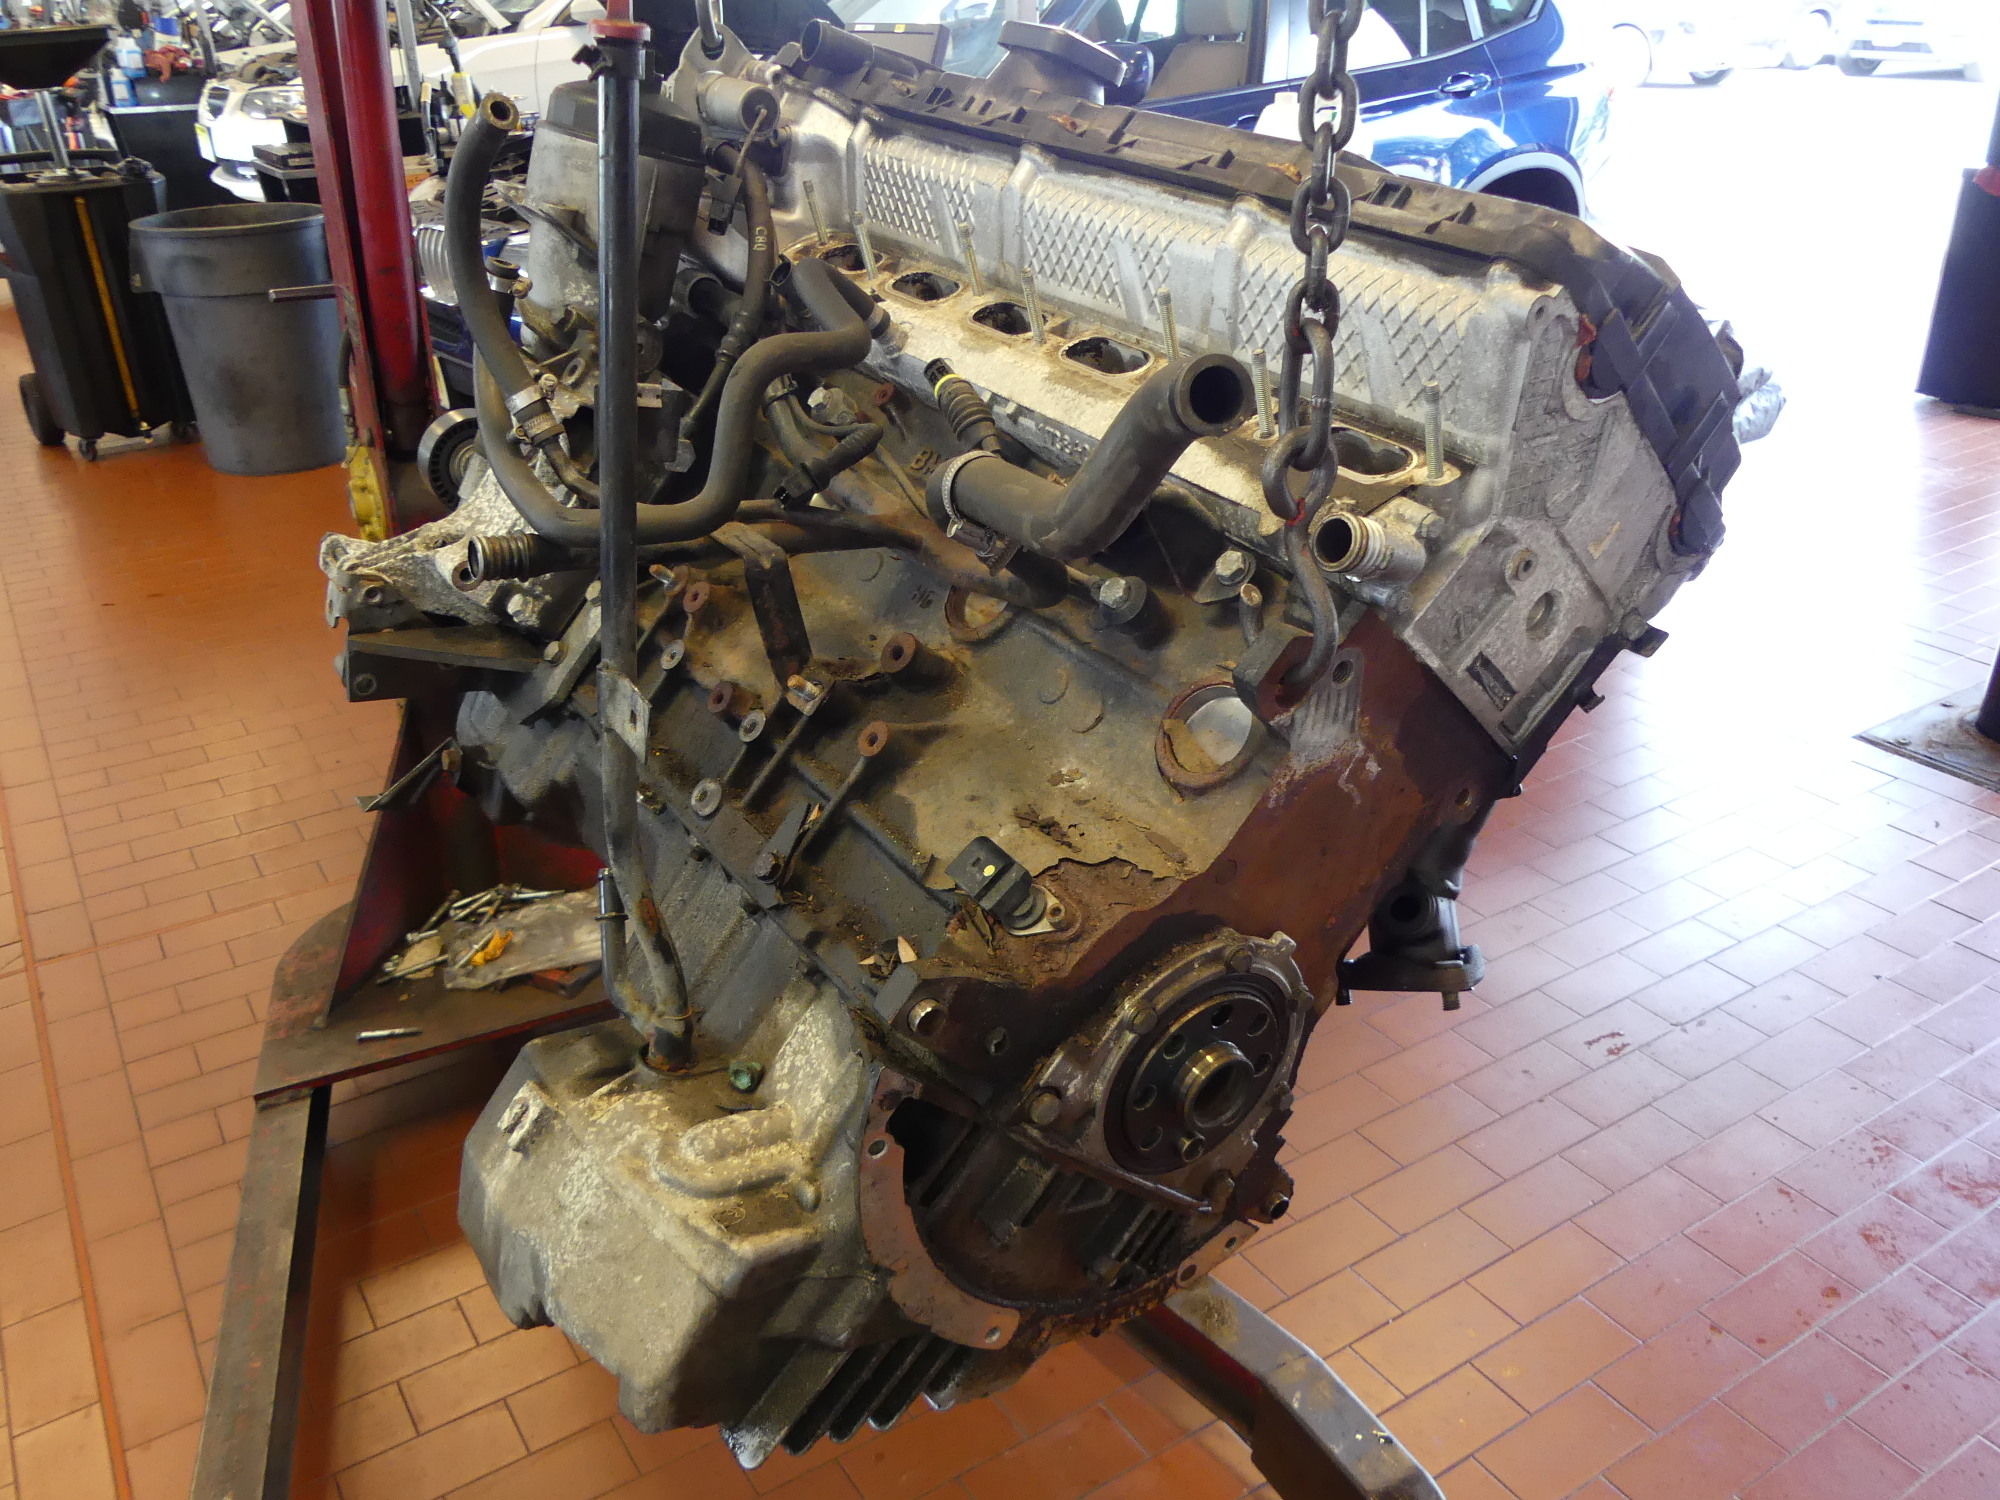 Behold -- my M52 removed after over 266000 miles in service. Overall the block appears to be in good shape. The intake ports are clean and the exhaust manifolds appear to be in excellent shape. I'll soon transport this back to my garage, hang it on the engine stand and get to work rebuilding it. |
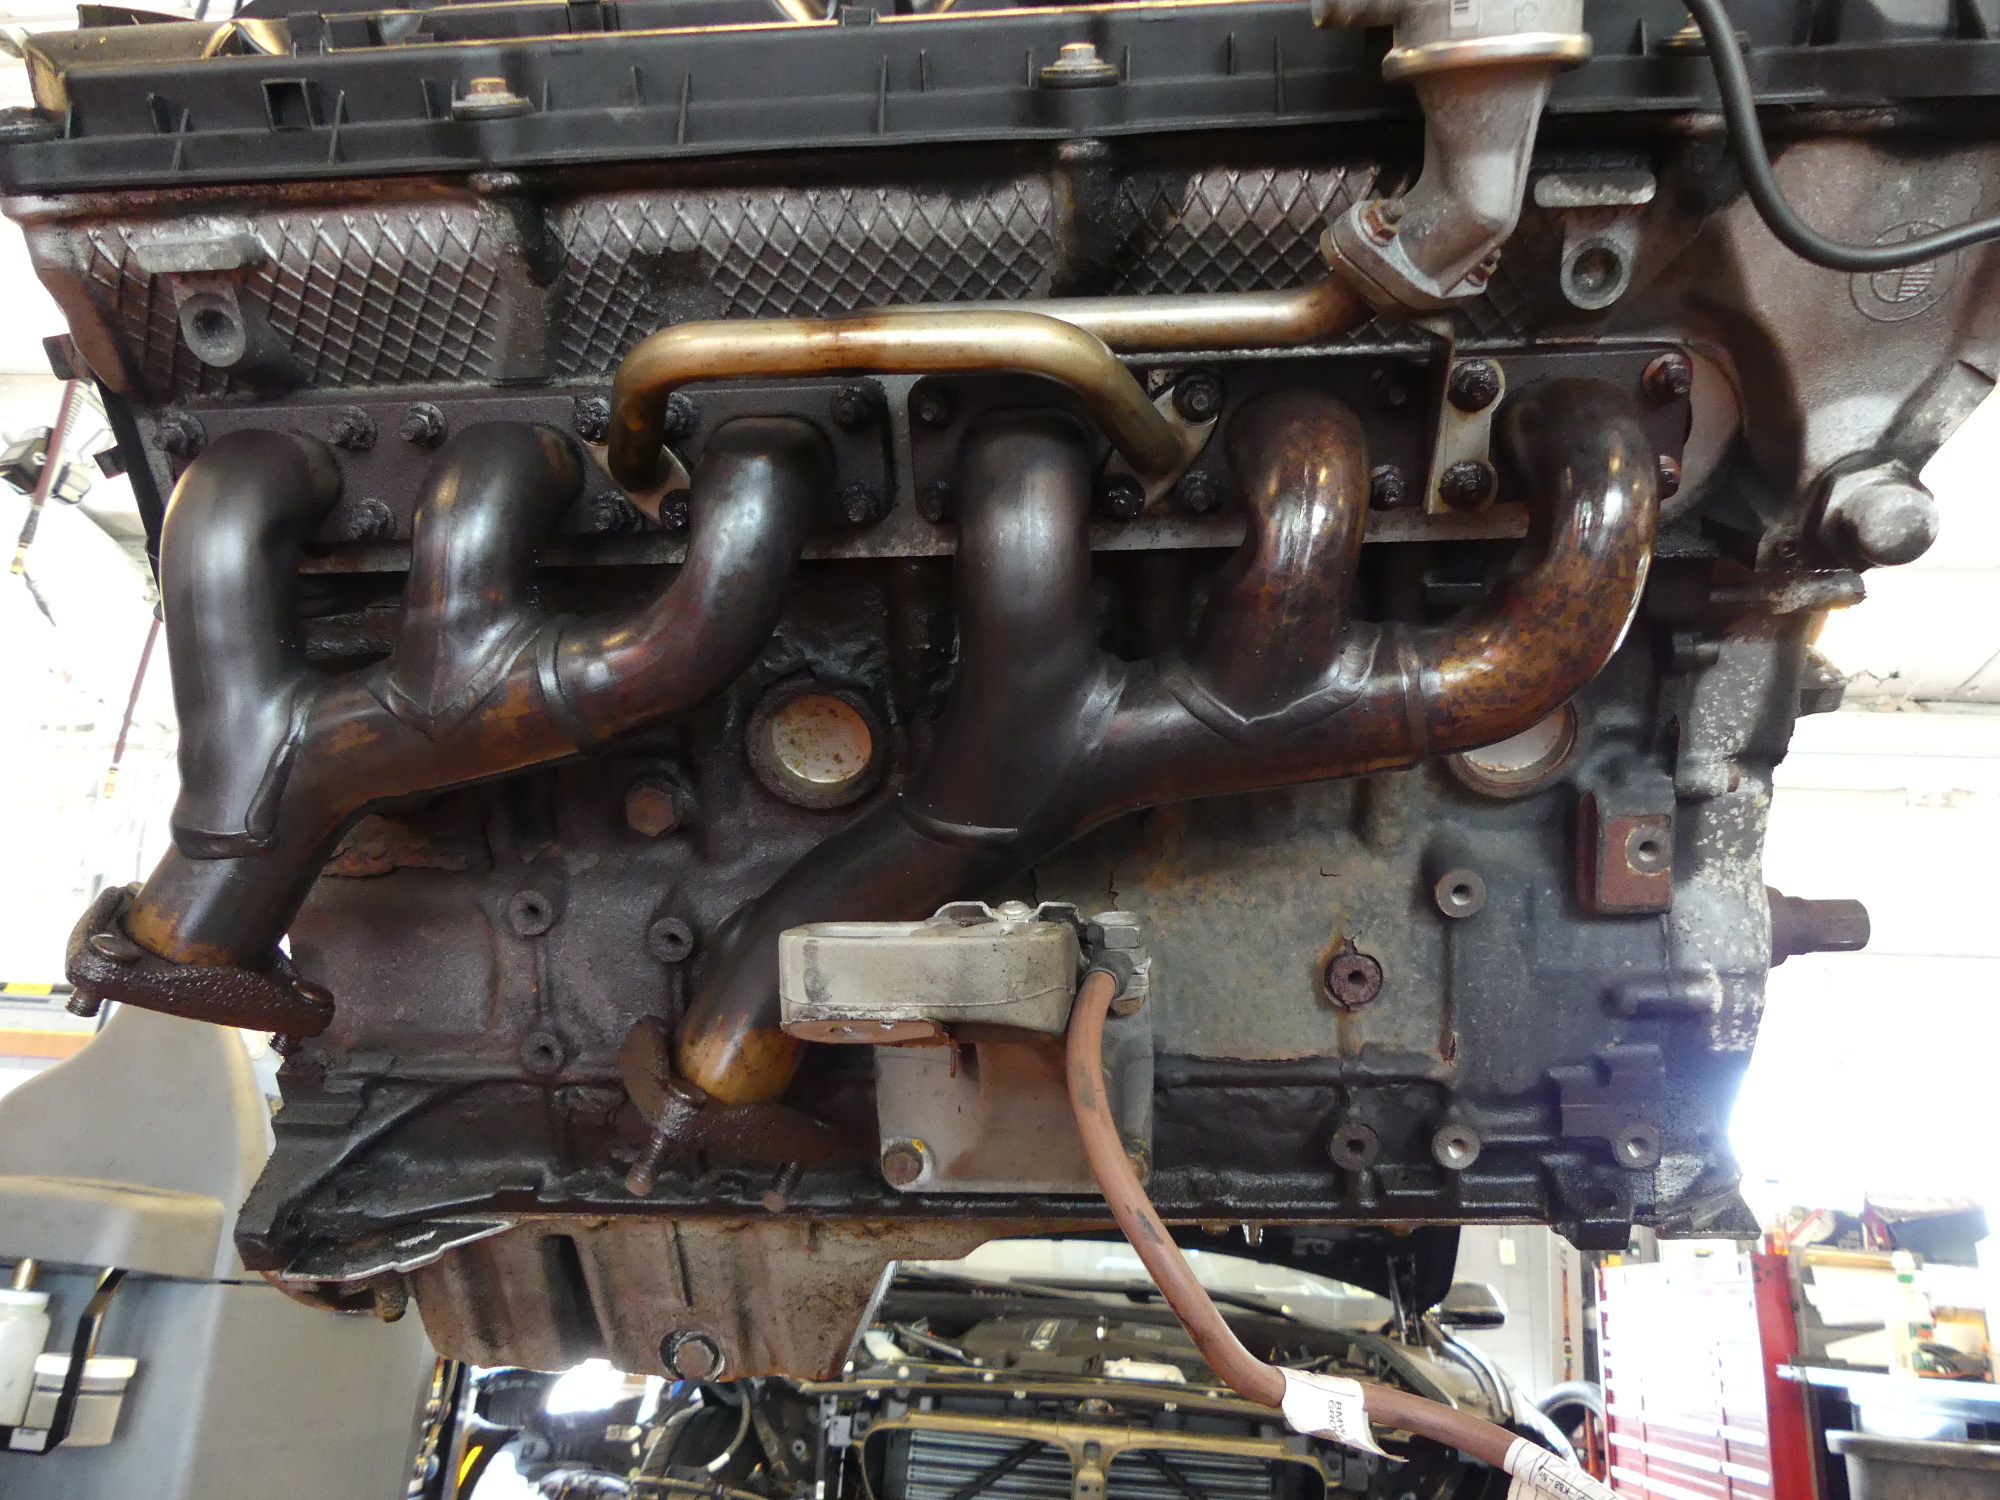 Another perspective of the M52 showing the crusty exhaust header nuts and studs that will ultimately be replaced. The oily sheen on the headers is penetrating fluid, which is used to aid the removal of the 20 year old nuts. The headers themselves are in remarkable shape and appear ready for a return to service. |
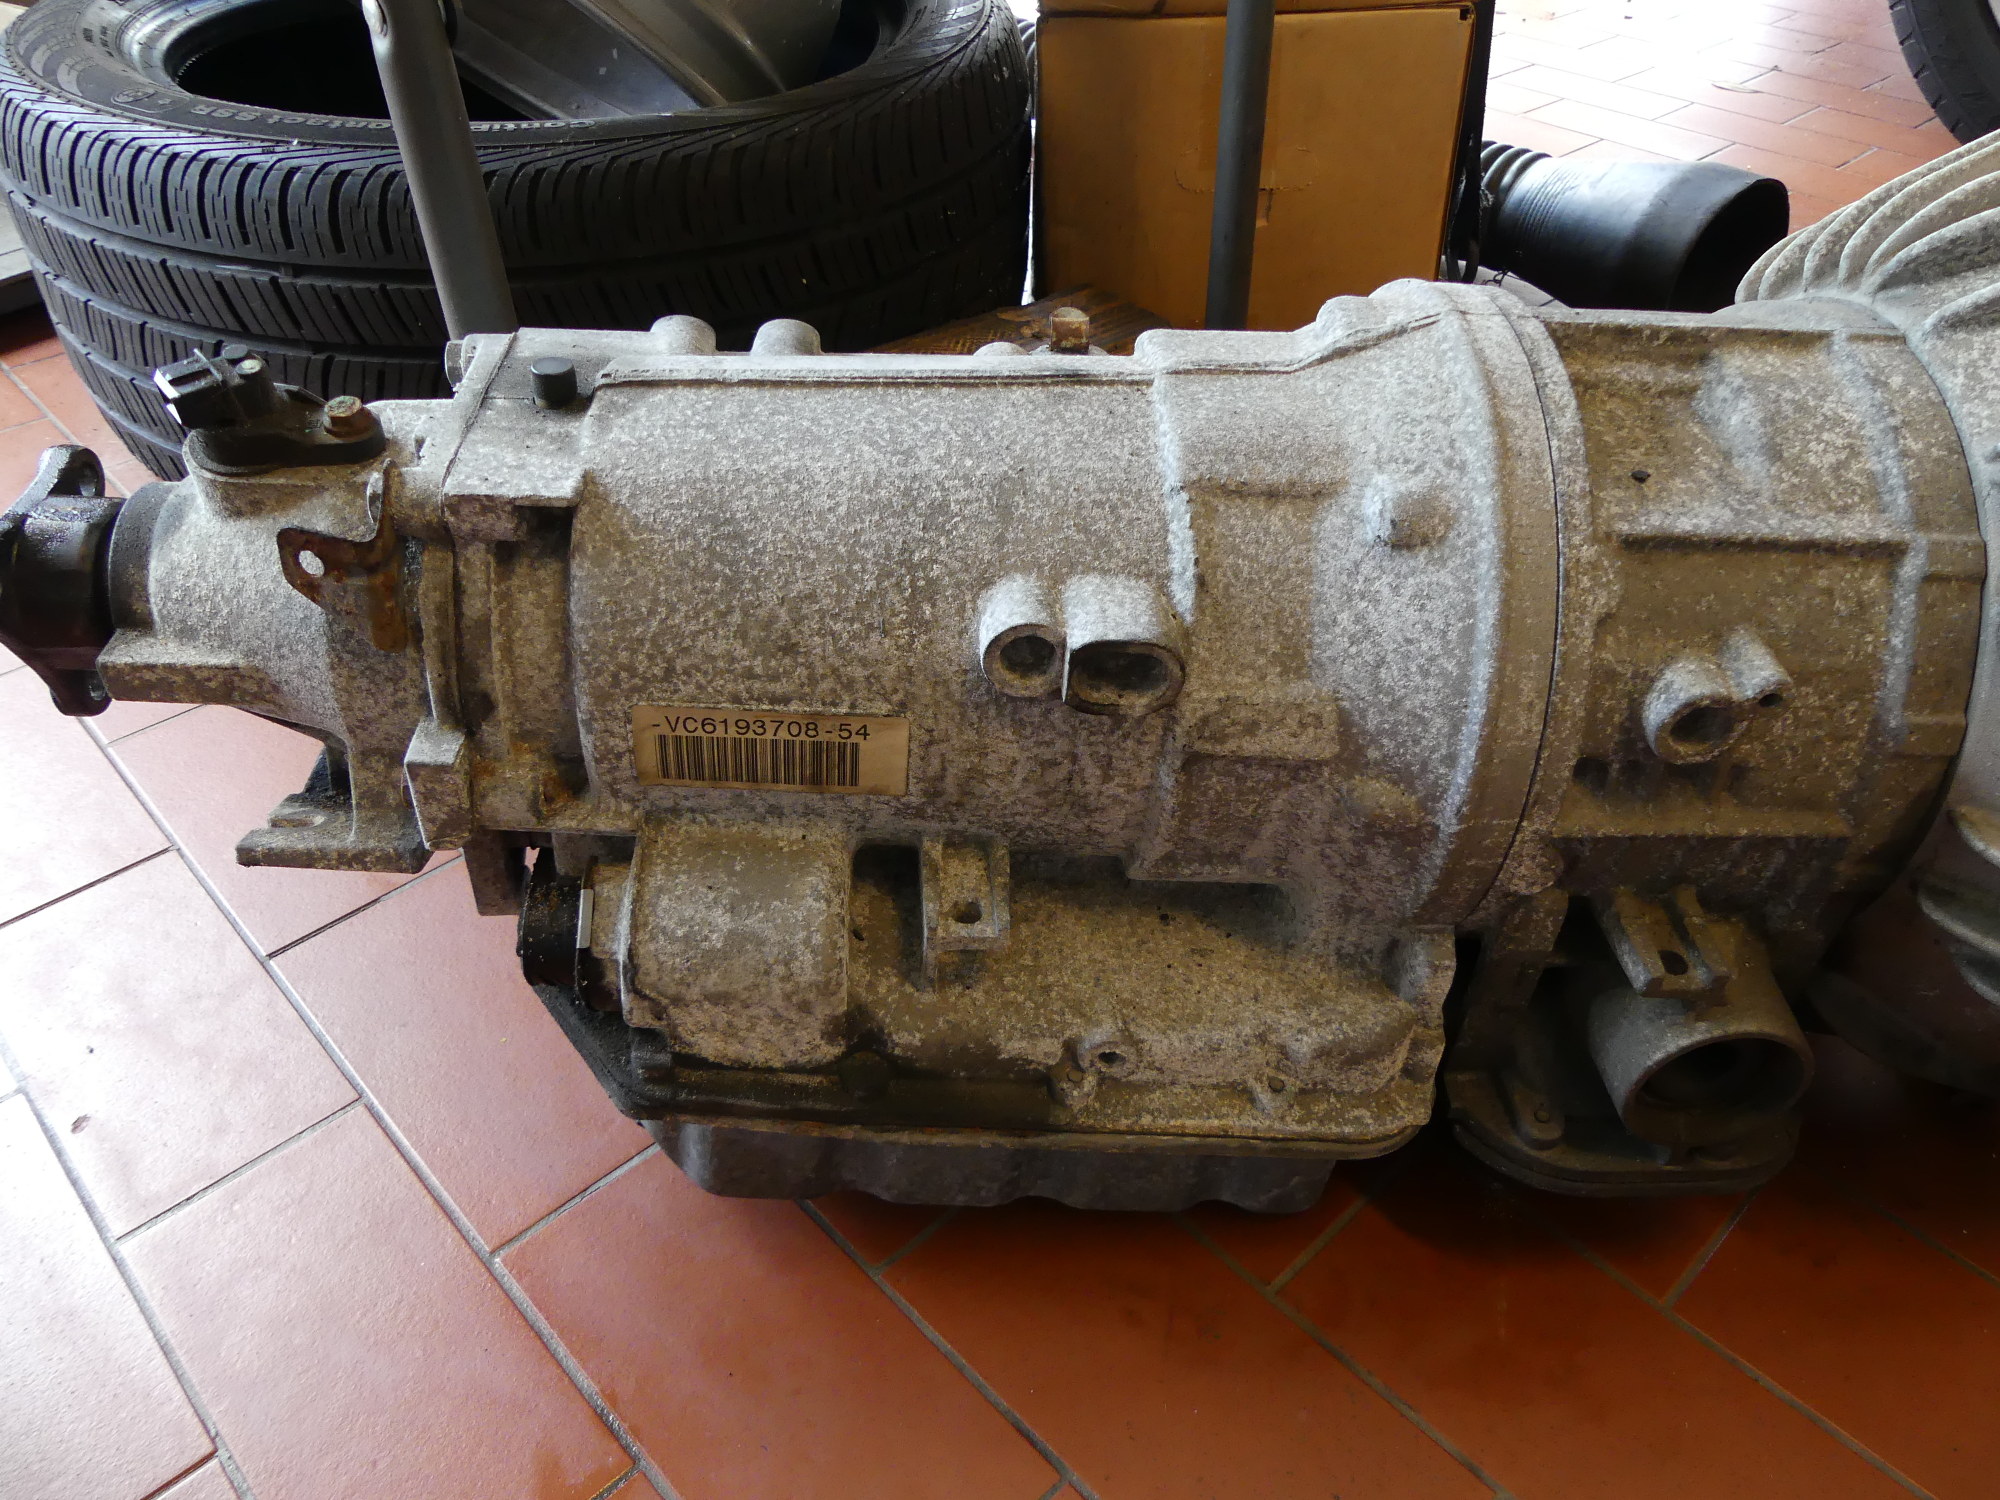 A shot of the BMW A4S310R / GM 4L30E automatic transmission. I'm farming out the overhaul of this unit to a local shop that seemed well versed in the unit as well as agreeable to my way of doing things (i.e. the right way, the first time). Can't wait to see if they live up to expectations. |
Speaking of sensors, I finally got a good look at the knock sensors and cabling. My technician and I both agreed that the insulation and connector appeared to be in good shape so assuming a closer inspection and cleanup does not reveal any cracks or other problems I plan to reuse the knock sensors. Another $150 saved. The cam sensor was recently replaced and still looks brand new so that will be reused as well. The only thing a bit questionable was the vanos solenoid wiring. As expected the insulation was a bit dried out, but otherwise intact, so I suggested I'd reuse that. "No need to pull the engine to replace it later", I joked. My technician agreed.
A vacuum cannister is normally mounted to the block near the crank sensor. This is apparently an accumulator of sorts that provides consistent vacuum to operate various things like the secondary air pump check valve and the exhaust butterfly valve (on cars so equipped). After he removed the intake manifold he noticed that the cannister was loose because its integrated mounting bracket had given up the ghost at some point. So the cannister will have to be replaced.
A quick survey of the intake ports revealed a like new appearance. My tech mentioned that he's seen these intakes in far worse shape on similar engines but my engine seemed to be "running well". I chalked this up to routine maintenance of the CCV and related piping, as well as running a bottle of Techron through the engine at every oil change -- something my technician recommended to me many years ago. Of course, looks can be deceiving so I'll await my own disassembly and the report from Autohead before I get too excited about the state of the head.
The last thing I noticed on the engine is that the coolant piping that stretches front to back under the intake manifold is made of metal, which is a far cry better than the shitty failure-prone plastic pipes used on the M54. The pipes were showing a bit of rust in some areas but that will be easily addressed with some sanding and painting. Of course, I may consider outright replacement as well to save time if the price is right.
Moving over to the car perched on my technician's lift he showed me a couple areas of rust in the tunnel he thought I should address. I could use POR-15 or a more traditional cleanup, prime and paint. In either case, I plan to cover the repair with a top coat of the excellent 3M "Professional Undercoating" product I have remaining on my shelf from earlier rust remediation projects.
We then discussed how to address the old fuel lines. The rubber fuel line will naturally need to be replaced, but as I've said earlier I'm also concerned about the state of the hard lines, which are quite crusty around the termination points. I asked my technician whether the fuel hard line is available from BMW in pre-bent segments or straight tubing. To the best of his knowledge fuel lines are pre-bent, but even if they aren't he suggested that bending them wouldn't be that hard provided the existing lines are used as a template. Something tells me a tubing bender purchase is in my future, but we'll soon see.
Thinking out loud I suggested that I might use this opportunity to drop the fuel tank (which normally requires lowering the rear section of the driveshaft) and replace the rubber lines going between the suction and fuel pump units down to the hard lines but he said that might not be strictly necessary, as I could snake new hose down from the top of the tank. My attention then shifted to the fuel tank straps and the areas areas where they connect to the body. All were rusty and crusty, so I'm now planning to replace the straps and clean / prime / paint the attachment points. Over the years I've heard from readers that have had issues with these straps so I don't think I'm being paranoid in recommending their replacement.
After arranging to pick up the vehicle and parts tomorrow morning I set off for home. On the way I came to the conclusion that in order to complete the necessary work on the body I would have to scrap my earlier plan to stuff the car into my garage as the garage is too small to allow jacking of the vehicle. I called my brother and we arranged to store the vehicle in his new garage adjacent to the area I'm using to rebuild the engine. This will allow me to do the job slowly and safely in a fully climate controlled environment.
Mileage: 266865