


Saturday, August 5, 2017
More Block Cleaning
As I've taken the block through a couple cleaning cycles I've realized that the water jackets are in like new shape (thanks to regular coolant flushes and BMW coolant) and the interior of the block is equally clean. So clean, in fact, that if it were not for the crusty exterior and the need to bore the cylinders I would be happy to put the block back into service as is.
To address the crusty exterior I originally planned to allow my machinist to shot blast the block but the more I've thought about this process the more I have grown concerned about the possibility of the shot contaminating the oil galleries. I realize this is done every day but as the amount of money I've spent on this project has climbed to stratospheric levels -- with no end yet in sight -- I've become exceptionally risk averse. I've also realized that if taken too far shot can and will roll over sharply machined edges such as the slots milled in the main bearing ledges. So the plan now is to have my machinist hot tank the block only and then prep and finish the exterior of the block myself prior to assembly.
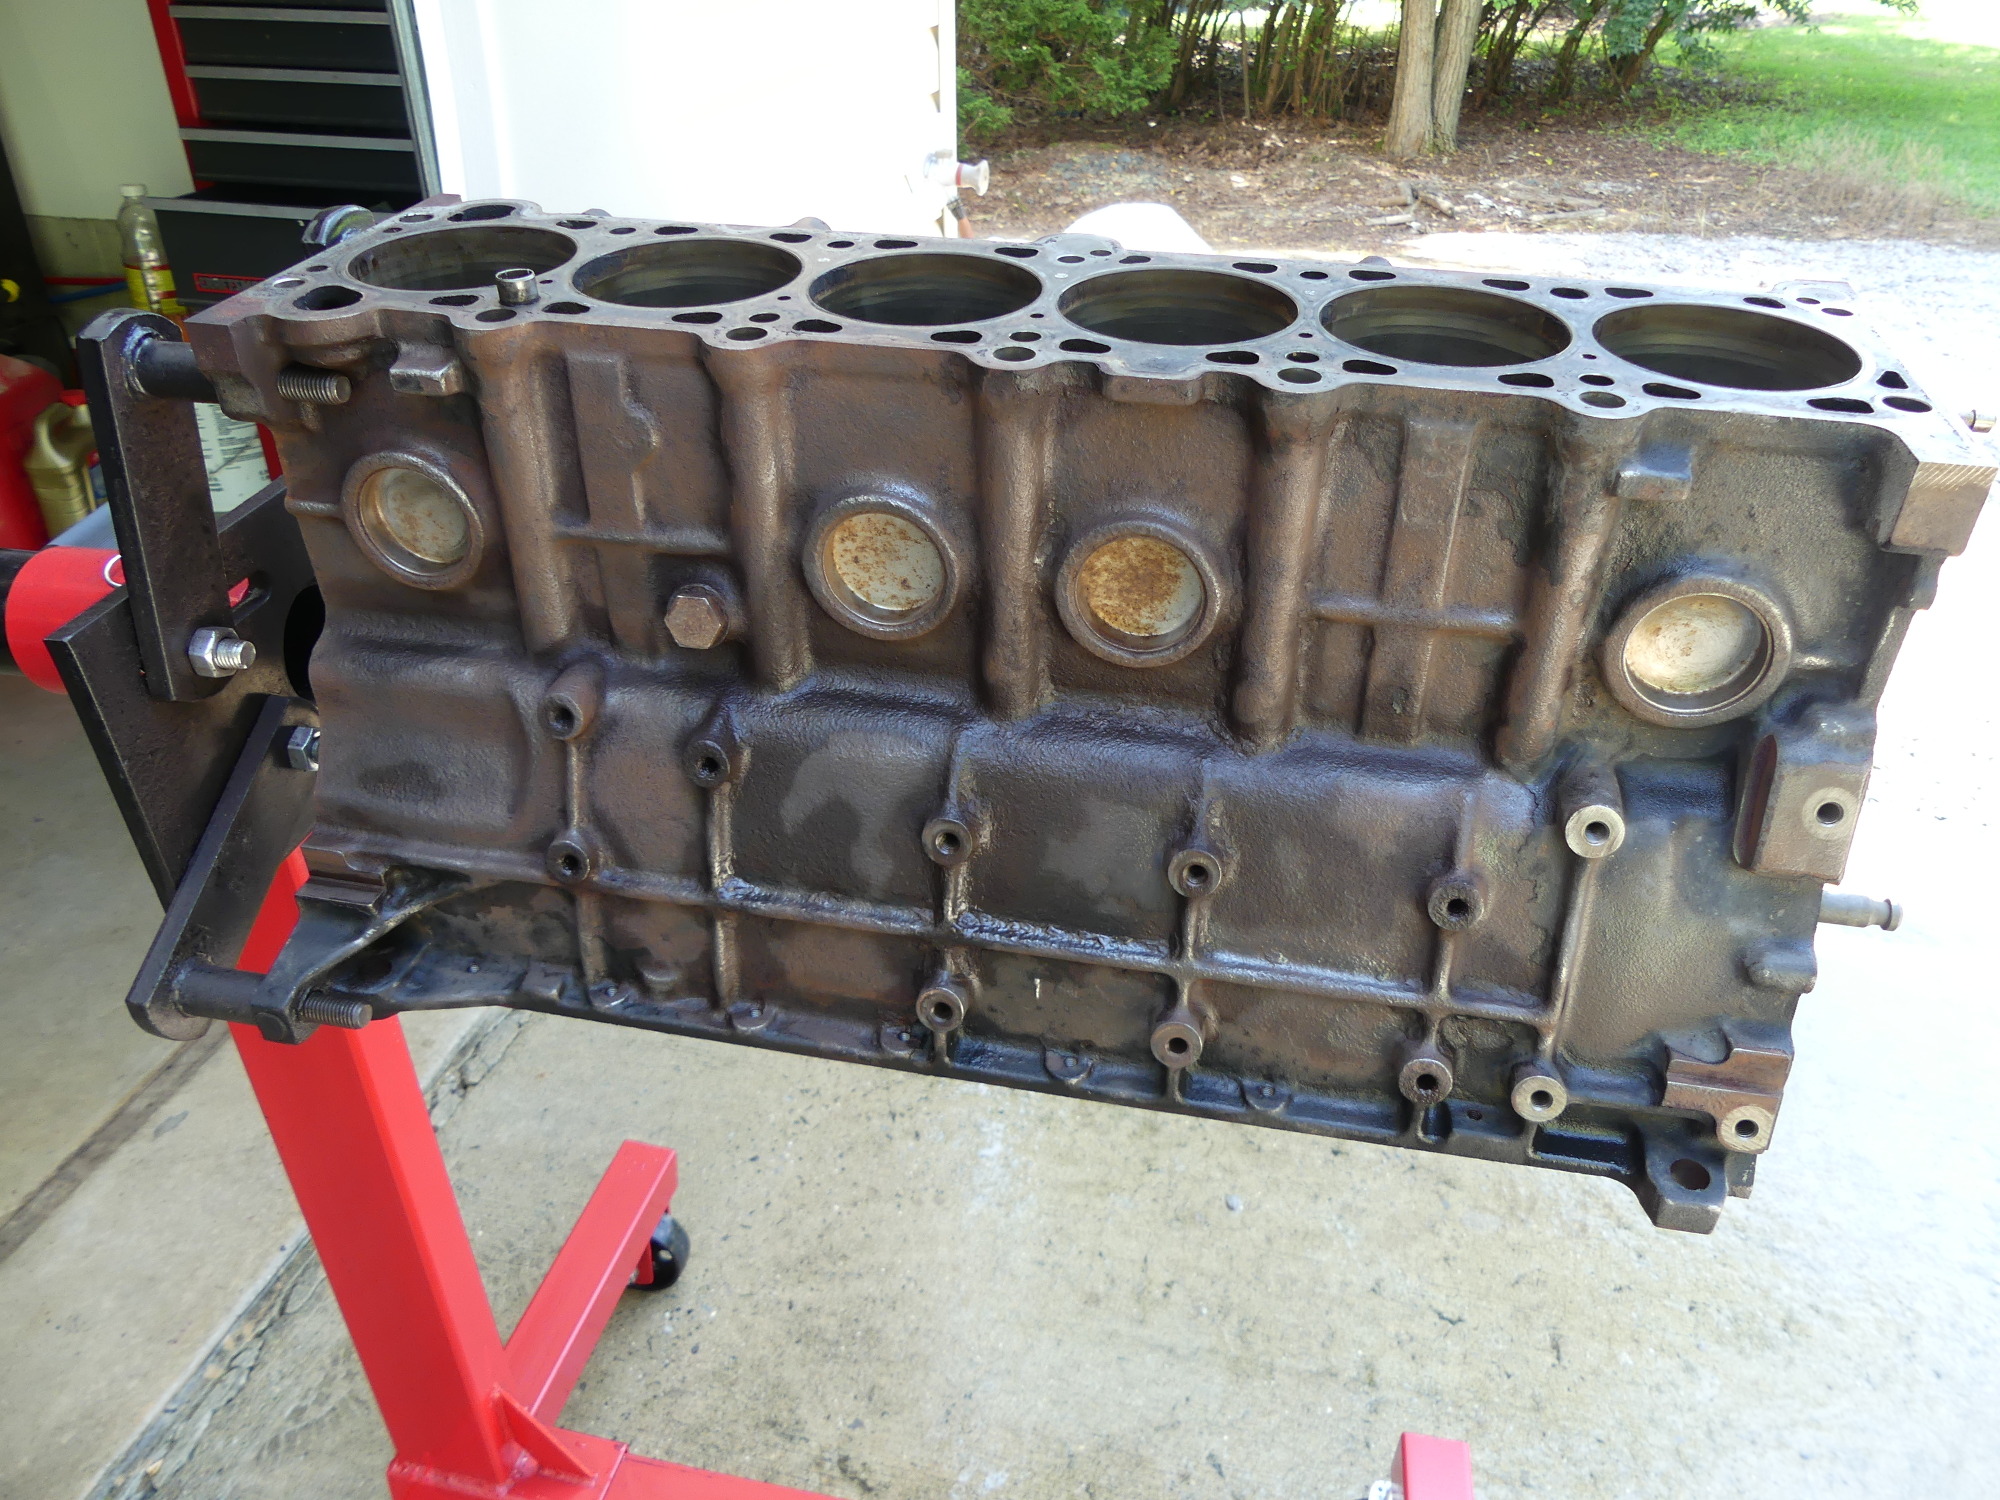 The exhaust side of the block following use of an end wire brush and a rinse with mineral spirits. The bulk crust and surface rust is gone, but the end wire brush was not sufficient to clean the block to the standard required for applying the Aerospray primer. I will need to address this later. |
 The left side shows areas that still have the factory paint. I found that the end wire brush tended to just glide over this paint rather than remove it, so obviously that is not the correct tool for the job. I think abrasion via media blasting will be the only way to remove that paint, as well as the remaining surface rust. |
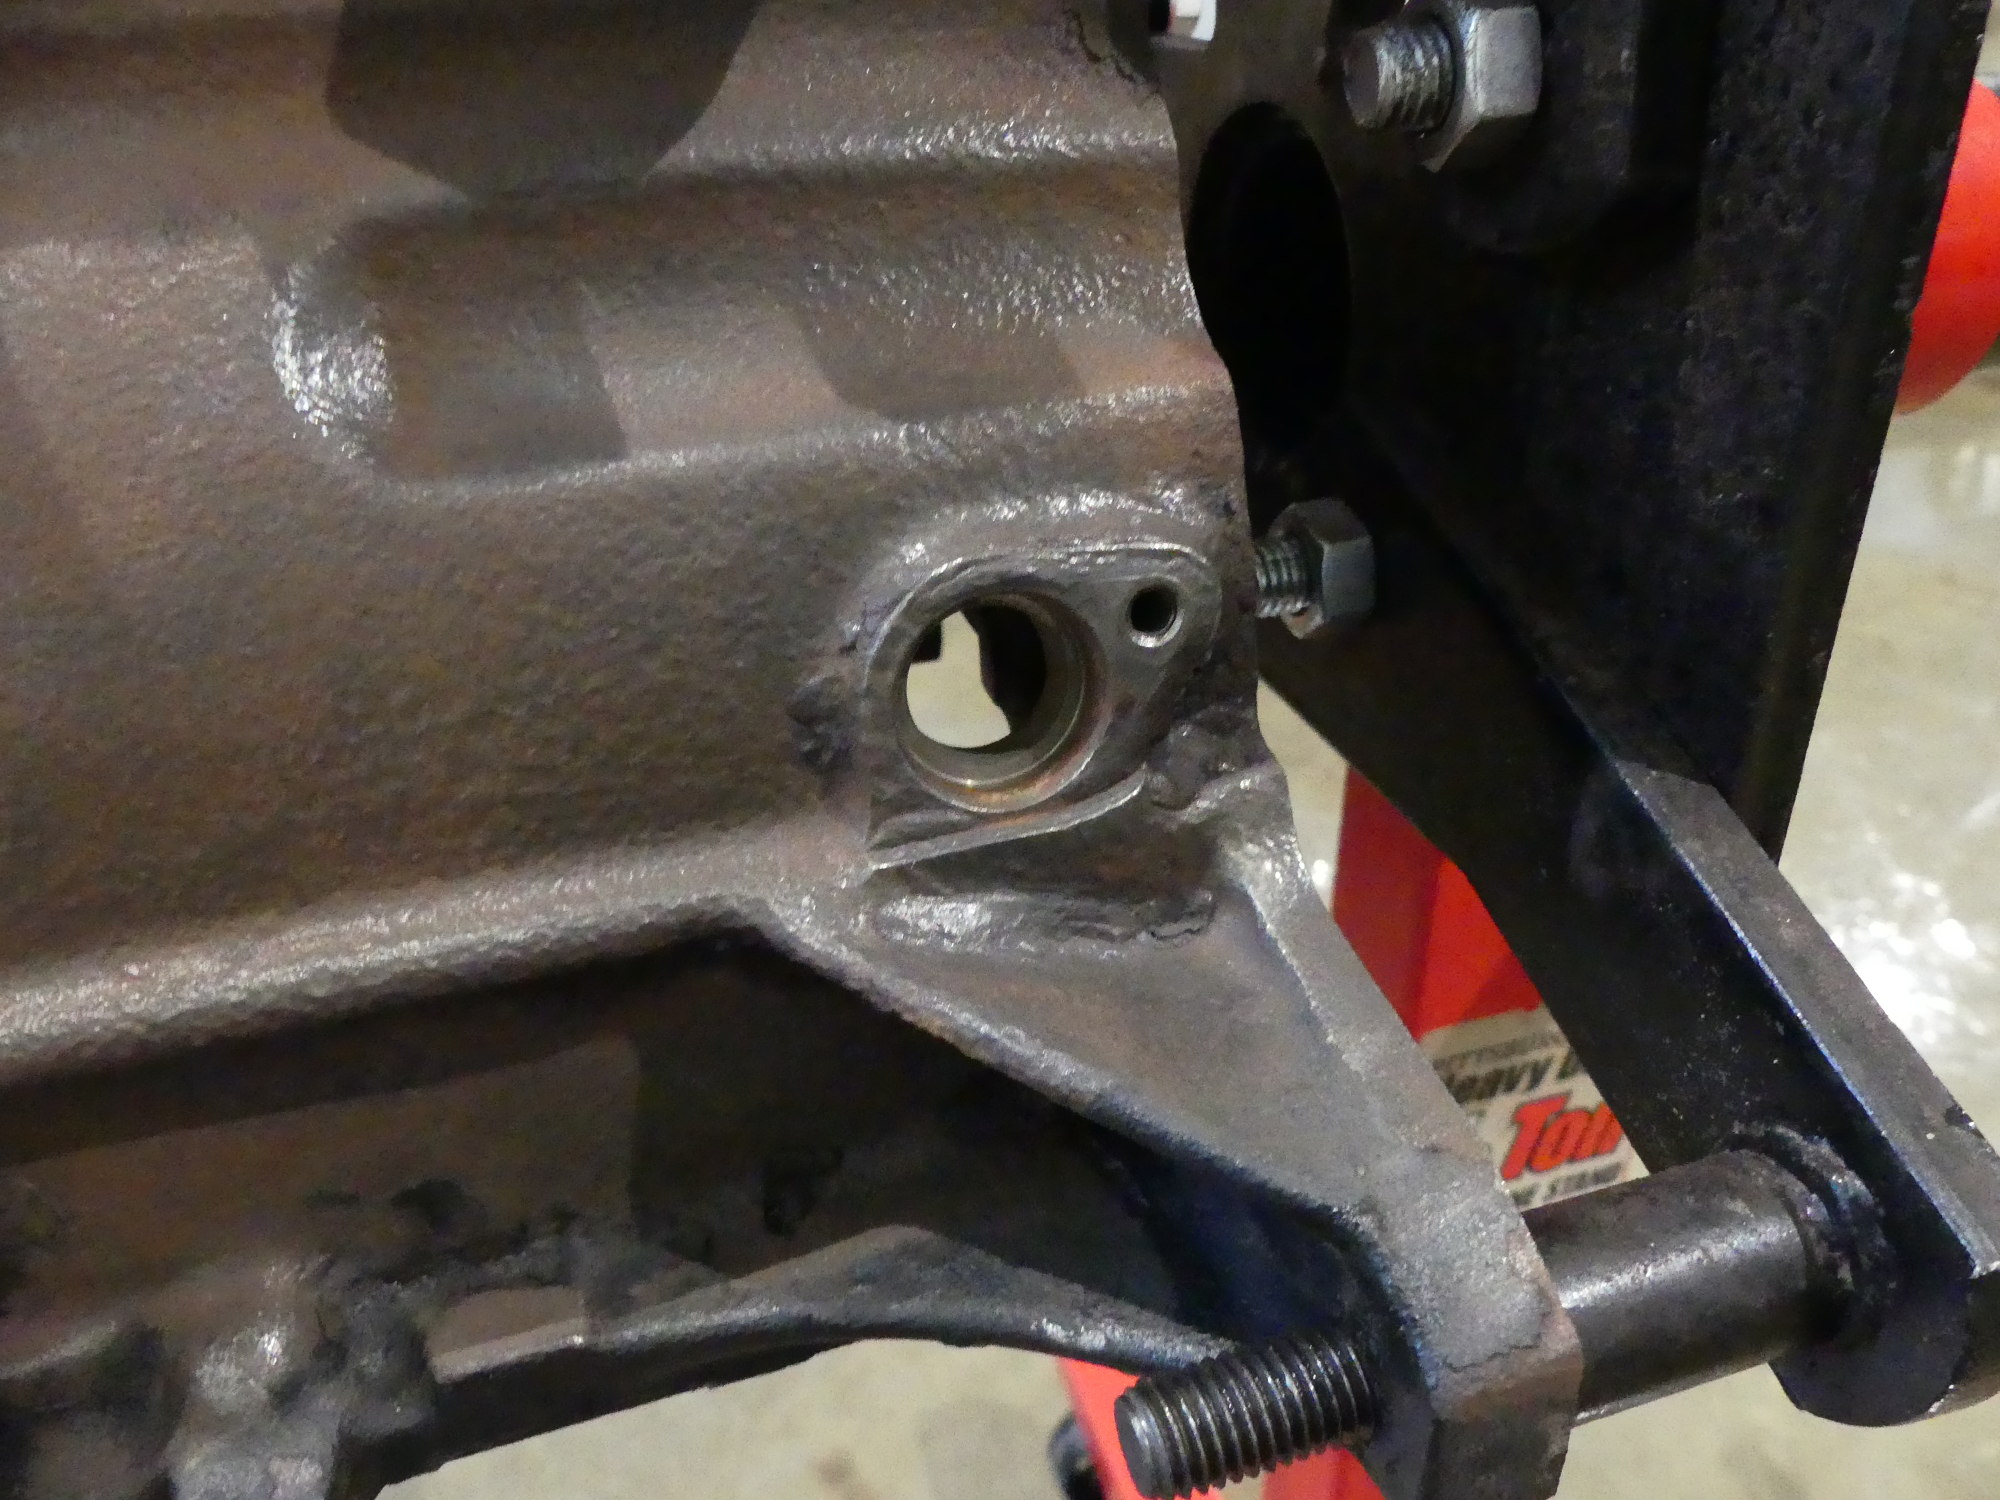 I knew going in that the area around the crank position sensor was extensively corroded and I have been concerned that the mounting flange had basically disintegrated. This shows that the flange is still intact but it's definitely not as flat as I'd prefer. |
As a first step in this cleaning process I used a DeWalt knot wire end brush chucked in my die grinder to remove the remainder of the paint crust and a good amount of the bulk surface rust. This worked remarkably well and only took about 10 minutes. I followed up with another rinse with mineral spirits and saw a refreshingly large amount of dirt and grease release from the block in the process. The end result was lot nicer, cosmetically speaking, but still inadequate prep for application of the Aerospray primer which requires bare metal for maximum adhesion.
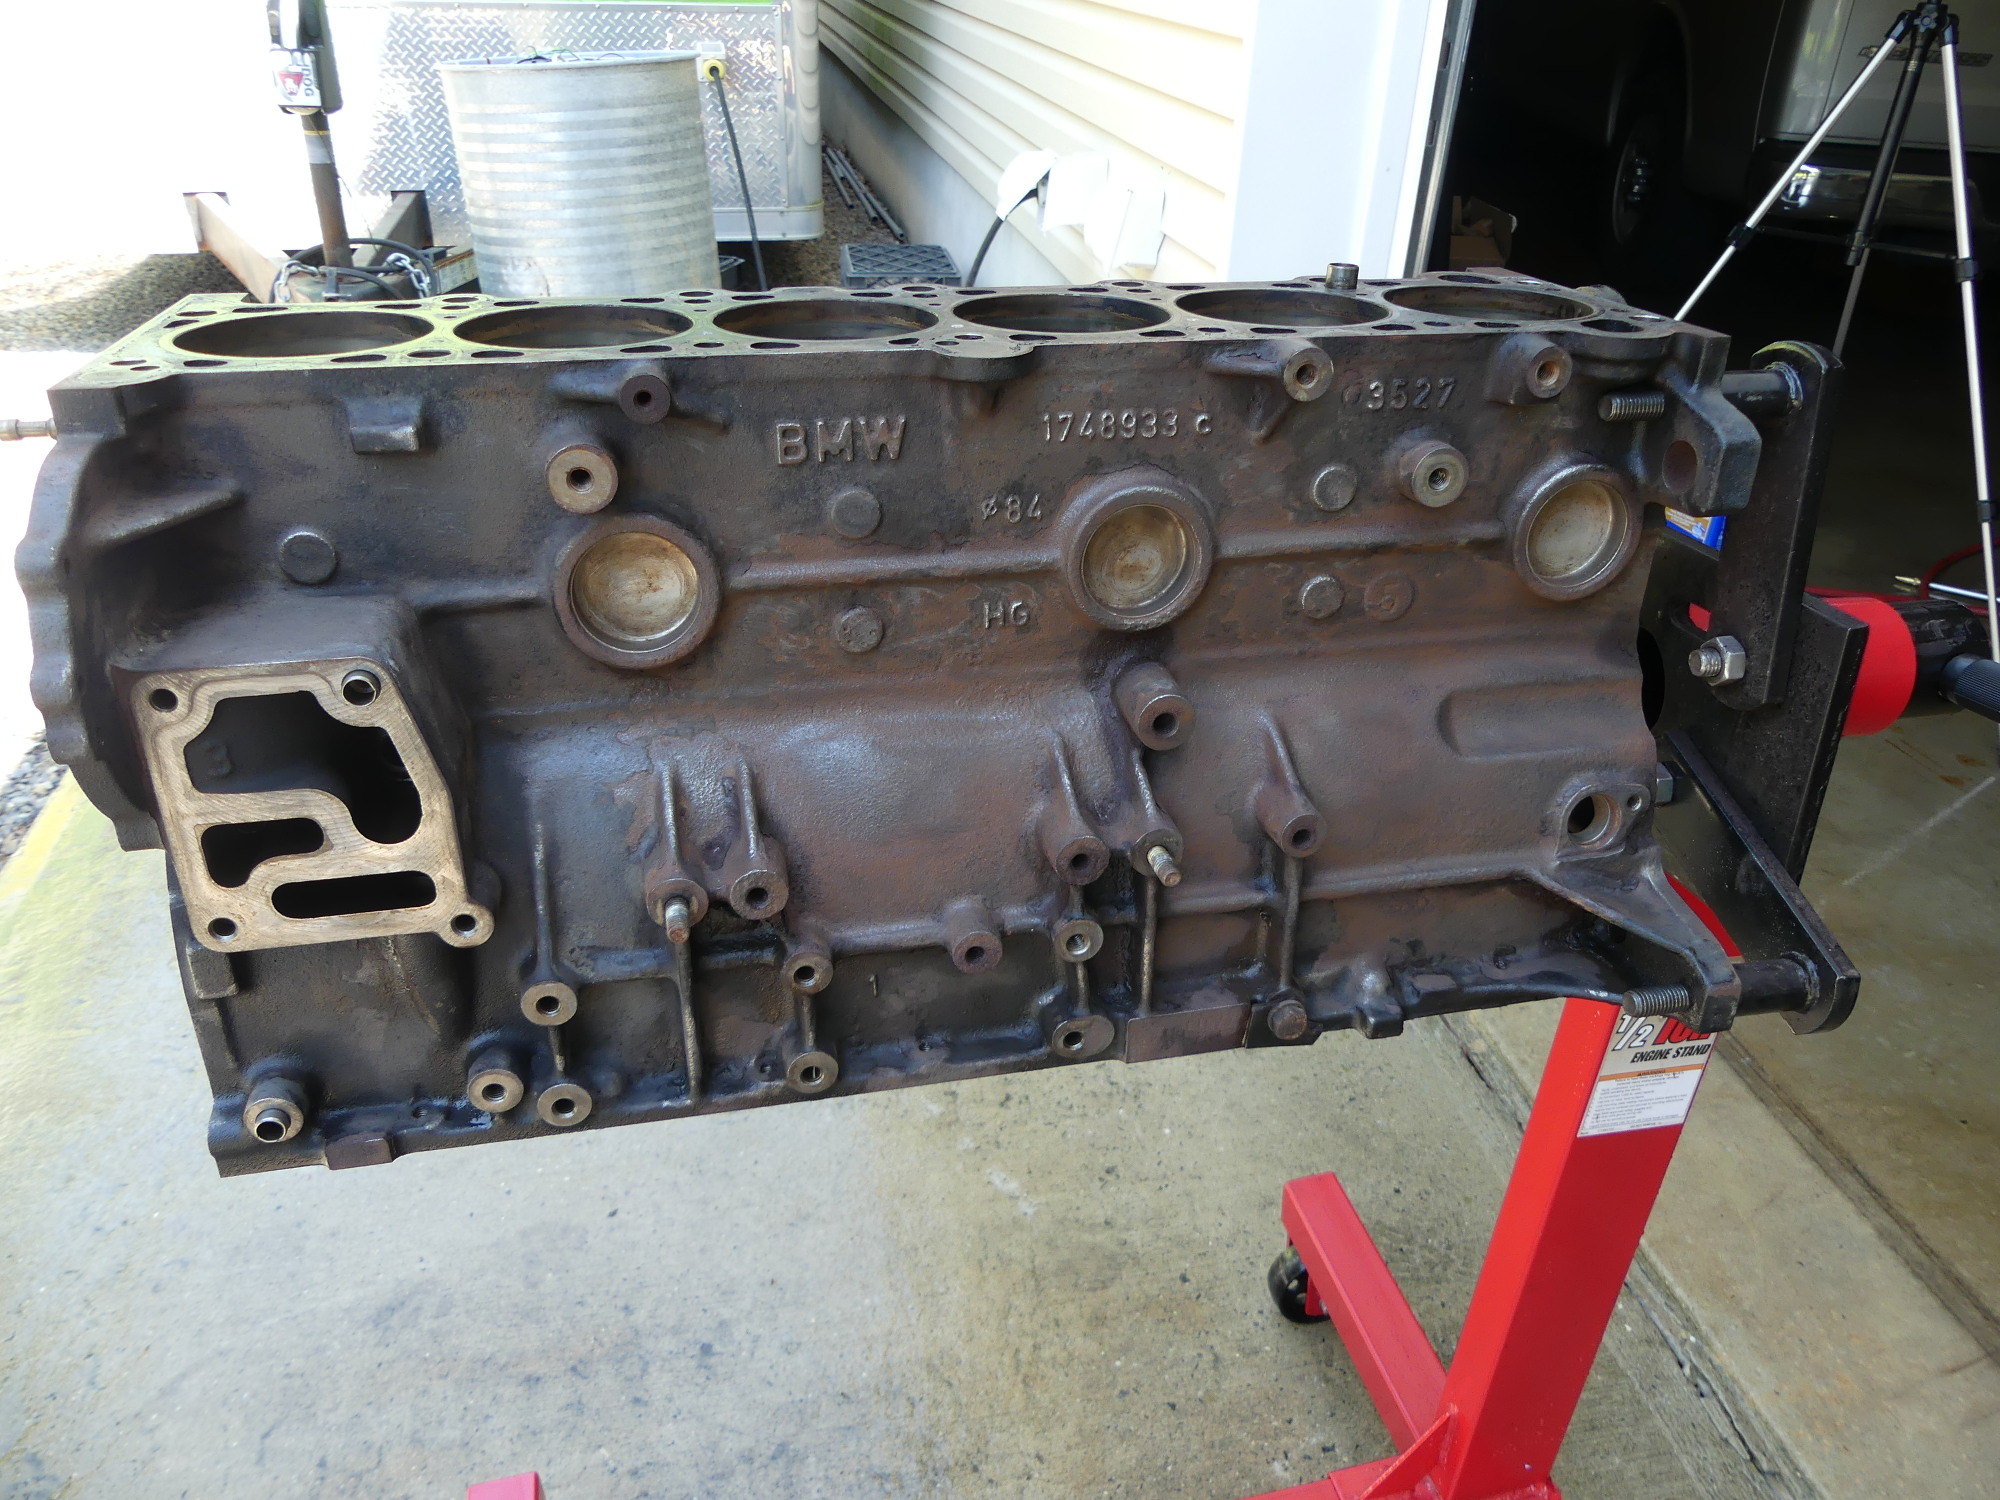
At this point I think the block is in acceptable shape to deliver to my machinist. I'll talk about my concerns with him at that time, including how we expect to address the two plugs that are pressed into the block to close off the oil gallery that is drilled longitudinally through the block. On the M54 these plugs are in fact allen screws and can be easily removed so the gallery can be flushed during the cleaning process, but that's clearly not the case with the M52. The plugs will likely have to be drilled out and replaced with new plugs, but we'll see what my machinist says about that.
Prepping Parts For Machine Shop
To prep the rods for delivery to my machinist I decided to remove the pistons from the rods and inspect the wrist pins. I used a hook tool to quickly remove one of the circlips on each of the pins and only one managed to launch at the speed of light never to be seen again. I expected the pins to come out of the bores easily but that did not happen, and once the first pin came out I saw the reason why -- significant wear in two areas where interference with the inside edge of the pin bore wore completely through the shiny finish and into the base metal. A fingernail test confirmed this was significant (no-go) wear, but of course I had no intention on reusing the pins anyway.
Lacking a brass drift (since ordered) I used the plastic handle of the hook tool to bang on the end of the pins as required to push them free of the pistons. The first pin came out fairly easily but the other pins required a concerted effort and I banged on number 6 for a good minute before it released. While some might blame my use of the wrong tool, the reality is this is strictly due to wear on the pins. They are supposed to fit closely, but once mated with a coat of oil the pins should basically fall slowly right through the bore. That was clearly not the case here.
Once the pins were removed I once again inserted them into their respective rod bushings to gauge the fit of the original parts. While holding the bottom of the rod in one hand I straddled the top of the rod and pin with the other hand and attempted to rock the pin back and forth in the bushing. I found three of the pins to be about as tight as I would expect, which is to say they had no perceptible slop, while the other three had a very slight, but noticeable play. I then pulled out one of the new JE pins, cleaned and then inserted it into one of the original rod bushings as a test of things to come. That definitely felt a bit too loose for my taste. So it's clear that I'll need new bushings if these rods are reused but of course I won't know if the rods can be reused until my machinist verifies they are straight.
 I last pulled the oil filter housing off in 2010 during my accessory overhaul project. I recalled recently what I learned back then -- these are not serviceable. The valve components (plastic with a rubber seal as usual) are not sold separately. Given the state of my filter housing and a relatively reasonable price I've decided to replace it. |
 The effects of vehicles that sit outside (yes, even under a cover) and are not driven. When I took this unit off in 2010 it was dirty, but not corroded like this. Yes, this is mostly a surface phenomenon but given the overall age of the unit and the money I'm investing here I think the decision to buy a new unit is justified. |
 I got a little carried away on the vanos housing. I took out the piston, thinking that I'd send the housing to the machinist for a hot tanking, but then I figured I'd try to clean it up with some mineral spirits. Worked pretty well. The exterior has some very minor corrosion on it (not shown) but it's perfectly acceptable. |
In a related note, I had originally expected to send the cams and trays (what BMW calls bearing ledges) out to my machinist to be professionally cleaned, but as I am now planning to replace these components with new units that will no longer be necessary. The only parts I'm planning to send for cleaning now include the oil pan, timing cover, and windage tray.
While dismantling my oil filter housing I remembered that the bugaboo with these units is the small plastic check valve (and the related seal) which cannot be serviced. Considering my filter housing is 20 years old and is now heavily corroded I've decided to buy a new unit. Fortunately the price of these units appears to have held steady for the last several years so it's within the realm of reason.
Head Rework Finished
Today I received I received an invoice from Autohead for $475. This was an unexpected surprise for a couple reasons. First, I didn't expect it to be done so quickly, and second, it was less than originally budgeted.
I spoke to Peter and he informed me about the state of the head. First of all, he said that he was able to resurface the head by removing only 4 thou. I attribute this to simply not overheating the head. He added that I am likely to notice a small area at the very front of the head near the water pump that was not completely milled but as this is in a non-critical area and removing it would have necessitated removing another thou or so from the entire surface he felt it best to stop there. He commented that some machinists will continue to remove material just to make it look pretty in this area but that it wasn't his practice to do so.
It turned out that the valve guides I was so concerned about had very little wear, to the point that servicing them was unnecessary. Always the engineer seeking data rather than anecdote or conjecture, I asked him how he arrived at that conclusion and he said that he used a bore gauge to measure the ID of the guide and naturally compared that to the OD of the valve stem. The resulting clearance (higher on the exhaust than the intake by design to accommodate the difference in temperature of those parts) was well within specs. Although it could be tighter, he pointed out it is better to be a bit loose than a bit too tight, otherwise the valve will not seat correctly after the head heats up. Why is this a big deal? Putting so much as a human hair between the valve and the seat can cause it to fail the vacuum test used to determine if the valves are sealing correctly.
Out of curiosity I then asked what is involved in replacing the guides. He immediately corrected me and said that technically the guide is not replaced or pressed out of the head. Instead, it is reamed between 40 and 60 thou oversize and then a special tool is used to insert and size a special copper sleeve. This sizing can be tweaked to achieve almost any tolerance, but he recommended against doing this in my case because in his opinion it wasn't strictly needed and he wasn't in the business of charging customers for needless work. Considering that there is really nothing the average owner can do to control wear in the valve guides (except perhaps changing oil at reasonable intervals and avoiding overheats), it's unlikely a head with lower mileage than mine (265K) would require reworked valve guides, but if you send your head to Autohead they'll address the guides as needed.
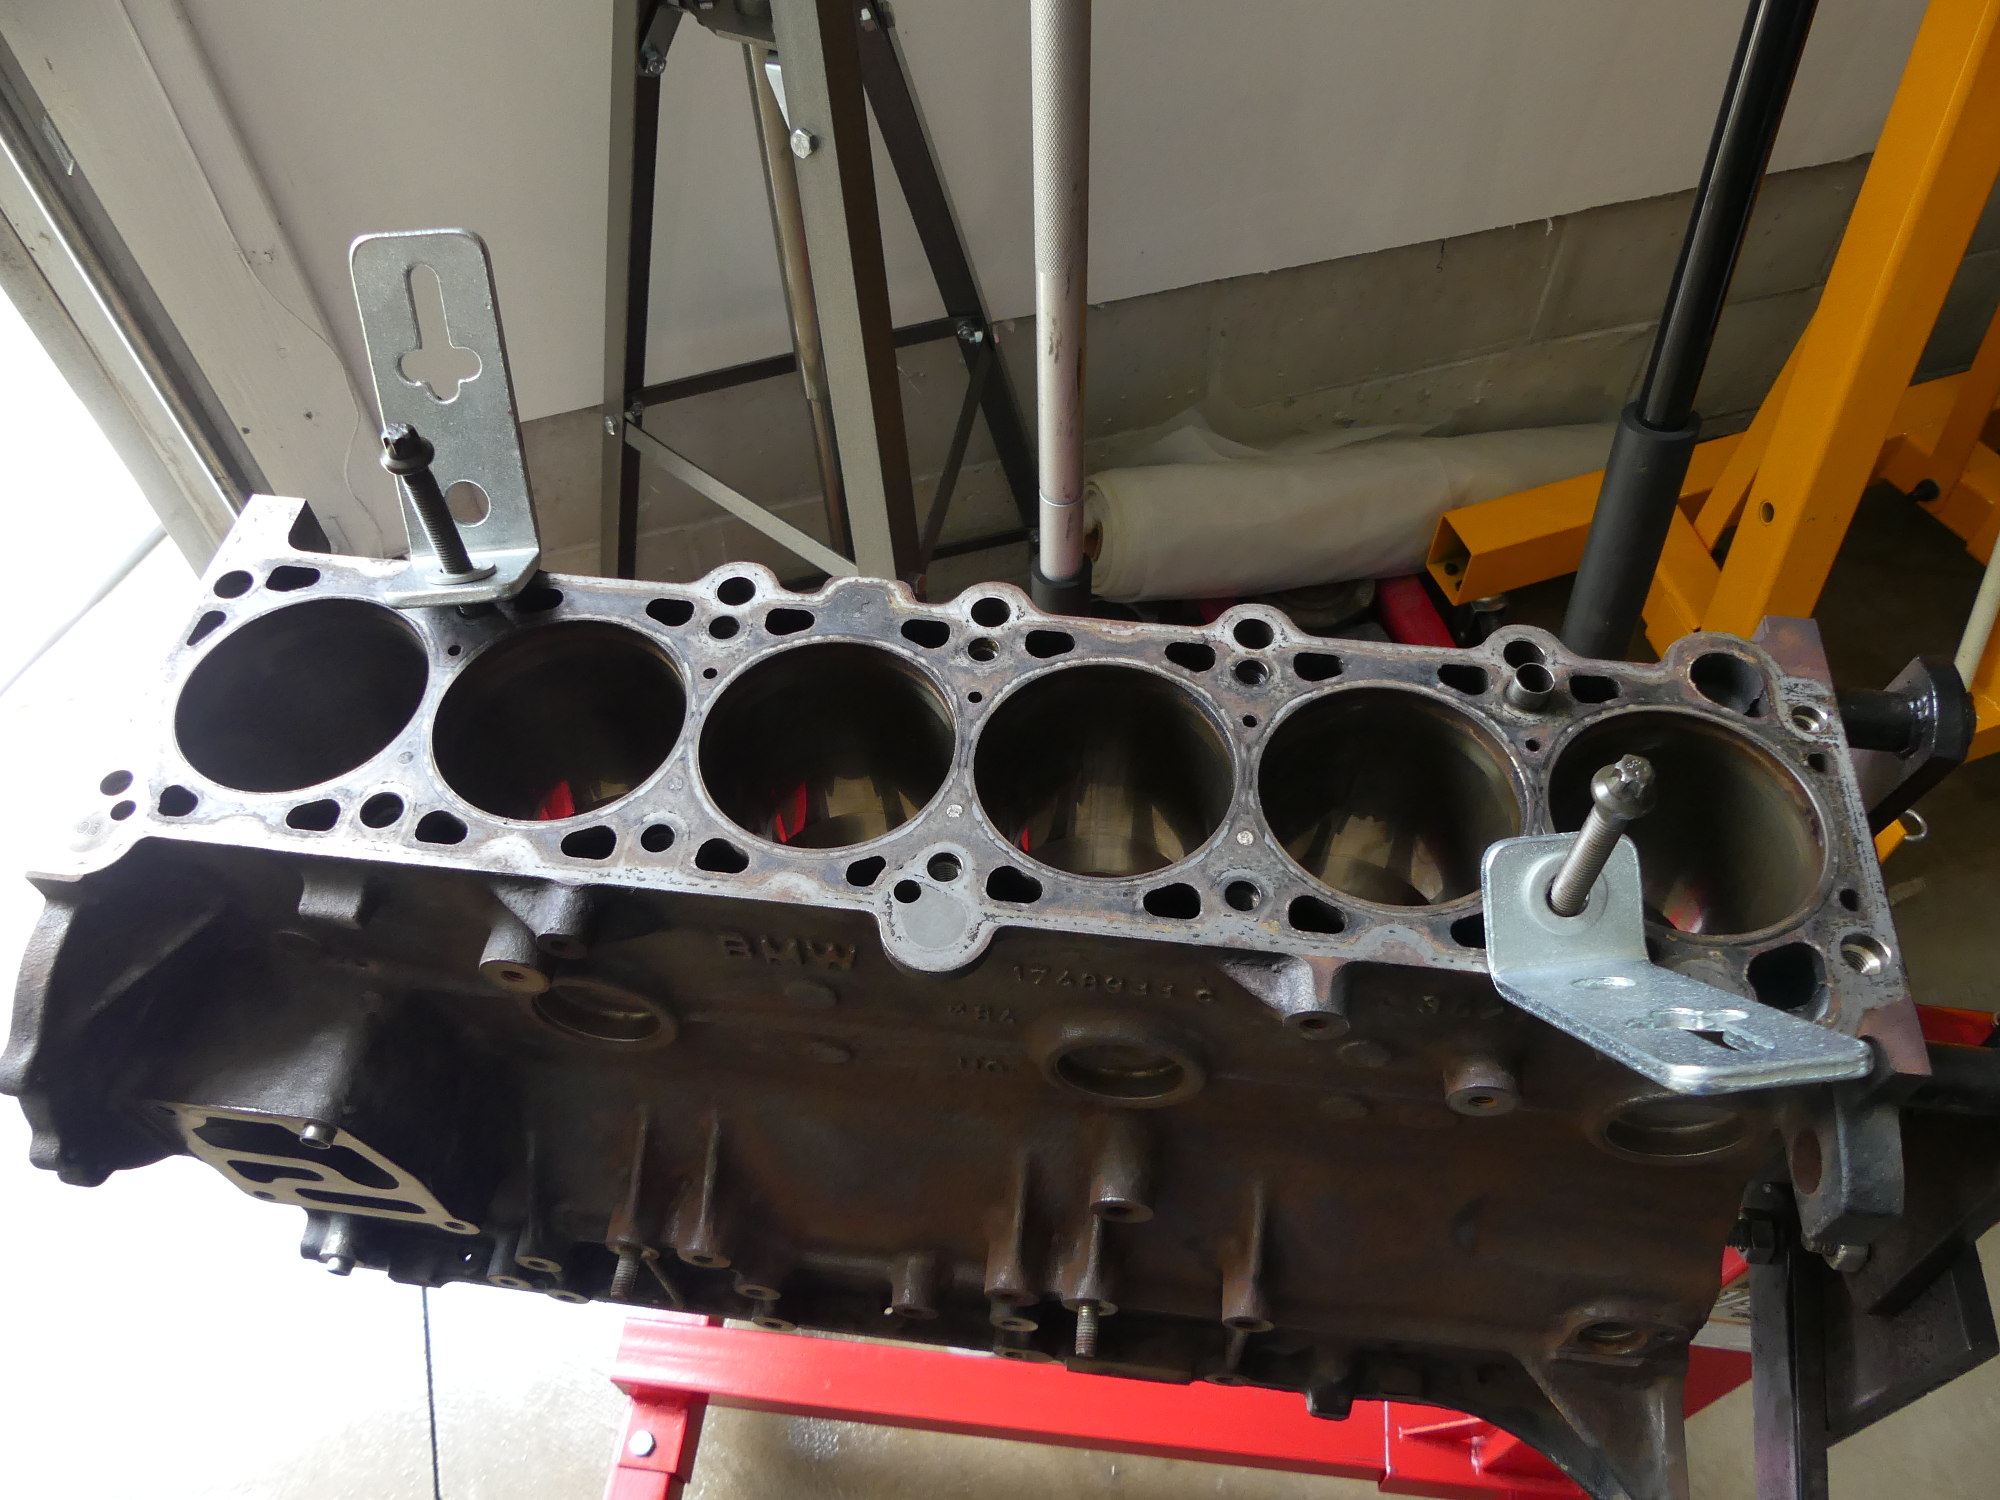 How do you lift a heavy BMW cast iron block with the head removed? You rig it with two head bolts and some high strength washers. The L brackets come from my AFF load leveler, of course, and make it very easy to attach and remove the chain links from the block. Better than a through bolt between two chain links, that is sure. |
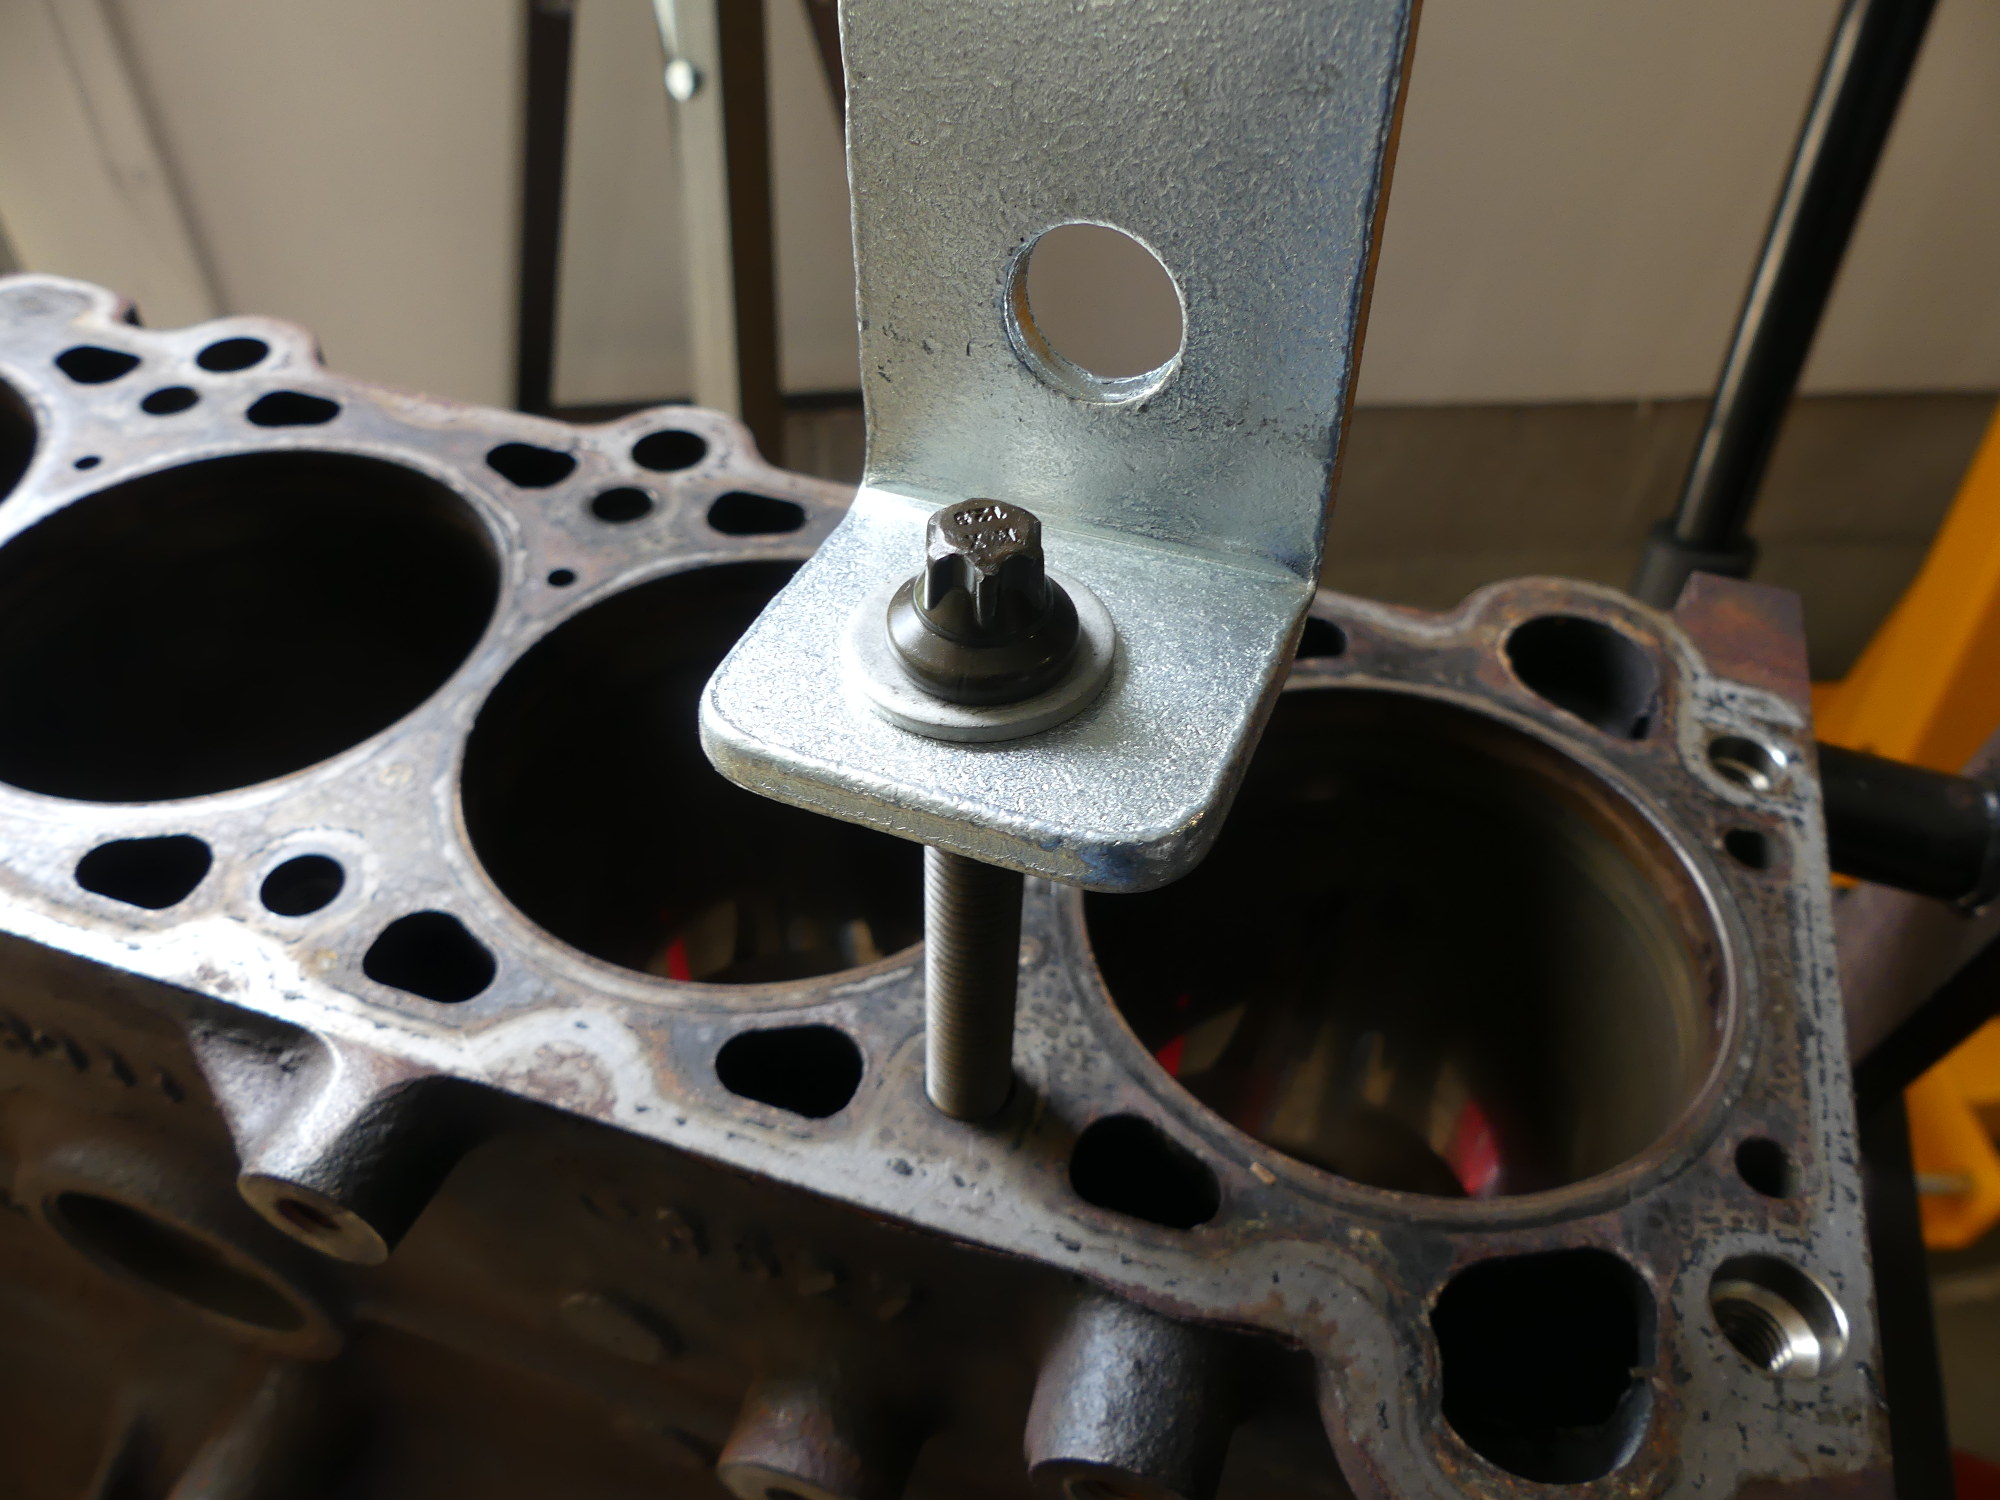 A closeup of the attachment point using an old head bolt and a high strength washer. The hole under the bolt is the same as shown above it, which is just slightly smaller than the head of the bolt, so a washer is required here. I'll hook onto these attachment points and lower the block onto a pallet for delivery to the machinist. |
 Remember those pieces I found lying in the head? I finally got the time to pull out the new valve cover gasket and compare it to the pieces I found. Mystery solved -- they are from the center spark plug hole gaskets. I clearly broke those off and then made a rookie mistake and did not closely inspect the head for this debris. |
I then asked what if anything he did to the valves. He said they were ground, cleaned and polished, but interestingly he noted they were not lapped. He said that is a 1950's technique and it is not done on these heads. Presumably, the accuracy of the grinding and polishing of the valve combined with the accuracy of the cutter (a Serdi machine) results in a perfect fit. The fully assembled head is then vacuum tested to ensure that the valves are seating correctly. Needless to say, after cutting the valve seats and installing my reconditioned valves, my head passed this test.
After the head went through the cleaning process he inspected one of the common areas for cracks and saw what he thought were some marks or scrapes on the surface but they turned out to be a non-issue. He pressure tested the head to confirm his assessment and the head passed that test. Most people seem to suggest that these heads don't crack unless you overheat them, but I wonder if that's merely one cause of cracks and the BMW heads are simply prone to cracking after a certain number of heat cycles.
While in general the head cleaned up nicely, the cleanup also revealed a good amount of corrosion on the exterior of the head. The corrosion appears confined to non-critical areas (outside of the head gasket, for example) so I doubt it will have any functional impact, but when Peter sent me pictures of the head I have to admit I wasn't all that happy to see it. Knowing the kind of investment I was making in this engine Peter suggested that if I wanted a brand-new appearance, as well as the benefit of several design improvements I could buy one of his new aftermarket (AMC) heads with my parts swapped into it for $1100. Considering the cost of a new BMW head that's a pretty damn good deal but as I don't make snap decisions involving large amounts of money I asked him to hold off shipping my head for a couple days while I think about it.
As it turns out there isn't that much information about the AMC heads on the forums or the net in general. That's not exactly surprising, given that Peter said he's sold fewer than a couple dozen of them. I did see a couple pictures posted to one Bimmerforums thread that looked promising. The casting appears to be beefier and prettier in general. According to Peter the AMC head is 10 (!) pounds heavier than the BMW piece and it's not hard to see why. For example, BMW reduced weight and yet maintained strength along the sides of the head by thinning the metal and using a crosshatch pattern. AMC appears to have simply increased the thickness of the metal in that area. This likely accounts for a majority of the weight increase.
So now the decision I have to make is whether to buy a new head or accept my refurbished head. At this writing I hadn't decided, but I have to make the call very soon. Although I'm sure it will grate on your nerves, I'll leave this entry as a cliffhanger. Tune in next time to find out what I did.
Mystery Solved
Remember those two plastic wrapped washers I found lying in the head? Turns out my instinct was correct -- they are in fact from the inner valve cover gaskets (the ones that fit over the spark plug holes). They must have snapped off when I removed the gaskets 10 years ago. In my defense, this was one of the first DIY tasks I did on the car so I'll chalk that up to a noob mistake.