


Thursday, September 21, 2017
Bearing Clearance Checks
The single most frustrating aspect of assembling the engine so far has been measuring the crank and attempting to select the most appropriate bearings. As I indicated previously, my crank began life at BMW marked with yellow (or what appears to be yellow) dots, and my machinist said that when he measured the crank it was still within the specs for yellow bearings. However, when I measured the crank with my own digital micrometers I got a very different picture. The numbers were squarely and consistently within the acceptable tolerance for white bearings so that's what I ordered. But even as I handed BMW upwards of $550 for a complete set of main and rod bearings I wasn't completely sure this was the correct choice.
Given the money involved and my dealer's policy indicating I could return for exchange only those boxes that had not been opened I was naturally paranoid about doing what I really needed to do: open up all the boxes and install all the bearings for a plastigauge test, but I'll cut to the chase and tell you that is what I ultimately did -- though not before going through a rather laborious process to measure the ID of a set of much cheaper rod bearings first, in the hope that I could use the same technique to measure a single set of main bearings and avoid opening all the boxes. The end result of that test was a set of rod bearing clearance data that didn't make any sense and a set of bearings wrecked (or so I assume) by the rubbing of the bore gauge anvil and wheels. This caused me to rethink my original plan to measure the main bearings with a bore gauge and jump straight to plastigauge.
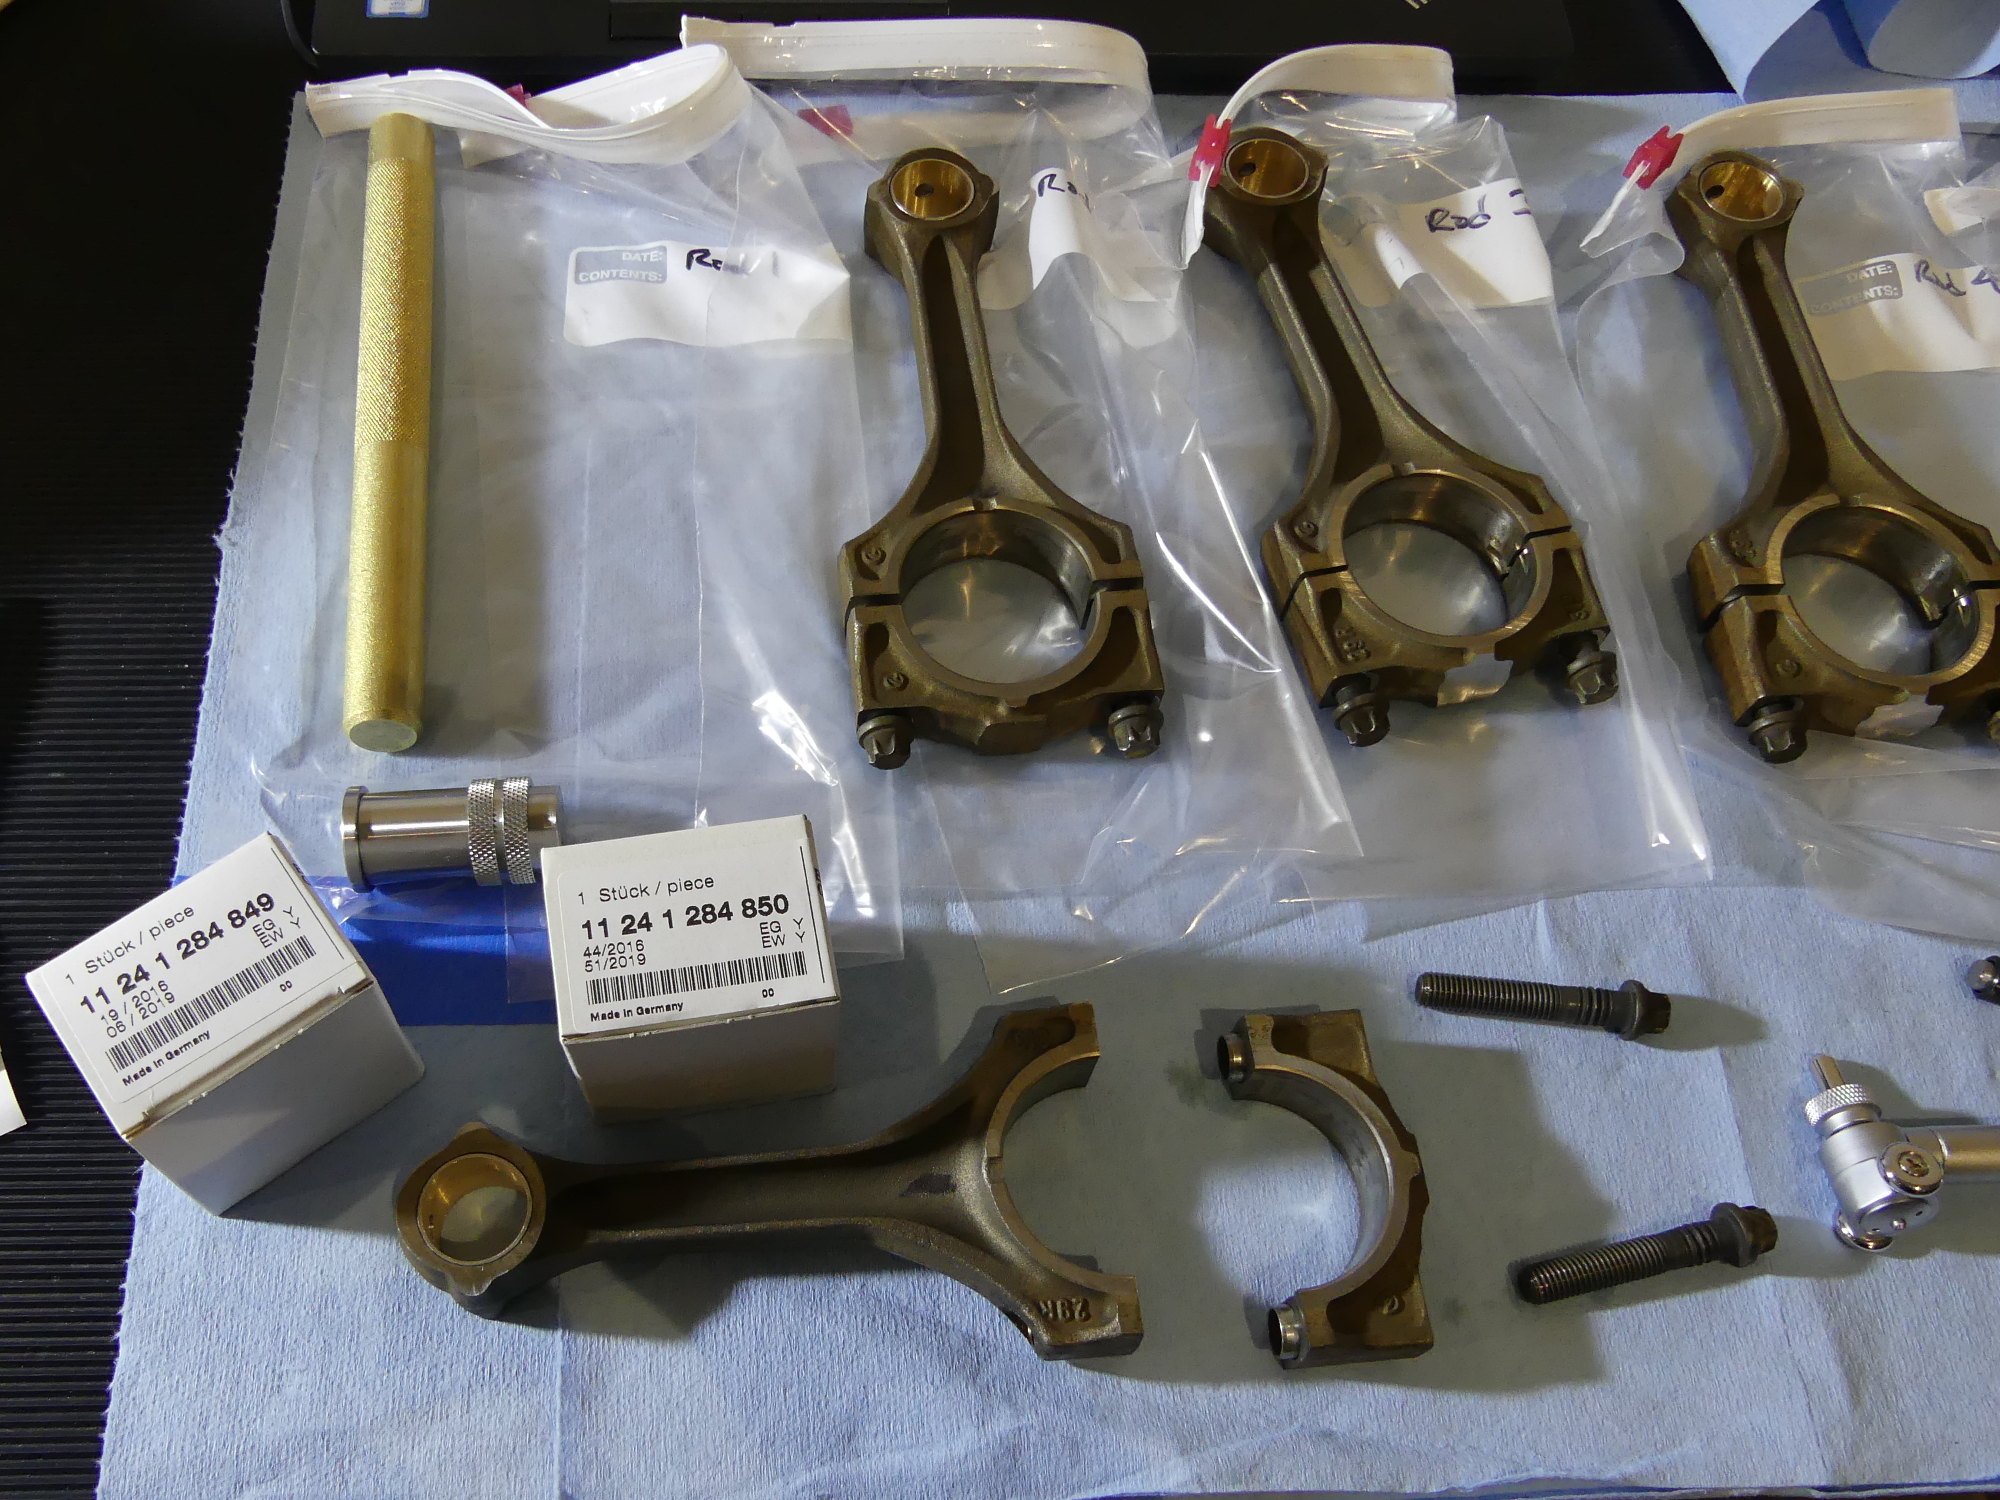 I began the day by installing a set of rod bearings and trying to measure the ID of the bearing surface so I could do some simple math to determine the clearance that would result. Unfortunately I did not get the results I expected. |
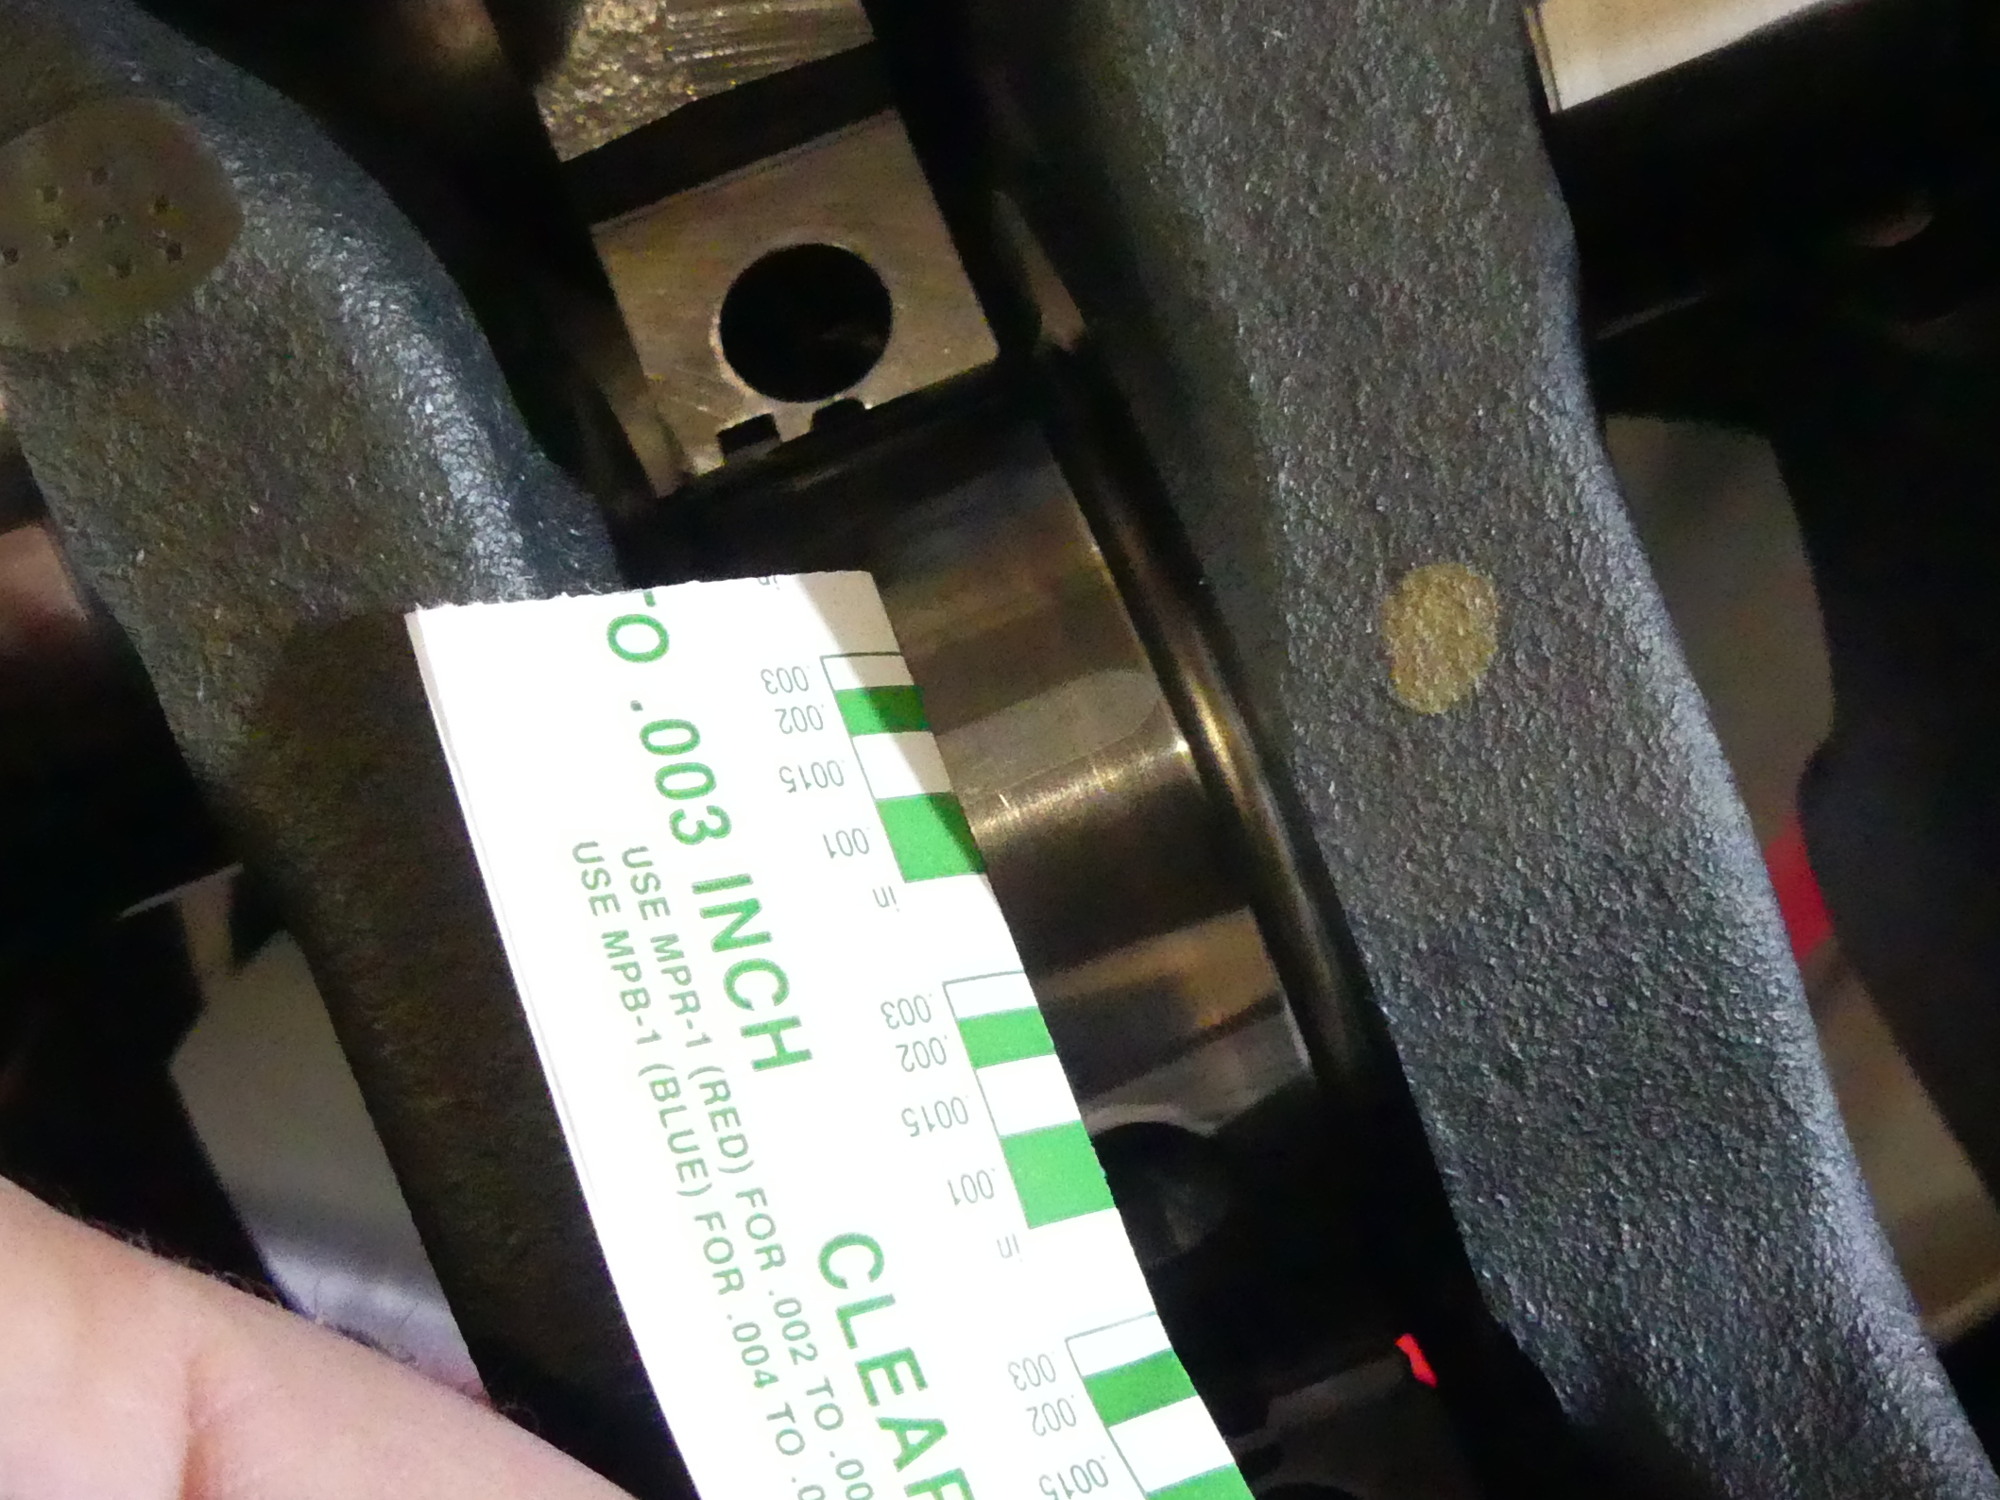
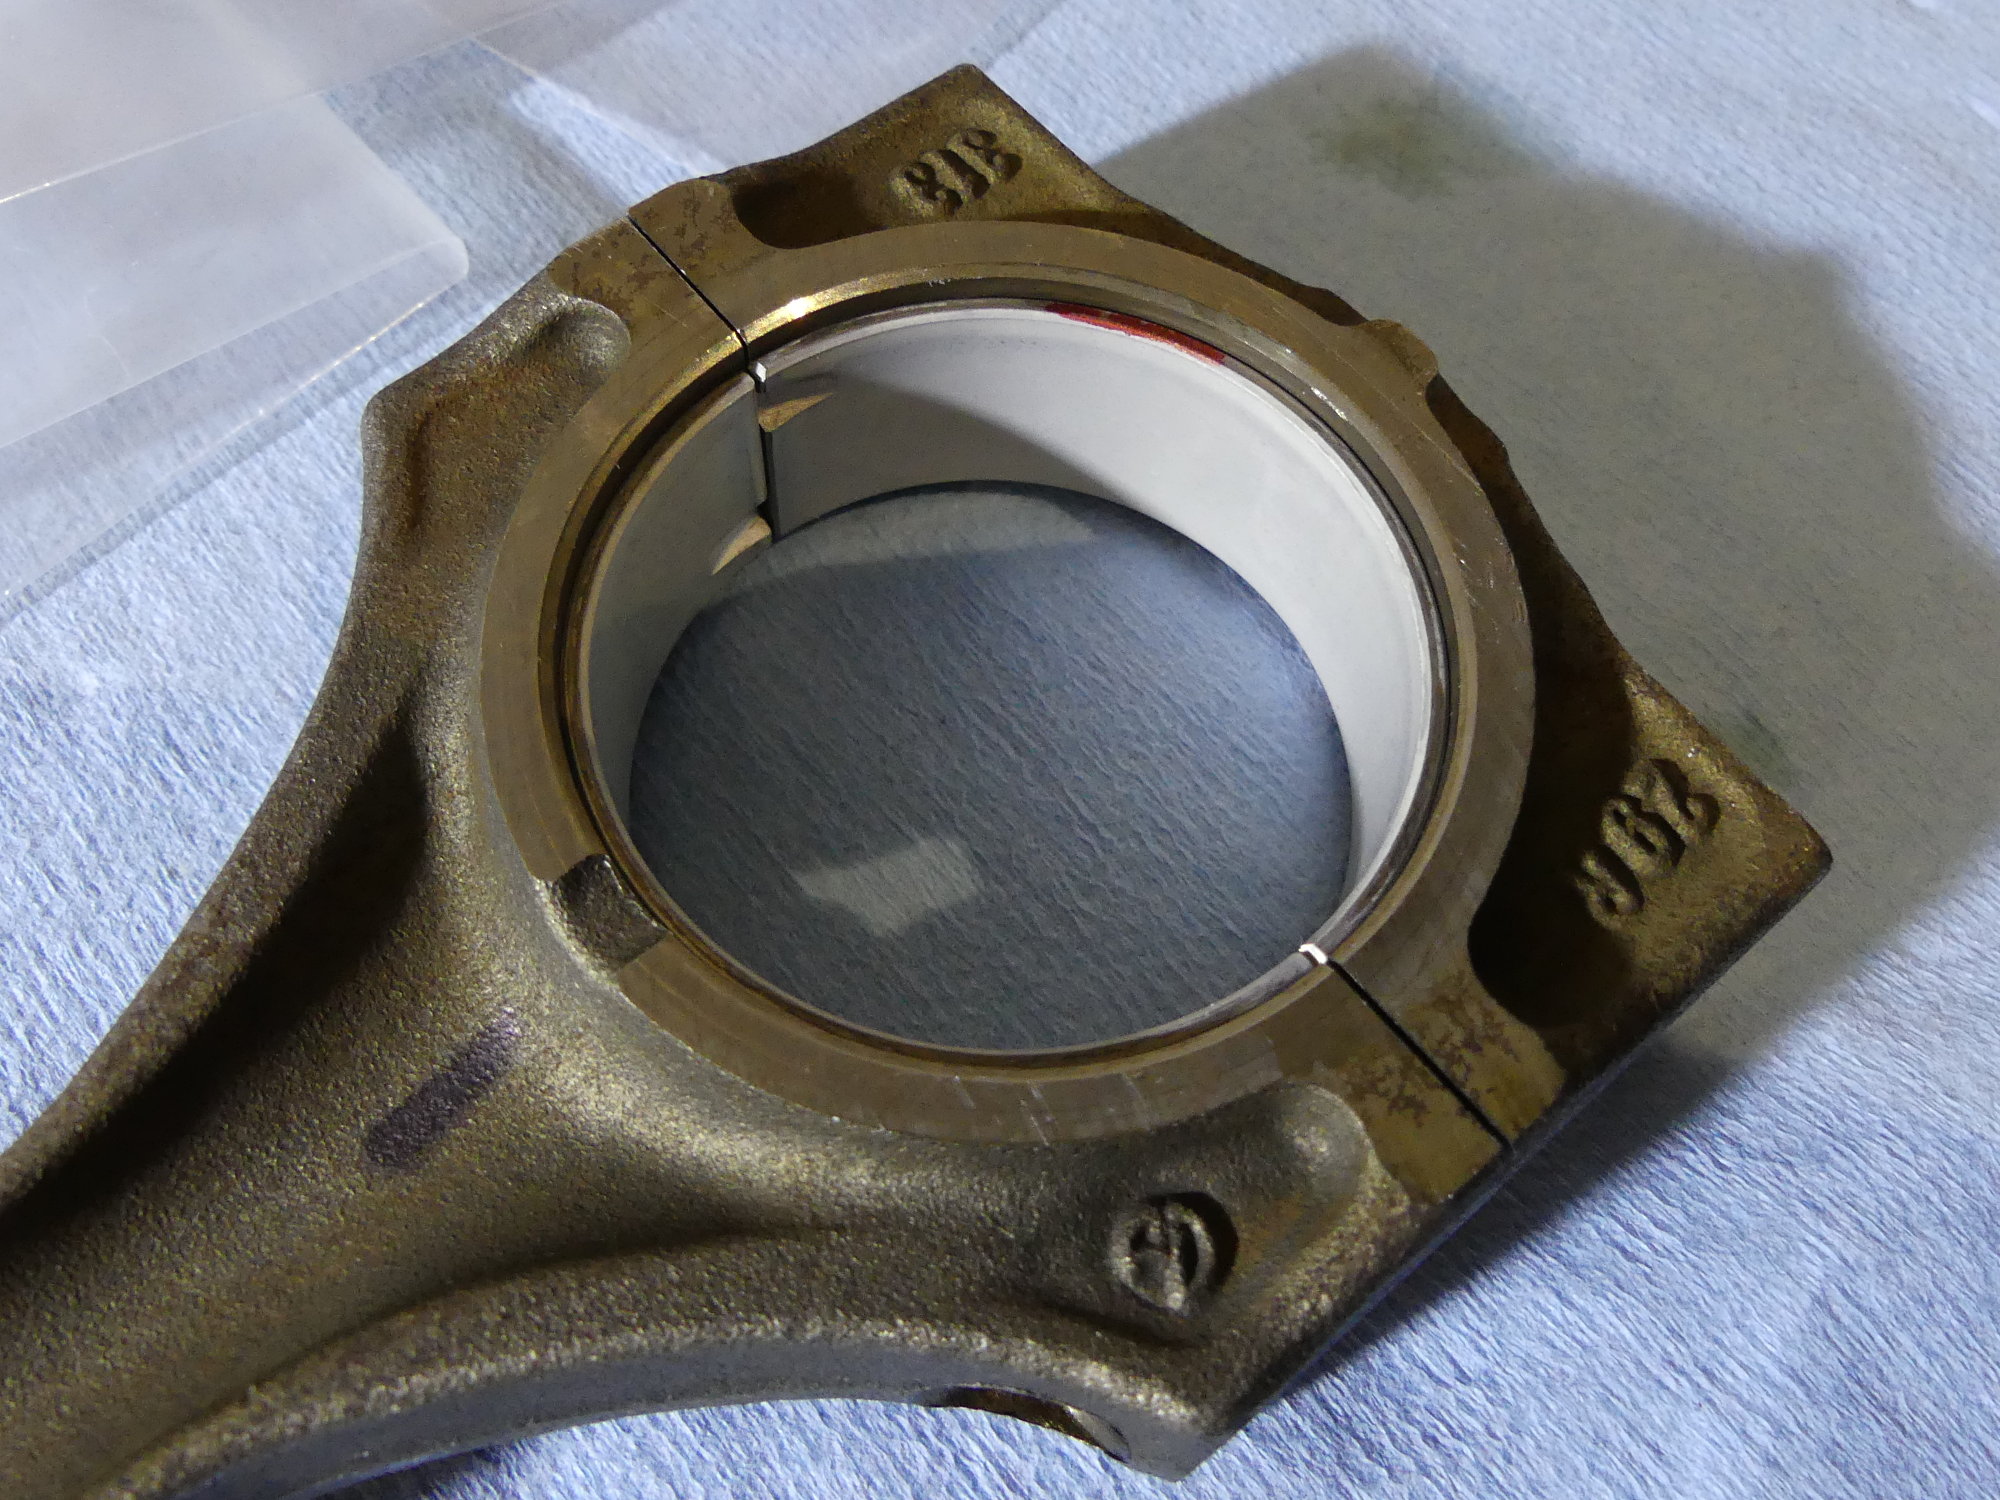 BMW's provides blue and red rod bearing shells in three sizes: standard, undersize 1 and undersize 2. The blue shell mates with the rod while the red mates with the cap. If you look closely you can see the red stripe on the side the shell. |
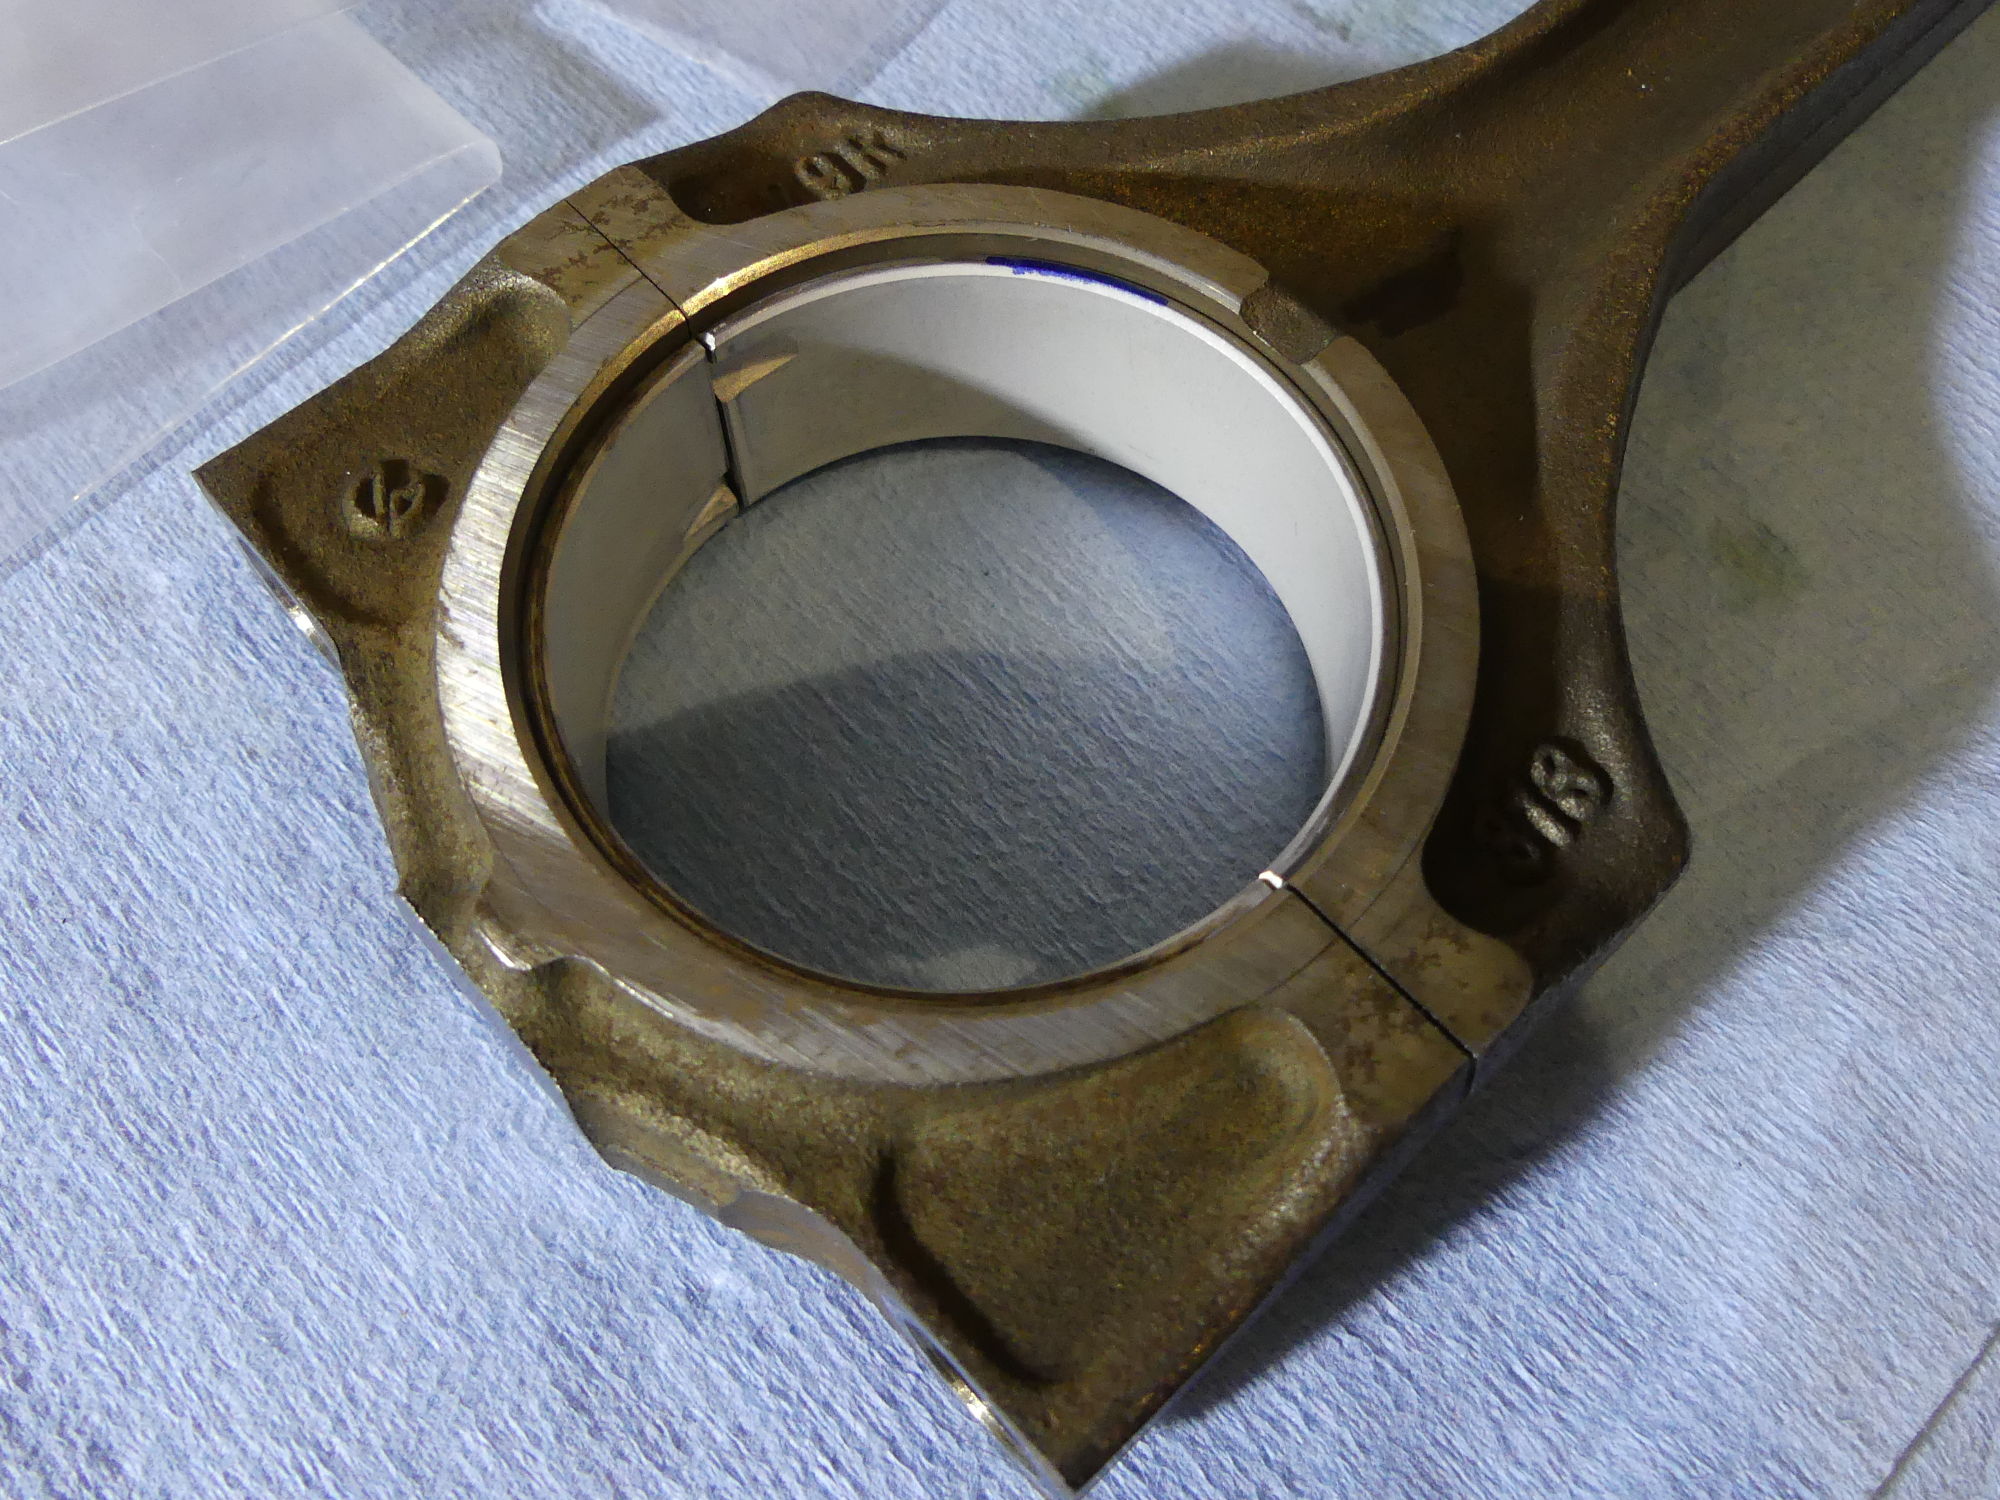 This shows the blue paint stripe on the upper rod bearing that mates with the rod. These are standard (45.00mm) shells, which covers journals measuring 1.7707 to 1.7713" or, in other words, all of my journals. |
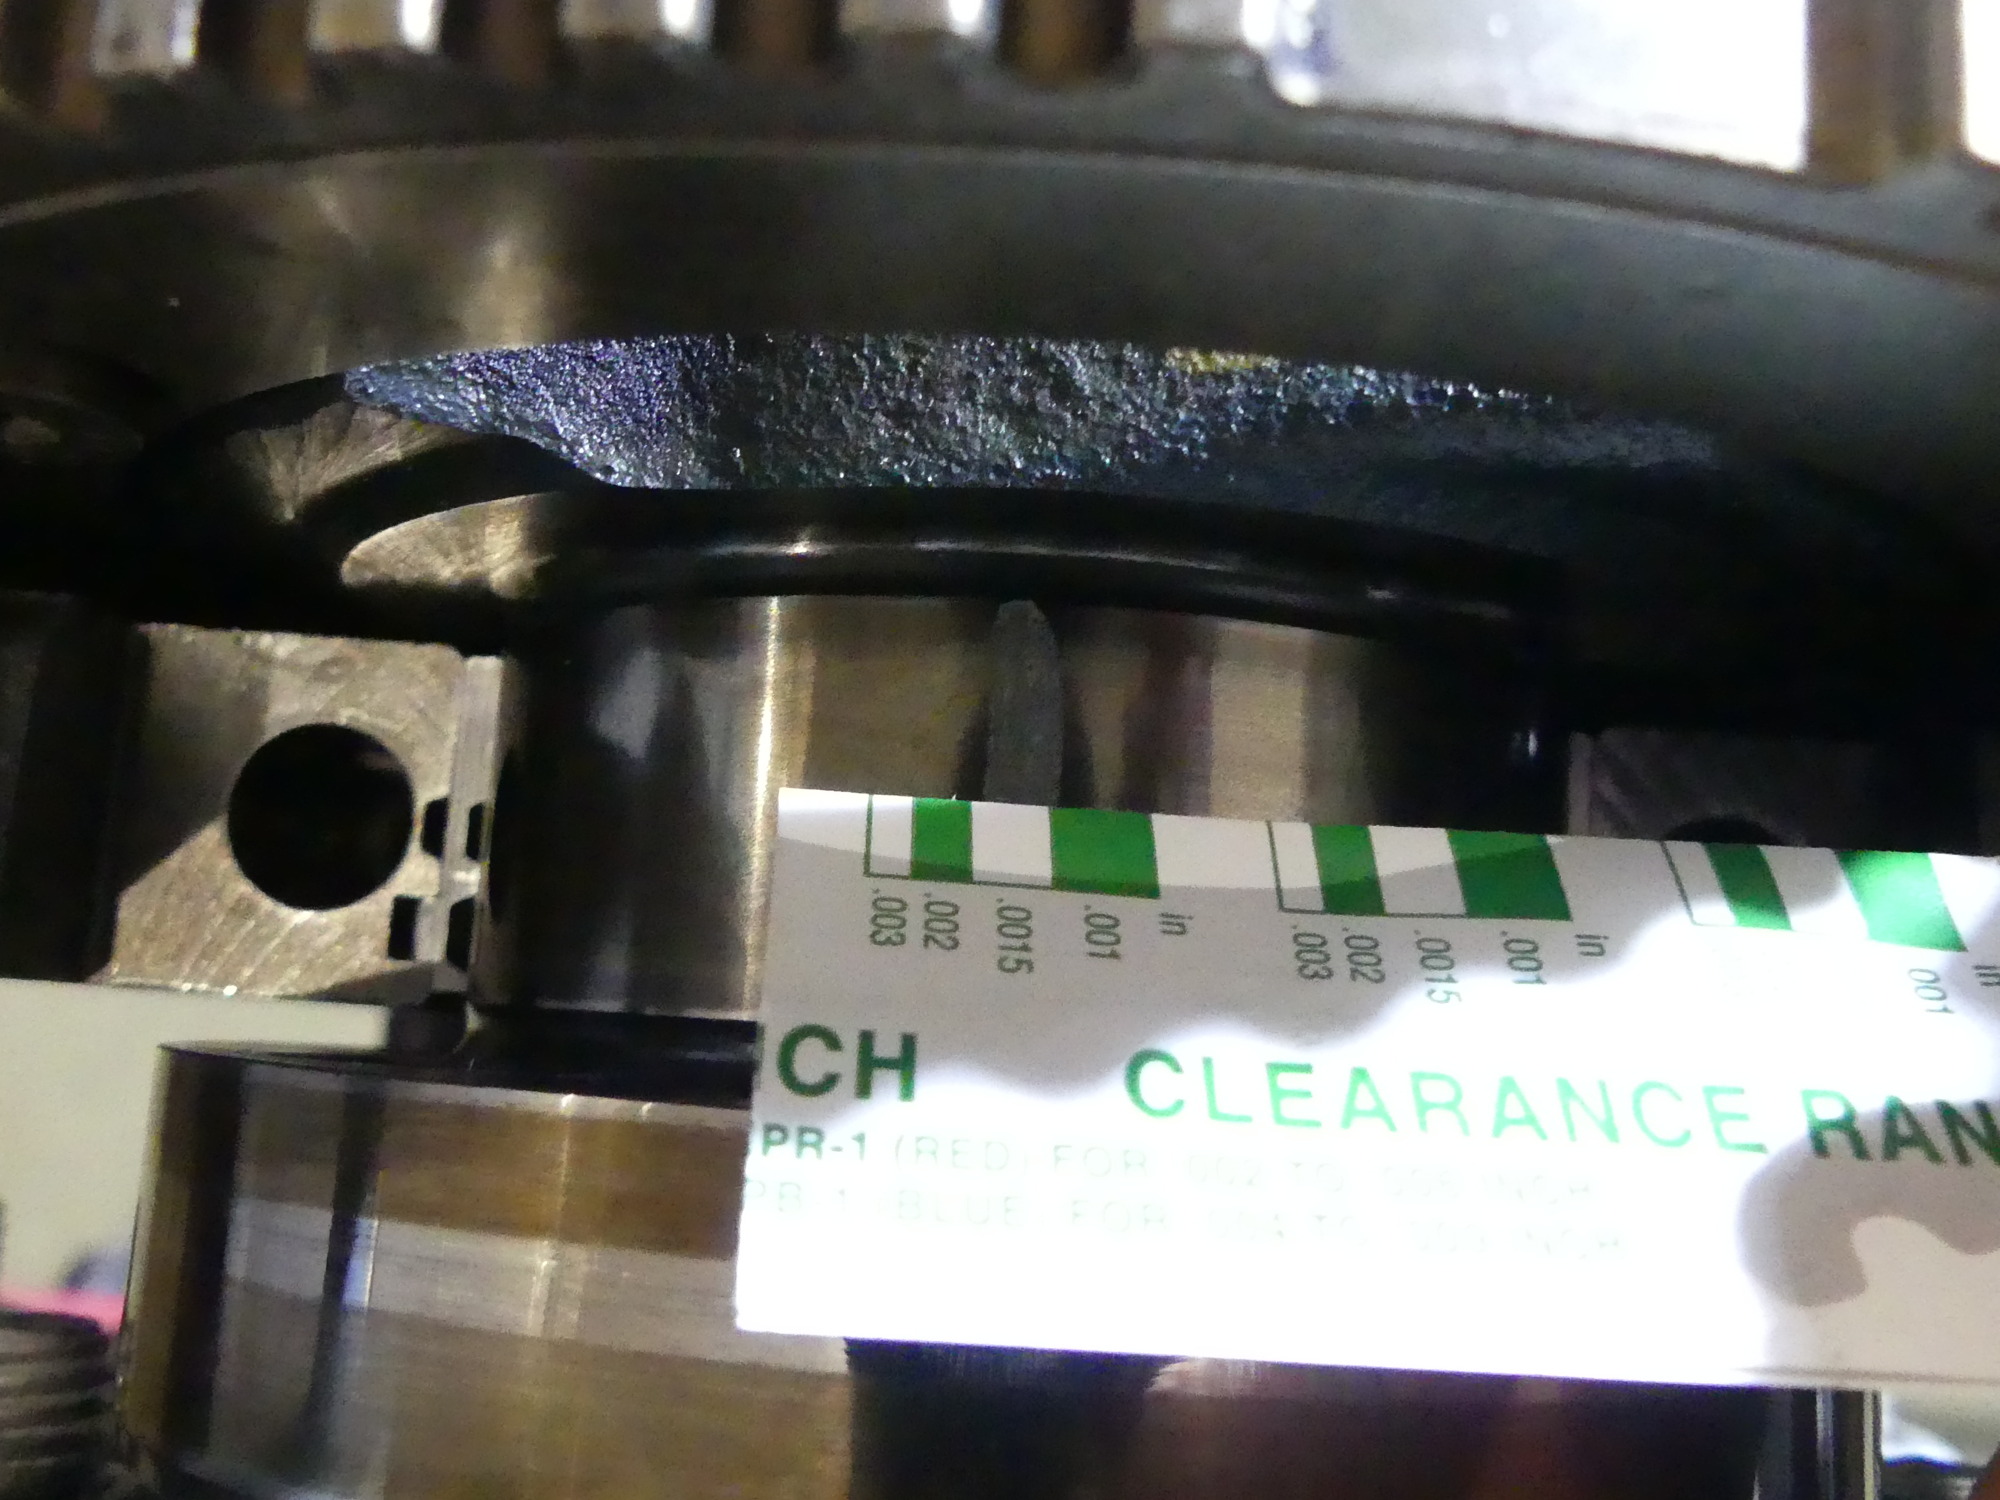
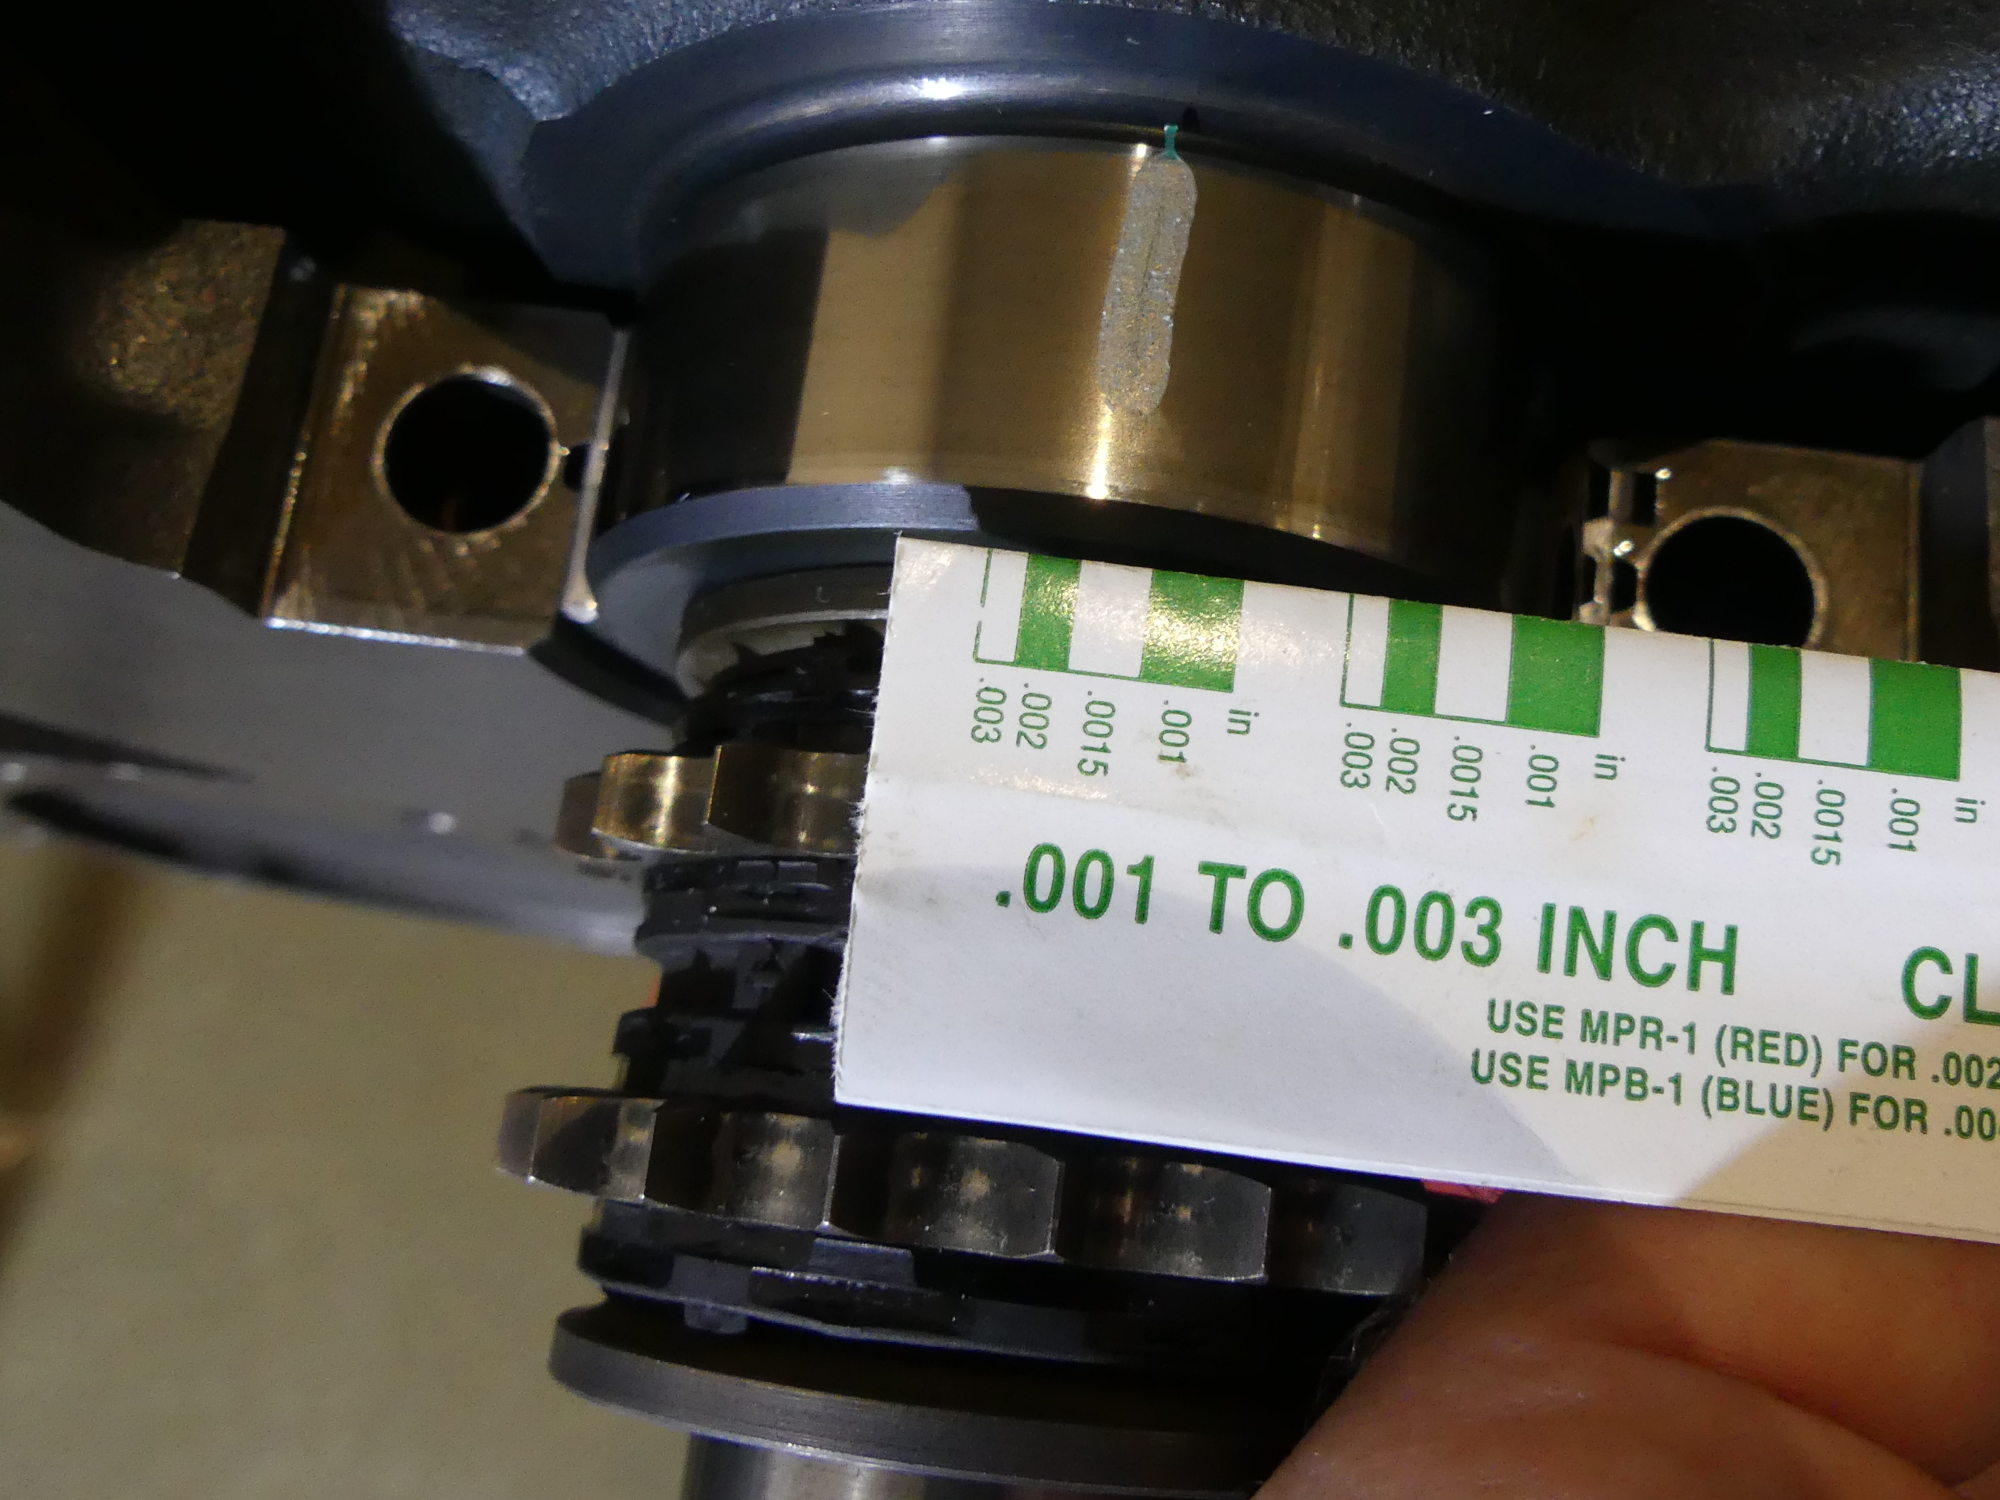 The main #1 measured at 2.3613 and produced a bearing clearance estimate of 1.5 thousandths according to this plastigauge test. This is exactly in the middle of the clearance range specified by BMW. |
 This shows the plastiguage test results for main #4, which like main #1 measured at 2.3613. Although a less than ideal perspective, this shows a plastigauge width corresponding to 1.5 thousandths. |
 Main journal #7 measured 2.3612, or a bit smaller than #1 and #4. This is reflected in the slightly thinner plastigauge result and likely represents a clearance of 1.6 thousandths. |
Still concerned about wasting $300 for a complete set of main bearings I wound up installing half the set in positions 1, 4, and 7 so I could plastigauge these shells and determine if I was in the ballpark. I chose these three positions to properly support the crank, particularly in the center. I used the original bolts for this test and torqued them to the specs provided in TIS (15 foot-pounds plus 50 degrees). This naturally required me to use the Brownline digital torque angle gauge for the first time and I quickly developed a few opinions about it that I'll talk about later. After the caps were torqued I removed each one and inspected the plastigauge. The end result? A surprisingly consistent 1.5 thou clearance.
Although I don't know exactly what bearing clearance BMW expects these shells to ideally produce (BMW merely publishes a range of acceptable clearances), 1.5 thousandths is precisely in the middle of the bearing clearance tolerance of 0.8 to 2.2 thousandths. Lacking any other information it seems appropriate to run the clearance in the middle of the range. But even if it were beneficial for some reason to run closer to 1 thousandth, I don't have that option as I'm already using the "tightest" bearings available in the standard range.
So what did I learn today?
-
I confirmed the accuracy of my 2-3" micrometer, the 2" standard provided in the kit, as well as my measurement technique, which involved relying on a single click of the clutch.
-
My machinist gave me bad information. I expected my machinist to return my refinished crank with a complete set of data describing its condition before and after the polishing process but, lacking that data, he told me what I wanted to hear. My measurements and plastiguage tests clearly contradict his observation that the crank was "still in the yellow bearing range". Had I blindly relied on his word I would have wasted time and money on a set of yellow bearings.
-
I'm convinced that while my crank may have started life in the yellow range, normal wear plus the polishing process has brought it into the white bearing range. This represents a removal of a mere 5 ten thousandths of material, which is pretty amazing considering the age of the crank. Put another way, if I bought a new crank from BMW today I could receive a yellow, green, or white crank, so after 270K miles in service my crank is still effectively "new".
-
Measuring the ID of bearings using a bore gauge will mar the finish of the bearing. I'm not sure if this officially wrecks the bearing or not. Further, measuring the ID of the rod bearings with a bore gauge with the rod fixed in a vice does not seem to produce valid data, perhaps because the bearing is not fully supported by the journal. I know people measure the ID of the bearings with a bore gauge all the time, but this didn't work for me.
So the plan now is to proceed with white bearings on the mains. I am still waiting on one of the thrust bearing shells so I won't be able to install the crank permanently until the bearing arrives next week. I am also planning to order a new set of standard rod bearing shells to replace the ones I trashed while attempting to measure them. I may have just removed a superficial coating designed to protect the bearing in storage but I'm not sure, and frankly, I'm not willing to take a chance to save $25.
Next Up
I really wanted to wrap up the bearing selection process by plastiguaging one of the rods today, but I can't do that until I've assembled the pistons and rods. Why? Because there's nothing to hold the rod steady while torquing it and any movement will invalidate the test. So the next task is to assemble the pistons and rods, and then file the rings for all the cylinders. Once those assemblies are ready I'll plastigauge the set and continue with the bottom end assembly.