


Saturday, April 21, 2018
Lock Assembly Diagnosis and Repair
After several months of being forced to lock and unlock the vehicle using the trunk or passenger door lock I decided it was time to diagnose what happened to my driver's door lock assembly. Once I removed the door panel I looked inside the door at the door pull / lock assembly I installed eight years ago. I inserted the key in the door and watched as I rotated the key. Sure enough, the tumbler rotated but the concentric component with the cam that normally triggers the microswitch to unlock the car remained stationary.
At this point the problem was that nothing looked out of the ordinary. I could see no broken / loose operating rods or bushings as I originally assumed. I quickly realized that the original lock assembly I had saved mostly as a trophy of sorts would come in handy here. After a few minutes of digging through parts in my garage I found the unit and took it back to the vehicle for comparison. Looking at the parts side by side it took all of about two seconds to realize what had happened.
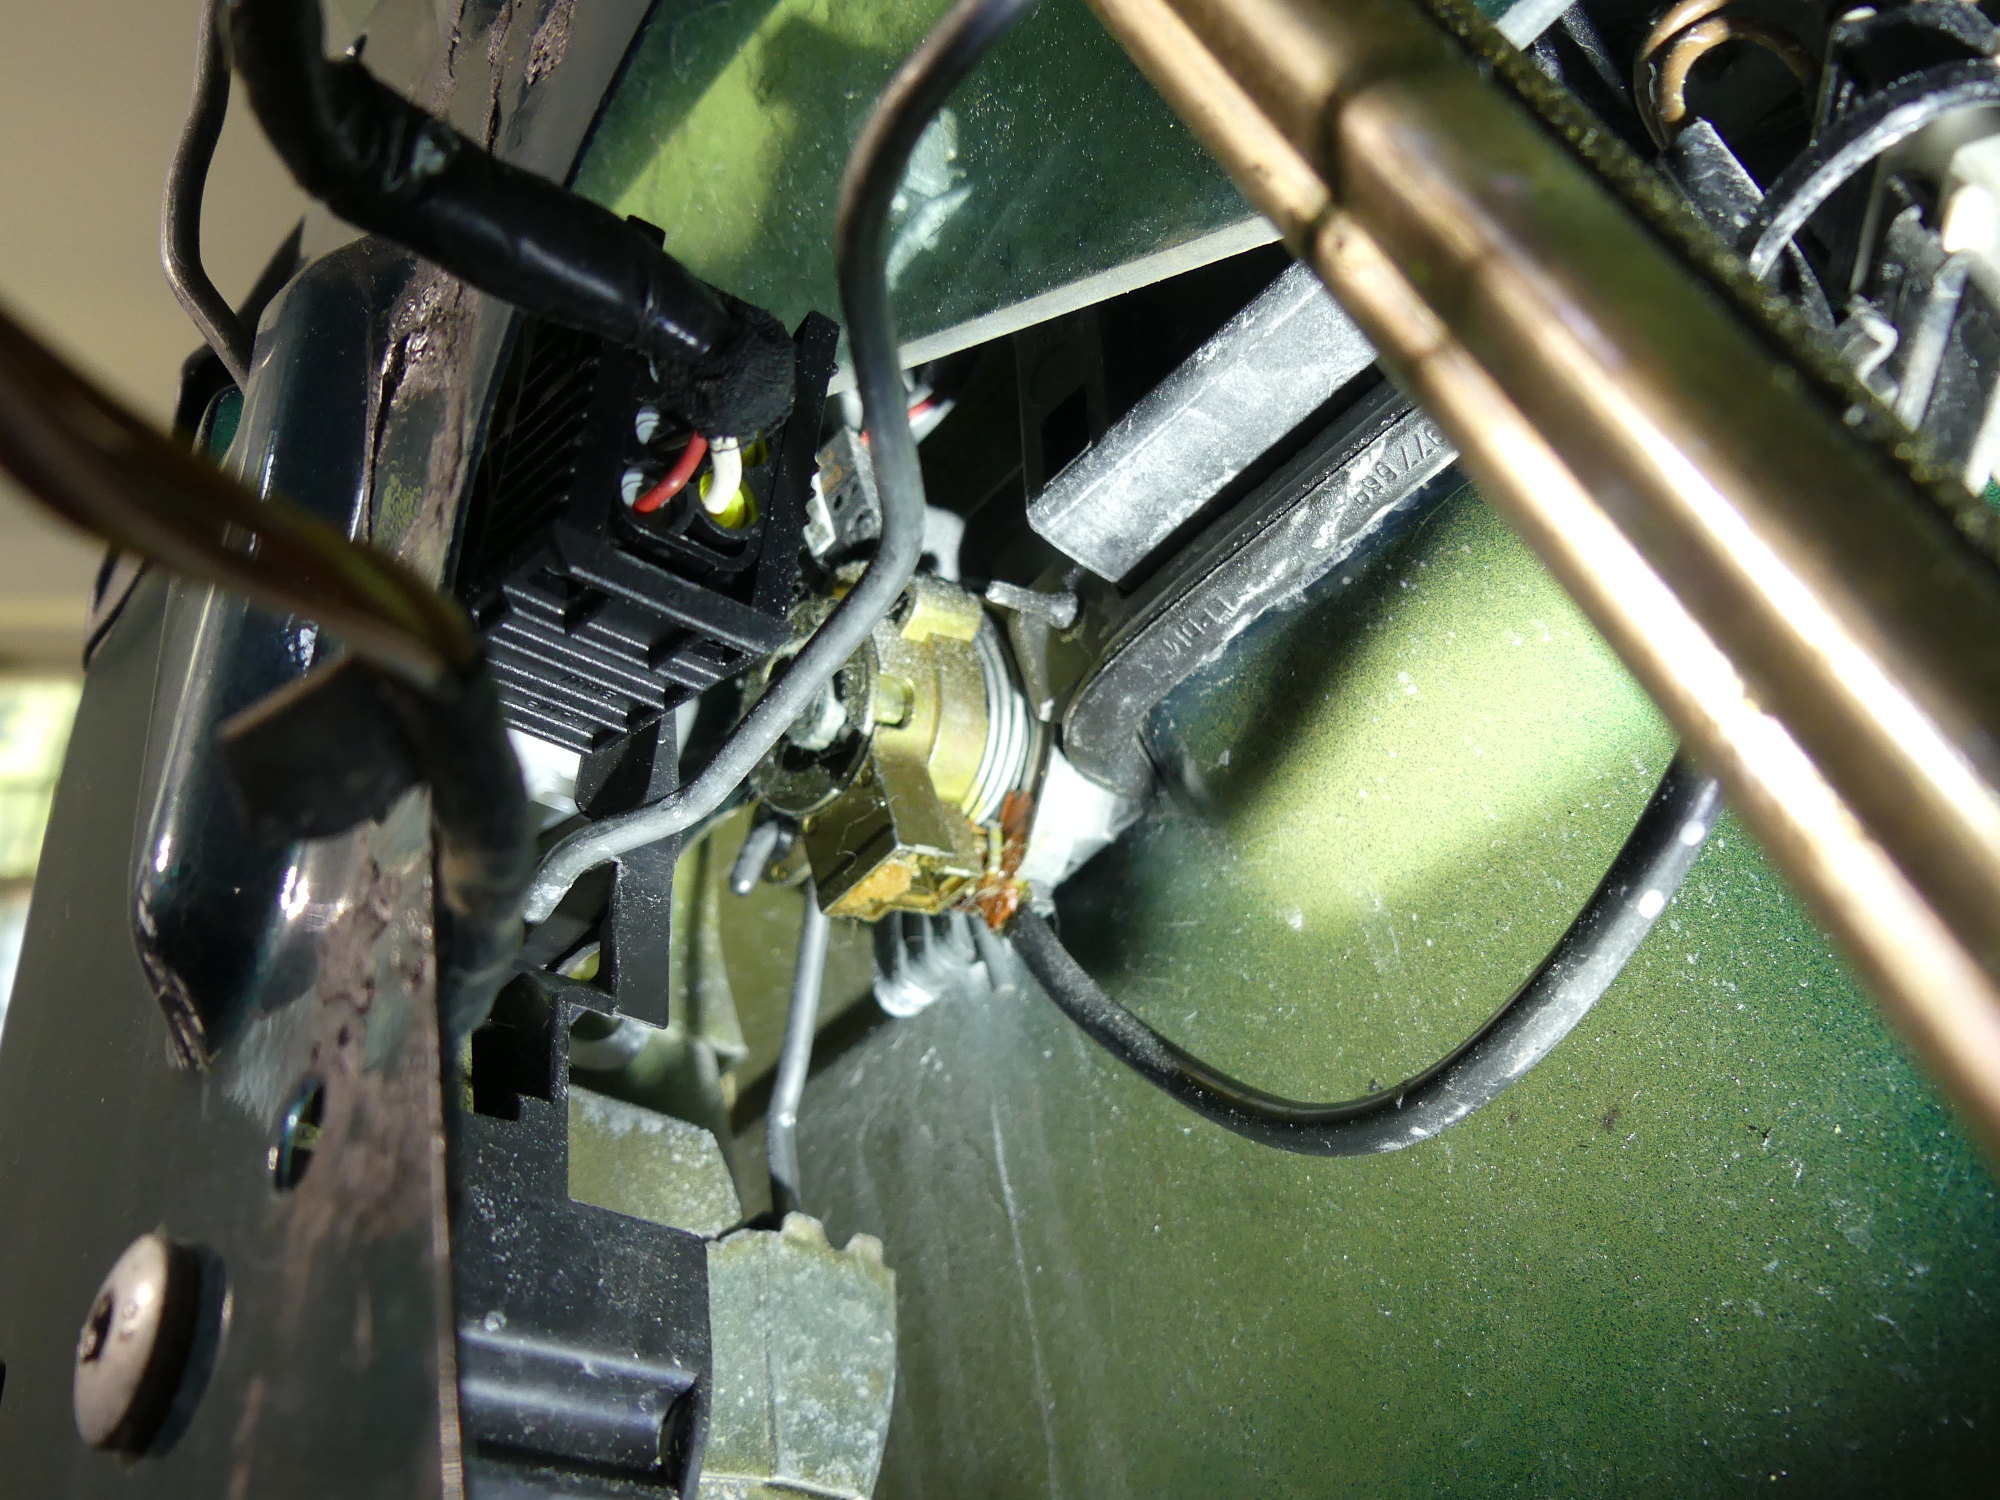
There is a small T-shaped metal cover on the bottom of the lock assembly concentric component that is snapped or pressed into position. Behind this cover is a chamber into which a small metal block slides. This block is machined with a hole on one side that accepts a spring. When assembled that spring is compressed against the rear face of the cover and this forces the block into a keyway milled into the tumbler. This effectively locks the tumbler and concentric component together so they rotate as a unit when the key is turned.
Reconstructing the events of that icy morning when the lock failed I assumed that water must have worked its way into the lock assembly and later froze. When I rotated the lock some of that ice must have worked its way between the tumbler and the block, forcing it farther outward / toward the cover. When I turned the key this pushed the block out farther than usual and this pushed the cover off the assembly, at which point the block, spring and cover dropped to the bottom of the door, leaving the tumbler to turn freely.
I must admit to wasting a few moments examining the covers from the two lock assemblies and questioning the parentage of the engineers that designed this thing. A rational person would have realized that the cover is under spring pressure and therefore designed it to slide into slots milled into the base assembly and secured it with a screw or clip. But no. That would have lengthened the assembly time by all of four milliseconds so they built this failure-prone piece of shit.
When I tried to reinstall the cover I found it would not stay in place, particularly at the bottom of the "T" that was under spring pressure. A close inspection of this part showed a slight bow or bend across the "T" in the cover. For this reason I installed the cover from the original lock assembly and then used a drift to lightly tap the cover into place inside the door to ensure it fully seated. A few tests of the key in the door lock confirmed my solution worked -- at least for now. If it falls out again it may reveal that the mating assembly is bent / damaged as well in which case I will be forced to remove the entire assembly and bring it to a local welder to tack the cover in place permanently, as I see of no other way to address this obvious design flaw.
Video: Lock Fix Highlights
Another Window Motor Replacement
When I was commuting on a daily basis with this car I noticed every three years or so the driver's door window motor one touch feature would stop working and the window would randomly stop in two different places (1/3 and 2/3 the way up, respectively). Despite recognizing these as symptoms of a failing motor I once waited too long to replace the motor and it died entirely. This made its replacement a lot more annoying, as I could not use it to aid in repositioning the window and regulator as required.
Since that time I have made it policy to replace the motor relatively quickly after the "hesitation" symptoms start, but I must admit to a serious case of procrastination this time around. The driver's door motor began exhibiting hesitation symptoms in late 2013, at which point I bought a window motor. Unfortunately by that point cold weather had arrived and I postponed the work simply because I didn't want to do the job out in the cold. Then the following spring I quit my job to build my own company. That fundamentally changed my priorities, and I wound up working on the car only when absolutely necessary. Fast forward to today.
While the driver's door was apart to repair the lock assembly I decided this would be an ideal time to replace the window motor. I managed to complete the repair by swapping the motor using my "optional" technique which allows replacement of the motor without completely removing the regulator from the door. Although somewhat of a pain in the ass this process does save time. This time I wound up pulling the regulator away from the door a bit too far and this cracked both sliders. However, as I always replace the sliders along with the motor and had the sliders in stock this wasn't a big deal.
Unfortunately, what I didn't have in stock was the half dozen door panel fasteners that had broken or otherwise become crushed, leaving the door panel loose the last couple of years. A quick trip to the dealer solved that quandary. And although I paid nearly $3 for six tiny pieces of plastic, upon seeing me my technician told me to grab some parts from his desk he saved for me during a recent parts department purge so I came away with about $30 in parts including an internal door pull trim, a top radiator clamp and a brake wear sensor. He also gave me another one of his latest Aeroplane magazines, which I always enjoy reading. So, all in all, a worthwhile trip.
During the assembly process the one thing I did differently this time around was lube the window motor bushing, regulator, guides and sliders with CV2 synthetic grease rather than spray-type lithium grease. I'll have to wait and see if that was a good idea, but I surmise the wider temperature range of the synthetic grease should keep things lubricated well enough. I then hopped in the car and closed the door as required to reset the window travel limits and, finally, reinstalled the door panel. To wrap up the job I inserted my key into the driver's door one last time and confirmed that the doors locked and unlocked on command.
Mileage: 268980