


BMW E36 HK Audio System
Speaker Upgrade DIY
Page 1 of 2
Spurred by a need to replace a failed midrange driver, I decided to
replace all of the speakers in my E36.
Introduction
This article explains how I replaced the speakers in my 1998 HK-equipped E36 using aftermarket drivers.
Before we get started, some background is necessary. The HK system uses an external, trunk-mounted amplifier that contains passive crossovers. This means that the speaker outputs of the amp are not full range signals so you can't just plug those into a component set with its own crossover and expect to get something listenable. If you intend to keep the amplifier and simply replace the speakers (definitely the simplest solution), that limits the number of options for replacement drivers. See "Choosing Drivers" below for more.
There have been a couple revisions of the audio system over the production run of the E36. Early systems came with a complement of round drivers mounted to the rear deck in a large square enclosure, while later models like my 1998 came with a smaller oval enclosure consisting of a 6x9 driver woofer and 2" component tweeter. You can easily determine if you have 6x9 drivers by sticking your head in the trunk and looking up at the rear deck. A black plastic oval enclosure indicates you have 6x9s. If that's the case, you can follow this DIY verbatim to replace the drivers.
If your vehicle is equipped with the older square boxes, you will have to buy some aftermarket mounting adapters as buying the BMW adapters pictured as provided in later vehicles is not an economically viable solution unless you can lift them from a parts car or a junkyard. I recommend using the adapters sold by BSW with one caveat: they do not provide a mounting location for a component tweeter. If you need to use these adapters, that means you have a few options:
- Eliminate the tweeters and accept that you'll only hear from around 500Hz and below out of the rear deck. Some would suggest that is not only perfectly acceptable, but desirable. Of course I might disagree, but I won't debate the relative merits of that solution here.
- Find a 6x9 component set that mounts its tweeter in the center of the woofer like a coaxial, but routes its signal wires down to a separate set of terminals or binding posts so you can splice those with the outputs from the HK amp. The MB Quart reference series component set (RCE 269) did exactly this. I'm not sure that the set is available anymore, or if an equivalent set from MB Quart or another manufacturer is available. Let your fingers do the walking.
- Rig up a tweeter on the rear deck, or possibly on a bracket fabricated to fit over the BSW adapters. Be creative.
Choosing Drivers
- Front Tweeters: Most 3/4" and 1" units should work. The Polk dB1000 1" soft dome unit is shown and is an almost perfect press fit. It also sounds great, as its presentation is more up-front than the OE unit but not glaring or annoying like some aftermarket units. "Smooth" would be a good word to describe the soft dome unit's performance.
- Front Midranges: You have two choices if you want to retain the HK amp and the 3-way component system: buy the OE units from BMW for $160 (pair) or get the custom replacements available from BSW for $100 (pair).
- Front Woofers: 5.25" will fit without modifications, but the bolt pattern is not a perfect match. Additionally, the driver should be as shallow as possible since depth in the kick panel is limited unless you remove the sound deadening material (not recommended). Pictured is the Polk 5510 from one of their 2-way component sets.
- Rear Tweeters: CDT units are pictured and fit the BMW adapter nicely. Make sure the driver you choose has a surface-mounting option and the diameter of the mounting flange is 2" or more. For this reason a 1" tweeter will probably fit better than a 3/4" unit.
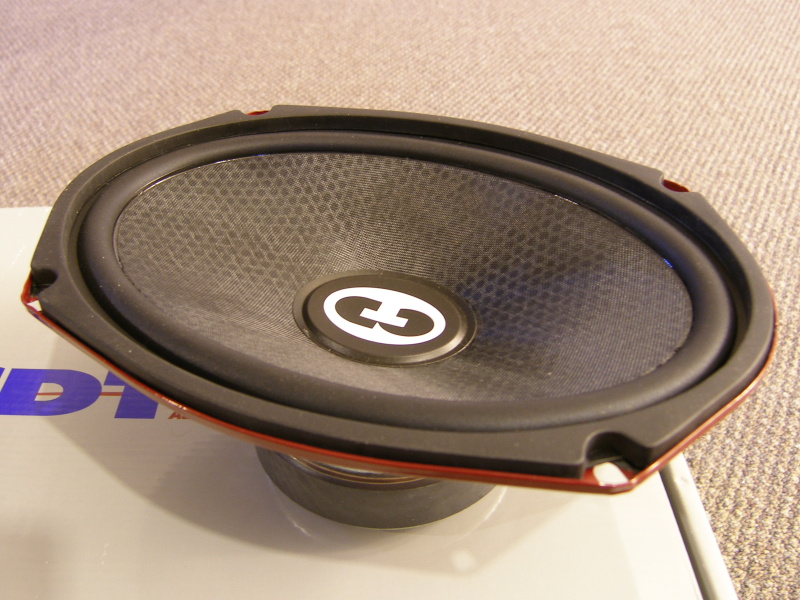
- Rear Woofers: The CDT 6x9 units are pictured and are a perfect solution for this system as they are designed for infinite baffle operation.
No matter what drivers you choose, if you intend to retain the HK amp, keep in mind that running any driver without the crossover designed for it may result in poor sound quality or, in a worst case scenario, damage to the driver. This is especially critical with tweeters and Polk units in particular. I've blown my share of Polk tweeters in the home to know better.
Prerequisites
Replacement of the speakers in the E36 requires the following:
- Speakers of choice as outlined above.
- BMW or BSW 6x9 adapters as required.
- 8mm socket to remove selected bolts on the kick panel.
- Right angle philips screwdriver or socket with ratchet. You'll need this to remove the screws holding the speaker assembly to the rear deck.
- Some extra door panel fasteners. Get the ones with the small foam washer for maximum leak protection. These are used in later model cars but are compatible with the E36.
- A tube of construction adhesive or a couple sets of two-part epoxy compatible with plastic and fiberboard applications.
- A handful of crimp or solder-on terminals that fit spade connectors on speakers.
- A handful of mid-line splice connectors to aid removal of the drivers in the future.
- A tube of 5 minute epoxy (only required to repair the door panels)
- Roughly 5 hours.
Front Speaker Replacement
- Remove the door panel. By now there are a ton of door removal DIYs on the net so I won't belabor how to do that here. I will point out, however, that a door removal tool is essential to prevent damage to the door panel. Unfortunately, even if the proper tool is used, due to the poor quality of the glue used in the manufacturing process the mounting tab or storage pockets may separate from the door panel. In this occurs, the parts must be glued to the door panel before the panel is reinstalled on the door. The best glue to use for this (courtesy of my technician) is 5 minute 2-part epoxy.
- Remove the midrange from the grill assembly. Remove the midrange and grill assembly from the door panel by unscrewing the locking ring from the back of the door panel. Once it's removed you'll see that there are two locking tabs that must be depressed with a screwdriver to release the driver from the grill assembly. You'll reuse the grill assembly, so do yourself a favor and protect the grill side with some blue painters' tape. It would be a shame to scrape that up and have to buy another one at $80 a pop.
- Install the new midrange in the grill assembly. The BSW units were a snap fit, but I found them a bit loose in the grill assembly. To prevent vibration I used a hot-melt glue gun to secure the driver to the grill assembly. I found it a bit difficult to get the glue in the right place because the gun was too big to fit into the recess between the driver and the grill, but tilting the grill assembly at just the right angle allowed the glue to fall right into place. Hot melt glue cools and solidifies fairly quickly (which is good or bad depending on how you look at it...if you don't know what I mean, you will), and I found I didn't need much to secure the driver.
- Remove the tweeter from the grill assembly. The tweeter assembly may be removed from the door panel in the same manner as the midrange. When it came to release the driver from the grill it was a bit more involved as I found my tweeters secured to the grill with a bit of glue. I broke that free with a screwdriver and then popped the tweeter out of the grill.
- Install the new tweeter in the grill assembly. Before the Polk db1000 tweeters would fit nicely into the grill assemblies I had to grind down the locking tabs on the grill. I used one of the abrasive stones on my Dremel. Literally five seconds per tab is all it took and the tweeters press fit right in like a glove. One note of caution, though -- when I mean press fit, I mean press fit. It's not like I couldn't remove the drivers if absolutely necessary, but it was pretty obvious the drivers wanted to stay put. Make sure you're ready to install them for good and push them home. As you will note in my pictures, I did not push them all the way into grill, and that was intentional so I could use a screwdriver to pry them out of the grills at some later point if necessary. I applied a few small beads of hot melt glue to secure the driver because I had the gun there ready to go, but it wasn't strictly necessary.
- Prepare the car's wiring to accept the aftermarket midrange and tweeter. The bad news is you'll need to cut off the factory connectors. The good news is Polk provides pigtails off of their driver and BSW provides some wires with pre-crimped, polarized spade connectors that are a perfect fit for their drivers. All I did was cut the pigtails to an appropriate length (about 18") and splice them in with the stock wiring using some mid-line splice spade connectors to facilitate later removal of the door panel. All wiring was bell spliced and covered in heat shrink because I can't stand butt splice connectors, but use what you want in your car.
- Remove the kick panel. Removal of the kick panels requires removal of the footwell ceiling panel. Both panels require removal of two screws and the wiring associated with the footwell lighting. All in all pretty easy. Then, to remove the driver's side panel, unfasten the hood release and set it aside. Finally, remove the kick panels themselves by pulling them aft before pulling them away from the car.
- Remove the woofer and install the new unit. Removal of the woofers requires an 8mm socket or screwdriver. Once the drivers have been pulled out of the cavity in the kick panel you may note that one of the terminals is smaller than the other. Depending on the vehicle and the chosen speakers, you may need to cut off the factory spade connector(s) and affix your own. Basic stuff, really. When done installing the new drivers, keep the kick panels off the car until you've completed system testing.
Front Speaker Replacement Highlights
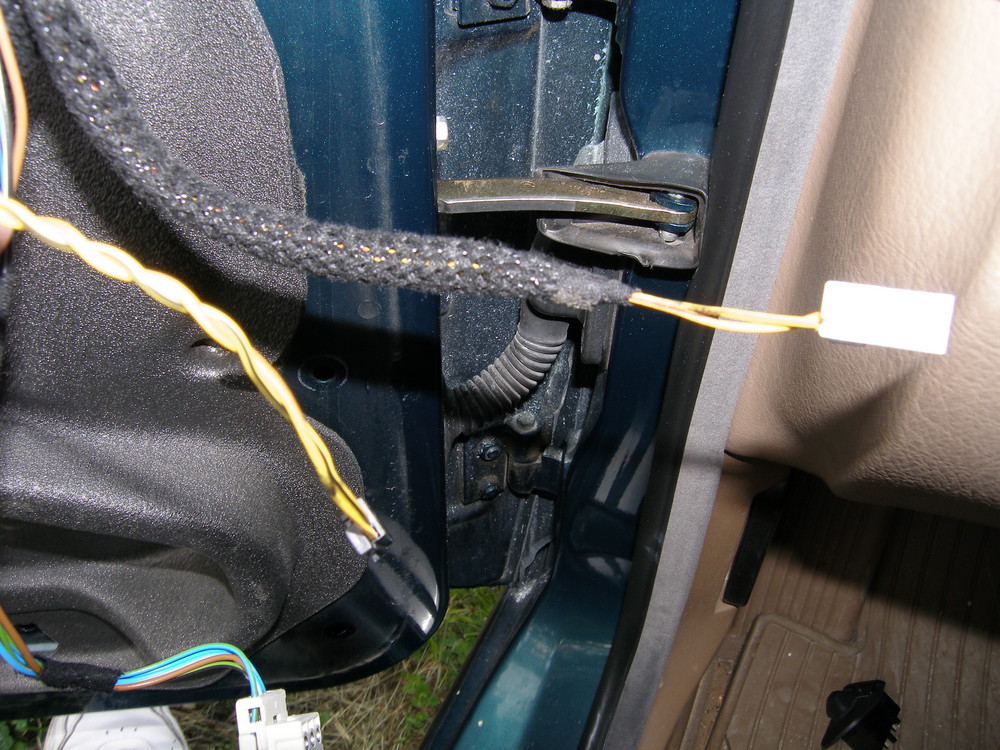
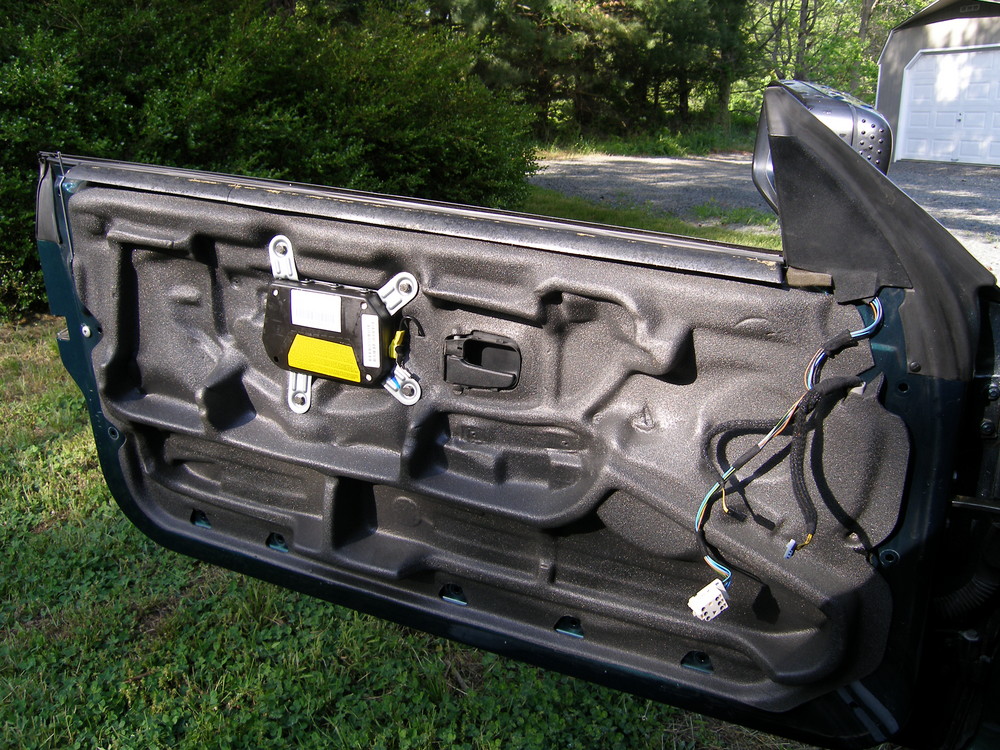 The most annoying part of this job is removing the door panel. And that long, curved black piece you see at the top of the door is why. That's supposed to be attached to the door panel, but it broke free because BMW interior subcontractors apparently don't know how to build a door panel. |
 This is the interior of the door panel. The round white clips around the perimeter fasten the panel to the door frame. The panel is then fixed to the door with three T20 torx screws. One fits through the black hole to the rear of the airbag deployment fabric, while the other two fasten through holes in the door handle. |
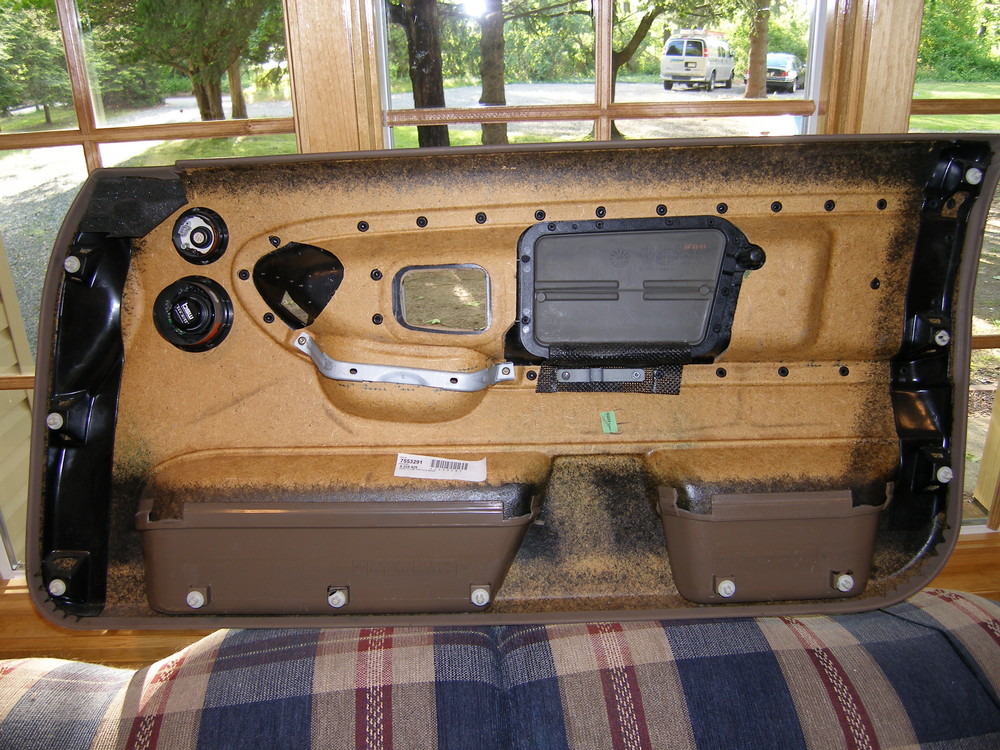
 My technician recommended I replace any damaged door panel fasteners with the newer versions that include a foam washer. This helps seal the door and prevent moisture infiltration. I ordered a dozen and replaced them as needed. |
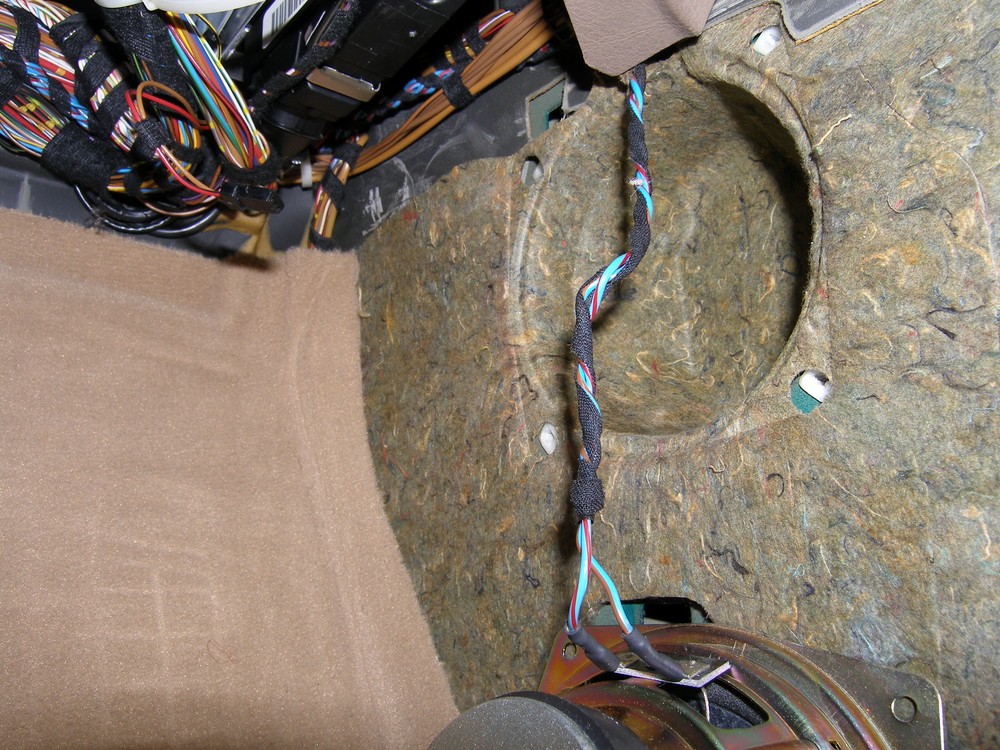
 The original wiring is sheathed from the factory and terminated in what is obviously a proprietary connector. BMW generally uses brown to mean "ground" or in this case, "negative" so you can use that as a guide if your wiring doesn't look like this. |
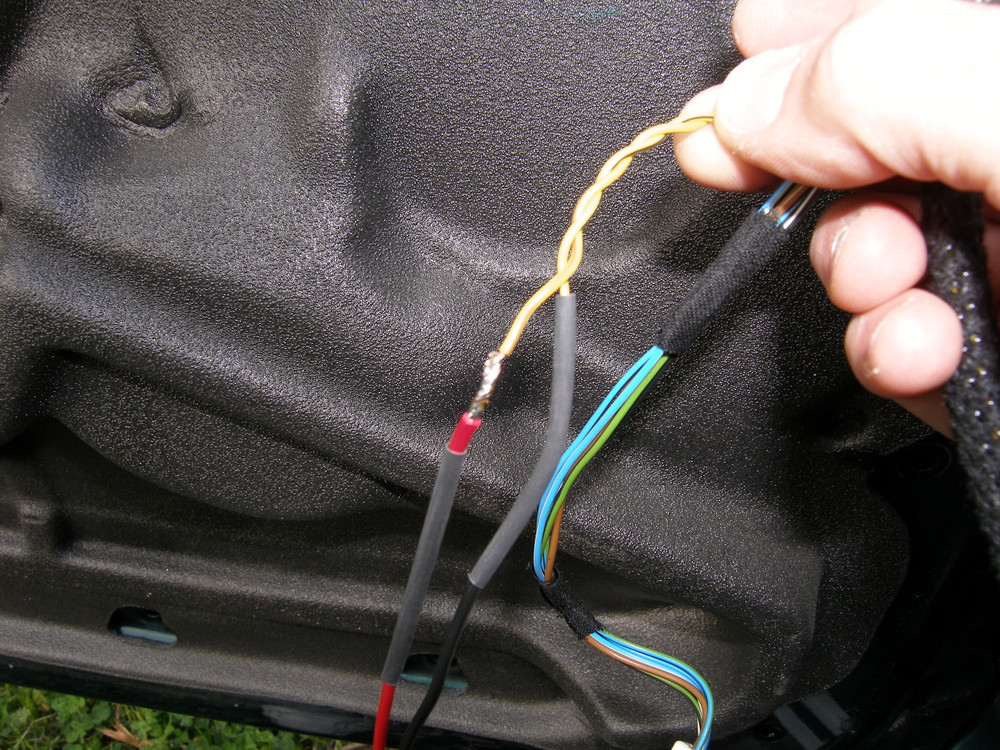 While I would normally try to save all of the OE wiring and connectors it's just not possible in this case. I make it a practice to bell-splice, solder, and heat shrink all electrical connections in vehicles so there is never a chance they will come apart. |
 A screwdriver can be used to press the retaining tabs in enough to pop the driver out of the grill. The midrange driver that failed (not pictured) had a broken surround. All things considered, these look pretty good for nine year old drivers. |
 BSW sells these drop-in replacement midrange drivers for a $100 a pair. If you intend to keep the factory amplifier, they are the lease expensive alternative to the OE parts. If you are planning to replace the factory amp, then my advice is to just buy a new component setup. |
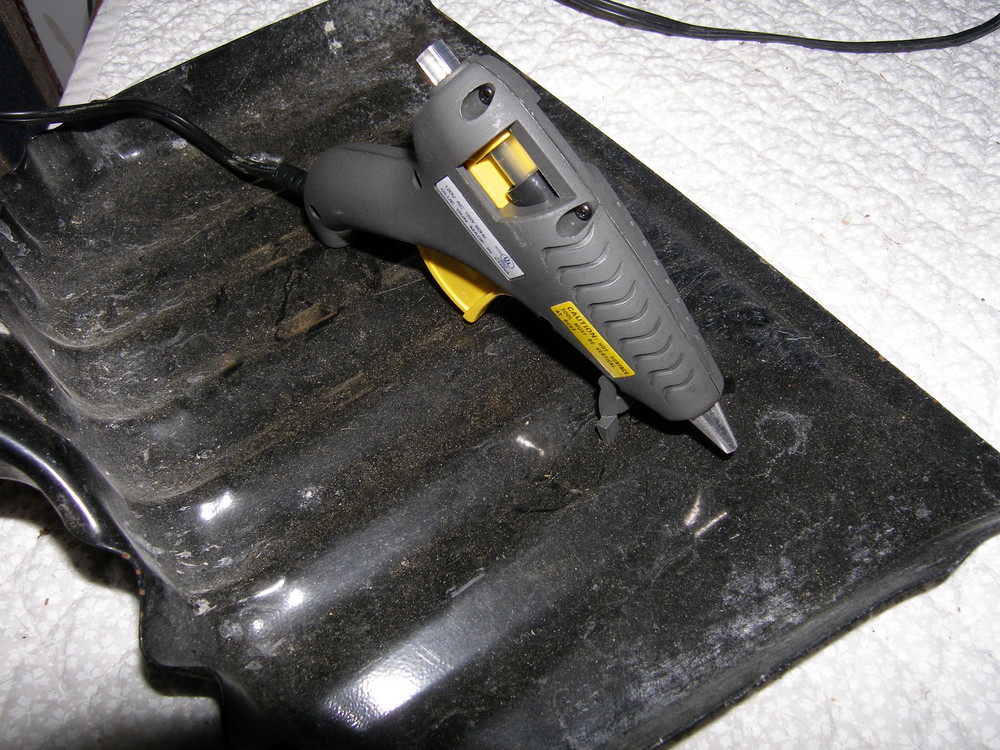 A simple hot melt glue gun is a required tool for this work. Just remember to conduct work on a non-flammable surface. I used this dust pan I had within arms reach. |
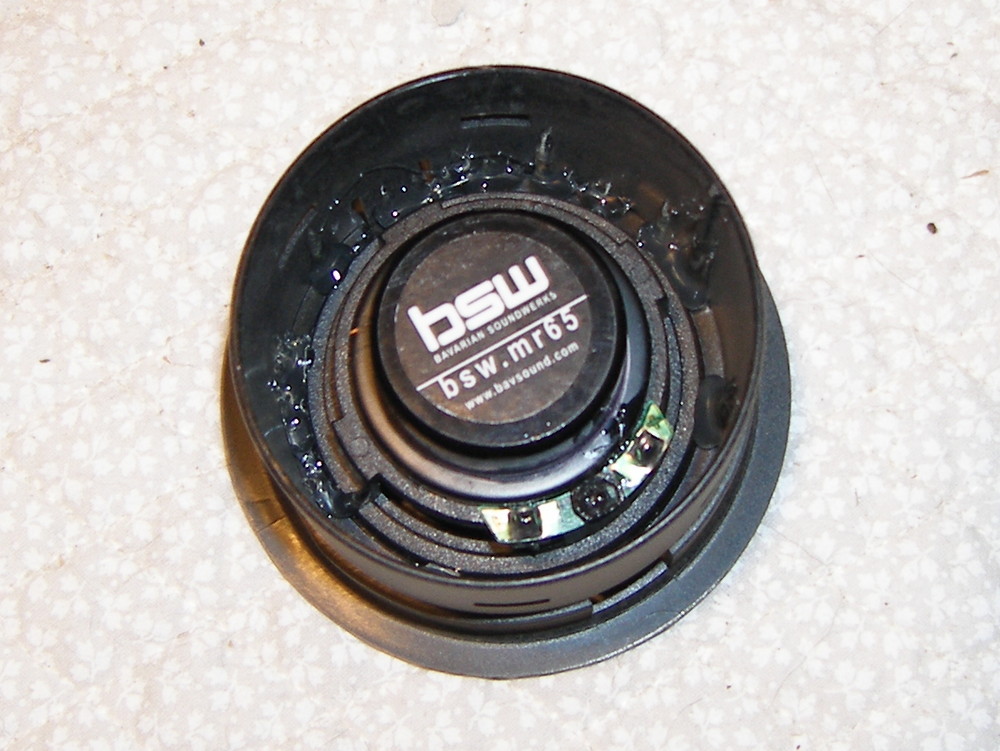 The BSW midrange just snaps into the grill but is a bit loose. I secured it with a bit of hot melt glue. The benefit to hot melt glue is that while it holds the driver securely, it's easy to remove if necessary. |
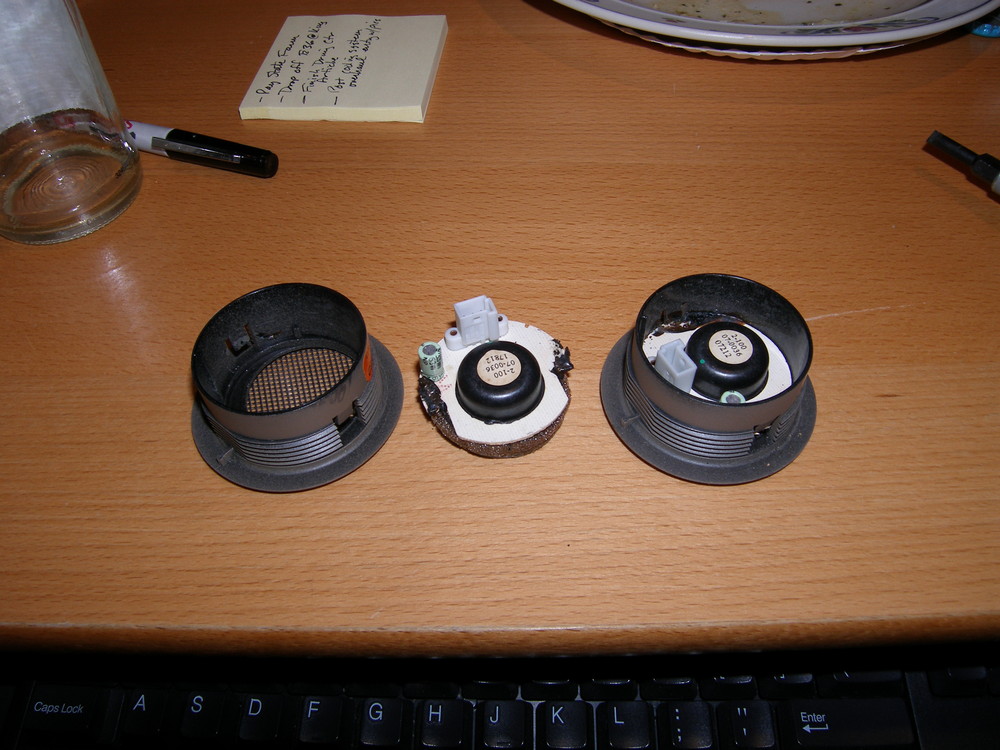 The black / brown gunk you see in the original tweeter assembly on the right is a bit of glue that must be removed to free the tweeters. The tweeter is actually mounted to a circuit board, and that board is held in the grill assembly much in the same way the mounting flange of the midrange is held in place. Use a screwdriver to release the locking tabs. |
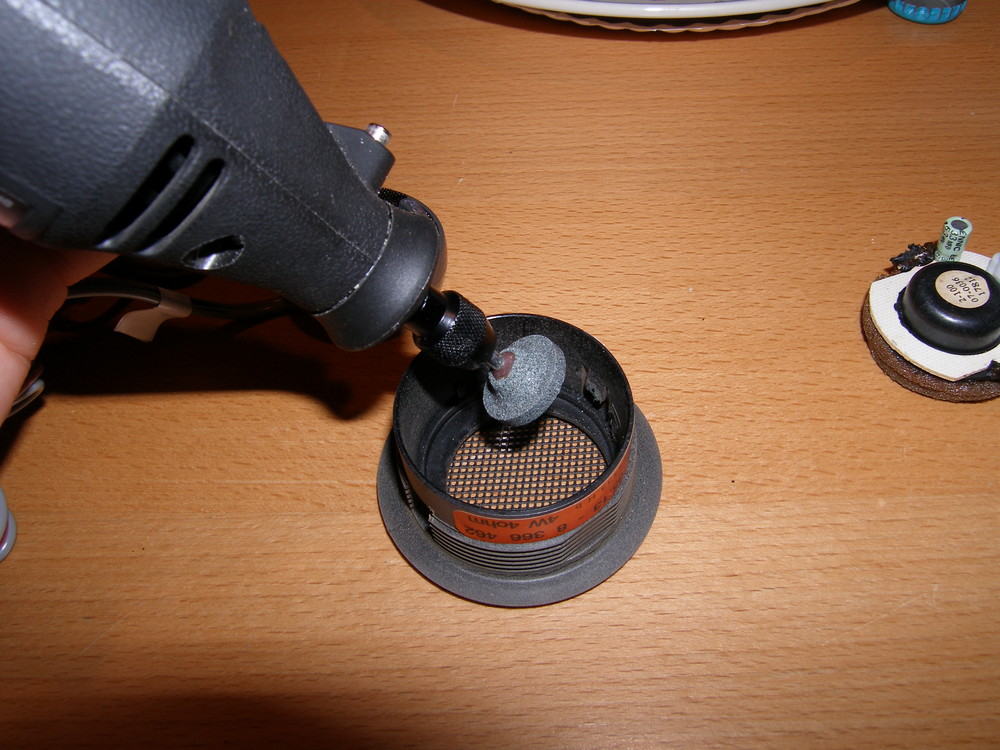 The best fit of the Polk db1000 tweeters required the removal of the very tip of the retaining tab. I accomplished this in a couple seconds of grinding using my Dremel and a stone abrasive bit. Oh, and for the anal retentive readers...no, I didn't do the grinding here on my desk. That is a dusty procedure best suited to the outdoors. |
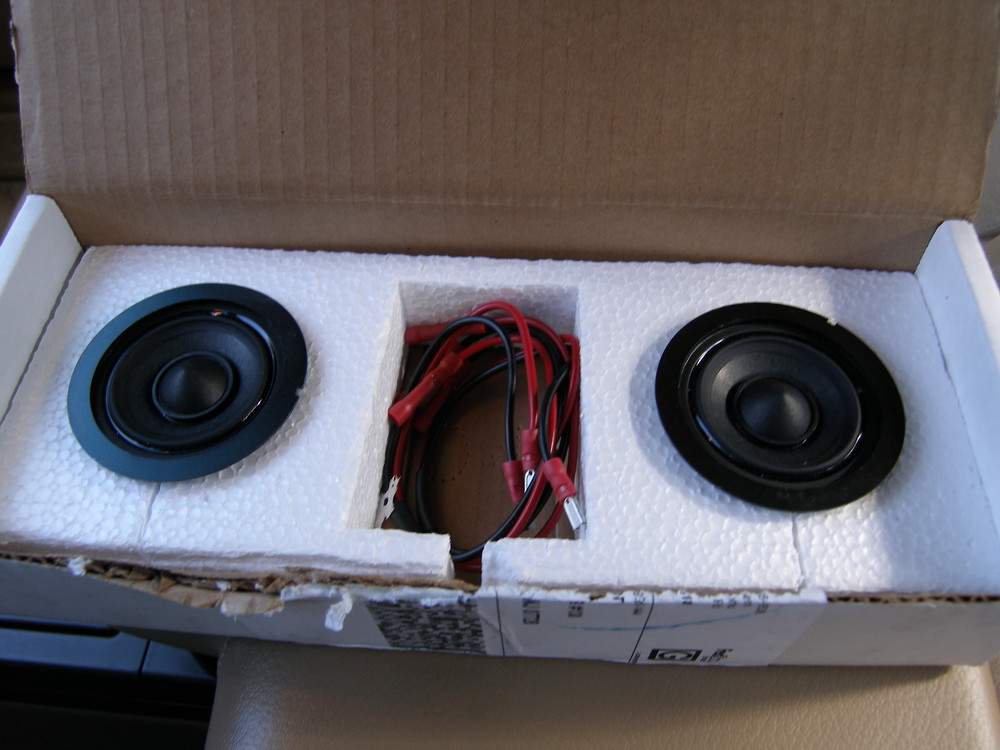
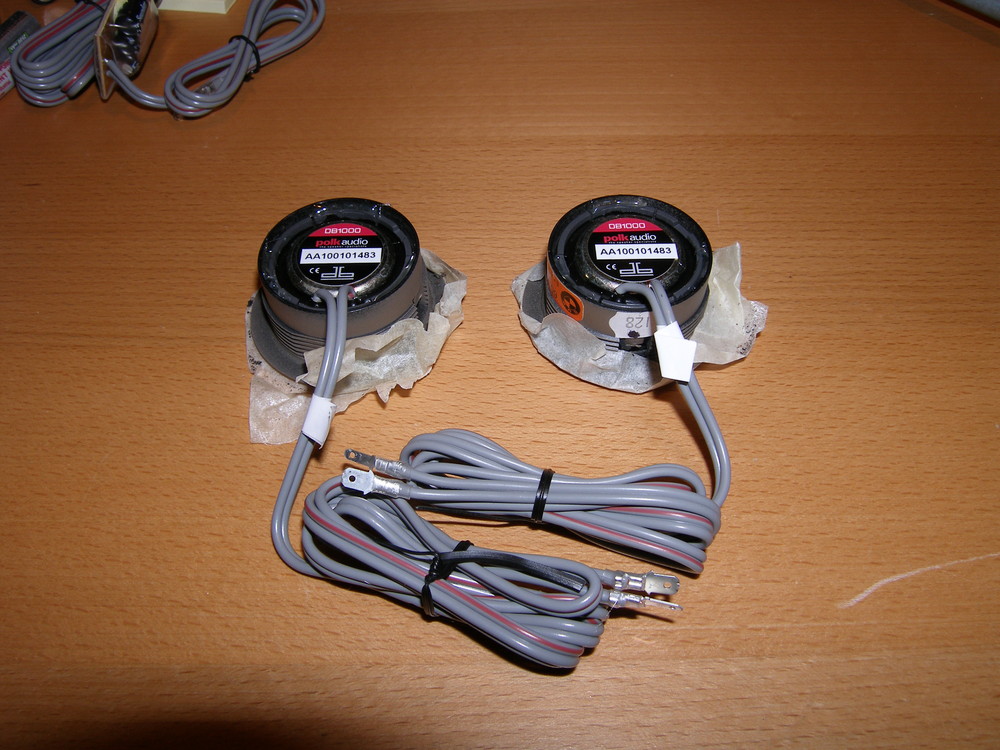 I already had some 5.25" Polk woofers hanging around from a previous project so I bought a set of db1000 tweeters. They come with pigtails and a very simple high-pass filter that operates at 4500 Hz. This is reportedly higher than the factory amp crossover, so really all I gain by using the Polk crossover is overdrive protection. You can also see tape wrapped around the grill to protect it from scratches. |
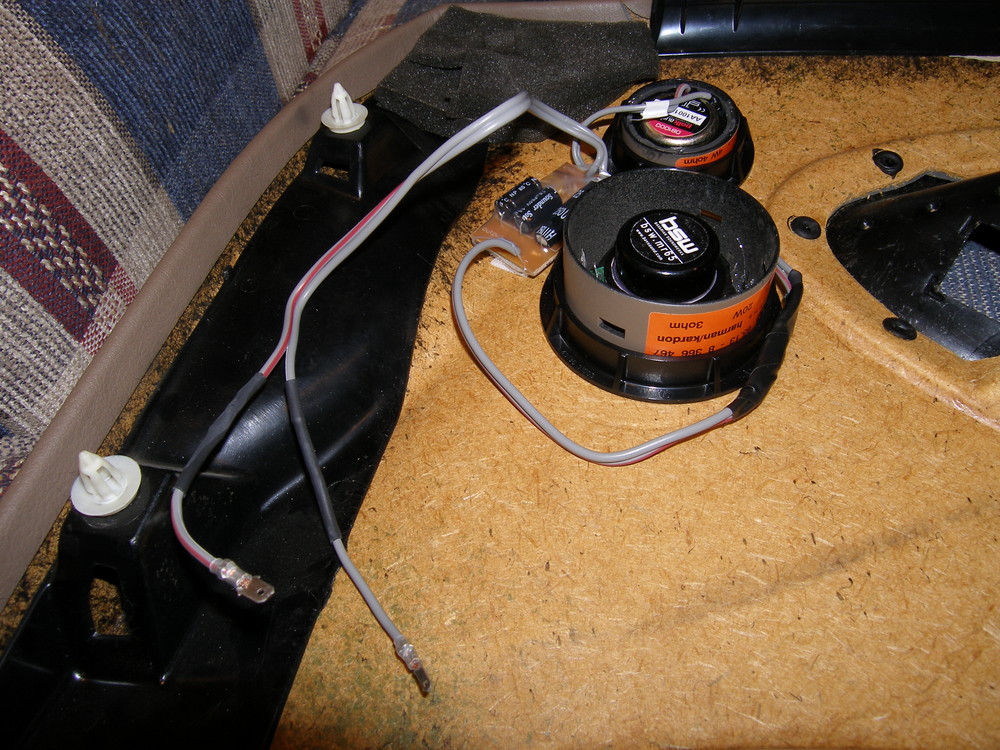 Remounting the new driver assemblies is a piece of cake. I reused the factory spade connectors but removed a bunch of excess wire I didn't want in the door, hence the extra splice. Oh, and that electrical tape covers another bell-spliced, soldered, and heat shrinked connection. This isn't a hack. Also pictured is the Polk crossover, such as it is, attached to the door panel with high strength velcro. |
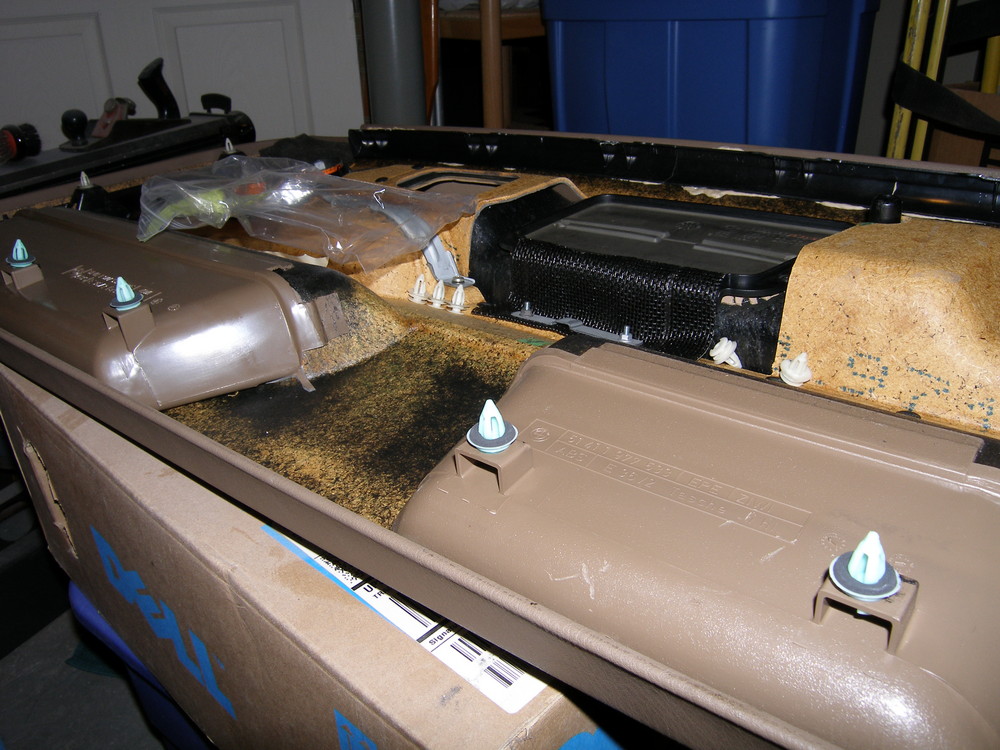
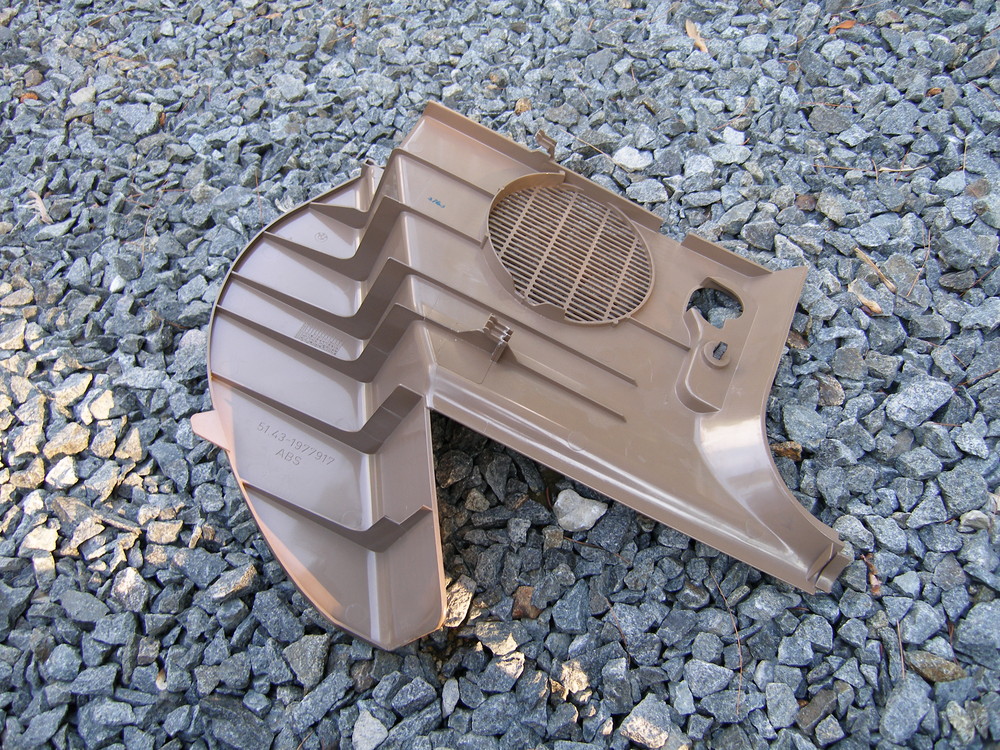 The dead pedal and kick panel are one piece. In the center of the panel you can see the clip that is only released when you pull the panel aft. To the right is the rear of the 90 degree twist lock, which is recessed behind the hood release handle. |
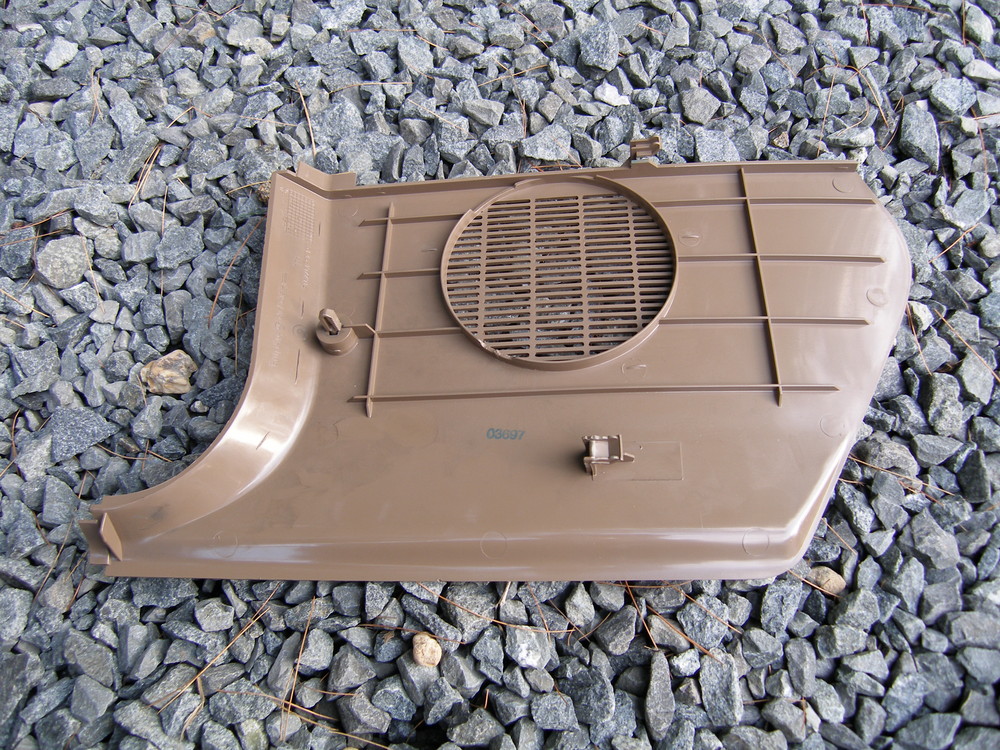 The rear of the passenger side kick panel shows that it fastens to the car the same way as the driver's side part does. Remember to pull it aft before you try to pull it away from the car or you'll break that mounting tab.. |
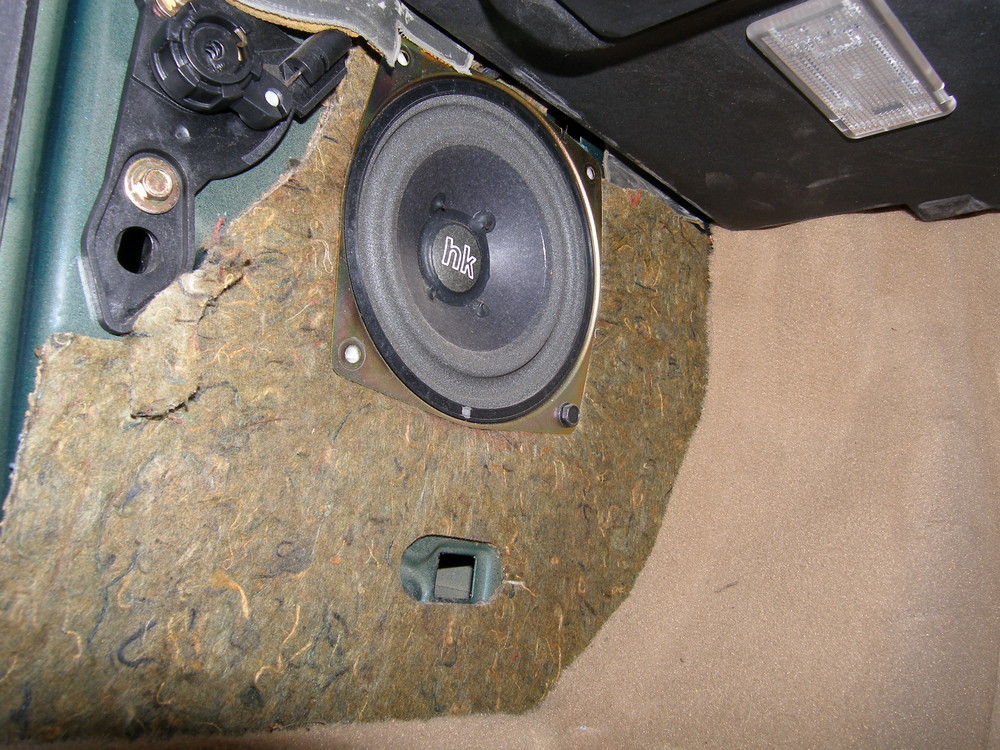 Nothing much to see here except the original driver's side woofer and factory soundproofing, which is quite effective. |
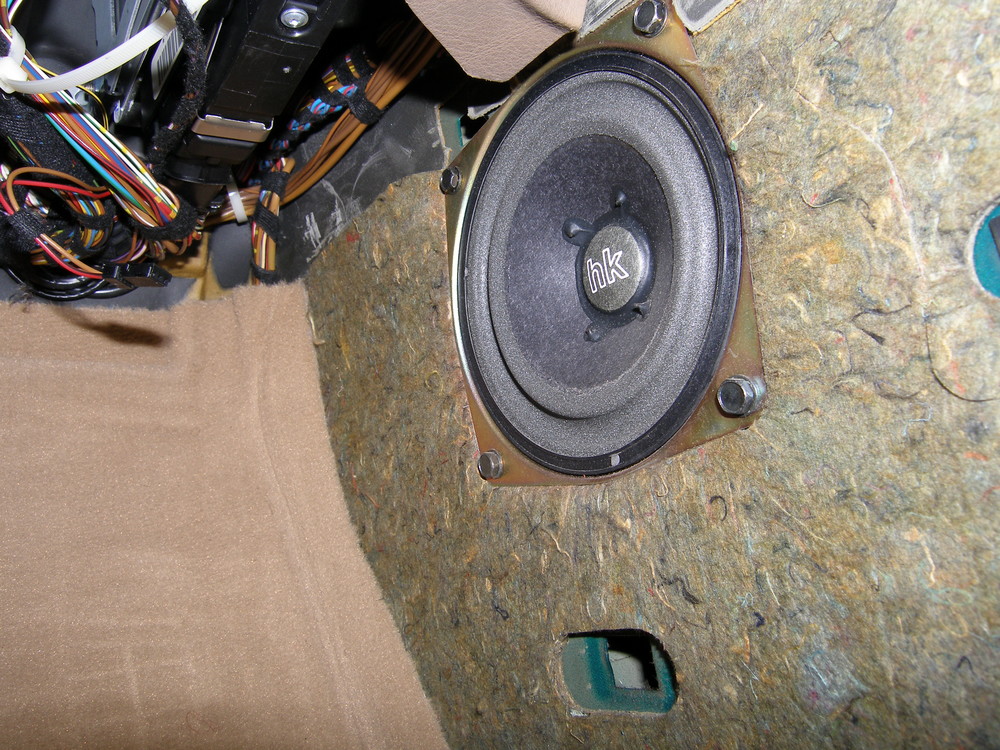 And this is the original midbass driver installed on the passenger side. Note that if you intend to do the surgery required to fit larger woofers here, take a close look at how close the top of the drivers is to the footwell ceiling panel. Unless you modify that panel, the driver may hit the panel. |
 Here you can see that the soundproofing also serves as a baffle for the driver. It also no doubt protects the driver from moisture so be careful cutting that out. If you do that, be sure to glass in a suitable replacement. |
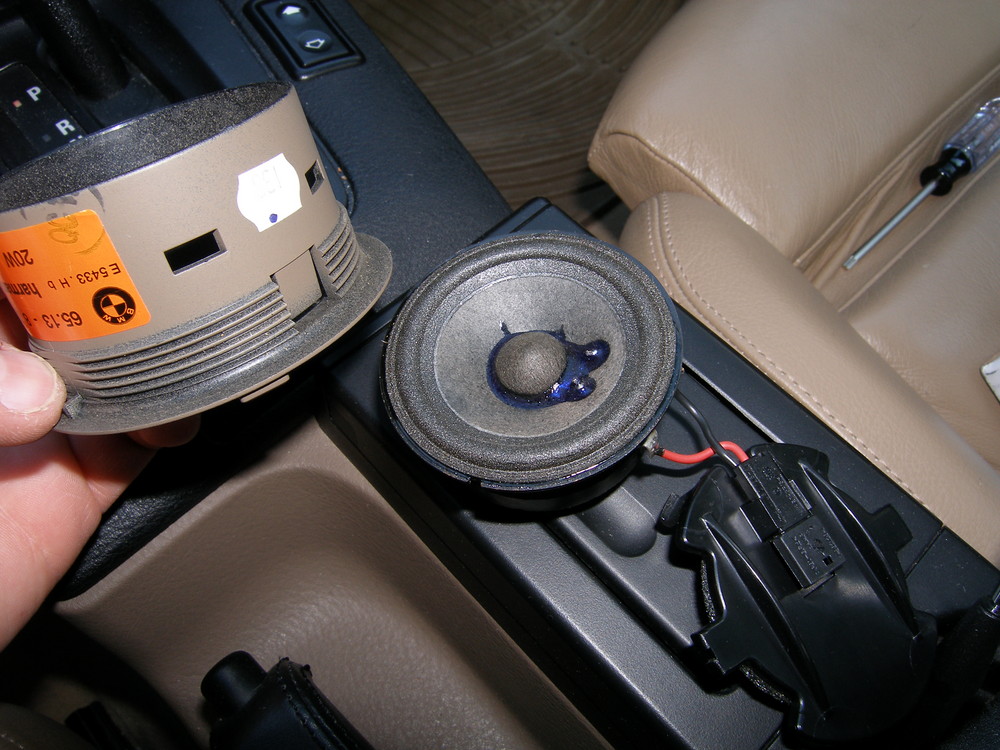
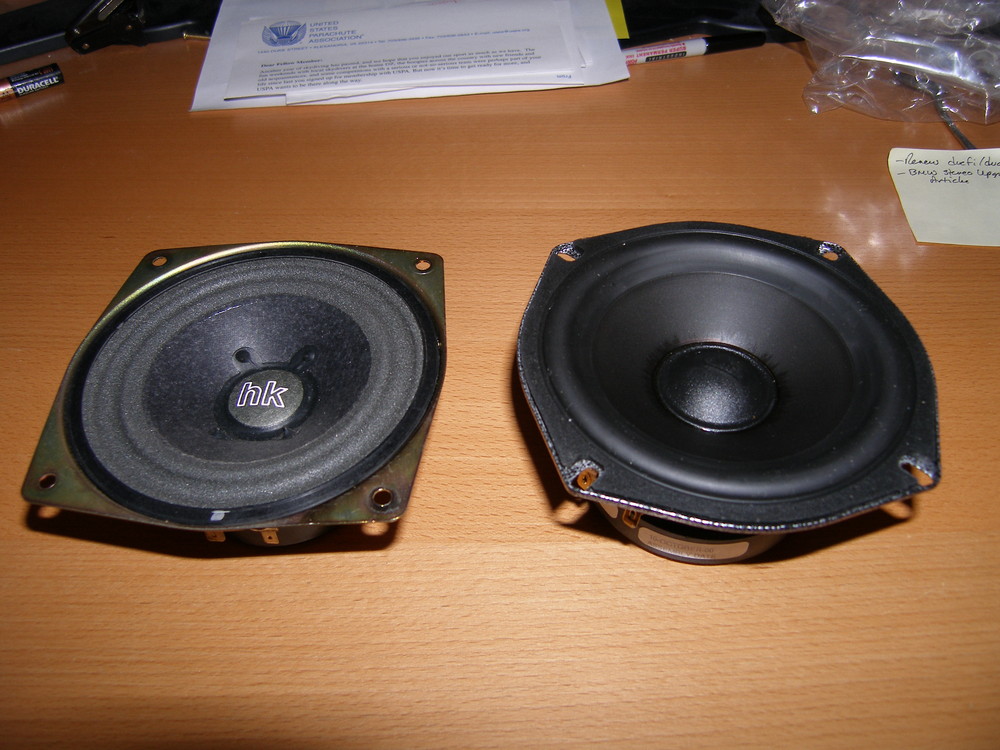
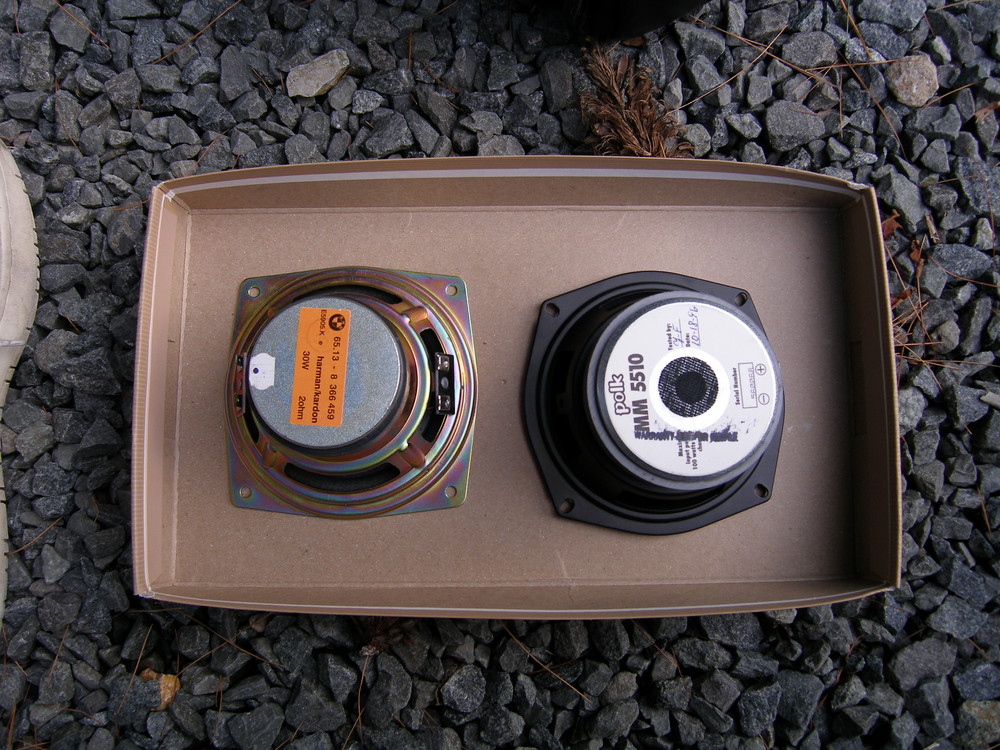 Sometimes it's hard to find drivers that will fit without modifications, so I figured I would show the relative sizes of the Polk 5510 and the OE unit. As you can tell, the bolt pattern of the Polk unit is slightly bigger than the OE unit. |
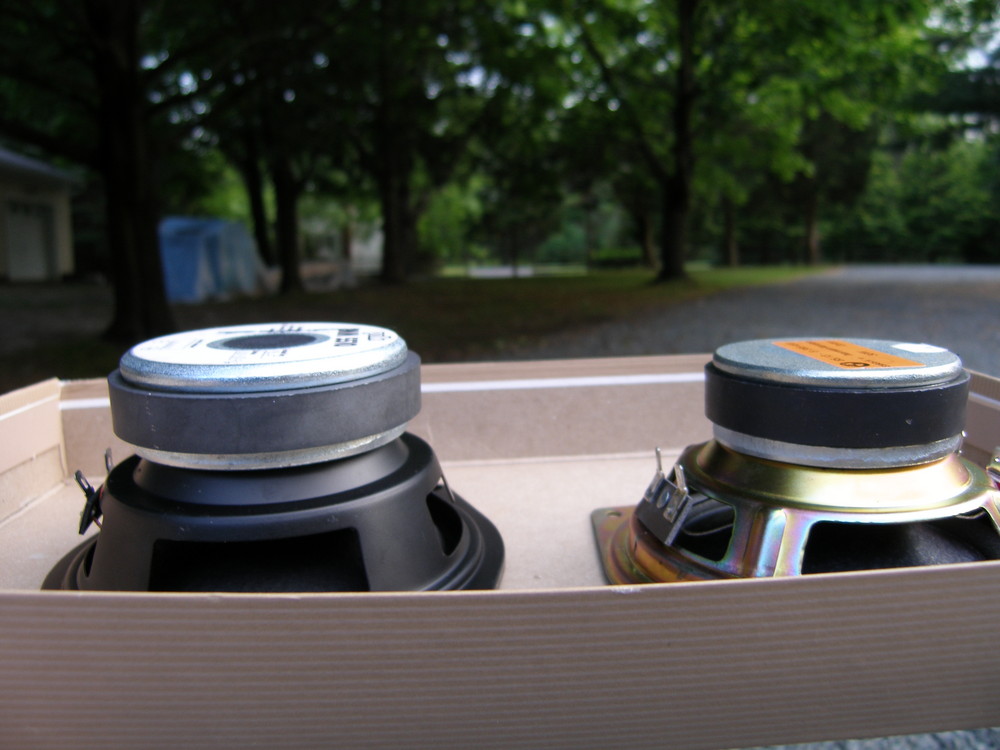 Here you can see that the Polk 5510 is a bit deeper than the OE unit, but it does fit (barely). Of course, you could probably get deeper units to fit if you cut out the sound insulation / baffling, but I didn't want to do that. |
 The most obvious difference between the Polk and OE unit when viewed from the front is obvious. The OE unit surround is inverted, no doubt to eliminate clearance issues during excursion. Fortunately, the Polk units don't seem to rub the kick panel grill. Be aware that a larger driver with a greater excursion limit may rub. |