


Annual 2003::Preparation
Part 1 of 3
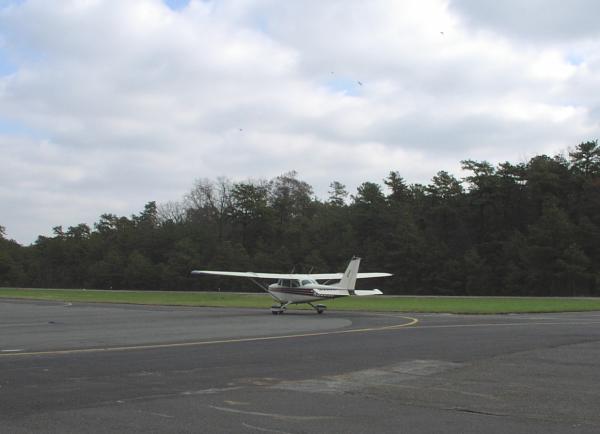
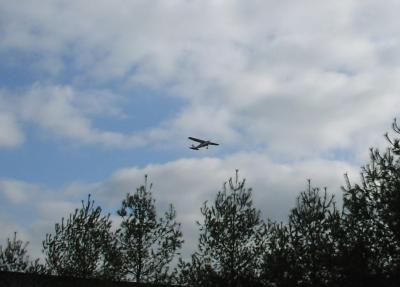
Parting is such sweet sorrow:
Marty taxiies out for a flight back to his shop to start the 2003
Annual Inspection
The past twelve months we managed to rack up 165 hours on the airplane, flying to (what seemed like) every airport between Virginia and New Hampshire. When we consider the fact that the airplane was down for a month for some avionics work early in the year, and that we actually brought the airplane in several weeks early for the annual, that works out to about 200 hours per year. Not only is this a record both for the aircraft as well as my personal logbook, but it's also the point at which ownership of this class of airplane starts to make more financial sense than renting (or so they tell me).
After all of the maintenance we performed on the airplane this year, both scheduled and unscheduled, I figured we could expect to get through the annual with the fewest number of "surprises". For that reason, we decided to dedicate a good chunk of change to our preventative maintenance program and schedule overhaul of several major components, including the propeller, propeller governor and alternator. I also considered doing some extras I'd been wanting to do for over a year to make the airplane a bit safer and, perhaps, more "refined".
While completing one of our 25 hour inspections this July, I started negotiations with our long-time friend, Marty Kress, to perform the annual inspection later in the year. Marty quoted us a number that seemed fair, and before we knew it, the second week in November had rolled around and it was time to bring the airplane into the shop.
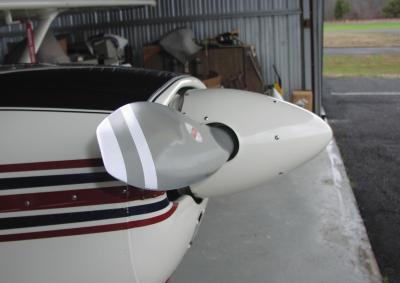 Propeller and
Governor
Propeller and
Governor
Installed in 1973 (yes, 30 years ago) as part of the 180HP conversion performed when the airplane was only 2 years old, this model Hartzell propeller was plagued by only one significant AD, which required a one-time inspection and rework of the blade shanks (if necessary). The AD was rescinded in the late 90's, but had already been performed at the last overhaul....in 1980(!)
Since that time the prop received nothing more than routine maintenance required to refresh the hub grease, an occasional redress of the leading edge, and some fresh flat black paint on the backside of the blades.
Hartzell's TBO for this propeller is 2000 hours or 5 years. In spite of being well beyond the TBO calendar limit, we hadn't exceeded the hourly limit, and since this airplane is operated under Part 91, we could have continued to run the prop as is, but 23 years is 23 years. Also, we'd recently had to redress the leading edge to correct for a defect put there by a careless mechanic (NOT Marty). So, it was pretty clear that if any component on the airplane could have used an overhaul, the prop was it.
I called around to several overhaul shops in the area to get a sense for the cost involved. The Hartzell factory was the cheapest at $1400, but I had heard that they were infamous for producing an invoice vastly higher than their initial estimate. And, when you think about it, that's no surprise. The factory makes the most money selling new blades, so they have no incentive to let a blade slide. And, before anyone quotes "factory specifications" to me, let's just say that there are factory specifications and there are TOLERANCES to factory specifications. 'Nuff said.
The Cessna 150 I used to fly needed a prop overhaul back in the mid 90's when a cursory inspection noted that the blades were tracking a full 1/2" (!) out of spec, and we wound up sending that to New England Propeller. I also had the prop dynamically balanced by them, and was pleased with their work. I called them this time around and was quoted $1600 for our Hartzell.
I then called Sensenich Propeller in Lancaster, PA, but eventually was told that they only perform work on fixed pitch Sensenich Propellers. That didn't make any sense to me since my mechanic had recently told me that he preferred "Sensenich in Lancaster, PA", until Ed at Sensenich explained the situation.
There are three propeller shops in the Lancaster, PA area. One is the original Sensenich Propeller, which indeed only sells and overhauls fixed pitch propellers. The other two were founded by former employees of Sensenich: East Coast Propeller Service and Sensenich Propeller Service (SPS). I don't know how the original company could have allowed the use of the name in such a confusing manner, but something tells me someone didn't have a choice. Such is business at times.
Next, I did a bit more research online courtesy of Google Groups, and I discovered a wide range of opinions on each shop. It would seem that the satisfaction (or lack of same) with a shop had to do more with the difference in price between the estimate and the invoice rather than the quality of the work, and most opinions of Hartzell seemed to back up what I'd heard personally.
So, the next day I called Marty and asked him to get a quote from SPS for the propeller, and, while we were at it, the governor. Marty soon replied with prices that exceeded the other quotes by a small margin, but he maintained that his experience with SPS was pretty favorable and recounted that unless they find an obvious defect in a blade, their invoice is usually within a respectable distance of their original estimate. So we'll see.
Ring Gear
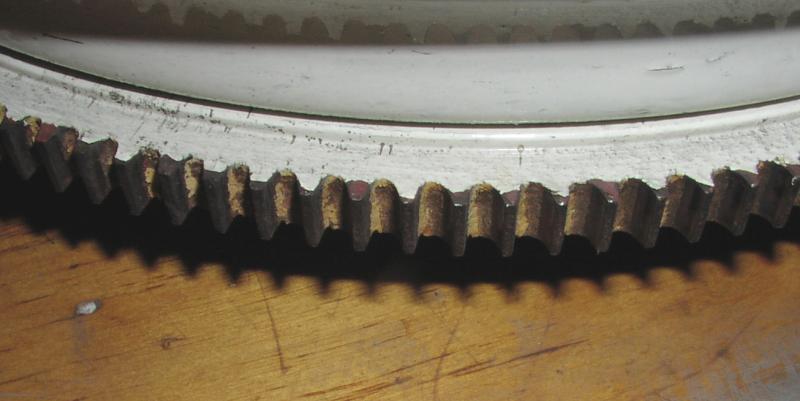 The ring gear looks exactly
like its name implies...it's a simple ring with teeth around its
outer circumference that allows the starter to turn the engine
over. It's mounted on the propeller backing plate.
The ring gear looks exactly
like its name implies...it's a simple ring with teeth around its
outer circumference that allows the starter to turn the engine
over. It's mounted on the propeller backing plate.
This airplane's original Bendix starter was replaced with a Lamar lightweight (permanent magnet) starter several years ago because no matter what we did (including an overhaul) the Bendix drive just wouldn't reliably engage the ring gear every time we turned the key. The result was a bit of frustration, and occasionally a question as to whether we might be stranded somewhere.
While the new starter solved the problem, the inconsistent engagement of the original starter managed to wear, and in some cases, chip many of the ring gear teeth. That, combined with 30+ years of rust and the fact that we had to pull the prop anyway convinced me that we should do the ring gear as well. At this writing Marty didn't have a firm price, but he said somewhere in the neighborhood of $150-200 could be expected.
Alternator and Charging System Enhancements
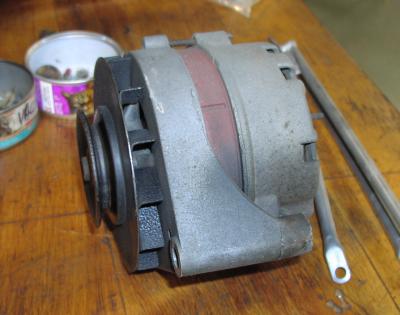 Alternators are a critical
component in any airplane, particularly ones with only a single
battery as a backup. While there are no required overhaul
intervals for the alternator in our application, we've made it
practice to overhaul critical components like this at 500 hours.
Since we were nearing that number and planned to break another
flight time record this year, we decided to put an alternator
overhaul on the list.
Alternators are a critical
component in any airplane, particularly ones with only a single
battery as a backup. While there are no required overhaul
intervals for the alternator in our application, we've made it
practice to overhaul critical components like this at 500 hours.
Since we were nearing that number and planned to break another
flight time record this year, we decided to put an alternator
overhaul on the list.
We had an option to buy an overhauled unit in exchange or have a local repair shop rework our own. Since most overhaul shops just inspect the unit, replace only that which is absolutely necessary, and then slap a fresh coat of paint on the case, we figured we'd get a better job done, as well as a lower invoice, by using the local shop. Two different brand overhaul exchange units were priced at around $350, but at this writing we had not yet received a quote from the local shop for comparison.
On my long list of "enhancements" was replacement of the 60 Amp alternator (main bus) breaker, for the simple reason that it was 33 years old, and old breakers typically trip at an amperage far below that rated. If it ever tripped, the sudden collapse of the field would create a surge that would likely toast most of the electrical system, and cost us a pretty penny. If it tripped during night IMC with a the pitot heat on, well....I don't want to think about it.
To cap off our charging system overhaul, I noted on an earlier inspection that the wiring and associated terminations at the alternator had seen better days, so I asked Marty to rework those as well. After all, the system is only as reliable as its weakest link.
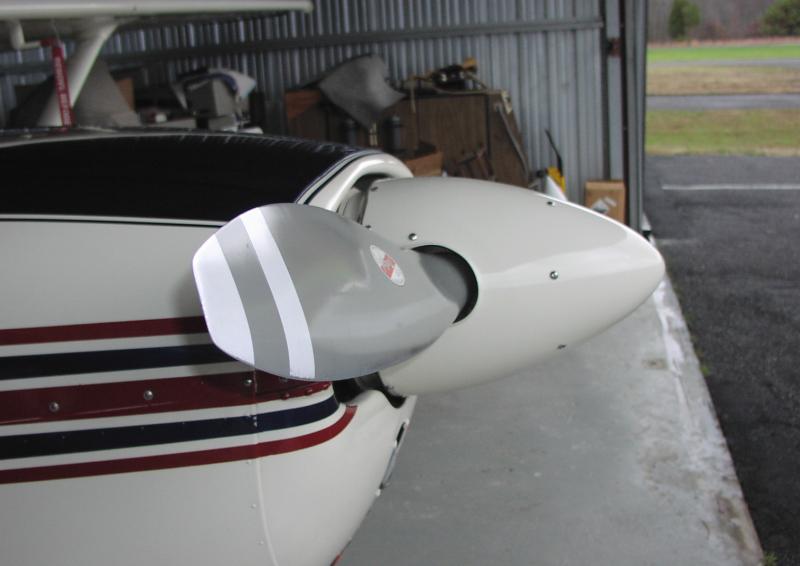
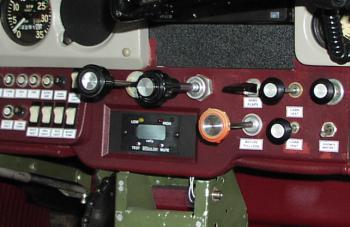 Vernier Control
Cables
Vernier Control
Cables
This aircraft was manufactured before Cessna had the brains to include a vernier mixture control. When trying to set the mixture at altitude, the resulting lack of precision in EGT control can get annoying. For this reason alone I've wanted to replace the original push-pull mixture control with a vernier unit. Compounding this problem is the fact that I tend to hit the mixture with my knee. This is caused by a co-pilot seat that does not adjust vertically, and the simple fact that the 180HP conversion relocated the mixture control to the lower half of the mid-panel, within easy reach of my knee.
From the day we picked the airplane up from its original owner, the propeller control has always required what I would consider to be excessive force to move aft (lower RPM). Pushing the control in required virtually no force (as expected). I'm still not sure whether the cable is damaged internally or it's just a consequence of the 6" radius bend in the cable required by the rear-mount governor installation (or even a problem with the governor), but every time I pull on the cable I feel like I'm going to break it. When the knob doesn't come off in my hand, I still wonder how the cable and/or cable lining must look after 30 years of runups and not a single indication that it had ever been removed for inspection and/or lubrication.
 I therefore asked Marty to
figure out the correct FAA/PMA'd parts for the conversion STC and
install them. Given that we lacked a parts list for the STC,
Marty had to remove the controls to determine their length in an
effort to match them to known standard lengths. It turns out that
McFarlane Aviation makes
both controls. The mixture is $116 and the propeller (hold on to
your hat) is $311. I'm not sure why they're so different in
price, but the fact that the prop cable terminates in a rod-end
rather than a thin wire may have something to do with it.
I therefore asked Marty to
figure out the correct FAA/PMA'd parts for the conversion STC and
install them. Given that we lacked a parts list for the STC,
Marty had to remove the controls to determine their length in an
effort to match them to known standard lengths. It turns out that
McFarlane Aviation makes
both controls. The mixture is $116 and the propeller (hold on to
your hat) is $311. I'm not sure why they're so different in
price, but the fact that the prop cable terminates in a rod-end
rather than a thin wire may have something to do with it.
Metal Component Rework
There's nothing I hate more than rusty, dirty -- or worse -- corroded parts on an airplane. After becoming insanely jealous of the outstanding metalwork performed by Dan Checkoway on his RV-7 project, I figured I'd strip, prime, and paint several parts under our cowling. The parts most in need of rework included the airbox and related support brackets, and the custom propeller cable support bracket.
Also encouraging me to rework the airbox was a need to reseal various points that were created as a natural consequence of its construction and some of the complex angles formed when the box was modified during the conversion 30 years ago. Someone had tried to use a duct-seal type material to plug the various holes in the box, but the material didn't hold up well to exposure to gas and oil. We'll be using ProSeal (actually, an equivalent, but that's the well-known name for fuel-tolerant sealant) to cover the gaps.
 When Marty told me the cost
for a replacement airbox, and I used my "airplane owner's
intuition" to derive a cost for a new propeller control cable
bracket (assuming we could actually get one from the current STC
holder), I figured we ought to spend a few bucks now to prevent a
huge expense later. It will be good to see this stuff freshly
painted, and PROTECTED.
When Marty told me the cost
for a replacement airbox, and I used my "airplane owner's
intuition" to derive a cost for a new propeller control cable
bracket (assuming we could actually get one from the current STC
holder), I figured we ought to spend a few bucks now to prevent a
huge expense later. It will be good to see this stuff freshly
painted, and PROTECTED.
Marty told me that he'd send the components to local body shop and Glasair III owner Ken Johnson for a final cleanup and coat of white epoxy paint. Why epoxy? Why white? Well, epoxy is harder than powder coat, and will thus crack to reveal defects in the underlying metal, whereas powder coat finishes tend to mask such defects. I chose white because I feel it shows defects more readily than black. I also figure it will tend to brighten up the engine bay and encourage me to keep the components free of dirt so I can easily see any defects if they do form.
Run with it!
After Marty and I finished discussing the long TO-DO list I'd brought with me, I gave him the logbooks and had him fly me back to Old Bridge so I could get back to work. Of course, I didn't need to twist Marty's arm to fly the airplane...he's flown it many times before and thinks STOL takeoffs with 20 degrees of flaps are particularly fun (and they are...the deck angle would make a 737 captain proud!).