


Annual 2003::Complete!
Part 3 of 3
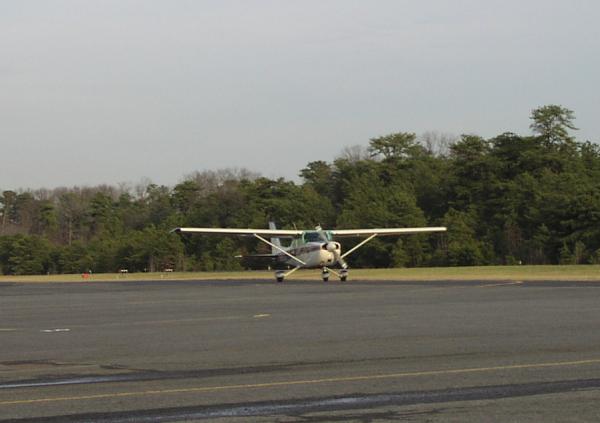
The bird returns to its roost!
Not an Average Annual
Almost six weeks, 65 squawks, and 51 shop hours later, the 2003 Annual Inspection is complete. And, believe it or not, all in all, things went as expected. For those whose jaws just dropped, and are wondering how a mere "annual inspection" could take that long, let me say that this was no "average" annual inspection for a couple reasons.
 First of
all, the actual "inspection" phase of the process consumed 18
shop hours, or a bit over two full work days. I have known annual
inspections to be completed in fewer hours and certainly less
expensively, but if this annual has taught me anything, it's that
the last few annual inspections, in spite of costing roughly half
of Marty's original quote, simply weren't worth the money because
they didn't find the things Marty found.
First of
all, the actual "inspection" phase of the process consumed 18
shop hours, or a bit over two full work days. I have known annual
inspections to be completed in fewer hours and certainly less
expensively, but if this annual has taught me anything, it's that
the last few annual inspections, in spite of costing roughly half
of Marty's original quote, simply weren't worth the money because
they didn't find the things Marty found.
Secondly, I came to Marty with a long list of things I wanted him to fix, regardless of what he found during his inspection, and these extras added significantly to the logistics (translated: downtime) as well as raw labor and materials costs of the process.
Of course, I managed to keep a pretty realistic estimate of the work I asked Marty to do, so when the numbers were tallied, about the only thing I wasn't happy with was the sheer length of time that the aircraft was down. I was ultimately able to rationalize the downtime, however, since the weather had turned sour in New Jersey shortly after I delivered the airplane. The months of November and December brought lots of high winds and at least one 20" snowfall, so that combined with the usual overdose of work wouldn't have allowed me to fly if I'd wanted. Sadly, in spite of the fact that the bird has returned to its roost, I'm still too busy to fly. *sigh*.
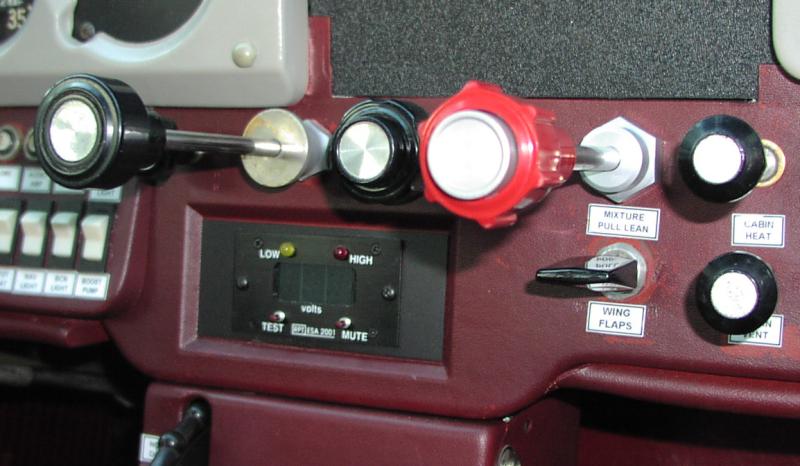
 Manifold
Pressure / Fuel Pressure Gauge Sticking
Manifold
Pressure / Fuel Pressure Gauge Sticking
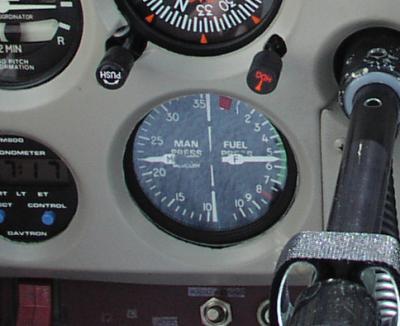
A couple last-minute items consumed some time and a few hundred dollars later in the process. The first was the combination manifold / fuel pressure gauge. Both sides of the gauge had been sticking, so we decided to pull the instrument and send it back to the facility that overhauled it less than a year ago. Yes, this has been a reoccuring problem.
The fuel gauge has had a history of freezing at a the nominal reading of 5 PSI. It stuck again recently, and Marty called me one day to tell me his theory of why. It turns out that, contrary to my understanding, the fuel pressure gauge operates on air -- specifically that trapped in the feedline between the carburetor and the aneroid in the gauge -- NOT fuel. Imagine our surprise when upon removal of the instrument and associated lines, fuel was found in both. What was happening? We figure one of two things.
In order to remove the gauge to fix the manifold pressure side of the gauge (see below), the mechanic disconnected the fuel pressure feedline at the gauge, which would have allowed fuel to drain down from the carburetor fitting, displacing the air that's supposed to be in the line. Or, alternatively, there was a slow leak in the feed line (probably introduced by the mechanic not applying sufficient torque to the fittings, but possibly the result of a defective flare or fitting), which would allow the air to escape and the fuel from the carb to flood the line, and eventually, the instrument.
 The
instrument repair shop asked us to send the fittings along with
the gauge, just to verify there weren't any leaks, and they
turned out fine. Therefore, more than likely it was the
installer's fault. This time around, I know Marty snugged
everything up correctly and connected the fitting at the carb
last, but I suppose only time will tell if this solves the
problem.
The
instrument repair shop asked us to send the fittings along with
the gauge, just to verify there weren't any leaks, and they
turned out fine. Therefore, more than likely it was the
installer's fault. This time around, I know Marty snugged
everything up correctly and connected the fitting at the carb
last, but I suppose only time will tell if this solves the
problem.
We've come to accept that the manifold pressure gauge will start to stick after 25-50 hours of operation. It's not that it sticks "permanently" like the fuel gauge, but rather hangs up at certain points until manifold pressure is changed to produce a differential sufficient to dislodge whatever debris is causing the gauge to stick.
What debris, you ask? Well, the manifold pressure gauge is effectively connected directly to one of the combustion chambers. There is a small needle valve in the instrument orifice that smooths out the pressure pulses that result from the Otto cycle. This valve seems to attract dirt like a trailer park attracts tornadoes, and has to be pulled every 75-100 hours to be cleaned. Of course, most people who clean the valve like to pull the instrument...and that usually winds up screwing up the fuel pressure gauge. I think we'll make it policy to NOT remove the gauge for such cleanings in the future.
If this gauge sounds like more trouble than it's worth, you're right. I'm already thinking of replacing it with an STC'd E.I. Digital Fuel Flow/Pressure Gauge, which utilizes a simple fuel pressure transducer that is mounted on the firewall. Then, I'll just have to decide whether to go with a standard 3" manifold pressure gauge or upgrade that AND the tach to E.I units as well. Ahh...what a slippery slope these airplanes can be at times. :-)
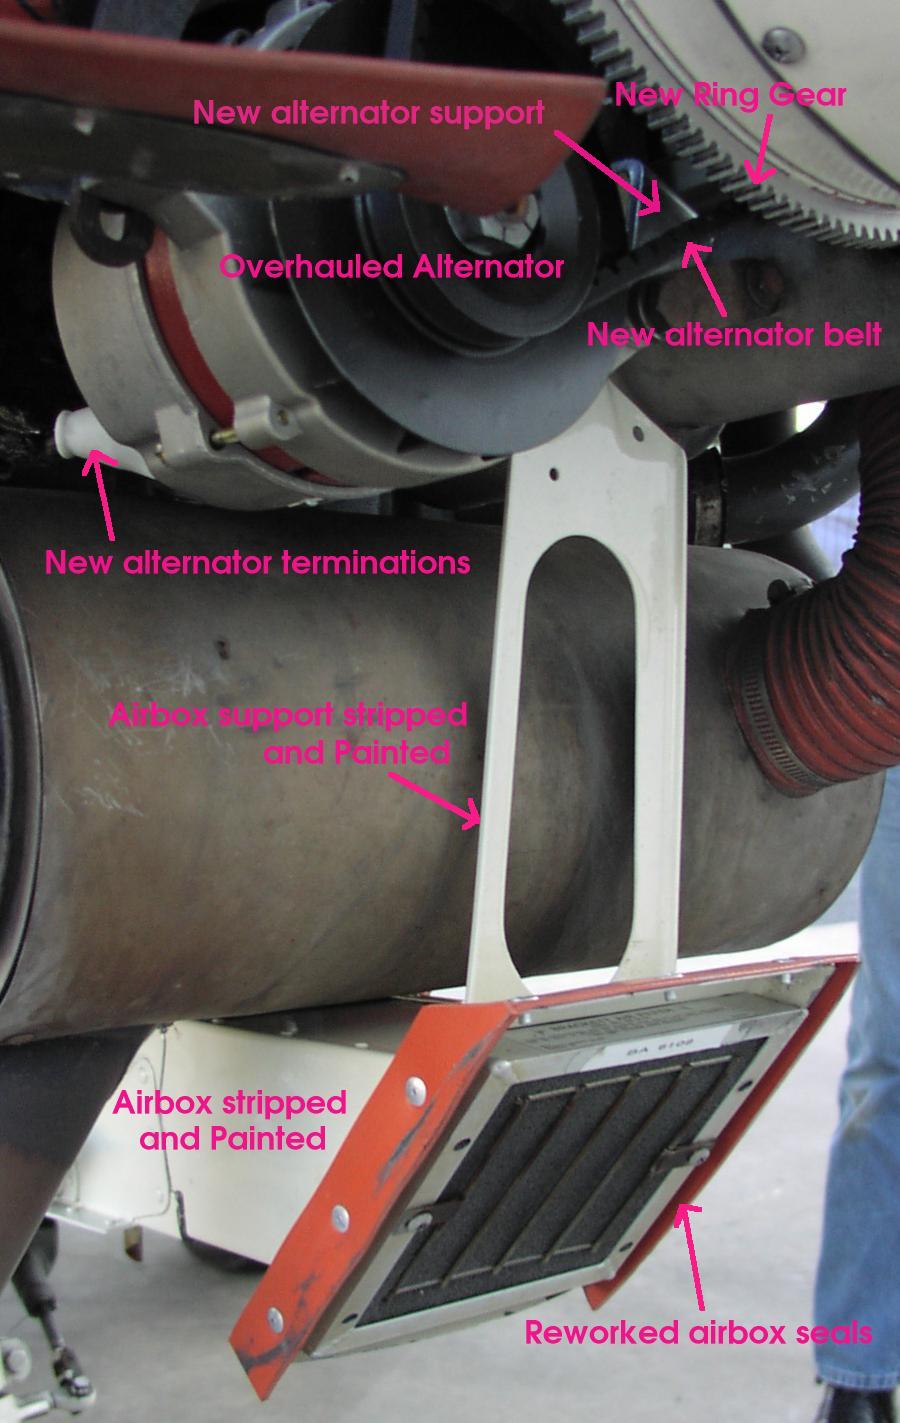
Oil Cooler Lines
Marty had to remove the high pressure oil pressure lines going to the oil cooler to work on the governor, and while he was bending them he noted that they seemed to be far less flexible than they should be; no doubt a sign of their age.
 When he noted that
the existing method used to route the lines put them smack dab
behind the oil filter, which made changing the filter without
making a mess near impossible, he made up new lines, extended
them a bit, and routed them over the filter. I expect this minor
improvement to be a big help about 50 hours from now.
When he noted that
the existing method used to route the lines put them smack dab
behind the oil filter, which made changing the filter without
making a mess near impossible, he made up new lines, extended
them a bit, and routed them over the filter. I expect this minor
improvement to be a big help about 50 hours from now.
Propeller Cable: 337 Required
Both Marty and I tried to reach the STC conversion holder in order to obtain a model number for the propeller cable, but they failed to return our calls. This meant we had to remove the cable to measure it so we could either match it to an off-the-shelf part or have one custom made.
Marty eventually faxed a depiction of those measurements to McFarlane Aviation. To make a long story short, it turned out that the cable would require custom fabrication. Interestingly, at $255, the custom cable is cheaper than the STC'd equivalent ($311), but as with most things aviation, there is no free lunch. Installing a custom part on any certified airplane requires a field approval (337), and since we could not expect to receive the approval before the airplane was otherwise ready to leave the shop, we could not install the new cable yet. This meant additional labor to reinstall the original cable and then replace it with the new cable when the paperwork arrives. The custom cable will, therefore, cost us more than the STC'd equivalent.
Fortunately, Marty has a great rep with the local FAA FSDO, and was told by the chief airworthiness person that it should be no problem getting approval for this installation under the circumstances.
The upside of this little excursion into replacement control cables is that the STC'd mixture cable made by McFarlane is very high quality...indeed better than the crap Cessna installs in the new 172s. The McFarlane control has a hard plastic knob set on a tough metal shaft mounted inside an aluminum housing. This cable should last the remaining life of the airplane. I expect the propeller cable to be of equal quality...and it will have an industry-standard blue knob as well!
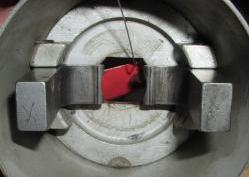
Flyweight Operation
On Speed Condition
Note that the flyweight ends are perpendicular to the end cap of the assembly. This is the normal, steady-state condition when the engine is running at the desired RPM set via the propeller control.

Underspeed Condition
Here, the RPM of the engine has decreased below the set speed, so the speeder spring tension set via the prop control overcomes the centrifugal force generated by the rotation of the assembly. The pilot valve shaft is pushed away from you, allowing oil pressure in the propeller piston to decrease, which drives the prop to fine pitch, and ultimately, higher RPM.

Overspeed Condition
In the case of overspeed, the engine is rotating faster than desired, and the centrifugal force is exceeding the speeder spring force. The pilot valve shaft is pulled toward you, driving oil pressure to the propeller piston, increasing blade pitch and, ultimately, reducing RPM.
Governor Flyweights Replaced
As I mentioned previously, the propeller repair facility that overhauled our governor said that the flyweight assembly needed replacement. They said that the assembly was worn, but could not have been overhauled due to the fact that the parts had been superceeded.
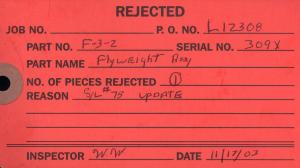 So,
if you're wondering what you get for your $450 when one of these
parts is deemed unairworthy, here it is...a nice big red tag,
which means that the part may not be reinstalled in any certified
airplane. Yes, technically, you could use it in an engine built
up for an experimental aircraft (and I've heard stories of guys
doing that to save money), but from a practical perspective, this
tag means this part is officially junk.
So,
if you're wondering what you get for your $450 when one of these
parts is deemed unairworthy, here it is...a nice big red tag,
which means that the part may not be reinstalled in any certified
airplane. Yes, technically, you could use it in an engine built
up for an experimental aircraft (and I've heard stories of guys
doing that to save money), but from a practical perspective, this
tag means this part is officially junk.
The one cool thing about getting a box of parts back at the end of any maintenance binge is that you learn something about the parts. One of the most confusing things for pilots transitioning to an airplane with a constant speed propeller is to envision exactly how the propeller speed is set and maintained. There are plenty of textbooks that explain the ins and outs of governor operation, so I won't go into that here, but there's nothing like a few pictures of an actual part vs. a simplified 2D drawing to understand what the parts look like and how they function.
On the sidebar, you can see the flyweight assembly pulled from our governor. The assembly is connected to a rotating mass inside the governor driven by the engine's accessory gears. The pilot valve shaft is inserted through the hole, and the short ends of the flyweights sit in a slot in the pilot valve. The weights, then, move the valve in and out (fore/aft from this perspective) in an a constant attempt to seek equilibrium between the speeder spring preload set by the propeller control and the centrifugal force created by the rotation of the long end of the flyweights about an axis.
I set up the flyweights in the three typical conditions. Note that I have exaggerated the degree to which the long end of the flyweights move to drive the point home. In reality, the weights move in and out an almost imperceptable amount as the governor attempts to fight the constant minute changes in RPM due to up and downdrafts, turbulence, or even movement of the throttle. Note also that the descriptions relate to the operation of a propeller on a single engine aircraft, which uses oil pressure to drive the prop to high pitch (low RPM). The opposite is true in multi-engine airplanes.
To Dynamic Balance or Not
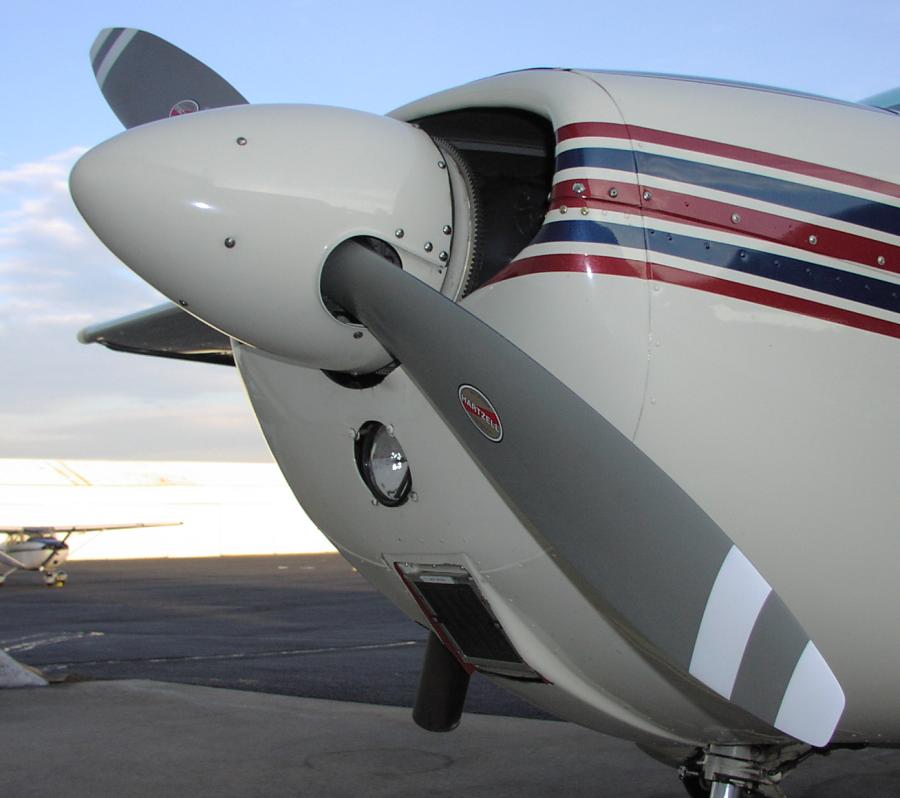
From the time I started the engine for the first time since the annual, I could feel the difference in smoothness of operation made possible by the propeller overhaul. I could probably avoid a dynamic balance.
However, I've seen the results of dynamic balancing and can say that just because you don't see your instrument panel shaking doesn't mean there is excessive vibration. The balancing gear is designed to pick up vibration over a wide spectrum, and it is quite surprising to see a "perfectly smooth" engine register vibration levels at the high end of the acceptable range.
So, when the dust settles on my bank account, I'll likely take a trip out to Sensenich Propeller Service to have the prop balanced. I have made arrangements with the staff for a tour when the time comes, so I should have lots of pictures and information to relate when I get back.
That's All Folks!
After I settled the bill with Marty I thanked him for doing a great job and keeping us involved in the entire process. Given that it was the shortest day of the year it was no surprise that the sun had set by the time I was ready to depart. But after all of the work we did (and, truth-be-told, the test hops earlier that day), I flew home in darkness with a confidence in the airplane that can only come from a thorough annual inspection.
I'm ready for the 2004 flying season, and now the airplane is too!