


Annual 2003::Work In Progress
Part 2 of 3
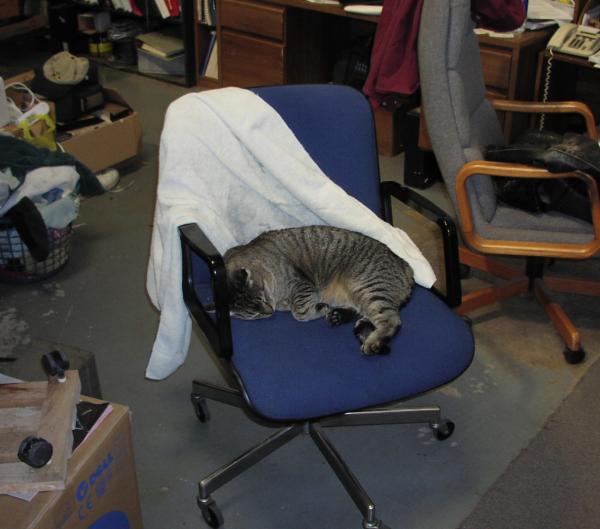
There's Jake sleeping on the job again.
Sure is difficult to find good help these days!
Work In Progress
 I had originally
scheduled to bring the airplane to Marty on a Tuesday, but nasty
low IMC weather consumed most of the week. This was unfortunate
because it delayed getting the prop and governor out by a week. I
coordinated the delivery of the airplane with Marty that Friday
morning and a week later, Marty called to ask if I'd like to come
by the shop to discuss the state of things.
I had originally
scheduled to bring the airplane to Marty on a Tuesday, but nasty
low IMC weather consumed most of the week. This was unfortunate
because it delayed getting the prop and governor out by a week. I
coordinated the delivery of the airplane with Marty that Friday
morning and a week later, Marty called to ask if I'd like to come
by the shop to discuss the state of things.
After I finished balling Jake out for slacking off on the job (again), Marty and I got down to business. First of all, he let me know that the prop and governor had gone out last Tuesday, and he expected them to be back in another week max. This translated into a 10 business day turnaround, which is pretty typical for a 2-blade prop overhaul. We then began to walk around the airplane with his clipboard full of squawks and ran down each one.
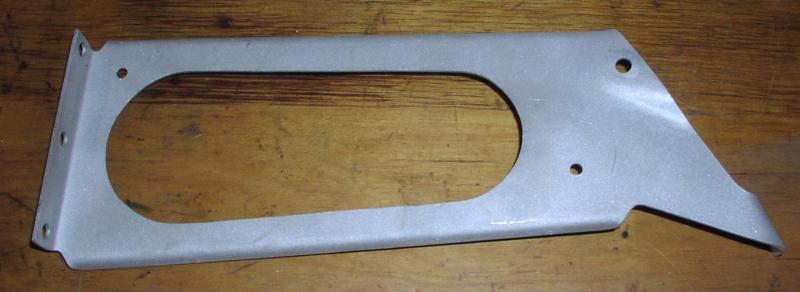
Lower Alternator Bracket Broken
The biggest surprise of the day related to finding the lower alternator support bracket completely broken in half. This is a fairly substantial piece of metal, but it failed after 33 years in service, leaving the alternator hanging by the remaining two bolts.
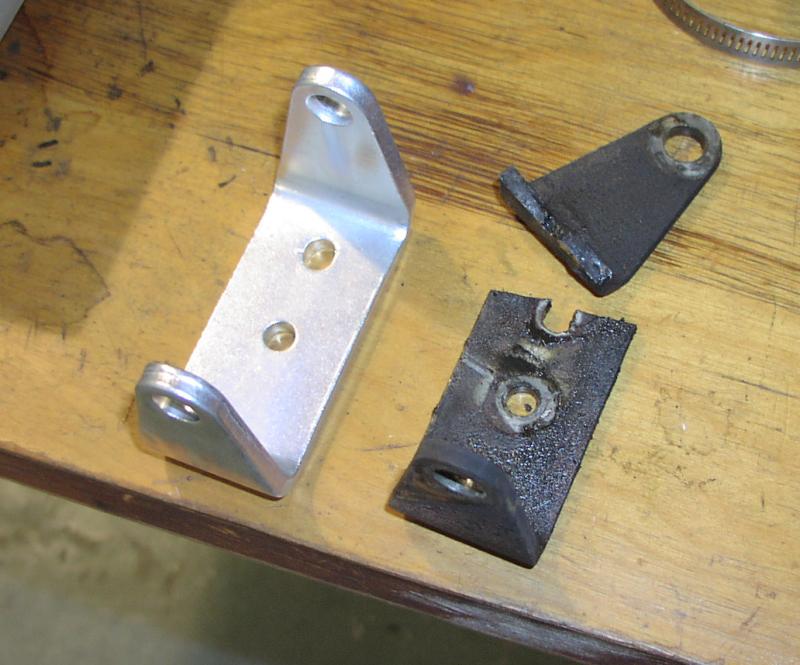 This must
have happened since the last inspection, about 25 hours ago.
Fortunately, the replacement part was only $35 (which IS a lot
for a simple bracket, but this is Cessna we're talking about!).
Of course, I was very happy Marty found this. No telling how much
the failure was stressing the remaining bracket.
This must
have happened since the last inspection, about 25 hours ago.
Fortunately, the replacement part was only $35 (which IS a lot
for a simple bracket, but this is Cessna we're talking about!).
Of course, I was very happy Marty found this. No telling how much
the failure was stressing the remaining bracket.
If I needed another example of how important our scheduled maintenance program is, this was it.
Flat Spotted Tire
As I taxied out on a solo flight a few weeks ago, I noticed the left main tire shimmying as I taxiied. I don't normally fly from the left seat, so I hadn't noticed it. It was also cold that day and the airplane hadn't been flown for the last two weeks, so I just figured the tire was out of round and would straighten itself out after a bit more taxiing. The problem continued, albeit not as badly, for the next couple of legs. When I got the airplane home I did my best to roll the airplane and find any imperfections, but largely due to the wheel pant I must have missed it.
Marty, however, found that we had flat spotted the tire. Then I remembered when it happened - a few flights prior, trying to salvage a not-so-great landing at Hartford with a gusty crosswind. Fortunately for us, the flat spot was mostly on the "worn" side of the wheel, rather than even across the tread. That meant we could rotate the tires as we normally would and effectively move the contact patch away from the defect. The tires had plenty of life left on them, so replacing them now would have been a pain in the wallet.
Only a taxi test will confirm if we've minimized the problem or whether we'll need to replace the mains, but we'll burn that bridge when we come to it.
Loose / Missing Rivets
One downside to the 25 and 50 hour inspections we perform is that they don't get into every section of the airframe. Marty had removed the fairings between the vertical and horizontal tail sections and found "smoking" rivets attaching the top horizontal stabilizer skin to both inboard ribs.
He also found one rivet that had been installed as part of a repair to the front of the horizontal stabilizer a few years back. The rivet was bucked properly, but it had missed the rib and the skin in the area was flexing quite a bit. Marty managed to get a mirror in a 1/4" slit between the edge of the horizontal stab skin and the fuselage to show me the problem. Sure enough...when they drilled the skin, they missed the rib. Talk about a useless rivet!
Marty then brought my attention to the recessed area under the wing into which the flaps retract. He pointed to three holes that were missing rivets. I told him I had noticed those holes while cleaning, but really didn't think much about them, since the skin in that area isn't riveted to every wing rib and it was clear that the holes had been without rivets at least since the airplane was painted in 1995.
Lastly, he pointed out some other loose rivets on the top and bottom wing surface that I actually pointed out to him some time ago at one of our routine inspections. Those outboard of the fuel tank area will be relatively easy to do, but the couple above and below the wing tanks cannot be done unless the tank cover is pulled and the tank removed. To do otherwise would risk puncturing the tank, as there is less than 3/8" clearance between the wing skins and the tank in some areas. Fortunately, since we found only one per rib and 5 total distributed between both wings, we mutually wrote these off as a "TODO" for some future time when we are forced to pull the tanks.
Brakes
 Part of every
annual inspection involves checking the thickness of the brake
pads and rotors. I had forgotten to ask Marty to take a look at
the brakes, drain and fluid, etc, but Marty had already replaced
the pads and topped off the master cylinders while he had the
wheels off to rotate the tires and repack the wheel bearings.
Part of every
annual inspection involves checking the thickness of the brake
pads and rotors. I had forgotten to ask Marty to take a look at
the brakes, drain and fluid, etc, but Marty had already replaced
the pads and topped off the master cylinders while he had the
wheels off to rotate the tires and repack the wheel bearings.
The pads had about 30-40% of their useful life remaining, but Marty said it was best to do them now, otherwise the mounting hardware would eventually gouge the rotors. If that happened, we'd need to replace the rotors, even if they met the minimum specifications. I wasn't sure of the time in service on these rotors, but they measured just under 200 thousandths. 164 is the specified minimum, so hopefully this means we'll be able to get at least two more years out of them.
The one nice thing about the STOL kit on this aircraft is that it doesn't only allow us to touchdown at a lower speed than an unmodified 172 - it effectively mandates it. Lower touchdown speeds directly translate into less wear and tear on the brakes and tires.
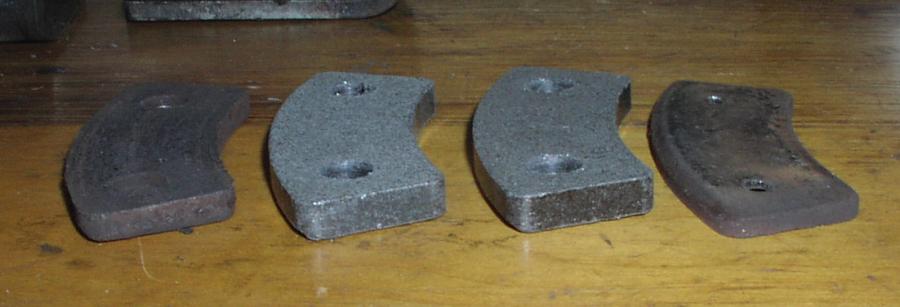
Marty was kind enough to provide a new set of pads to compare to the old (pictured). Note the variation in thickness of the old pads. Unfortunately, I don't know the original locations of the pads so I can't make any generalization about whether inboard pads wear faster than the outboard or whatever, but my point is they don't necessarily wear evenly, so you can't just look at the pad you can see through a hole in the wheel pant -- you need to completely inspect both pads to determine if they need work.
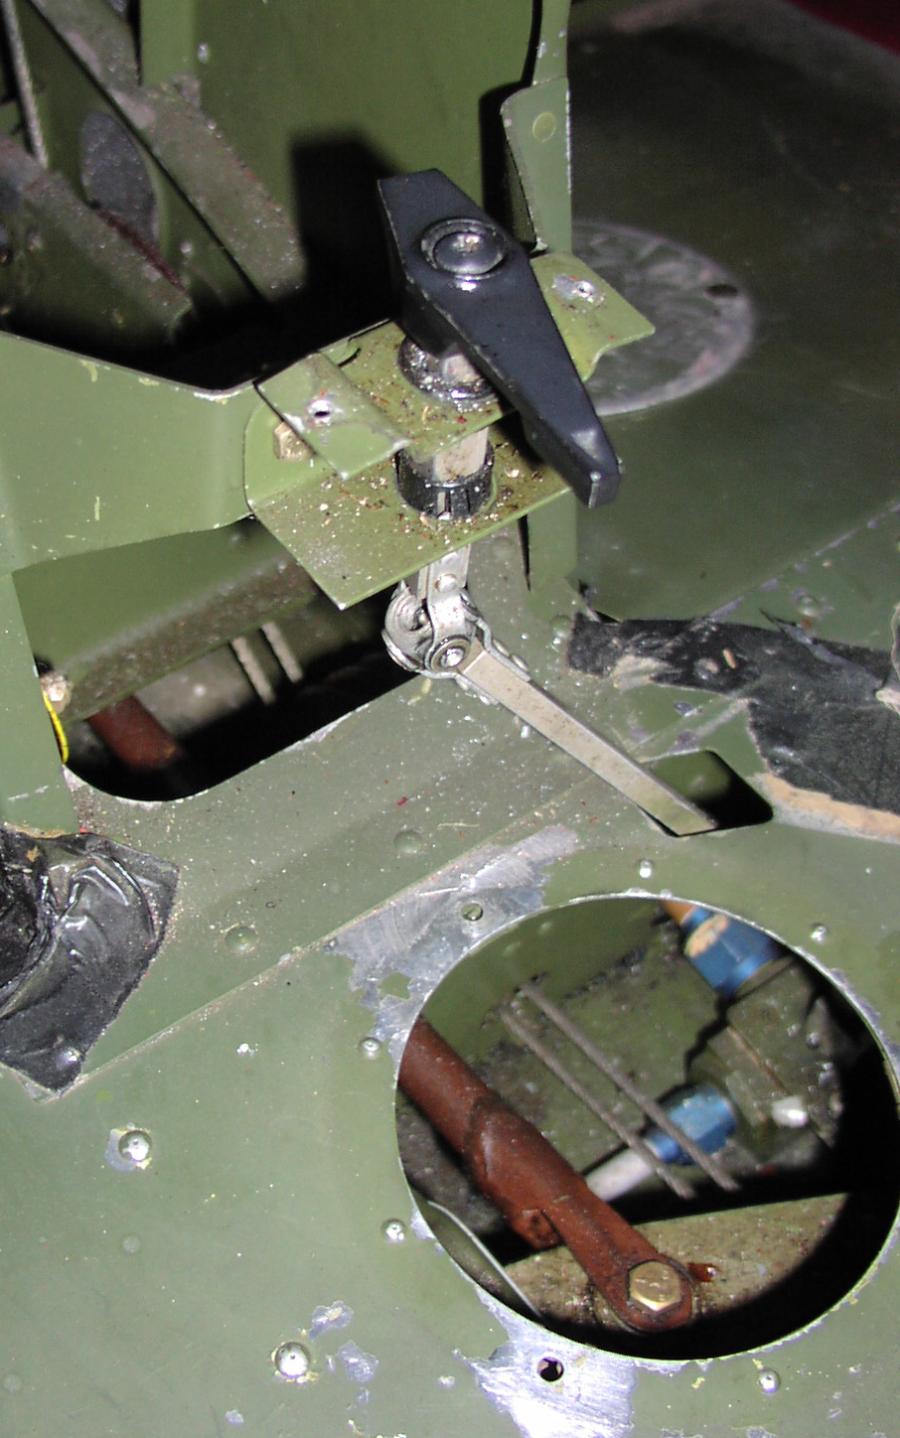
Fuel Selector
The fuel selector in this airplane has always worked well, but the selector handle has never perfectly lined up with the "BOTH" position. We don't know why, and after an inspection of the shaft that connects the handle to the valve itself and the universal joints that compensate for the angle between the two, it's still not clear why.
Marty initially flagged this, not realizing that we believe it's been this way from the factory...and certainly as long we've flown the airplane. Good thing too...since Cessna doesn't sell the entire shaft or u-joints...they sell each piece, including the parts necessary to build the u-joint (that, incidentally, amount to about $290 EACH...yes, you read that correctly...per u-joint!). Marty said he felt the play in the joints was still acceptable, so he sprayed the joints with a bit of Zep 45 teflon-based lube and left it at that.
Other Fuel System Issues
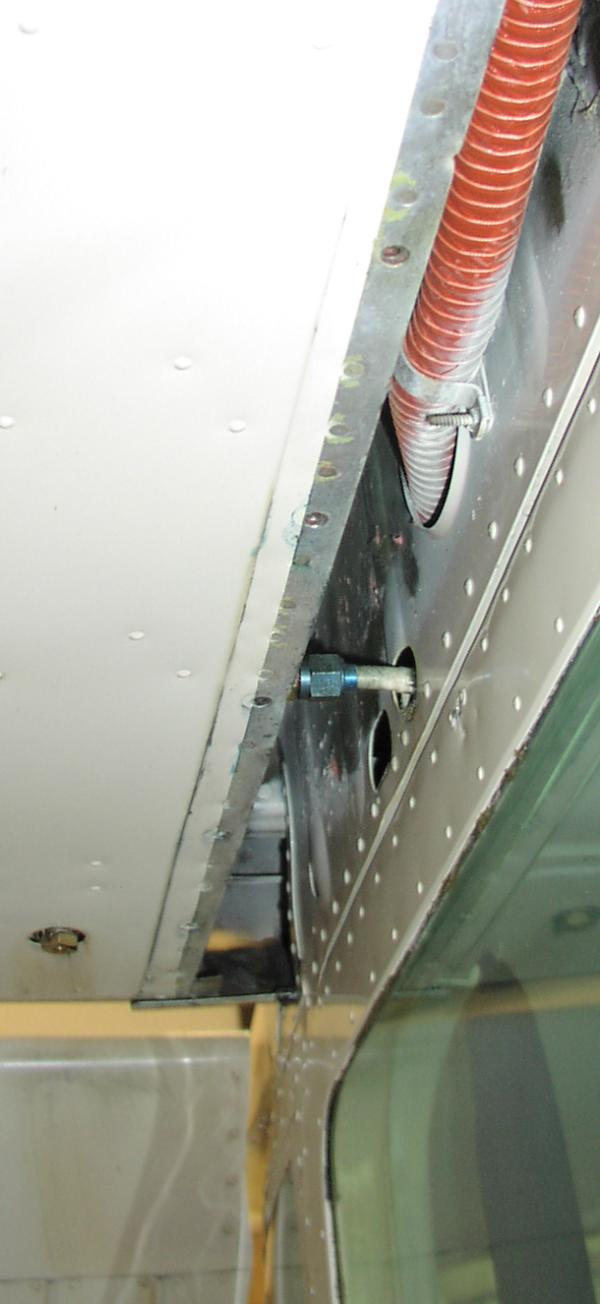 Several months ago,
we noticed the main tank drains weren't draining very well, and
had been leaking somewhat during flight, so we replaced them. The
interesting thing is I had noticed fuel stains reappearing aft of
the right tank drain and couldn't quite believe that it was
leaking again, but I didn't think much of it...until Marty pulled
the wing root fairing and showed me the REAL cause for the leak.
The main fitting connecting the fuel line to the tank was visibly
wet, and the telltale signs of leaking fuel were everywhere on
and around the fairing. The fix -- replacement of the fitting --
looks to be pretty easy, except for the fact that we'll need to
drain the tank to replace the fitting. Oh well. I knew there was
a reason I didn't come here with full tanks. :-).
Several months ago,
we noticed the main tank drains weren't draining very well, and
had been leaking somewhat during flight, so we replaced them. The
interesting thing is I had noticed fuel stains reappearing aft of
the right tank drain and couldn't quite believe that it was
leaking again, but I didn't think much of it...until Marty pulled
the wing root fairing and showed me the REAL cause for the leak.
The main fitting connecting the fuel line to the tank was visibly
wet, and the telltale signs of leaking fuel were everywhere on
and around the fairing. The fix -- replacement of the fitting --
looks to be pretty easy, except for the fact that we'll need to
drain the tank to replace the fitting. Oh well. I knew there was
a reason I didn't come here with full tanks. :-).
For several months prior, I had also noticed the belly drain dripping once or twice, but decided not to replace it because we noted no stain on the hangar floor, thus we felt the one or two drips we'd see after draining fuel was just normal "drip dry". On one of the last flights before the annual, however, I noted that I had to tug downward on the T-handle built into the drain to stop a slow, but periodic drip. I told Marty to order a new drain and replace it.
If you're wondering, yes, it is possible to get the o-rings that fit these valves, but in my experience the valves usually fail because water causes the shaft and collar to rust, destroying the o-ring seat in the process. You *could* replace the o-ring, only to have it leak again in a few flights. Since the "top of the line" recessed fuel drains are only about $18, it's really not that big a deal in the grand scheme. Oh, and by the way, I know I just rationalized that big time, but you have to understand...the ability to rationalize expenses large and small comes with aircraft ownership! :-)
Marty also noted, as I had for some time, the fuel stains forming aft of the filler caps on the top of the wing. Considering that the cap seals looked to be in good shape, I attributed the leaks to an uneven surface of the filler port that could not be easily repaired. However, Marty said new seals should take care of the problem, so we put those on order. Each seal is about $5 each and is quickly replaced.
Other Airframe Items
 Marty managed to find
a small crack in the firewall extending about 1/8" from one of
the rivets attaching one of the cowling support brackets to the
firewall. This was so small that I can't believe he found it, but
I'm glad we caught it early. Nothing a bit of stop drilling can't
fix.
Marty managed to find
a small crack in the firewall extending about 1/8" from one of
the rivets attaching one of the cowling support brackets to the
firewall. This was so small that I can't believe he found it, but
I'm glad we caught it early. Nothing a bit of stop drilling can't
fix.
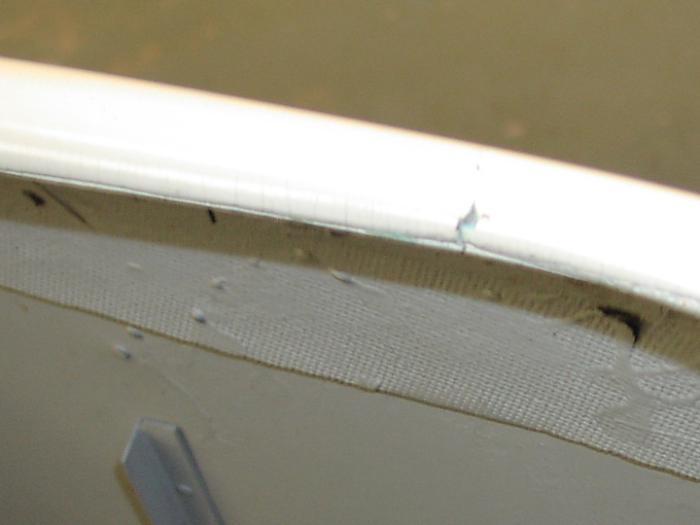
And, speaking of the cowling, we found a couple cracks in the fiberglass portion near the front top leading edge. These have have formed due to natural vibration and a lack of support in that area due to modifications to the cowling during the conversion. Cutting out the cowling supports around the prop wasn't a particularly smart idea, but I'm sure it was a conscious decision to avoid substantial rework. I'm not sure how we're going to fix this without damaging the paint, but my guess we'll ultimately decide to apply a few more layers of glass to strengthen the area. It won't stop the cracking, but it should slow it down.
Governor Surprise
Marty called me the following Monday and said that Sensenich had called to say that the flyweight assembly in our governor was not only worn beyond specifications but the parts were out of date as well.
We had a choice of replacing the assembly with a serviceable (overhauled) unit for about $450 or a new one for a "mere" $550. Since the prices were surprisingly close to one another, I told Marty to tell them to install the new assembly. Had the difference in price been $200 or more, however, I probably would have seriously considered the overhauled assembly.
 And, if
it's not obvious, the charge for the new assembly is in addition
to the standard $450 overhaul charge, so we're now into this
governor for a cool grand. That's the downside. The upside? It's
nice to know that our decision to overhaul the unit resulted in a
fix, and not just a new coat of paint.
And, if
it's not obvious, the charge for the new assembly is in addition
to the standard $450 overhaul charge, so we're now into this
governor for a cool grand. That's the downside. The upside? It's
nice to know that our decision to overhaul the unit resulted in a
fix, and not just a new coat of paint.
Alternator and Alternator Circuit Breaker
Marty told me that the local shop he had planned to have "field overhaul" the alternator recently turned in his repair authorization to the FAA.. While he still could have performed the work (skills aren't forgotten), he declined to do our alternator when Marty mentioned we fly the airplane IFR. Apparently he didn't want the liability, and since he technically didn't have authorization to sign it off, I couldn't blame him.
This left us with two alternatives -- find another shop and take a chance that they'll do what we want for less than the cost of an overhaul, or just get the overhaul exchange for $350. I chose the latter, simply because Marty said that he has good luck with the exchange units, and because I wanted a "known quantity" on the airplane. I don't play games with the thing keeping the radios on in IMC.
 Marty
also informed me that Cessna had published a service bulletin on
the Alternator (main bus) breaker I wanted to replace, and
offered a replacement breaker kit consisting of a 55 Amp breaker
(down from 60 Amps) and some mounting hardware -- necessary
because the new breaker is of a different form factor than the
one it will replace. We had yet to get a price on that kit, but
Marty suggested it shouldn't be more than $100, since the breaker
itself would run about $50 if he had to purchase it
separately.
Marty
also informed me that Cessna had published a service bulletin on
the Alternator (main bus) breaker I wanted to replace, and
offered a replacement breaker kit consisting of a 55 Amp breaker
(down from 60 Amps) and some mounting hardware -- necessary
because the new breaker is of a different form factor than the
one it will replace. We had yet to get a price on that kit, but
Marty suggested it shouldn't be more than $100, since the breaker
itself would run about $50 if he had to purchase it
separately.
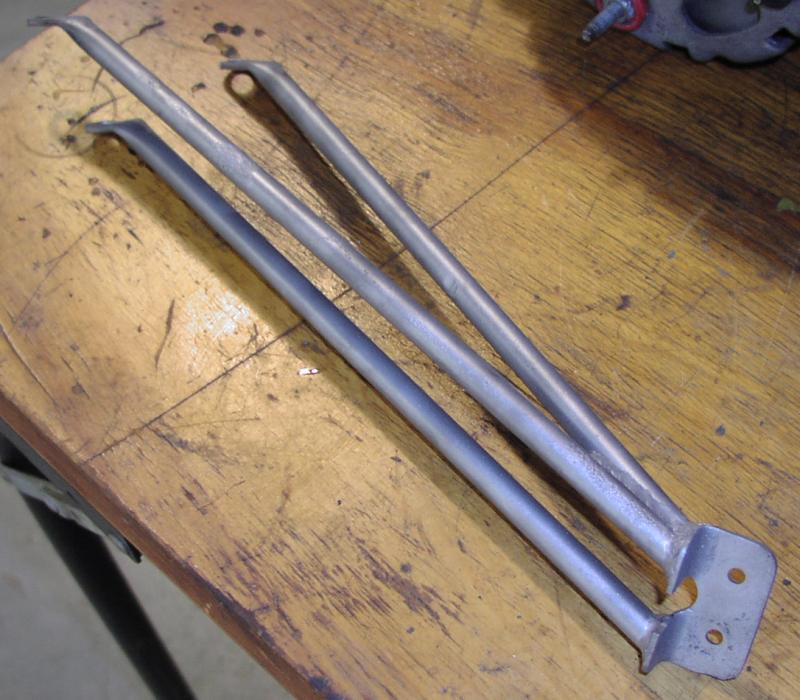
Metal Rework Started
The propeller control cable support and the airbox support were stripped in Marty's media blasting booth so that theycould be checked for cracks or other defects. Since the airbox was deemed structurally sound, Marty felt it would be best to let the painter prep it.
 The
prop cable support bracket had shed most of its paint over the
years and had been rusting in places. After the remainder of the
paint was removed and the surface completely cleaned, it was
clear that some surface pitting had started, but fortunately was
very mild and in no way compromised the strength of the piece. No
replacement was necessary.
The
prop cable support bracket had shed most of its paint over the
years and had been rusting in places. After the remainder of the
paint was removed and the surface completely cleaned, it was
clear that some surface pitting had started, but fortunately was
very mild and in no way compromised the strength of the piece. No
replacement was necessary.
The airbox support bracket had lost some of the primer used to protect it originally as well, but after a few passes in the booth it looked like new. Marty said that these usually crack near the "pointy" end, but this specimen looked fine. With that news, everything was shipped off to the paint shop.
Almost Done!
Exactly two weeks after I dropped the airplane off (and 8 business days since Sensenich picked it up), we received word that the propeller passed all tests and was being prepared for shipment. When I heard that I breathed a sigh of relief, since the propeller was the biggest question mark in the entire process. One new blade would have set us back almost $5000, and that would have effectively doubled the cost of the annual.
Now that I knew we had dodged that bullet I felt content in my decisions to do all of the extra work, and began to really look forward to seeing everything complete. Of course, for every yin there is a yang, and so I wasn't surprised when Marty asked me to bring him a check so he could pay for the prop and governor upon delivery the following week.
I can see the light at the end of the tunnel. We're almost done!