


Friday, June 25, 2010
Rear Suspension Overhaul - Assembly Day Two
When I arrived at the garage I got right to work because I knew I had a very long day ahead. I started with something easy -- securing the shocks to the trailing arm. That uncovered a small wrinkle. As I jacked up the right side trailing arm I noticed that the spring didn't look right. It turned out the lower spring seat on the right side had popped out of the upper control arm and caused the spring to sit crooked. If you look back at yesterday's post you can clearly see that in one of the pictures. Once that was fixed I secured the shocks to the arms and moved on to more pressing (and annoying) things.
When I told my technician about this project initially he smiled and said "Don't curse too much". In spite of dealing with stubborn fasteners, banging my head on various protrusions under the vehicle, and wrestling very heavy objects half way around the state of New Jersey I have managed to maintain my composure throughout the project. In fact, this was a zero curse job...right up the point I started work on the $!#@!$! parking brakes. These infernal things caused me to curse (loudly) several times as I wrestled with the return springs. They were damn near impossible to stretch as required to reach the hole in the adjacent brake shoe. I almost broke one of my hook tools and then decided to try a pair of long nose pliers. With nearly half of my body weight on the pliers I still had a hell of time securing the springs. I managed to get the work done, naturally, but it was the most annoying aspect of the entire project.
The only upside of dealing with the parking brakes -- that is to say, other than the obvious fact that they look great now -- is that I now know how to adjust them. BMW insists that they be adjusted such that the clamping force is matched to within 30% and since they are completely independent of one another that is most certainly a trial and error process. I spent probably 20 minutes just going back and forth between each rear wheel with the parking brake lever in the various states advocated by the TIS to make sure that it was adjusted correctly. I will likely have to tighten them up further after I go through the break-in process but that should be easy enough to do now.
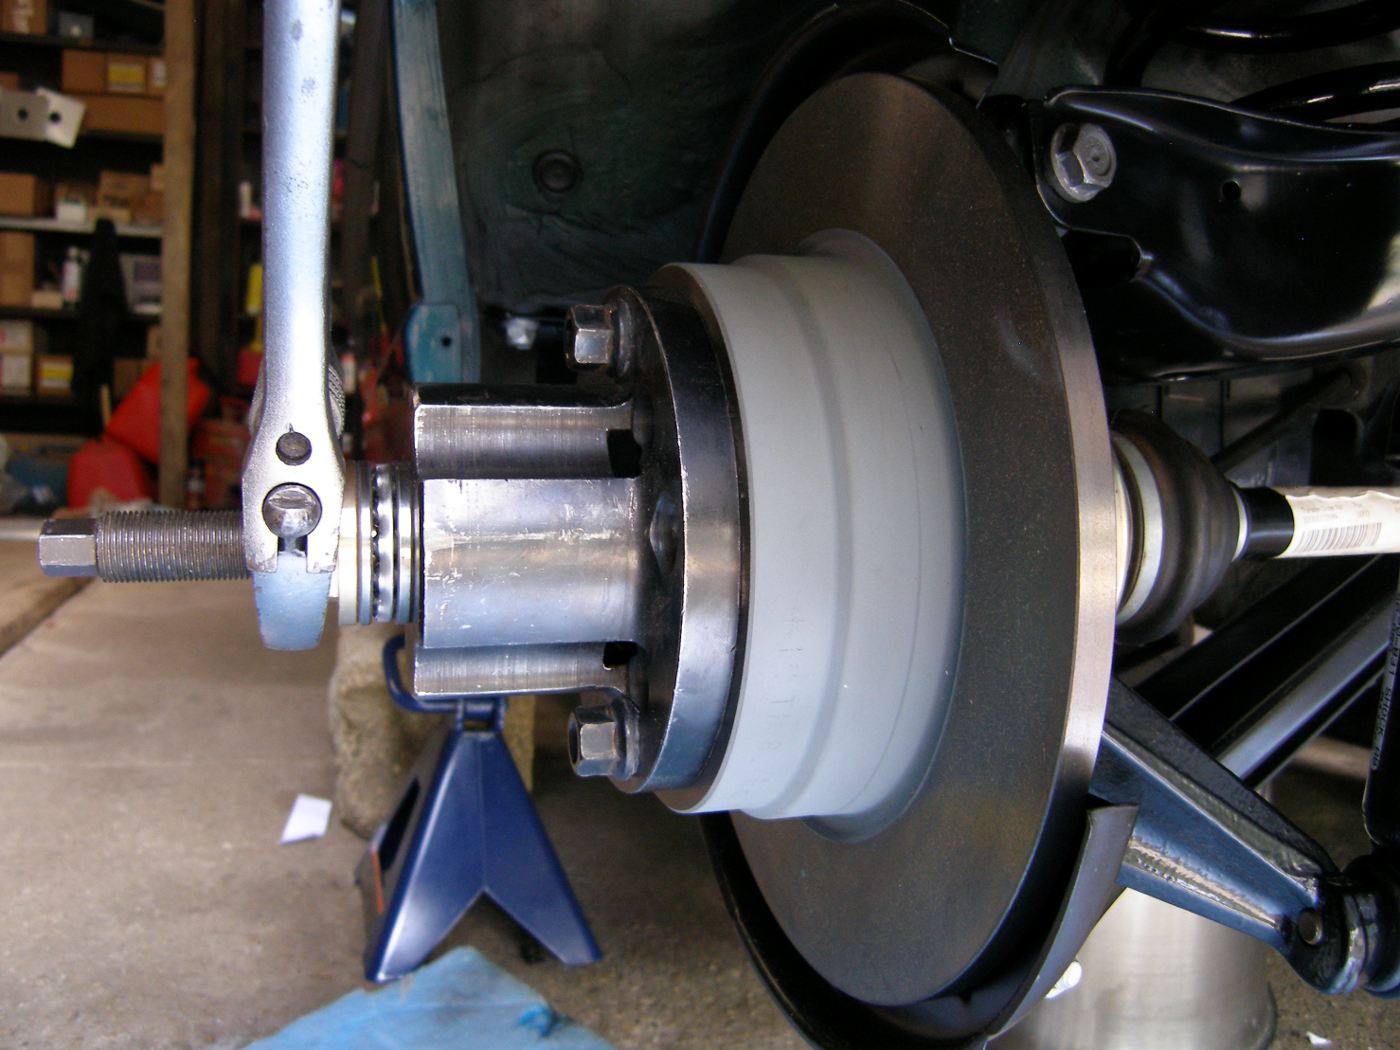
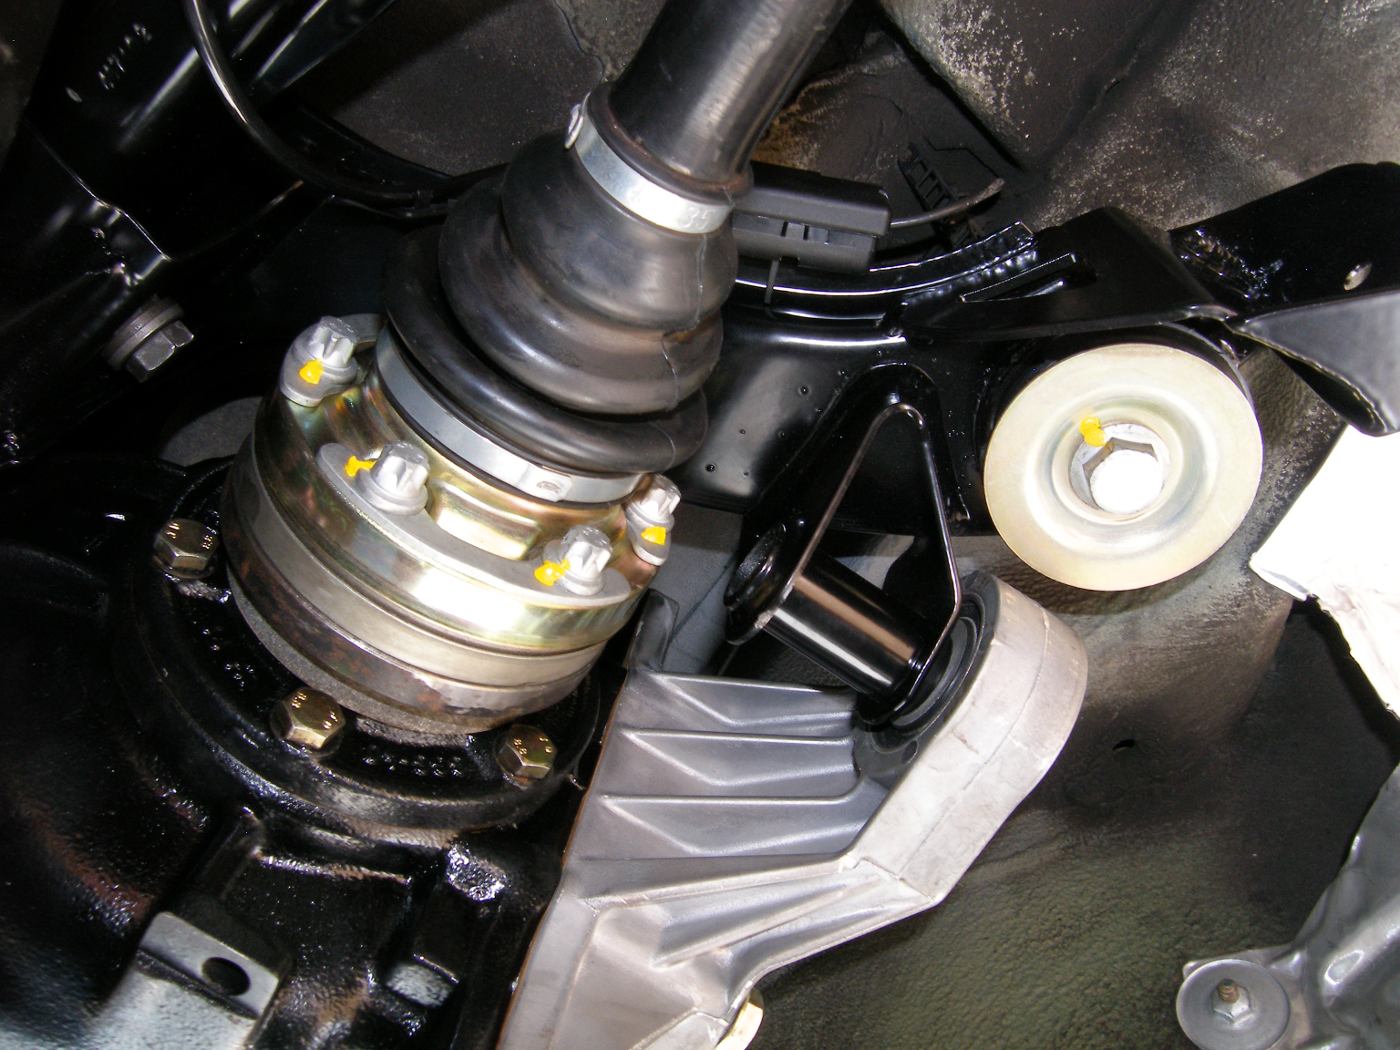
With that nightmare over, I took one of my axle shafts over to my technician so he could assemble the correct components from his wide array of BMW special tools required to pull the axle shafts into the drive flanges. Back home I screwed the shaft onto the end of the axle, inserted the axle into the drive flange, mounted the base to the rotor with a couple wheel bolts, threaded the bearing-equipped nut on the shaft and then used a huge adjustable wrench (also courtesy of my technician) to tighten the nut and pull each axle shaft smartly into its flange.
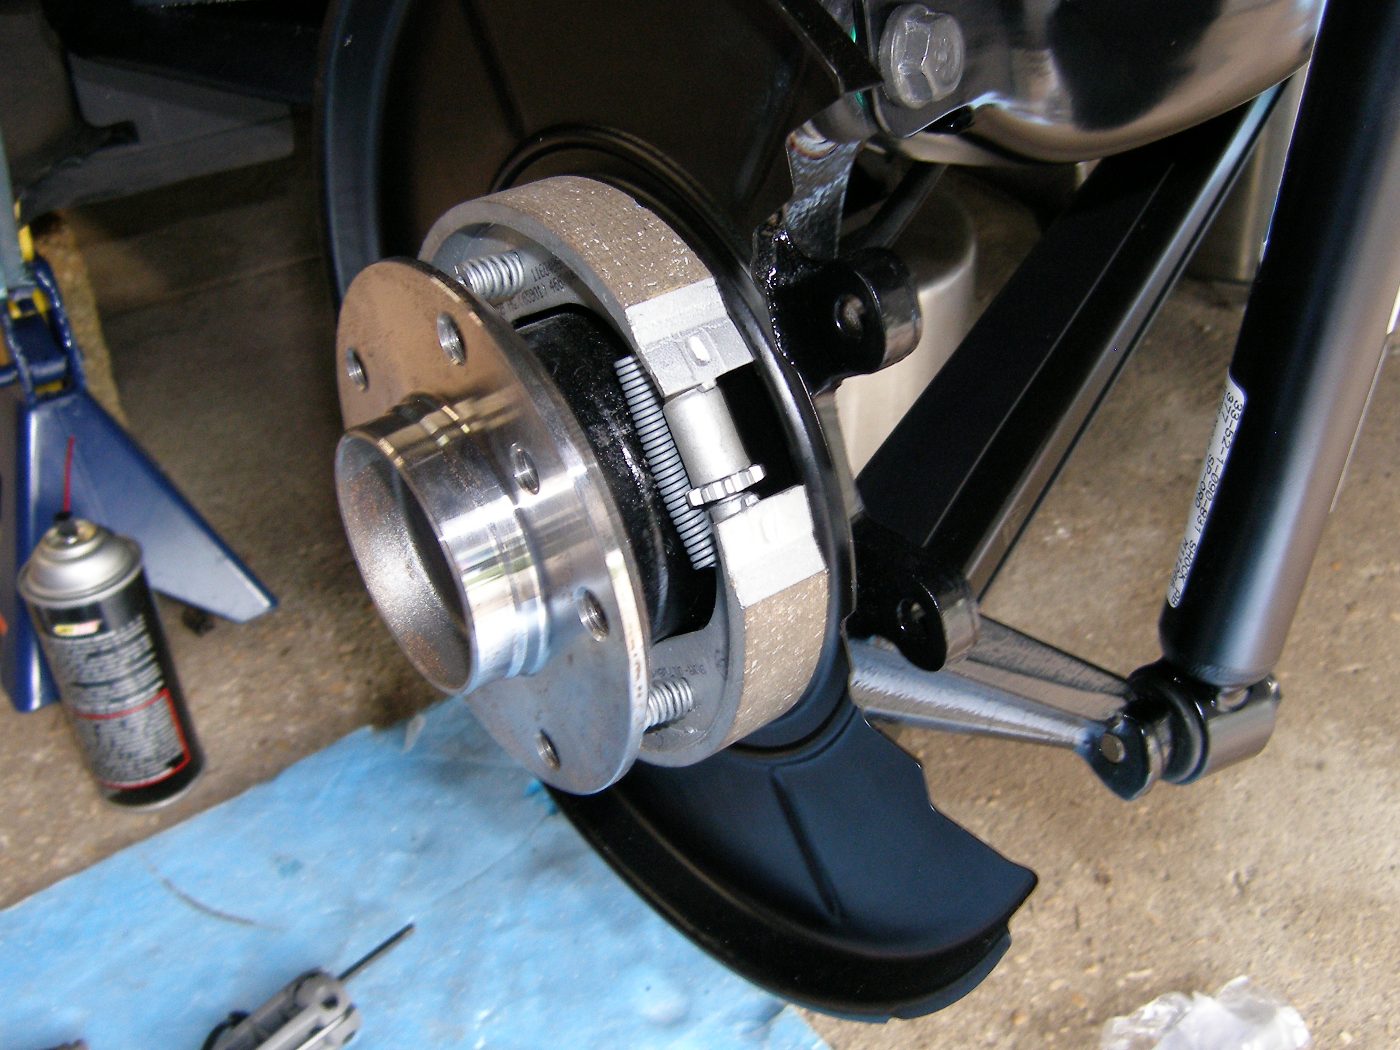 After much swearing and sacrificing of goats to the Evil Emperor of Return Springs, here are the new parking brakes. |
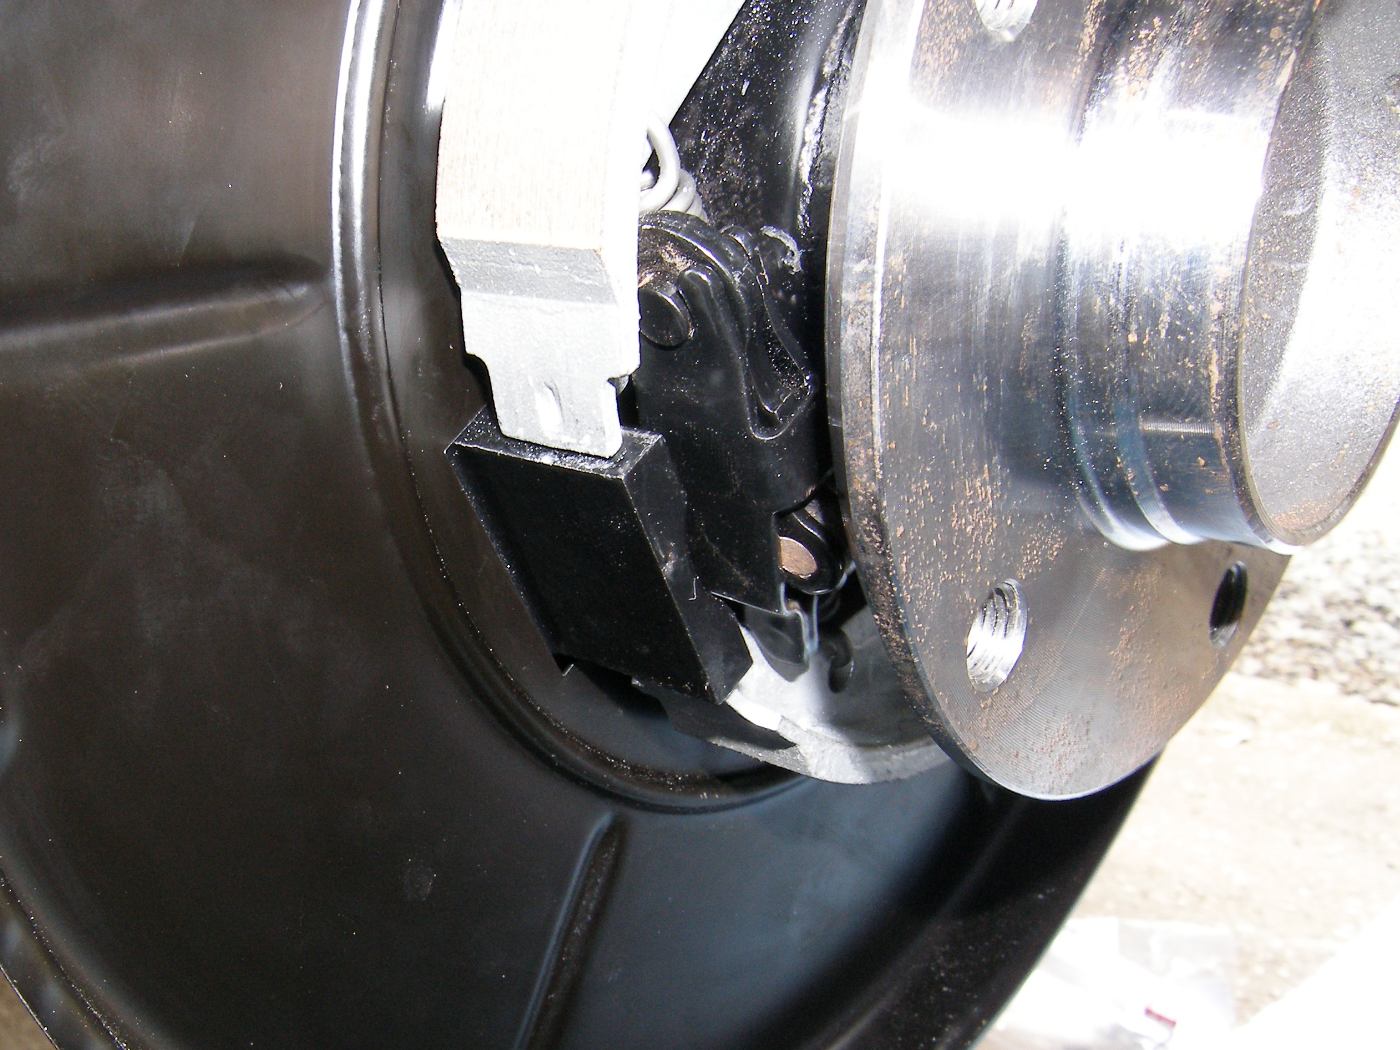 I had to file one of the actuators down a bit after they were powder coated to make sure the brakes wouldn't bind up, but it looks far better than the original. |
 After the lower 12mm nut is used to adjust the brakes, it is held with a box end wrench so the 9mm stop nut can be secured. |
 It's great to have cool friends in high places. Behold $1000 in BMW special tools at work in my garage. |
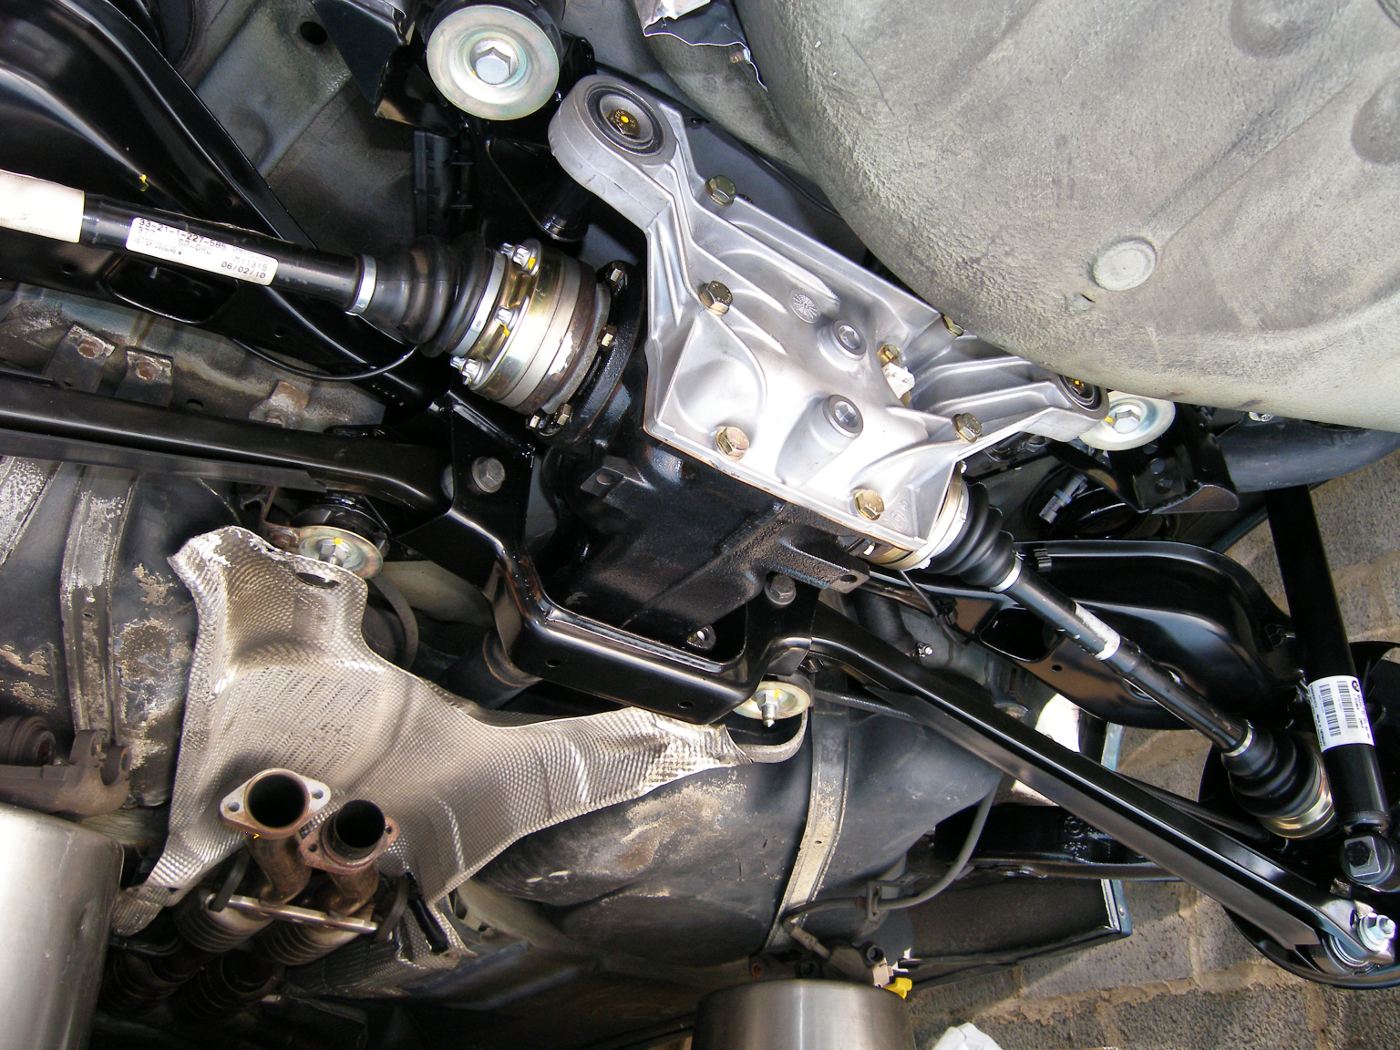 Installing the differential was a struggle but it's done and it looks great. |
 Torque seal makes it easy to see what has been torqued, and what hasn't. |
The right side axle slipped almost all the way into the drive flange by hand but the left side axle barely fit into the flange so the tool was absolutely essential to this task. The lesson learned? Don't think for a second it's possible to just press these things in by hand even with new flanges and remanufactured axles with nice clean splines. The parts are designed to mate with a press fit and special tools are consequently required for the job. Baum Tools makes a tool that should do the job, but it's not as slick (or as expensive, I'm sure) as the BMW toolset. Once both axles were pressed in I returned the tools before anyone missed them and drove back to the garage once again to install the differential.
Due to the angle at which the differential must be inserted into the subframe I found the jack only slightly useful for the task. I wound up hulking the thing up there with my bare hands, and burning out the muscles in my arms in the process. That thing is HEAVY. Once it was in position I mated the input shaft with the driveshaft and then secured the differential with new hardware. I had to use the old nuts to connect the driveshaft to the differential because I forgot to buy new nuts. No matter, really. I have new nuts on order and I have tightened and torque sealed the existing nuts so I can inspect them in the interim to make sure they don't walk before I'm able to replace them with the new parts.
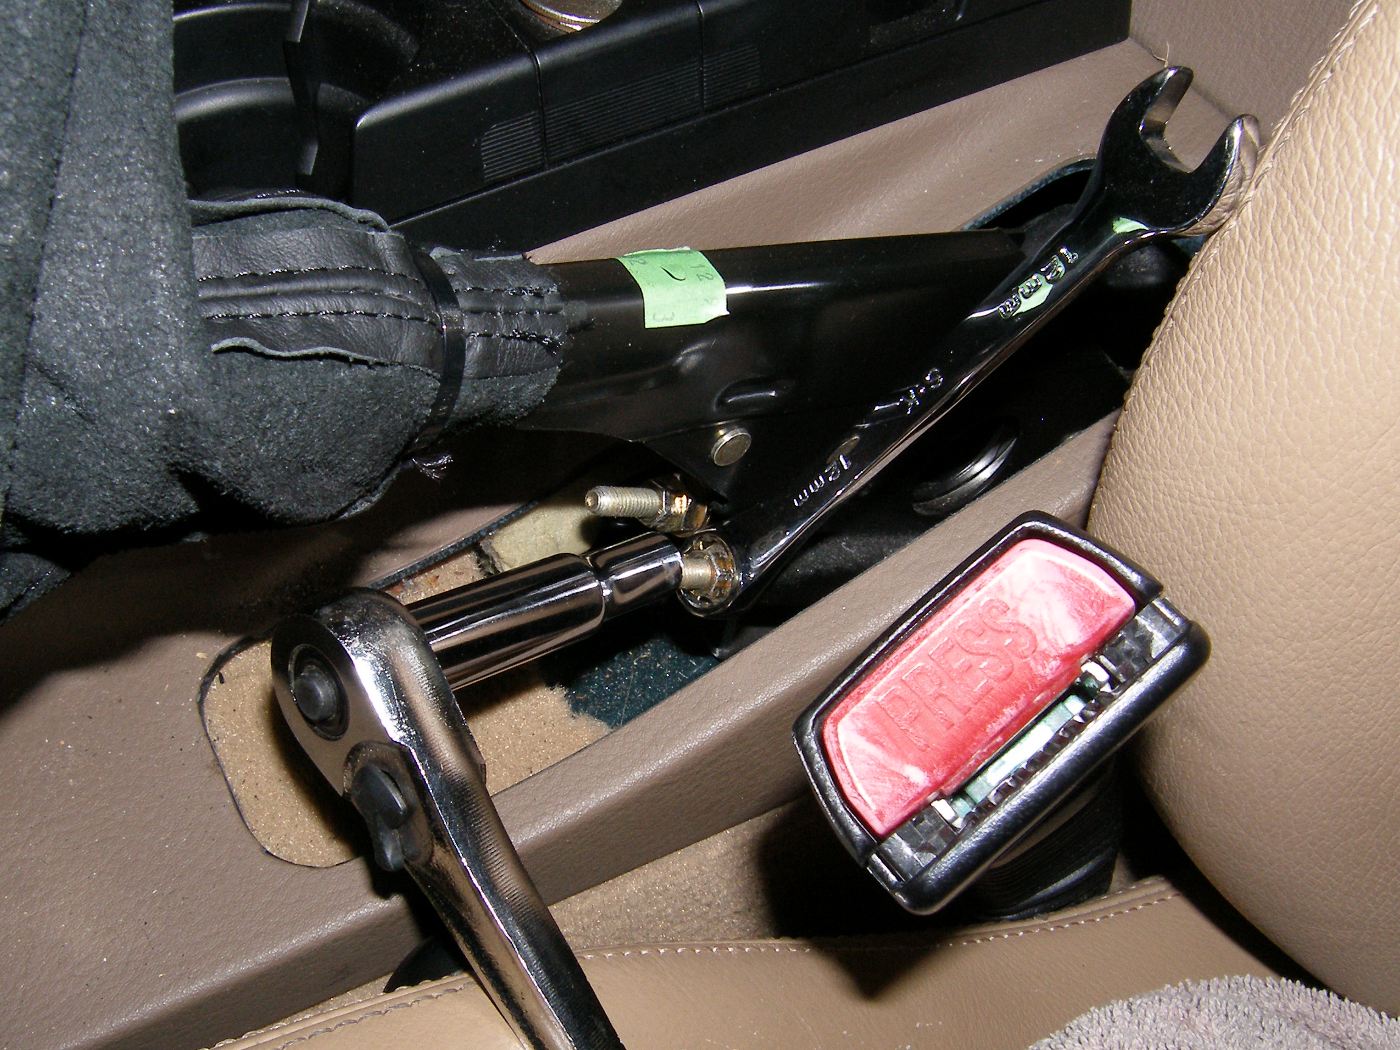
What's torque seal, you ask? It's a colored gel that is used to bridge the gap between a fastener and its mating surface. When torque seal dries it becomes brittle and will crack if the fastener moves. This provides a clear visual indication that the fastener is no longer secure. It can also be used simply to mark fasteners that have been properly torqued and it came in very handy in that sense when I began to secure the axle shafts to the differential. Securing those bolts requires multiple trips between the underside of the vehicle and the interior to alternately secure and release the parking brakes or gear shift so the output shafts can be rotated to provide access to all of the bolts and then secured as required to apply the necessary torque. So my output shafts now look like they belong on an airplane. I can't wait to see if the car lifts off at rotation speed. :)
After about six hours of unrelenting work, I said "uncle" and went home short of my goals for the day. I have eleven hours in the assembly process so far and expect to spend another 2-3 hours tomorrow installing the wheel brakes, swaybar, and muffler. I spoke with the dealer today and they said an alignment might be possible tomorrow but it would be tight. I'm not holding my breath. At this point I think it is more likely to happen early next week.
Mileage: 193332