


Sunday, September 11, 2011
Interior Overhaul - Day 4
This week I received several new parts including the FSU, sunroof cassette, and new speaker grills. The visor clips and third brake light grill are still on the boat.
The new sunroof cassette came preassembled with a new roof seal (something I'd considered buying for the old cassette had I decided to reinstall that) and pre-greased, so the only thing I should need to do is install the repair kit used to mount the interior panel, function test it, and then install it in the car before reinstalling the metal panel. Needless to say, I am quite nervous about installing this unit correctly, since breaking it would mean another delay and yet more money. My technician was on vacation this week so I expect to corner him this week to get more information before proceeding with the installation.
With my 20% discount the new speaker grills were $14 each and the sunroof panel repair kit only $38. The parts manager (a guy I've known forever because he worked at the dealership long before the ownership change in 2006) took considerable pity on me as he discounted the cassette by 25%, shaving a full $200 off the $800 retail price of that part. I've said it before, but it's nice to have friends in high places. :)
I also pulled the trigger on a iPod Touch 32GB and that should be here late this week. I briefly considered buying the Nano to save money and because its small size would have allowed me to stealthily install it in the ash tray, but at the end of the day I couldn't justify spending nearly two thirds the cost of a Touch while giving up what I wanted most -- a parametric equalizer that I could use to tweak the acoustics on the fly. The perk for me is that the Touch is not just a music player...it can do everything an iPhone or iPad can do, except make calls on a cell network, and I can use it anywhere WiFi is available. So, in my opinion, the Touch is clearly the better buy.
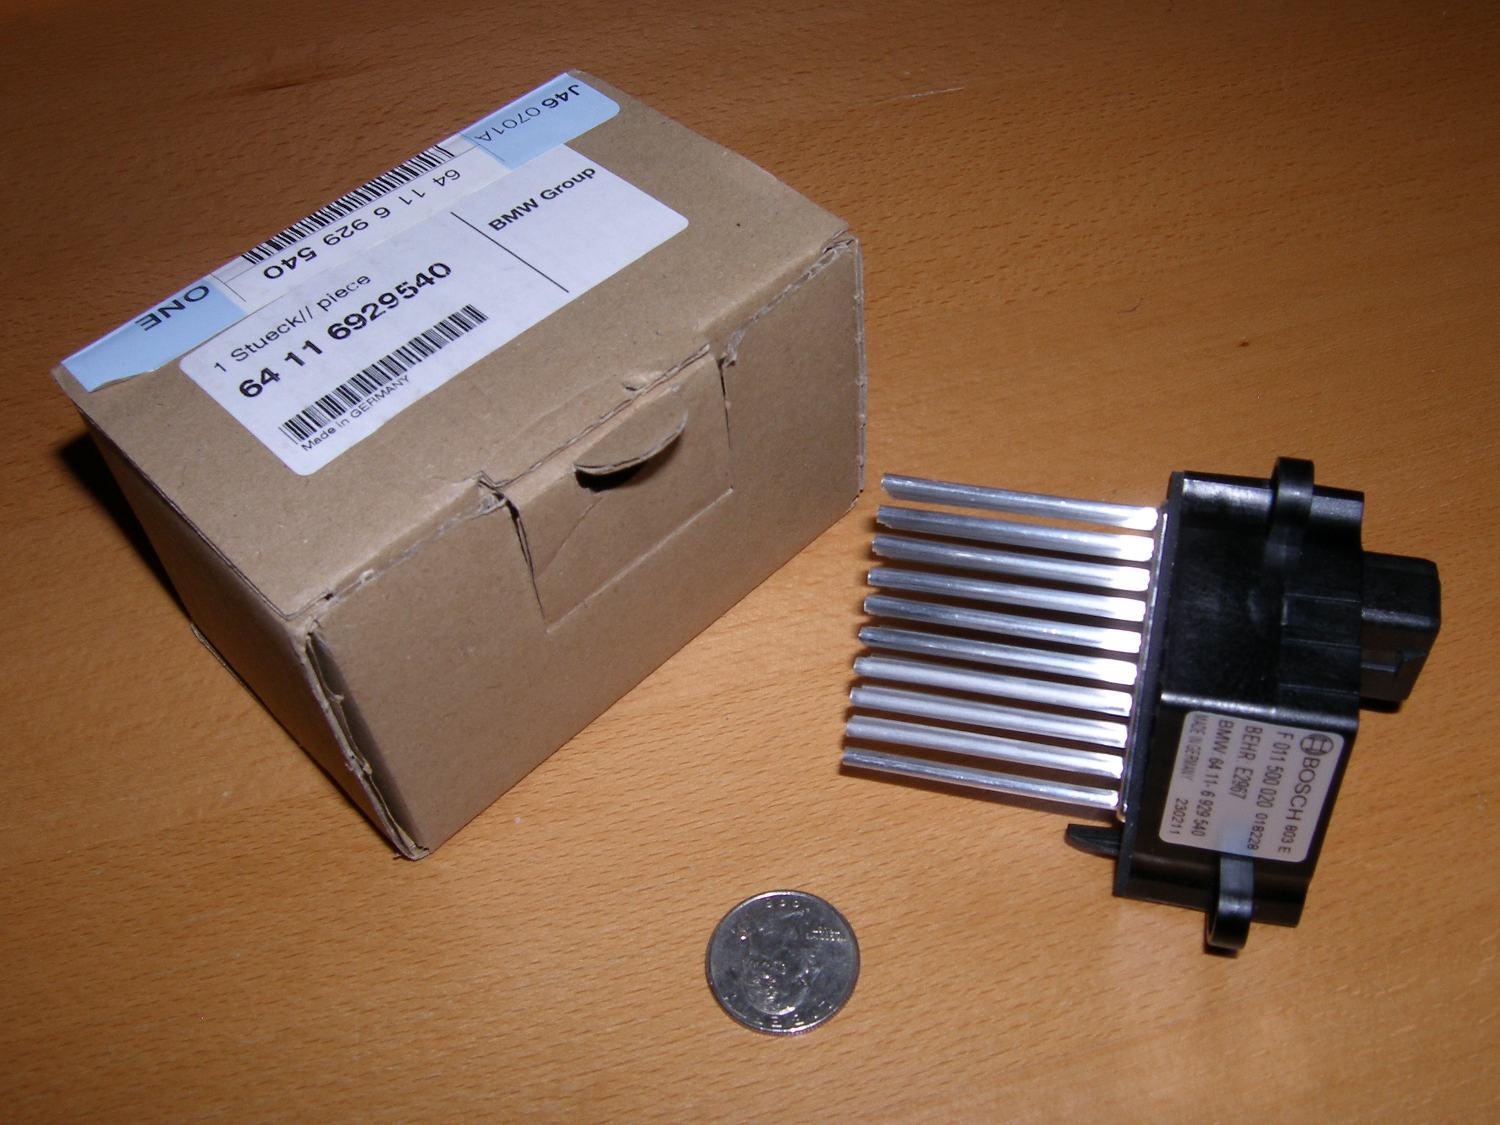 The BMW Gods are not without a sense of humor -- I still have to deal with routine failure modes while I work on major overhaul projects. Behold the new Final Stage Unit (FSU). |
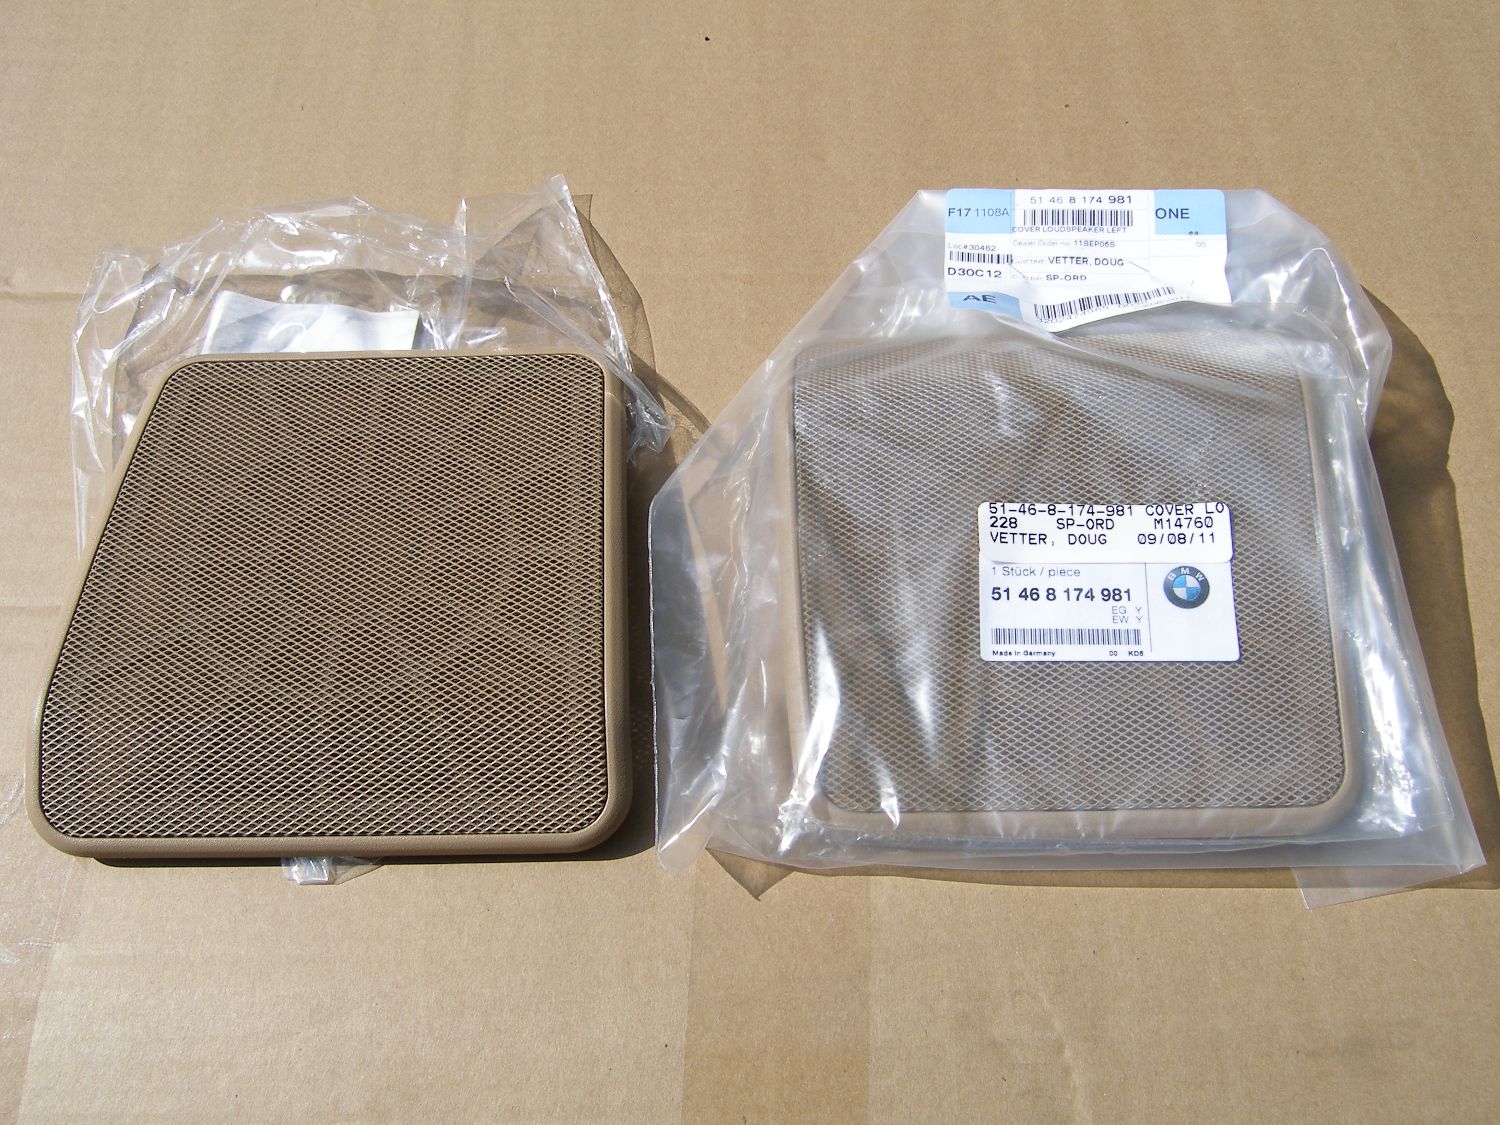 The old rear speaker grills are broken, faded, and the protective foam is crumbling. These new parts are beautiful in comparison. |
 BMW calls this a sunroof "repair kit" and it's used to affix the interior fabric panel to the sunroof cassette assembly. |
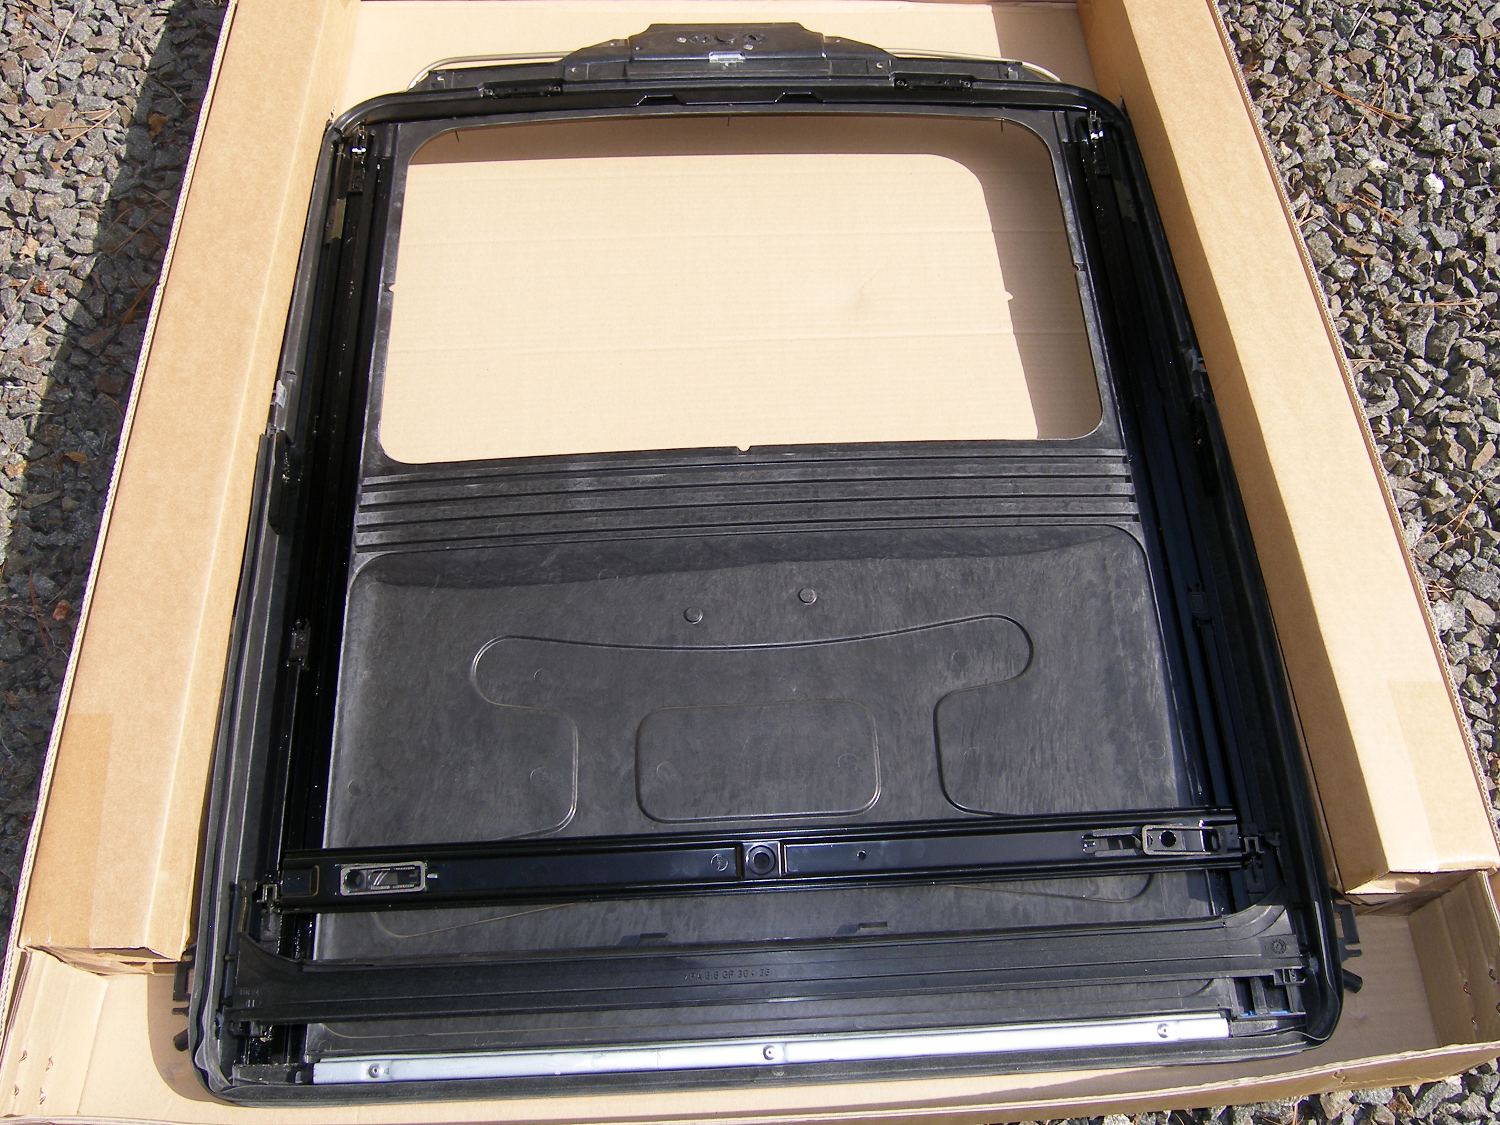
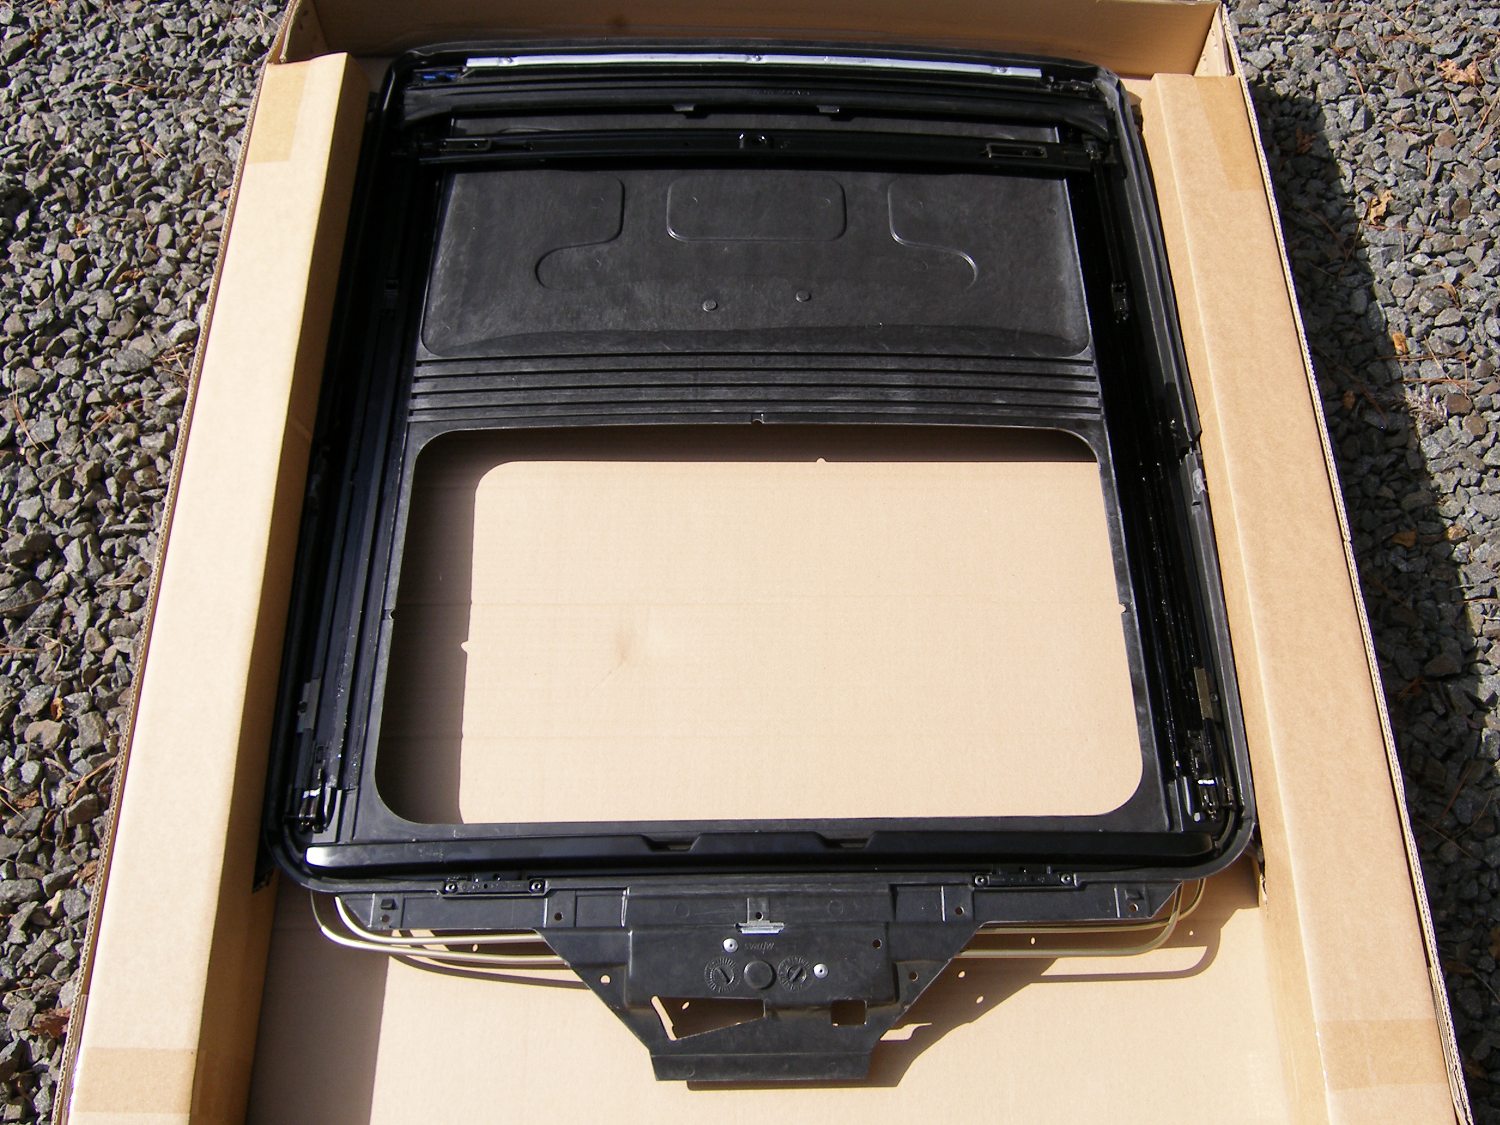 Front view of the new sunroof cassette. The unit comes fully open, but the wind deflector is closed because the front carriages are fully forward. |
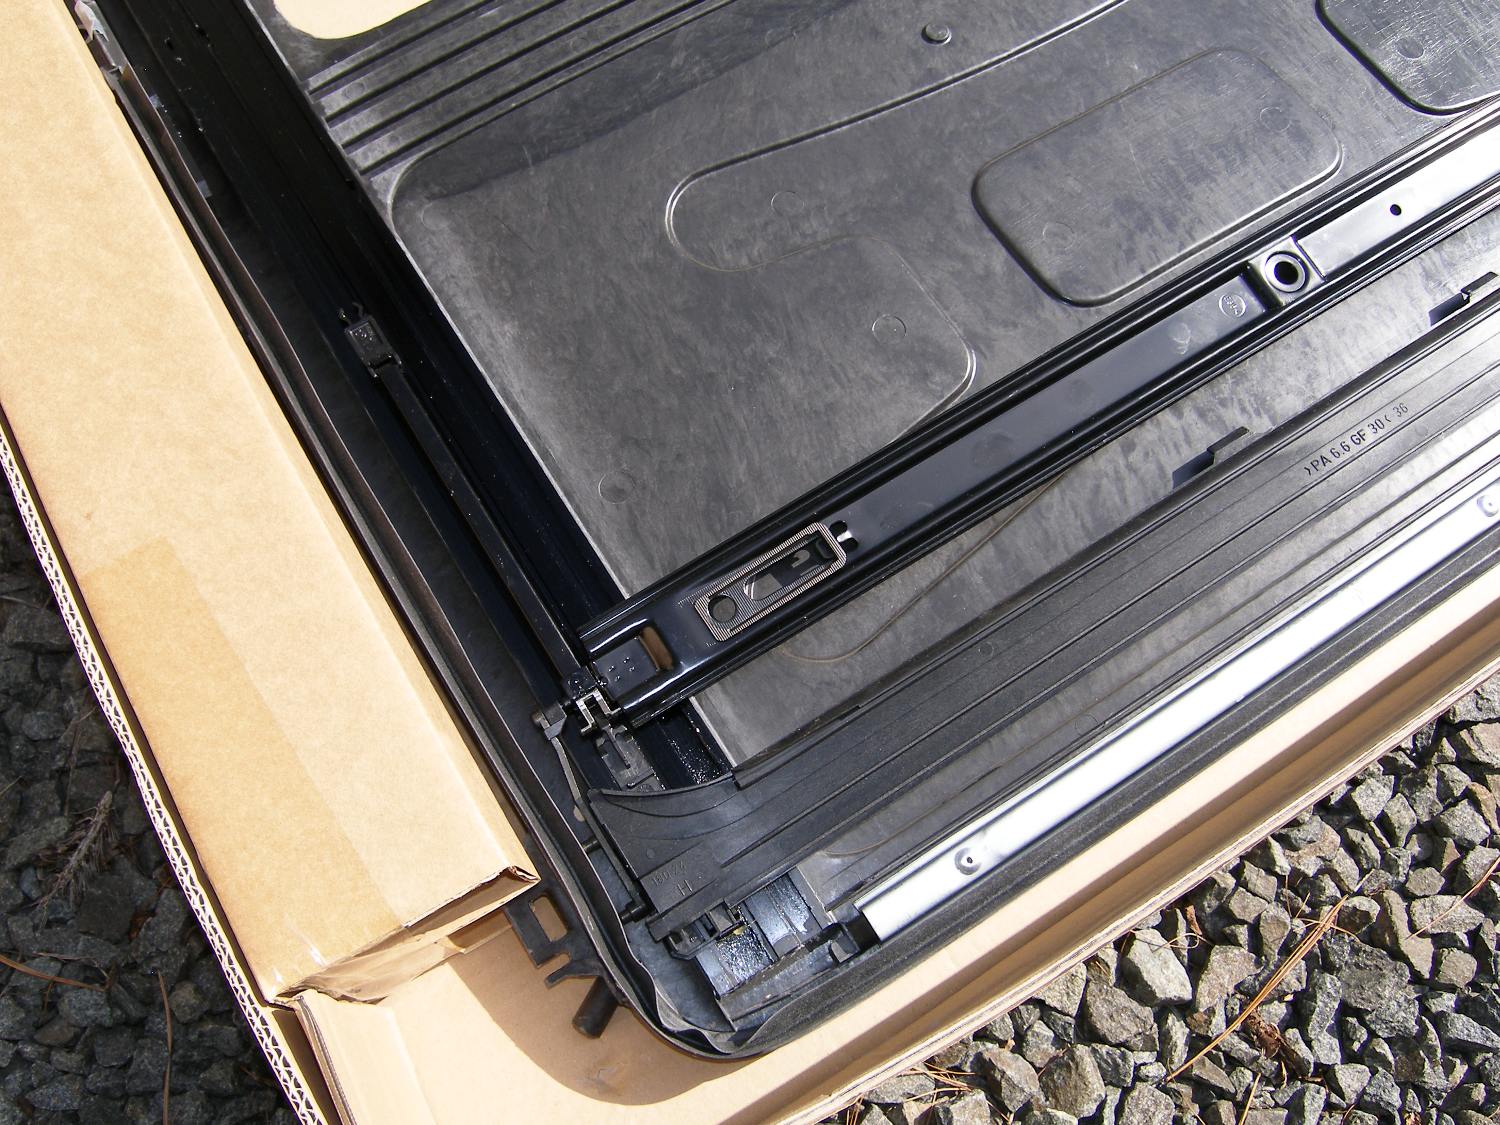 A closeup of the rear corner of the sunroof cassette showing the crossbar and one of the two wedges that are used to adjust the height of the metal panel. |
 Plan is to connect the repair kit to the sunroof and then attach the interior fabric panel to that, and slide it forward for testing and eventual installation in the vehicle. |
Interior Overhaul - Day 4
I went over to the garage today with the intent to install the repaired brake light assembly, parcel shelf, and FSU. I definitely made progress today, but for various reasons, I didn't get as far as I'd hoped.
I figured that the installation of the brake light assembly would be a nice way to ease into the work day so I began by cleaning the recess in the body that accommodates the brake light assembly before installing it. A quick test verified that the brake lights were now working. At this point my confidence and OCD combined to produce an overwhelming desire to remove the passenger side assembly in order to clean behind it. Just as when I removed the driver's side unit I found a bunch of crud packed behind the assembly so I grabbed the hunk of dirt and debris, tossed that outside where it belonged, and cleaned both the body and the assembly, paying particular attention the weather stripping that seals the assembly to the body. A couple minutes later I reinstalled the assembly and reconnected the electrical connector. However, when I pushed down on the brake pedal to verify the installation, I realized that the passenger side brake light no longer worked. Doh!
I turned the headlamp switch to the parking light position and walked around the back of the car to verify that the tail lamp bulbs were illuminated so I knew the electrical connector was properly seated. I decided to pull and reattach the electrical connector a few times on a hunch that the connections might be slightly corroded but that had no effect. So I pulled the connector off one more time and inspected the contacts more closely to find them covered with a green coating typical of highly oxidized copper. Lacking any contact cleaner in the garage I decided to use some emory cloth I had on hand to clean up the contacts.
The trick was tearing off no more than about 3/8" of the 3/4" wide cloth and rolling it up tightly so I could insert it into each contact and spin it around several times as required to remove the oxidation. That process noticeably cleaned up the contacts so I reinserted the electrical connector, performed another test, and was greeted with properly functioning brake lights. I wanted to get moving on other projects so I didn't bother to clean up the driver's side contacts but I expect to do that, wash all the contacts out with some contact cleaner and then sparingly apply some Noalox or other suitable anti-oxidation compound to prevent similar problems in the future. Why BMW didn't use a properly sealed connector here is beyond me.
With that task more or less complete I moved on to the parcel shelf -- only to realize that some of the small pieces of foam necessary for the installation were missing. So that meant a trip over to the local big box store to pick up some vinyl foam weather stripping. That took a good 40 minutes but I knew the lack of this foam would probably result in various creaks and rattles so it was worth the effort. At that point my brother came over to ask me to help him remove the seats in one of his cars so that ate up a solid half hour. By the time I got back to the garage I realized that I had yet to remove and repair the driver's side rear panel as required to install the parcel shelf so that was next on the list.
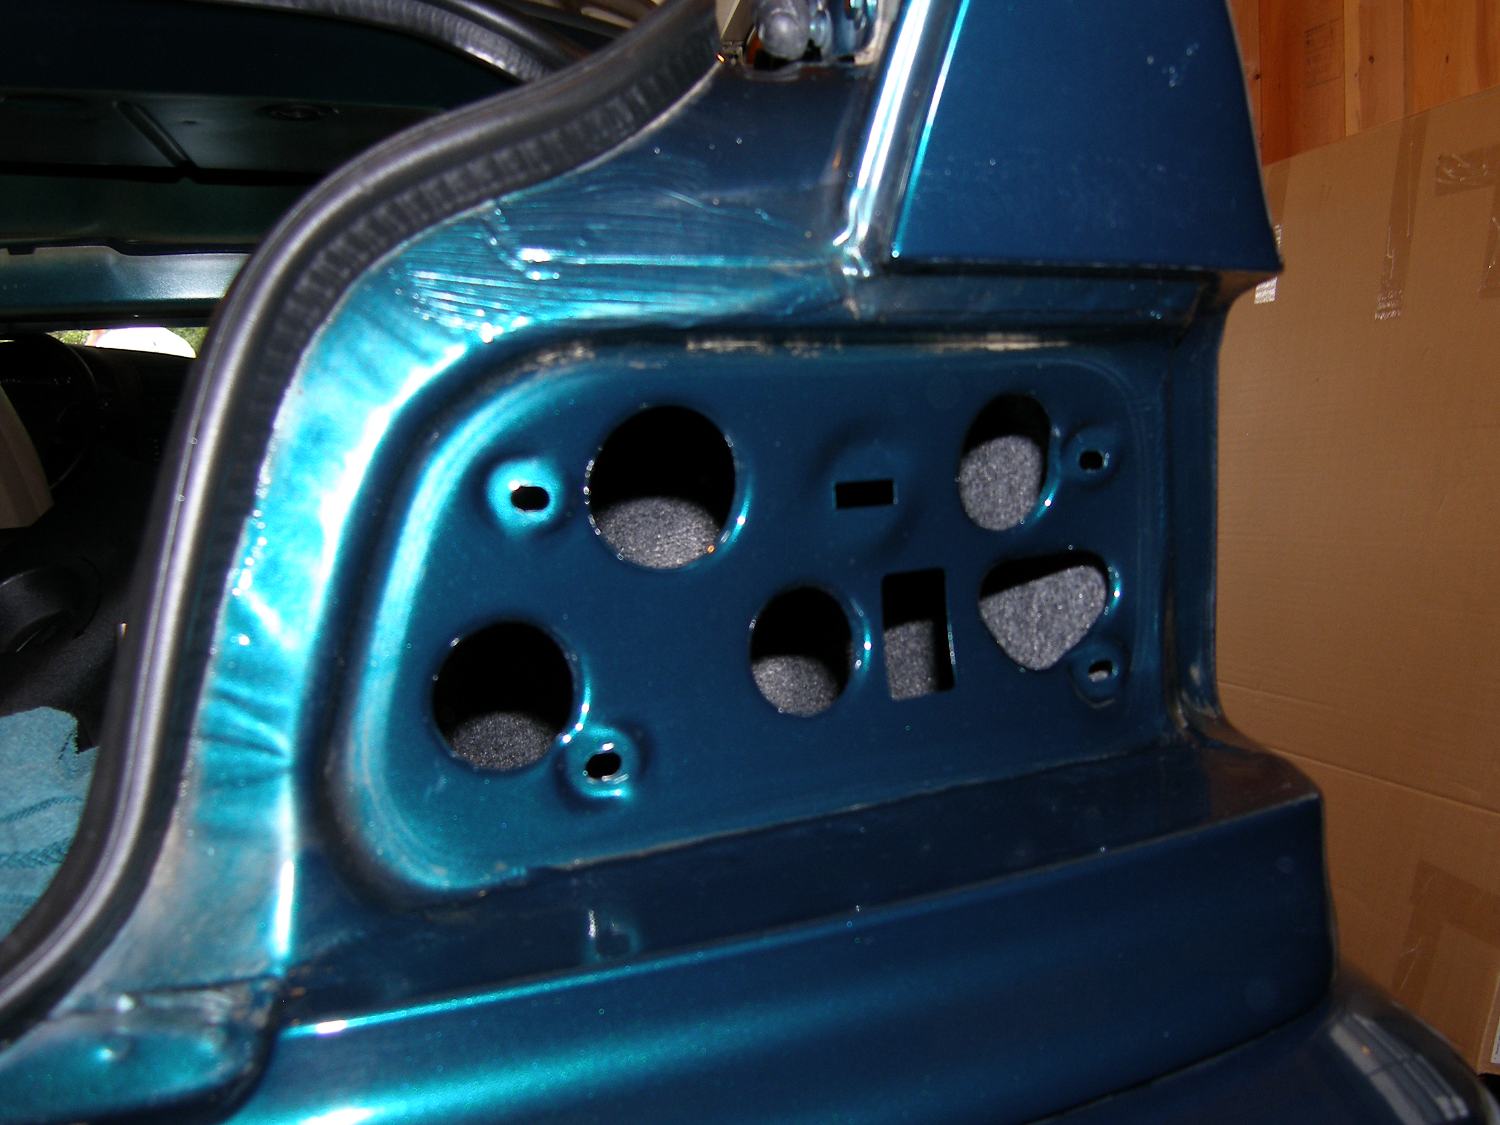 This is the passenger side recess in the body that supports the brake light assembly. This was caked with dirt and debris...and yet now it looks almost presentable. |
 Looking down through the rear window this shows two of the four positions where I applied vinyl foam to take up some slack where the parcel shelf tabs fit into the slots. |
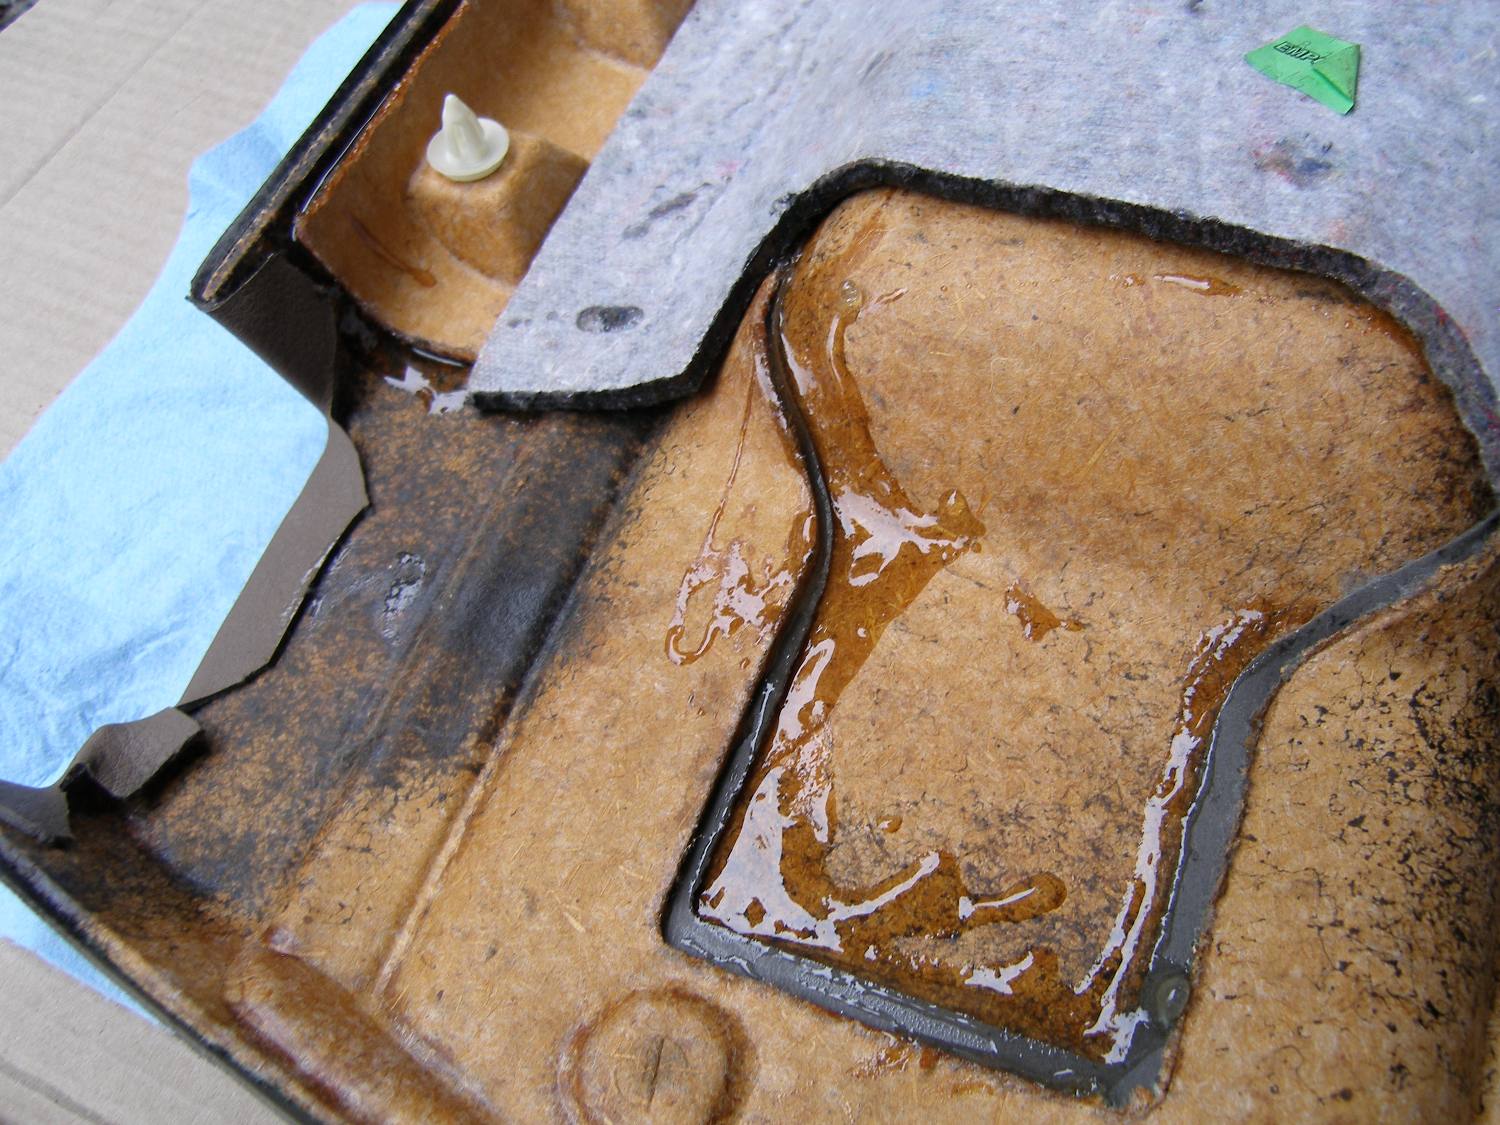
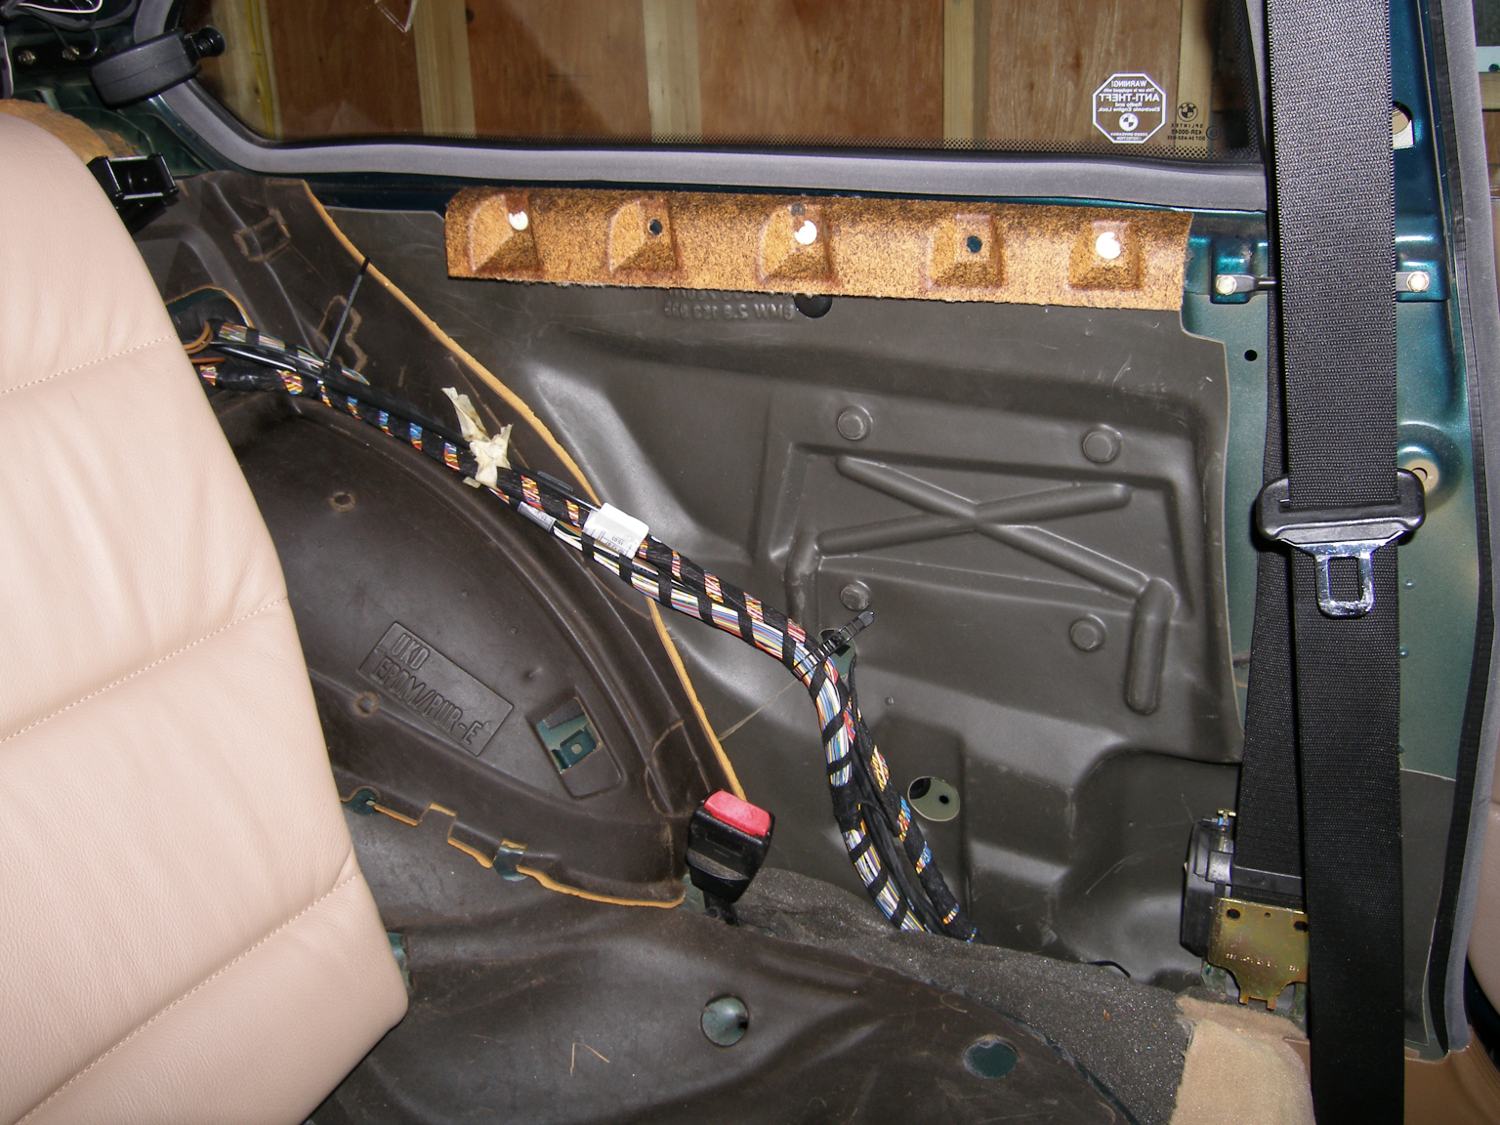 Hmmm...something's wrong here. Can you spot what it is? Sure enough, the upper panel support stayed behind with the vehicle. |
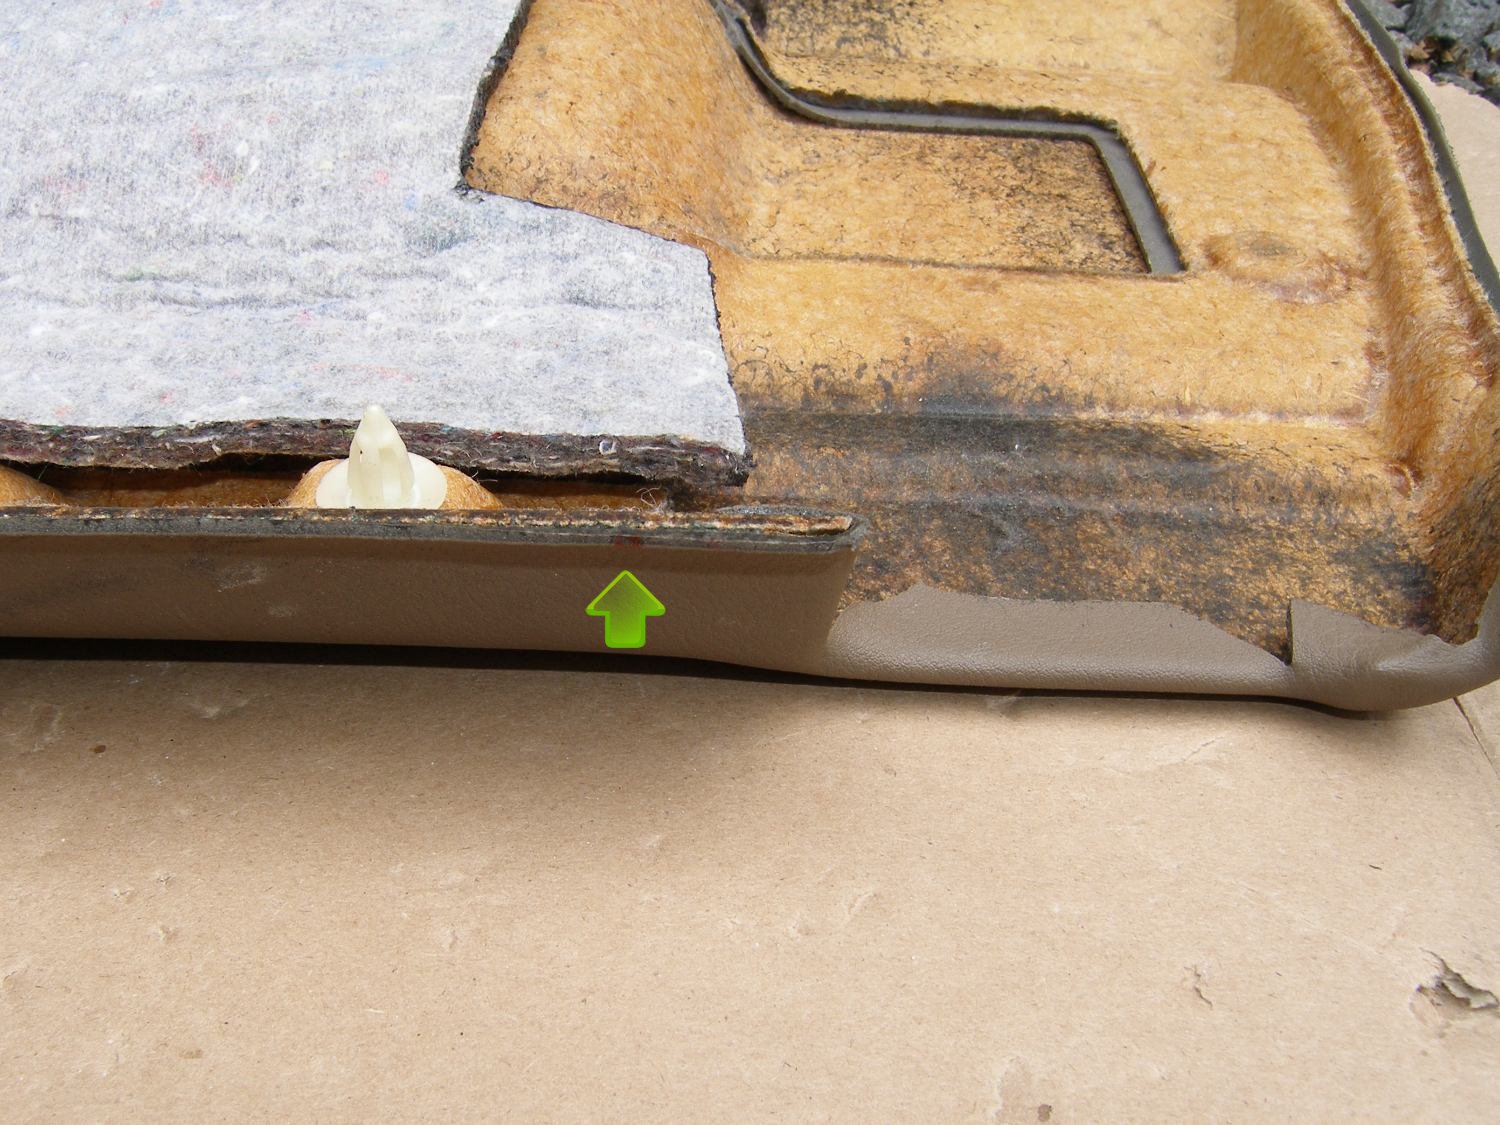 The arrow shows how I marked the edge of the panel with a red marker. I marked the other end of the support for good measure and then used those marks to center the support before I applied epoxy. |
 I carefully pulled the inset slightly away from the base panel, stood the panel upright and then squeezed some epoxy down into the "slot" that resulted. Then I applied a bit more epoxy over the rear seams to strengthen them. |
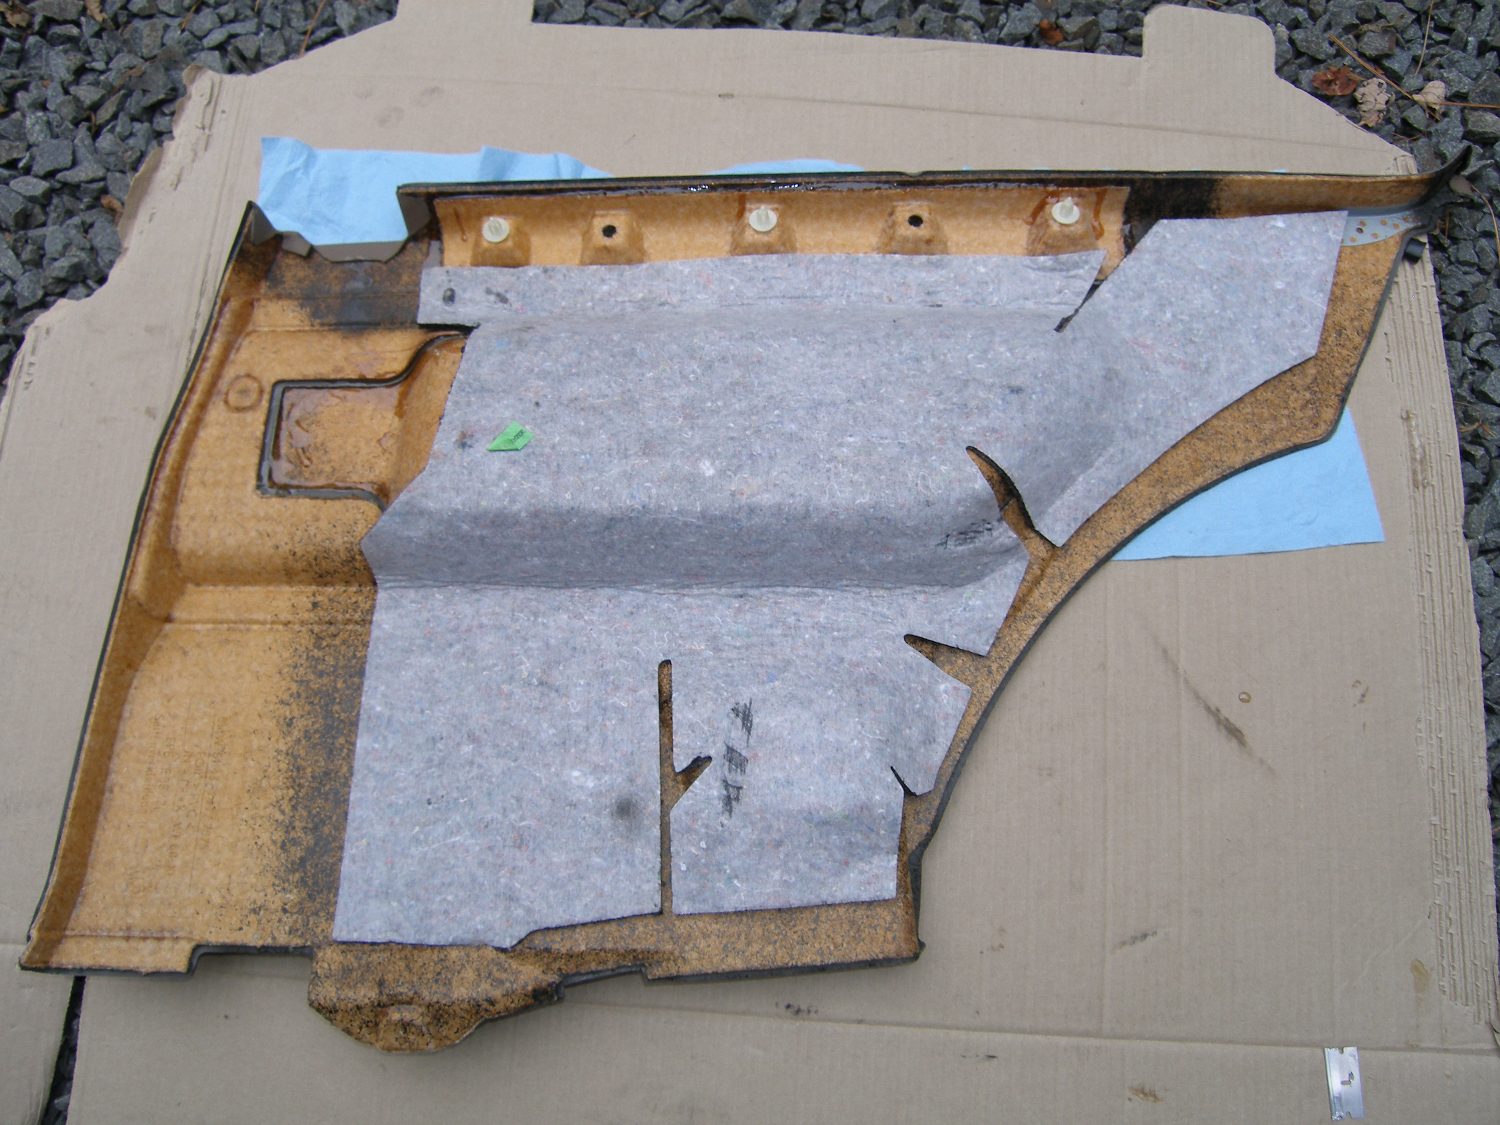 The repaired rear side panel ready for installation. Hopefully I'll never have to pull this out again, but if I do, at least I'll know what to expect. |
To remove the panel I had to remove the rear seat cushion, open the rear quarter window, and pull the quarter window weatherstripping up and away from the panel. As I surveyed the panel to ensure I would remove it without damaging it I noticed that it was fit loosely to the vehicle. From my work on the door panels I was quite familiar with this symptom and naturally assumed the upper support piece had separated from the panel itself. Interestingly, this worked to my advantage, as it didn't take much effort to pull the panel directly forward and away from the body. As the panel came away from the vehicle I confirmed my suspicion: the support had remained attached to the vehicle. It was at this point that I thanked myself for buying a couple extra tubes of 5 minute epoxy the last time I was at the box store.
I carefully pulled the upper support away from the car and took it and the panel outside for a closer look. The first thing I noticed was a bit of water staining on the leather. That could only come from a leaking window, yet a closer inspection of the weatherstripping did not reveal any obvious problems with the seal integrity. A quick application of some leather cleaner / conditioner did wonders for the overall cosmetic condition of the panel so I decided to proceed with the repair. First I pulled the panel inset away from the base of the panel enough to inject just the right amount of epoxy into the joint before compressing the two pieces and holding it for a few minutes until the epoxy set. Next, I mated the upper support with the car once again and installed the panel in a manner that allowed me to mark the front and rear edges of the support on the panel, before once again removing everything and bonding the support to the panel with another tube of epoxy.
I was pretty much out of time at this point so I decided to do one small job before leaving for the day: figure out how I would route the cables for the iPod adapter. The instructions point out (wisely, based on my reading online) that the adapter interface box needs to be mounted somewhere easily accessible just in case it is necessary to conduct a hard reset of the device or change one of the dip switch settings. After surveying the center console, I figured that would not be a good place for the unit for reasons of clearance and accessibility.
I pulled the adapter cables from the box and uncoiled them to get a feel for their length. As it turns out, the thicker and longer of the two cables that connects the CD changer wiring in the trunk to the interface box is sufficiently long to reach the glove box so I could install the unit in or near the glove box easily enough. But I also confirmed that I could mount the box in a small space currently filled with foam near the front corner of the rear seat and then route the iPod cable up through the center console. I'm not sure which I'll do yet, but I plan to think about it this week...which is probably the only benefit of my slow progress on this project: no rash decisions I'll regret later.
Mileage: 212050, Parts: $1030, Materials: $20, Parts Saved: $216