


Tuesday, May 29, 2012
Front Suspension Overhaul - Day 3
At the close of day 2 I had separated the struts from the kingpins but because I lacked a socket adapter to reduce the 3/4" drive of the 45 mm axle nut socket down to the 1/2" drive of my air wrench I could not remove the nuts, bearings or brake shields. So the first thing I did today was stop by Eppy's to pick up that adapter.
I began the work session by removing the wheel nuts. I was somewhat concerned that I would not have the leverage required to hold the kingpin still in isolation (since it was no longer connected to the strut or the car) but I quickly realized that this is why air tools were invented. I put the kingpin on the floor, put the tip of one foot on each of the brake caliber bracket bosses and went to town with the air wrench. The wheel nut came off so quickly it spun off the spindle and rolled a few feet away. The second wheel nut came off just as nicely, and I have video proof as evidence.
When it came time to pull the bearings I was aware that the inner race tends to stay behind on the spindle. It doesn't happen all the time, but it does happen. The first bearing I pulled off with my hands brought the inner race with it, while the second left it behind. To remedy that I used some screwdrivers to pry it off. I wound up bending the brake shield due to the recessed nature of the inner race relative to the shield but I did not consider this an issue as I had plans to replace them. I noticed several cracks in the brake shield near each of the mounting holes so they needed to go. With the inner race removed I then wrapped up the task and pried the inner bearing shield cup off the spindle.
With the inner race of the second bearing removed I took some time to inspect the insides of the bearing. The grease still looked almost fresh and the balls were all perfectly shiny. I could not believe these bearings had over 220K miles in service. I snapped the inner race back onto the bearing and spun it to find it rolling smoothly -- perhaps not as smoothly or as tightly as the new bearings, but not bad either. I guess this sums up what I've gathered about bearings -- they are really best replaced on condition (meaning, when they fail). One thing is sure: quality OEM (SKG or FAG) bearings last a long time. For reference, my original factory bearings turned out to be FAG and I have bought SKG / Toyo to replace them.
The first snag of the day came when I attempted to remove the notoriously stubborn ABS sensors from the kingpin. The first job is, of course, to remove the sensor mounting bolts. I soaked both liberally in PB blaster and took a 10 minute break before returning to remove them. I loosened the first bolt and wicked yet more PB blaster into the threads before continuing and rocking the bolt, only to feel the bolt suddenly loosen up snap off, leaving a stud about 5/8" in length behind in the kingpin. Damn! I likely could have removed the stud myself but quickly resolved to deliver it to Don at Mr. M Car with the other parts the next day and have him remove it as I expected that to be a more efficient use of my time and money. The second bolt, incidentally, came out without any trouble.
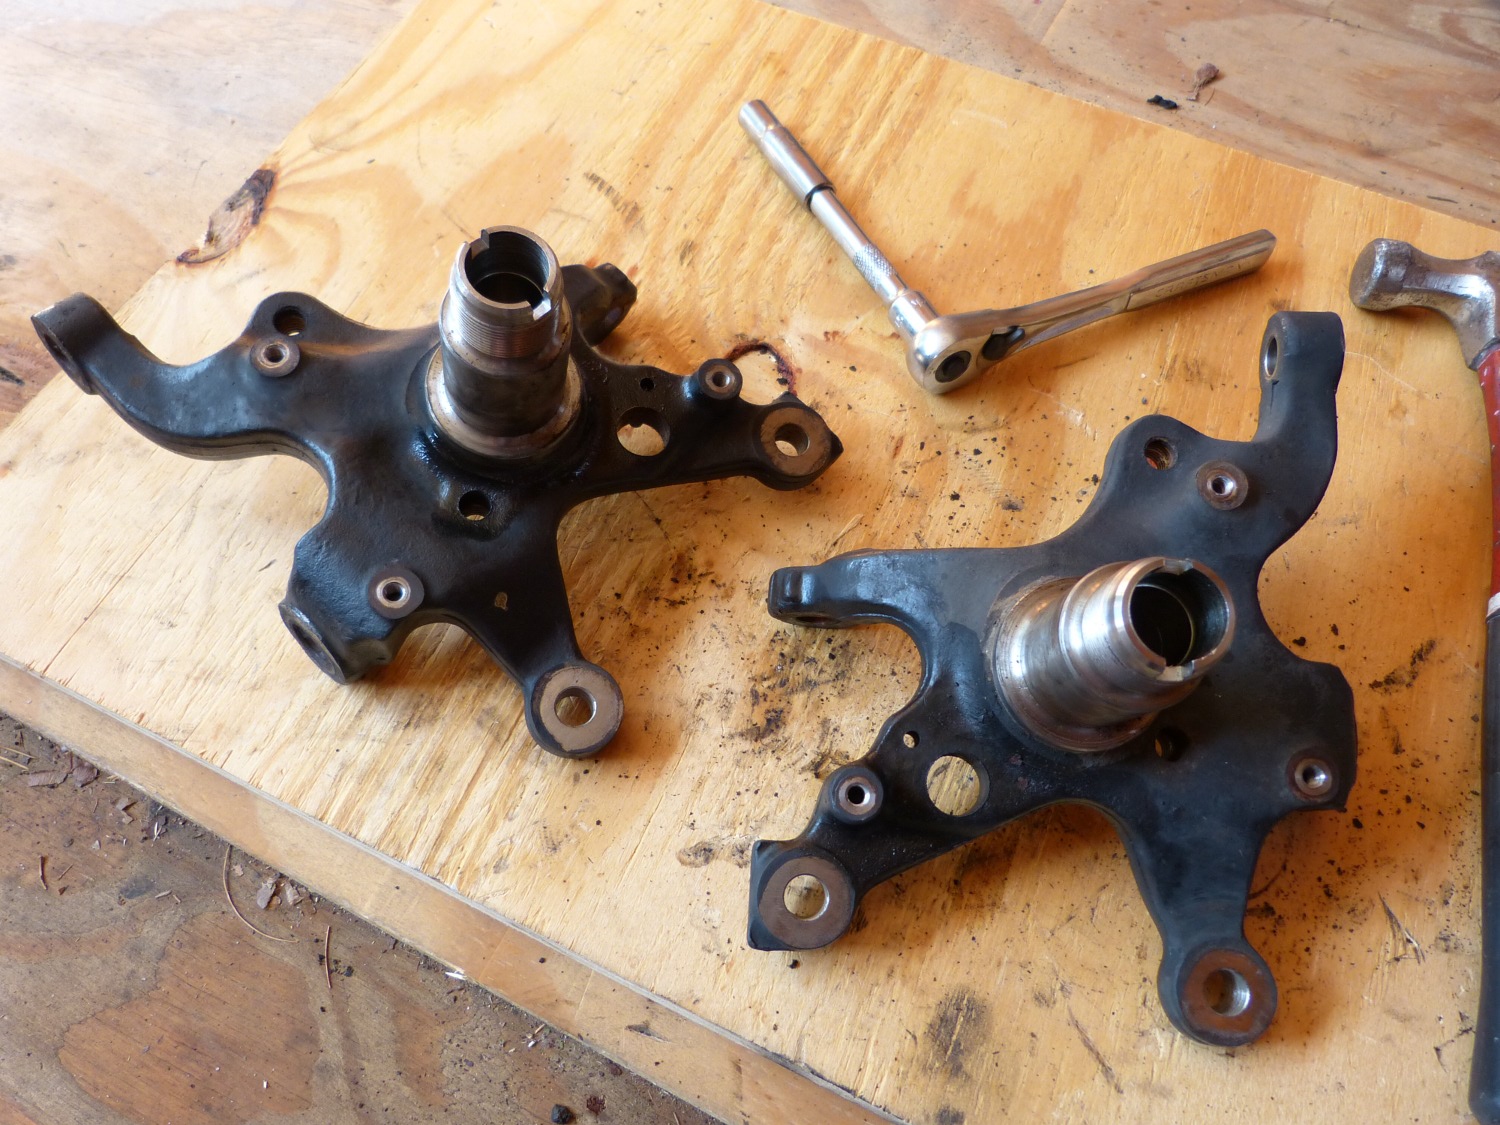 Here's what the kingpins look like completely stripped of the brake shields and bearings. |
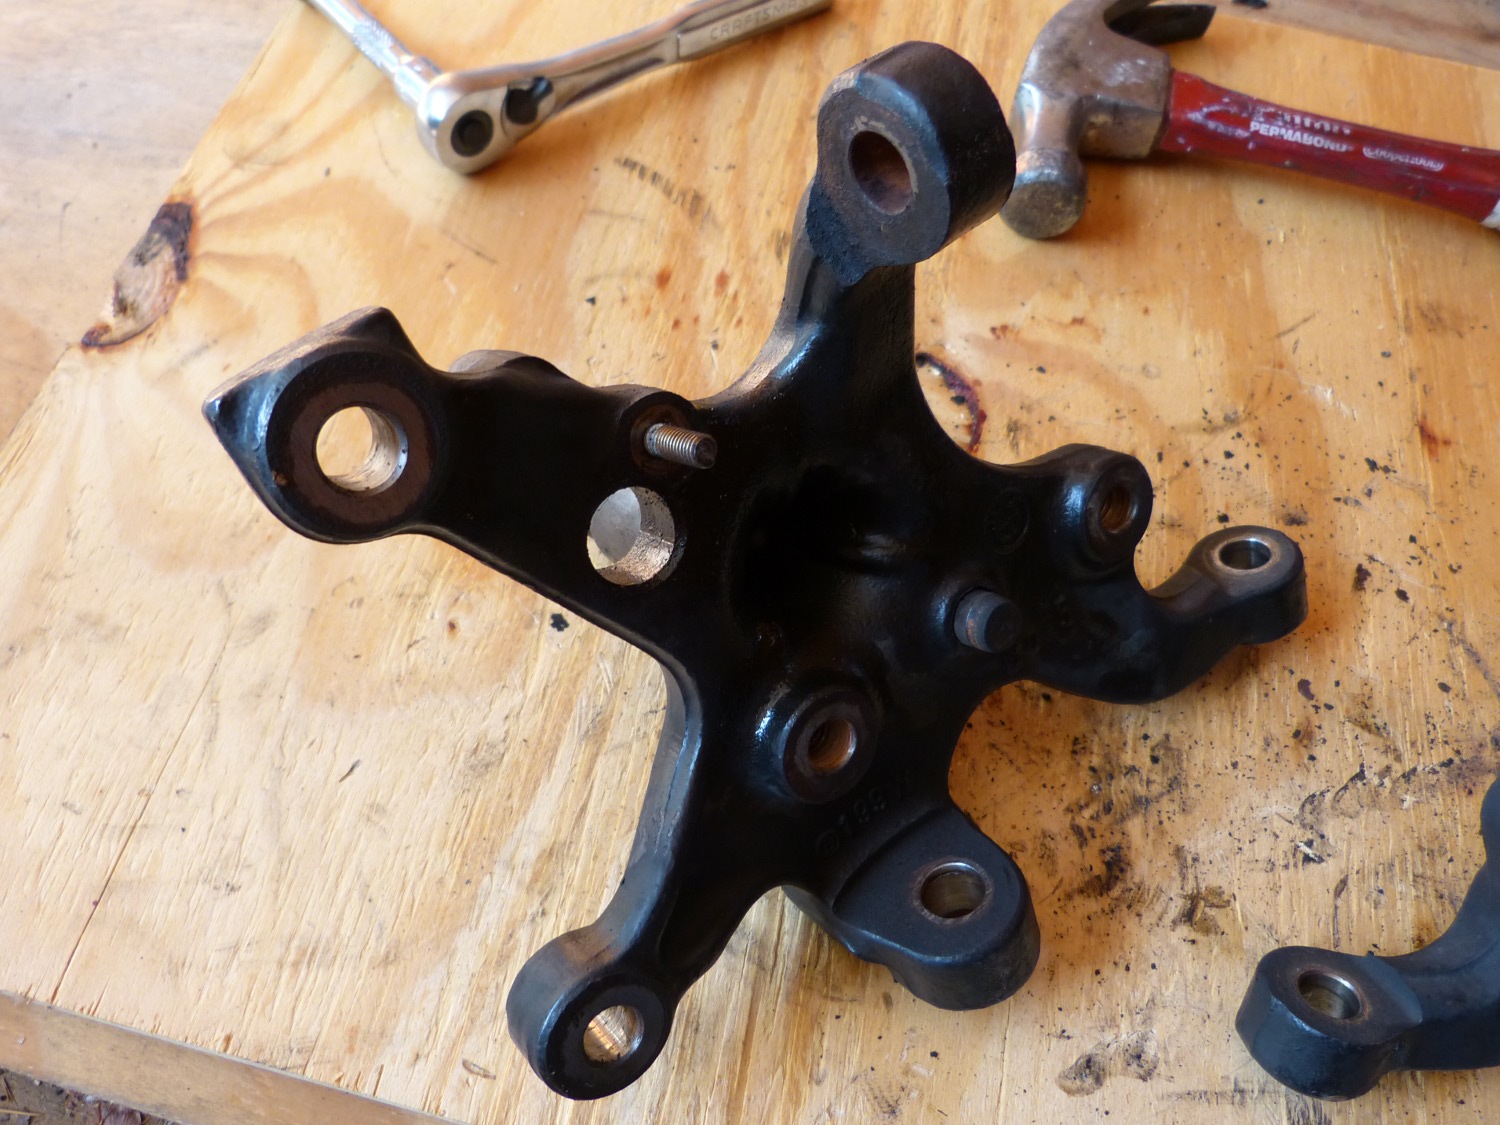 The snag of the day: a broken ABS sensor bolt. This will go to my local indy tech to be removed because he does this all day long. |
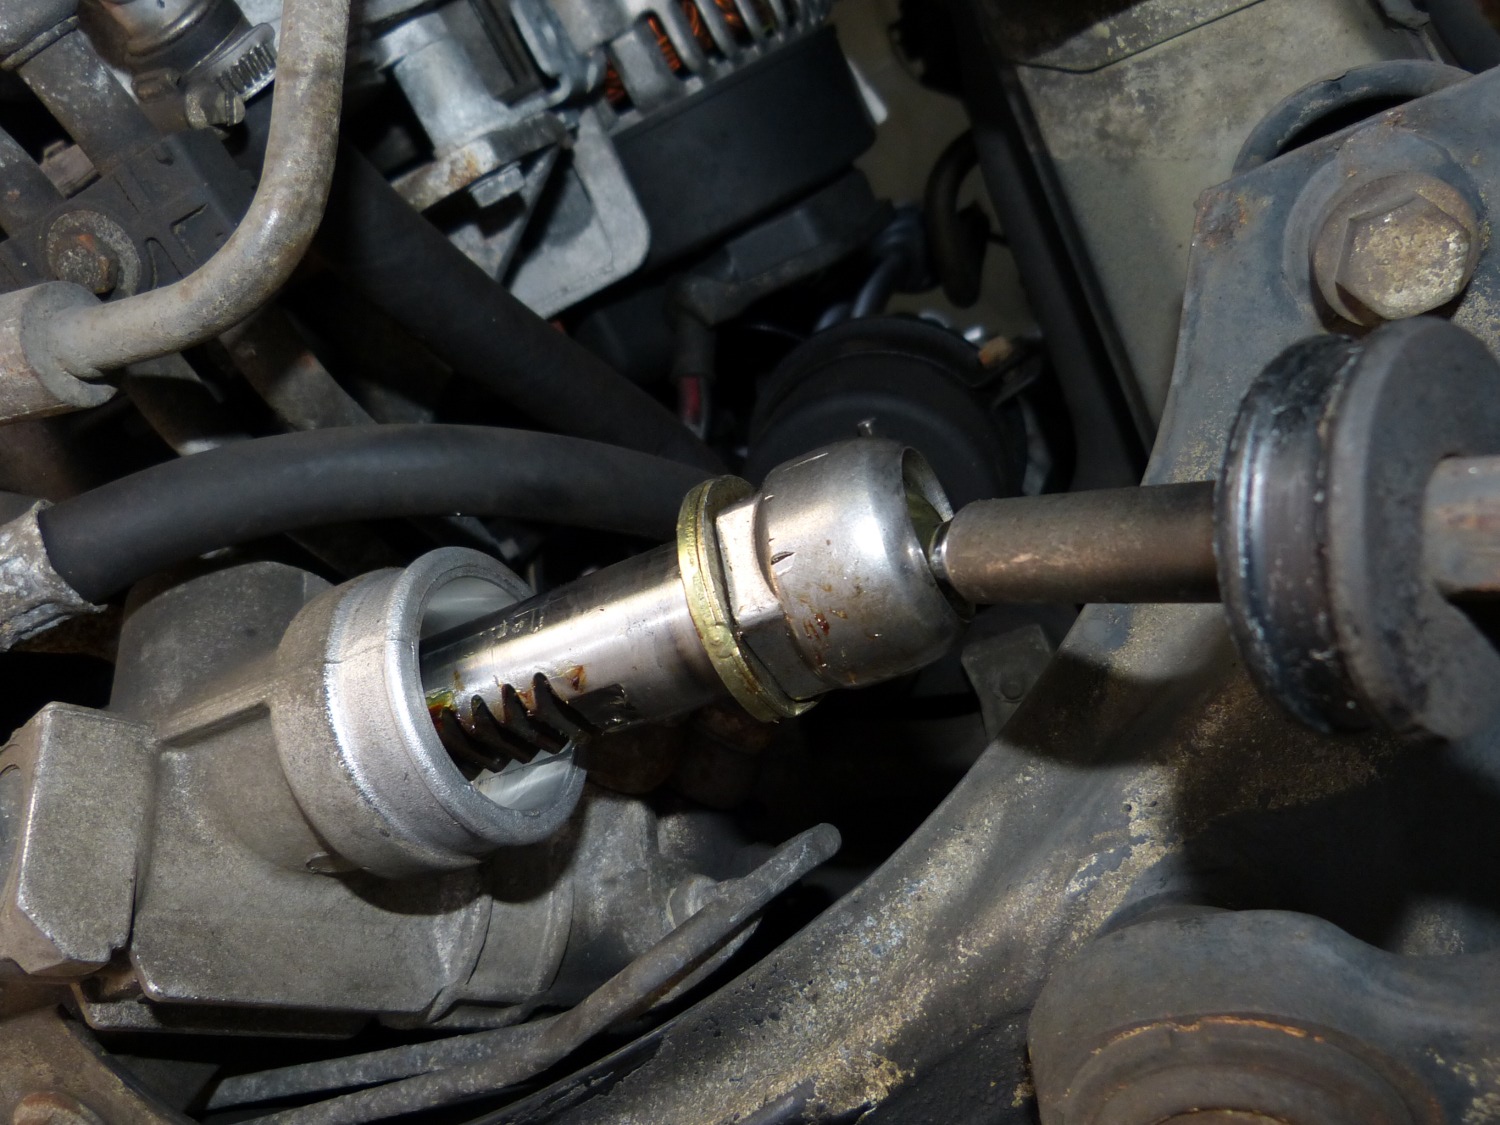 The left side inner tierod exposed after removing the dust boot. Here you can clearly see the need for a thin 32 mm wrench or crow's foot socket. |
When it came time to remove the sensors themselves from the kingpins they refused to budge. I found this reminiscent of the rear suspension overhaul and became quite nervous that I might destroy these very expensive sensors. I quickly decided to use a deep socket as a drift and found a 7/16" fit nicely. I wicked a bit more PB blaster into the small gap between the sensor and kingpin before fitting the socket and tapping with a hammer until it released. In less than a minute I had removed both sensors using this method. I found I had to hit both sensors quite hard to get them to break free but after that several lighter taps completed the task. A quick inspection of the sensors appeared to show no damage so I may have avoided a $300+ charge, but only time and a test drive will tell.
Moving back to the car I decided it was time to remove the control arms. I quickly removed the bolts holding the lollypops to the frame rails and then broke out the big guns (air hammer with large pickle fork) to remove the inner ball joint from the subframe. I found this considerably easier than dealing with the outer ball joints. The inners just popped free after a few seconds of trigger down time...and as luck would have it (and maybe a touch of planning) I have video proof. I set the arms aside as I expect to deliver them to Don so he can pull the bushings off the old arms. I could probably do it myself but it will take him less time. Naturally, I'm also planning to have him install the new control arm bushings at the same time.
Next up I decided to remove the tie rods from the rack so I pried off the clamps holding the dust boots to expose the inner tie rod nuts. At this point I realized that I would indeed need a thin 32 mm crows foot to both remove these arms and ultimately torque the new arms. I did not have that tool so I decided to attempt to remove the rack with the arms attached, simply so I could proceed to remove the subframe.
To remove the steering rack I had to first drain the rack using standard procedures. I took the time to put a bag around the pulley to protect the belt from any contamination with ATF, and then loosened and ultimately removed the banjo bolt on the pump. I then waited the 10 minutes or so required for the flow to slow to a drip before I loosened the clamp on the rubber hose connected to the ATF reservoir. Because I drained the system via the pump not a single drop of oil came out of the reservoir.
I then set about to disconnect the rack from the isolation joint in the steering column. Due to reduced clearance I decided to remove only the lower bolt for now. A small ratchet and open end wrench in combination worked but it was slow going as there isn't much room to swing anything.
When I started to loosen the bolts holding the steering rack to the subframe I realized that they were spinning but not loosening. I had originally assumed the bolts threaded into the rack but this was clearly not the case. Looking on top of the rack I found the nuts I needed to hold steady but I also found clearance to be an issue. I did manage to get one of my box-end wrenches up there but with the sun low on the horizon (I started late today due to the heat) and my patience wearing thin I decided to call it a day and pick this up next weekend.
Before I left the garage for the day I collected the parts I have to deliver to Don to build up my struts, and put everything in the trunk of the E46 so I could deliver them to him at lunch the following day. I'm back at the salt mine tomorrow so I'm done with the project until Saturday. Total time in disassembly so far: roughly 6 hours.
Videos:
- Removing stub axle nut with air tools
- Pulling wheel bearings off stub axle
- Inner tierod closeup
- Removing inner control arm ball joint with pickle fork
- Condition of old lollypop bolts
- Condition of inner control arm ball joint
- Draining power steering rack
Mileage: 222600