


Sunday, August 27, 2017
Belly Rust Remediation Begins
When I started this project I had no plans to clean the bottom of the vehicle but after inspecting all of the areas I knew I would need to clean in prep for rust remediation and realizing that dirt could be hiding additional rust I decided that it would be easier to clean the entire bottom of vehicle rather than spot clean. I knew up front that this would be a messy job so I bought a tyvek suit. By the end of the cleaning process I was glad I did.
I used the spray wand to coat the bottom of the vehicle with a strong solution of ZEP degreasing liquid. Unfortunately, a lot of the oil and grease residue would not budge so I had to resort to lots of scrubbing. Once the dirt was agitated I used the spray wand again to apply a second coat of degreasing liquid and that took a bulk of the grease away. I wrapped up by rinsing everything off with pure water.
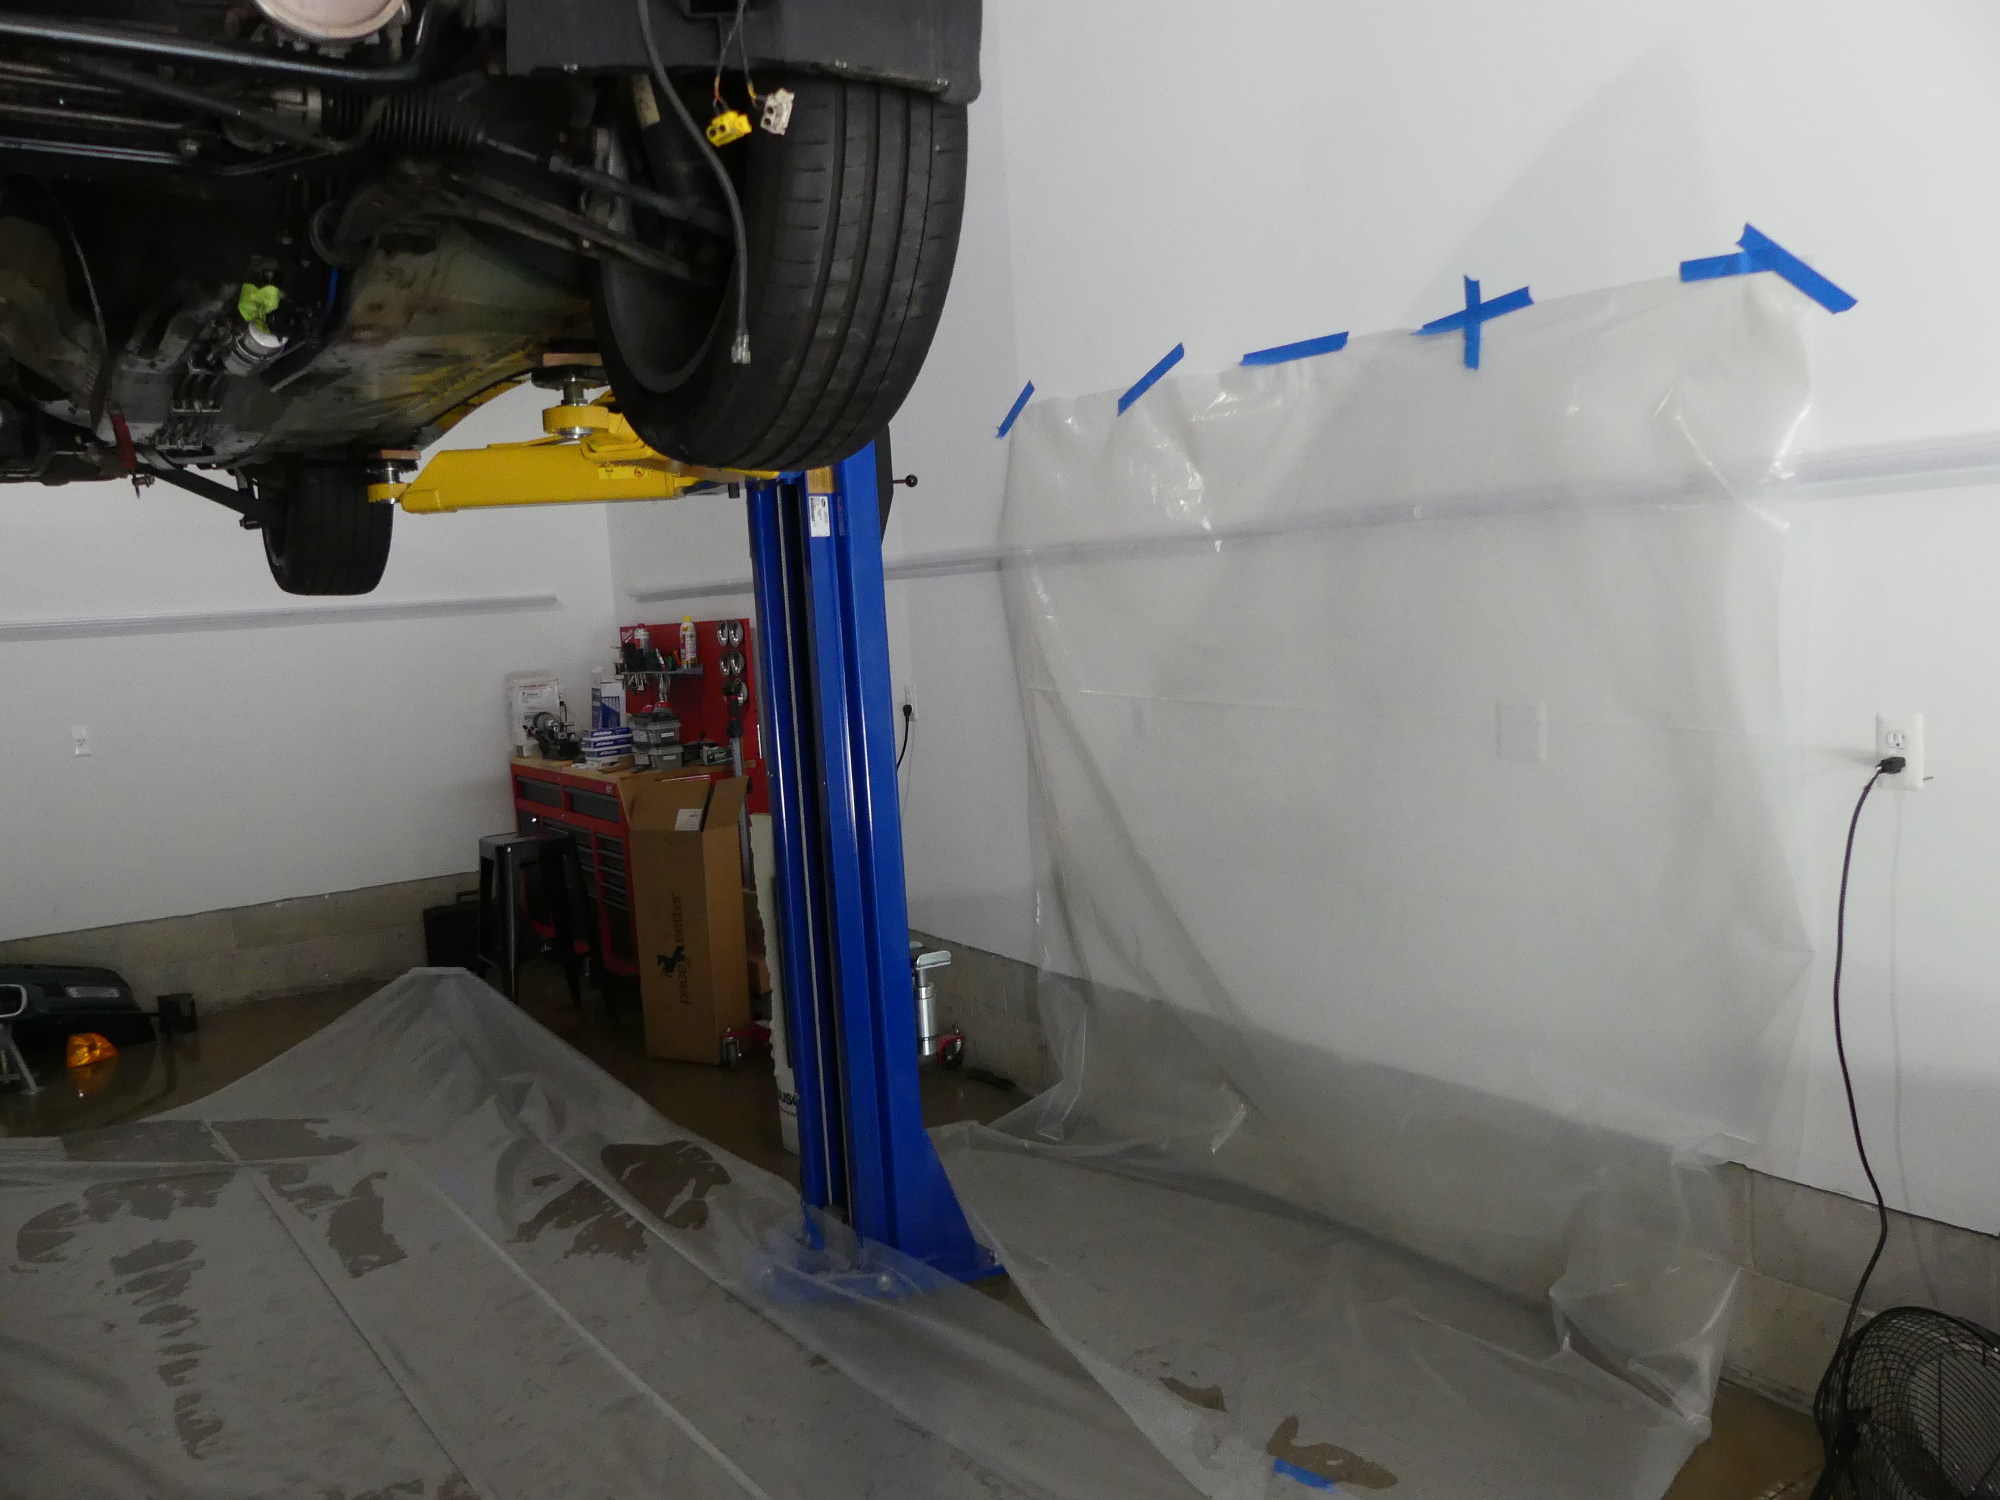 My attempt to protect my brother's garage wall against splatter. Here's a tip for all garage builders: make sure the lower six feet of the wall is painted with a semi-gloss finish so it can be easily cleaned. |
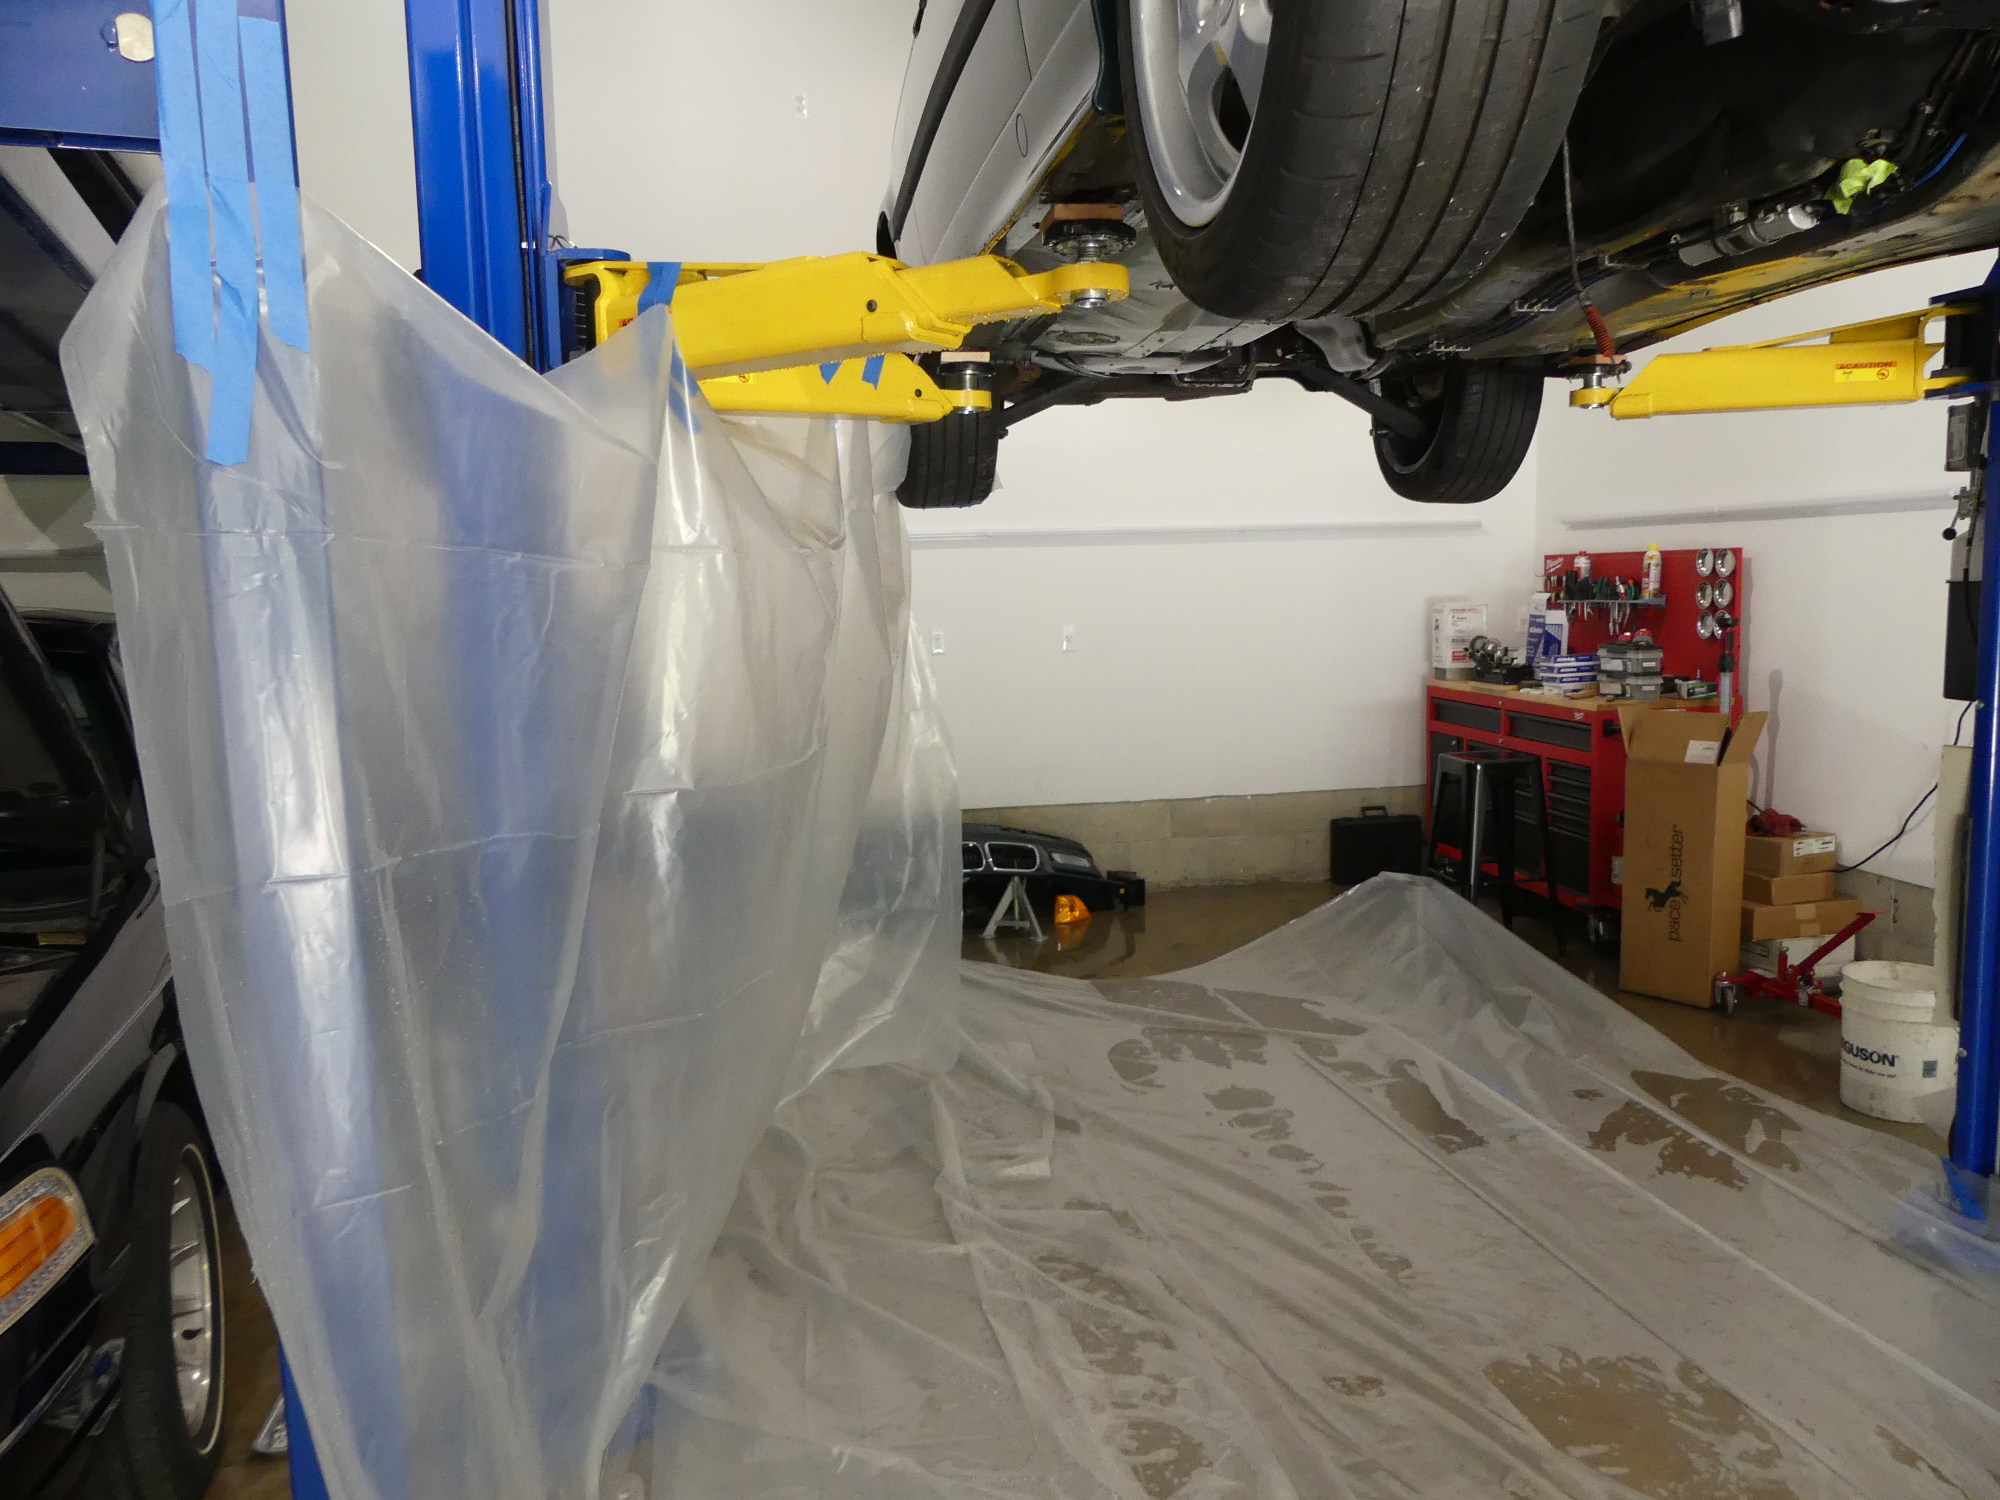 I put up this splash guard primarily to protect my brother's car. Advice to garage builders: leave a large space open for a wash bay and general projects. It will come in handy! |
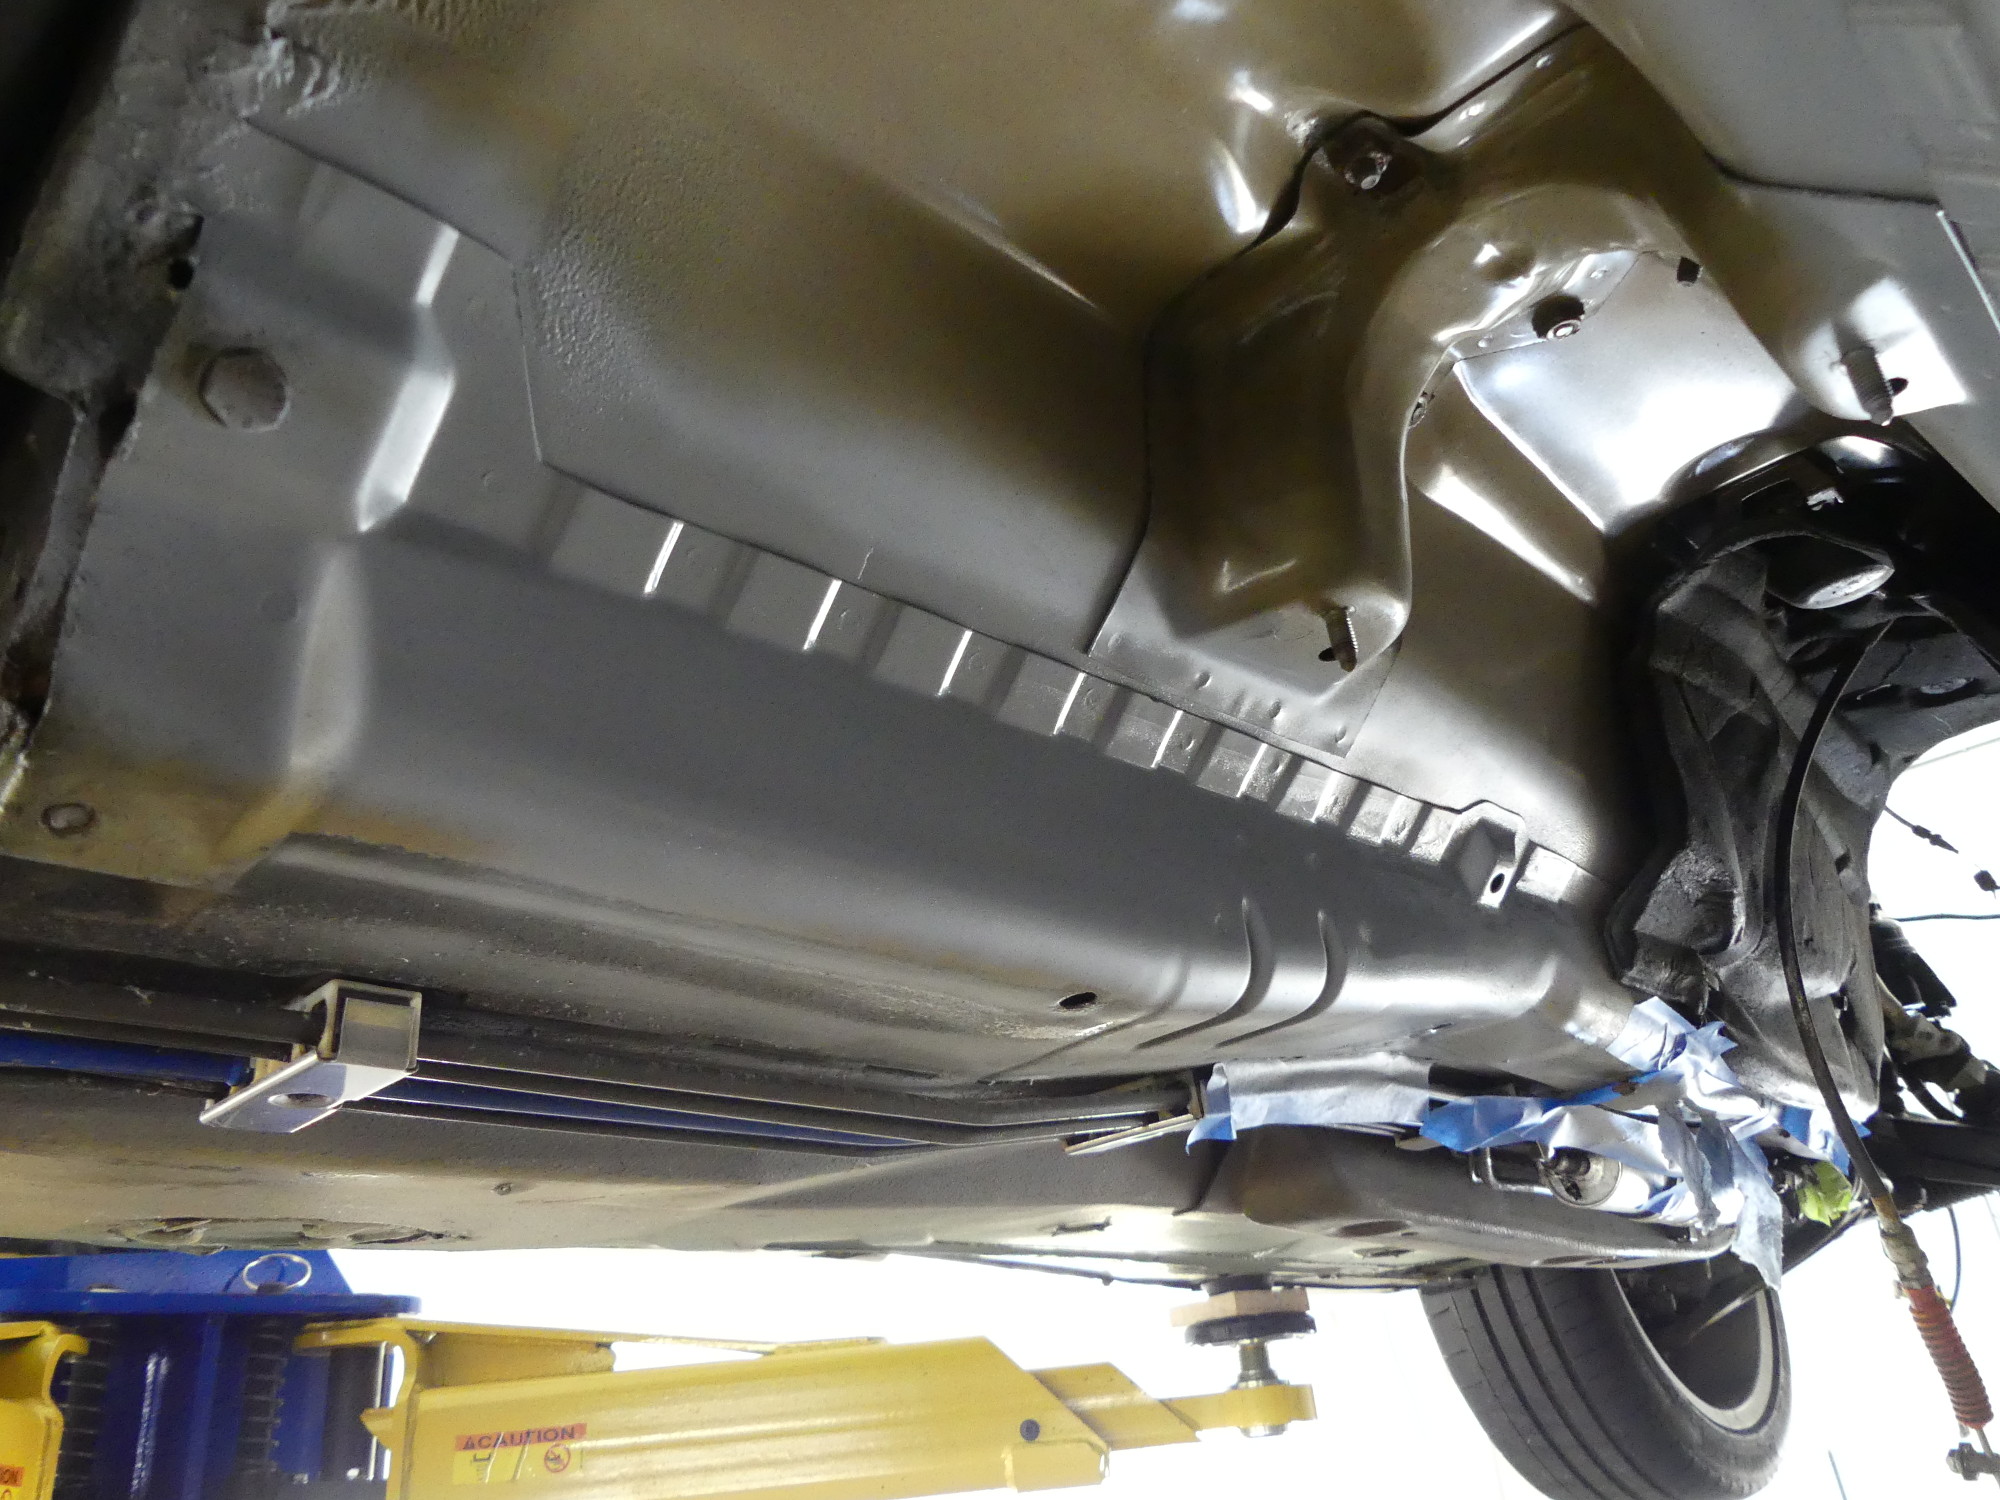
 Here I'm waiting for the belly to dry. Degreasing has revealed a a gray phosphate coating in addition to the tan Glasurit primer. The seam sealer appears to be between the gray coating and primer. |
 Cleaning the belly also reveals more of the Boston Green overspray. I am contemplating using what remains of my custom base coat rattle can to cover the primer I am about to apply. |
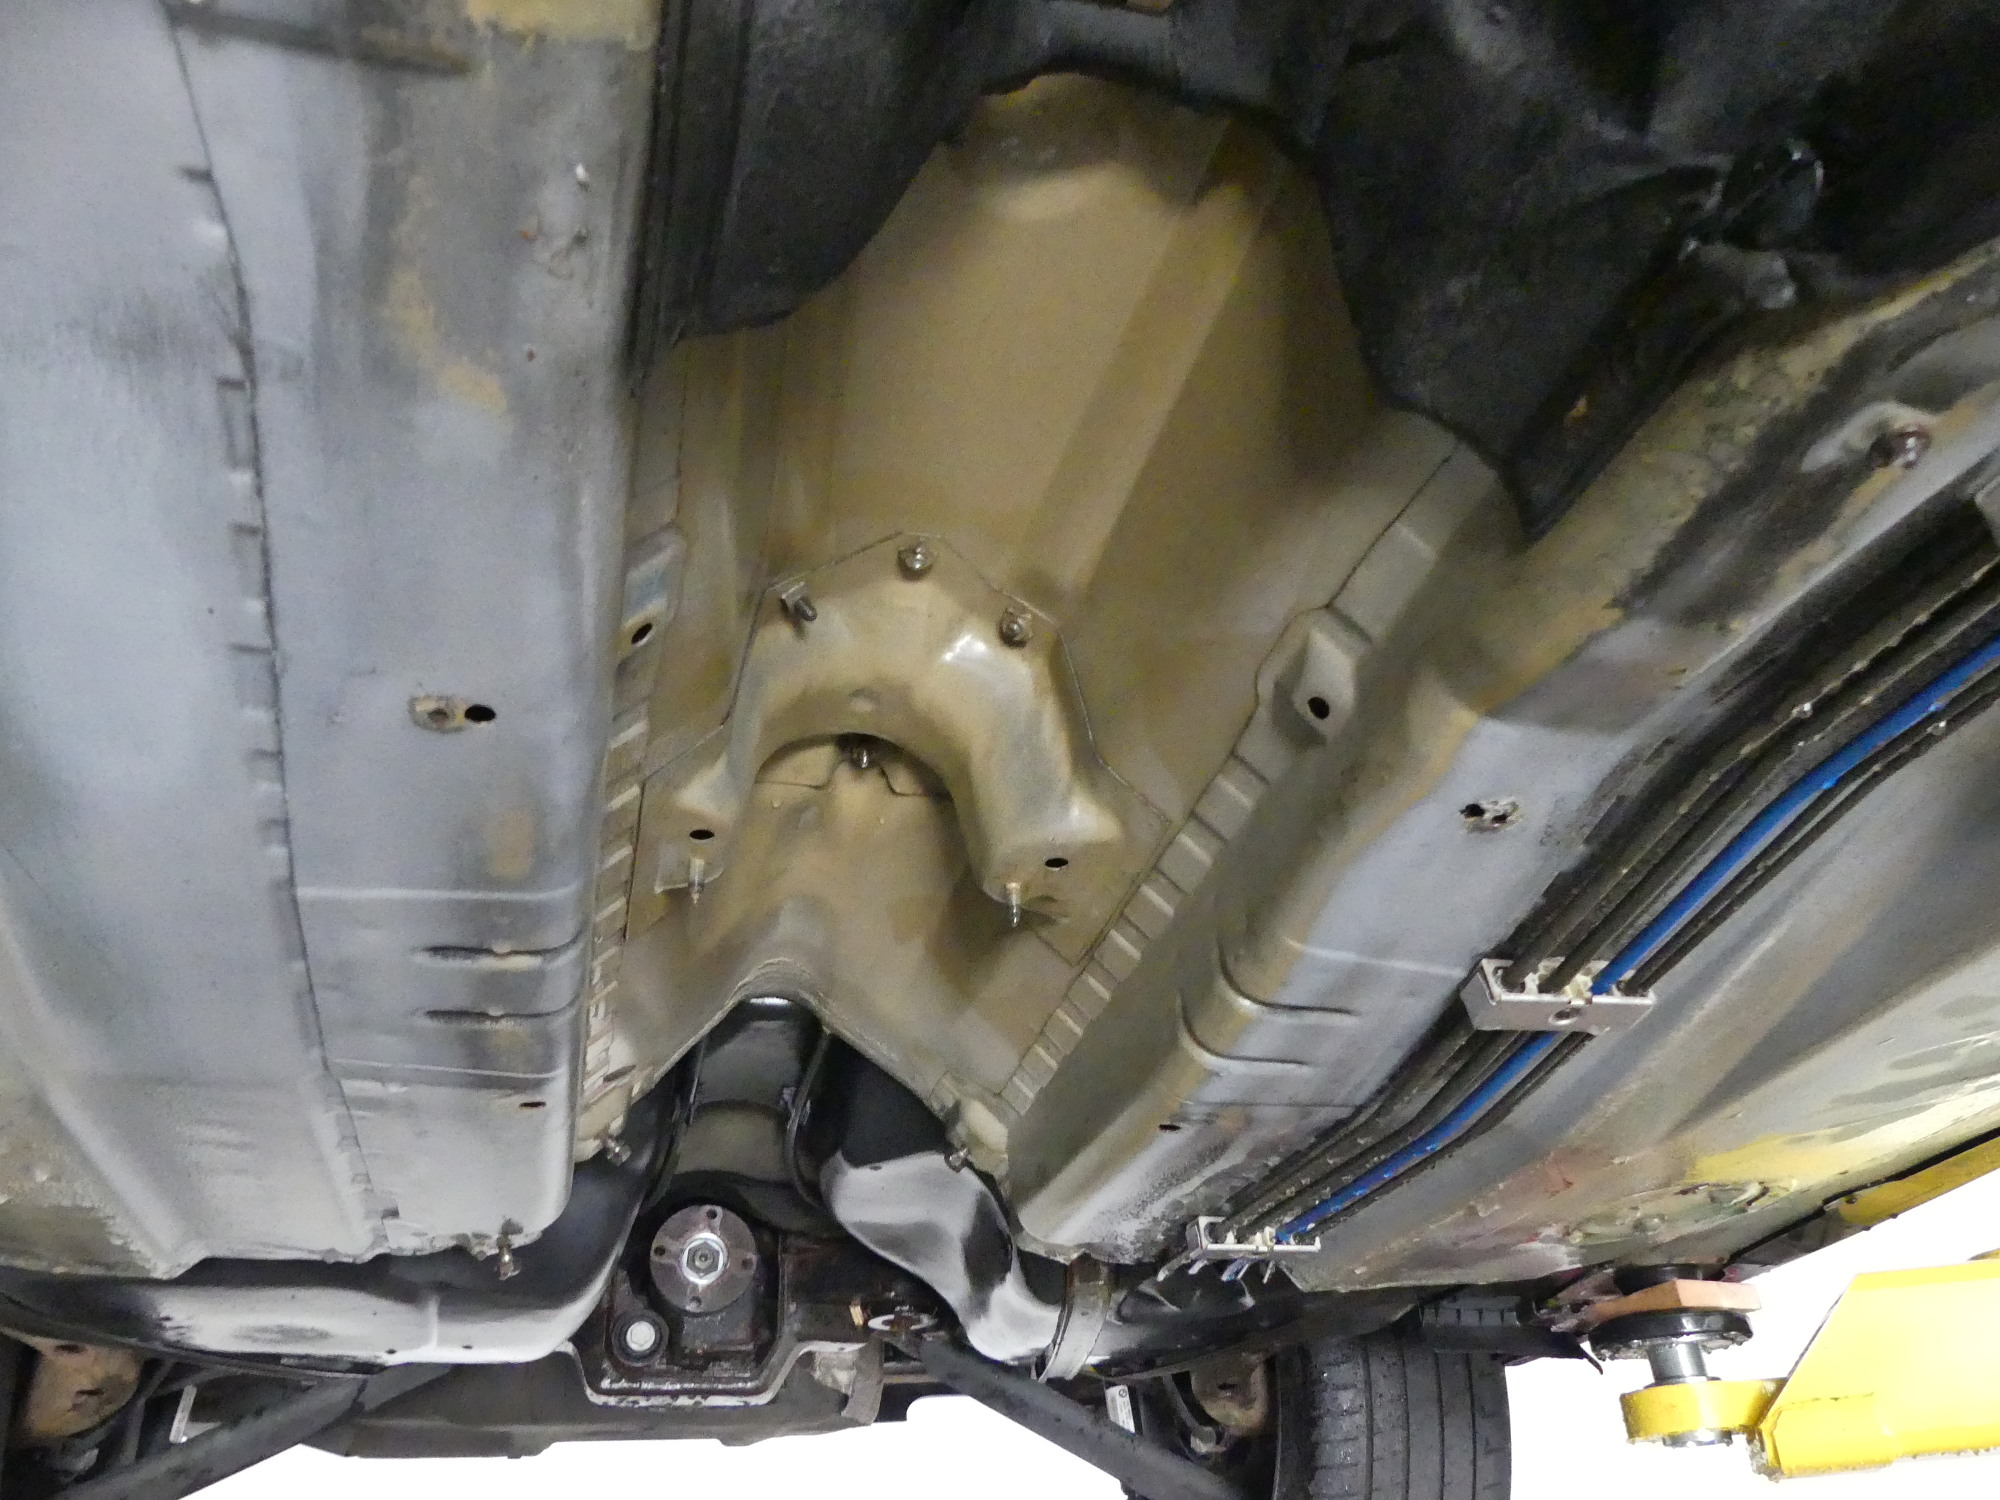
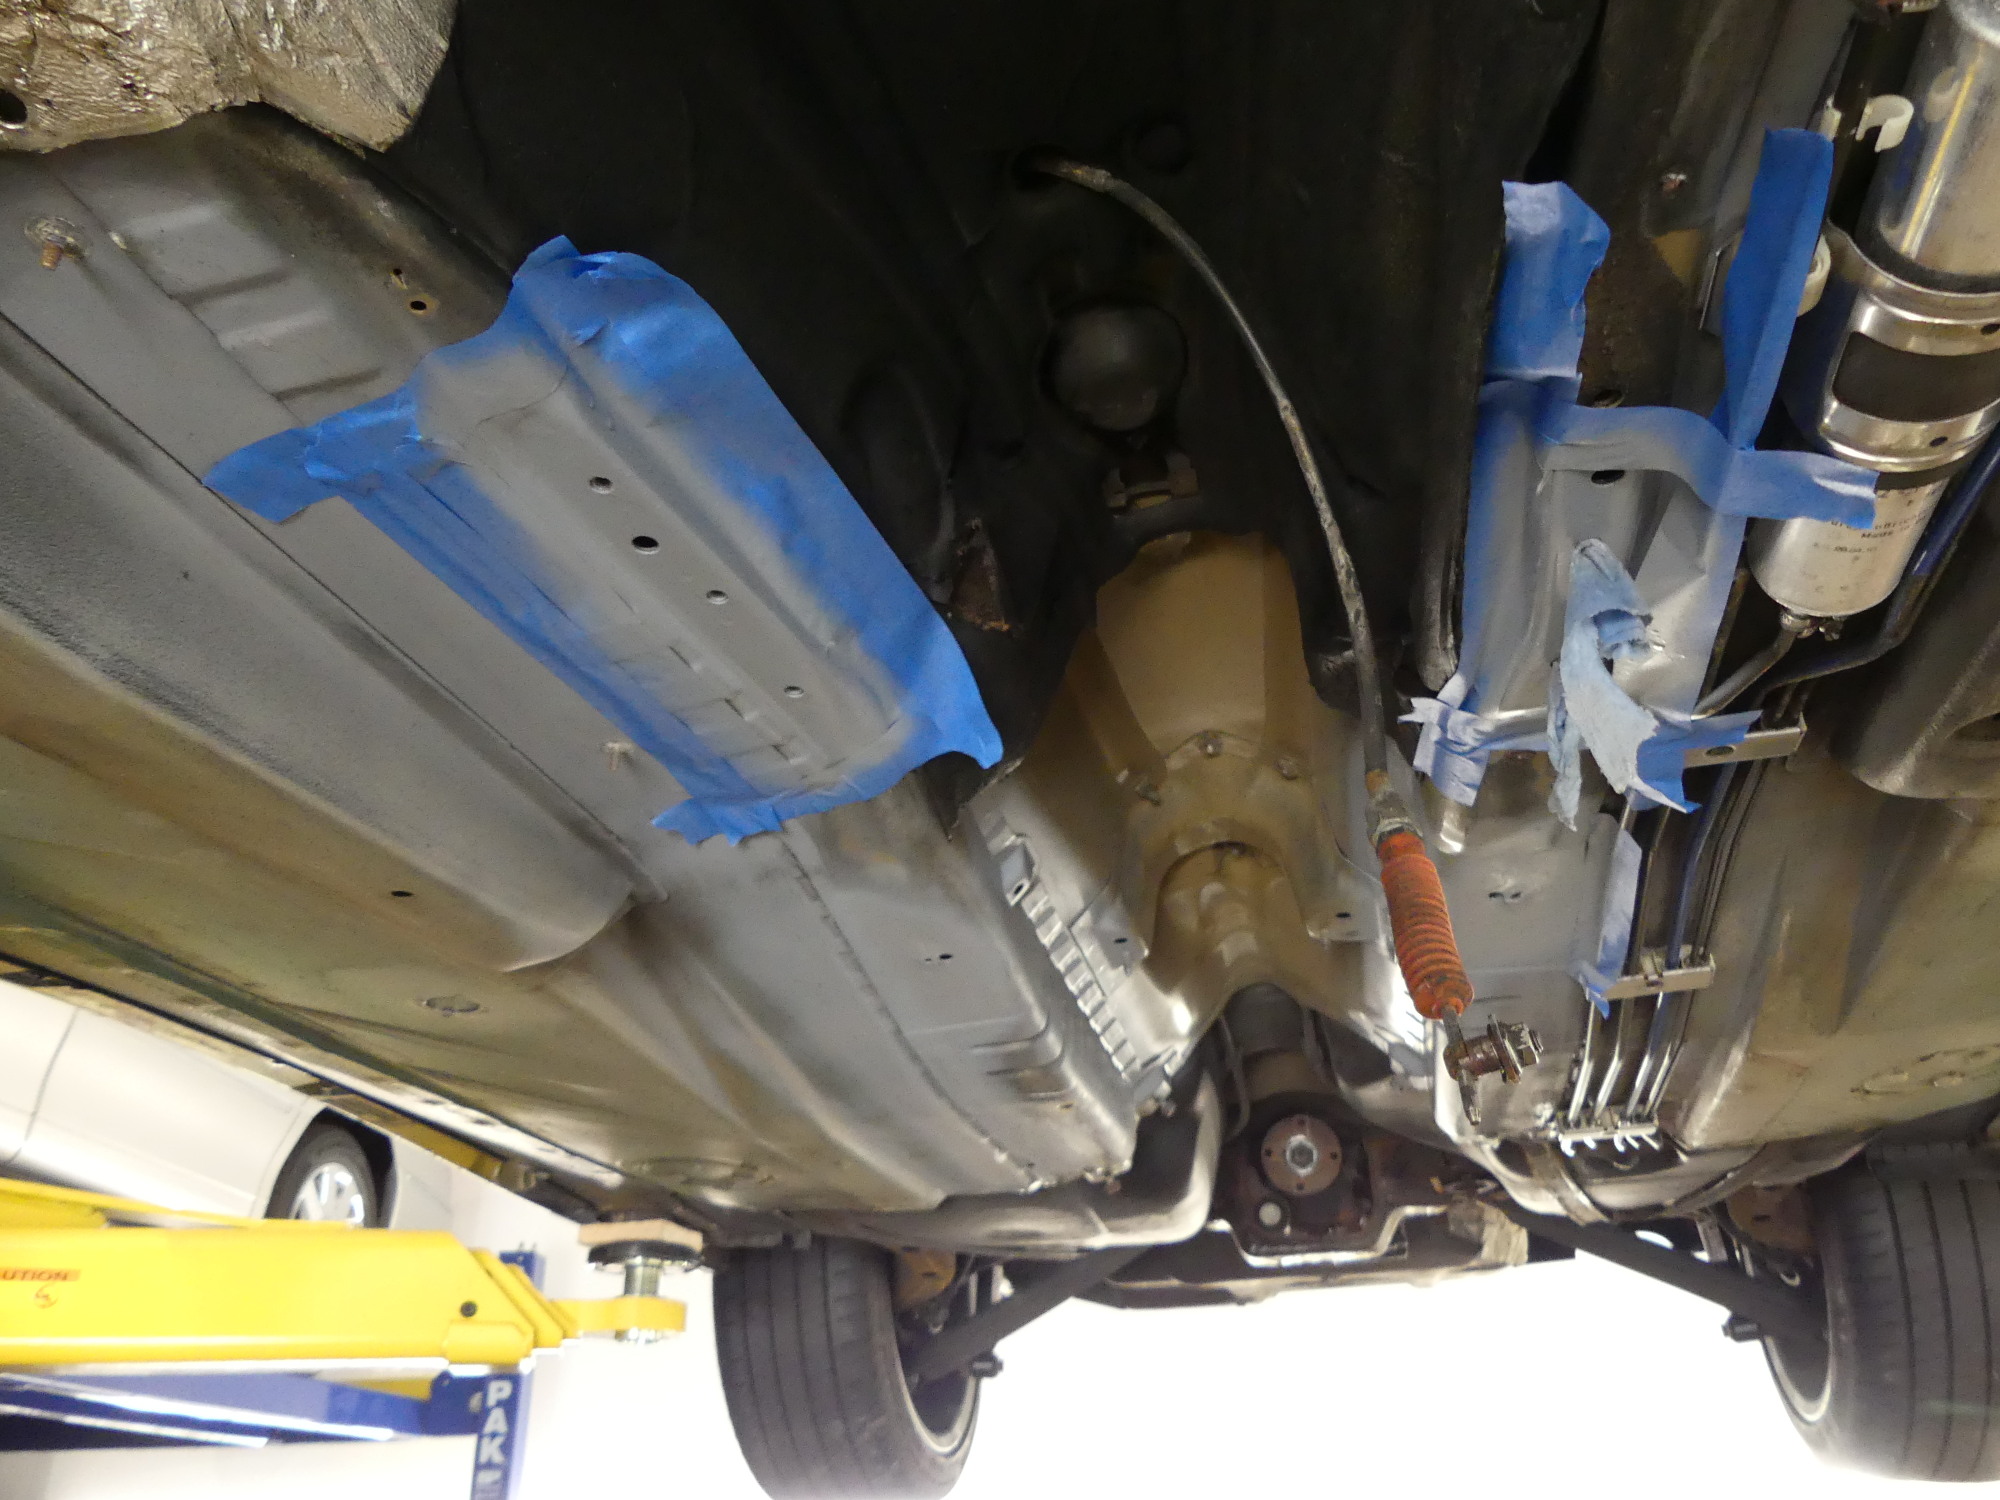
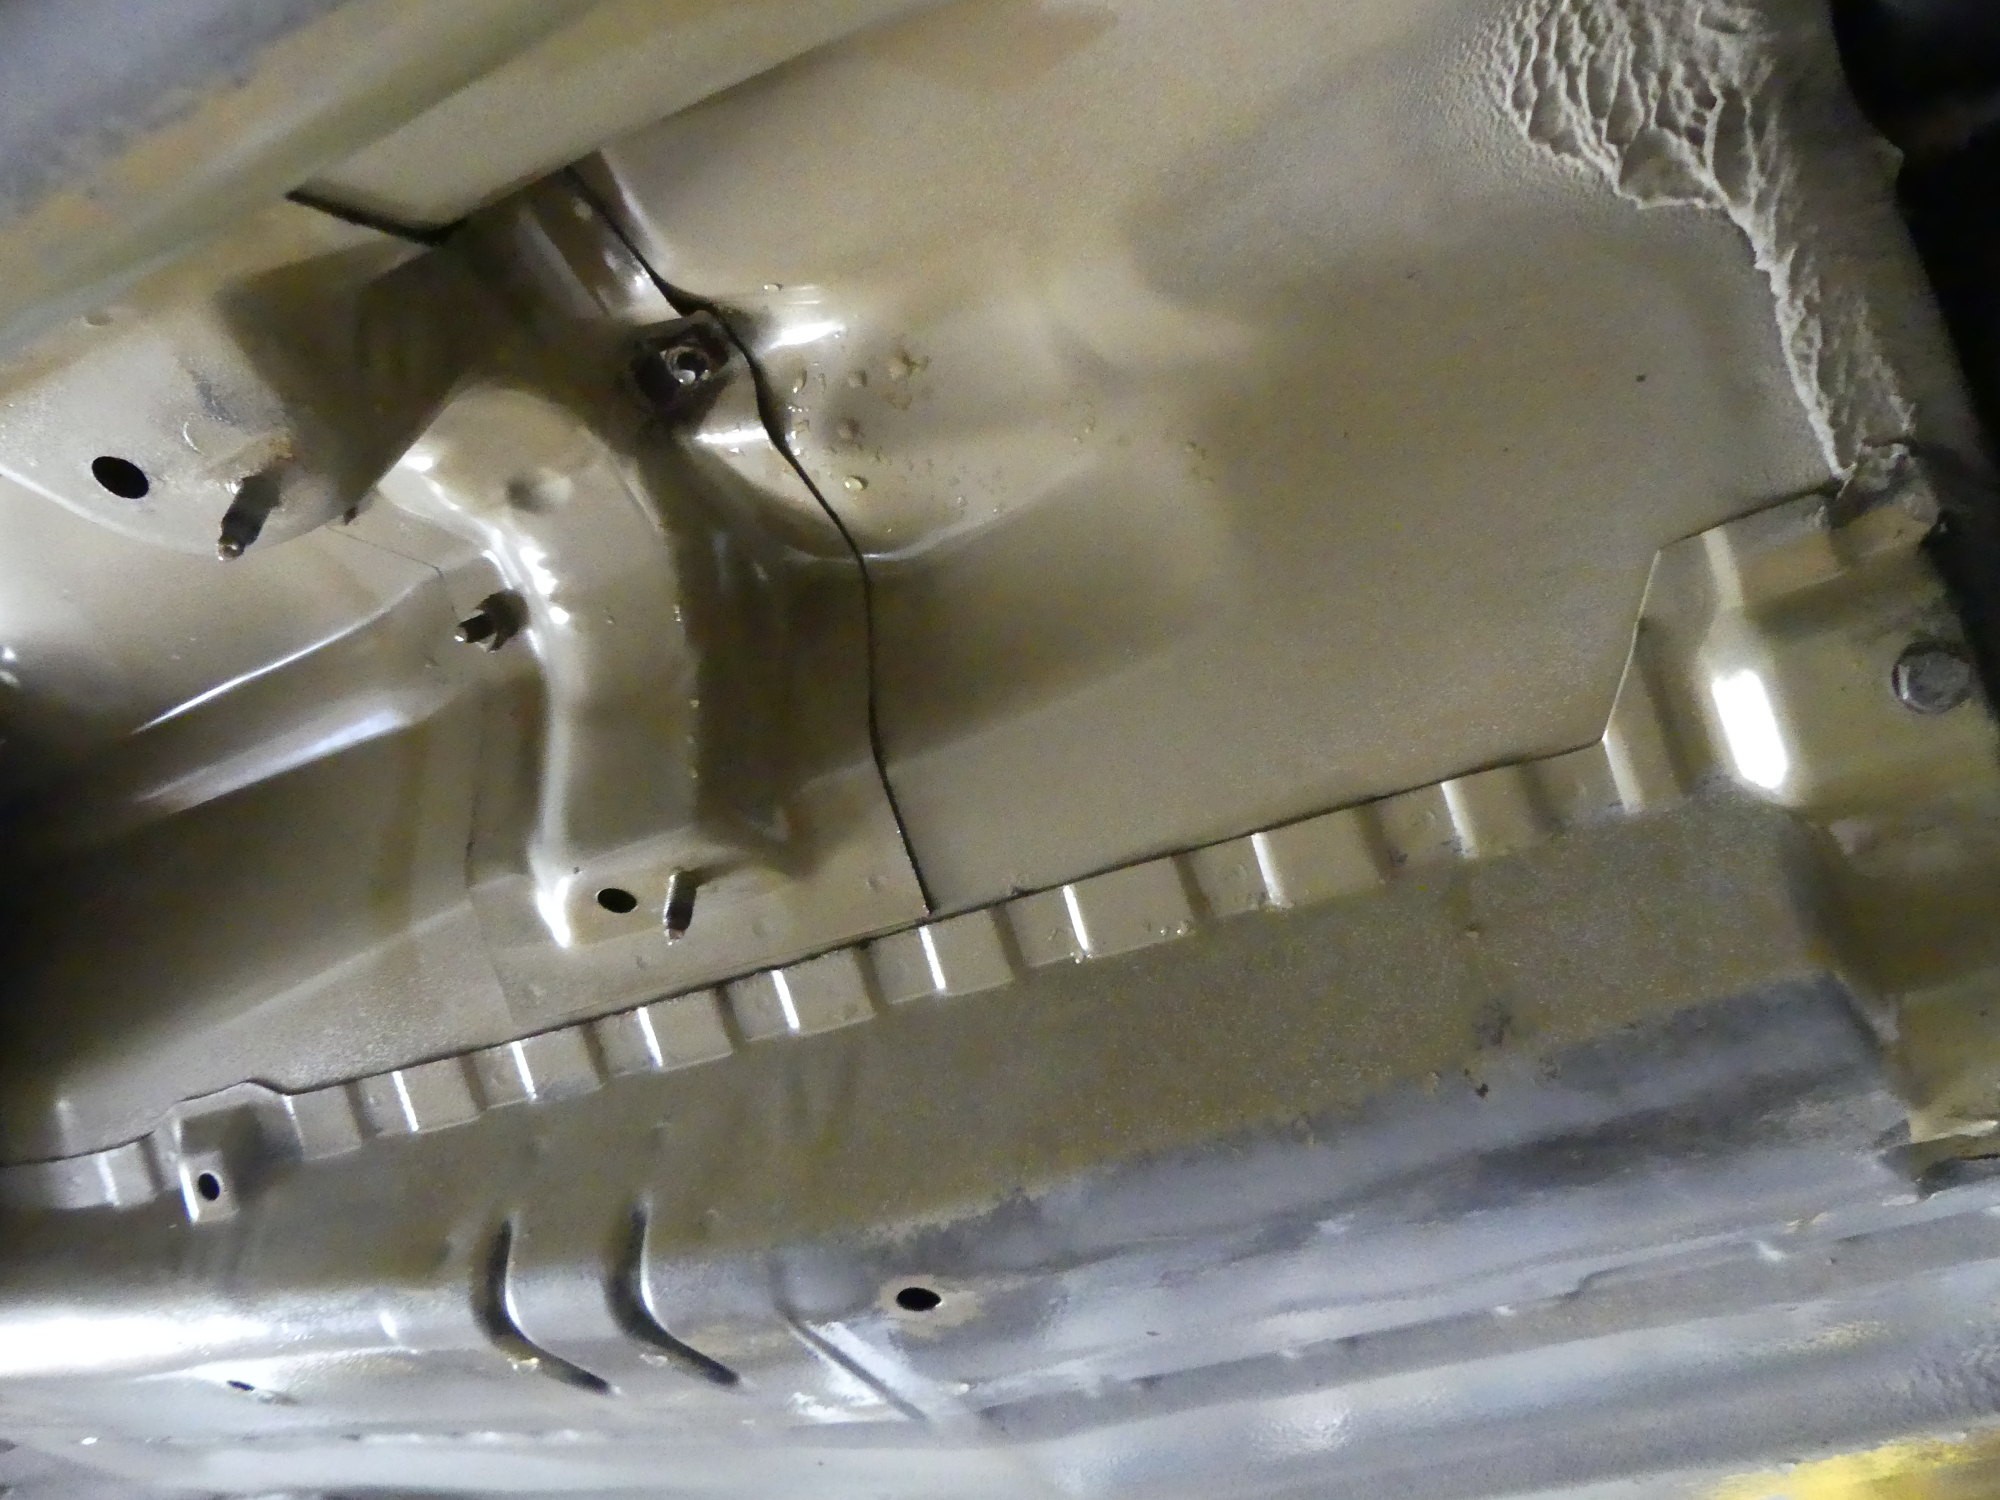 My tech advised me to pay attention to any rust forming on these corrugations in the tunnel. While mine appear in relatively good shape he's seen other E36s with significant rust here. |
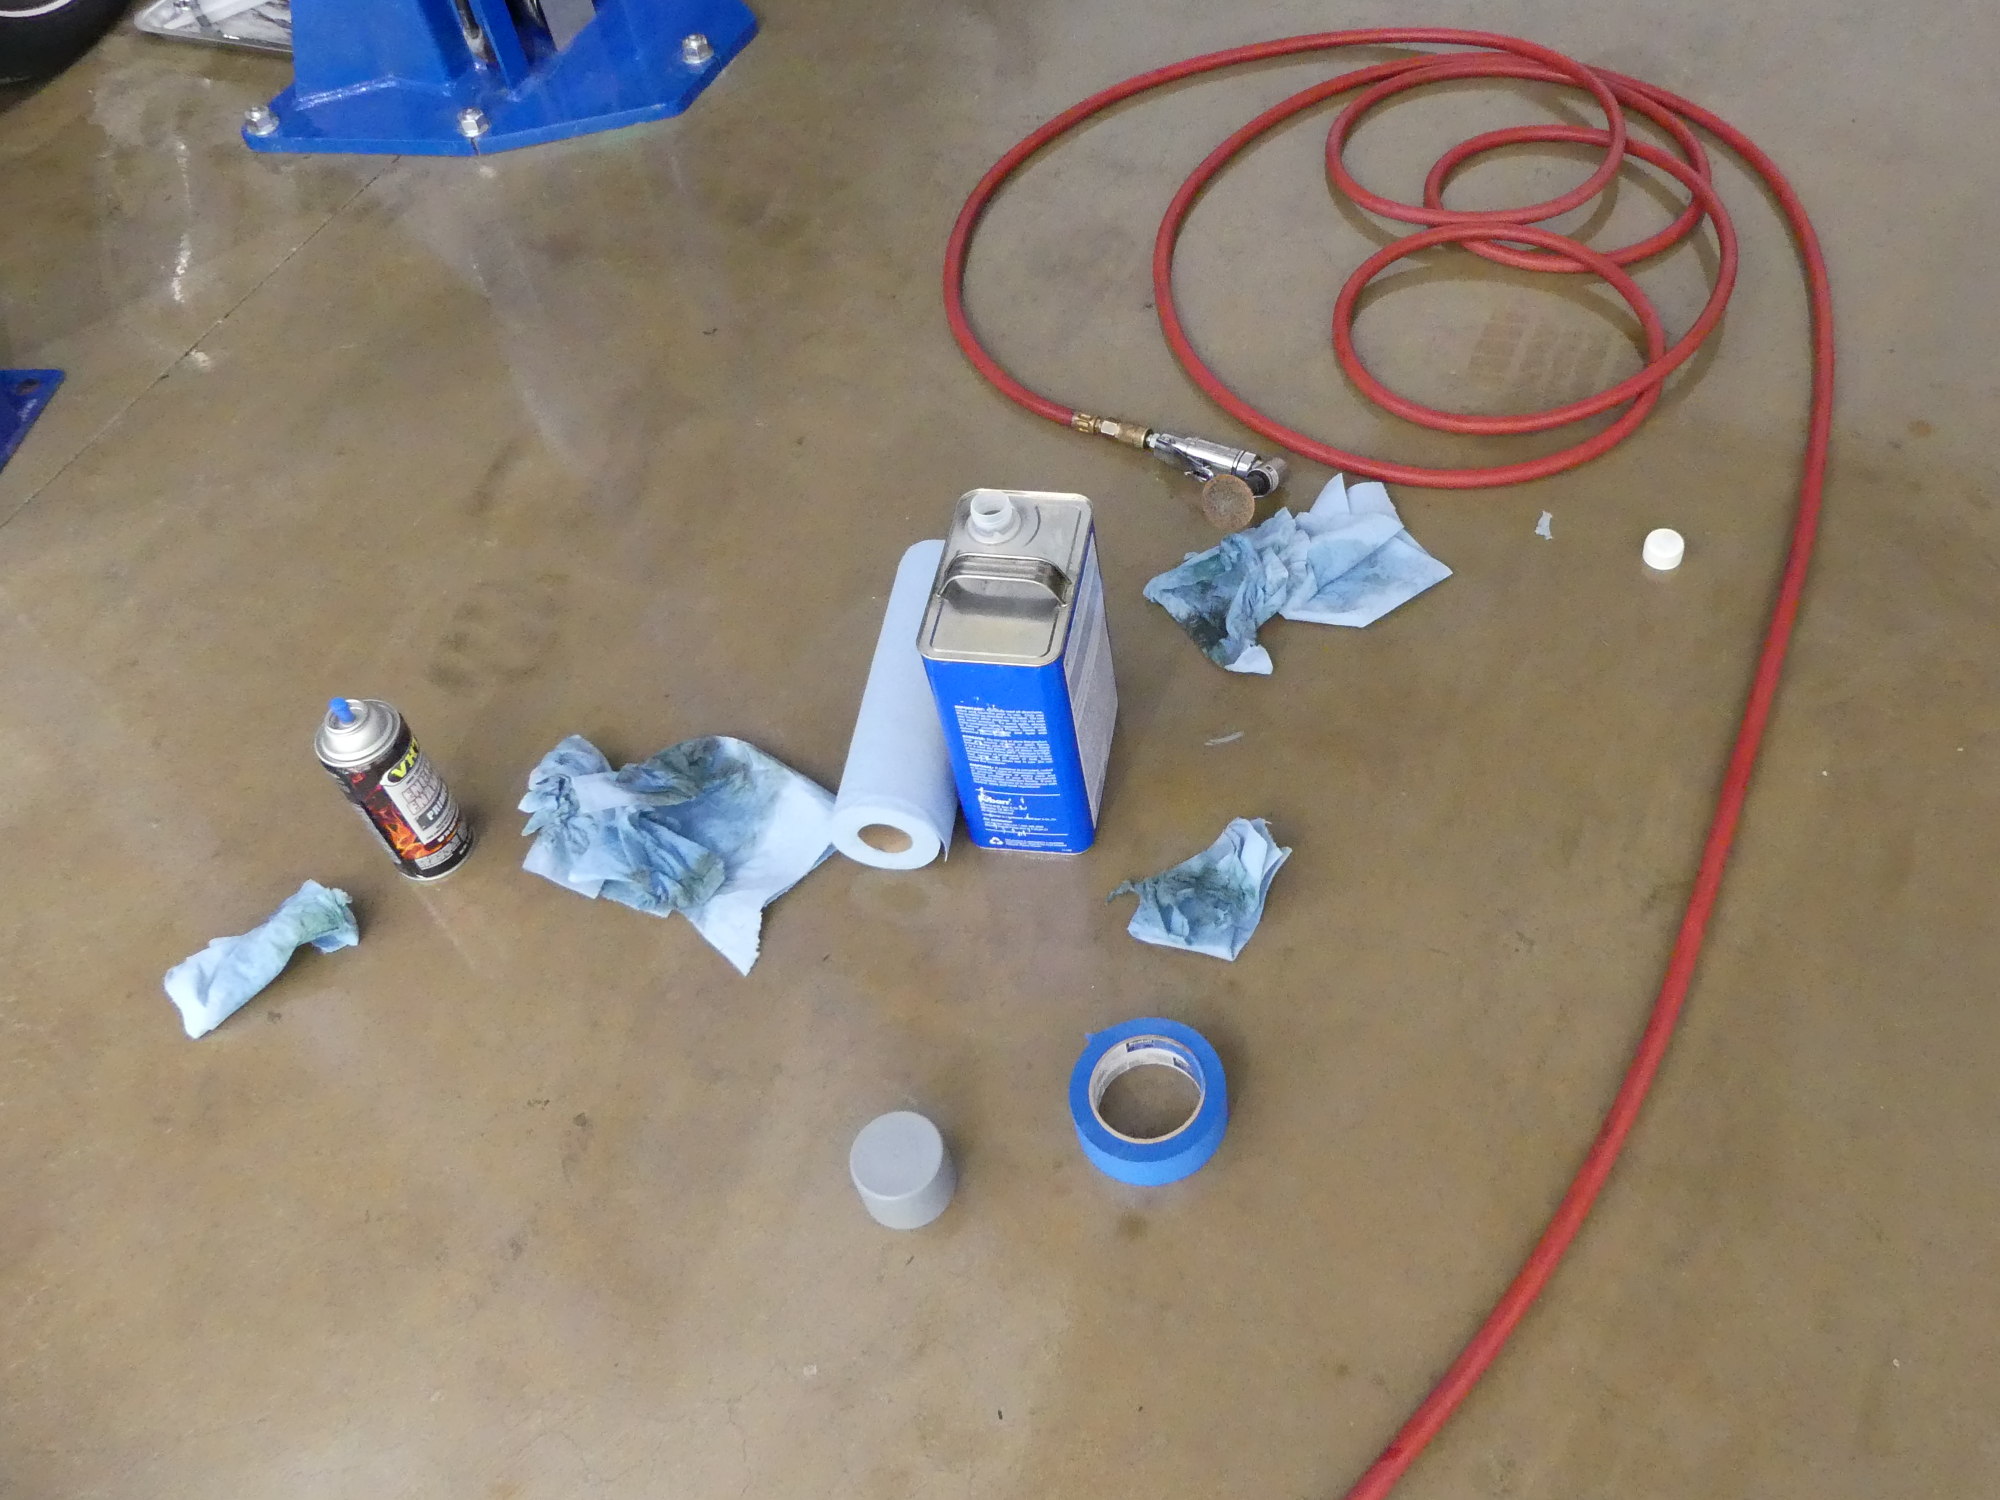 My tools of the trade. My die grinder with a roloc disc installed, mineral spirits, towels, masking tape and VHT primer. |
If you're wondering how I managed to do this without making a complete mess of the garage it had to do with lots of plastic. Plastic on the floor. Plastic taped to the side of the lift. Plastic taped to the nice pretty white walls I advised my brother two years ago to paint a semi-gloss light gray within six feet of the floor because flat white stains when you so much as look at it. Oh, and a floor drain about 15 feet away and a rubber broom to guide all of gunk down the drain.
I pointed a fan at the belly of the vehicle for a half hour or so and came back to find everything mostly dry. I followed up with a towel where necessary and then grabbed my die grinder with a roloc disc and began to grind away whatever rust I found. I then applied mineral spirits to remove whatever grease or oil remained on the surfaces and then used the remaining VHT primer to coat all of the bare metal surfaces. Why VHT? First, I had it on hand. Second, when I read the fine print of the other "automotive" primer I had on hand it indicated that it was only rated to 200F -- a temperature easily reached under the vehicle in proximity to the exhaust on a hot day.
 I noticed significant corrosion on this area, which is where the transmission support is installed. My support has been powdercoated, which should reduce the dissimilar metal corrosion in this area. |
 Taken just after application of the first coat of primer (hence the wet areas), I managed to sand the top edges of the corrugations which were host to some minor rust. I scuffed, degreased, and primed the entire area for good measure. |
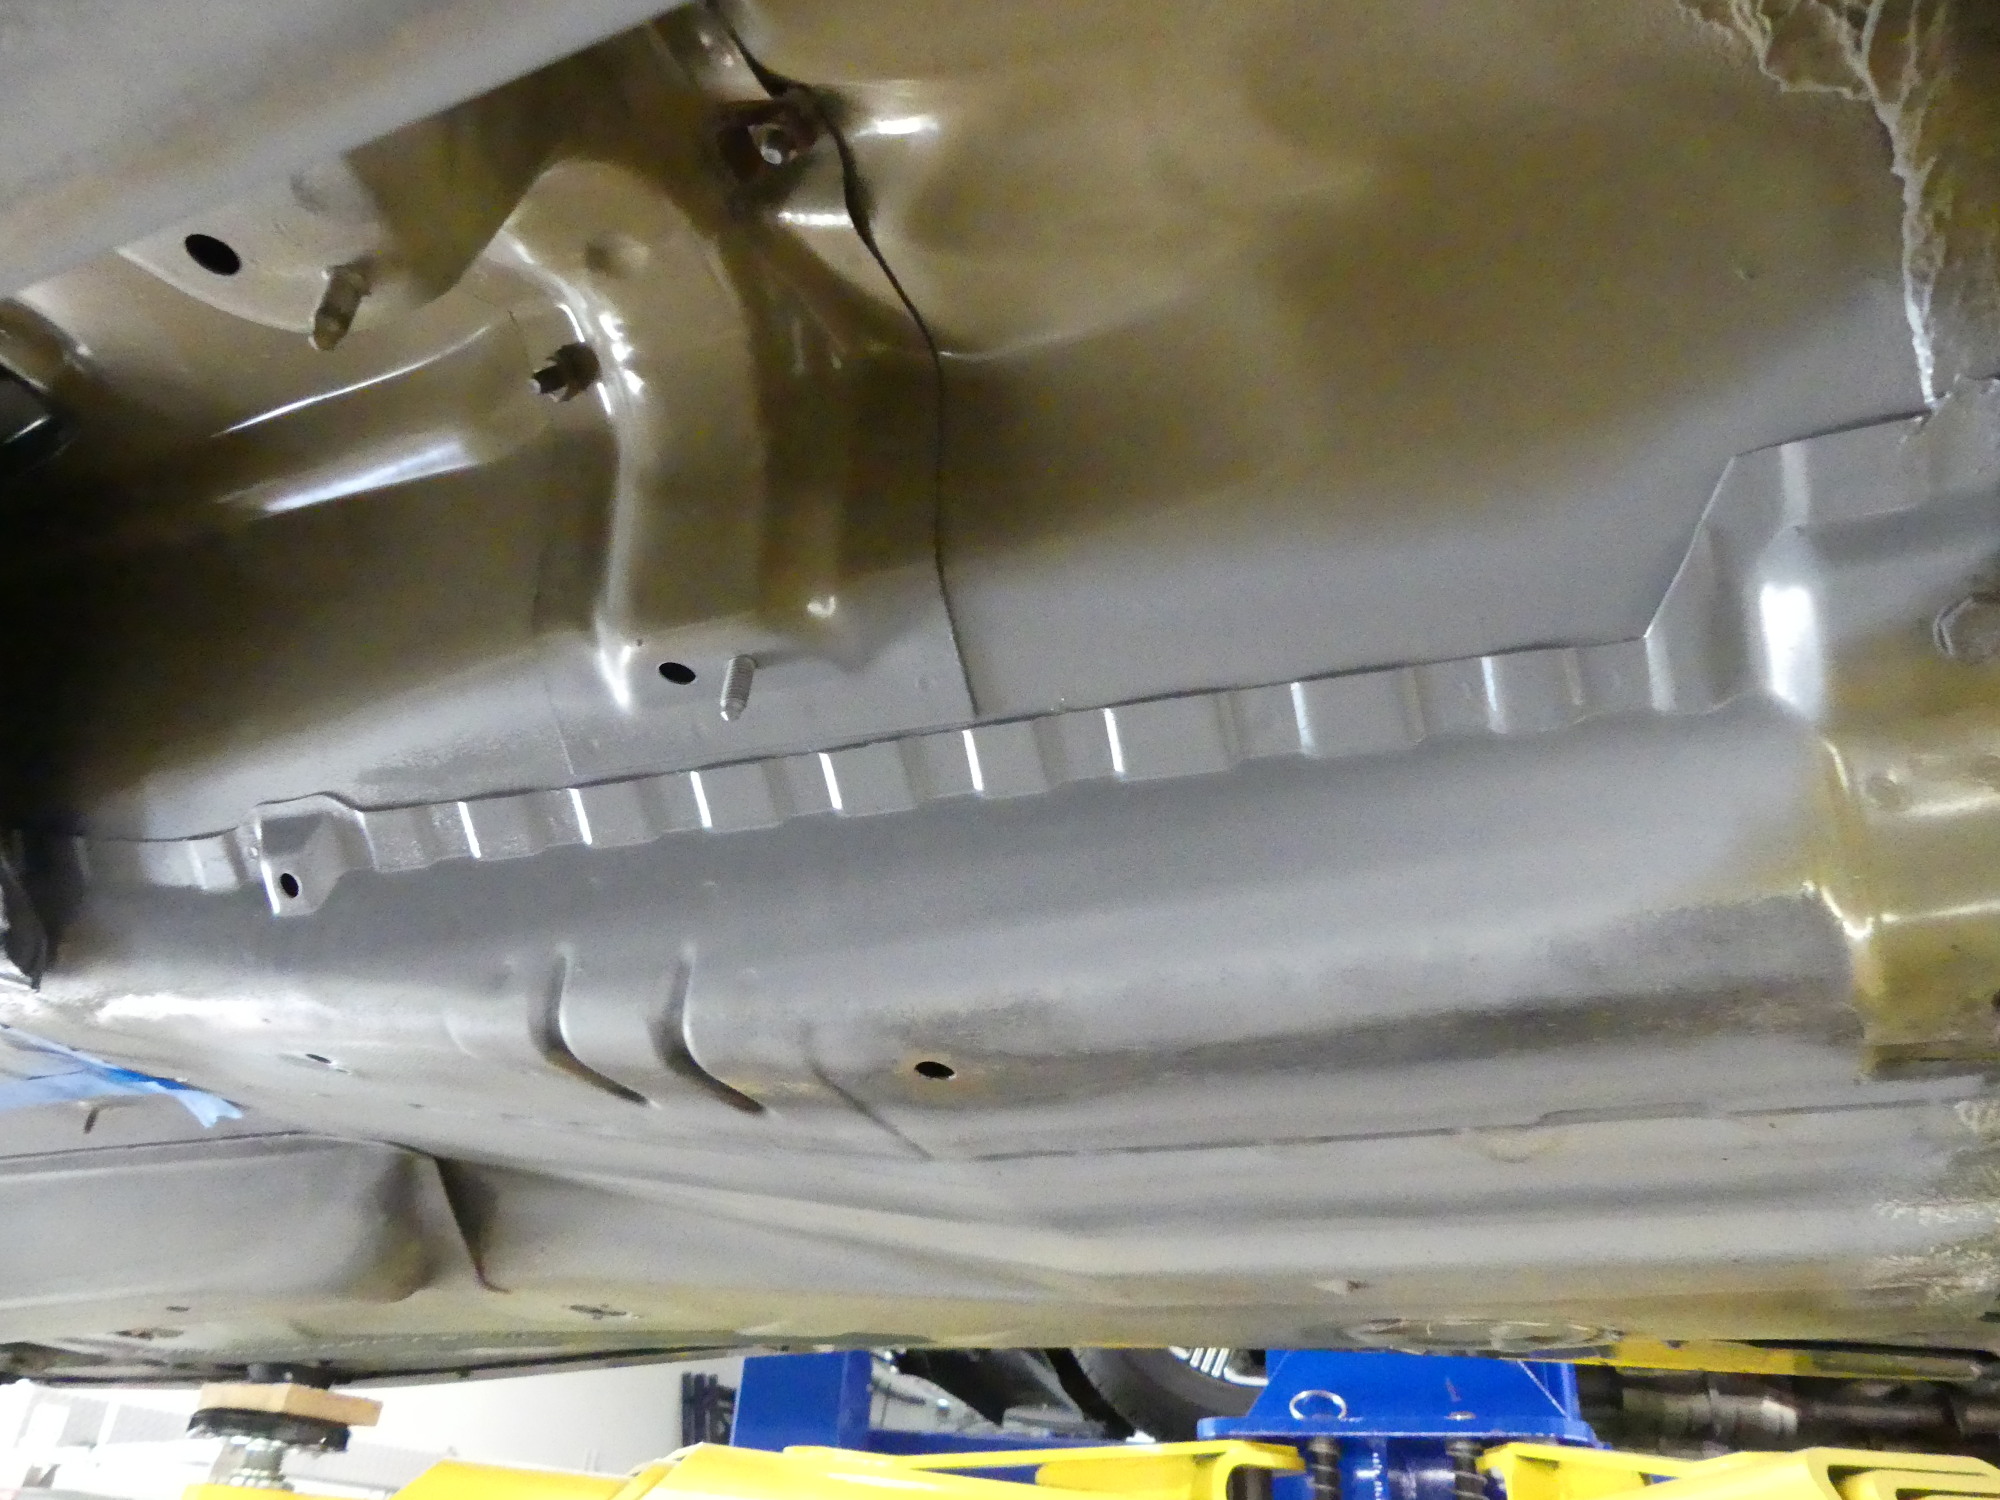
 Another perspective showing the left side of the tunnel. There was almost no rust on this side but I scuffed, degreased and primed this area much as I did the right side. |
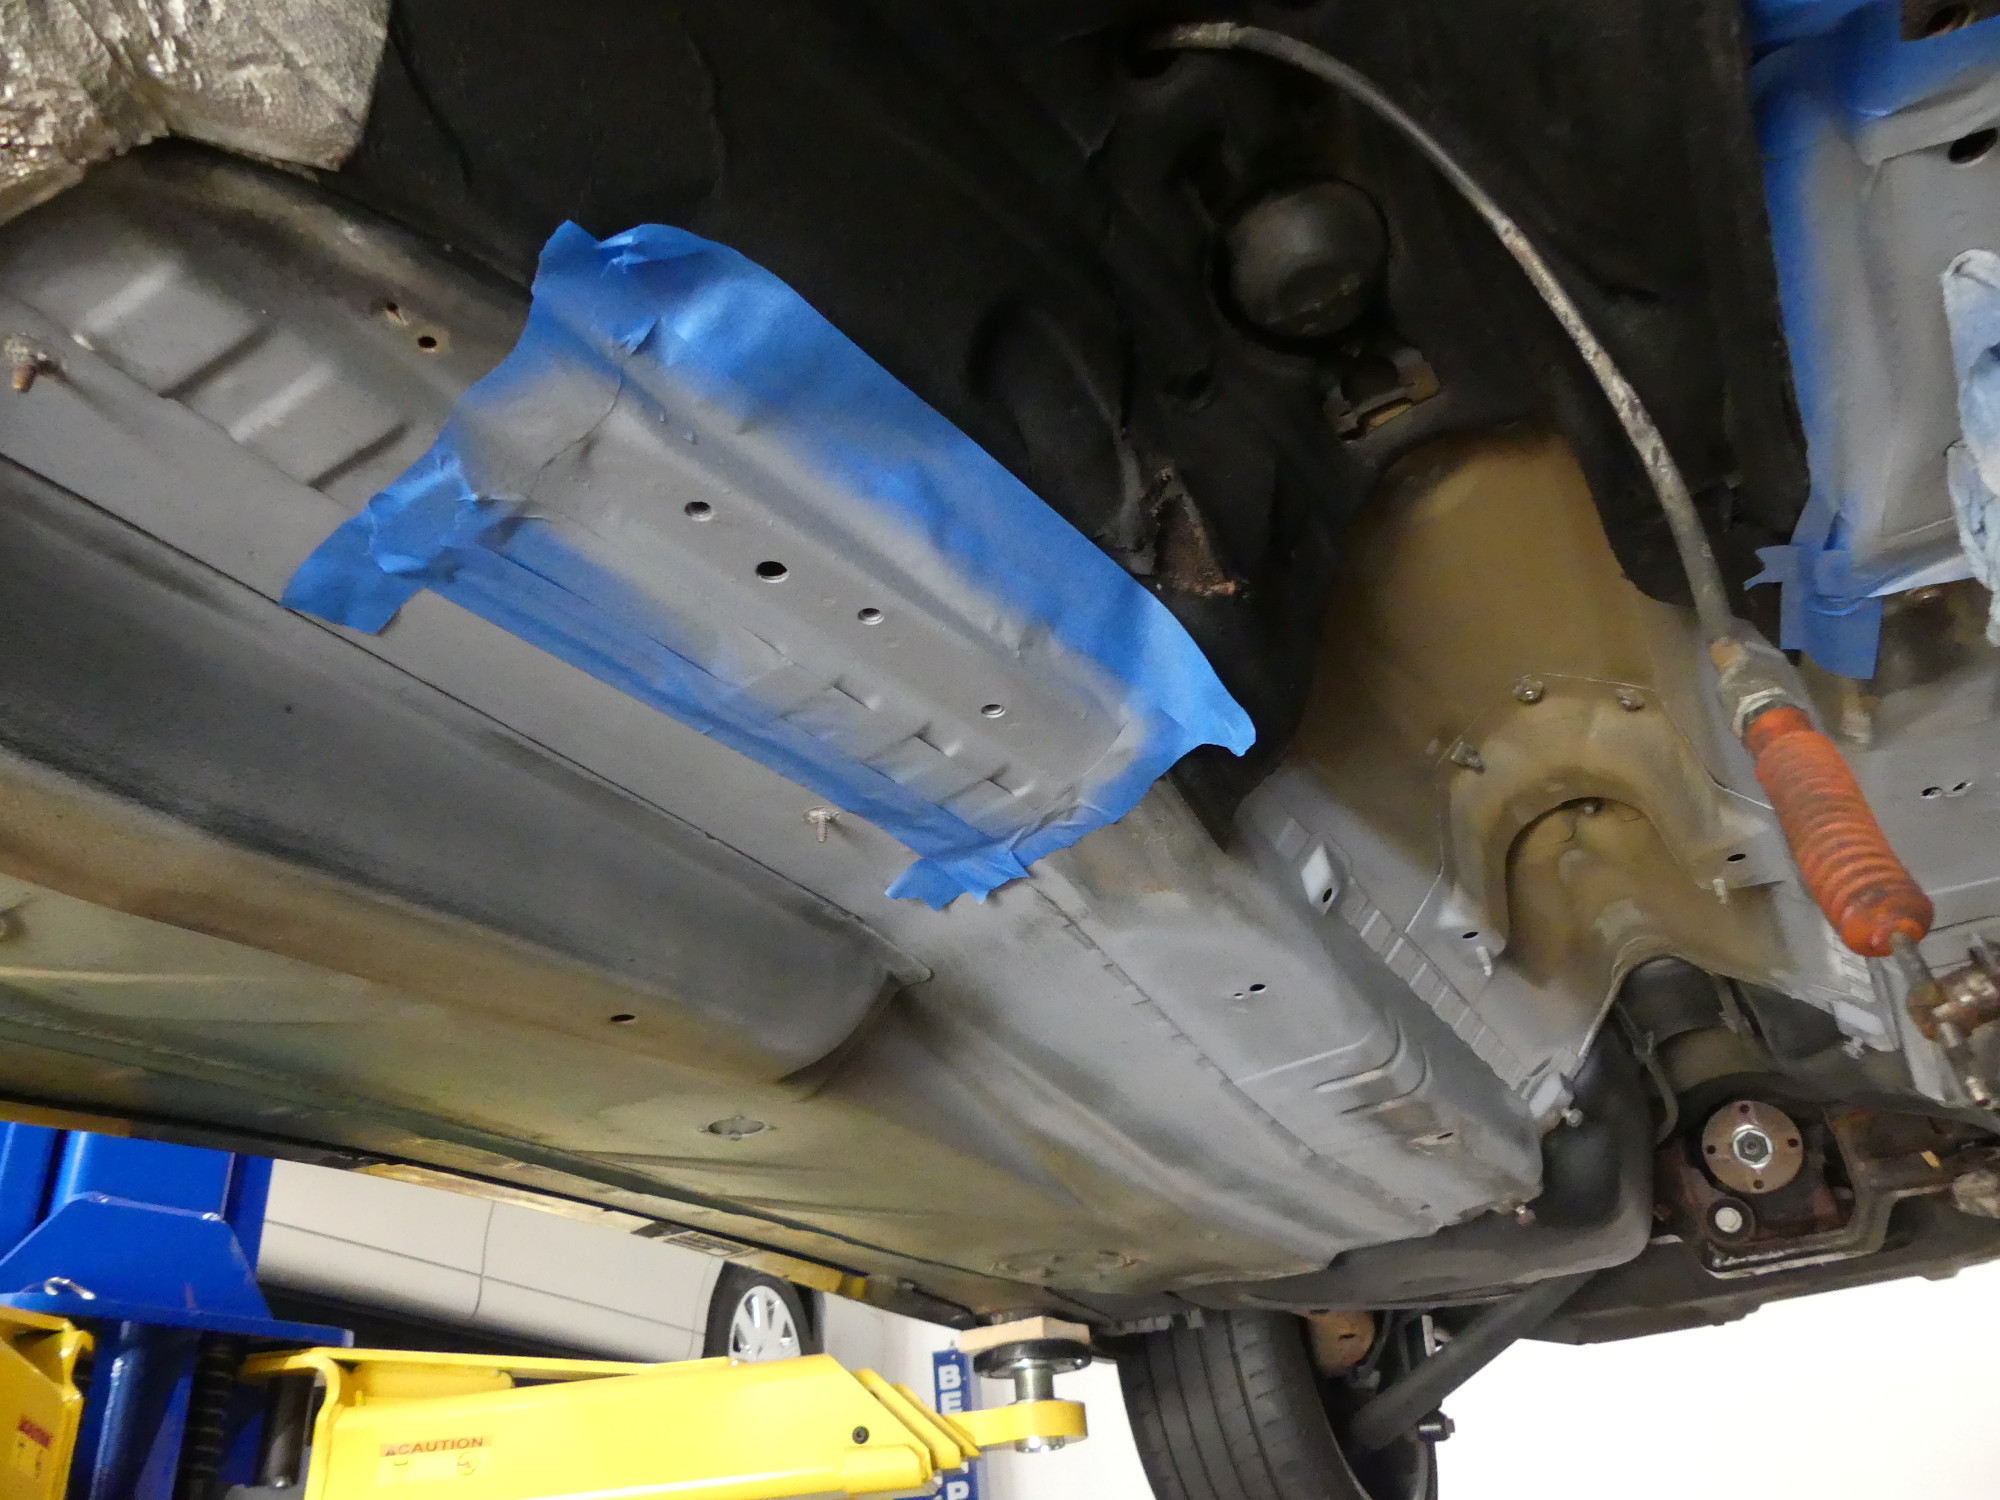
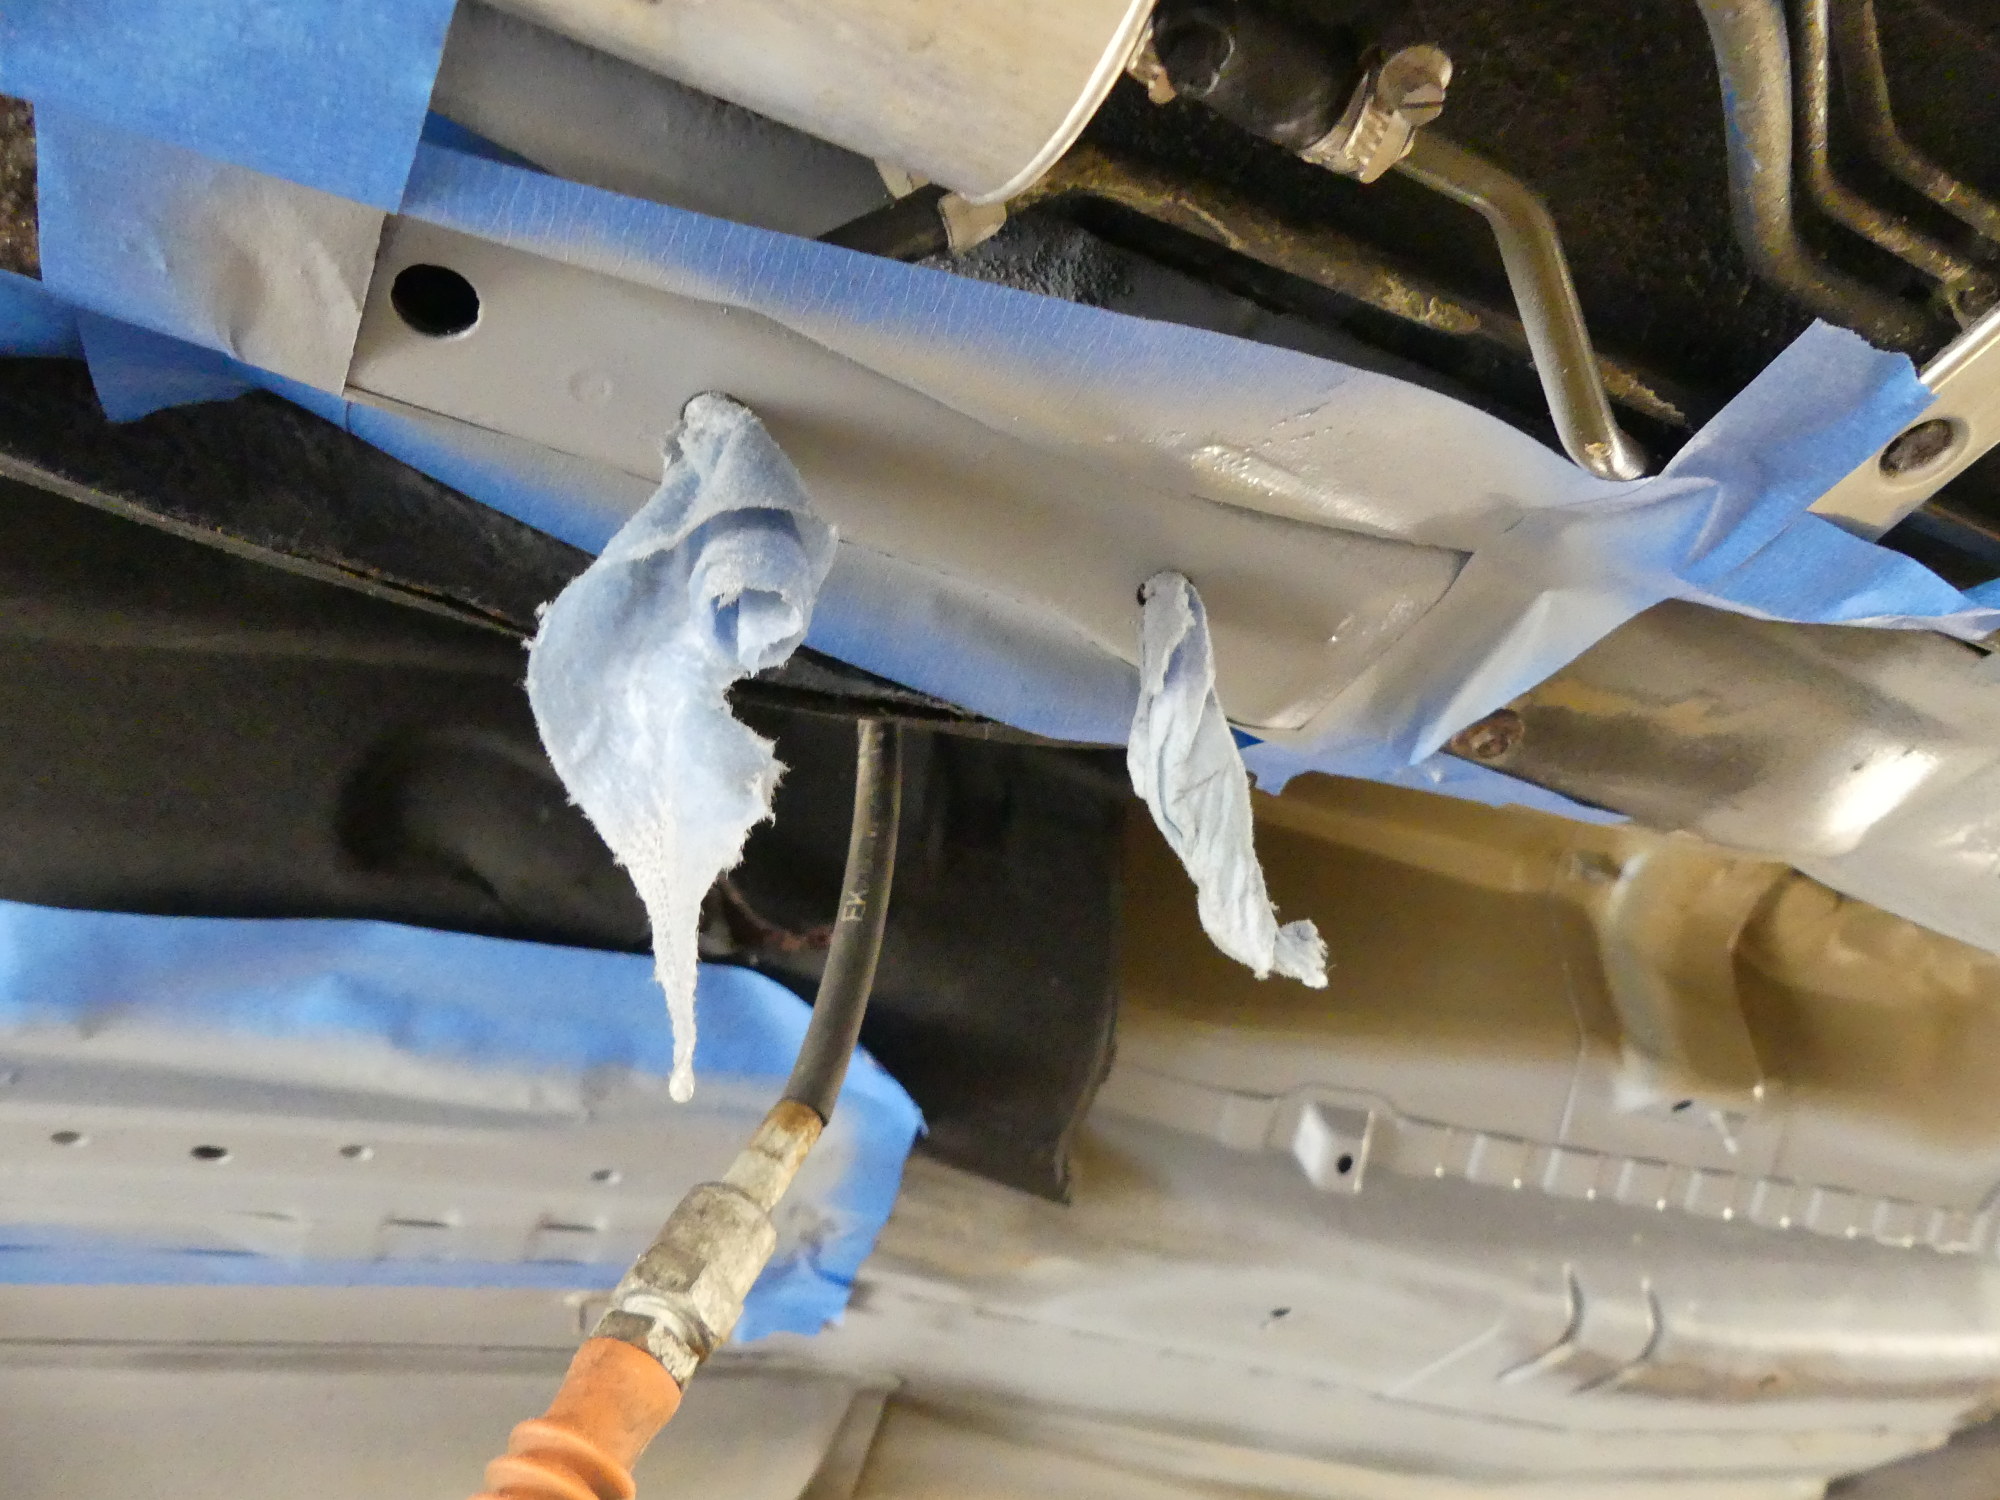 I found that water continued to ooze out of the left side transmission support mounting holes I stuffed some towels in them to prevent contamination of the primer until it was dry. |
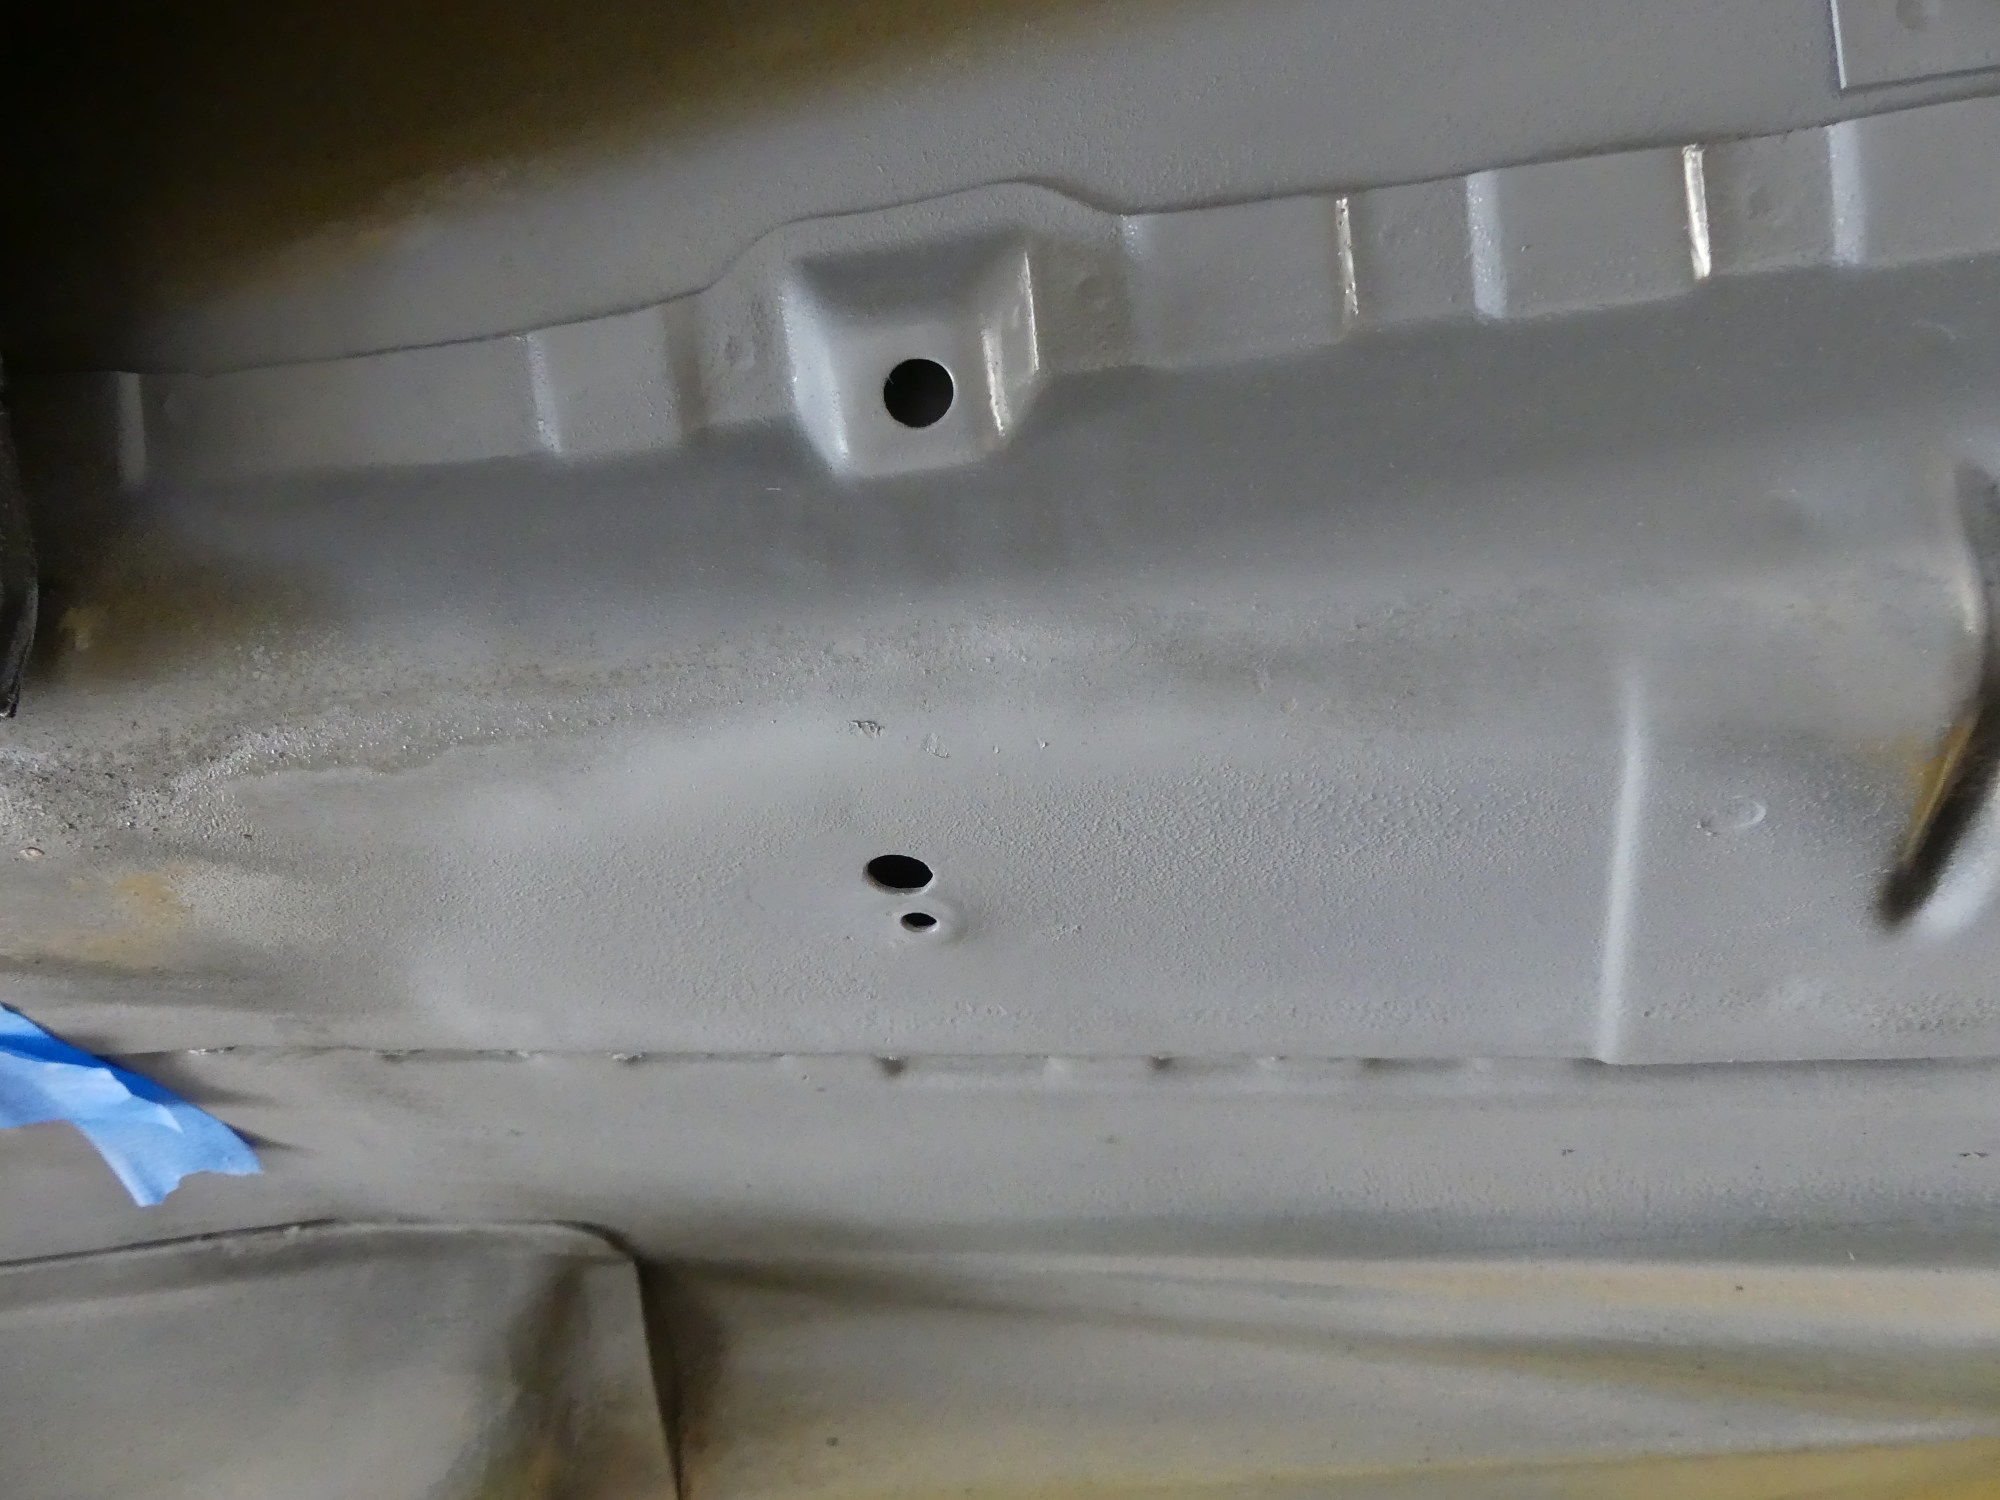 This is just a random hole that does not seem to serve any particular purpose. It was heavily rusted with some bubbles popping up around it so I naturally took the time to address this and its mate on the other side of the car. |
 Advice to garage builders: Install good lighting. These LED light strips which mimic fluorescent tubes considerably improve ambient lighting underneath the vehicle and facilitate detailing. |
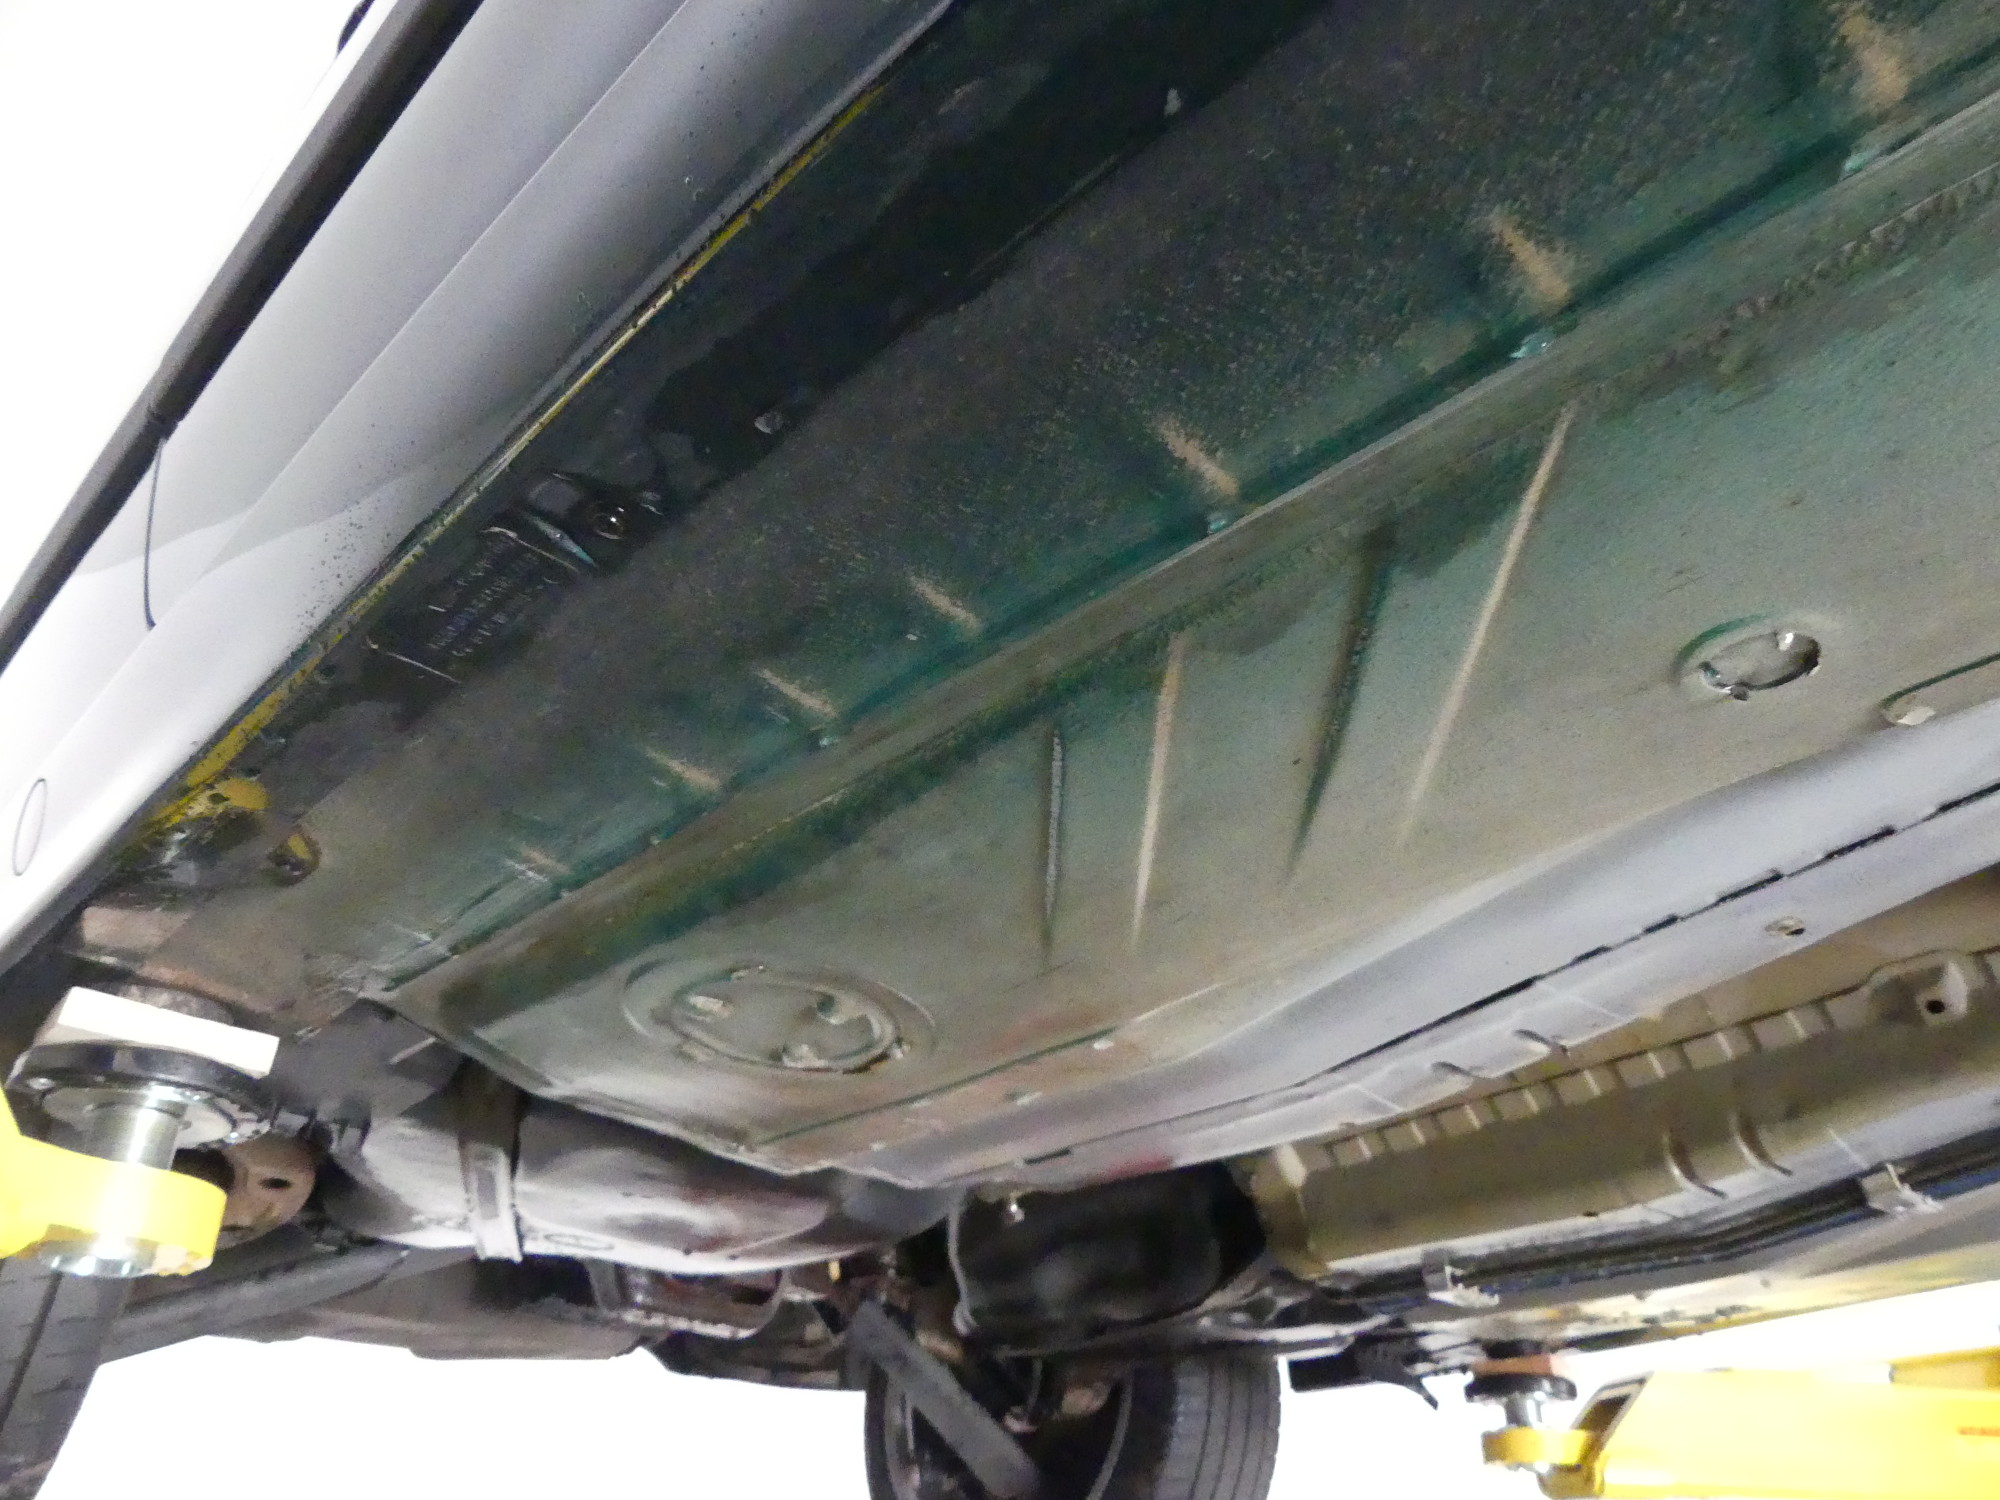
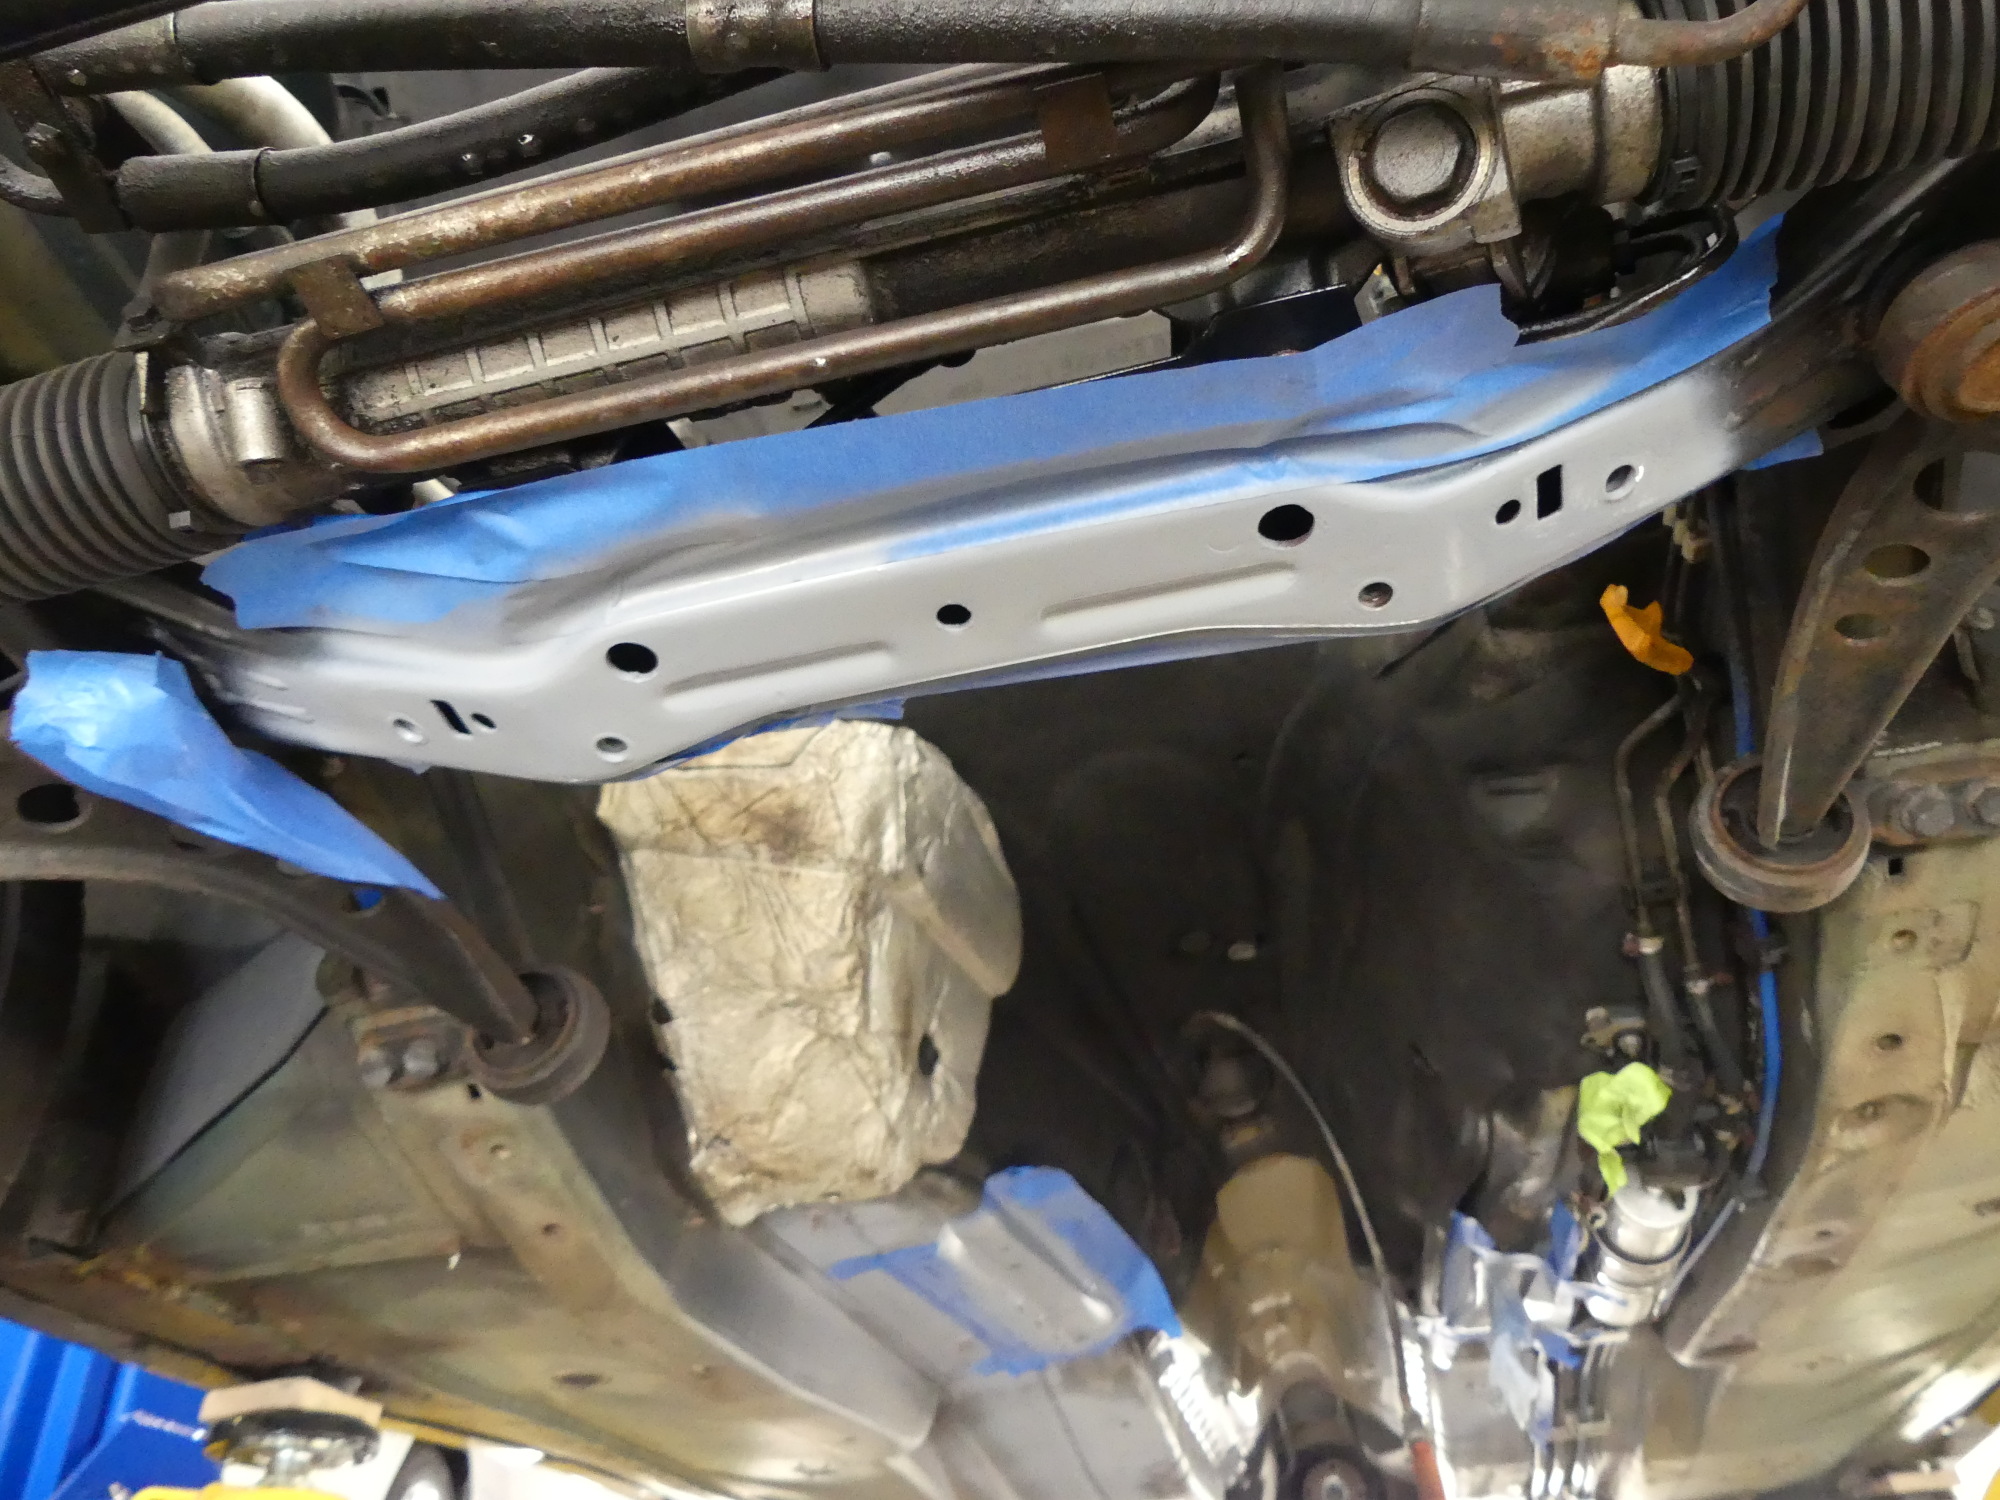
 Another perspective showing how much cleaner the bottom of the vehicle is now. I've used mineral spirits to clean around the knockouts which will be seam sealed. |
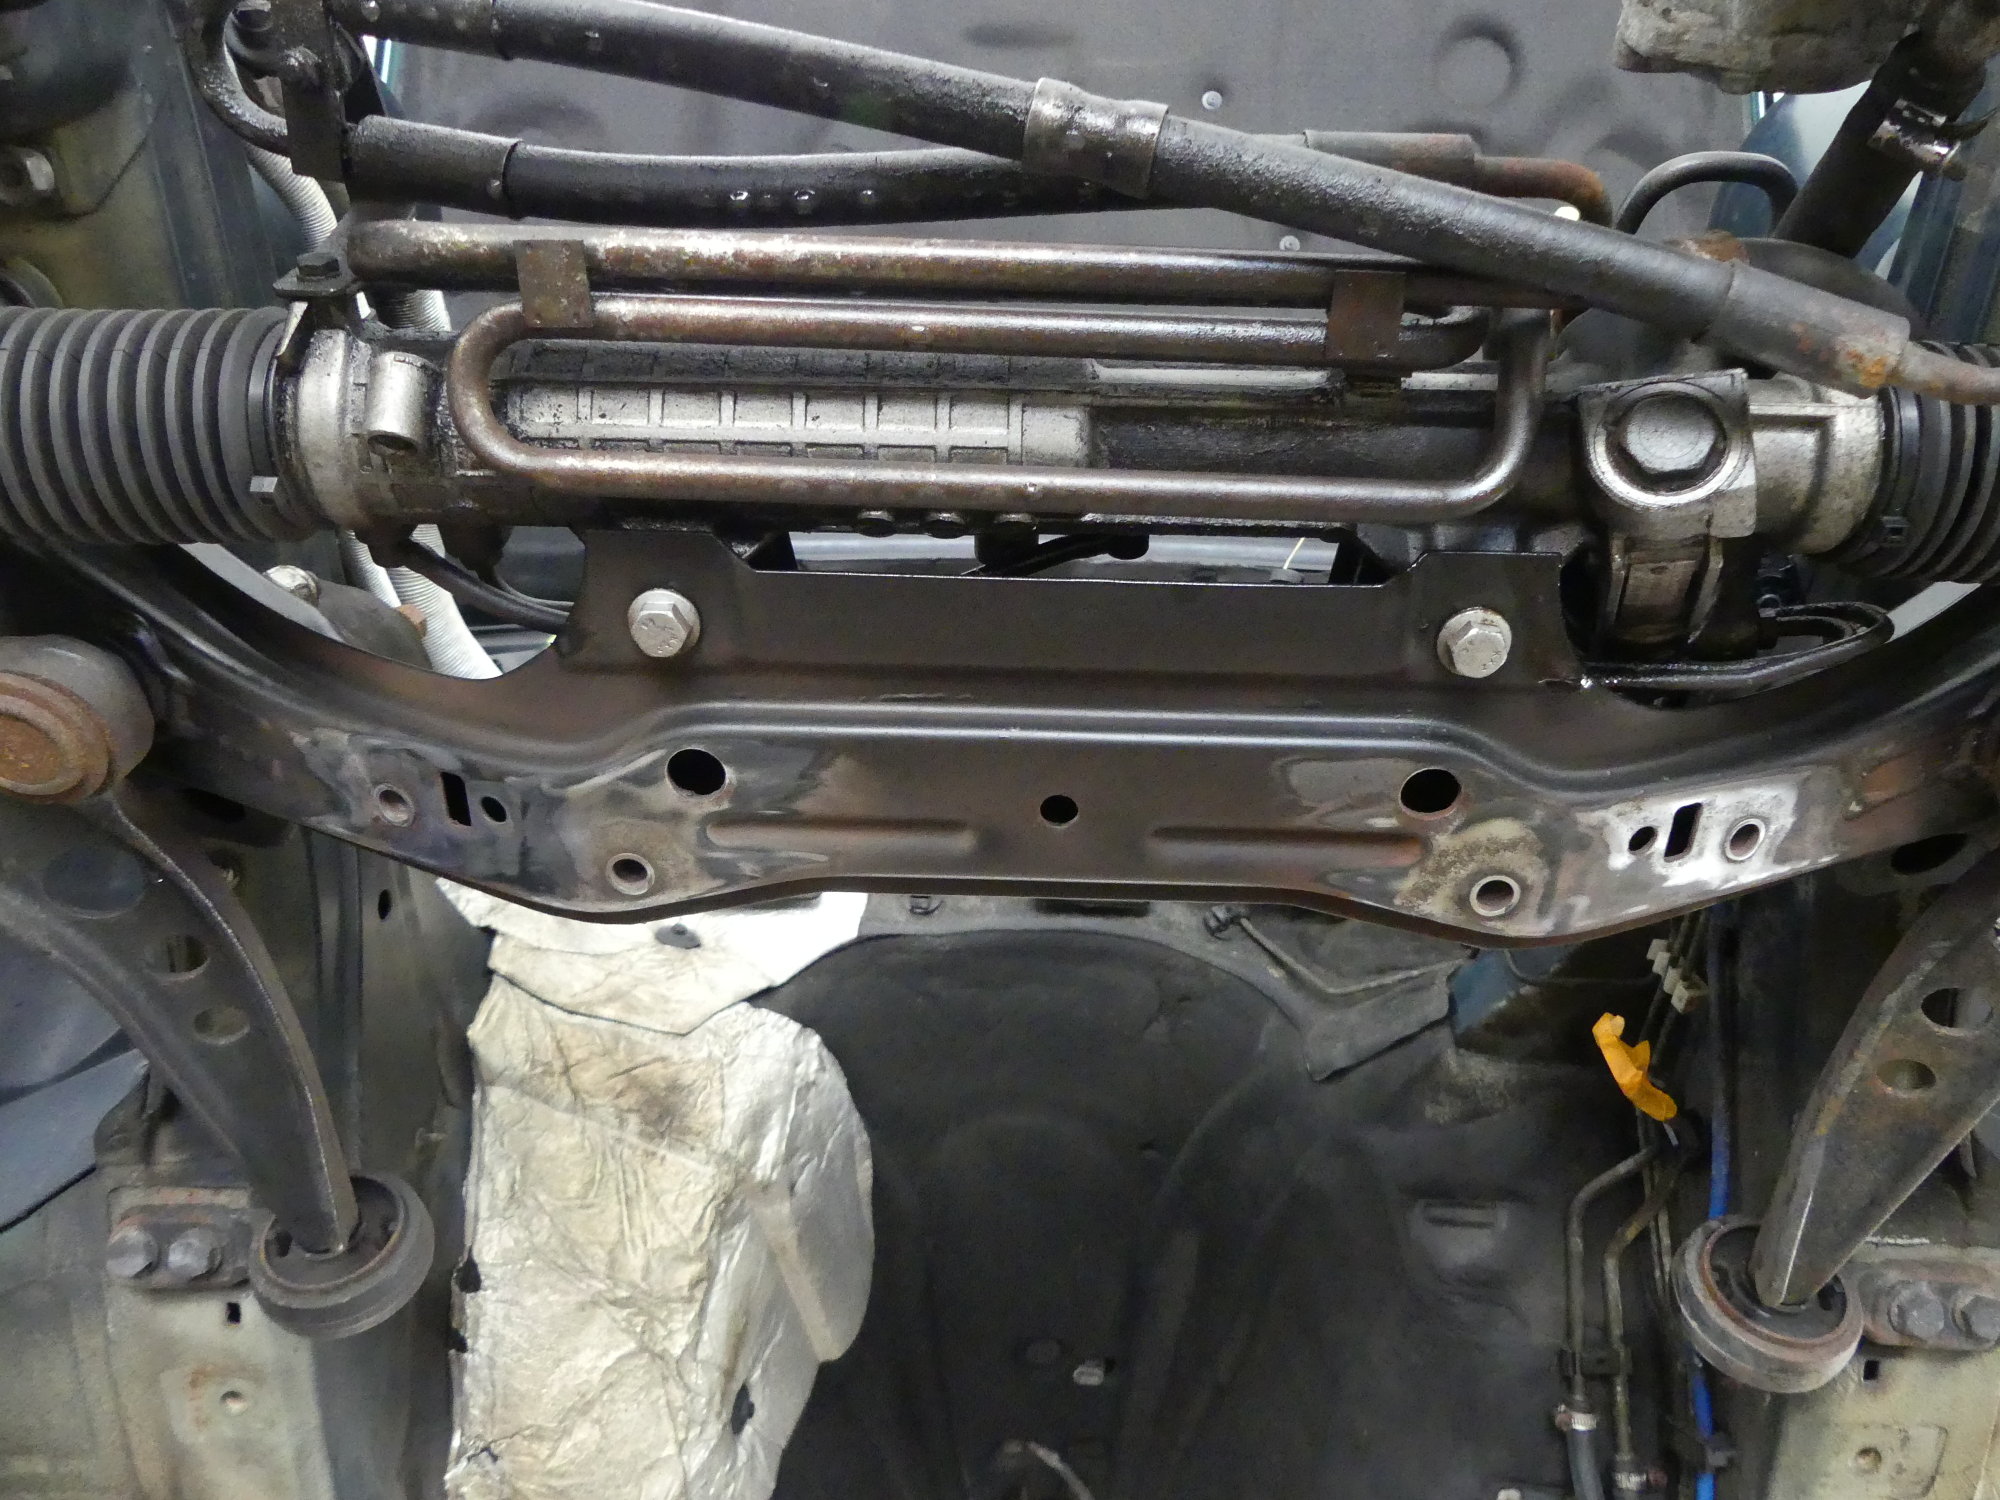 This was taken while sanding off the rust on the front subframe. When done I wiped the entire area with mineral spirits to remove all traces of oil (mostly ATF) that continues to drip from the lines for some reason. |
 I'll apply a VHT satin black finish over the two coats of VHT primer shown here. I'm irritated that virtually all the powdercoat I did on the front and rear suspension overhauls has failed. |
One of the areas I had to address was the front subframe, where I saw a lot of rust bubbling up through the powdercoat in the areas where the X-brace attached. The good news is this looked worse than it really was. The roloc disc quickly removed the bubbling powdercoat and the underlying rust, leaving me with bare metal and a minimum of corrosion damage. I again applied a couple coats of VHT primer to this area and I think it will look pretty good when finished with VHT satin black (the same color used for the dipstick guide tube), even if most of it will be hidden by the X-brace when it's reinstalled.
I also took the time to use a cutting wheel to remove the remainder of the broken stud that previously fastened the fuel filter cover. I then followed up with a roloc disc to smooth out the surface and apply a bit of primer so rust would not occur before I'm able to drill it out and install the nutsert. In the same vein I have to drill out the M8 bolt that snapped off while my tech was removing the rear heatshield support and then order new bolts for that as well, since I'm sure as hell not putting the old rusty ones back in there.
All told I was at this for five hours today, and it felt more like eight. I don't know how pro techs do this shit every day but my hat is off to them.
Next Up
Tomorrow I expect to pick up the front support from the body shop as well as a bunch of hardware and other parts at the dealer I'll need to begin installation of the front end. I also expect to pick up the powdercoat that was originally promised on Friday before they had "oven trouble". Once back at the garage I plan to wrap up the paint work by addressing a few more areas in the engine bay, apply the seam sealer to the needed areas, and then paint the seam sealer to restore the factory appearance. If all goes as planned I should have the front end back together by Tuesday or Wednesday, which will set the stage for the engine build. And speaking of the engine build, I have to call my machinist. He's officially overdue for delivery as of Friday.