


Wednesday, August 30, 2017
Front End Assembly Begins
The day began with what has become a ritual with this project -- a trip to the dealer to pick up my latest batch of parts. This batch included mostly miscellaneous hardware and wire harness mounting clips I needed to assemble the front end. It also included new air ducts that channel air through the radiator and condenser. I hesitated to replace these parts due to cost but it's amazing how much more flexible the new parts are. I discovered quite by accident that the edges are supposed to be a soft rubber, presumably for improved sealing -- yet the originals feel more like an extension of the plastic that form the core structure of the parts.
Once at the garage I got to work fixing the engine bay painting flaws. While that was drying I applied the seam sealer to the needed areas on the belly using a standard caulking gun and then smoothed out the sealer using an acid brush. This came out as expected and I can now rest easy that I won't have any leaks. And yes, I'm still amazed I missed the open / loose closures on my underbody inspections. I suppose I'll chalk that up to a case of looking but not seeing.
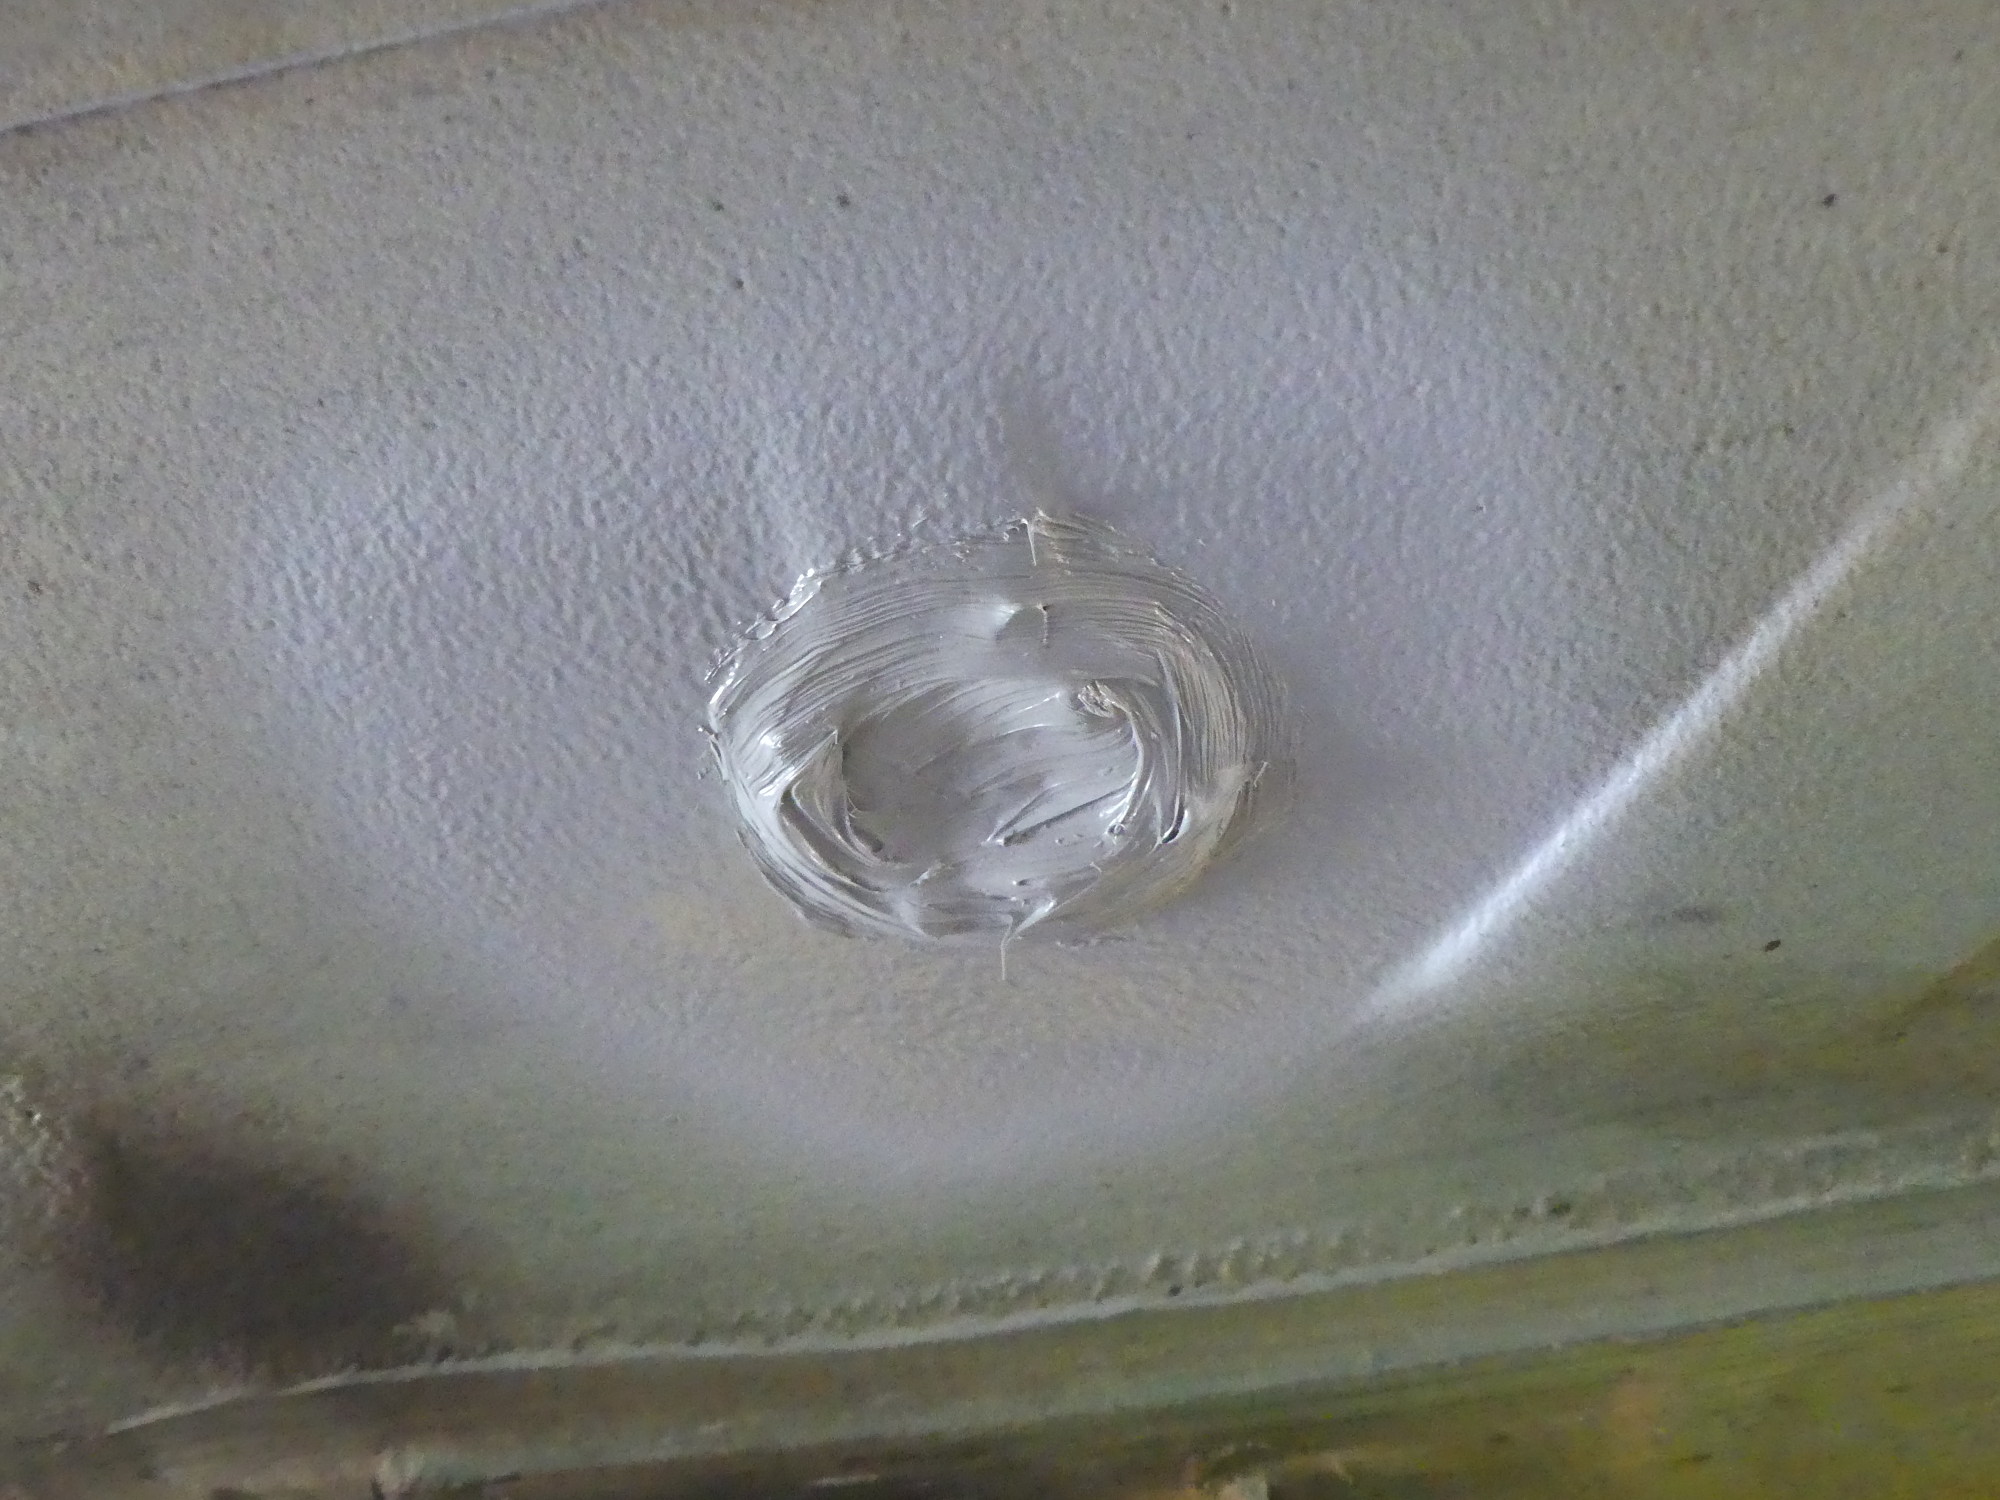 To seal the knockouts on the bottom of the car I cleaned and degreased the belly, applied some VHT primer (gray) and then followed up with some BMW seam sealer (also gray). Next up: some finish color to protect the seam sealer. |
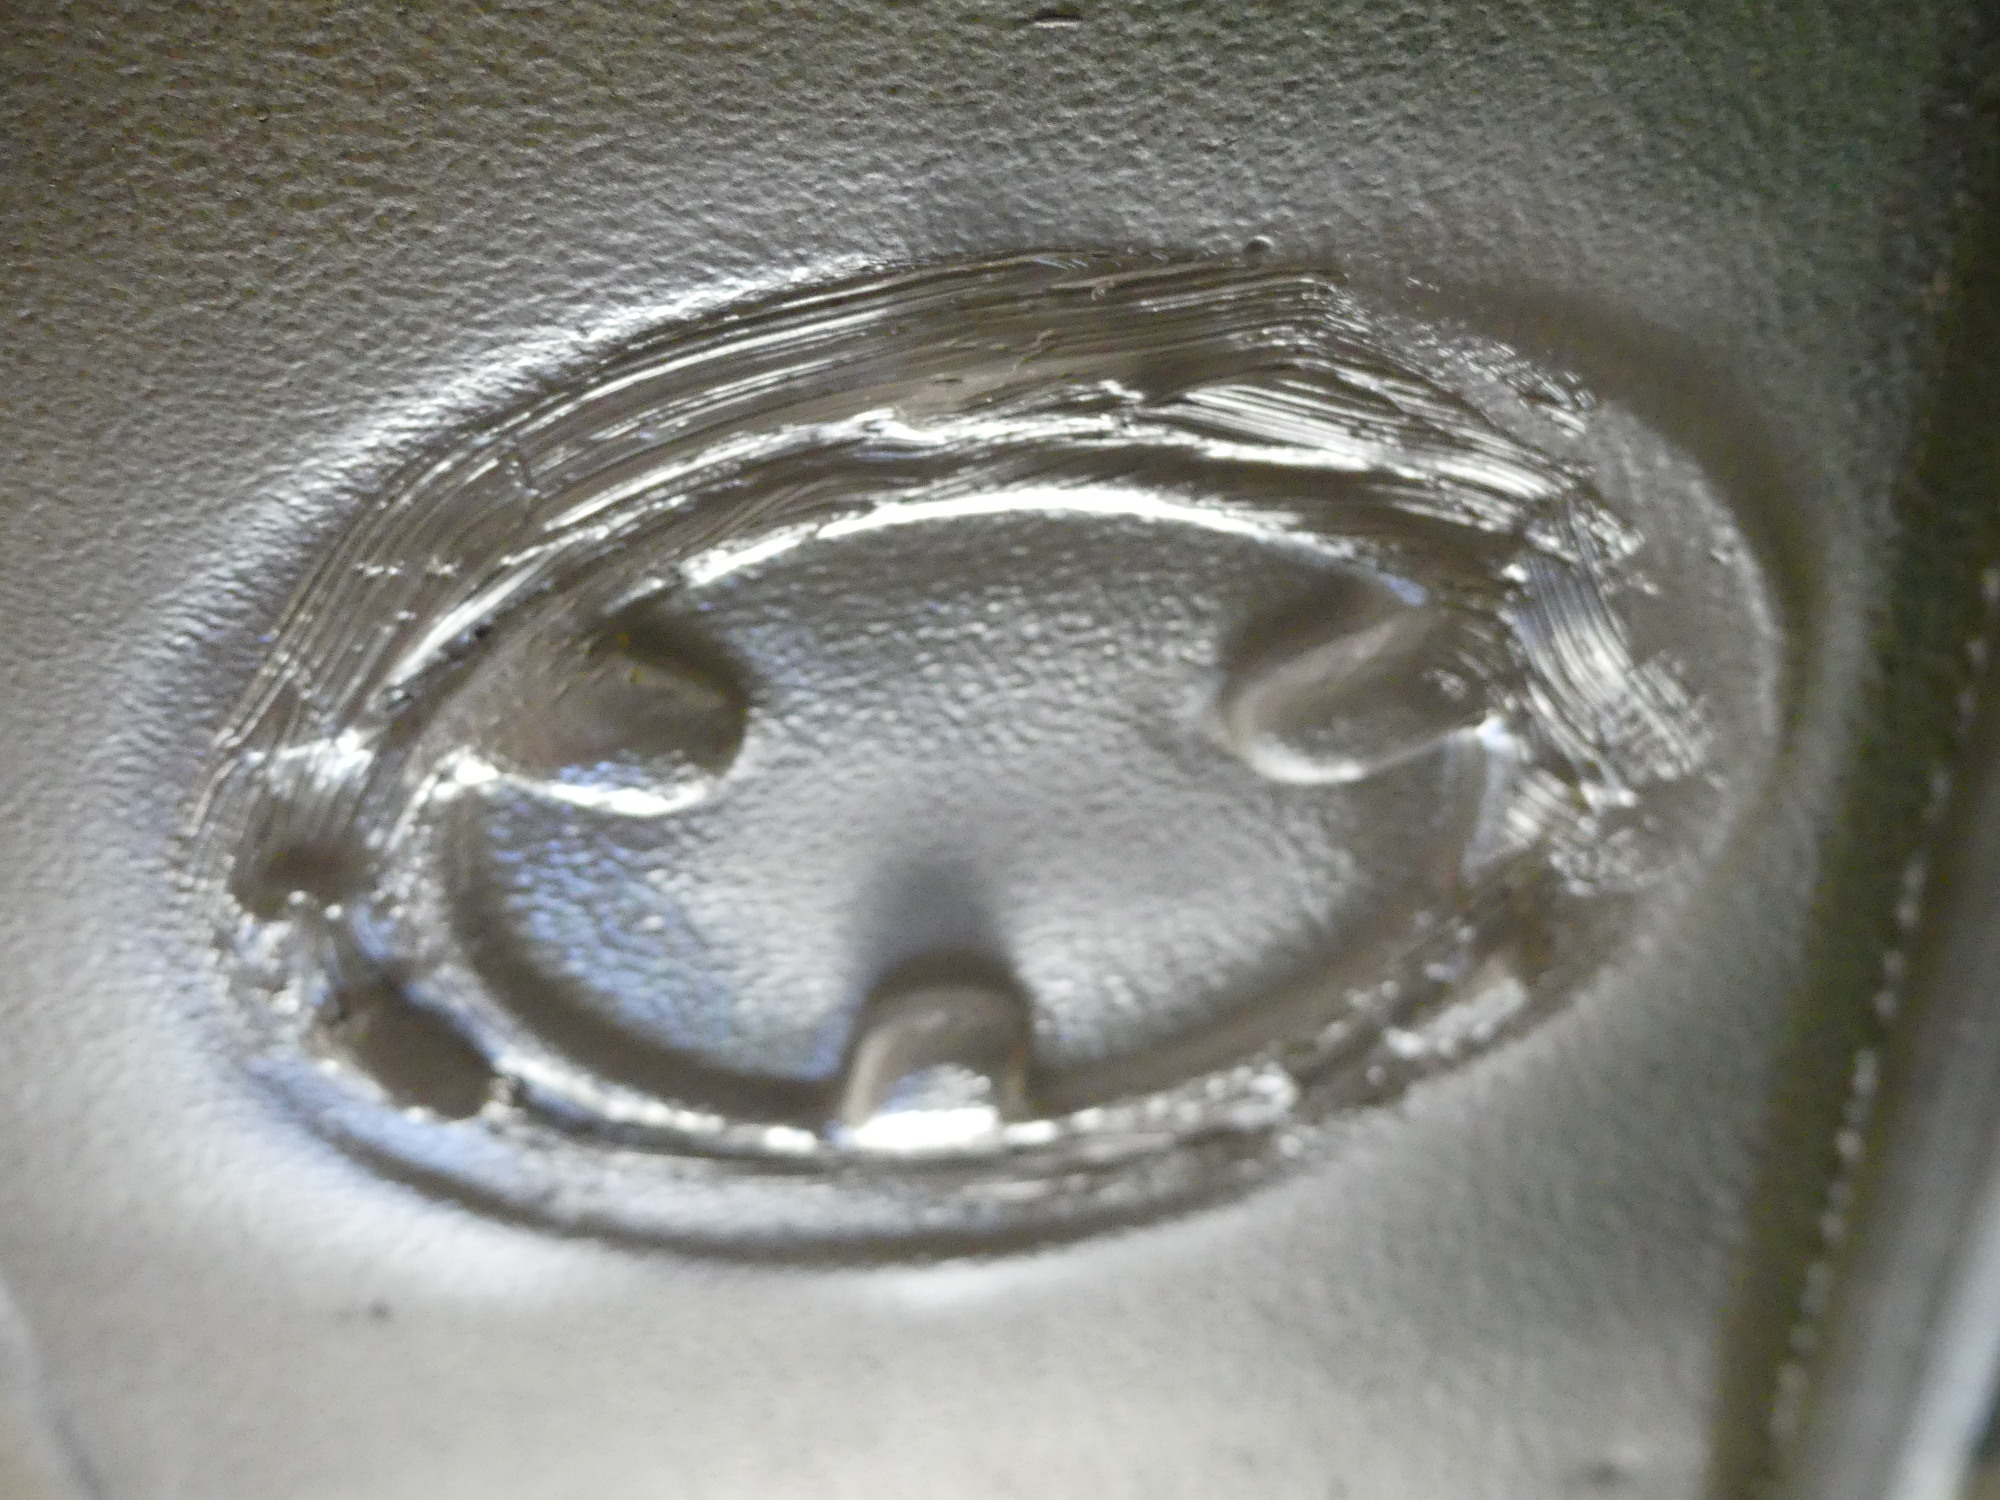 Although these larger knockouts, which appear to screw in, were secure, I did notice several gaps around their circumference that could have been a source of water ingress, so I sealed these too. |
 What can I say, but I'm not a painter. I wound up having to reshoot the left side shock tower and use some creative masking techniques to blend the new and old paints in a less obvious way. |
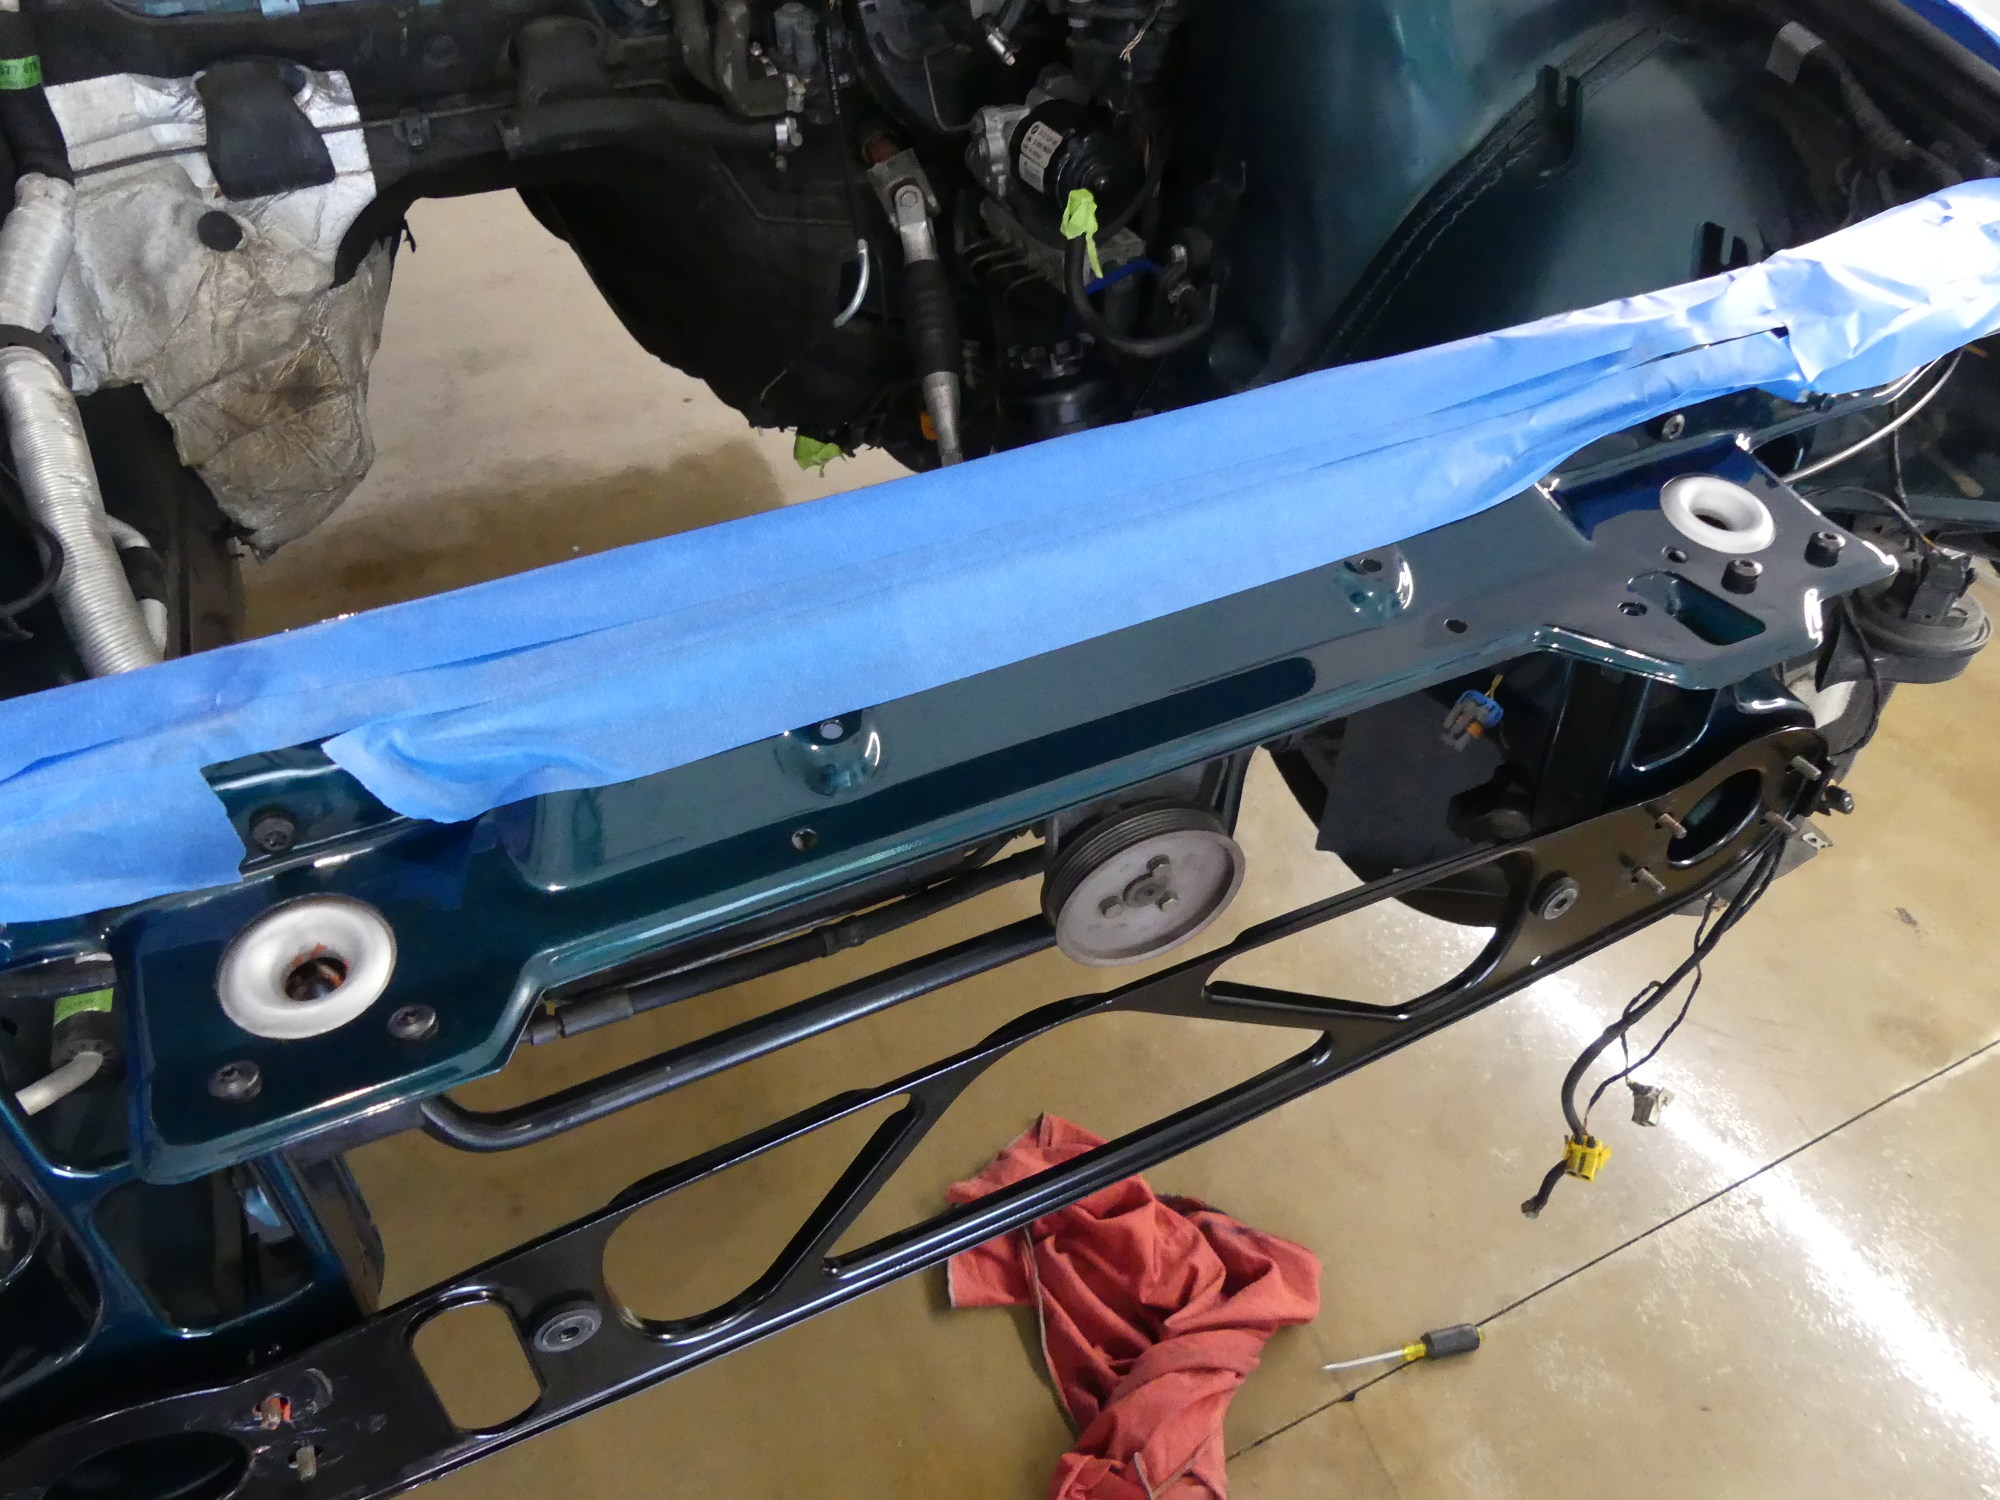
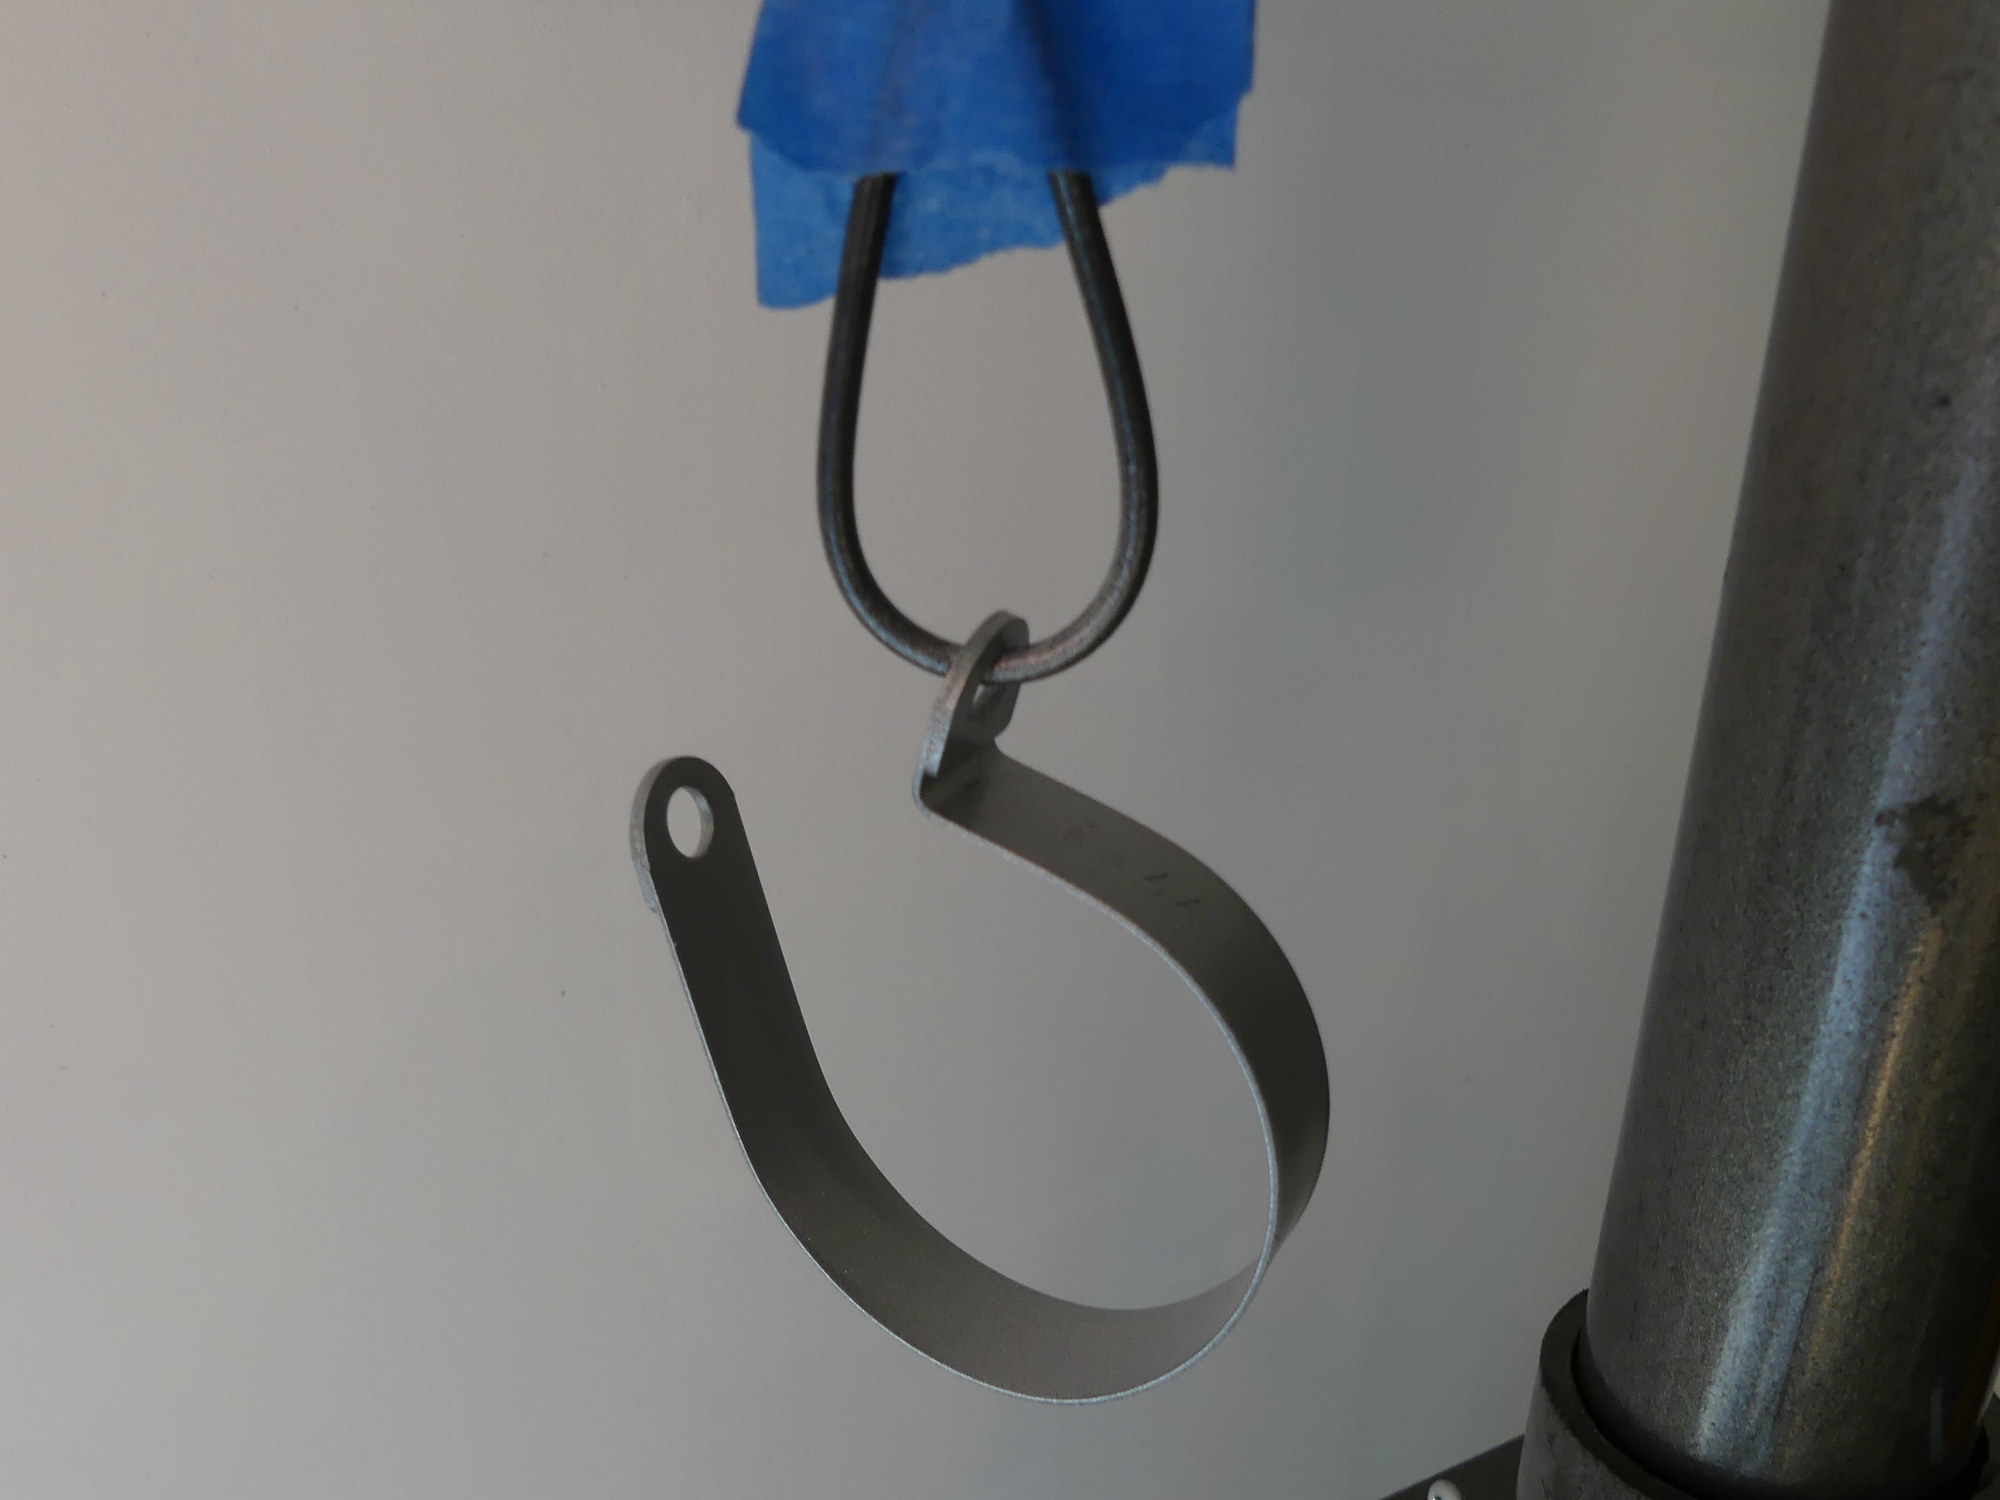
 Here you can see the new support installed and the powdercoated truss support installed over that. Note the orientation of the support -- the flat edge is installed facing down and, naturally the curled edges are facing outwards. |
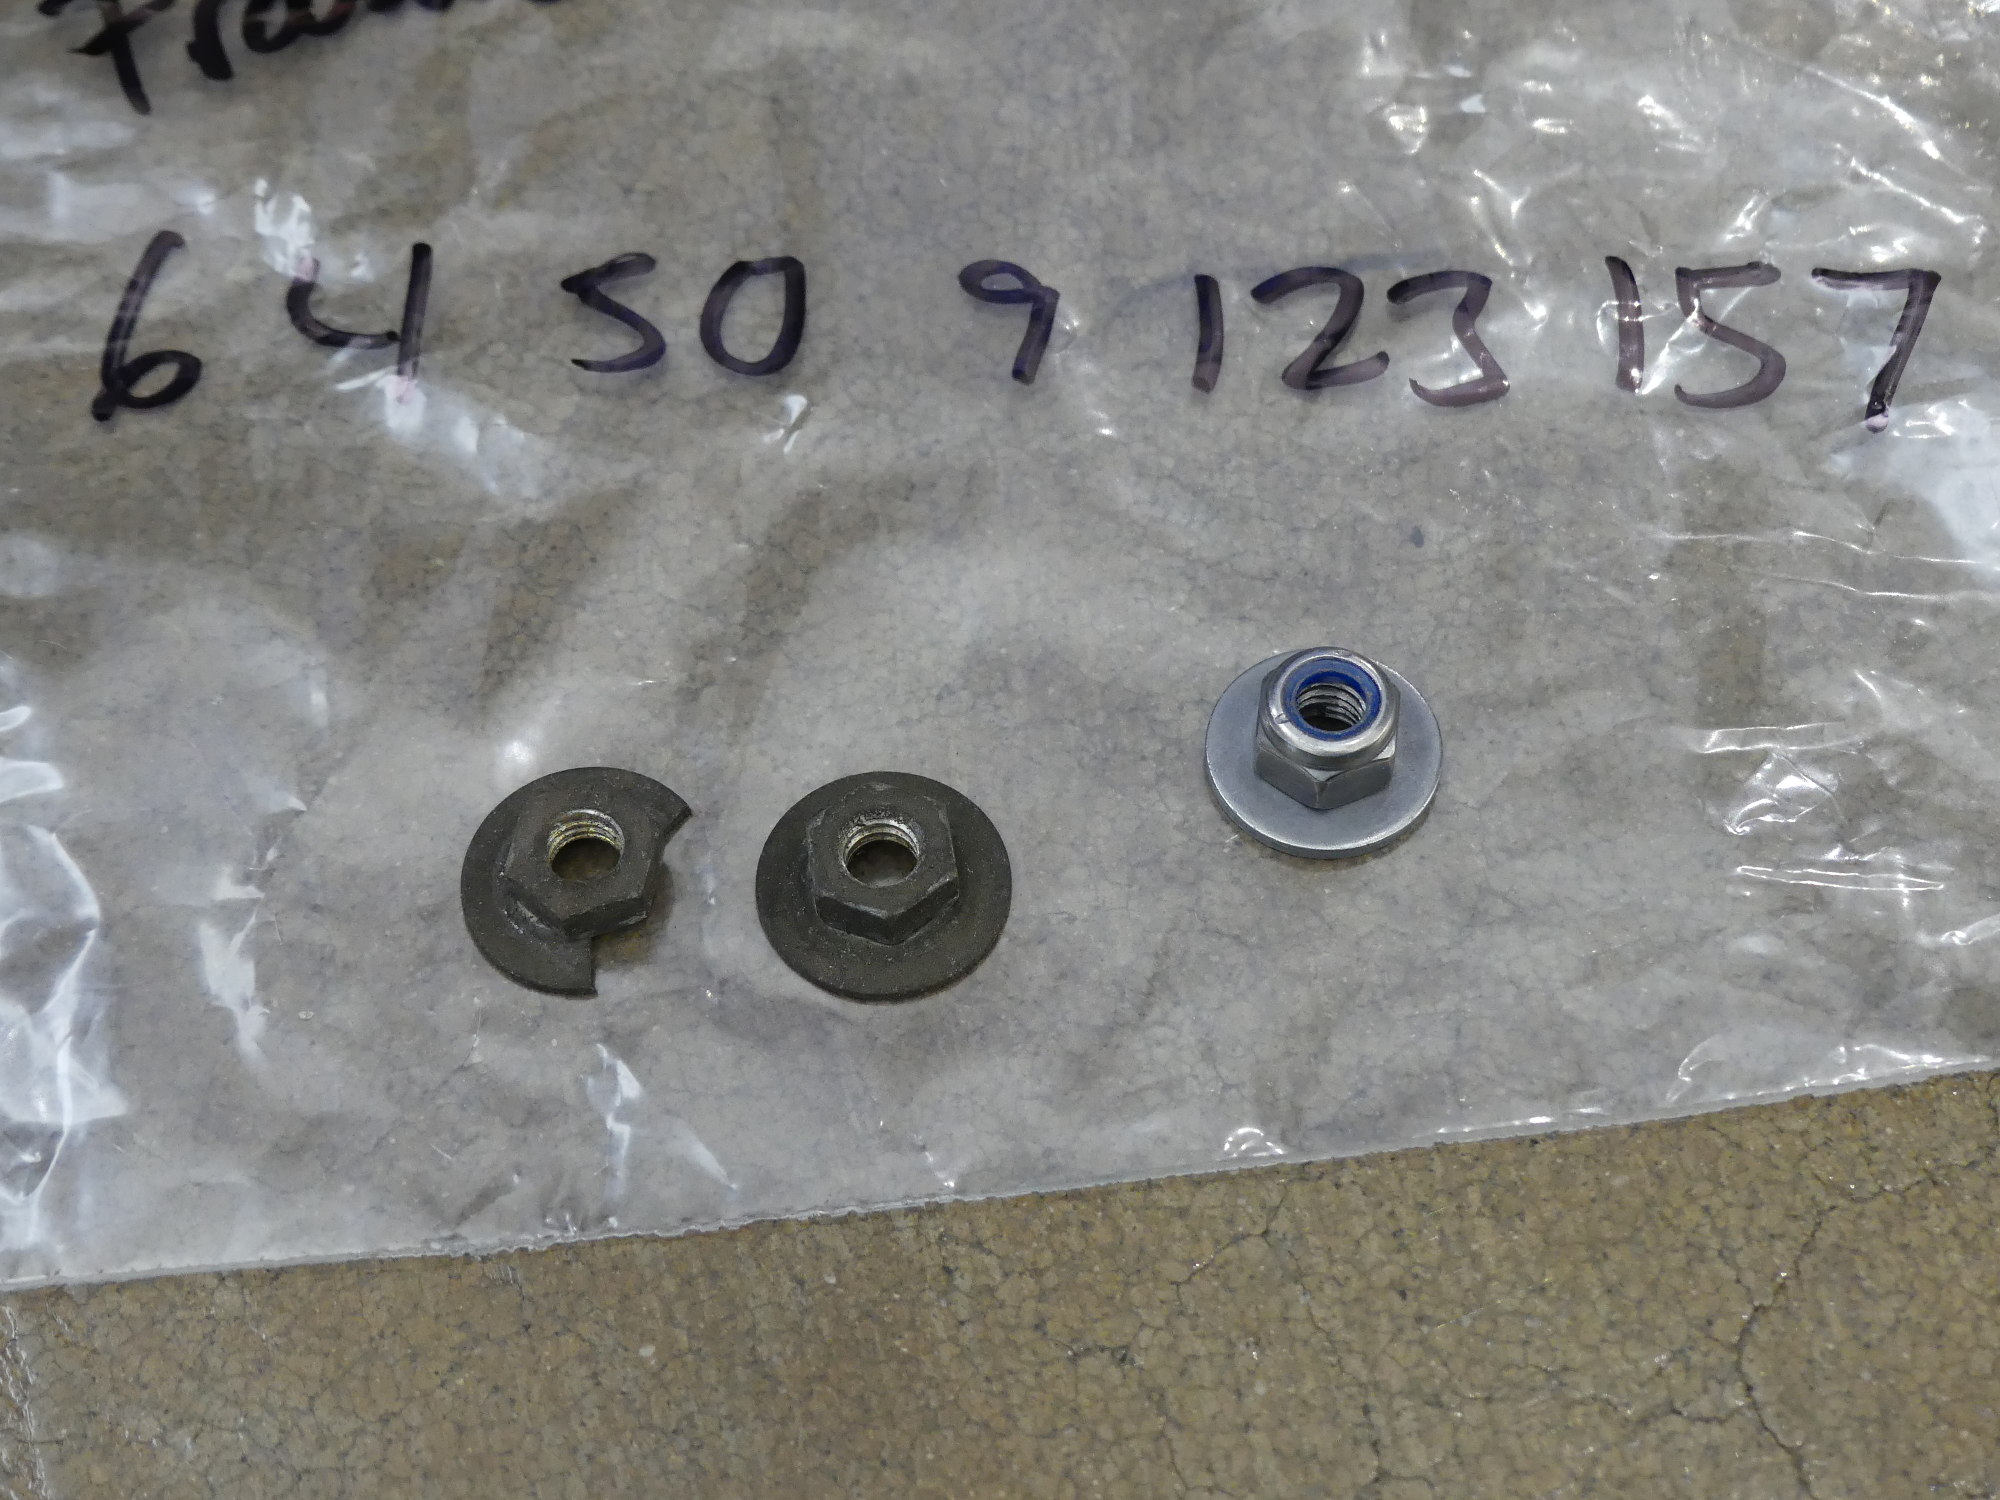 The old vs. new frame rail stud nuts. I was inclined to replace these due to the failure of the washer on two of the parts, but I was pleasantly surprised to find that BMW changed these to a self-locking nut that appears to be ZnNi plated. |
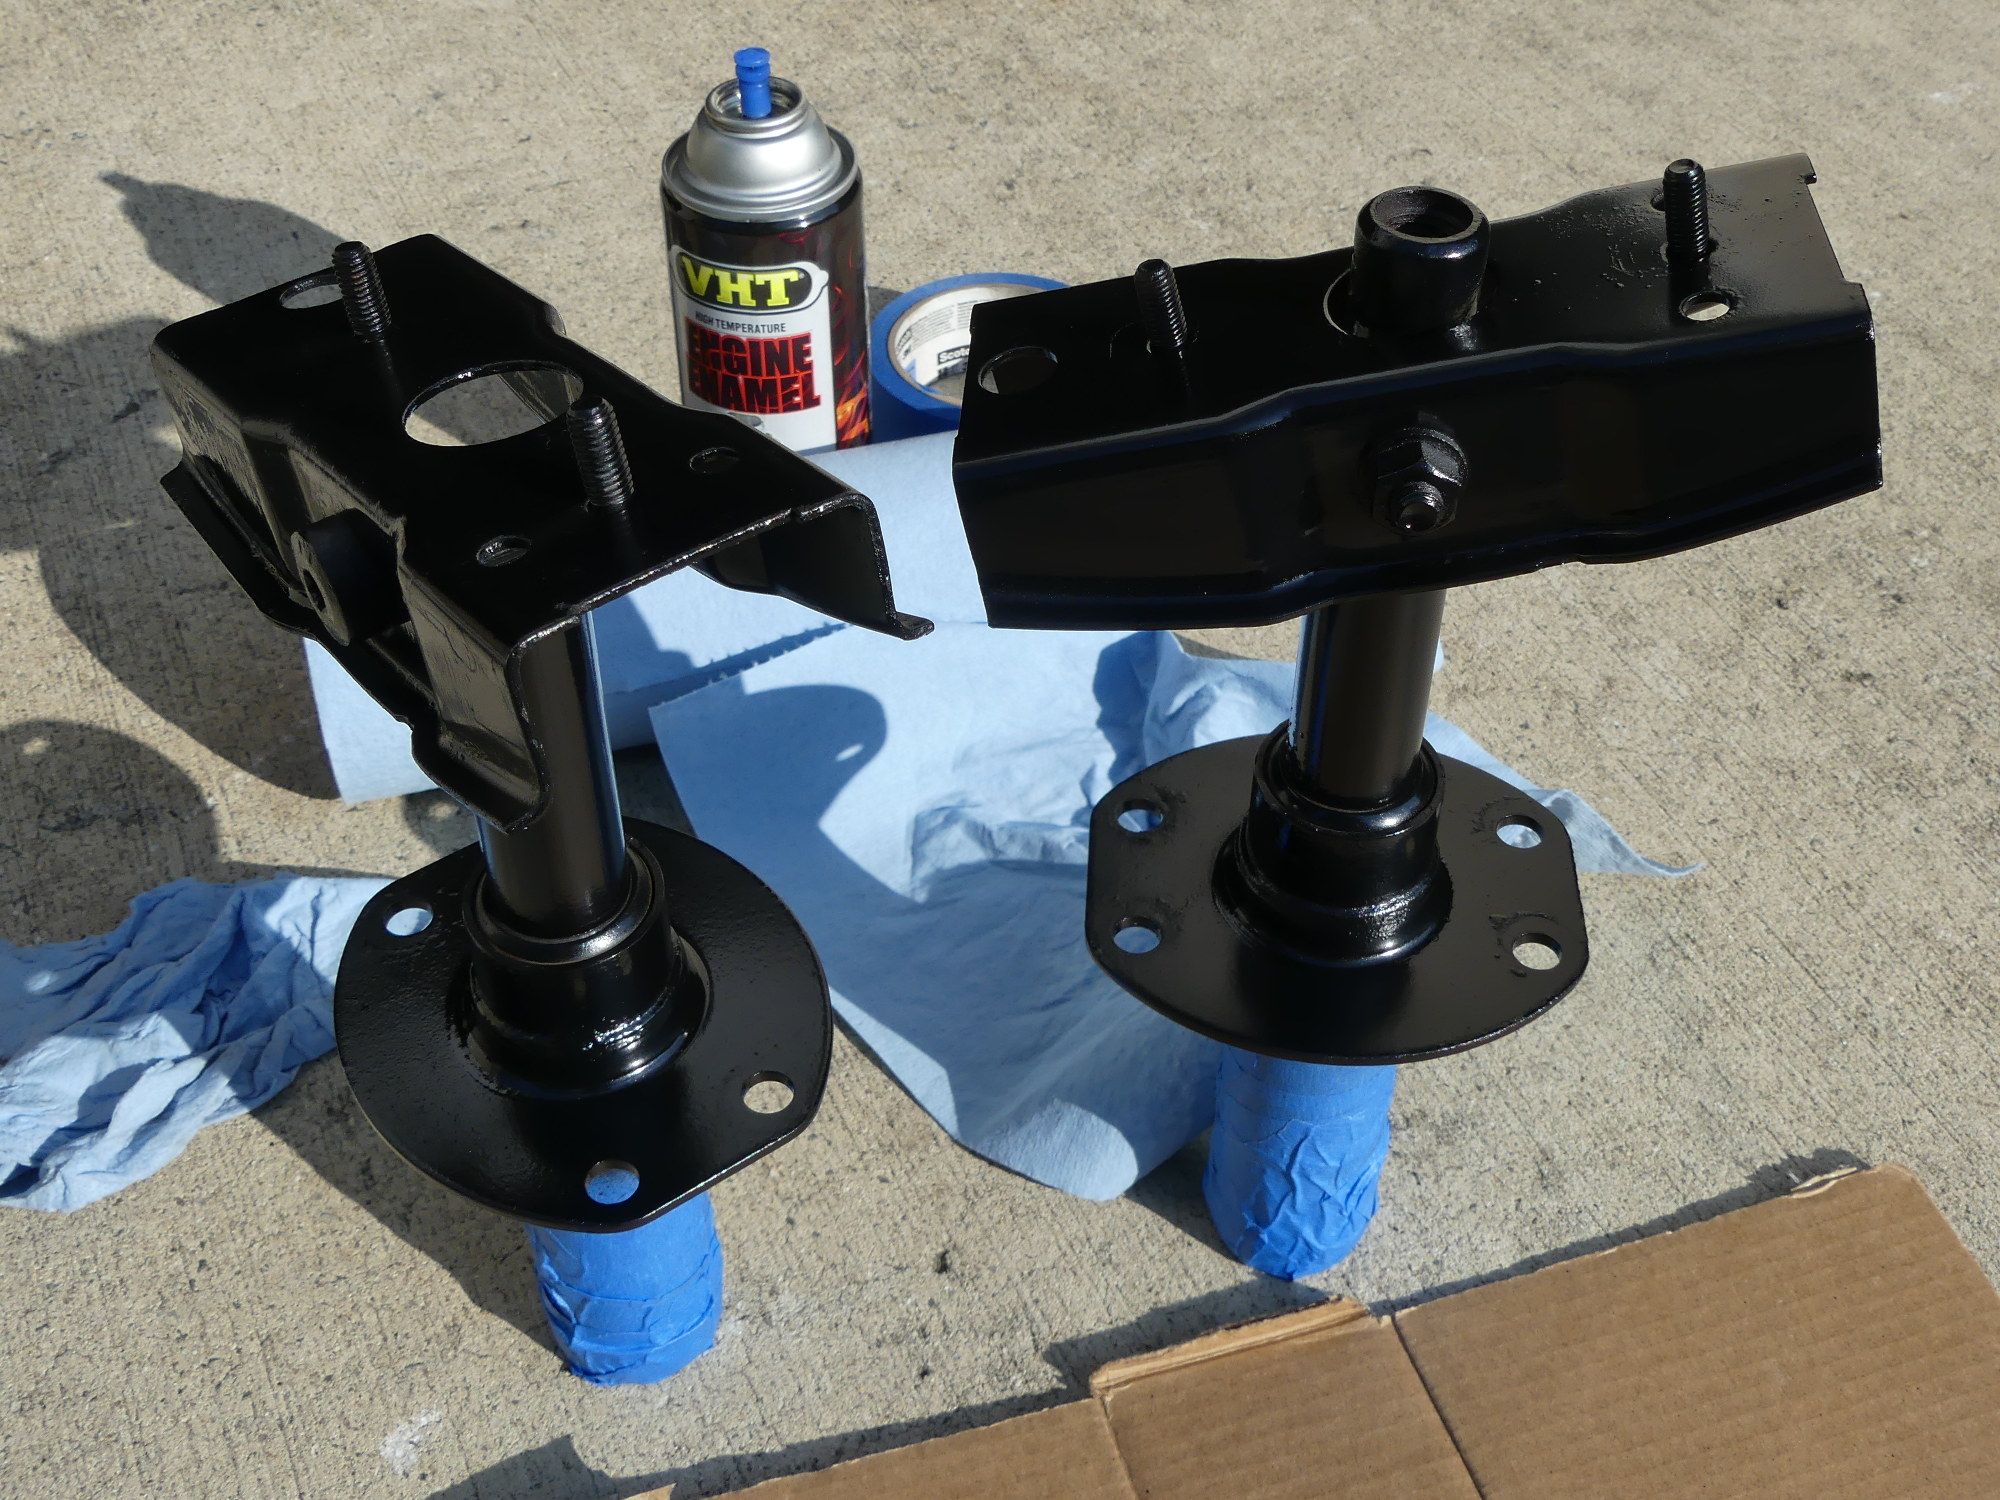 I decided at the last minute to mask and paint the shock absorbers. Although I wasn't able to remove all of the rust prior to painting I think this will help preserve the parts to the extent possible. |
 What not to do -- as I discovered after I attempted to fit this assembly to the hood release cable. The problem is you're forced to counter the force of both receptacle springs while mating this with the hood release cable and it takes too much effort. |
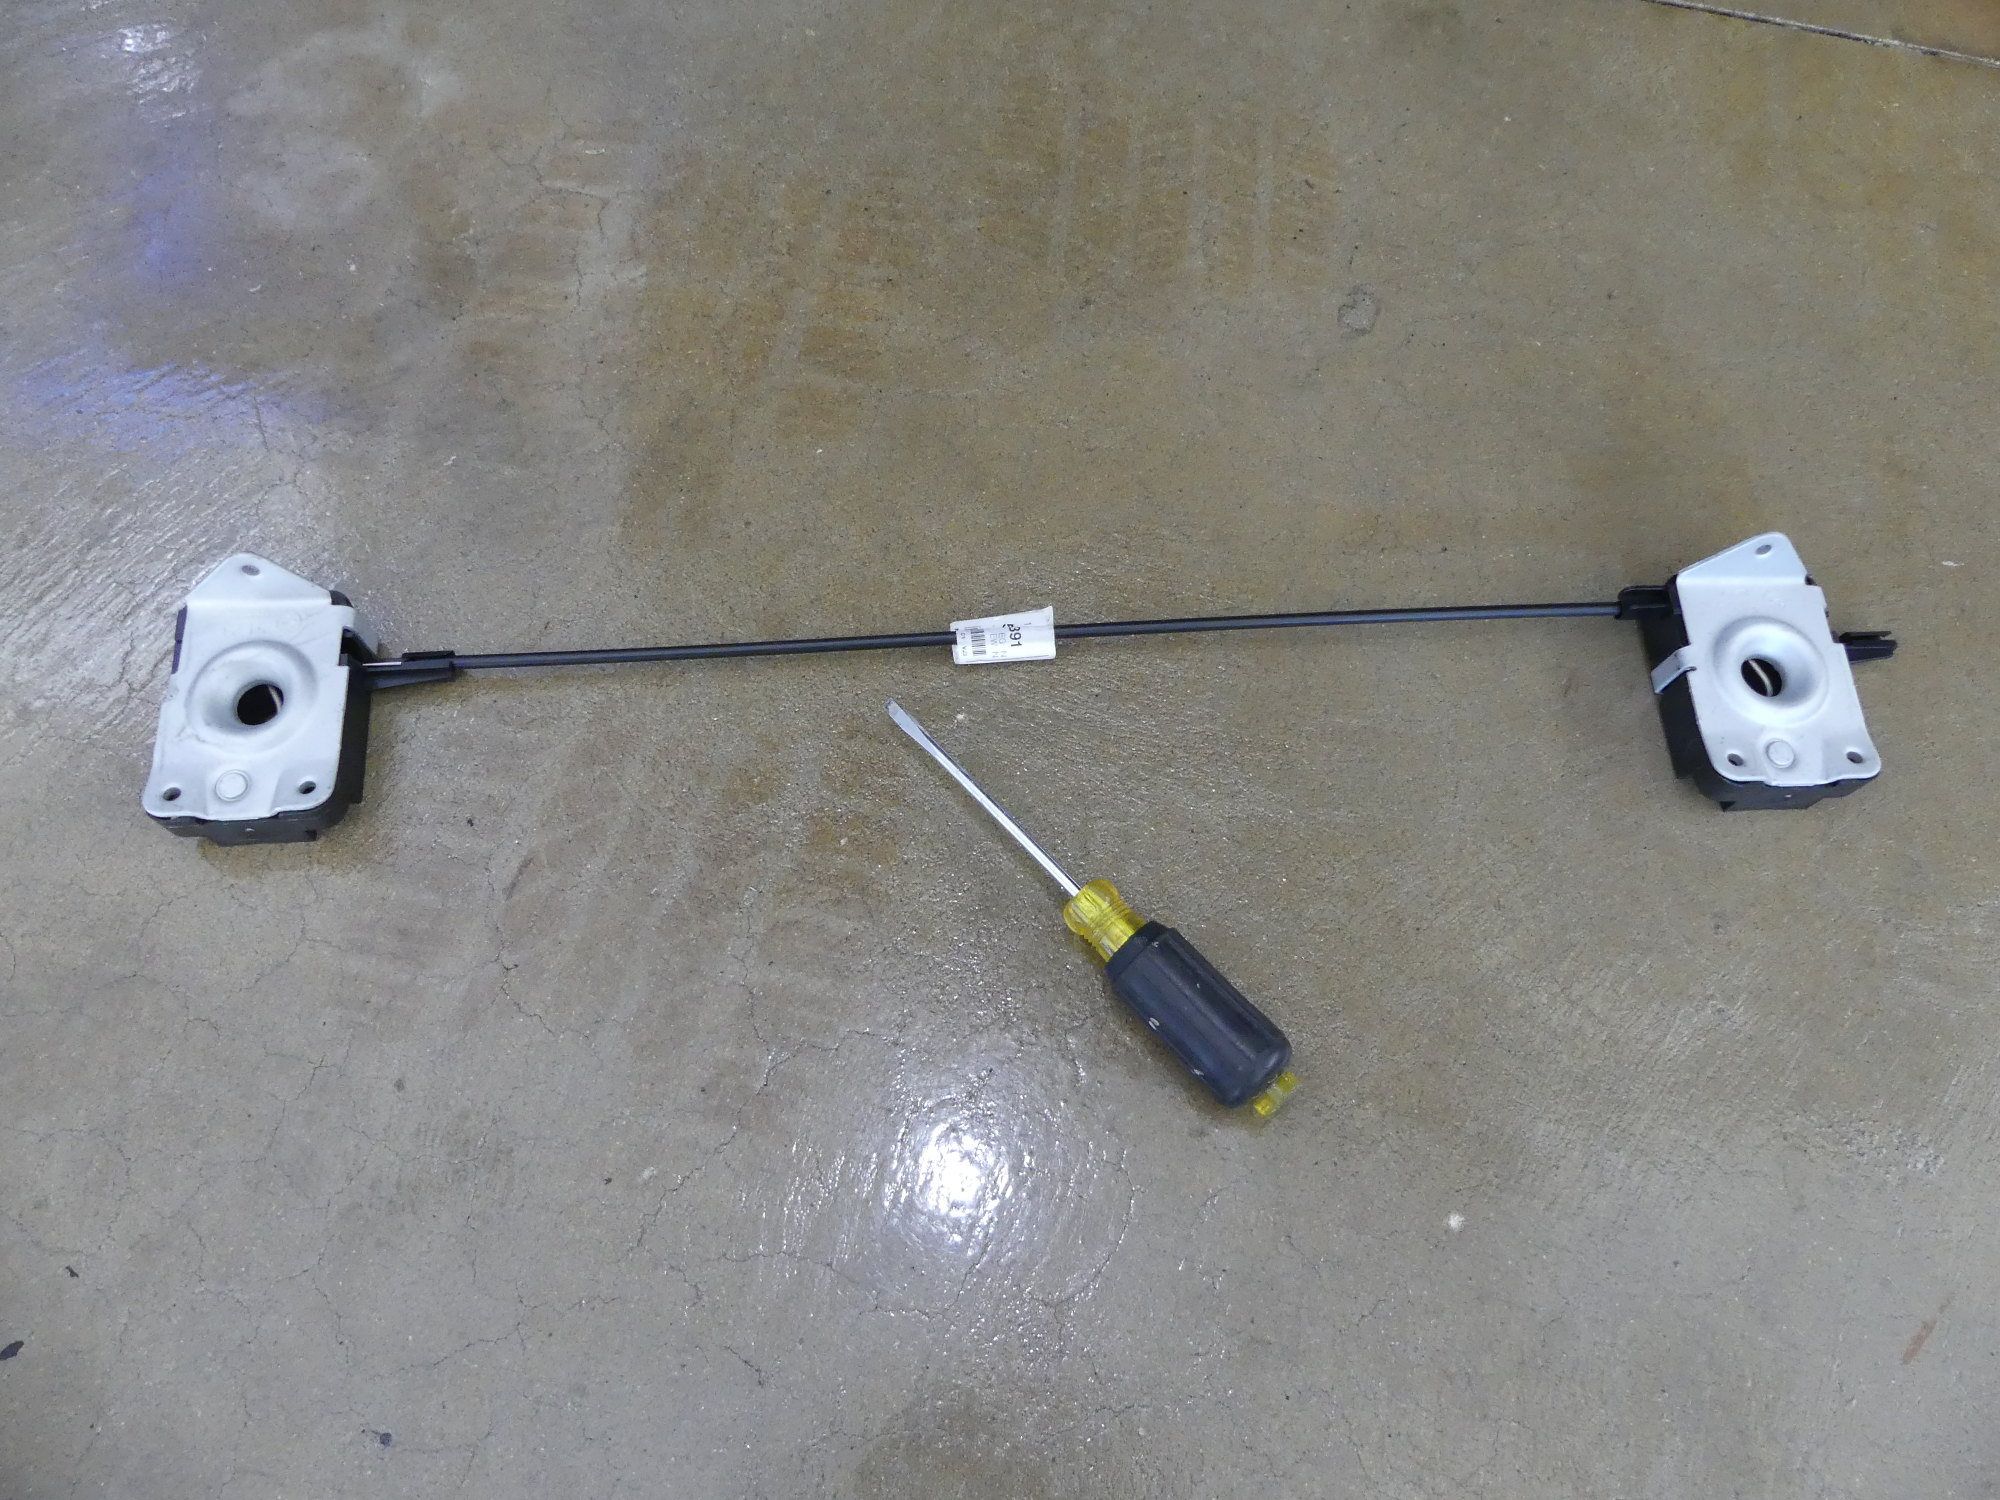
 The best way to assemble the hood release receptacles is to attach the left side receptacle (shown here on top) to the hood release cable, attach the tie cable to the right side unit and lastly, mate that assembly with the left side receptacle. Worked for me, anyway. |
 The reward was seeing those nice new receptacles mounted in the front support. The receptacles have no threads so BMW provides self-tapping screws. They take a bit of effort to get started but once on their way they tighten predictably. No torque spec here. Just tight. |
After lunch I cataloged all the hardware I received and began to install the front support. I decided to put a bit of grease on the two torx screws that connect the horizontal beam to each fender so tightening them wouldn't do as much damage to the new paint, because this kind of damage is exactly where rust starts. With the front support now partially secured to the vehicle I placed the truss support over it on the frame rail studs. When I reached for the bumper shock absorbers I realized they would look a lot better painted with the remaining VHT satin black, so I spent a few minutes cleaning, masking, sanding and painting those parts. I wasn't really looking for perfection here -- just a means to keep the rust I found on them at bay. After they were dry I installed them and used eight new self-locking nuts to secure the front support, truss support and shock absorbers to the frame rails.
At this time I noticed that BMW changed the type of nuts used for this application. The previous nuts were a non-self-locking type with a captive washer. The new nuts have a captive washer as well, but are of the nylon self-locking type. While these nuts weren't cheap they appear to be zinc-nickel plated. If this is true this could be a very good thing, as ZnNi plating has a much higher resistance to corrosion than standard Zinc plating. Based on what I've seen since BMW switched from Cadmium plated fasteners to Zinc, I think Zinc plating is completely inadequate for automotive applications, particularly those exposed to the aggressive salts they're putting on the roads in winter regions these days. Zinc plating seems to give up the ghost all too soon (typically within 2-3 years) and the result is predictable -- rusty fasteners and rusty base metals. Of course, even Zinc-Nickel plate will give up the ghost eventually but depending on the alloy used it can last up to five times longer than straight Zinc.
With the front support installed the next step was to install the new hood latch receptacles. Because the springs in each receptacle are quite strong and given that the locking mechanism in each receptacle must be rotated to capture the ferrule of each cable I found it necessary to assemble the parts in a specific order. I first mated the left side receptacle with the hood release cable then the tie cable with the right side receptacle. Lastly, I mated that assembly with the left side receptacle. Finally, I secured the left side receptacle to the front support with three new self-tapping screws and repeated the process for the right side receptacle before opening the driver's door and actuating the hood release handle. As expected, the pull is a bit heavier now that I'm countering the force of the spring in the handle mechanism as well as the two receptacles, but it's much lighter than before. I have not yet tested the system by closing the hood, but that is coming soon.
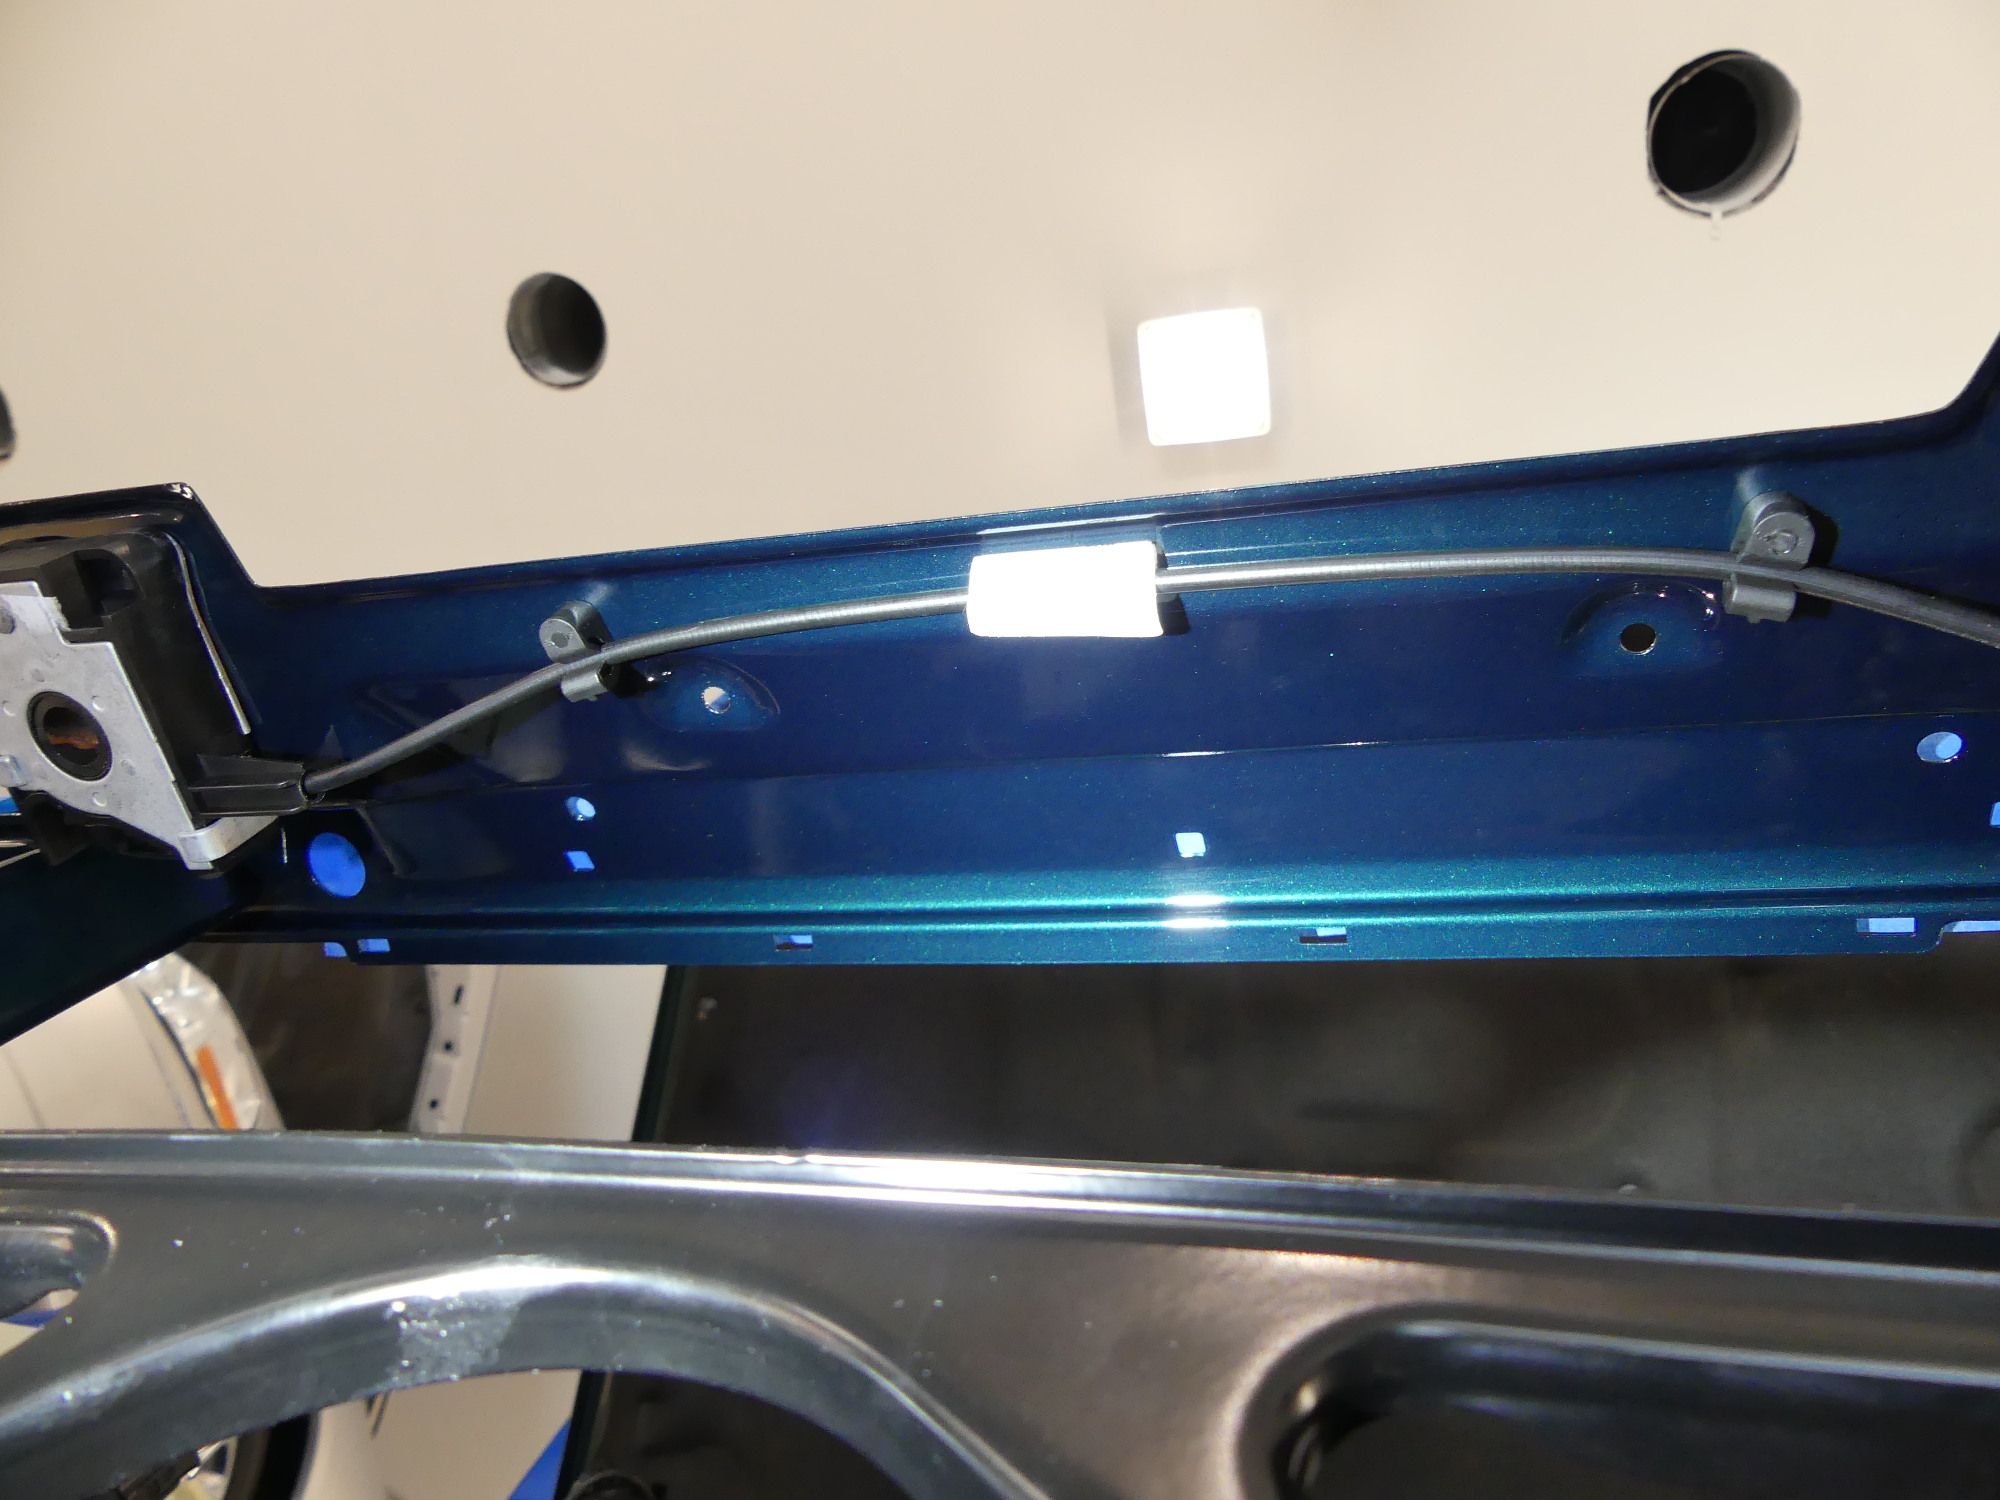 The tie cable between the receptacles is fastened to the front support with two special clips that integrate an expanding rivet. If you're doing this job you want to replace these clips. Don't leave the cable flopping around. |
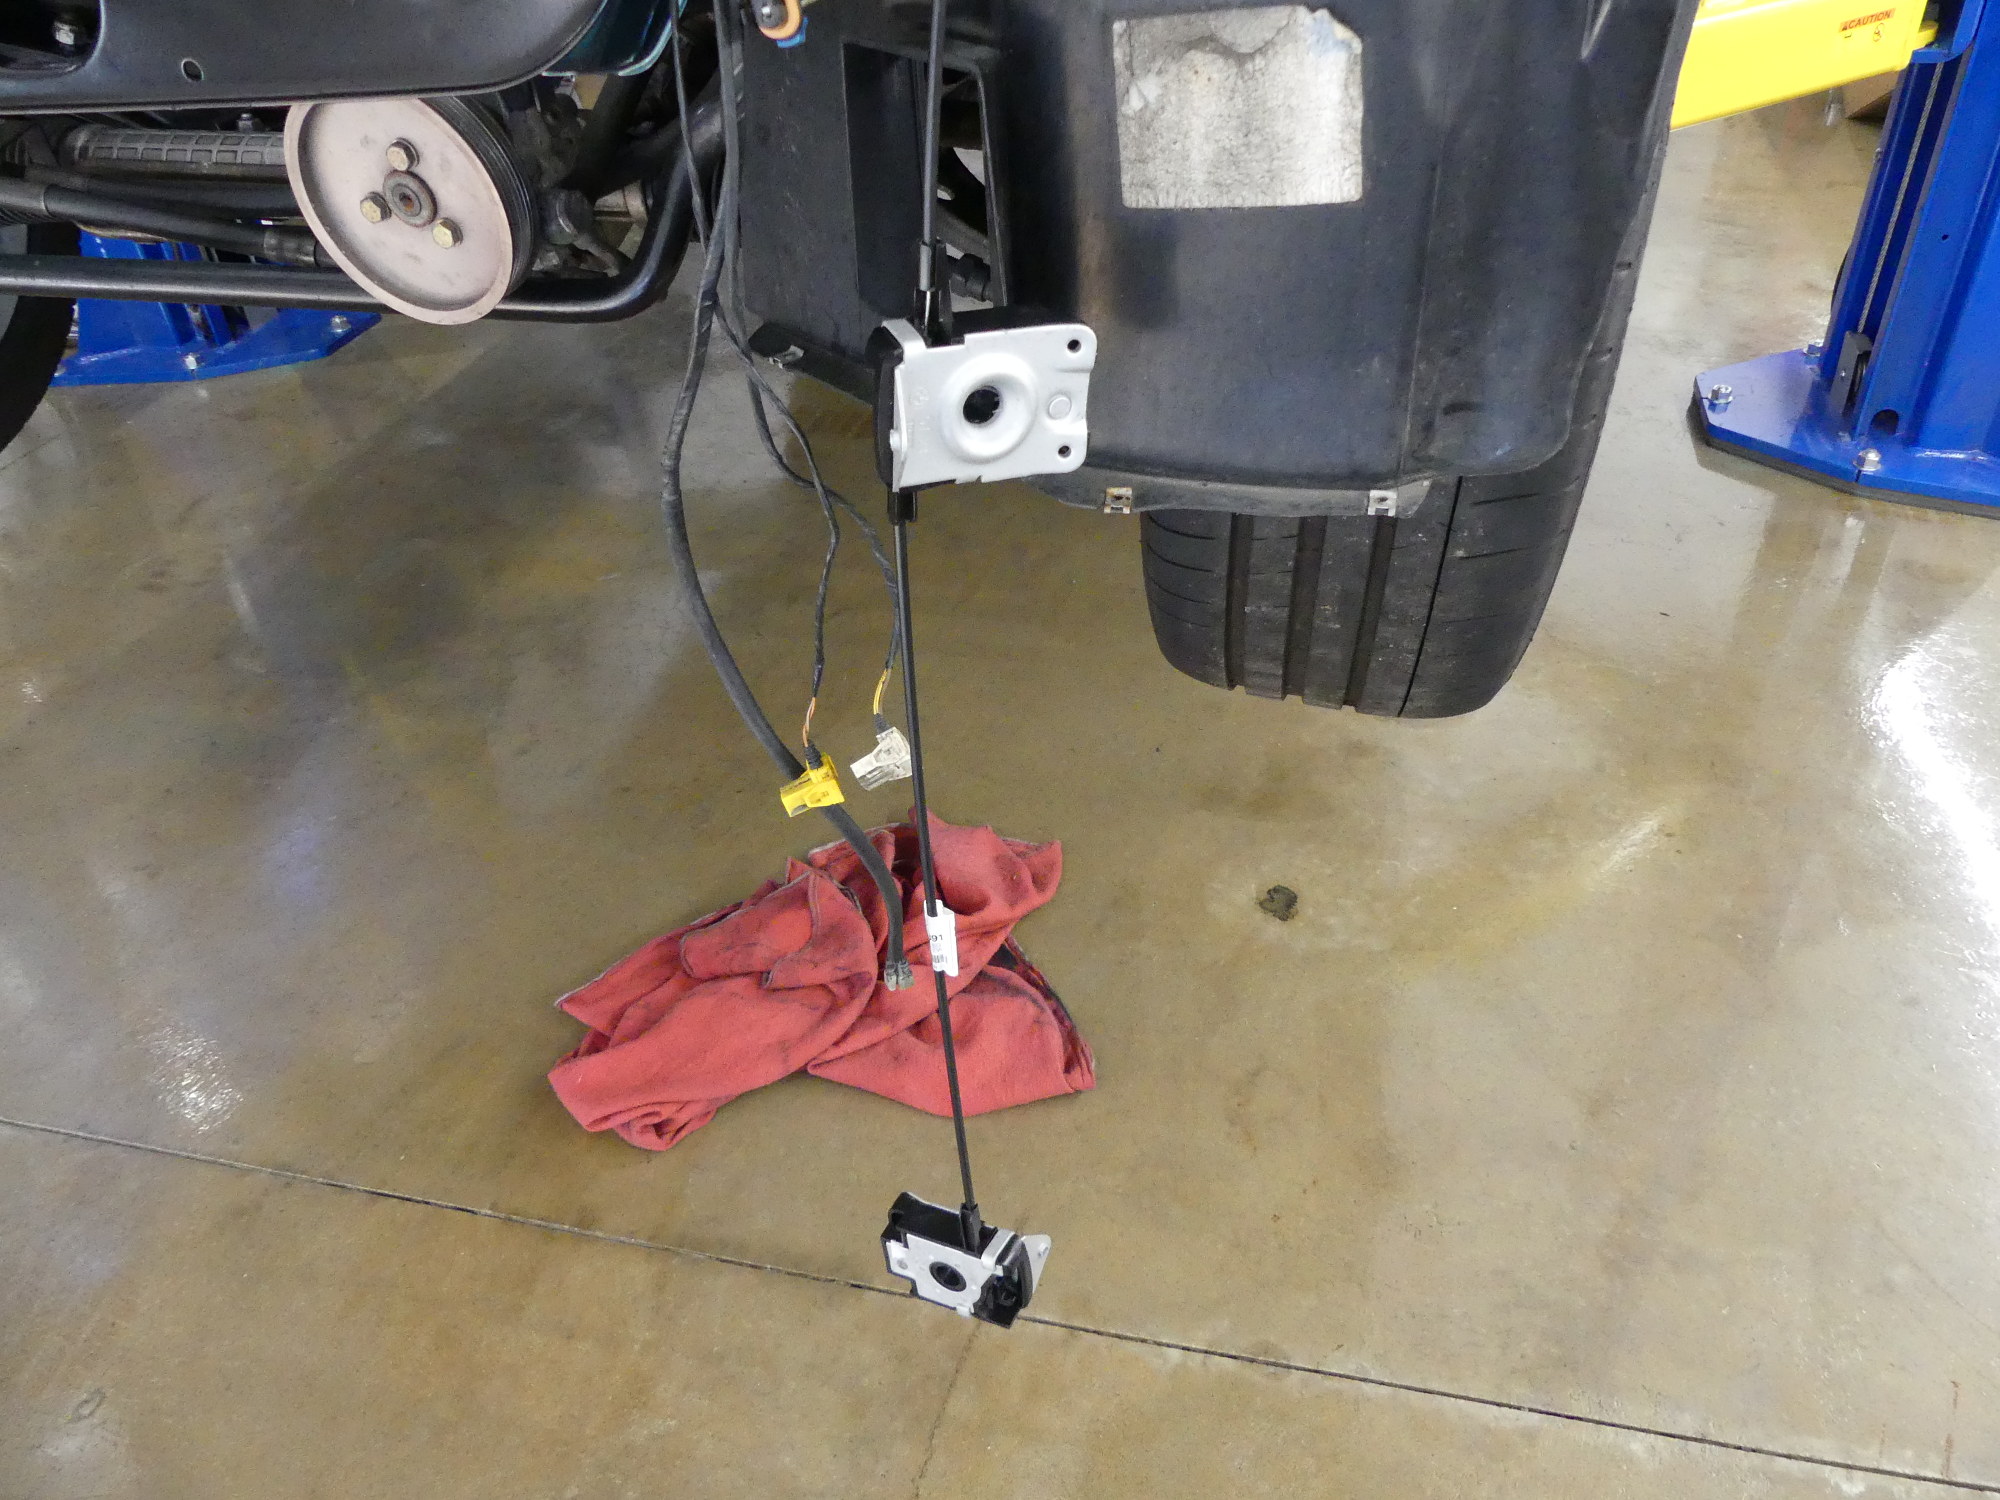
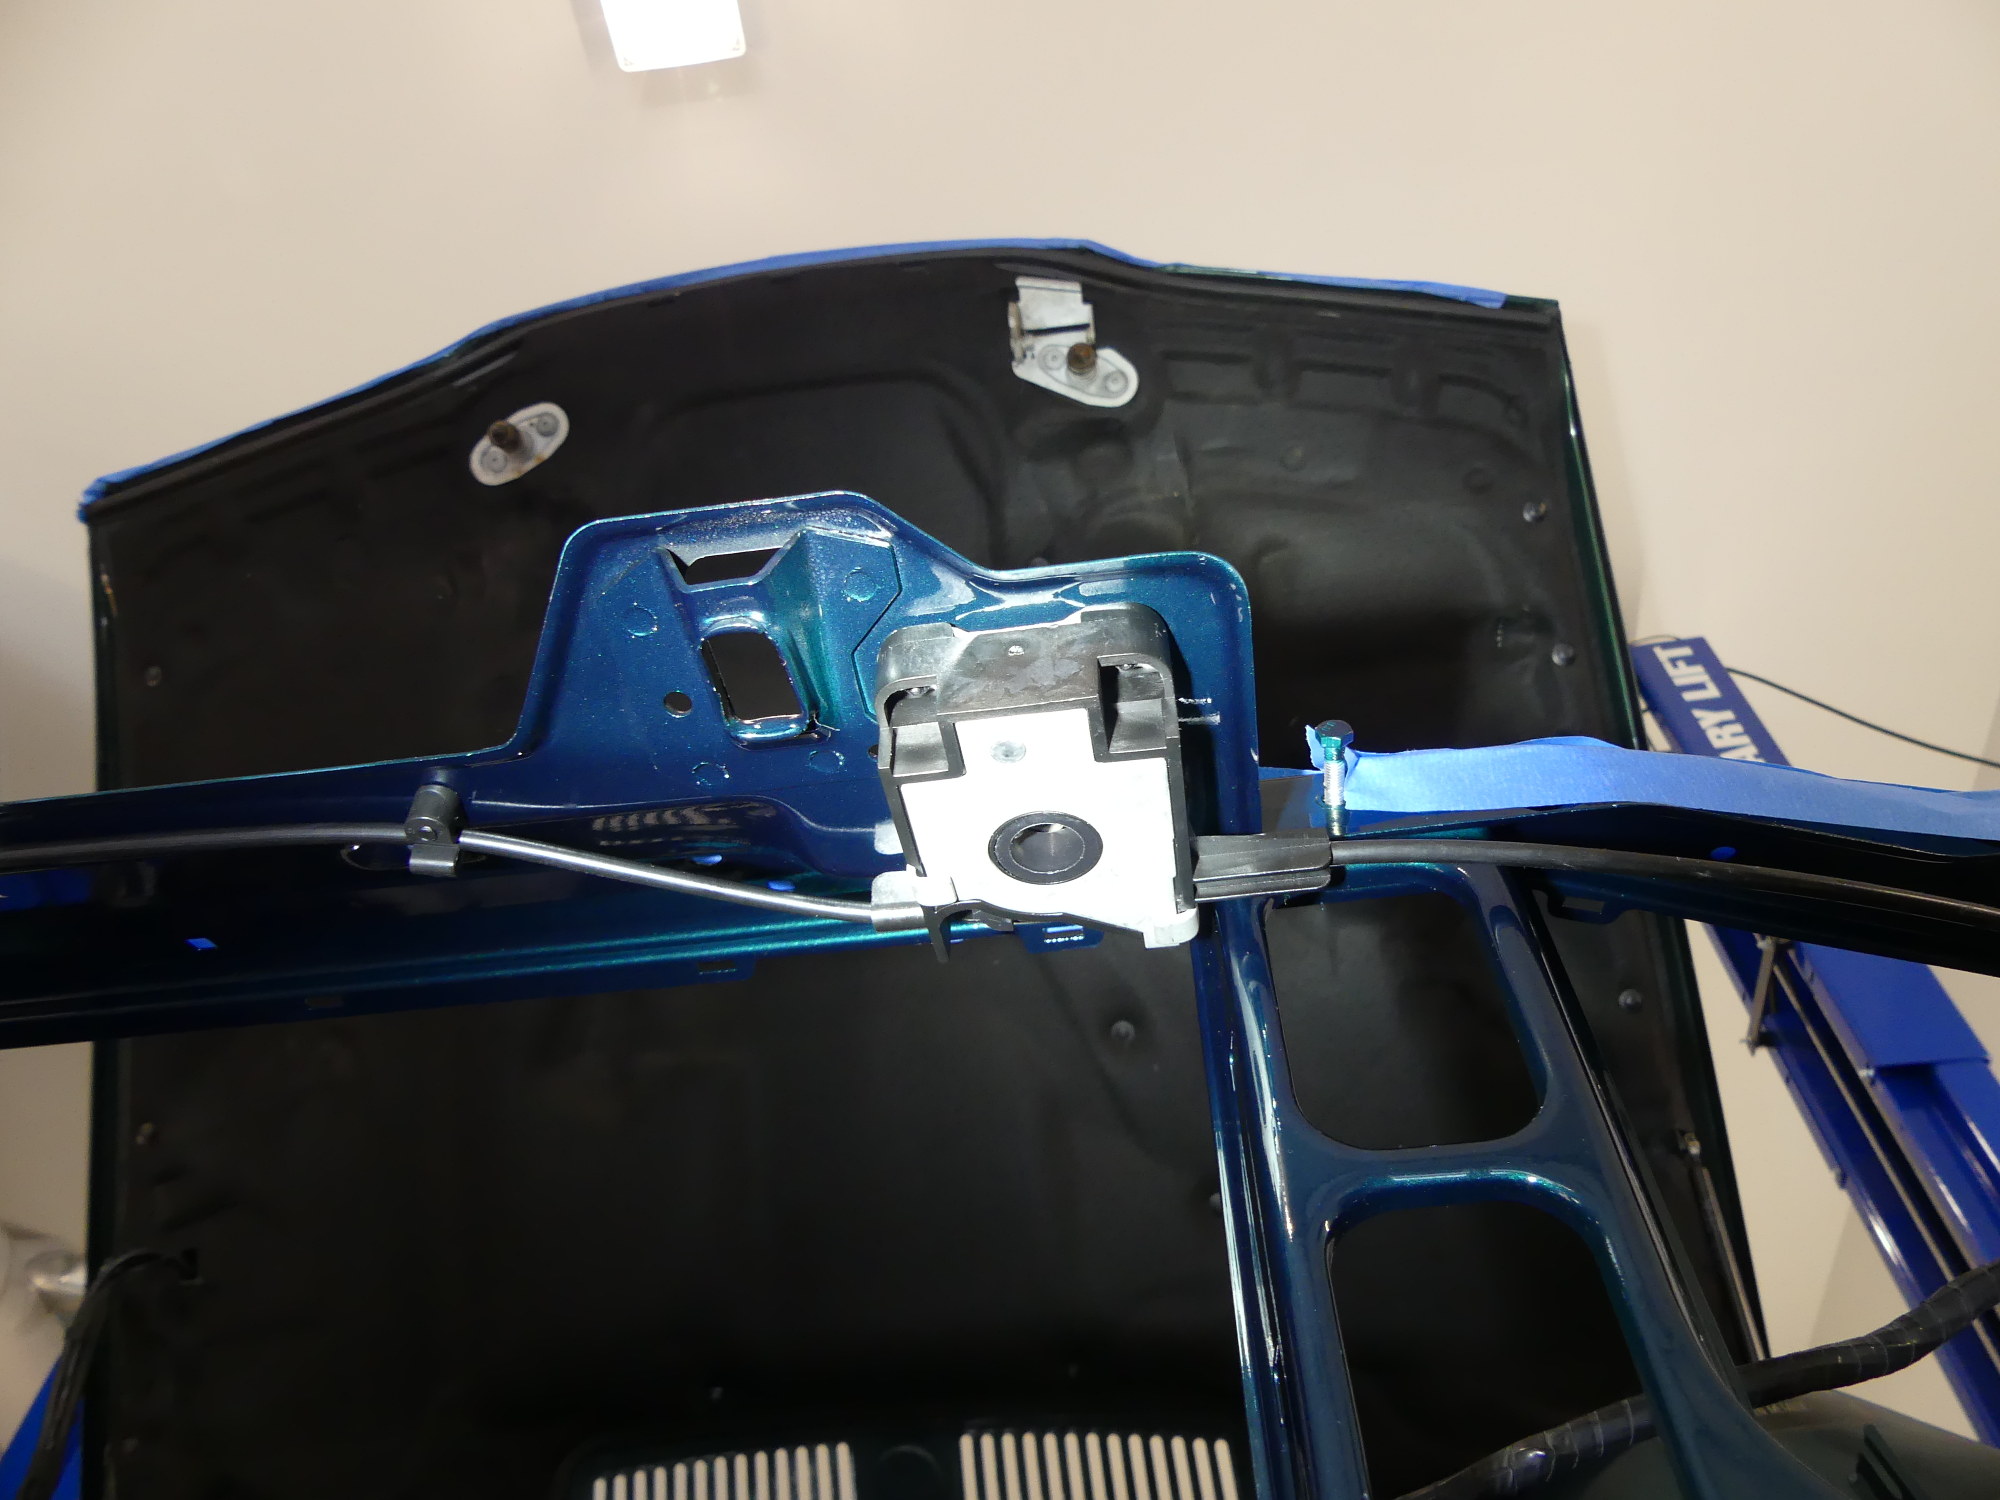 The new left side receptacle installed clearly shows why these units are hard to reach. And this isn't the half of it -- when the air ducts are installed they are practically invisible even from this perspective. |
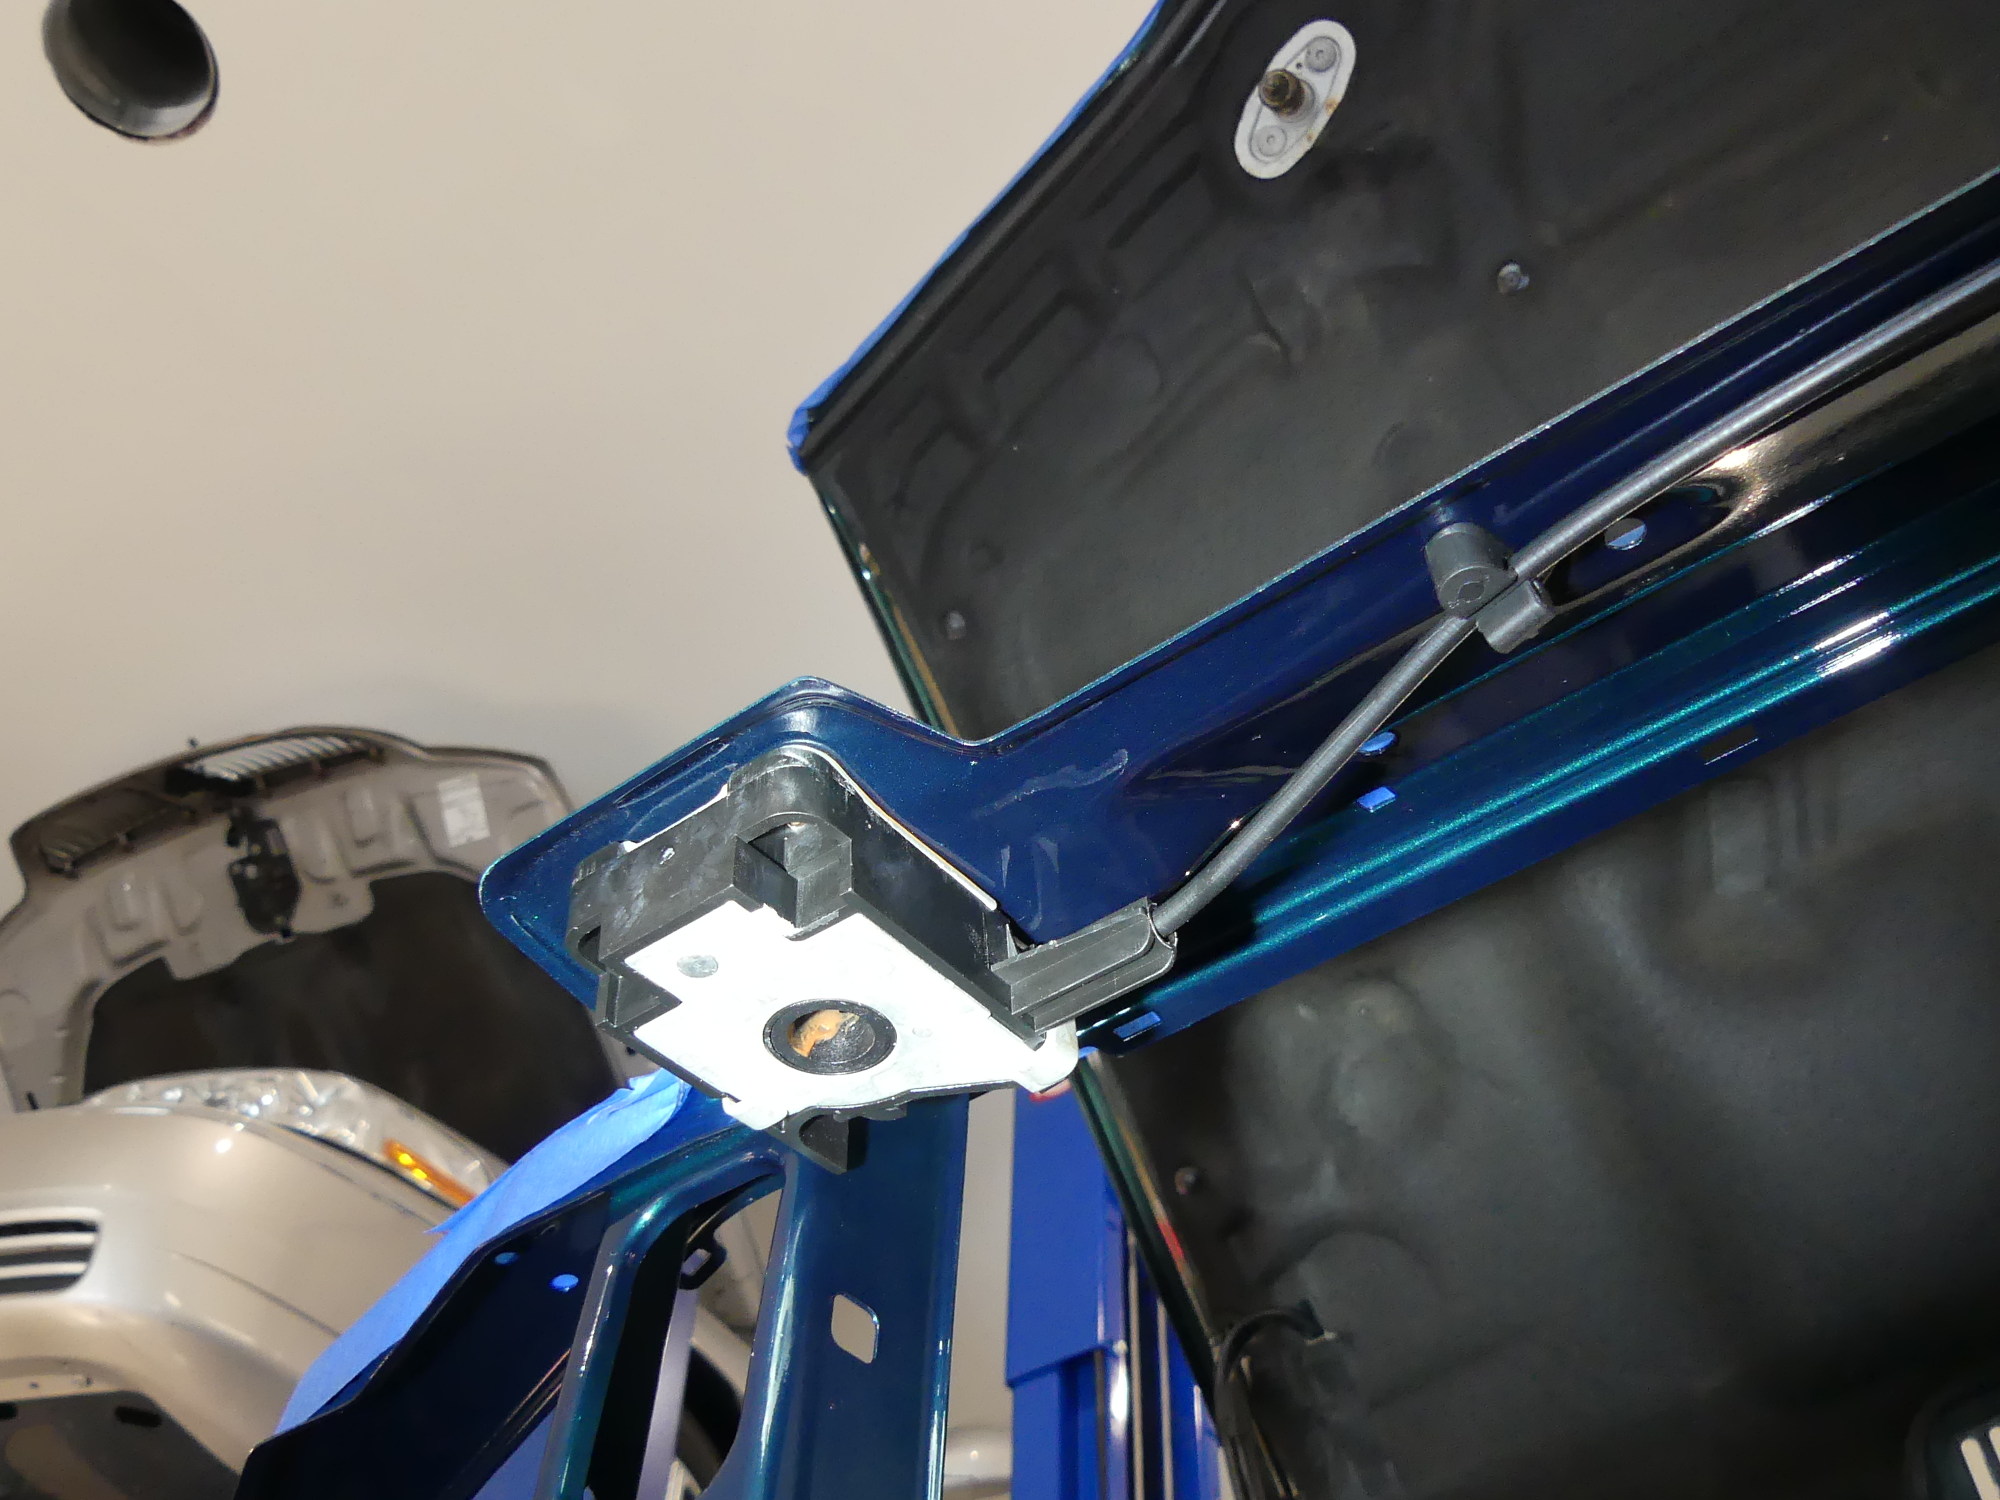 The bottom of the right side receptacle shows a bit of grease inside the pin hole. I added some CV-2 to this as well as the wire / rotating mechanism in each receptacle for added protection. |
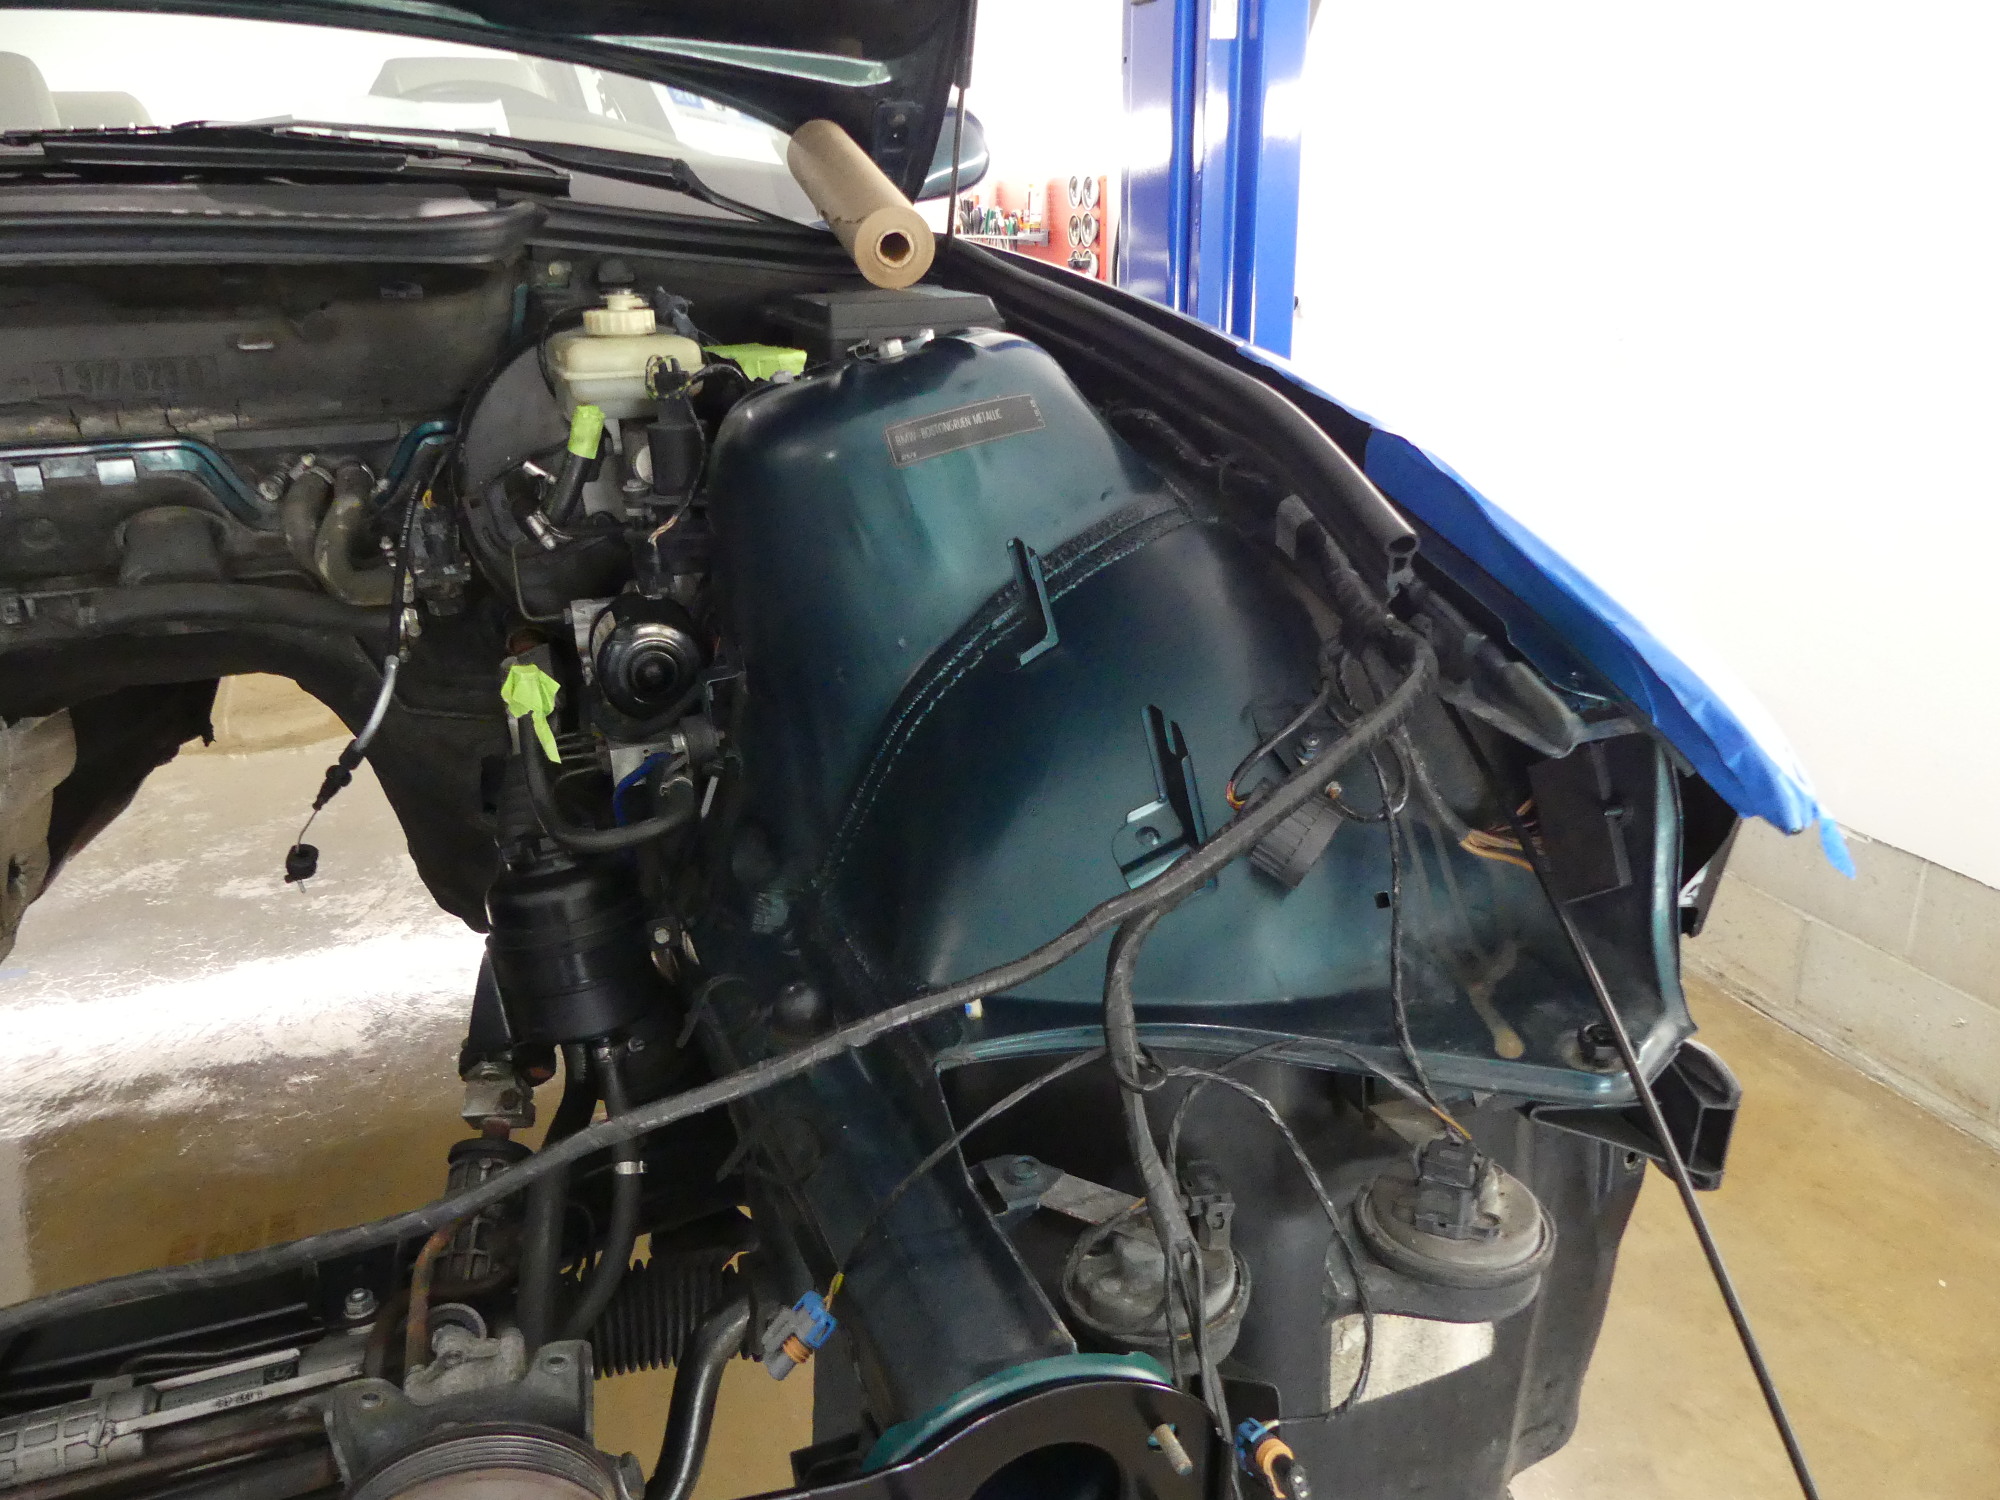
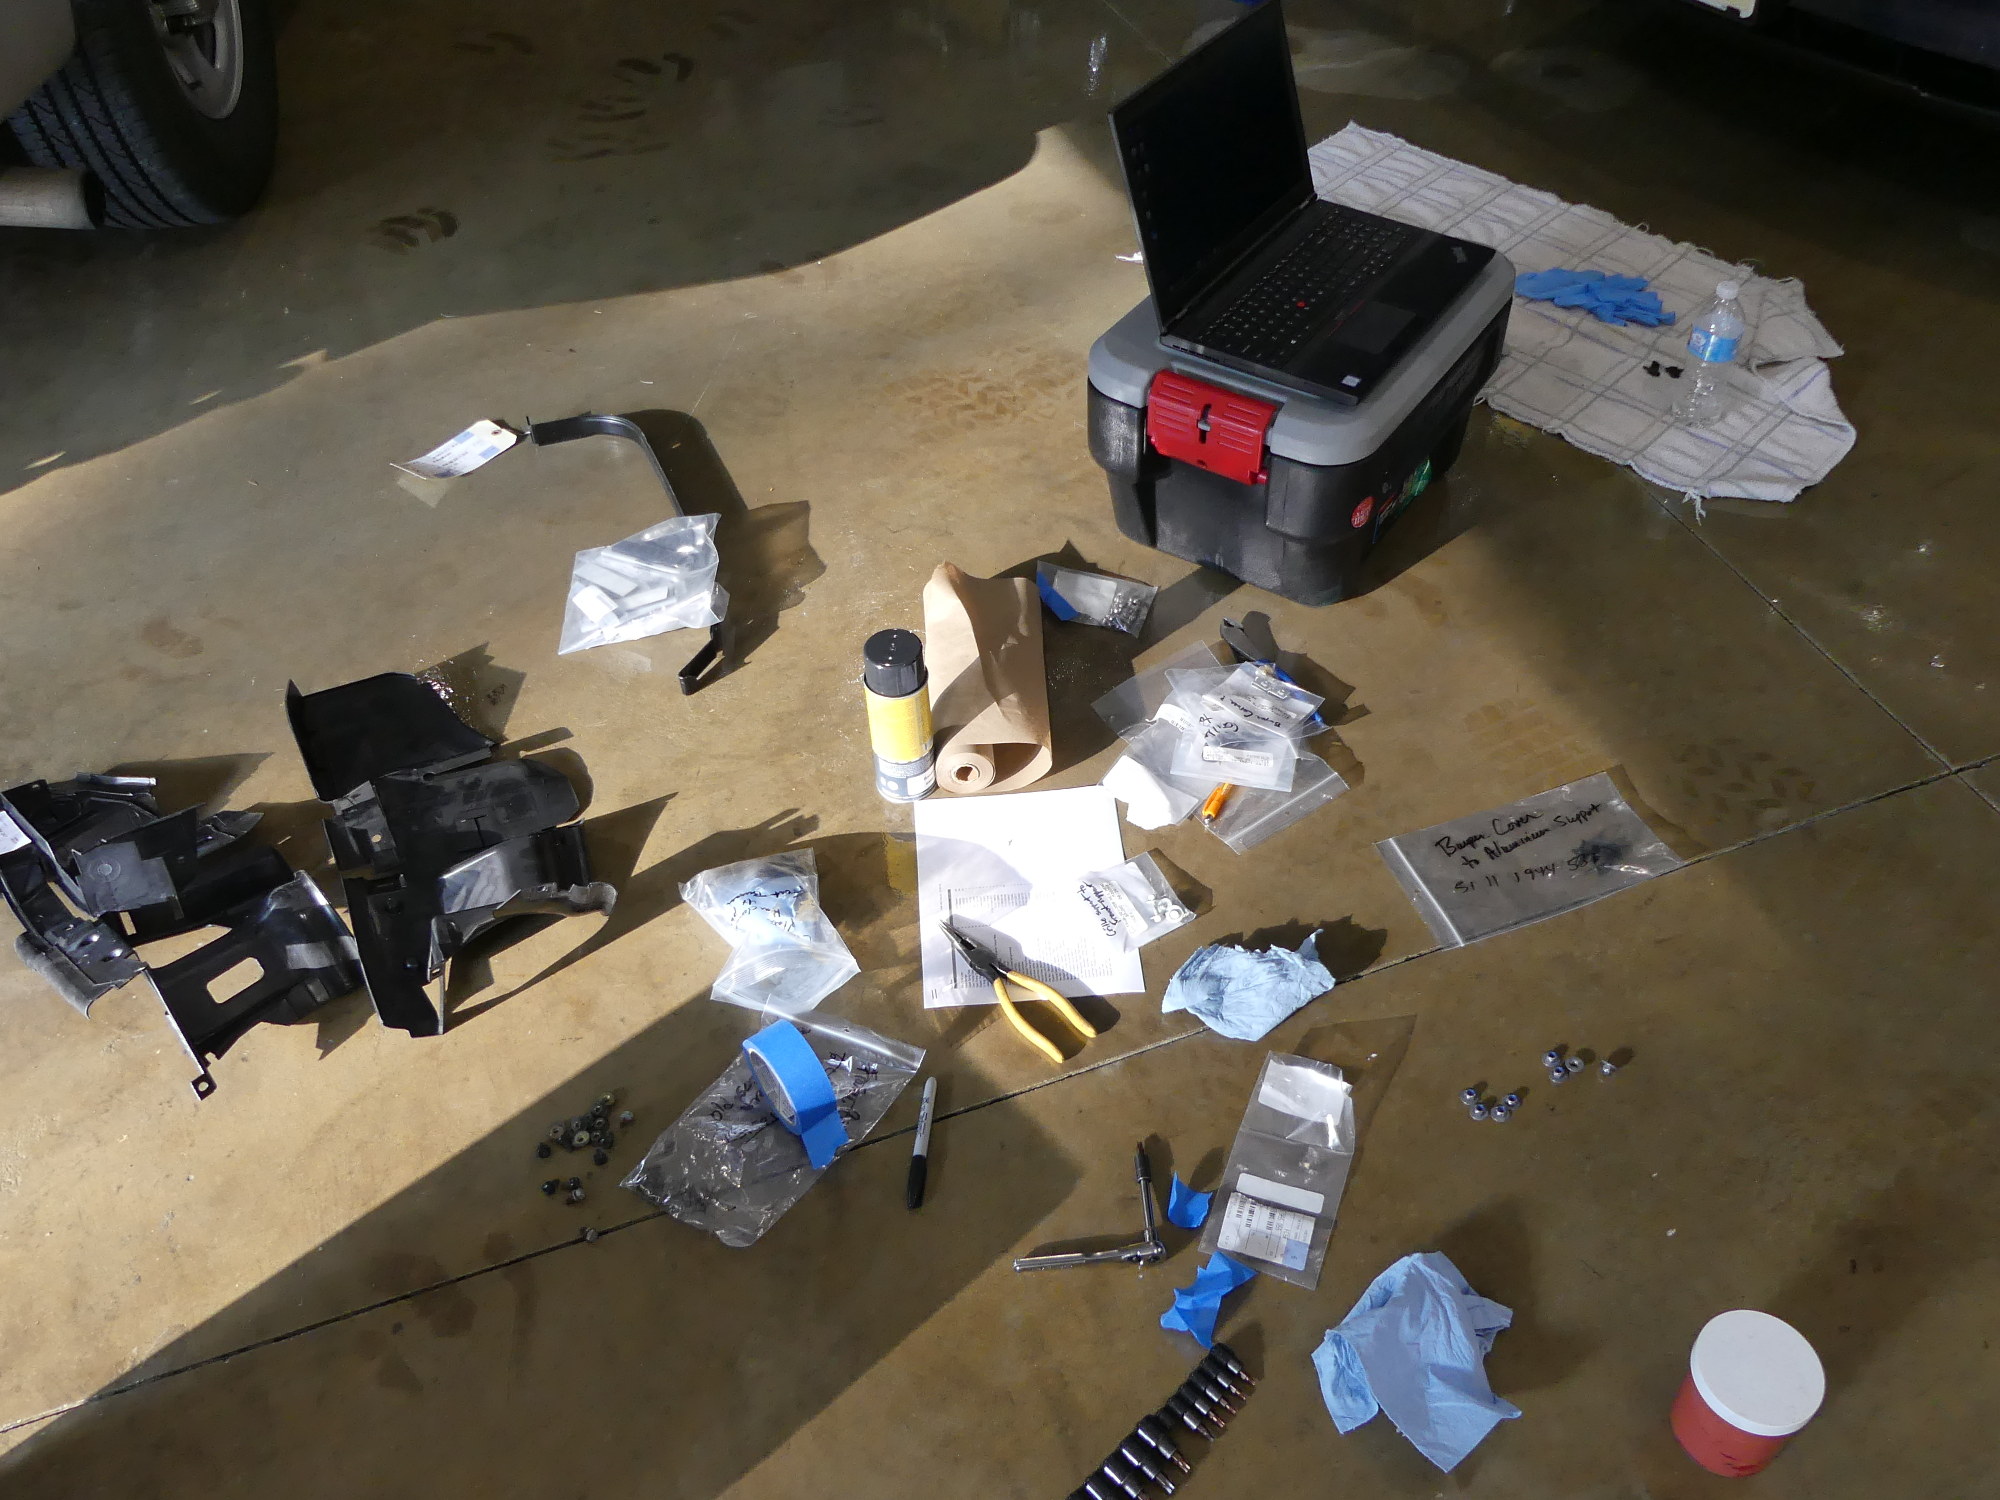 This is what I call organized chaos. Today was a mix of painting, parts identification and assembly -- far away from my desk as I grew tired of walking back and forth between the desk and the car, which was located on the lift. |
 This was another last minute decision. Painting the bare metal refrigerant line strap with a single coat of VHT primer and Cast Aluminum will help protect this part from evil corrosion. |
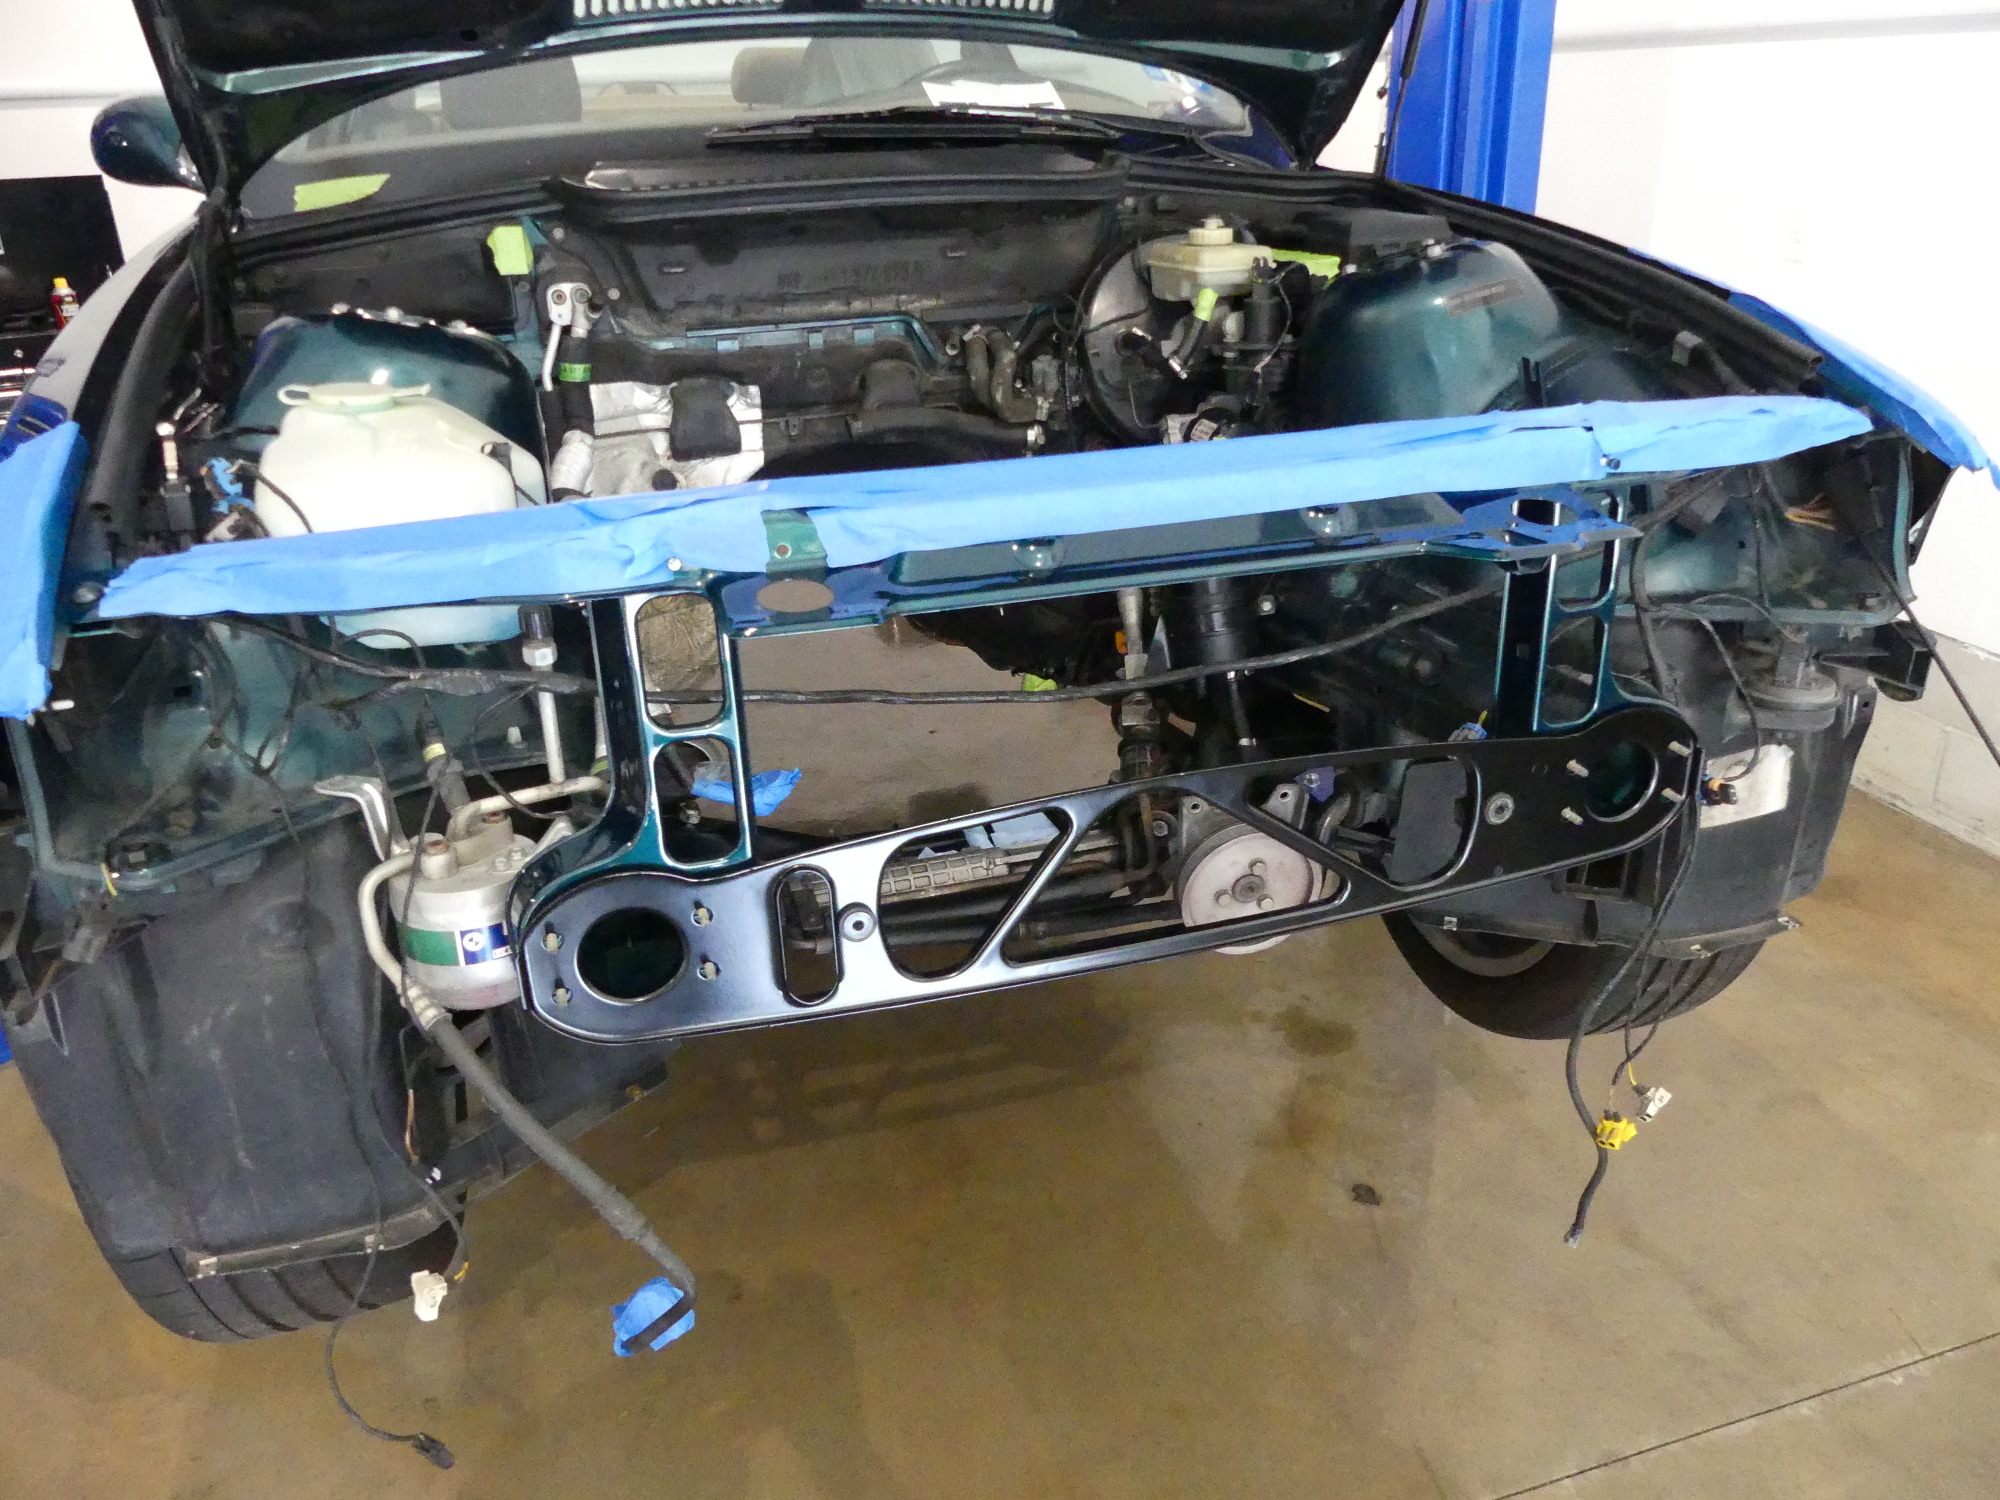
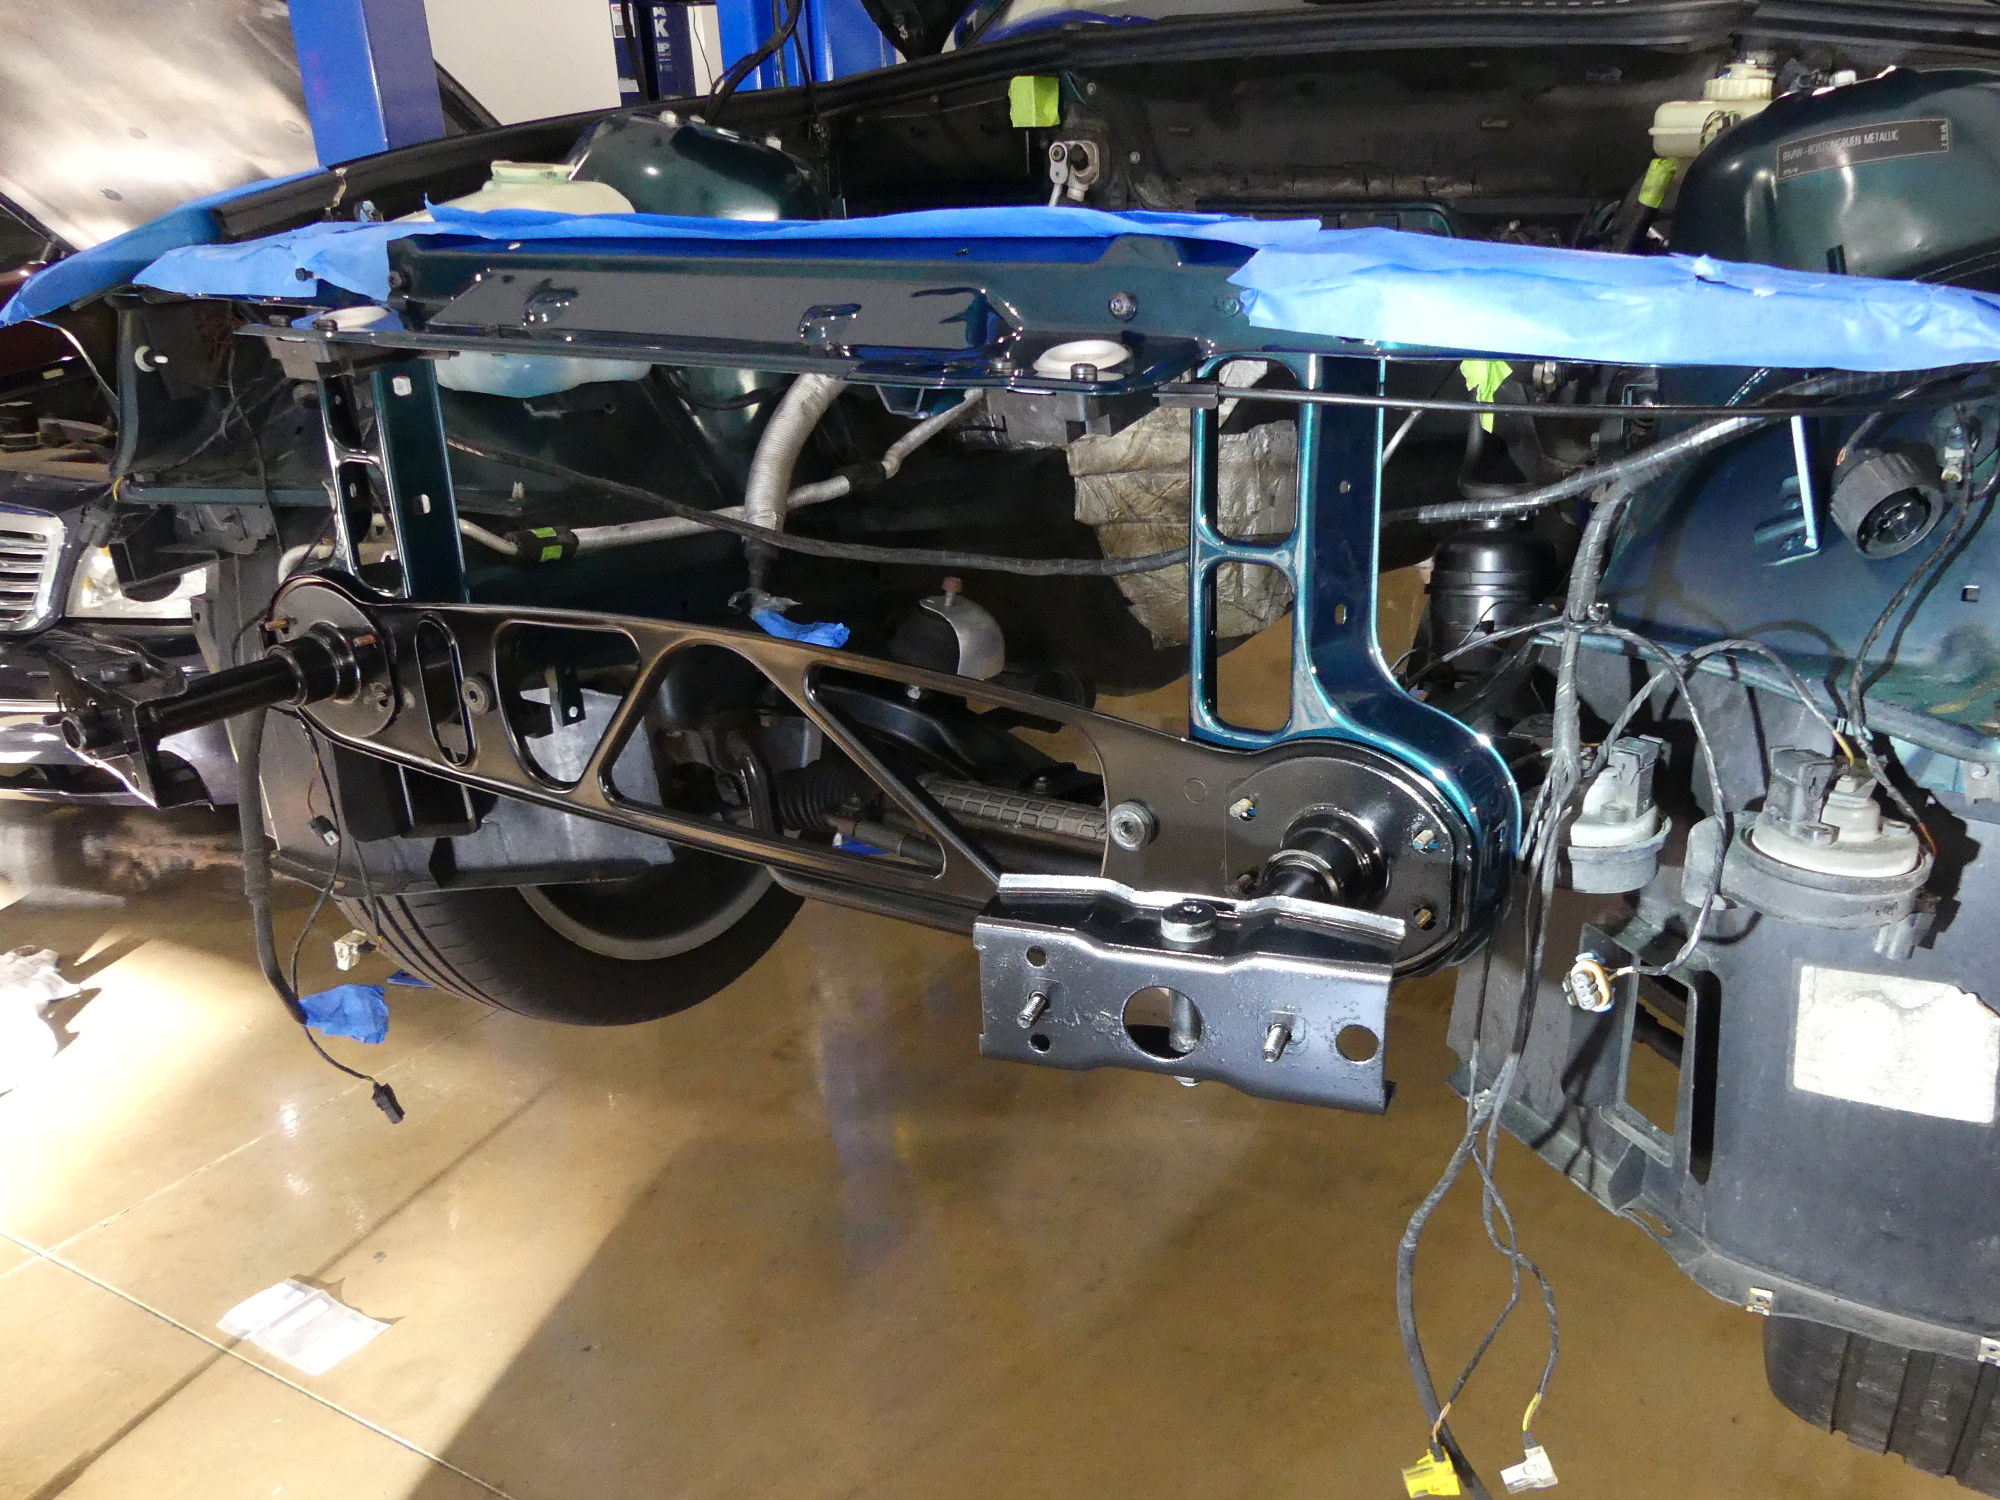 A perspective showing the progress at the end of the day -- the front support, truss support, hood release receptacles, and newly painted bumper shock absorbers are installed. Next up: the grille support, headlights, condenser, and bumper. |
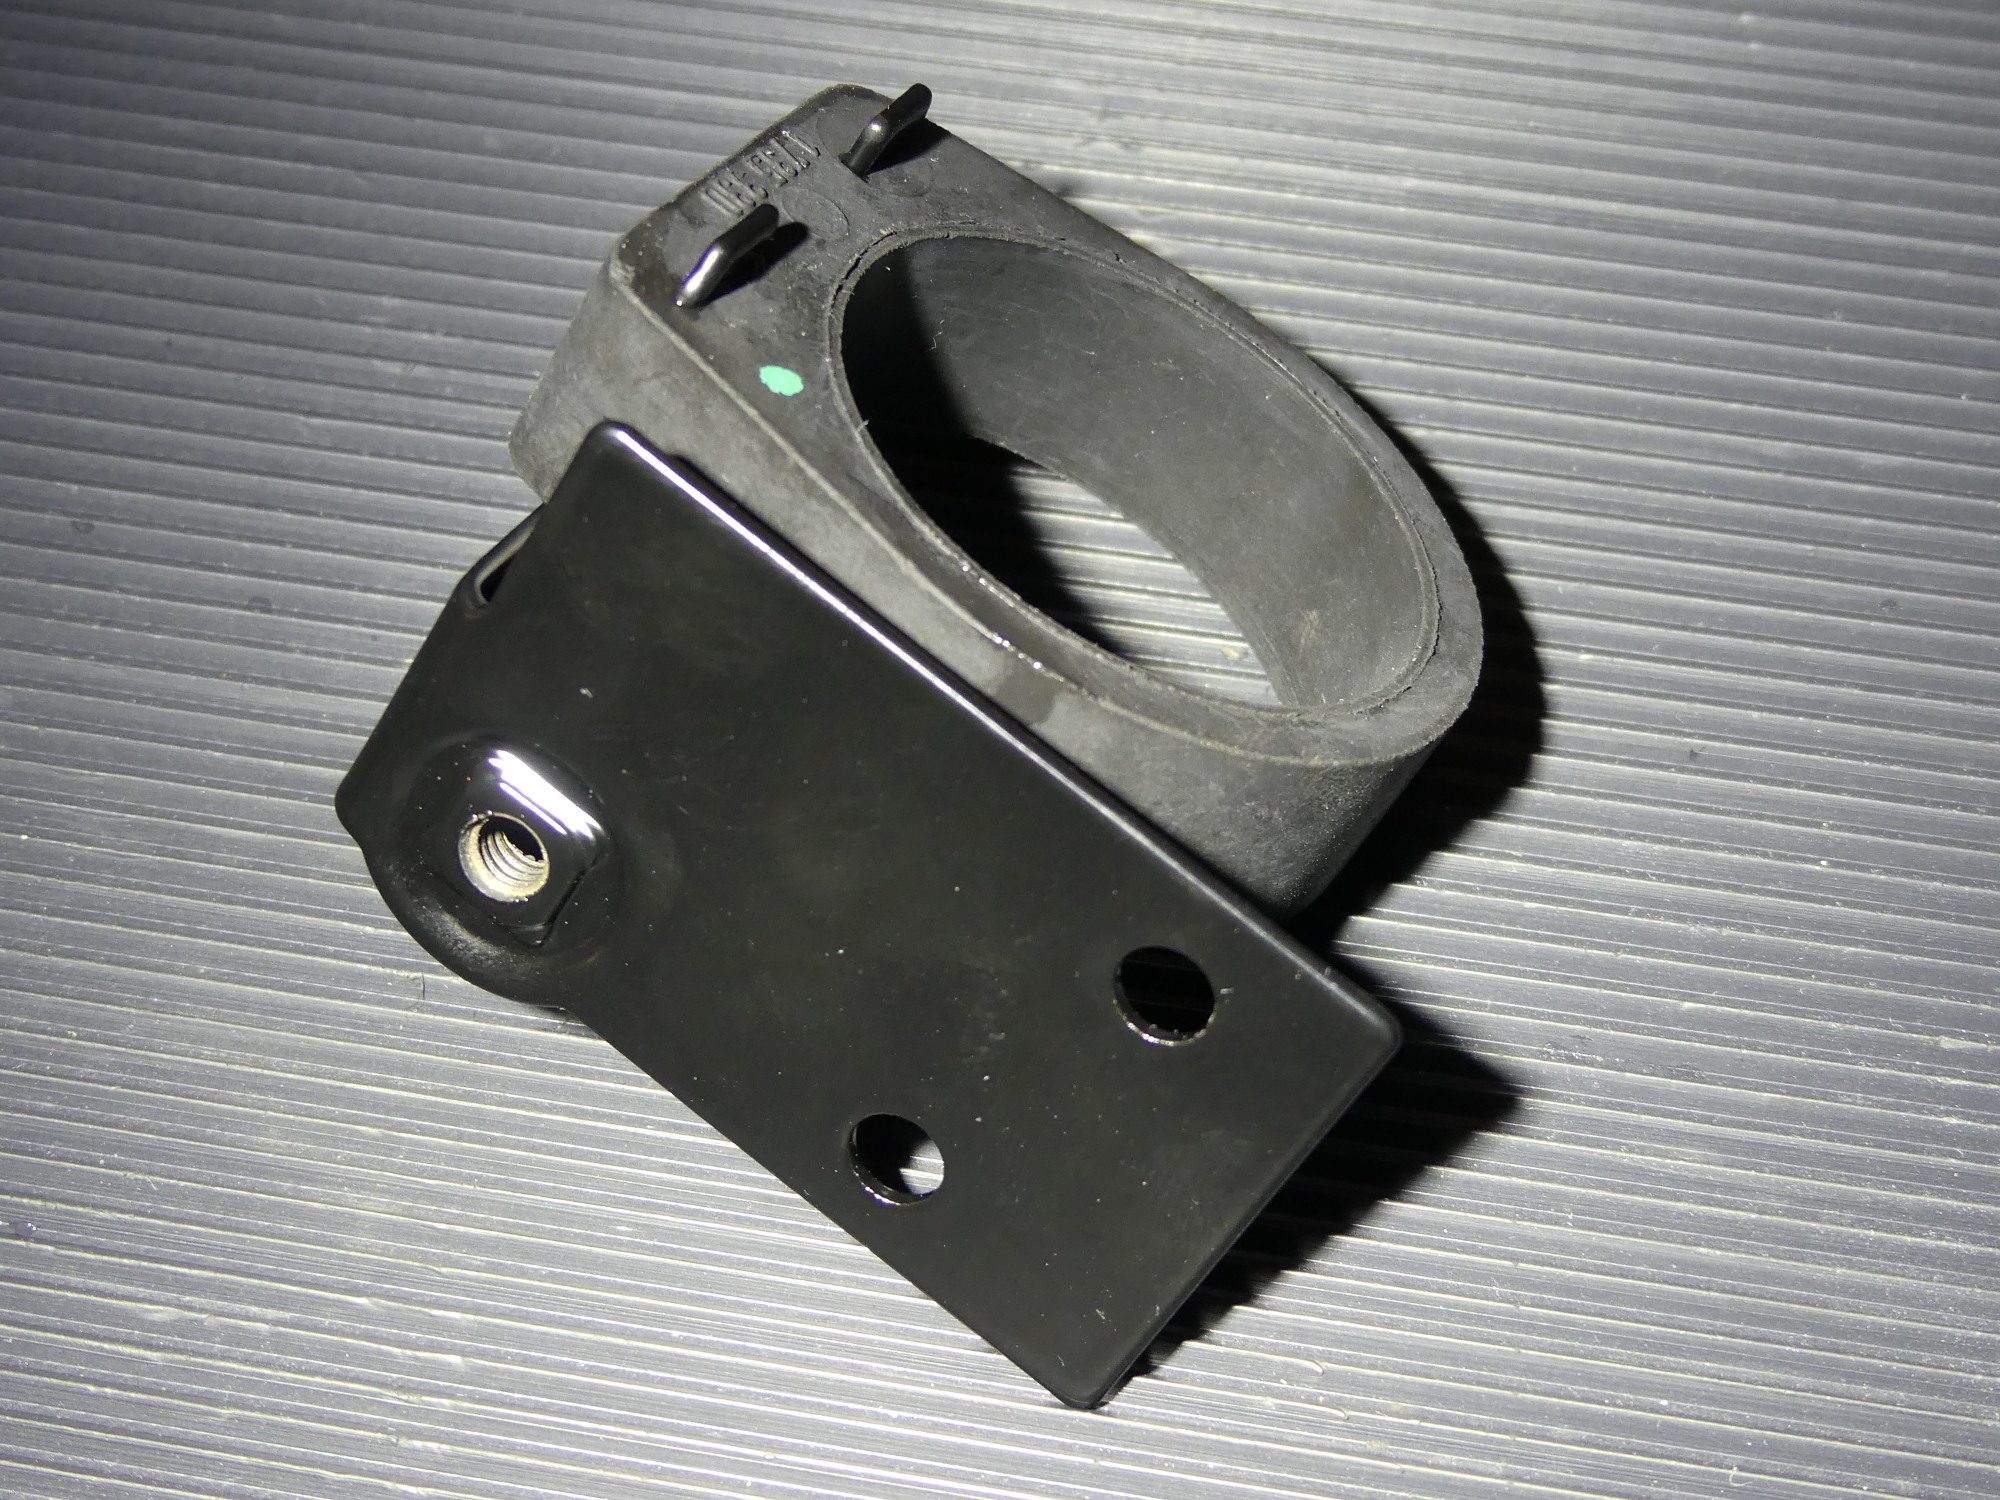 A simple wind-down task -- I installed the new ICV rubber mount on the freshly powdercoated mounting bracket. And if you're wondering, the old rubber was still surprisingly pliable but the new rubber is softer and "grippier". |
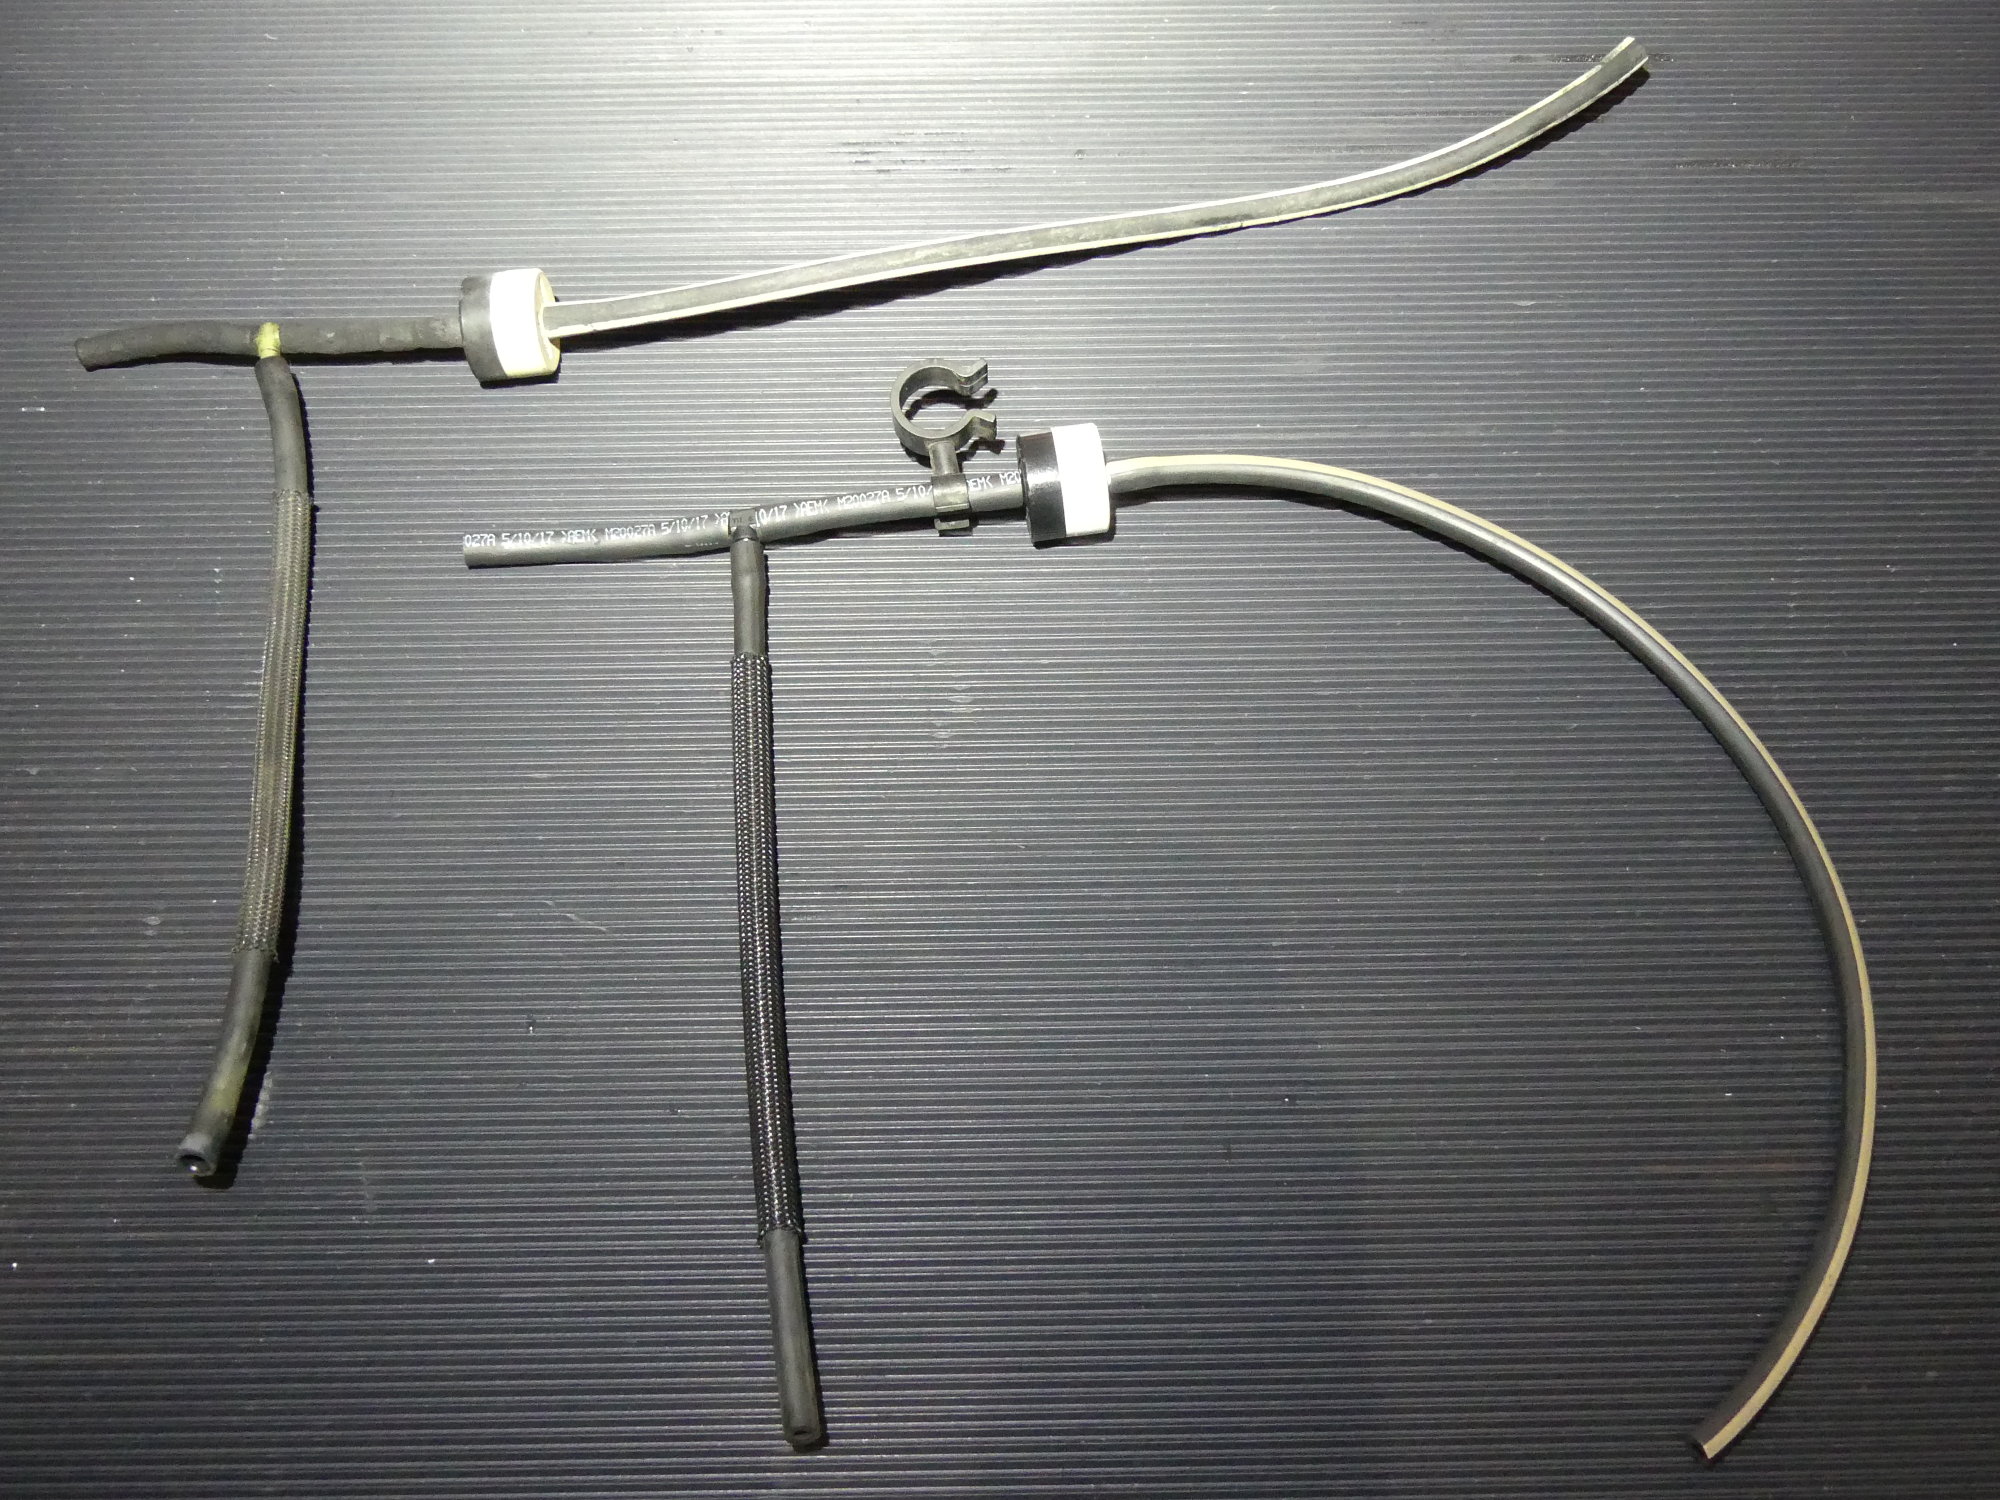 It felt really good to assemble this assortment of vacuum hoses (the one with the external covering is a custom part while the other hoses are cut from 1M lengths), T-fitting and check valve. Note the white stripe on the hose leading from the white side of the check valve. |
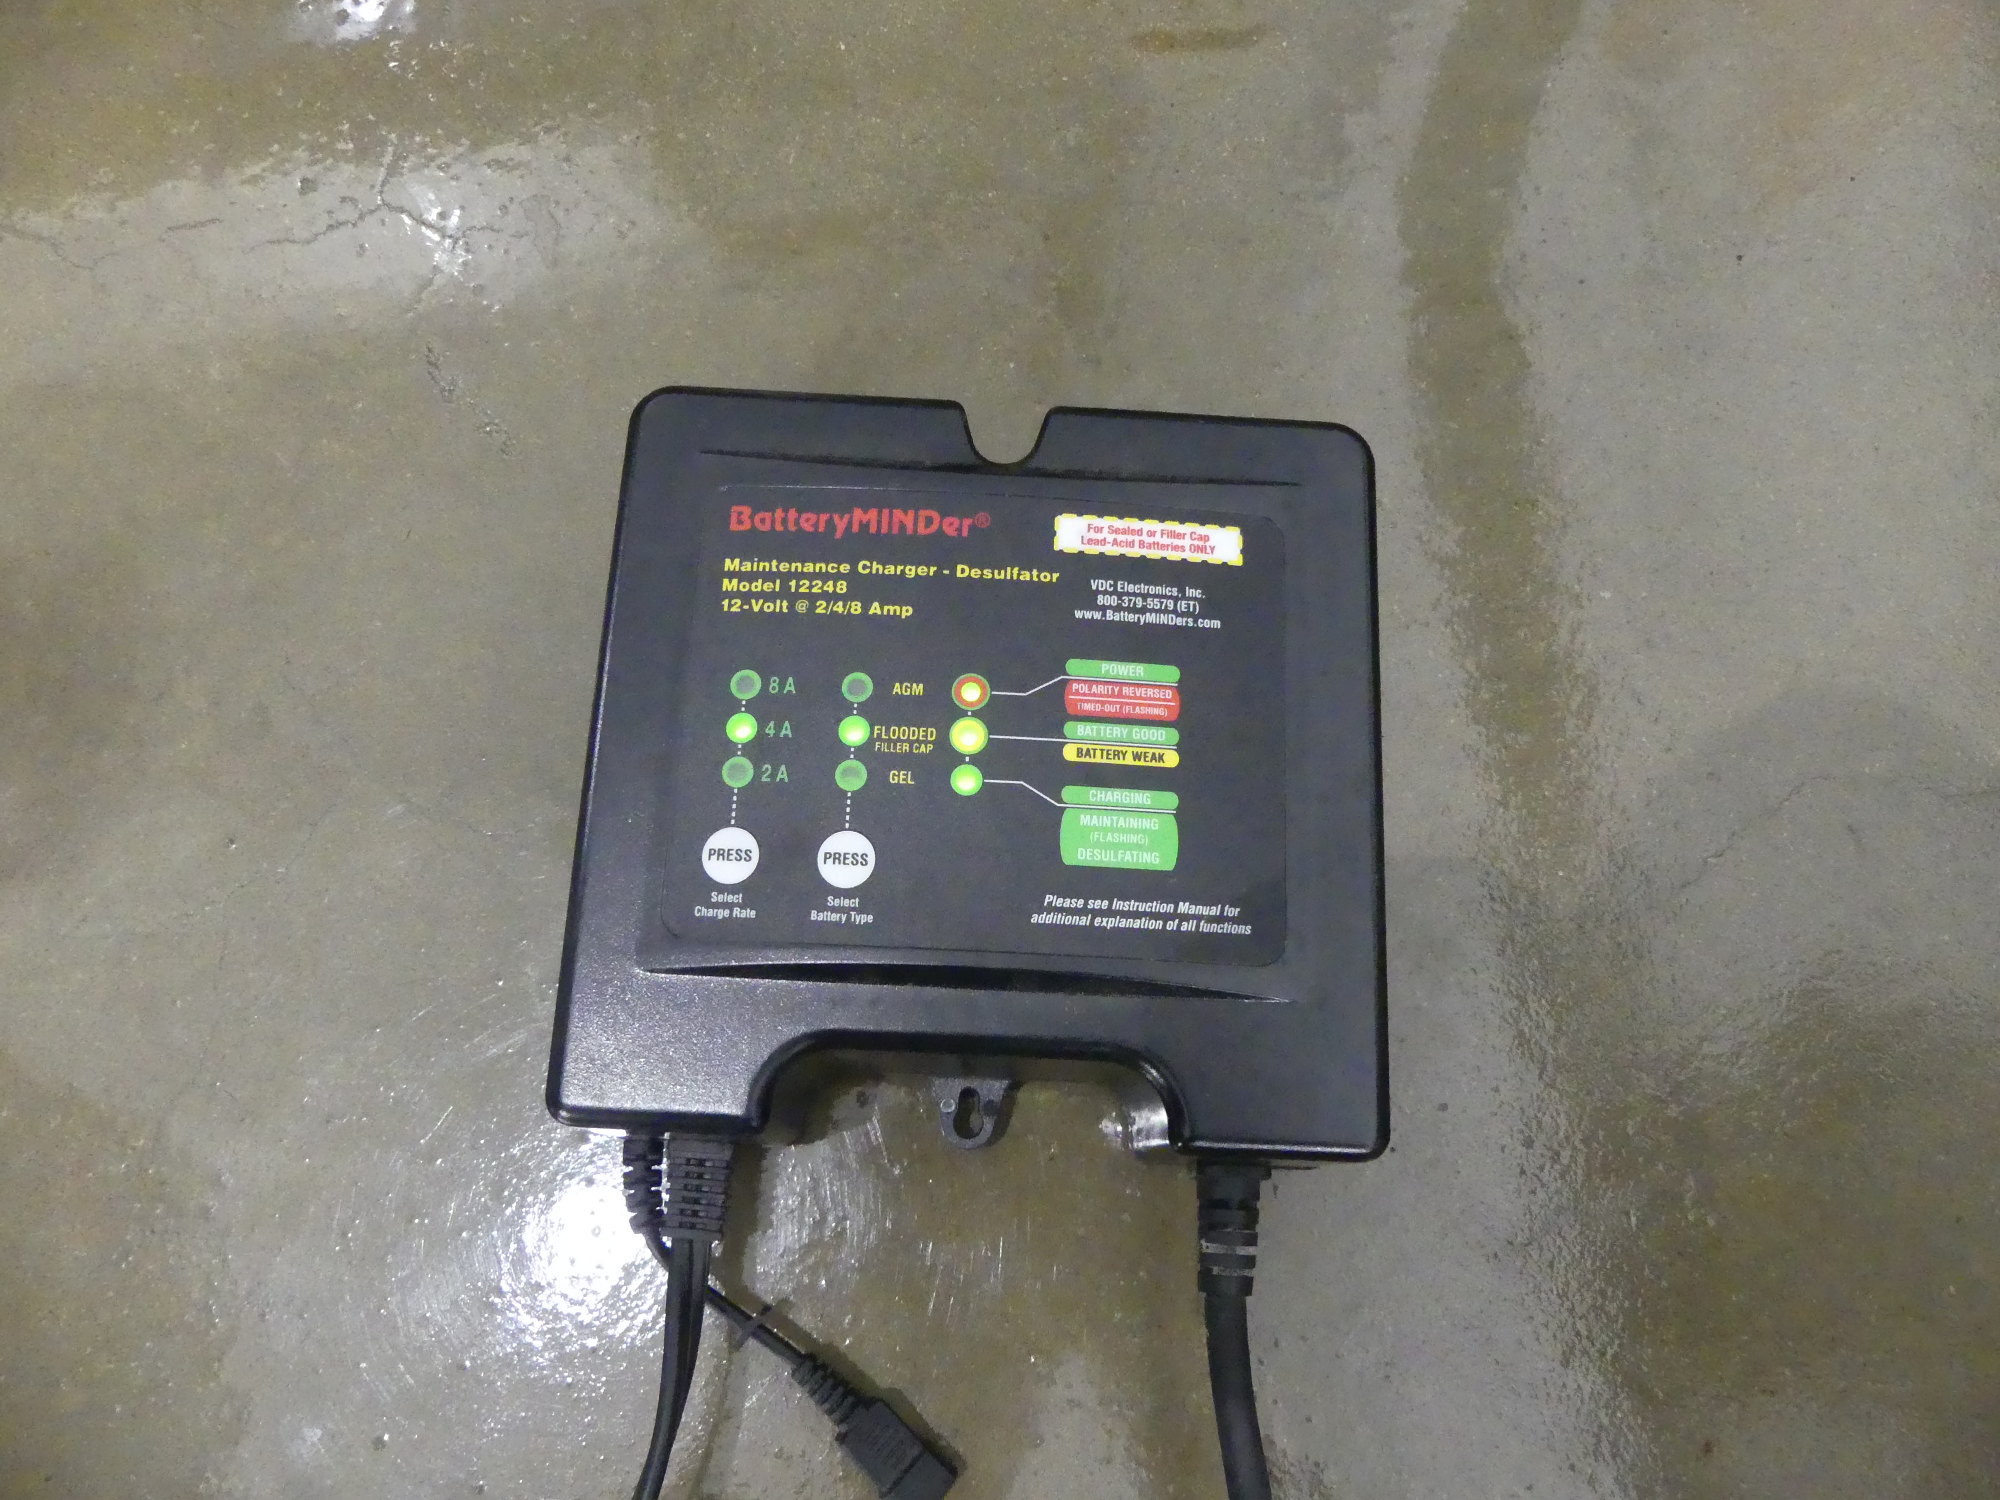 It's easy to forget about the simple things during a huge project, including keeping the battery charged. Even disconnected from the car batteries will self-discharge, and after this spending spree the very last thing I want to be forced to do is buy a new battery. |
With the support now installed I decided to secure the wiring harness so it would not get in the way later. There are two different wiring clip types used on the horizontal beam of the front support. Near the corners (above the headlights) there are four clips that are supposed to be pressed into a hole from the bottom. The remainder are a kind of U-shaped clip that just snap into small rectangular holes punched into the edge of the beam. To make a long story short, I bought the wrong "corner" clips but the other clips were correct, so I was able to secure the majority of the harness. I'll buy the correct clips and wrap up the job later. Considering how many clips I found broken or missing during disassembly the harness is, despite the lack of a few clips, better supported than before.
More Miscellaneous Assembly
To wrap up the day I decided to do a bit of miscellaneous assembly.
First I decided to finish the 45mm hose clamp that fastens the lower refrigerant hose to the frame rail in order to prevent the corrosion that hacked up my original clamp. The new part arrived in the form of an unplated bright metal of some kind so I gave it a bath in mineral spirits to remove any tooling or preservative oils, then primed and painted it with some VHT Cast Aluminum. It not only looks a lot better, but it shouldn't rust overnight as I suspect the unfinished part would have.
During disassembly my technician placed an arrangement of old vacuum lines, a T-fitting and a check valve in the trunk. The check valve and T-fitting came in with today's order so I decided to assemble a new replacement hose assembly. As I said before the vacuum hoses in this assembly were original and in very bad shape so once I built the new assembly it felt particularly satisfying to toss the old parts in the trash.
New Brake Parts Ordered
Given the need to remove the brake booster and hence disconnect the master cylinder in order to install the new sound insulation blanket I have decided to install a new booster, master cylinder and reservoir.
The boosters are resilient pieces but can be a source of vacuum leaks as they age. The master cylinder most certainly wears with every press of the brake pedal until it fails more or less suddenly. I've wanted to replace the reservoir for years because it has been tinted dark with age and so it's quite difficult to observe the fluid level either casually when the hood is open or during brake fluid flushes. Unfortunately, replacing the reservoir can require cycling the ABS pump and that is not something I'm equipped to do, so I always assumed I'd have to flatbed the car to my tech to bleed the system. Since I'm putting the car on a flatbed in a few weeks anyway it seems like a logical time to tackle this task.
As it turns out, the only part available in the aftermarket is the master cylinder, which is manufactured by BMW's OEM, ATE. However, the unit was around $210 shipped and the dealer's price for the OE part with my discount wasn't that much more. When I took into account the guarantee that the part would fit (important given the time crunch I'm in now) and the two year warranty it seemed like a good idea to go OE for all three parts. The perk is I didn't have to ask my parts rep for special treatment here -- he just quoted the parts at employee pricing, which is around 40% off.
I spoke to my tech the other day to let him know I was doing this work and he offered to give me the bench bleeding tools when the time comes. So once the master cylinder arrives (from Germany, unfortunately) I'll install the new reservoir and go through the bench bleeding process before I mate the assembly with the vacuum booster.
Next Up
Tomorrow my expectation is to wrap up the front-end assembly by installing the grille support, condenser and refrigerant line, aux fan, headlights and bumper. If I can muster the time and patience required I'll start the work necessary to replace all the fuel lines. However, something tells me I'll want to start that task fresh on Friday as I discovered recently I will in fact need to drop the tank to replace the lines that route to the pump and suction unit as they are clipped to the top of the tank. That process, in turn, will require removal of the emergency brake cables. I've done that work before so I'm confident I can tackle it, but it's just another in a long list of items I need to complete o wrap up the work on the chassis.