


Thursday, August 31, 2017
Engine Machining Update
I called the machinist yesterday looking for an update. He didn't answer so I left a message. He never returned my call. For a brief time panic set in -- I wondered whether the guy was admitted to the hospital, or worse -- dead -- leaving my parts and project (as well as my deposit) up in the air. This morning I called again and this time he answered. That's the good news. The bad news is he still hasn't started on my engine aside from having it cleaned. He promised to have it done by "middle to late next week". I told him I expect to be busy with the chassis through Monday or Tuesday, but then I'm twiddling my thumbs until he returns my parts. He then suggested I call him next Wednesday for an update.
Going into this I assumed that it would take a machinist no more than a week total to get this work done. I added a week to accommodate the selected machinist's warning that the summer was his busy season. If he actually delivers at the end of next week he will have had my parts for a month. I don't think I'm being unreasonable when I say "that's unreasonable".
Front End Assembly Continued
Last night after reviewing pictures I took during disassembly I realized that I installed the hood release receptacle tie cable clips in the wrong holes in the front support. So the first thing I had to do was punch out those pins and relocate the clips. Easy enough.
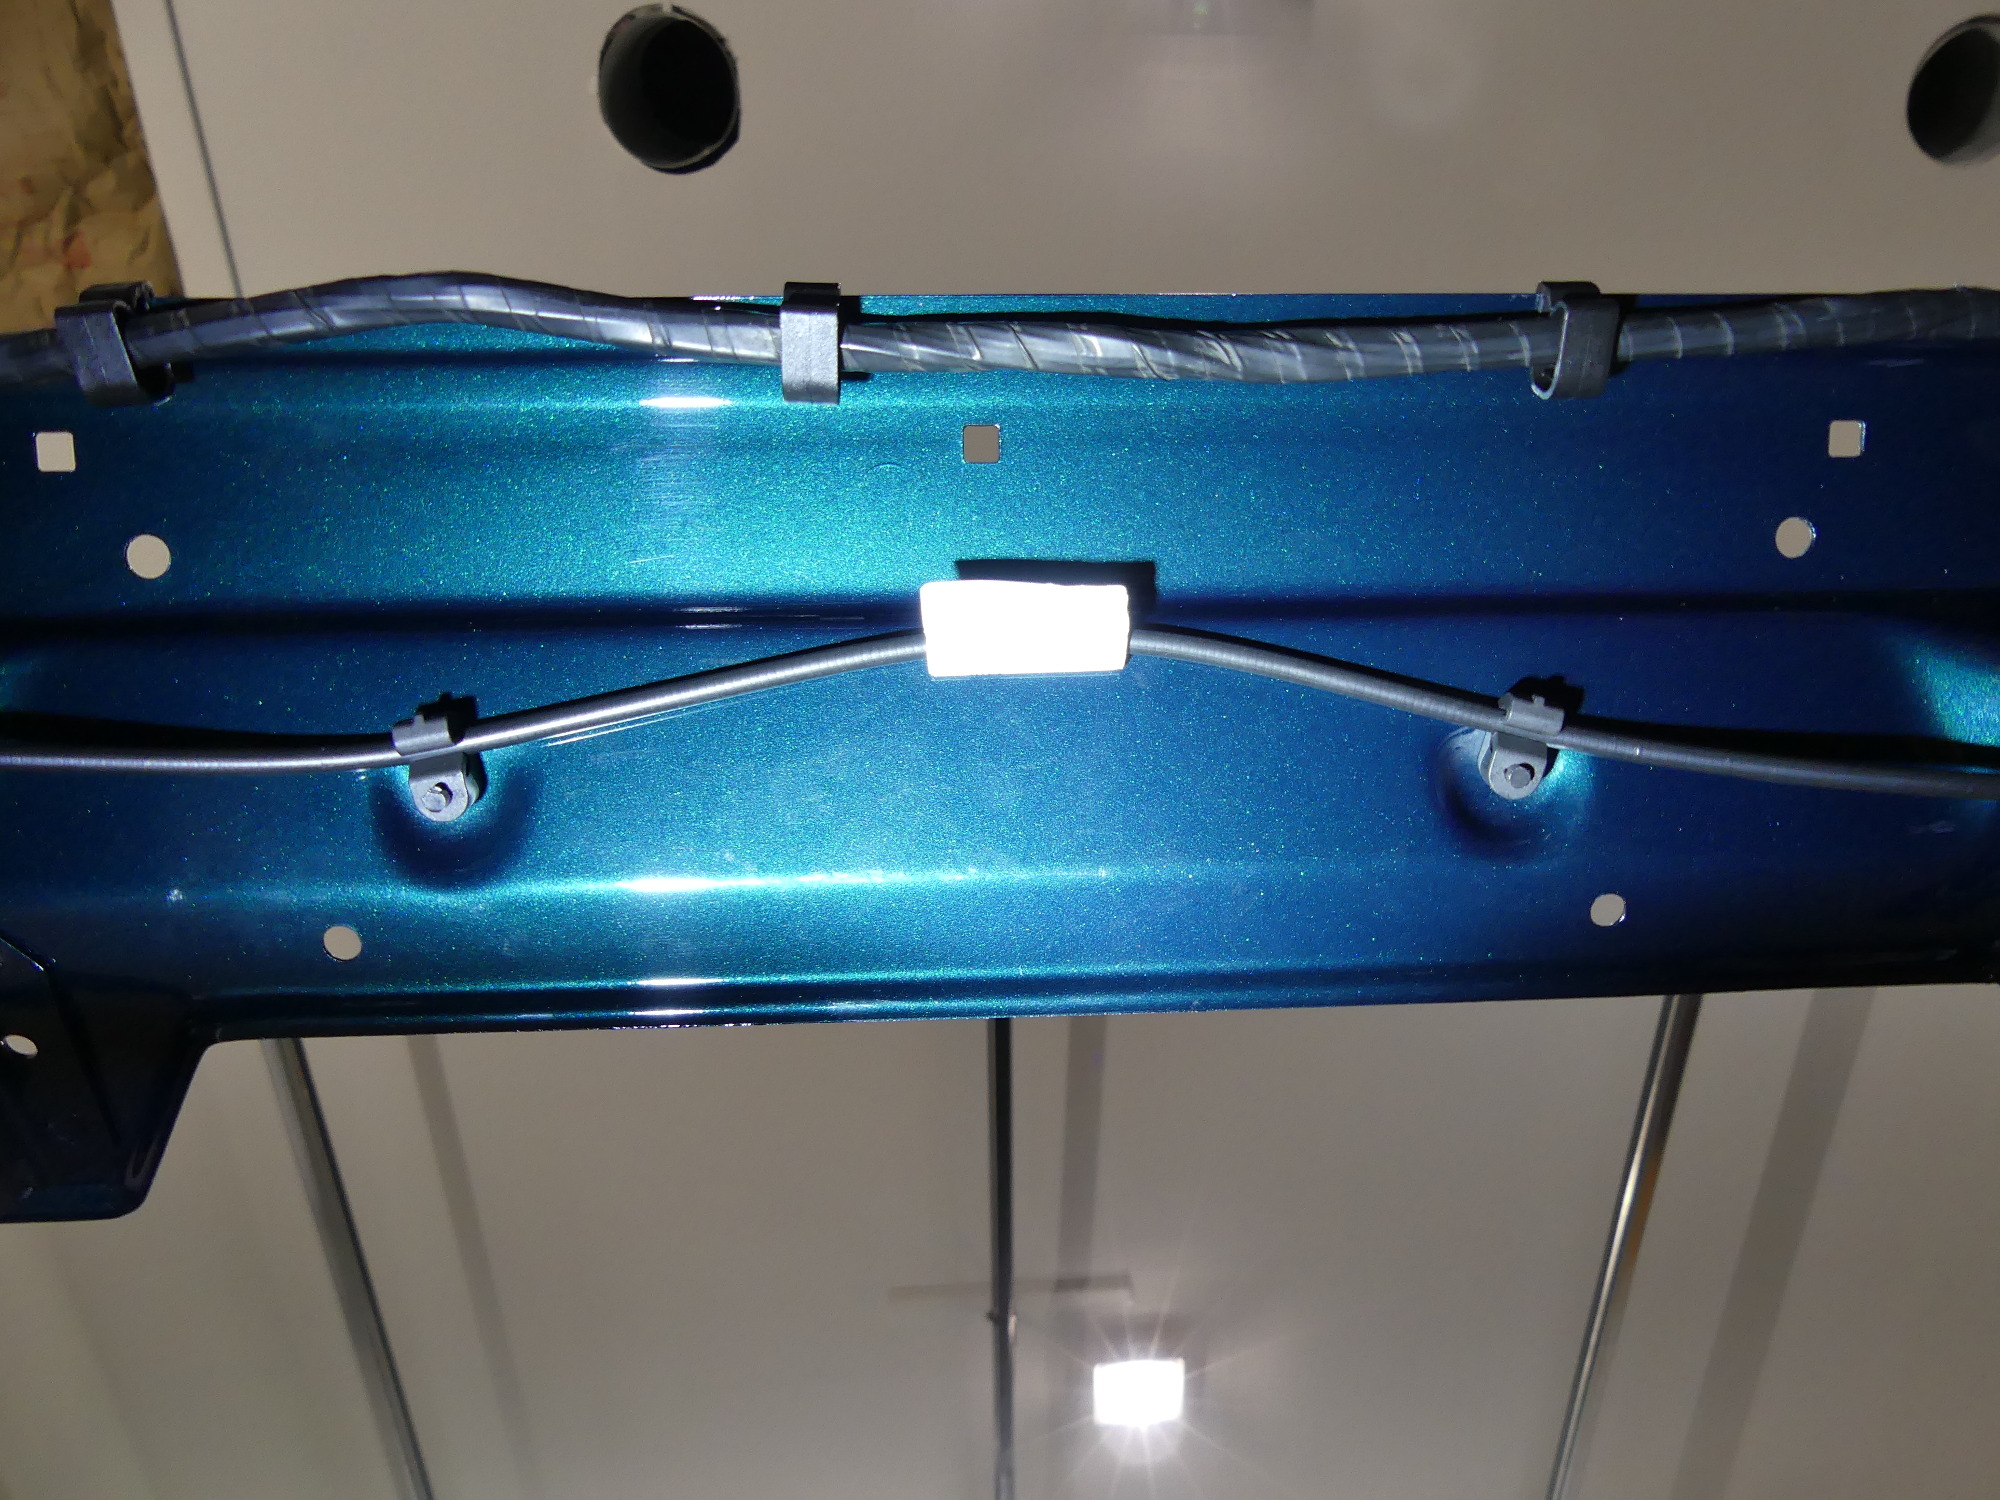 After reviewing some pictures I took during disassembly I realized that I installed the hood release receptacle tie cable retaining clips in the wrong place. They go in the embossed holes as shown here. |
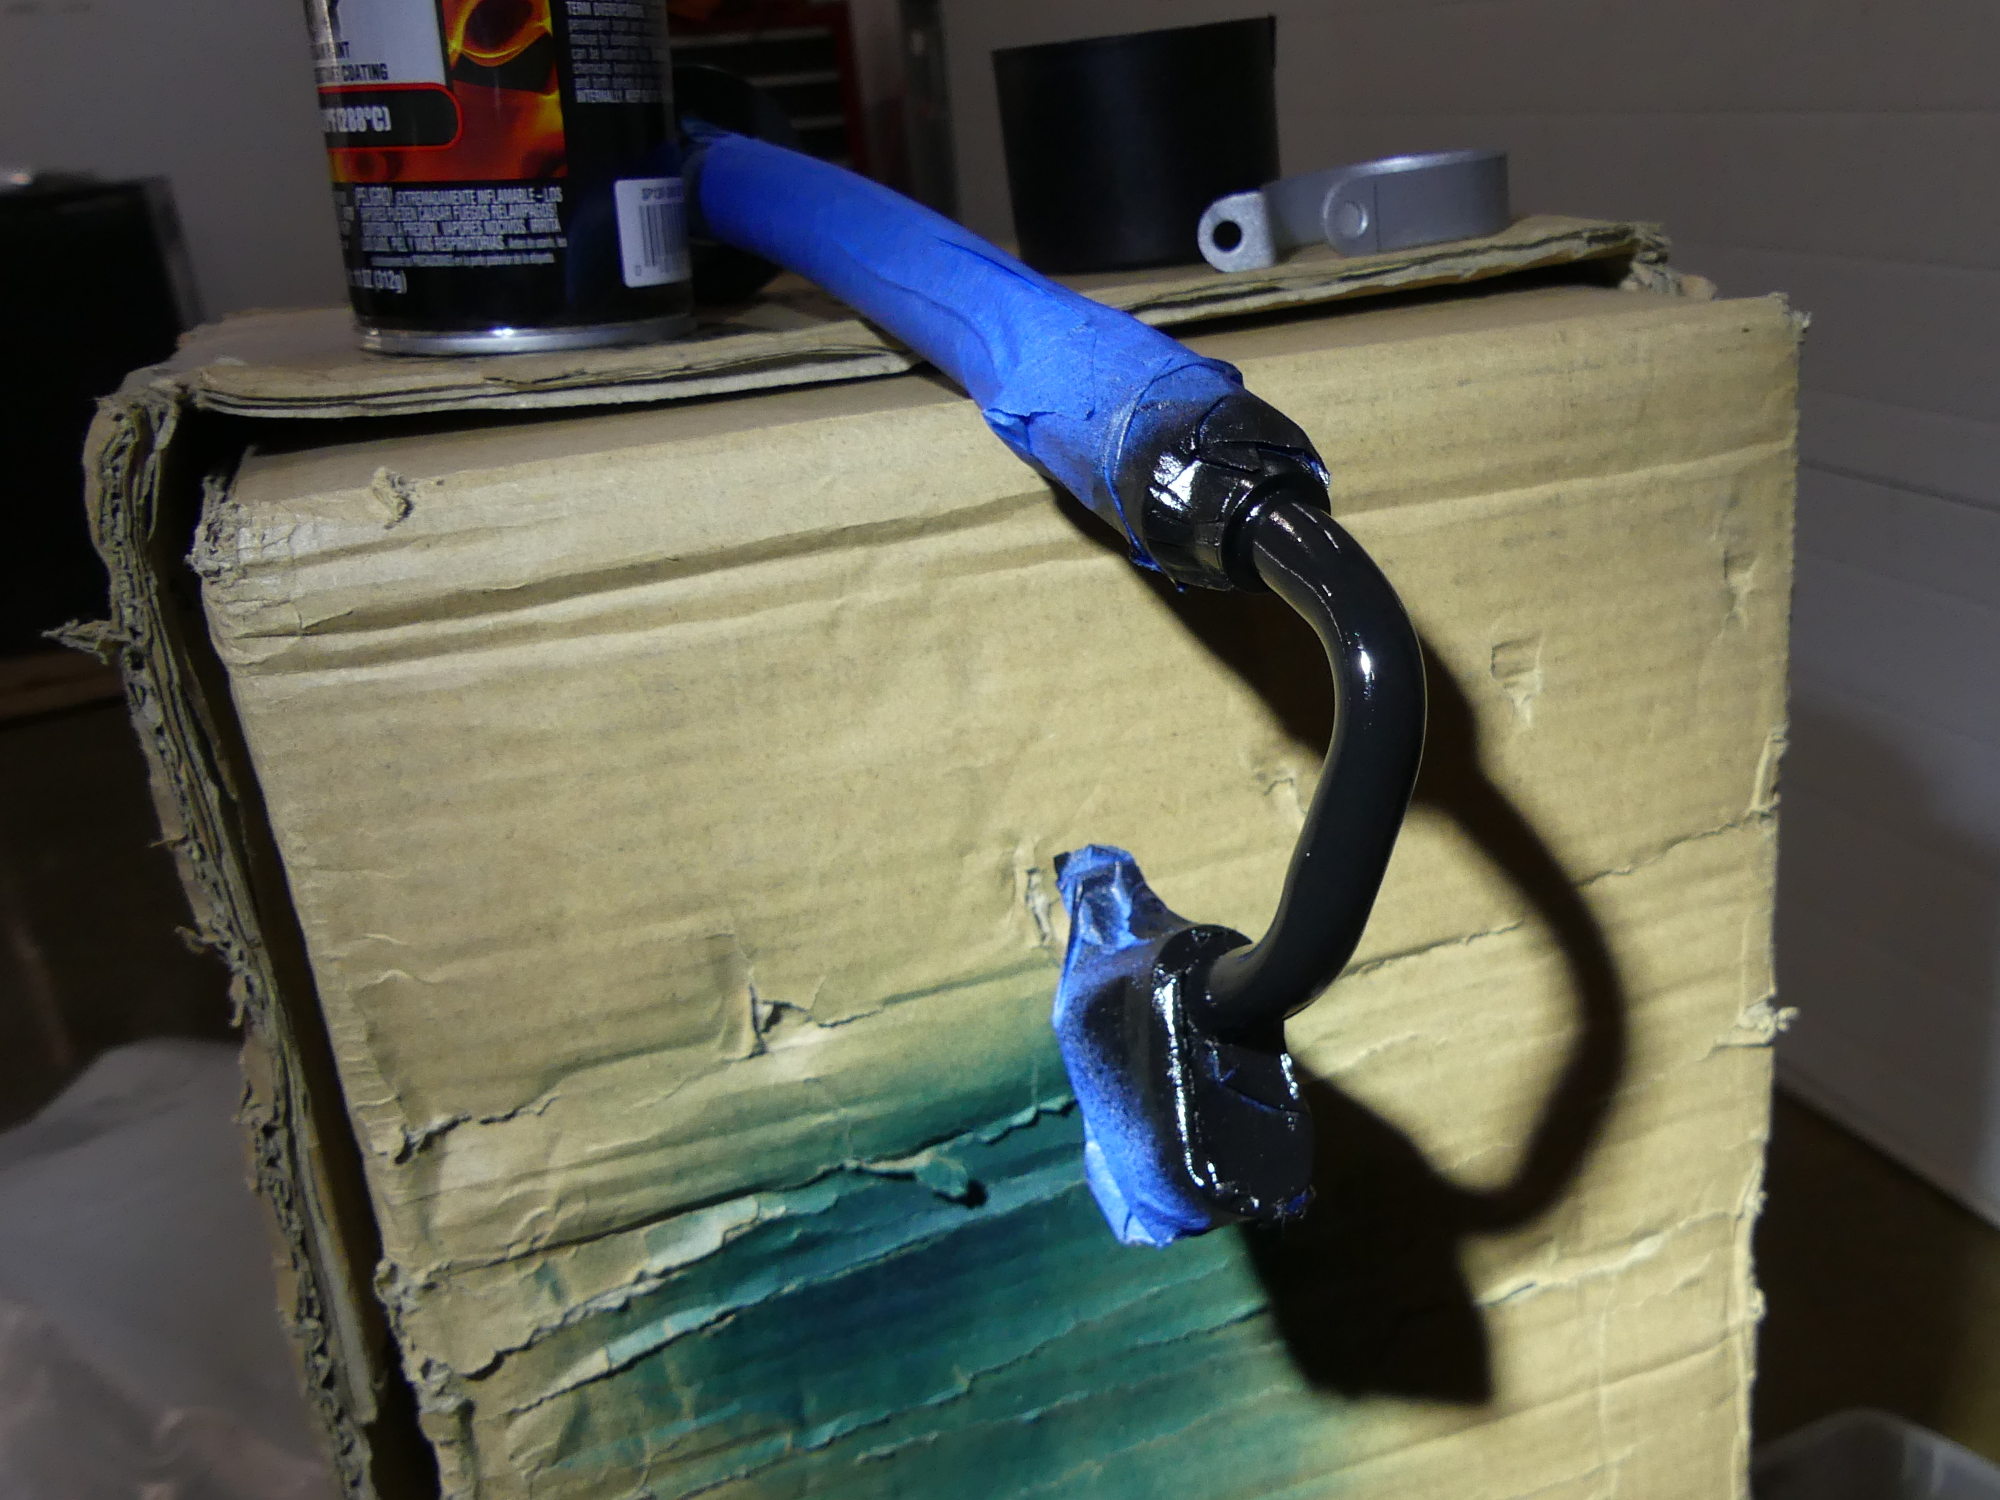 While futzing with the clamp that holds the new refrigerant line in place I realized the hose itself wasn't completely painted from the factory, so I naturally masked, scuffed and painted it with VHT Satin Black. |
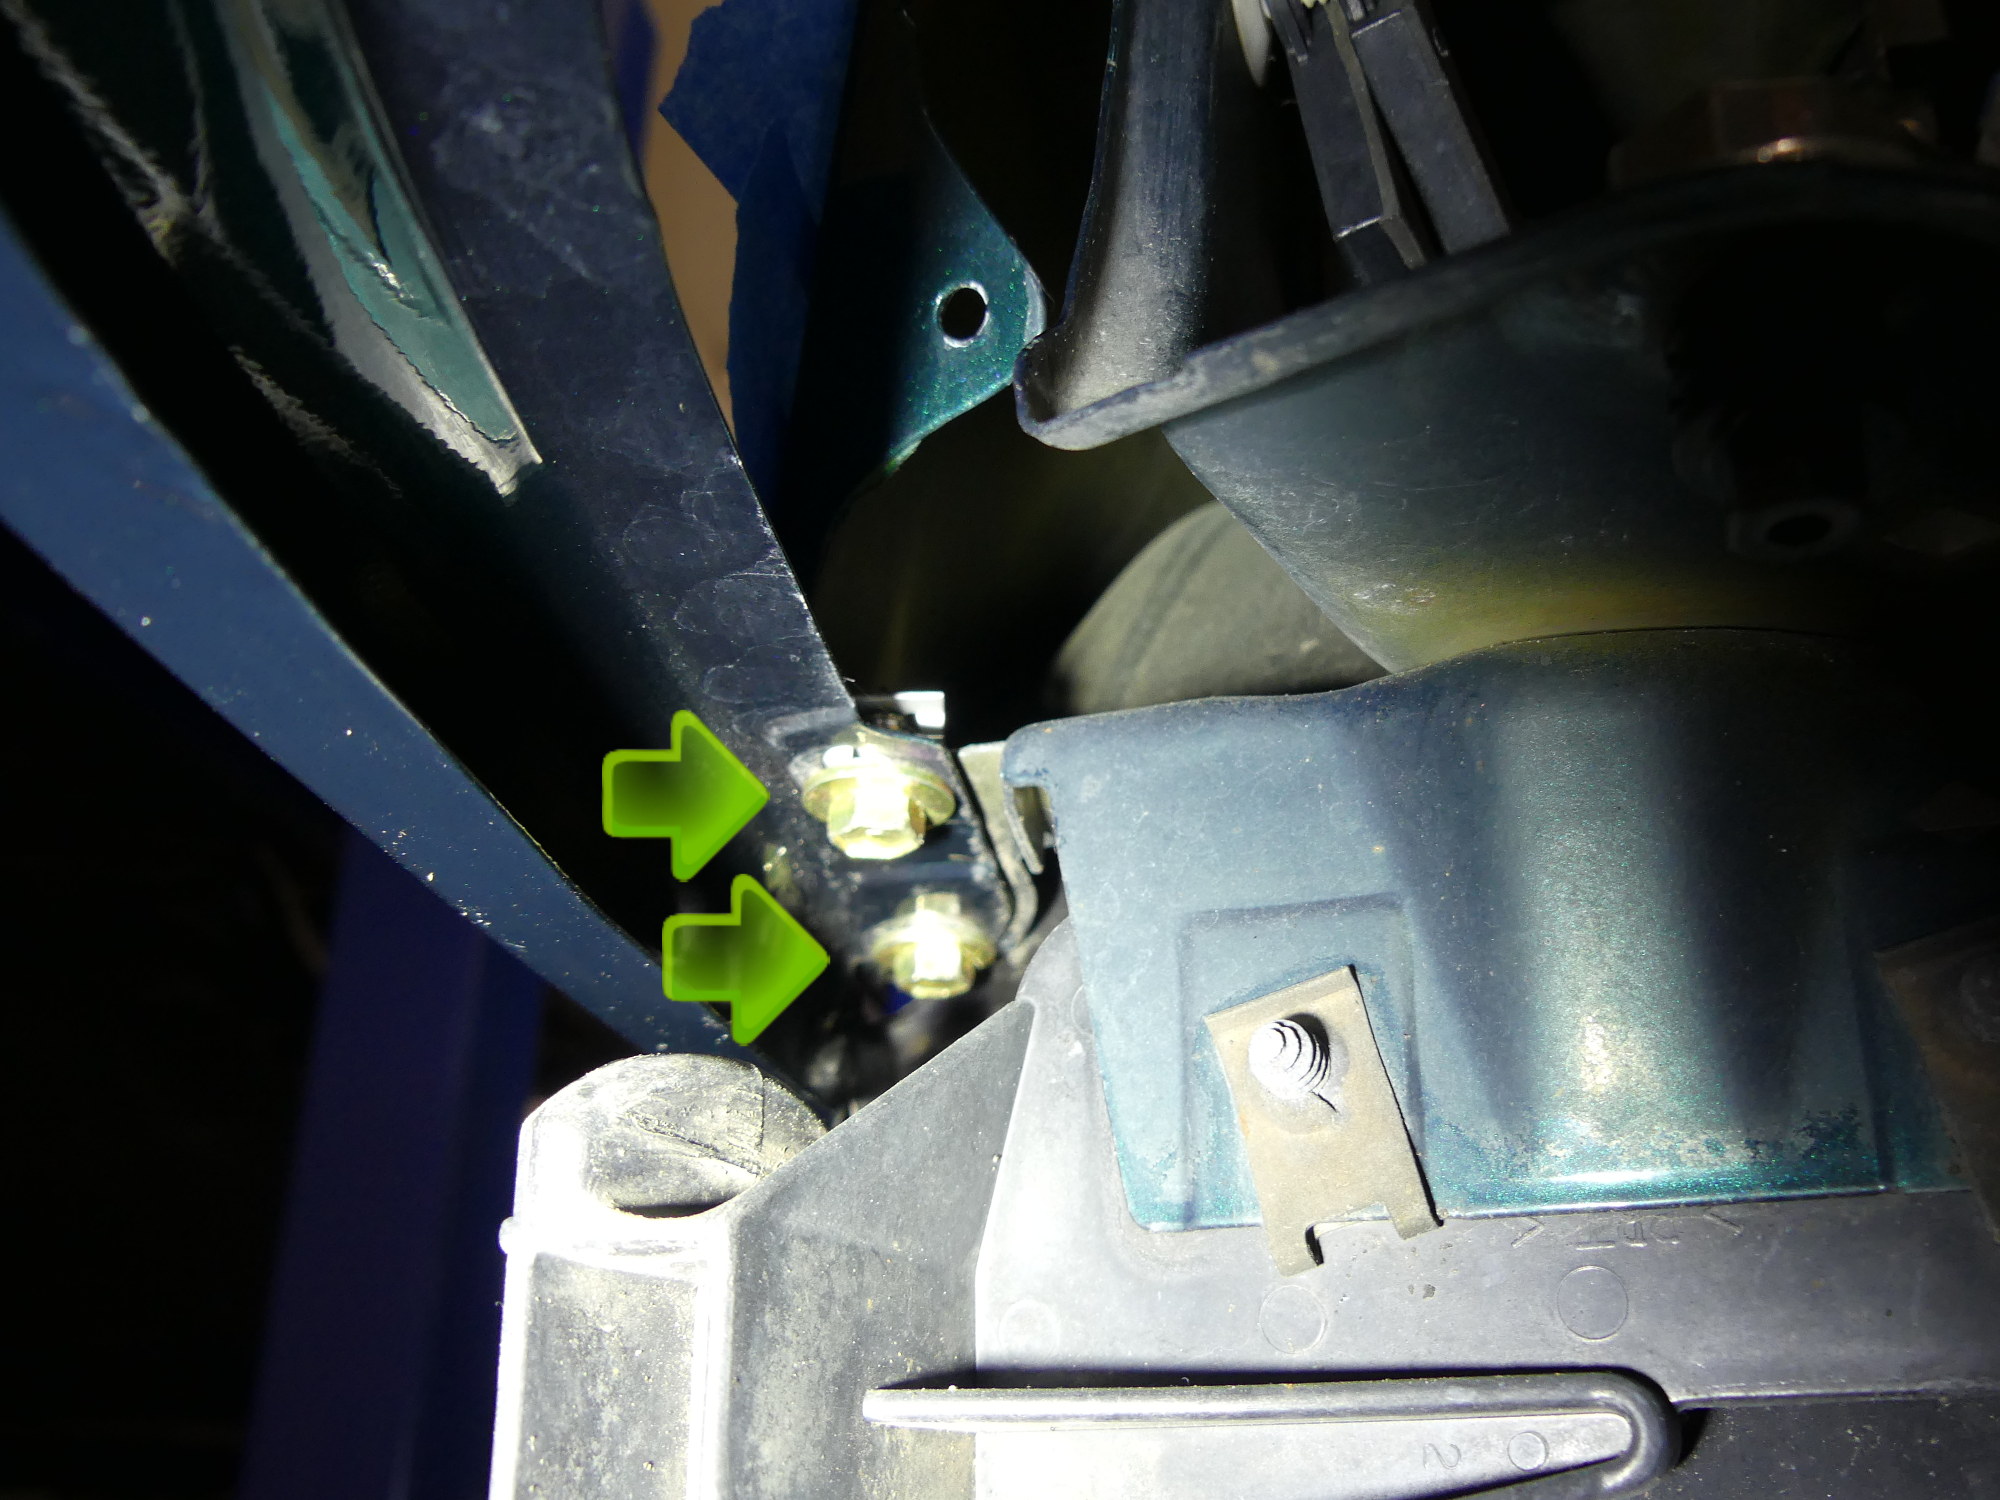
 Just a perspective showing how the front support and grill support tie together along with the hood release receptacles. This all goes together as a system and must be assembled as such. |
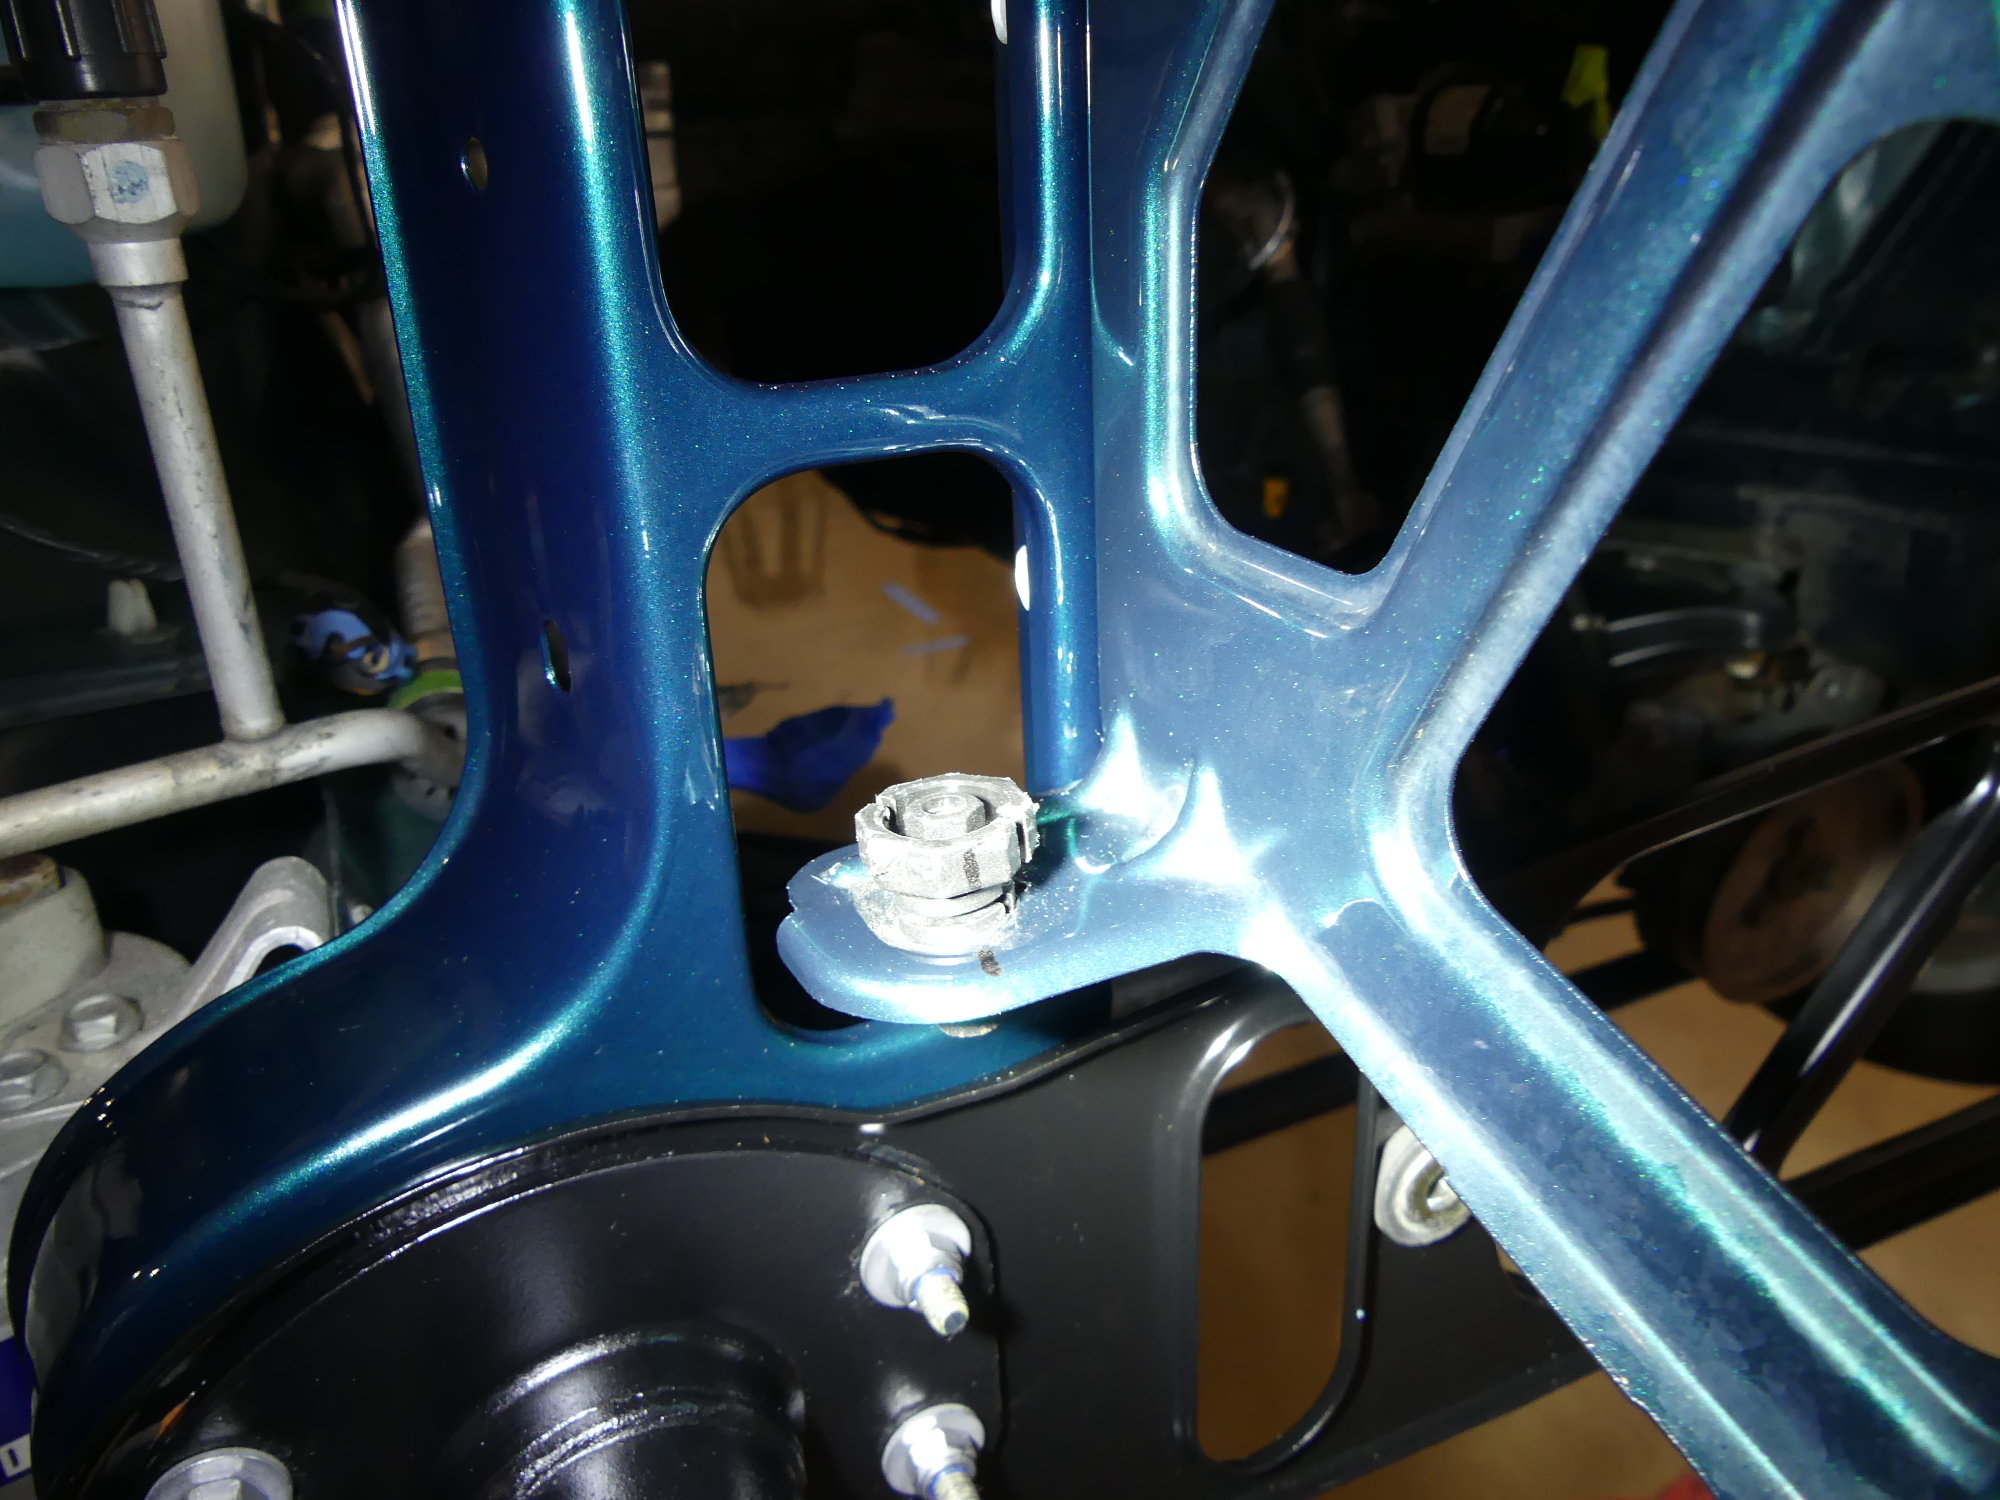
 The arrows show the new (cad plated) hex screws I received when I ordered replacement hardware. The old stuff was rusty, one of the tinnerman clips was broken and it was all incorrect for the application. |
 Since I was reusing the grille support into which the lower headlight adjusters are installed, I marked the adjusters thinking I'd save myself some work later. Turned out the headlights were not positioned correctly in the body so I adjusted these freehand. |
 Although there is some means of adjustment where the grille support attaches to each fender I found I couldn't really move the pieces once the support was attached elsewhere. Still, I checked the reveal for consistency. |
 Here's the other side of the grille support where it connects to the left side (driver's side) fender. I think I got the reveal about as consistent between the sides as possible. |
 The new right side air duct. The new parts were a lot easier to deal with as they were more flexible. I bought them primarily because they were still available. These appear to be overmolded with rubber where they contact the grille support. |
 The left side air duct installed. If you compare the two air ducts it's obvious they are not symmetrical in any way. Also note how they cover the hood release receptacles. Those things are really buried in the front end. |
I then grabbed the grille support and began to sort out the hardware needed to install it. The grille support fastens to the vertical beams of the front support with two hex screws with captive washers. These screws replaced the incorrect hardware used by the last body shop to assemble the front end. The grille support also fastens to each fender with two hex screws and appropriately sized tinnerman clips. I ordered these parts via the ETK and when they arrived I found them to be considerably larger than the hardware I found installed, which means the wrong hardware was installed there too.
As I attempted to mate the grille support with the vehicle I realized in my haste yesterday I had fastened the hood release latch receptacles to the front support without considering the fact that the grille support is retained in part by the two forward screws that secures each receptacle, so I had to remove those, wedge the grille support between the front support and the receptacles, and install the screws again. The other hardware was installed as expected. Note that although there is some adjustment possible with the grille support where it mounts to the fenders I noticed that I couldn't really budge it in any meaningful way, but I did try my best to ensure that the appearance and reveal was consistent on both sides.
With the grille support installed I spent some additional time pulling tinnerman clips and hex screws out of my stock to prepare the air ducts for installation. As I installed the ducts I decided to install each related screw with a bit of CV-2 grease on the threads and back of the captive washer. This made them practically glide into the tinnerman clips but the real goal here was to inhibit corrosion, at least for a time.
I then spent over two annoying hours installing the headlights. Based on my experience last year I knew this wasn't going to be fun, and I wasn't wrong. Despite taking careful measurements of the adjusters in the hope that I wouldn't have to go through the alignment procedure again I wound up tossing those out when I realized that the crummy fit of the corner lights I've noticed since I installed these things was because I had incorrectly positioned the headlight enclosures too far forward in the body. To correct the problem I tightened the top adjusters and loosened the bottom adjusters, and this allowed the headlights to move aft without pivoting upward too much. While the headlights and corner lights now appear to be in a much better position the lights are no longer aligned. That means I'll need to go through the alignment procedure again, but I'm holding off on that until the end of the project because I need to be able to move the car under its own power to make that job easier.
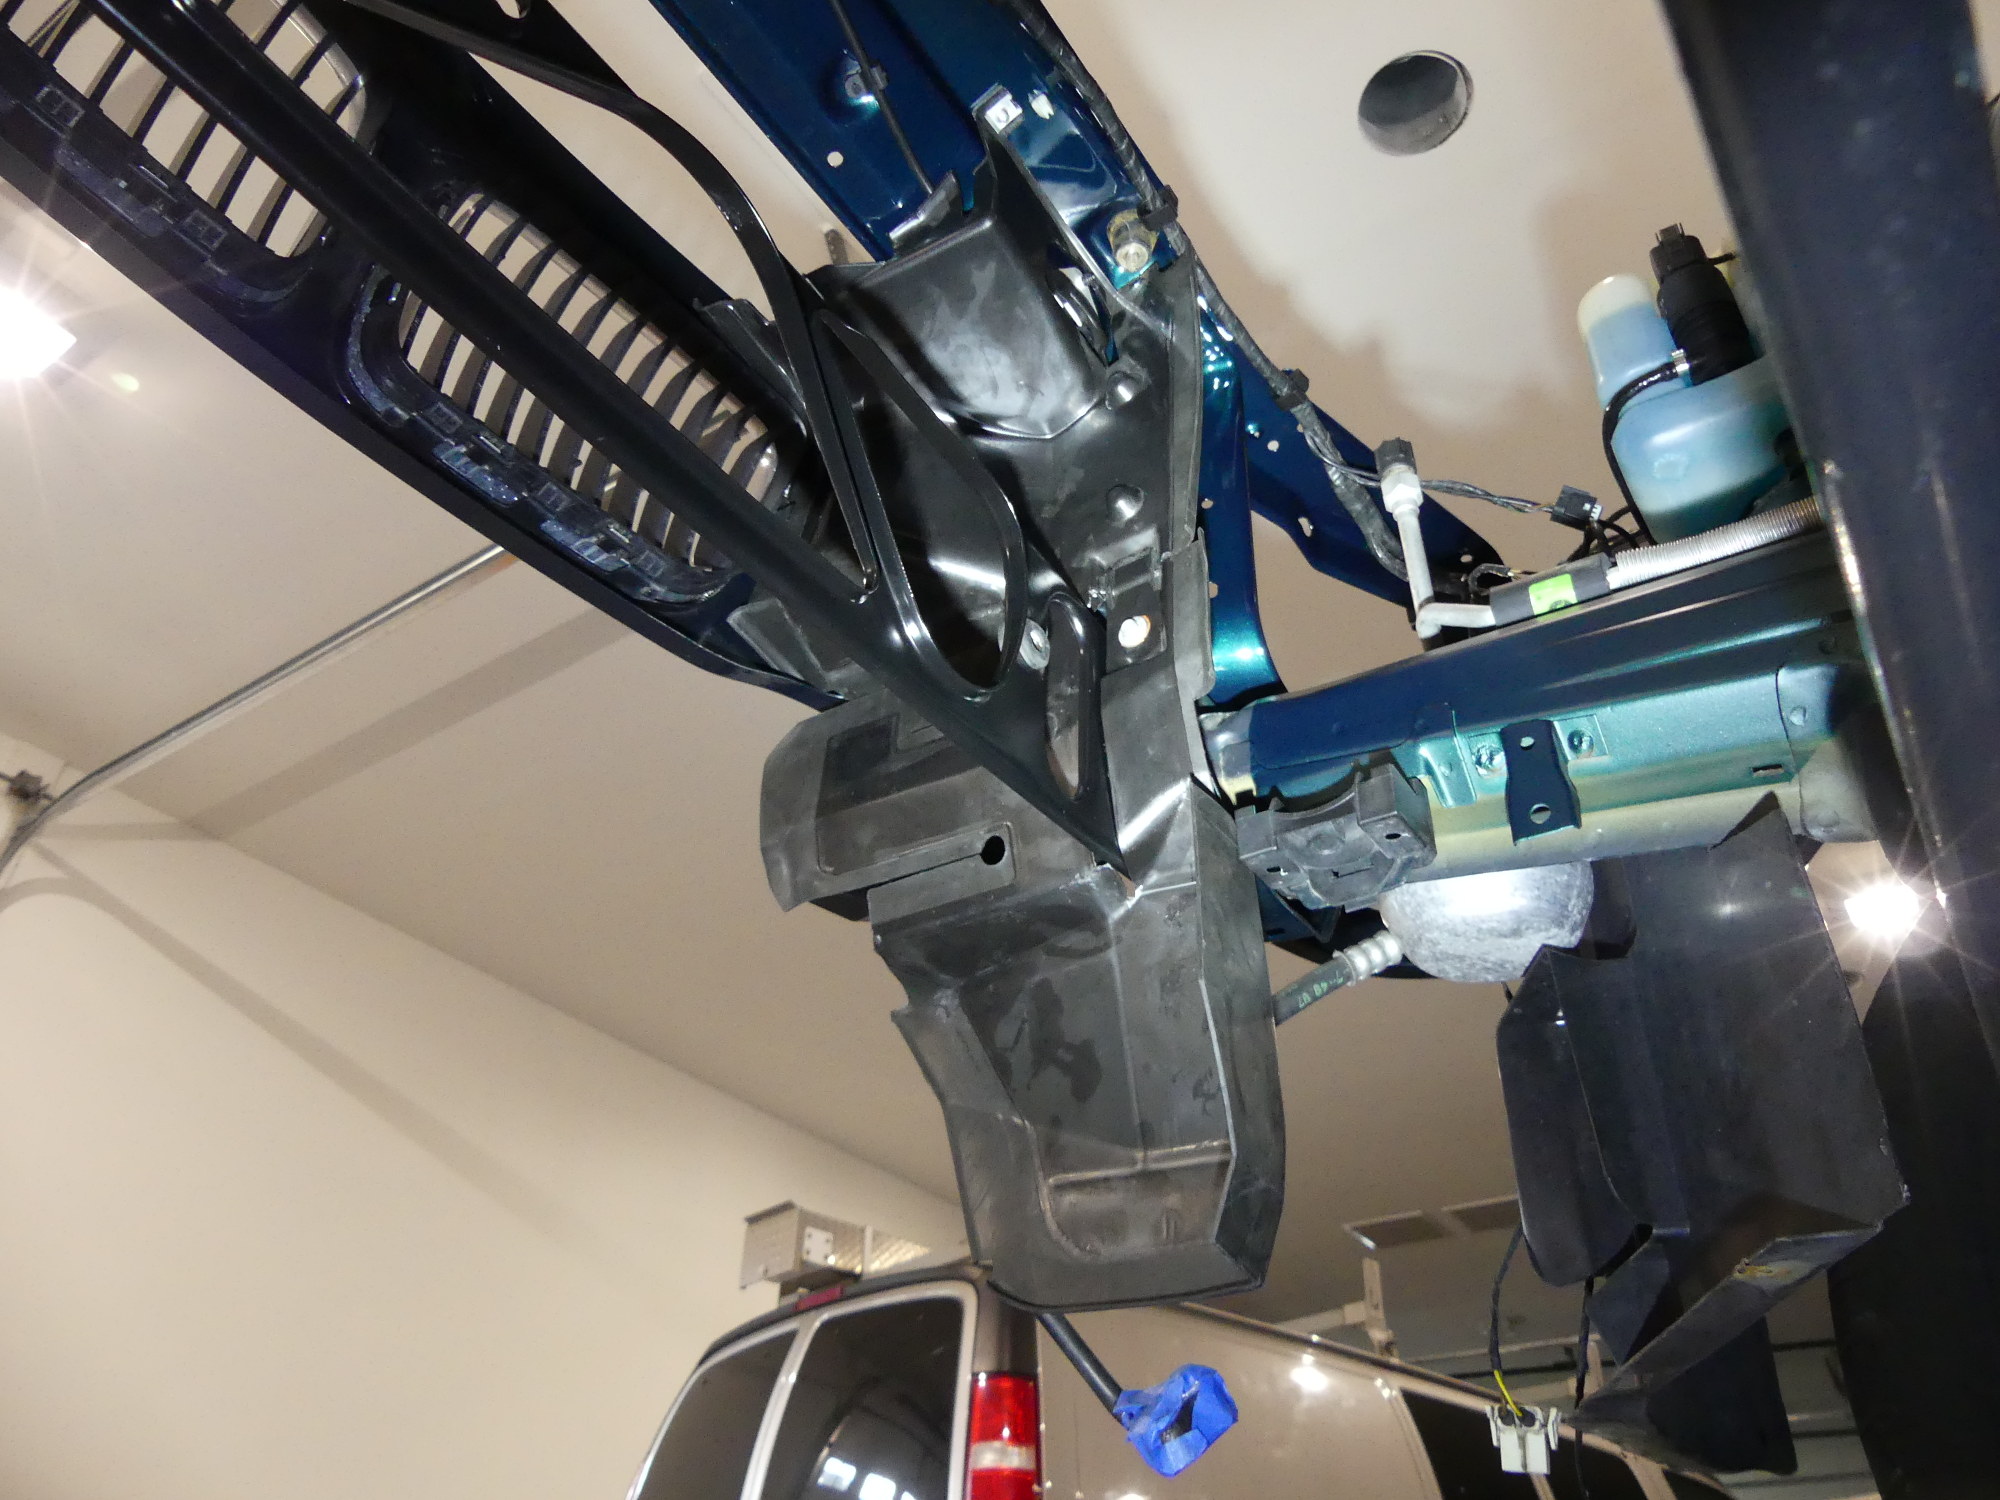
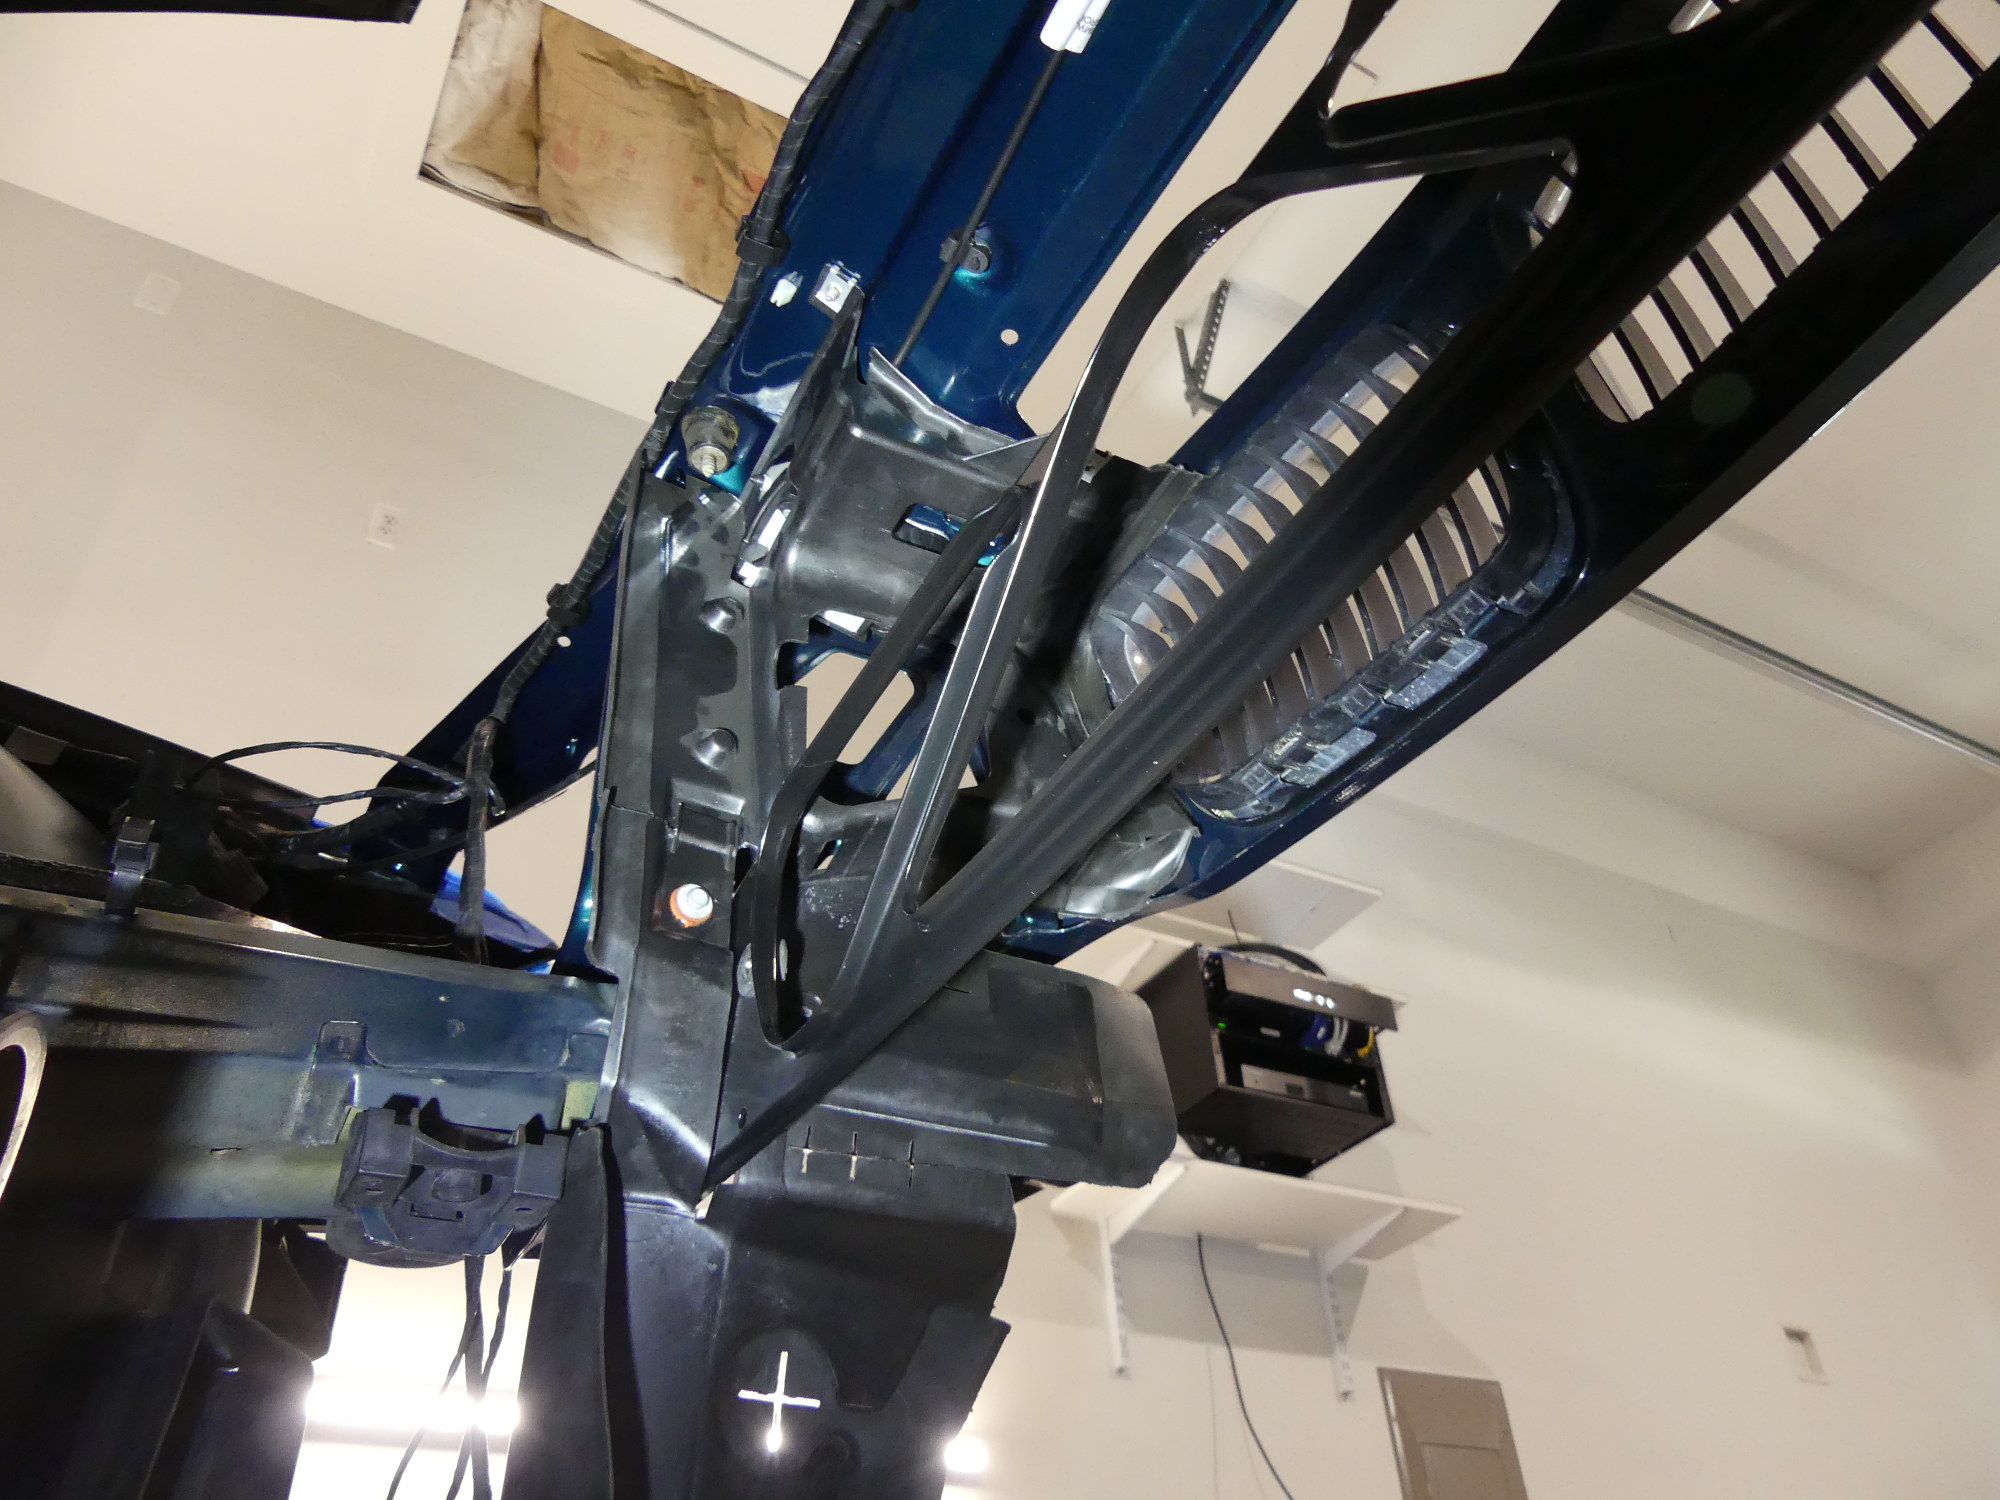
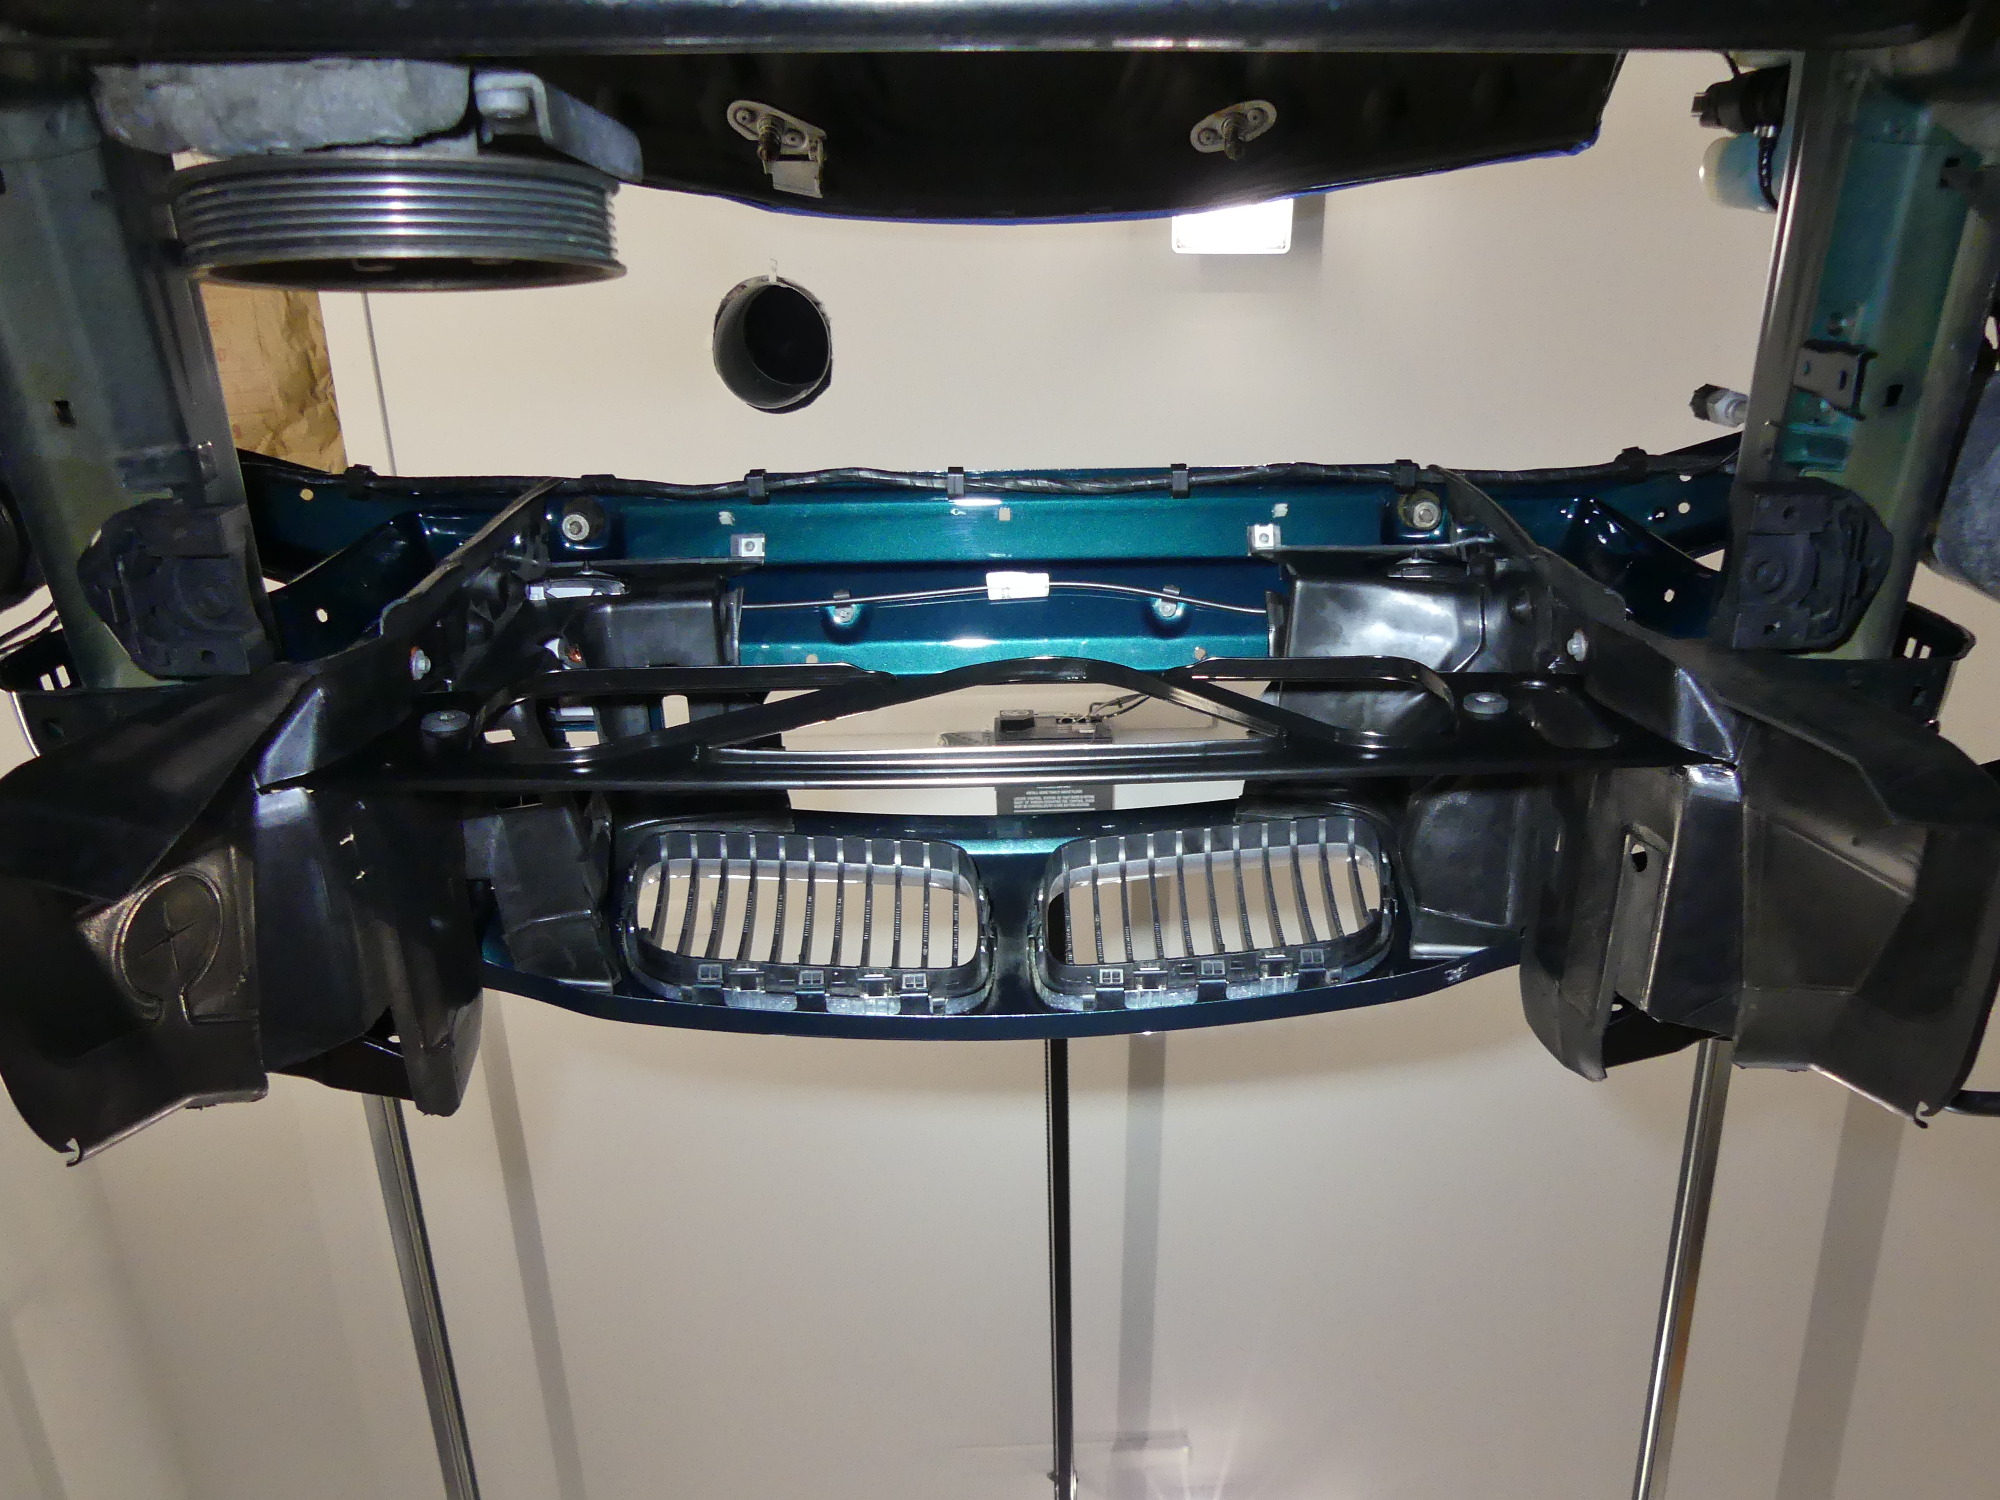 Sometimes during the installation I'd just stop and look around to make sure I hadn't forgotten anything. During one of these times I found myself lying under the car looking up. This is what I saw. |
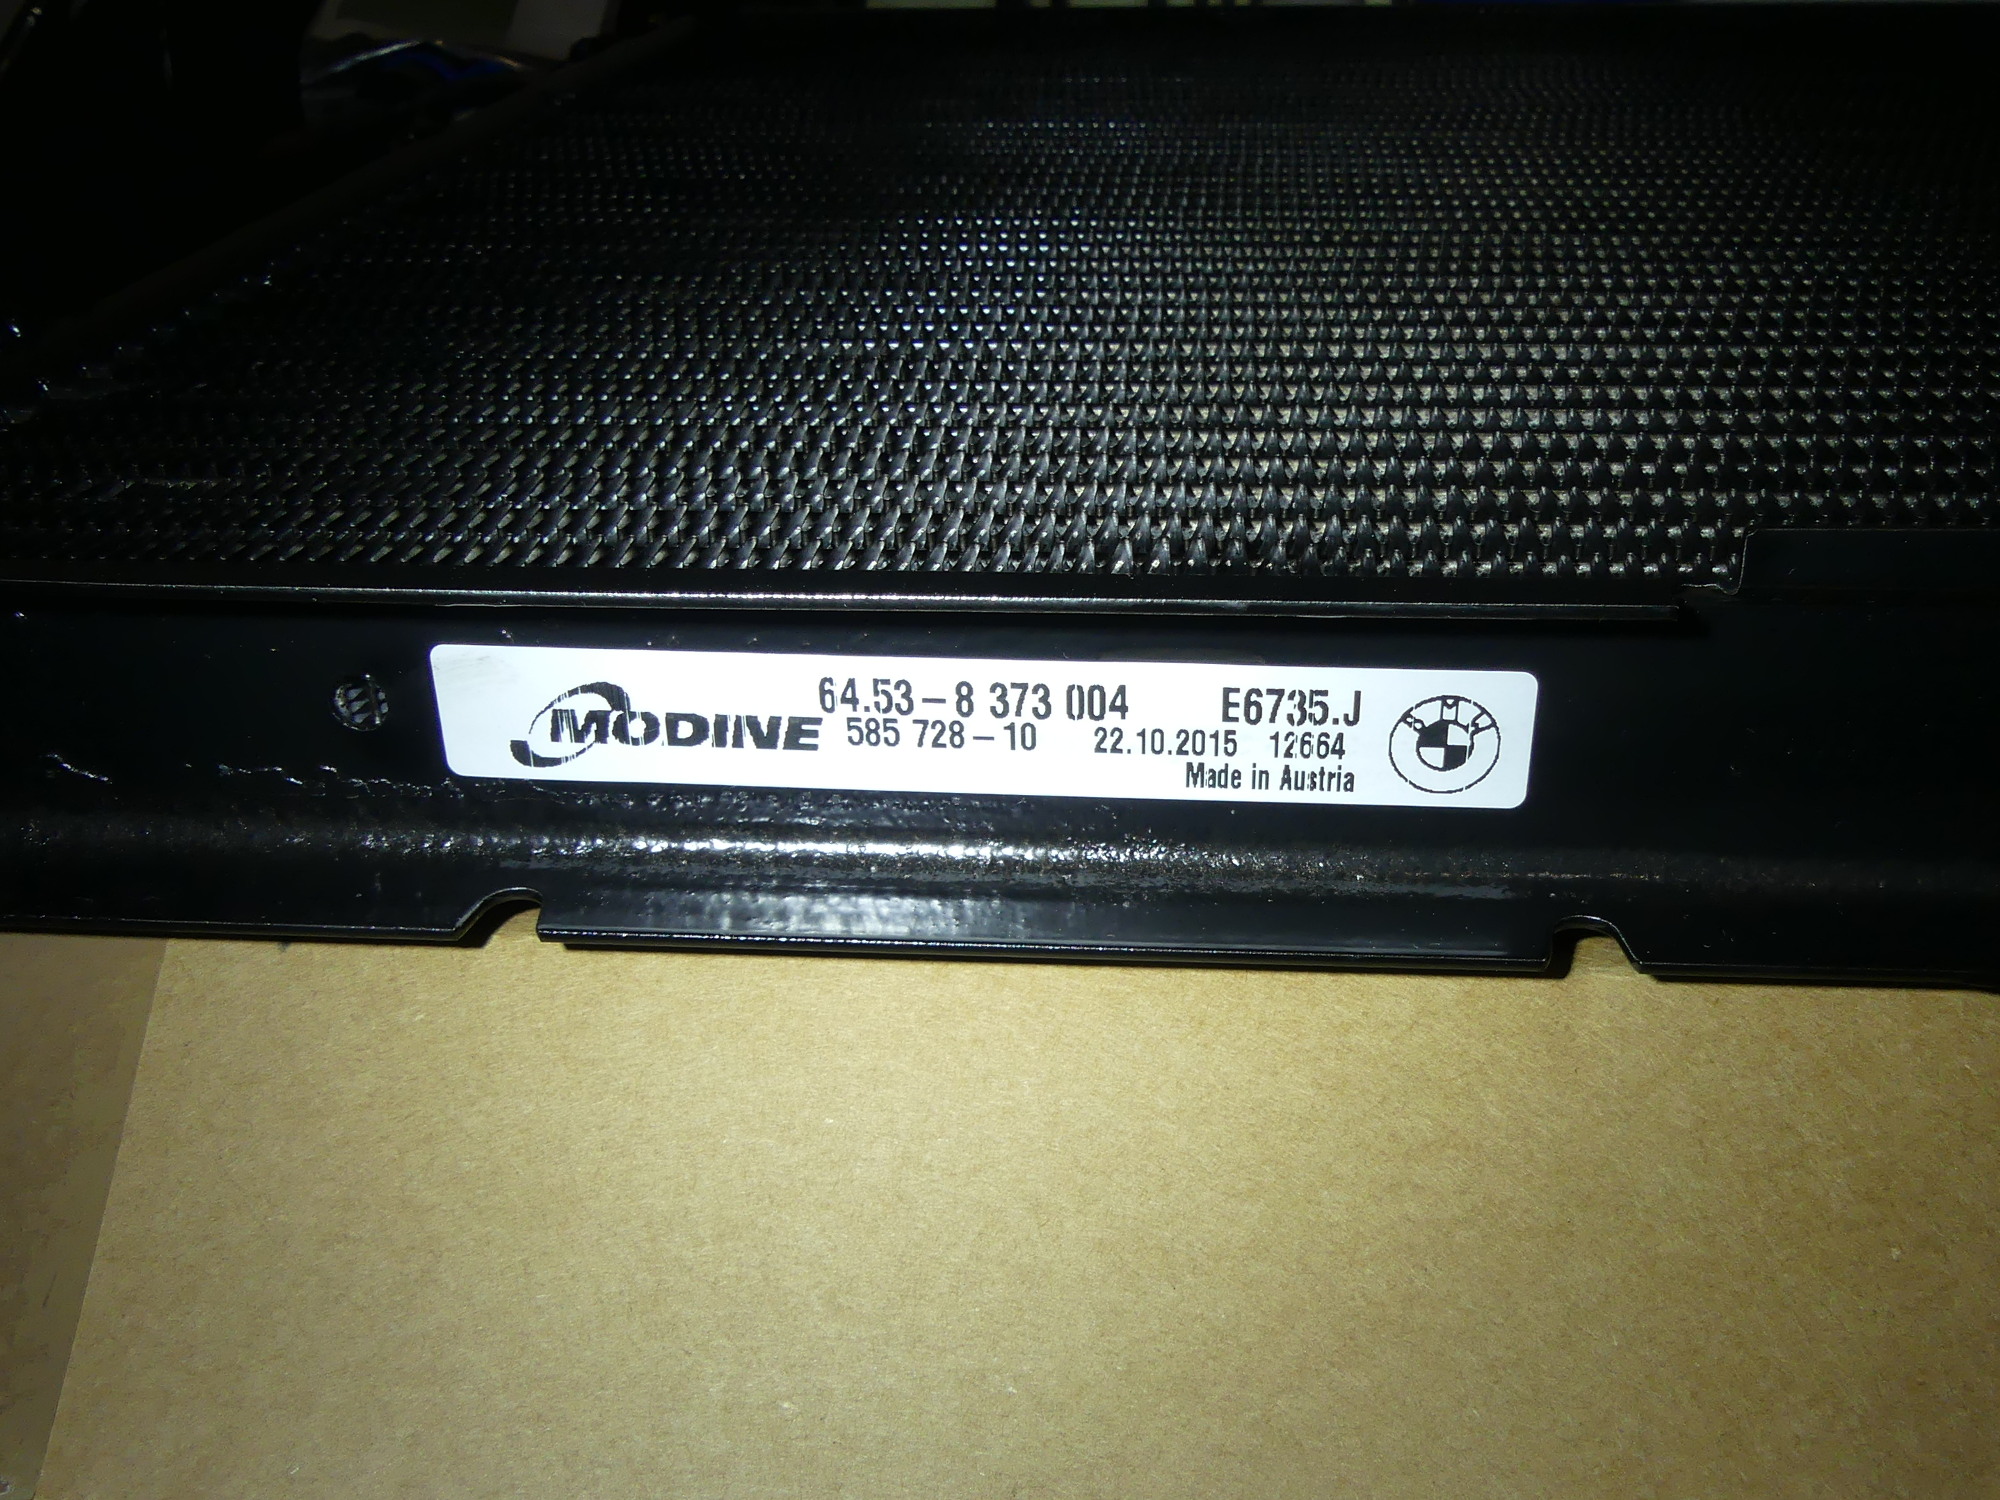 The label on the new BMW OE condenser. There are many aftermarket ripoffs of this but none of them seem to fit correctly. I'm not sure this company produces an aftermarket unit but if so, I think it's safe to buy it. |
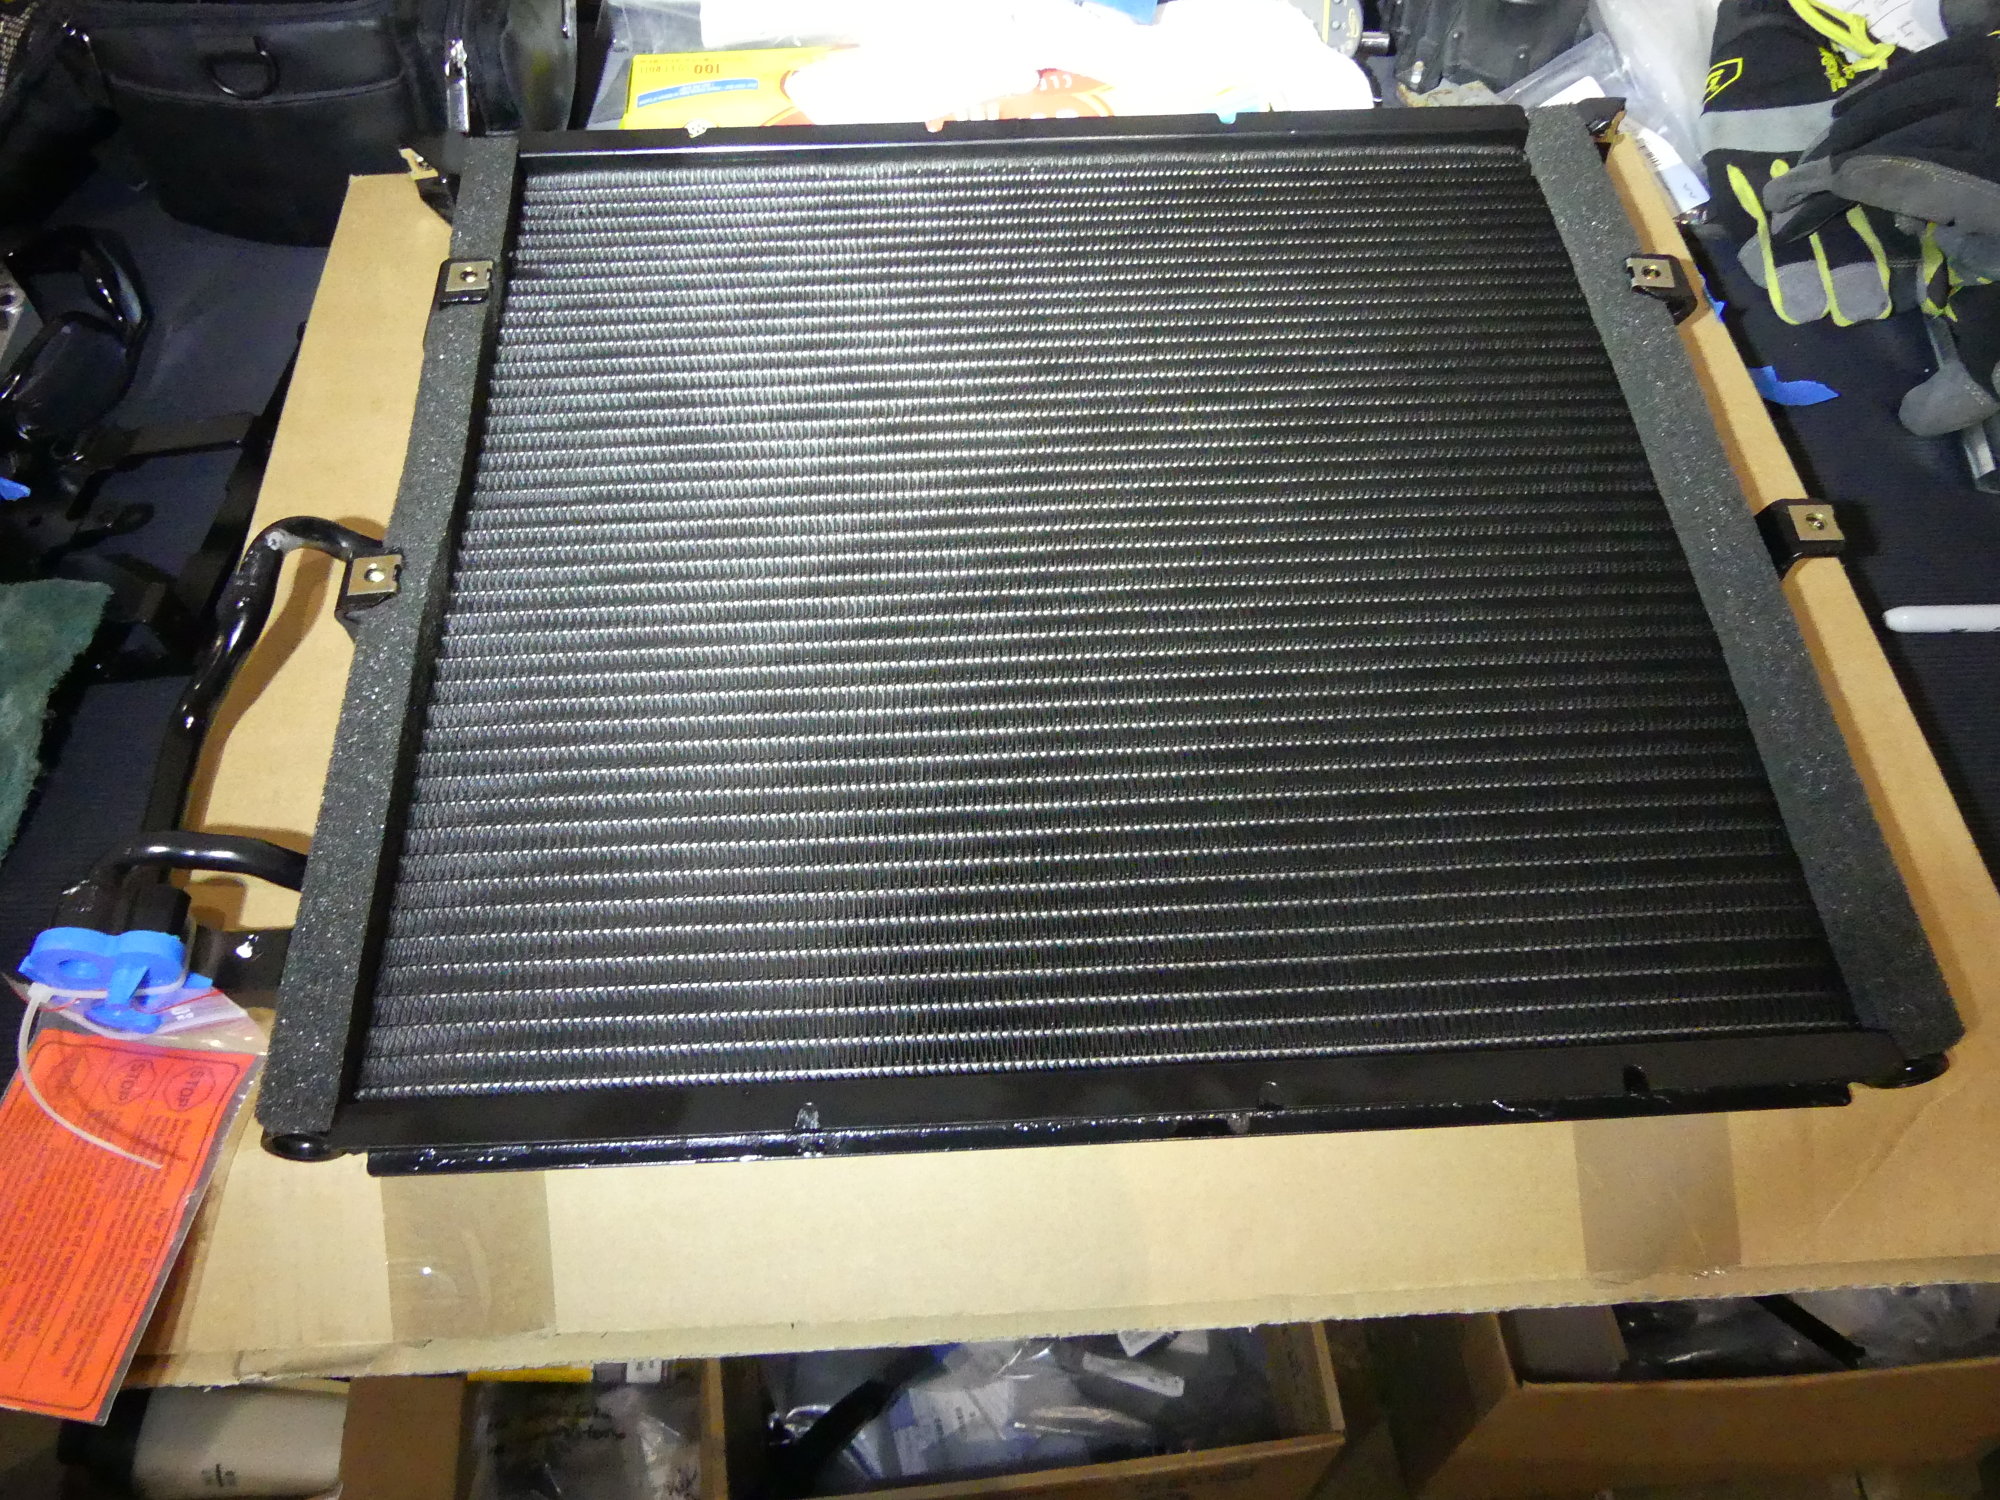 Another major difference between the OE and aftermarket ripoffs I've seen is the lack of foam on the aftermarket pieces. This foam helps seal the interface between the aux fan and the condenser. |
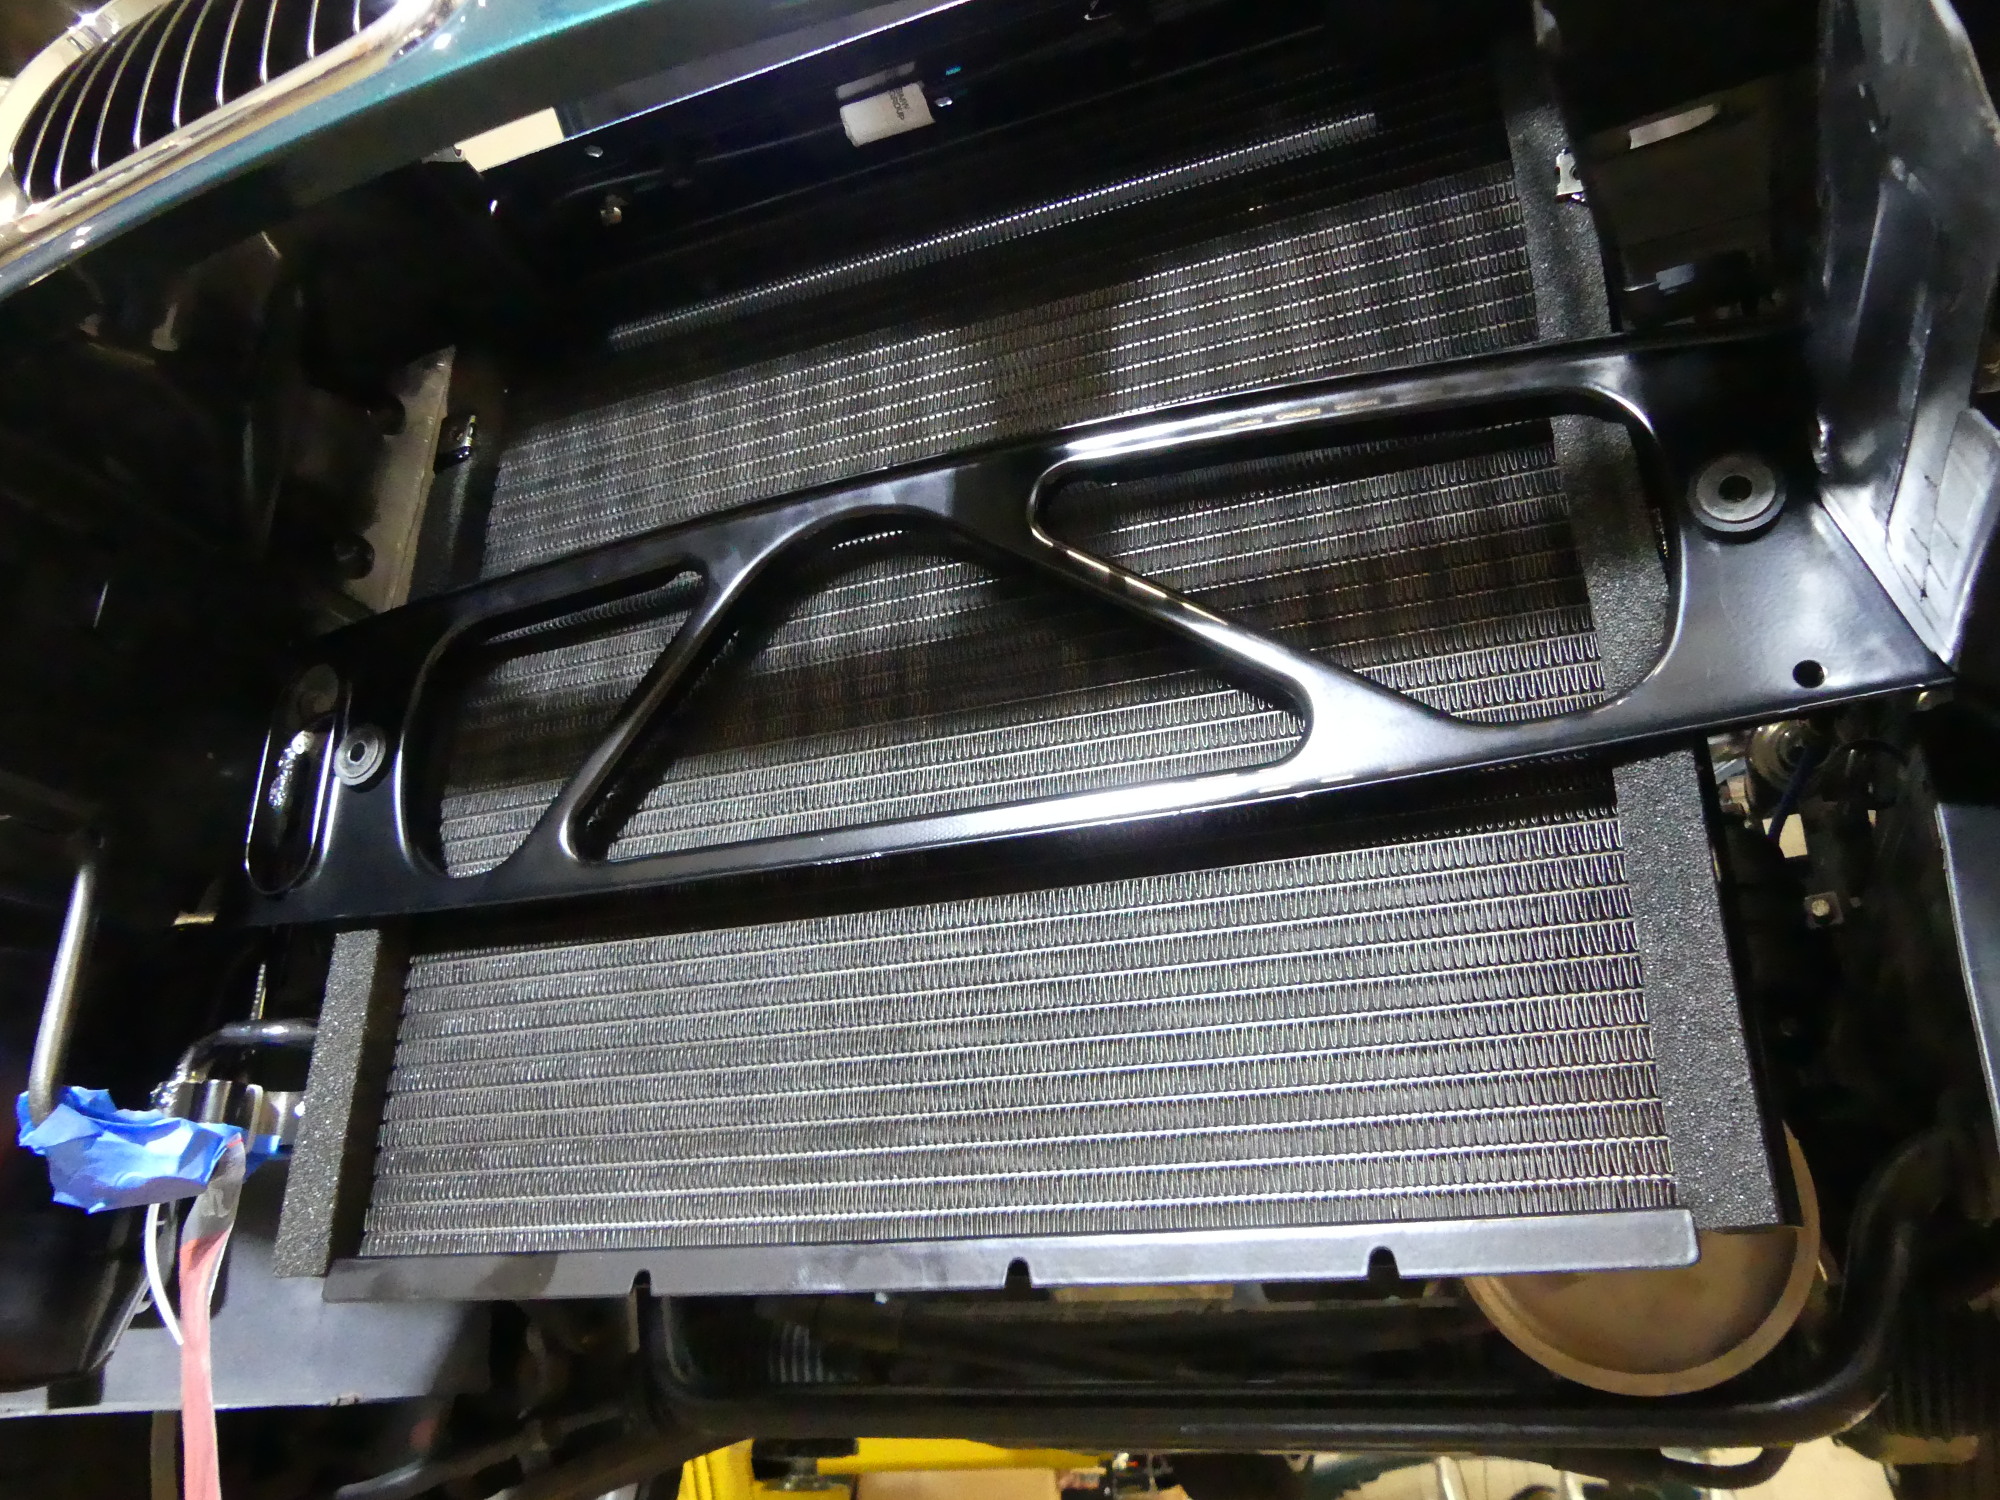 The condenser has to be installed in the car first, as it provides the tinnermann clips into which the aux fan screws are captured. The lower two aux fan holes go through the truss support bushings with the metal insert. |
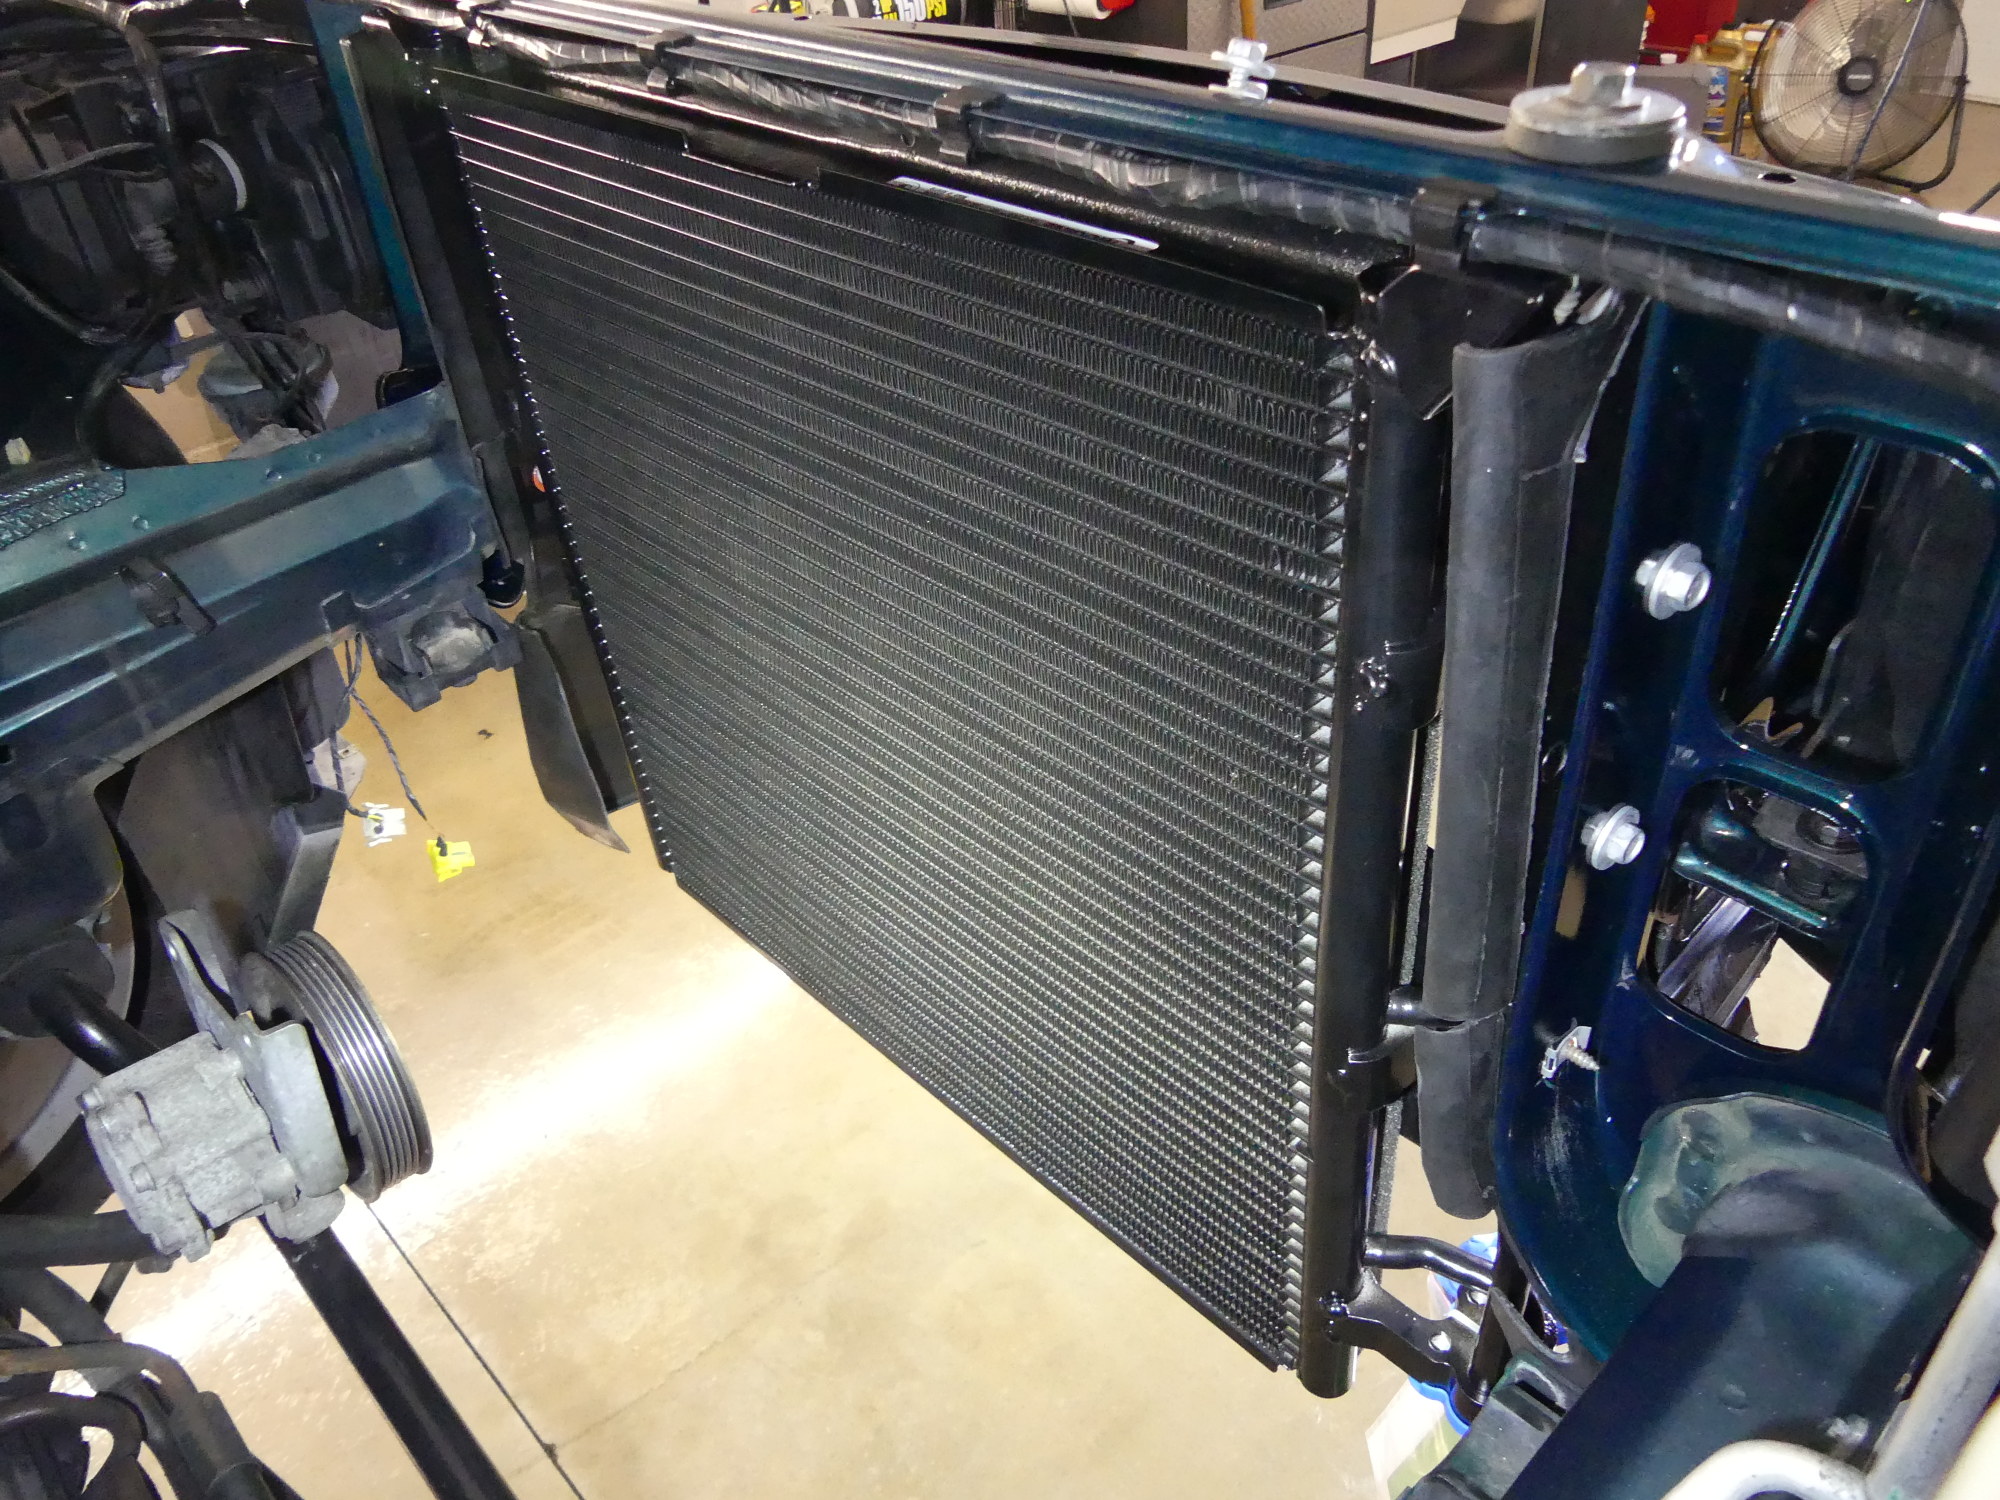 The new condenser looks right at home in the newly refinished engine bay. But it is also exceedingly vulnerable right now. Hmmm.... I should do something about that. |
 This is the lift height resting on the lowest set of safety locks. This is the ideal height for working on the front end. High enough so I don't have to bend over all the time but low enough to get to all fasteners with appropriate leverage. |
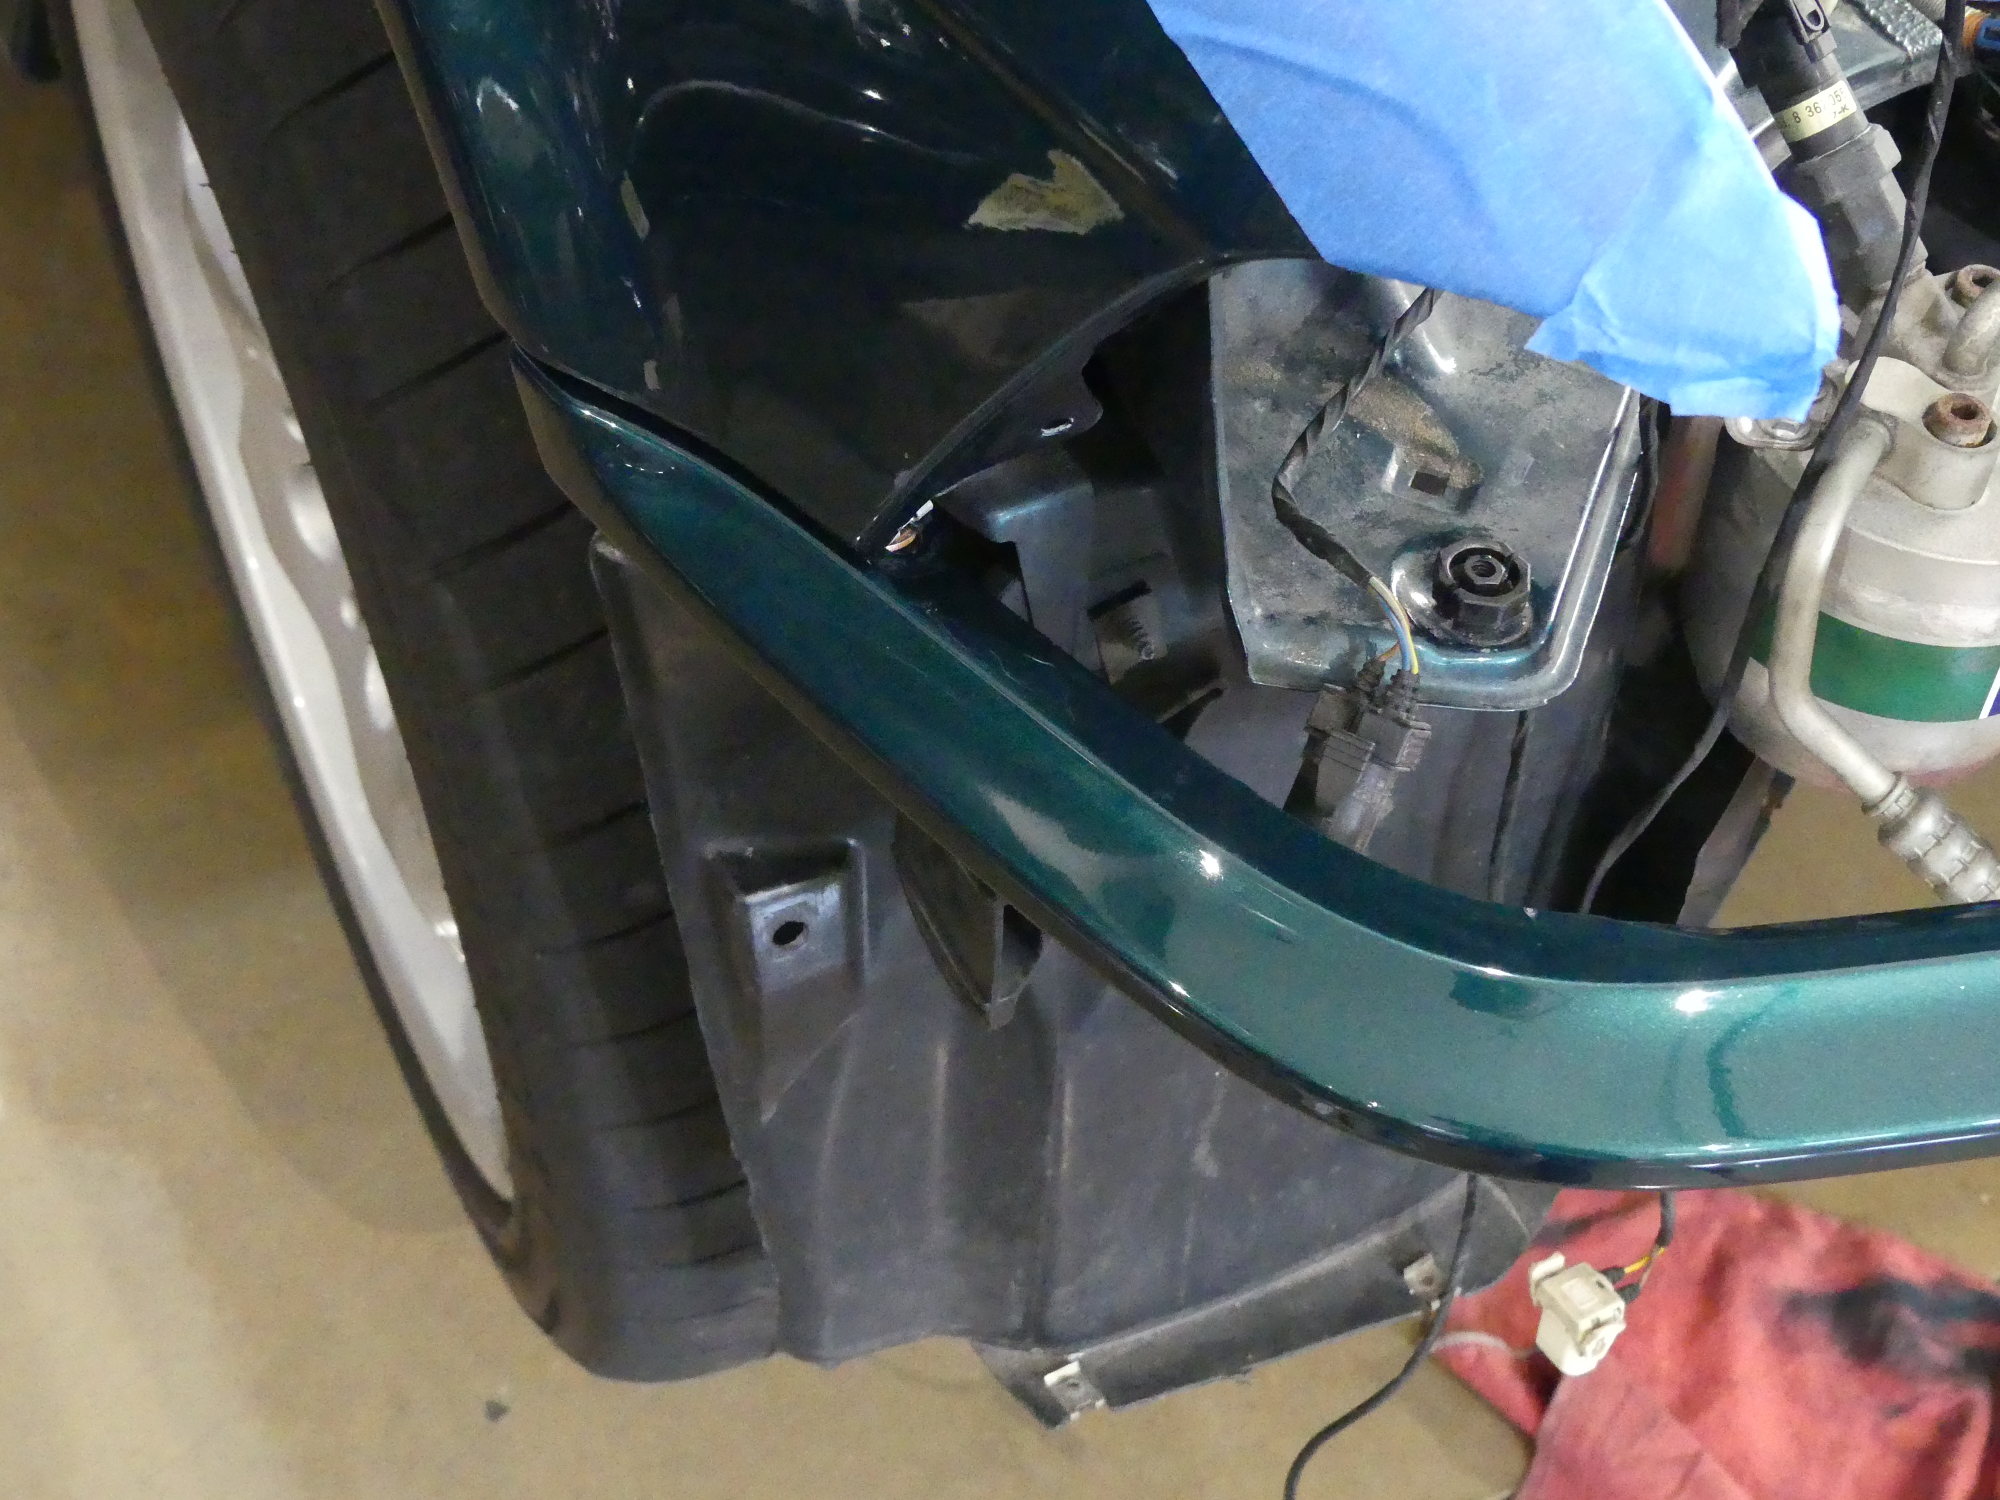
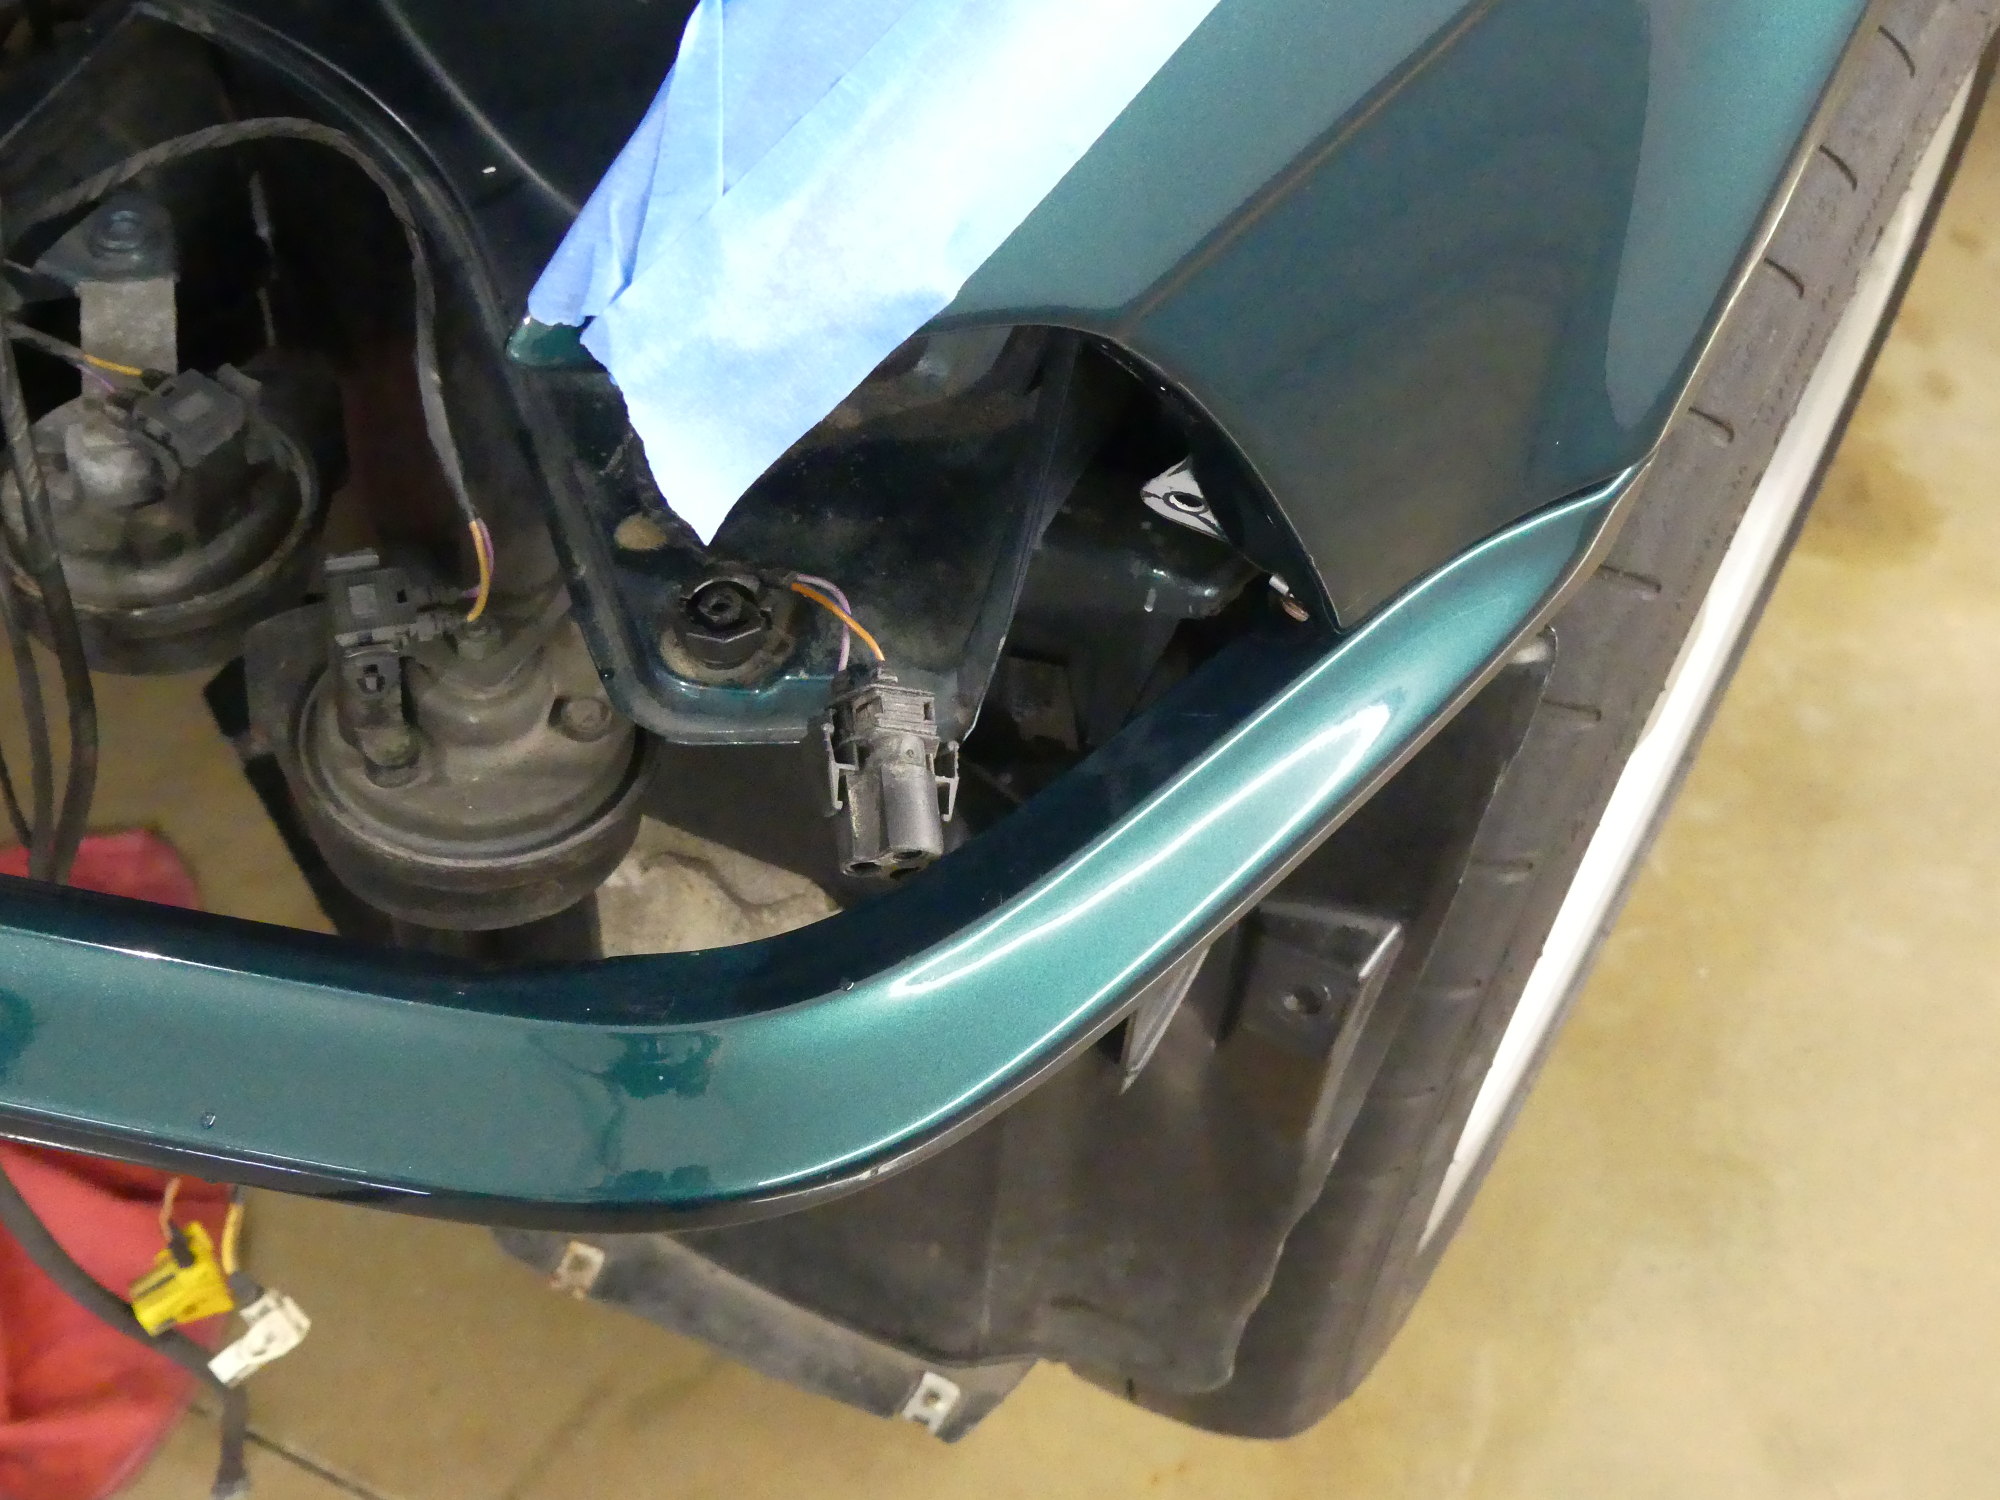
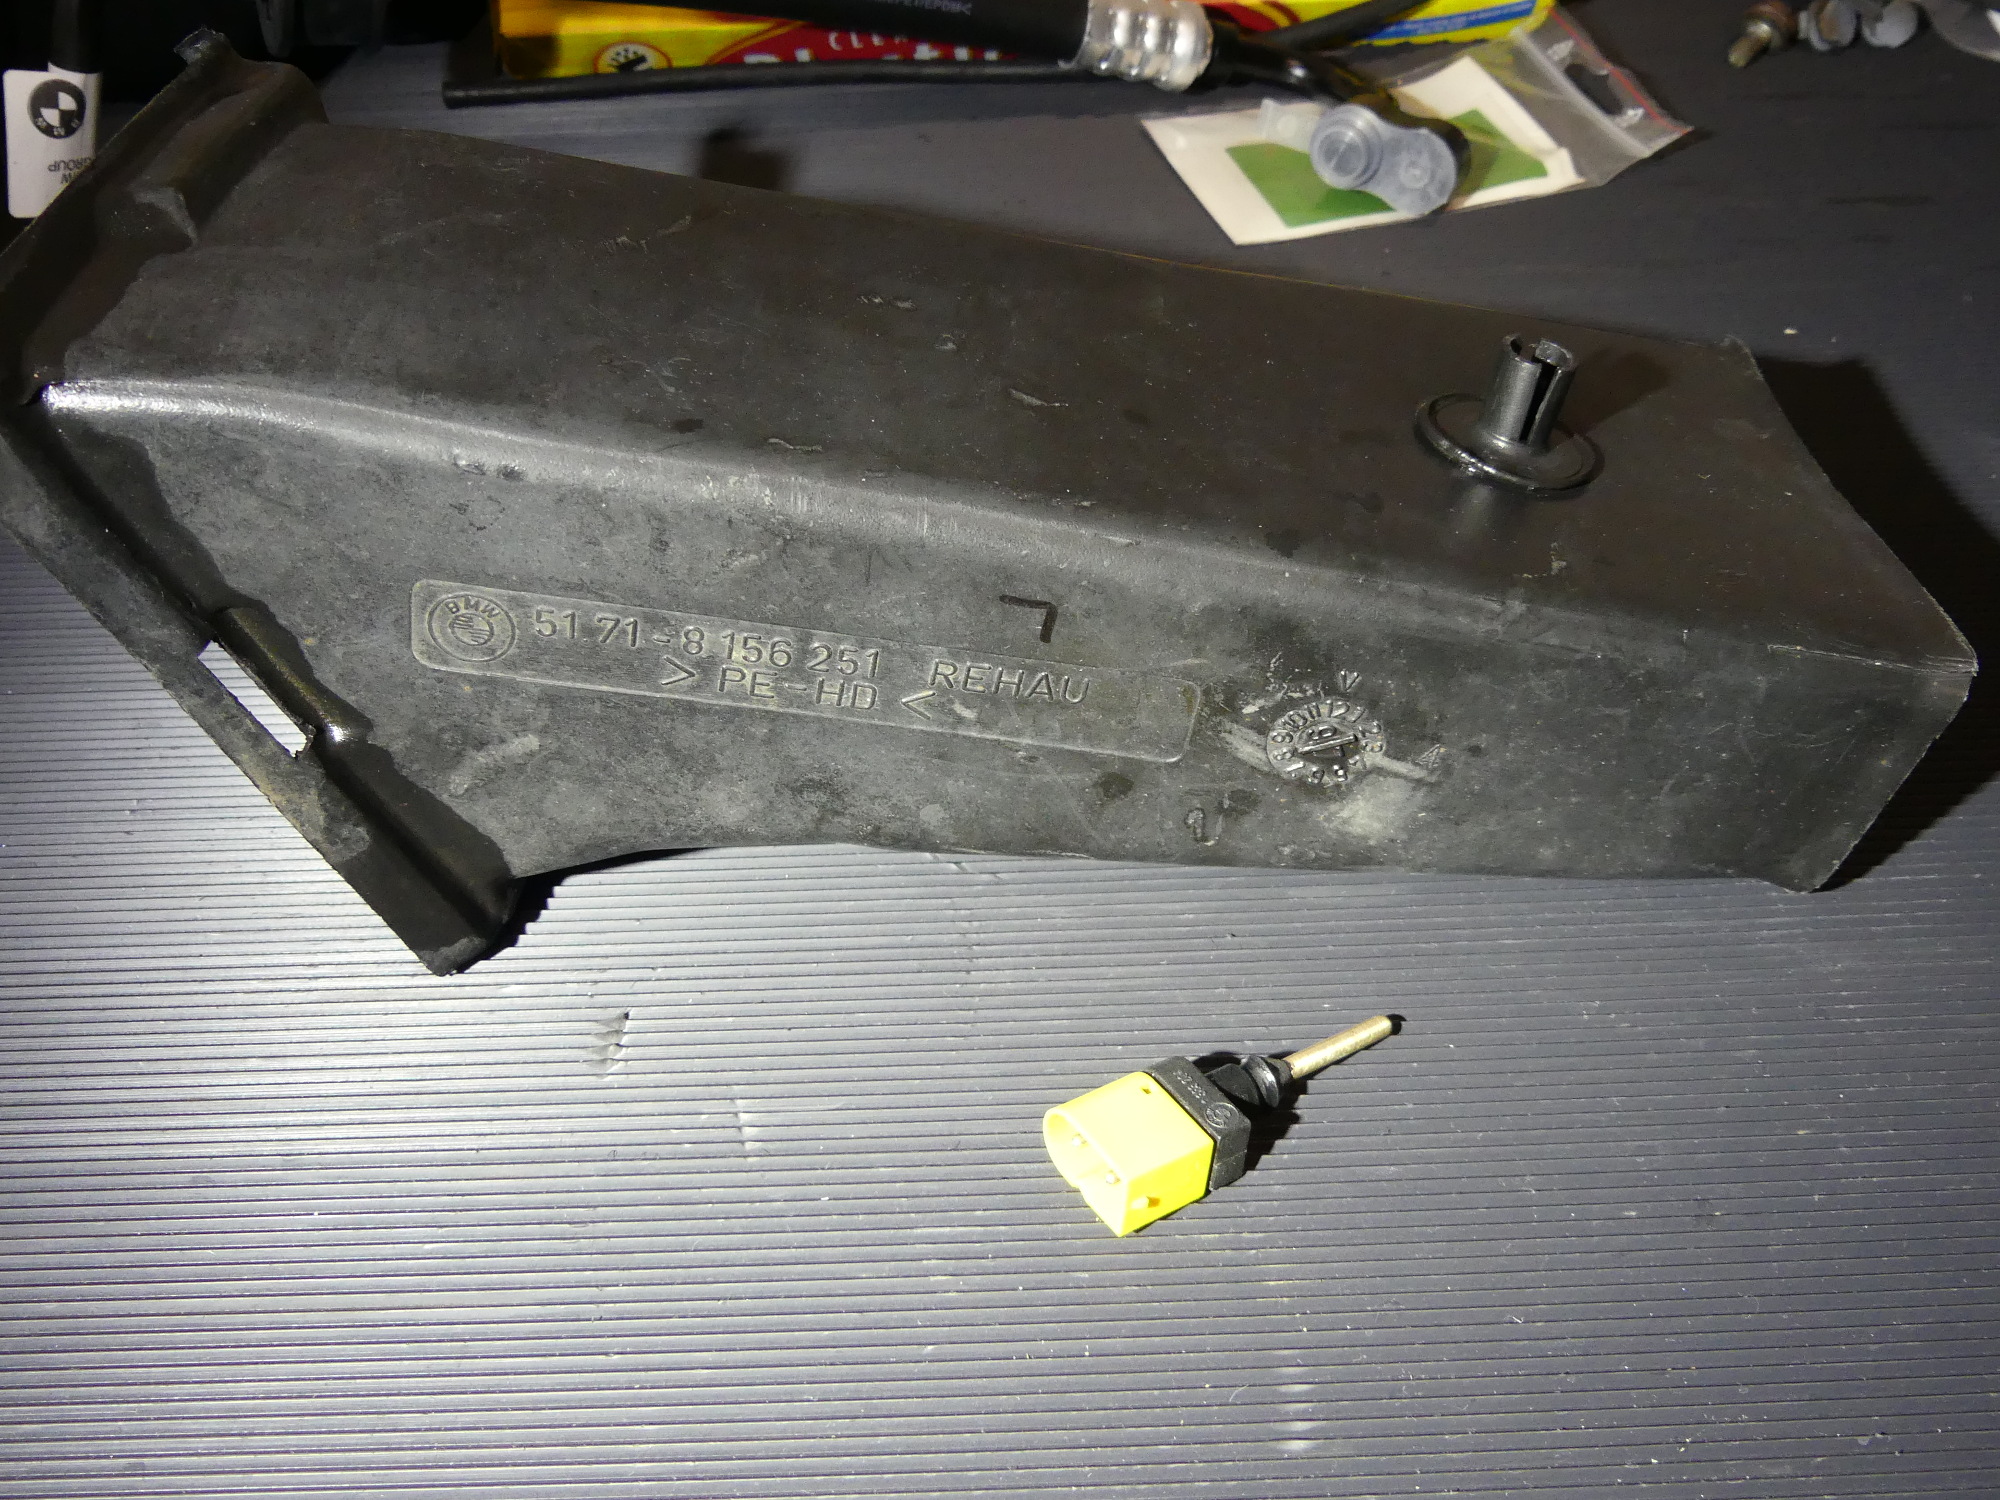 While preparing the bumper assembly I noticed that the temperature sensor probe was quite crusty with dirt so I cleaned it up. I also washed the ducts and inspected them for cracks. No worse than the last time I did this. And that's good. |
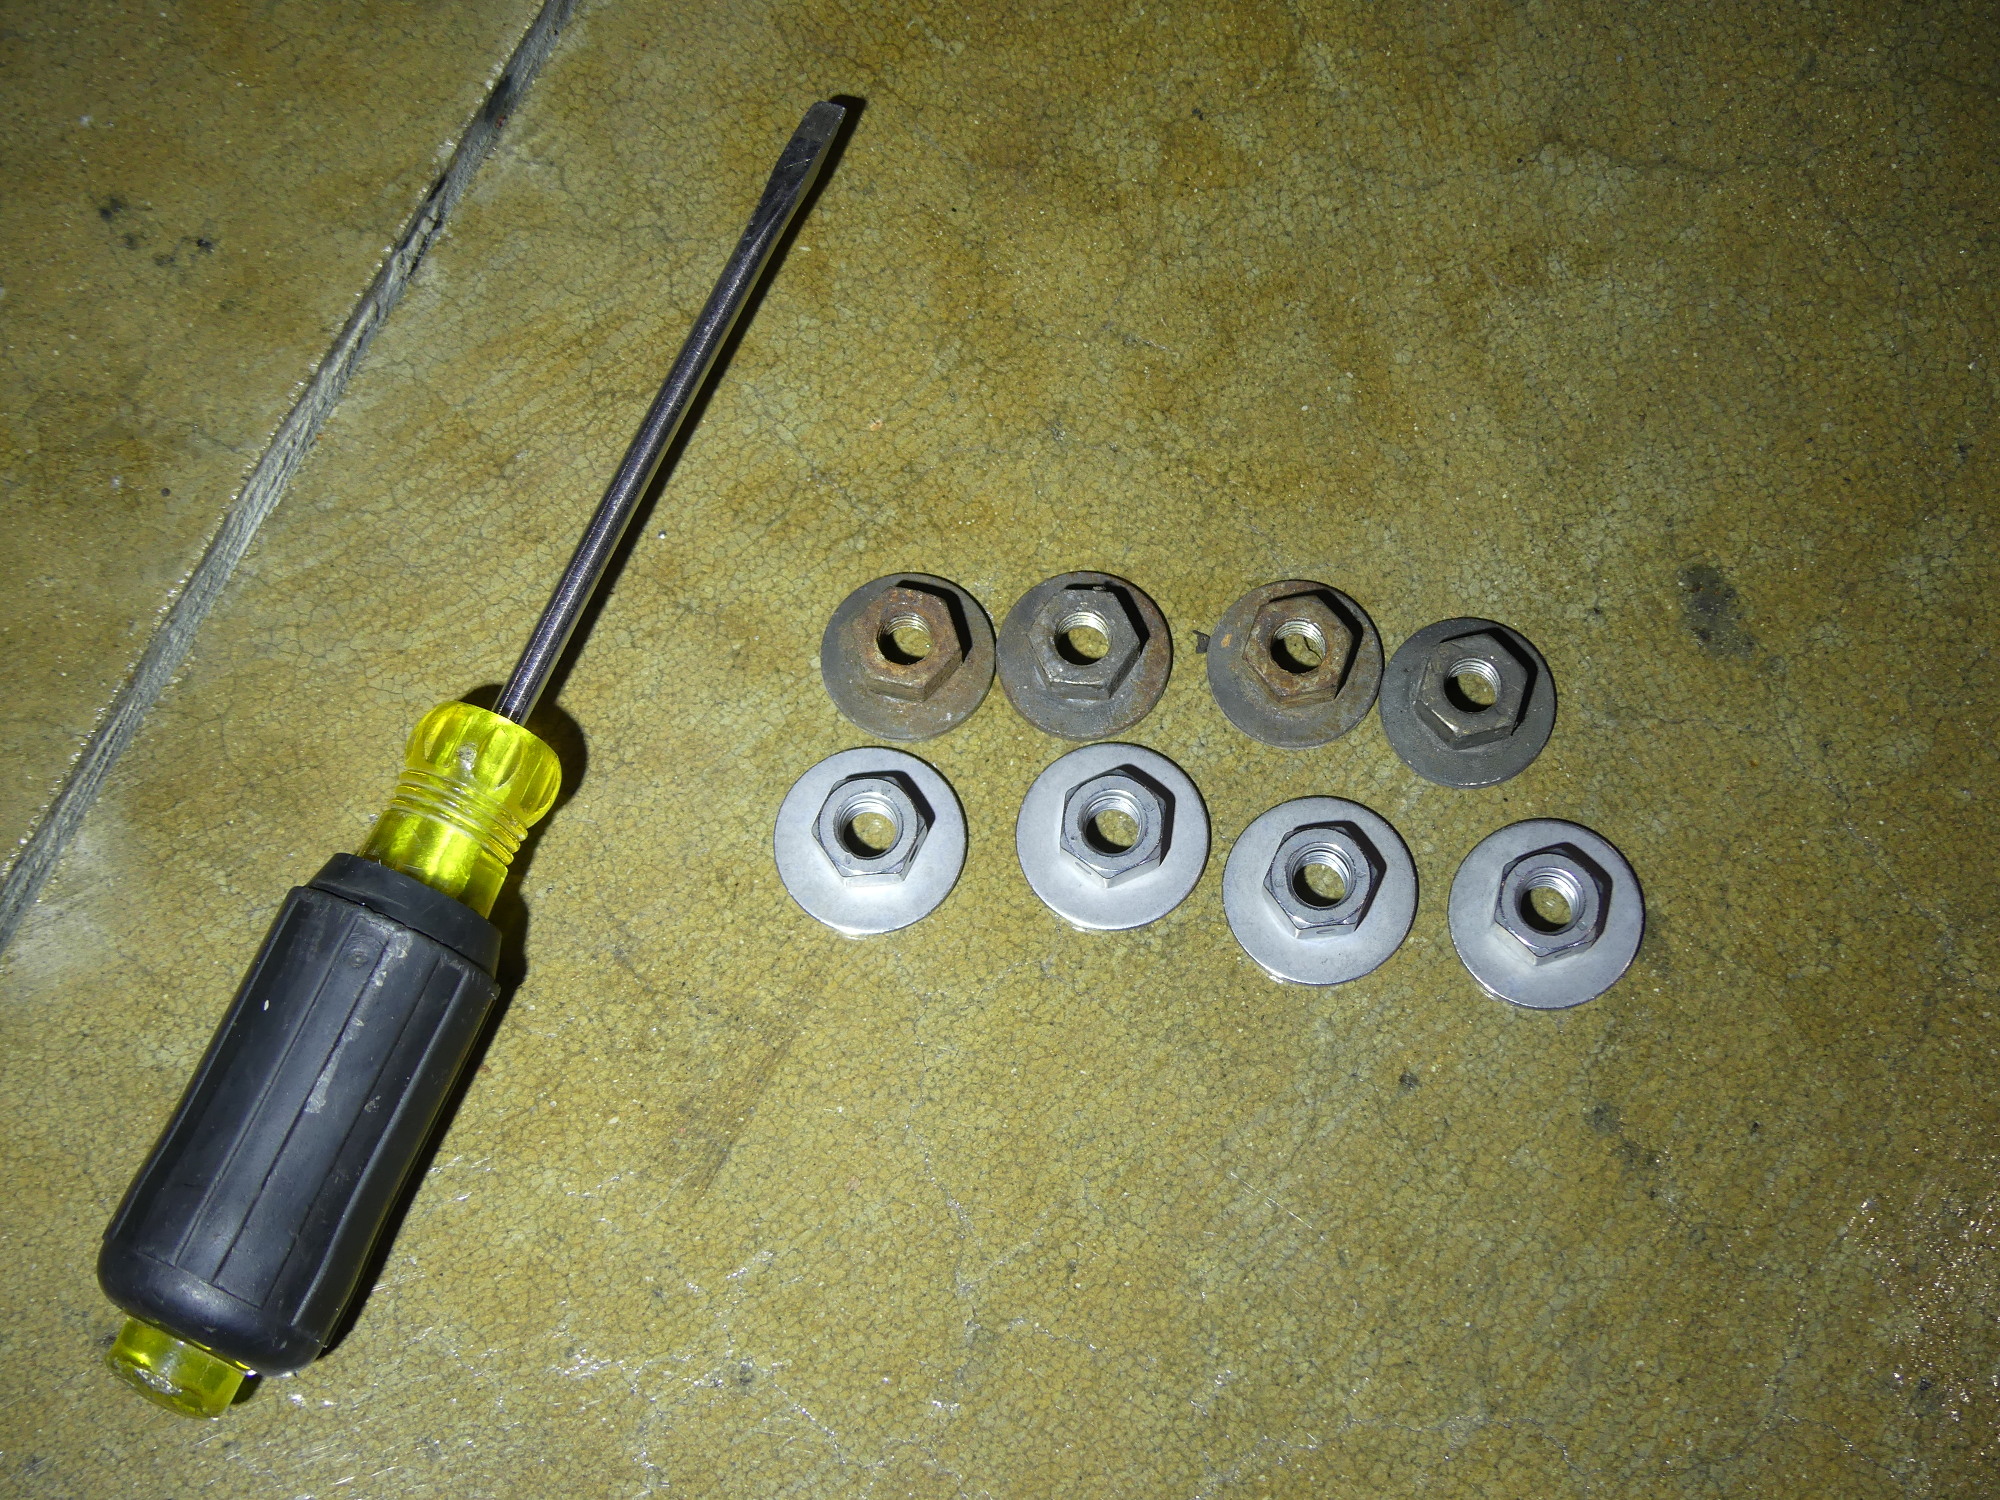 The old nuts used to secure the bumper to the shock absorber flanges were kind of crusty so I bought new ones. These came with larger captive washers, and that's a good thing given the size of the holes in the bumper support. |
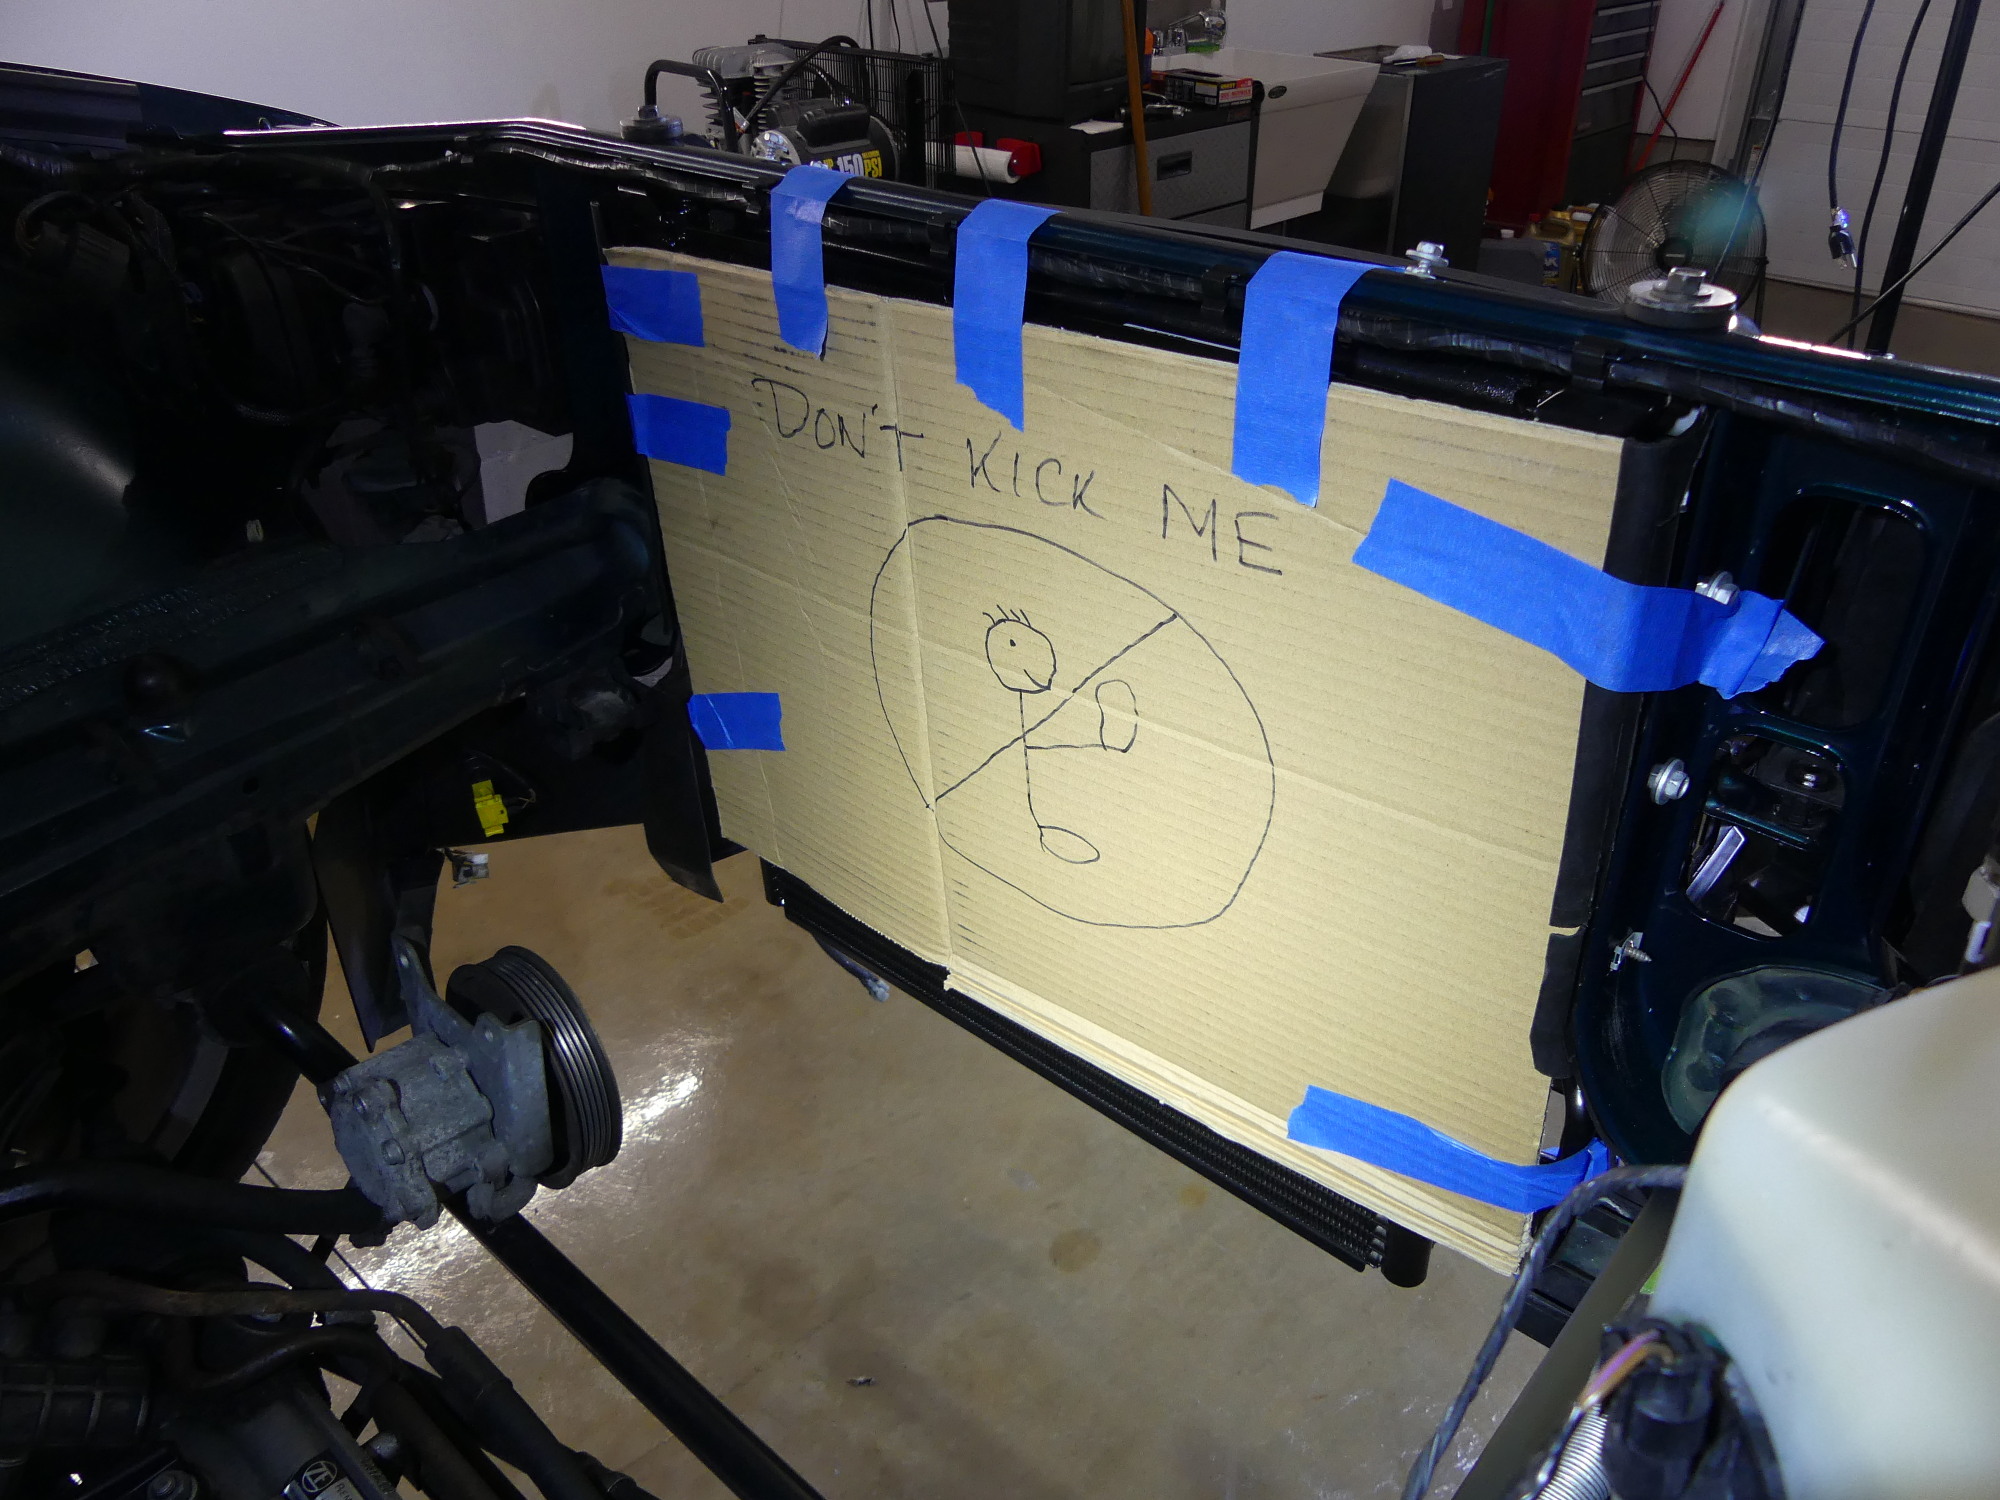 Just before leaving the garage I decided to protect the condenser so it isn't damaged -- either by me or my technician. I'm an artist, no? I really should look into a gallery showing of my works. :) |
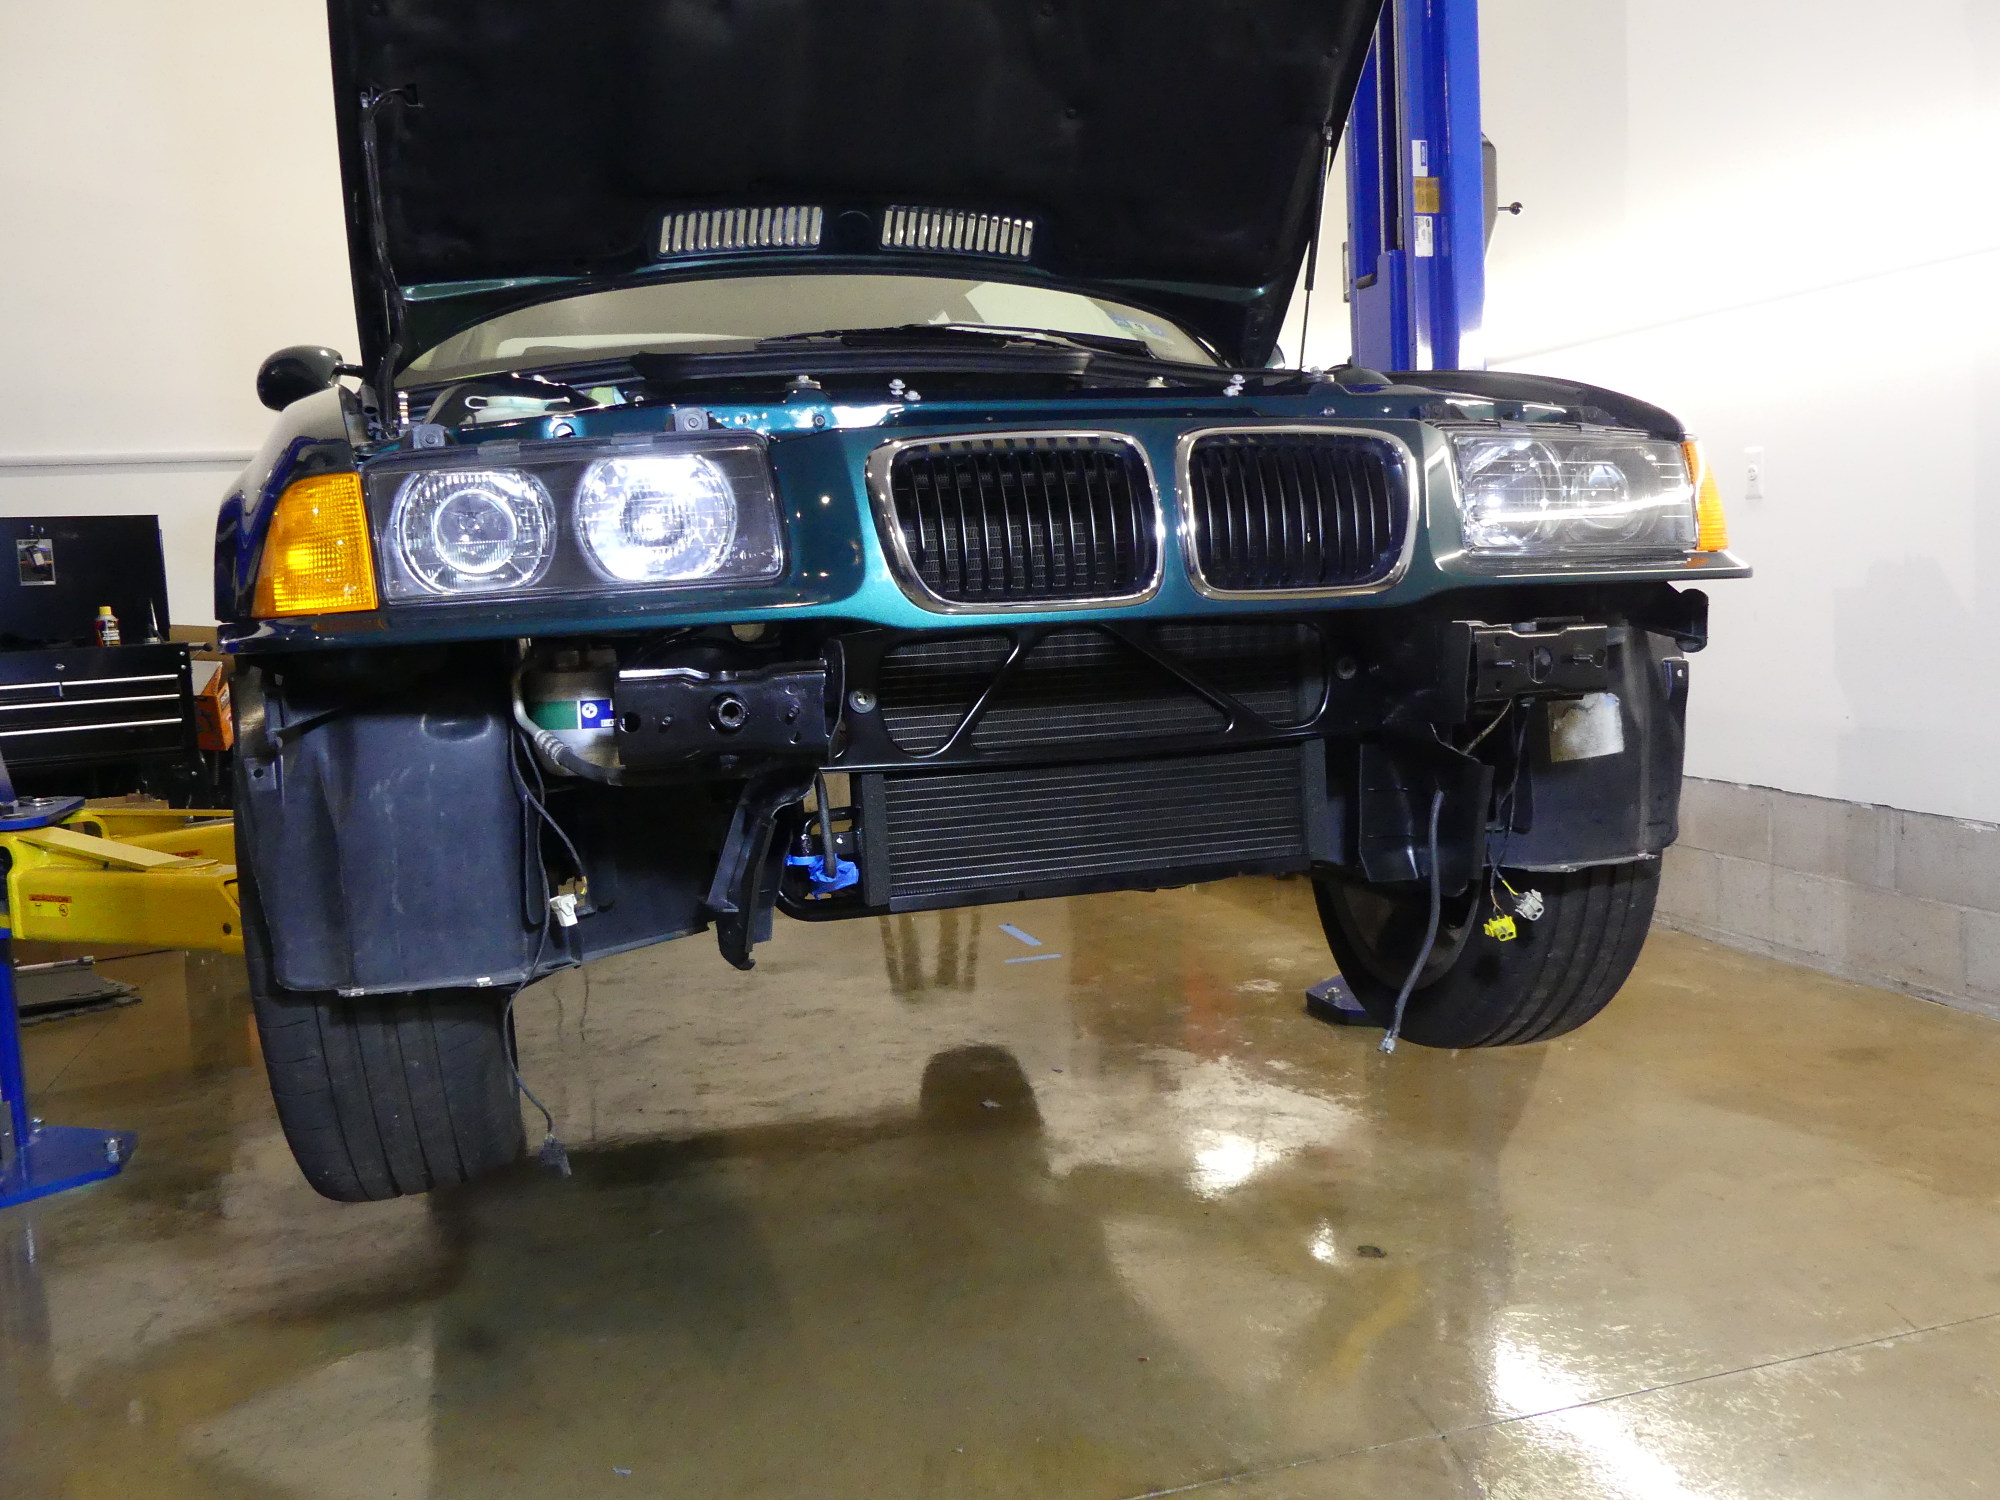
With the headlights installed it was time to install the new condenser and old aux fan. This went pretty much as expected. This was the first time I installed the aux fan with the bumper removed and I have to admit it made accessing three of the four screws a bit easier, though the top left (driver's side) is still a colossal pain in the ass to access and nothing changes in this respect with the bumper off the car. Unfortunately, I did a bit too much damage to that top left screw installing it at an angle so many times. I wondered why the screw was just spinning and not grabbing the new tinnerman clip on the condenser so I pulled it out and realized that the first few threads were completely gone. I was able to secure the aux fan with the remaining screws but I plan to replace them all with new parts before I wrap up the project. That means the pork chops and panel that protects the condenser and radiator will have to remain off the car for now.
Speaking of the aux fan -- a few years back during an aux fan replacement I chopped off the factory power connectors and replaced them with generic spade connectors. Intent to replace the spade connectors with something more suitable to the automotive environment I recently purchased some weatherpack connectors but I ultimately decided to postpone their installation. For now I'll have to reseal the spade connectors with electrical tape as I did previously, which is ugly and annoying to deal with when the aux fan must be removed, but given how infrequently that occurs it's hardly a major inconvenience.
When I first attempted to mate the bumper to the vehicle I saw a ridiculously large vertical gap between the top of the bumper and bottom edge of the grille support. I initially thought the worst -- perhaps the grille support had some adjustment I had set incorrectly -- but then I realized this would occur also if the bumper shock absorbers had some range of adjustment and I had neglected to push them all the way up before tightening the nuts. I loosened the four nuts on the left side shock and found that I could in fact push the shock upward. I managed to fix the left side (driver's side) and attempted the same fix on the right side, but after another fitting I realized that I hadn't pushed the right side up evenly -- it was twisted. This put each stud at a different height and this naturally prevented the bumper from moving up to the extent required. At this point I looked at the time, realized it was almost 8PM and figured I'd pick this up tomorrow.
Next Up
I have to wrap up installation of the bumper and then get on to the fuel hose refit. It's going to be a long day -- and a long weekend. I'm anticipating two days at the garage to wrap this project up. Then it's on to the sound insulation blanket and brake booster/master cylinder work, which I expect to take another few hours.